Rewriting my Napoleonic rules 3: combat

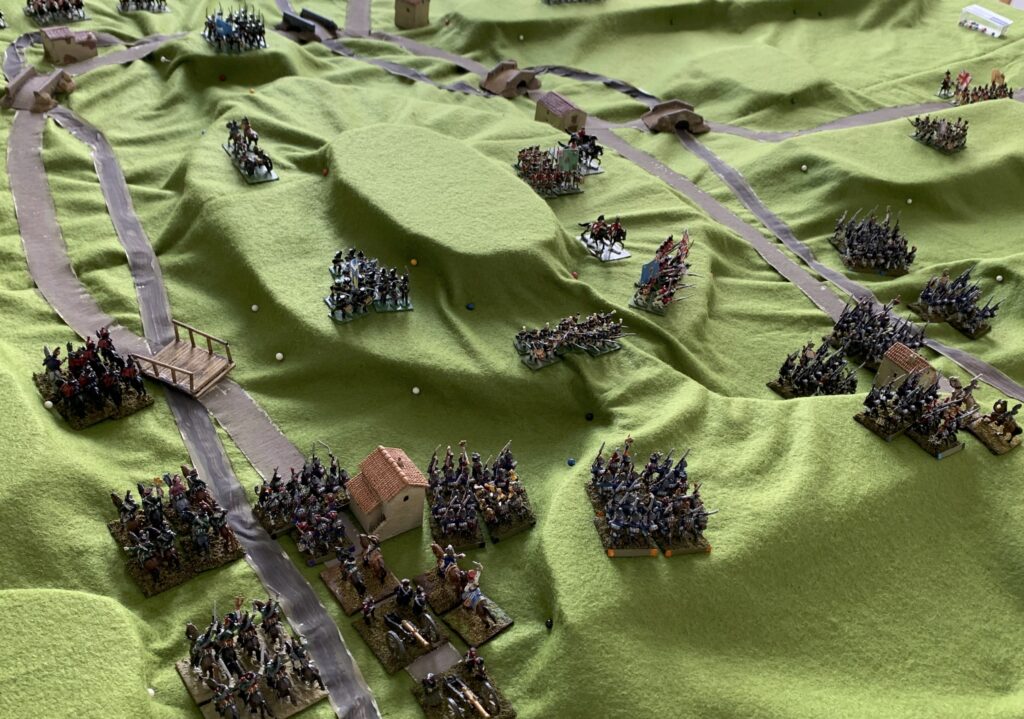
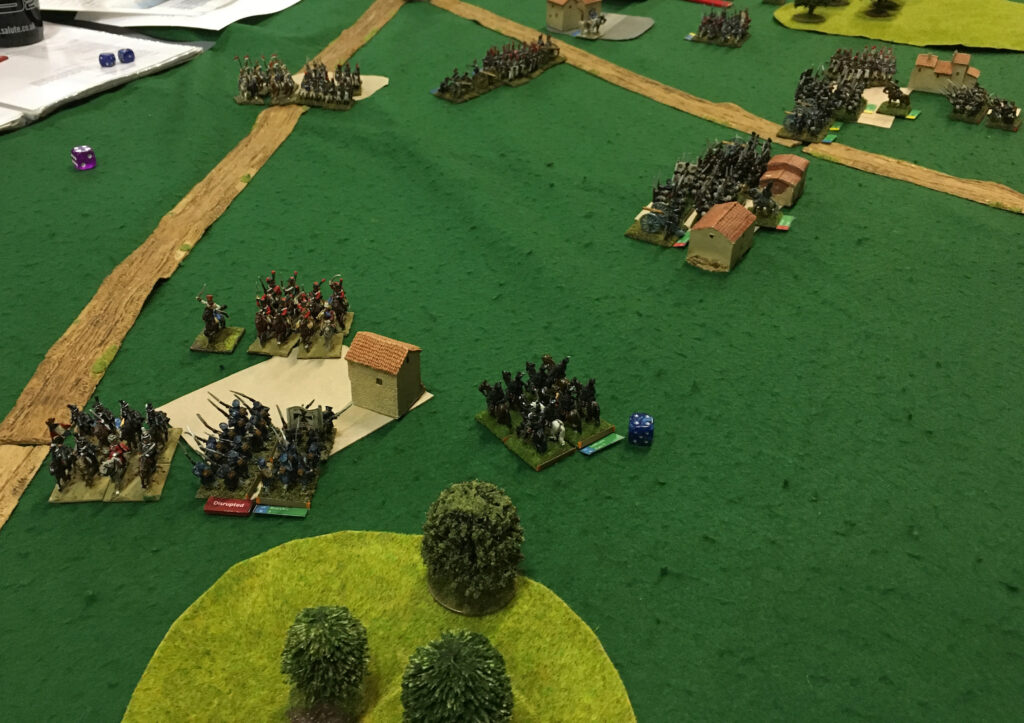
One of the last club games with my previous rules, in February 2020. I think it is based on Montmirail 1814

While the game structure on my new rules was falling into place, I needed to rethink the combat mechanisms. What I was looking for was both a period feel and something that players could pick up quickly, with the minimum of referring back to tables and the like.

My old system was inherited from Bloody Big Battles, which in turn adopted the Fire and Fury system. There are two types of combat: firing and assault. Fire combat covered both artillery and small arms fire, and is carried out by each side in two phases – first by the passive player after movement (“Defensive Fire”) followed by the active player (“Offensive Fire”). All firing by the relevant side is resolved simultaneously. Fire points are totalled from all sources on each target, two dice are thrown and totalled (or a single D10 for F&F), and the result looked up in a table; there are no dice modifiers, but there are “column shifts” on the table. Assault combat occurs when units are brought into contact, but not resolved until the end of the turn, after firing, which both sides in the assault participate in. The combat is resolved by each side throwing a die (all dice in BBB are six-sided; F&F uses 10-sided dice), and the modified results being compared. One side always breaks off in some form after the combat, if only by three inches.

I have never been comfortable with this system in the big-battle context, and especially without long-range infantry weapons, for which the BBB game is designed. The narrative fits much smaller encounters and much shorter turns – especially the firing. At the big game level firing was more a matter of exchange than one side firing after the other, and the distinction between close combat and short range firing is artificial. Still I stuck to it because it seemed to work, and rewriting it would be a big job. But now I can’t avoid that rewrite, because of what I am doing do with the game mechanism.

This has proved quite long journey, but I have ended up with something that seems to work, but needs more play testing. I have three forms of combat (plus some special rules for pursuits), which I am calling, for now, bombardment, firefight and assault. Bombardment covers artillery fire at longer ranges – over 3in. This fire most closely resembles the old fire system. It can be used by the active player at the start of his turn in a Bombardment Phase, or when he activates the unit; the responding player can fire too during the active player’s turn. Each time a unit fires it picks up a smoke marker; it may not gather more than two of these in a turn. I also limit ammunition to six rounds – though I may yet drop this if it doesn’t have enough impact on play. Most fire creates a fire zone which troops cannot move through in that turn – but not preparatory fire in the opening Bombardment Phase, which is meant to represent a short burst of rapid fire.

All combat is resolved as being one unit to one unit – but I do allow three artillery units to combine fire on a single target, by allowing up to two supporting units for each attack. Fire, like all combat in my new rules, is resolved by both sides throwing a die. In this case the modified throw of the firer must exceed that of the target; more hits are scored for bigger margins. Funnily enough I found that this method can be crafted to exactly replicate the old fire table in its results. Of course it is easier to combine the fire of several units using the fire points and table method – but that is not so important for my system – and having kept modifiers down to a minimum, this method is now very quick and easy. It helps to strip out short-range artillery fire, which is wrapped up into firefight and assault combat.

I seriously considered whether I could combine short range fire and assault combat into a single system, based on the old assault rules. In the old system fire by infantry units was usually fairly ineffective, and certainly quite random; you would be unlikely to use it as a serious way of engaging the enemy on its own. Infantry firing (and short-range artillery) almost always came as an adjunct to assault. It was in the rules simply to add a bit more depth and complexity to the assault, which otherwise could have had too much hanging on the throw of two dice. But then I reflected that in this era (and later ones too) there were two distinct forms of infantry combat. Apart from the classic close assault, meant to displace the enemy, forces might enter a prolonged fire combat, which would wear down the opposition, but was unlikely to yield quick results. This was tempting for armies whose troops’ morale and training made them less effective at the close quarters fighting. This style of combat should not be confused with the exchange of volleys by formed troops within 100 paces of each other – which for my purposes is another version of close combat. Instead it is what Is often referred to in English as “skirmishing”. But a skirmish implies inconsequential exchanges between small numbers of troops., when in fact it typically involved serious numbers of men over a period of time. I have called it “firefight” for want of a better word – “tirailleur combat” might be better, though it often involved more than tirailleurs – it might include artillery, and sometimes troops in more close-packed formations.

Classic wargames rules, including the BBB system, do not handle firefight combat well. They tend to have one side throwing dice to determine losses on the other side, and the other side doing the same with a separate throw, either at the same time or, as in BBB, sequentially. There are two problems. First, specifically to BBB, the fire is often ineffective, so the whole thing is a pretty pointless. In fact such combats on the grand tactical scale (when troops might blast away for half an hour or often longer) almost always had an impact, though casualties might be relatively light (the shooting was often inaccurate and the target dispersed) – because firing a musket repeatedly is physically exhausting and ammunition was not especially abundant; troops low on ammunition often refused to fight, so this was important. Better troops often prevailed because they did not burn through their ammunition so quickly, rather than because their fire was more accurate. The other big problem is that there is much too much random variation between the effects of fire between the two sides. In fact a lot of the myriad variables that are represented by the dice applied pretty much equally to both sides – visibility, range and length of time engaged in particular.

Firefight combat in my game is resolved by both sides throwing a die, as usual, with same menu of modifiers is the same for both sides. Numbers of participating bases is part of the modifier process, and supporting artillery can be brought in. First the number of hits on the active player is determined, by looking at the responding player’s modified score. This is usually one or two hits; the responding player suffers the same number of hits unless the active player’s score is four points more or less than his. That is a little complicated to describe, but it is quick when you get used to it. The result is a bit boring; both sides usually suffer one or two hits. But that is intentional – the combat is meant to be low-risk, but (usually) a drain on both sides. Of course if one side masses lots of modifiers, the outcome will not be so even.

The mechanism for assault combat is nominally similar to the old one. The result (usually) depends on the difference between the two sides’ scores, but in this one side is forced o disengage. I wanted to do away with the results table, and have a set of simple outcome rules that would replace it, which would be able to handle the differences between infantry, cavalry and artillery. I also wanted to keep dice modifiers to a minimum. One of the complexities of the old system is that of conferring advantage for numerical superiority, which involves counting bases. There is also an advantage for sides in deeper deployments, as well as the a two point advantage for flank attacks, though these were quite strictly defined. Now that combat is reduced to one-to-one encounters between single units, I had the opportunity to rethink this. I took the view that the outcome of this sort of combat was primarily about momentum. Numerical advantage conferred staying power but not much else. This simplifies things dramatically. The modifiers for numerical advantage and deep formations disappear. This is not quite accurate. If a unit had more men, and its opponent had an open flank, it did have the possibility of using its superiority to tactical advantage. I also suspect that there are differences for units that deployed extended or in depth. But it is hard to reflect these ideas without the rules become too fiddly – so I’m keeping it simple for now. I have retained the flank attack modifier, but split it between a +1 for the attacker and -1 for the defender, with a lower threshold for the former.

I have also added outcomes that reflect the absolute size of each side’s score before combat is joined. If the attacker fails to get a positive score, the attack baulks, and the defender is not engaged. If the attacker fails to get a score of 4, then the attack stalls – if the attacker is infantry, then the attack converts to a firefight; if it is cavalry, the attack does not proceed, but the target unit is pinned, which may limit its options in the next turn. On the defence side, if the assault proceeds and the defender fails to achieve a positive score it routs without combat. The 4 threshold for an attack to progress as an assault is a high one – I want to use the same set of thresholds on all my resolution procedures (i.e. 1, 4 and 7) to make them easier to remember. In fact I think it was quite hard to make troops conduct a full-blooded assault.

That’s just an overview. I am quite pleased with the overall design – the process is simple, and yet it yields a wide range of historically plausible outcomes. Whether it achieves my aim of packing more decisive action into each turn is another matter. I have this habit of providing with one hand and taking way with the other.

So that is far as I am going to describe the rules for now. I am pleased that the length of the them has actually been reduced from 14 pages to 13; it was running at 12 until the last series of tweaks. (The text is quite dense and there are no pictures…). I will only know how well they work after further play testing. Until this testing is done I won’t post up on the website. If any reader is interested in reading them before then please contact me in comments.

Rewriting my Napoleonic rules 2: game structure

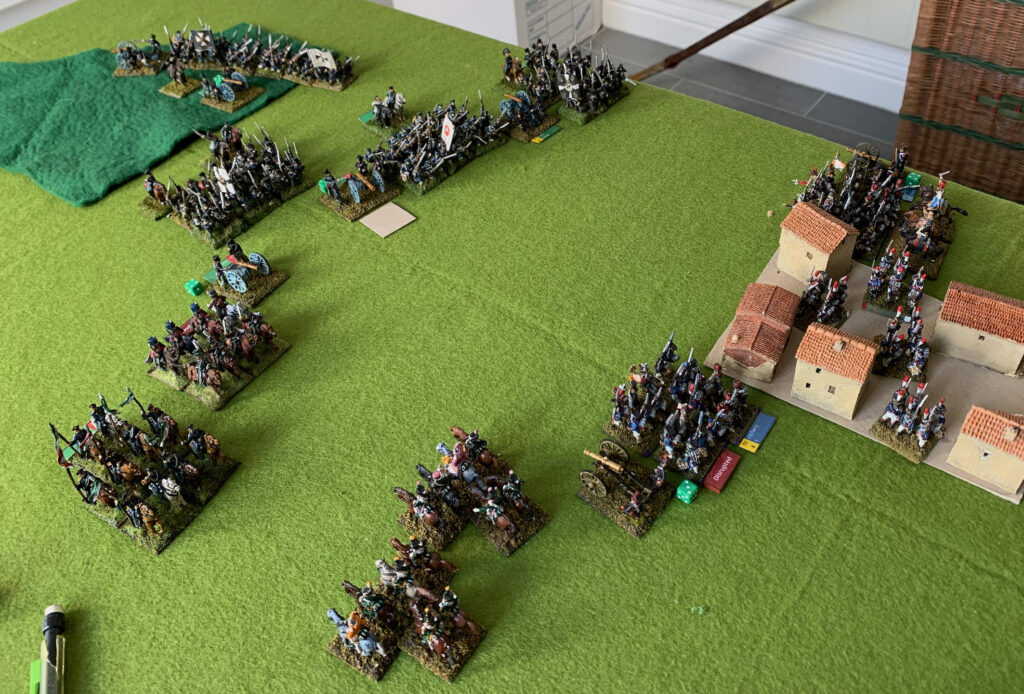
Another view of my Plancenoit trial game

In Part 1 I described how I settled on a game based on divisional units with a game turn representing one hour (or more – I will return to this). I described the journey that led to that conclusion. If that was clear before I started the project, the game structure – the basic framework for the two sides to interact – certainly wasn’t.

It is worth explaining a bit more on the representation of the armies. I started with the Bloody Big Battles system where troops are represented by bases, in my case 25mm square, though I have also acquired some on 30mm squares. I mount these with six figures for infantry and two for cavalry, as I like my miniatures to be more densely packed than the modern fashion, though still looser than actual close order formations, where you would get four rather than three infantry figures across 25mm in 18mm scale. In BBB each base represents 1,000 to 1,500 men for both infantry and cavalry, meaning that each of the figures would stand for 167 to 250 infantry, or 500 to 750 cavalry. Artillery bases represent 30 or more guns. I kept the infantry scaling but I felt this did not do justice to Napoleonic cavalry; I base these at the same figure ratio as the infantry, which means 333 to 500 men per base. I wanted more cavalry on the tabletop, and besides they did take up more space than infantry. Cavalry did not deploy dismounted and engage in fire combat in this era, so that was a complication I did not need to think about. I also halved the artillery ratio – though I adjusted the fire factors to reflect this. While the high artillery ratio in BBB worked better than I thought it would, each base is still an awful lot of hardware, when artillery was not always massed together. Each artillery base is 12 to 18 guns.

The elapsed time that each game turn represents needed a bit of thought. Other large scale games, such as Et Sans Resultât and the 1870 series use 30 minutes, as I did in the brigade-based rules that I used for my Vitoria game. But this creates too many moves for a game, even in a fast-playing system. Also a longer turn length is one way of simulating the communication delays in these large scale encounters. It takes longer to react to your opponents’ moves. A one hour turn is the logical next step – and it is what BBB is based on nominally (and Volley and Bayonet). But one-hour turns are not the only option. You can go for a two hour turn, but with a more complex interactive system for sub-moves within this. This is what Grande Armée did and another old system – Legacy of Glory – that I bought in the 1990s, but never played properly. I actually designed a system based on this idea with a rather interesting interactive system of sub moves. I may yet bring this into the light of day, but I was worried about the complexity of it.

Somehow I needed to pack a bit more action into the move, and especially combat action, while maintaining simplicity. I gradually realised that I had to rethink the turn structure. Like BBB I was using the Fire and Fury system. This was innovative for its time. Prior to that the fashion was for an alternate move system, where each player took turns to go through all their armies, with phases for movement, firing, mêlée, morale an so forth. Or (how my games started) with a simultaneous move system based on written orders. F&F retains the alternating structure, with each player taking it in turns to be the active player. But the passive player gets a firing phase directly after the active player moves, and before the active player fires or mêlées. This creates a very interesting dynamic, but firing and mêlée is done on a whole army basis, with complex interactions possible between several units on each side. Two units can gang up on one. This is one of the things that makes the writing of traditional rules so complicated.

Then I had a lightbulb moment as I was reading about innovations in modern fantasy games, less tied to notions of realism. In one system all actions are one on one; there were no multiple combats. If two units were to gang up one one it had to be done sequentially. This means that a player can pick a unit and go through the whole action sequence, including combat, before moving on to the next. In systems terms this is much simpler than the traditional wargames approach – indeed this is how computers tend to do things, in my rather limited experience. It then hit me that this could work for Napoleonic warfare for divisional level units. It was impossible to coordinate divisions closely, and it rarely happened. There was something sequential about how they moved and entered combat. On the few occasions where more than one division operated closely with another (I could think of two examples – McDonald at Wagram and the French main attack at Albuera) the divisions became entangled and in effect merged into a single tactical entity. The sequential approach could be adopted for my game – though artillery would be a complication.

So now a player picks a unit, activates it and goes through the complete sequence. This includes allowing it to carry out more than one attack per turn. The old Movement Throw (a combined movement randomisation and morale test which is a central feature of the F&F system) stays (now called Activation) and gives the unit zero to three actions (and can cause a battered unit to retreat). Each action can be used for movement, rallying or an attack. The player also has an opportunity to focus command resources on particular units to improve their activation result – allowing players to manage the risk of being slowed down by bad dice throws – one of the issues/features (depending on your point of view) of the F&F system.

This approach opens up the whole turn sequence. It is now possible, as it is with many modern wargames systems, for the I-go/U-go sequence to be broken down, with moves from both sides being mixed up. Here I decided to be more cautious. I quite like the idea of a player surveying the scene, deciding what he is going to do, and then trying to do it -rather then everything being lost in an interactive muddle. The typical narrative of a Napoleonic big battle does seem to work this way, with each side moving into action or response across the whole field. I also worried that a more mixed up sequence would take longer to play out. So I left the basic idea of alternating active and passive phases for each player, but allowing the passive player more opportunities to respond (e.g. opportunity charges or turning to face a flank).

Artillery does not work this way though. In some cases I allow it to tag along with other units, but I also have a Bombardment phase when all the active side’s artillery can fire together, either in a quick burst of preparatory fire – or in a longer cannonade of up to an hour. The passive player’s artillery can also fire at any unit it can while it is moving. Artillery differs in many ways from other troop types – not least in that the noise and smoke means that the whole field knows if it is in action, so the same command and control issues don’t apply.

This is all very clever, but it brings with it some problems. The most obvious is that of sequential attacks. This could be very advantageous to the active player. The first attack will almost inevitably disrupt the defender, making it more vulnerable to further attacks, before it has any chance to respond. This is harder in practice than in theory – because the attacking unit tends to block other attackers. But it does bring to light a more fundamental problem – that while each unit is operating in its own time and space on the table, in reality other units on both sides are using that time and space too. If a unit has been fighting multiple rounds of combat while passive, won’t that reduce what it is able to accomplish when it becomes active?

All sequential move systems run into with some variation of the time problem. That is why simultaneous systems were so popular in the early days with gamers who wanted to move from games with toy soldiers to historical simulation. Still, a couple of ideas can help smooth things over. First is overlapping time. So if side A’s turn is 10am to 11am, side B’s might be 10.30am to 11.30. So each side spends part of its turn responding to the other player, and part setting the pace. Another idea is slack: the furthest a unit can move in my rules in one turn, across good terrain but not along roads, is 18in or 2.7 km in real space (1.7 miles). This is slow going, meaning that more action can be packed into that turn without it getting out of hand. A third idea is that the game turn is not strictly tied to the clock – an hour (or whatever) is only meant to be an average. Sam Mustafa is a particular exemplar of this line. He avoids tying his game turns down to particular time periods, and he has a similar flexibility towards space. This is too much for me – I like to have a clear crossover narrative from what is happening on the table to what might get recounted in a history book. That means creating reference points: naming the geographical points on the table, the units and commanders, and so on; the clock is an important such reference point, albeit on a rather approximated basis – this is before the age of precision timetables. As the game clock reaches 6pm I like to image the evening sun. You don’t get that from a system that just tells you it is Turn 12.

Using such reasoning I simply created rules to stop more obvious problems: limiting the number of attacks on any one unit to three for example. These were the rules we used for the Sorauren game. These worked OK, and we encountered only one clear problem on the time and motion side. One of the French brigades advanced into the field of fire of a newly-moved British artillery unit. This unit was able to give it the full hour-long cannonade before it had any chance to adjust its position – which was in fact enough to knock the unit off the table, coming on top of earlier wear and tear. As the French player I could have been warier and spotted the danger, but it still didn’t feel right.

That problem doesn’t require a big fix, even if it means another fiddly little rule of the sort I have been trying to avoid to keep things simple. But the time problem still nagged me. The idea that you would attack an enemy unit with the primary aim of pinning it down is certainly relevant to this era, but the ability to do so in this rule system is limited. Before Sorauren I tried out a simple scenario based on Bulow’s advance on Plancenoit at Waterloo, which I ran twice. This is quite an interesting time and motion problem. Loyal readers of this blog will know that I puzzle at the speed with which the Prussians were able to reach the village, in spite of the supposedly hard and skilful resistance of two French divisions and two kilometres of ground to cover. In this trial there was no issue. In move one (about 4pm) the Prussians went in hard against Lobau’s corps, with two rounds of combat. When it came to the French turn (on both trial games) they decided to fall back on Plancenoit in case their line was turned or broken in the next round, threatening the whole corps. They had plenty of opportunity to do so. Apart from needing to rally if they wanted to fall back in good order (problem that the pursuing + would also have to face) the effect of the first turn’s heavy fighting did not limit them. One hour (or one and a half) would cover both the heavy combat and the 2km withdrawal. This the point at which the photo above was taken. So in this game the Prussians attacked the French in turn 1 and engaged in two rounds of combat; the French withdrew in their turn. In turn 2 both sides reorganised. In turn 3 (6pm) the Prussians (in the one game I played that far), the Prussians attacked the village. This is not a bad tracking of historical events, but it still didn’t feel right.

I wanted to address this problem. In my new (and untested) version of the rules each attack on an enemy unit causes it to gain a “pin” marker. Pins are also picked up picked up for response moves, such as opportunity charges, evades, or turning to the flank. Similarly responding artillery gets a smoke marker each time it fires. When it comes to the next turn, when the responding player turns active, these pins (and smoke markers) need to be cleared before the unit can move. So if the unit activated with two moves, it might have to use one to clear a pin marker, before using the next to rally or attack. However this rule could get out of hand, so the rule is that the first pin is cleared for free; only if a unit picks up two or three pins will it cost them a move (or two). I rationalised this on the basis of overlapping time and making use of slack. We will see how it plays out – but it could have a significant influence on play. I have two slight worries – that it will confer too much of a first mover advantage on attackers by not giving the defenders enough space to recover; and that it will slow things down again, after all that effort to put more action into a turn.

We will see how that works. Meanwhile I am pleased to find that the new turn structure has led to simpler rules. Next time I will describe how I handle combat.

Rewriting my Napoleonic rules part 1 – scope

The Prussians drive the French back into a rather Mediterranean-looking Plancenoit in my trial game

After a spate of painting this spring and early summer, my energies turned to rule-writing. It proved a much longer and harder road than I expected. But the end result might be very close to my final “Dining Table Napoleon” product. Or it might yet collapse into a heap of broken pieces. I want to take this opportunity explore the choices I had to make and the solutions I have come up with.

But first: what is the game for? As the blurb on my blog suggests, I want to fight big Napoleonic battles. Wagram and Leipzig might be a stretch, but a medium-sized encounter of 30,000-50,000 a side should count as a relatively small game, and a Waterloo (with about 70,000 a side plus 40,000 Prussians) should be quite possible to handle with two players (plus one for the Prussians) on a moderately-sized table. I want to use my 15-18mm figures (while catering for smaller ones) and I also want rules that will be quite easy to pick up and play for occasional players. I want to recreate the ebb and flow of a Napoleonic battle reasonably faithfully, so that game outcomes are historically plausible, and historical outcomes within the bounds of the game’s possibilities. But the game needs to evolve reasonably quickly, with a turn representing about an hour of action.

If that sounds straightforward, we are left with the puzzle of why so few games systems take this on. Only one mainstream system that I know of does: Sam Mustafa’s Blücher. This is a clever system with a lot of interesting features. I played three games with it at the club with my French and Prussians, and the experience was decidedly unsatisfactory. Why? A lot of it was visual. In order to make it fit the table sizes I wanted meant having two bases to a unit, giving 12 infantry figures and four cavalry. This didn’t look right, for reasons that I find hard to pin down – but my fellow club members thought so too. Too few men to a unit? It would have looked better with 10mm or 6mm figures (or bigger bases and a fuller ground scale). Certainly that was true of the cavalry. I also didn’t like uniformity of the unit sizes in this context (as opposed to a smaller game). Other aspects of the rules failed to float my boat too. The rules on built-up areas felt entirely wrong – they became fortresses against which attacking units were dashed in vain, rather than stages for gory and confused fighting that was costly to both sides with frequent changes of fortune. Leaders are not generally represented, and neither is the divisional level of organisation – all for very good games-design reasons, but which spoiled the historical narrative for me. The rules did not handle the Prussians very well. They are a pretty boring army in terms of classic gaming features (elite units, heavy cavalry and so on), while their flexible battlefield organisation, where the battalions from different regiments were mixed up in task groups, did not lend itself to a system where the basic unit is a regiment or small brigade.

So I let Blücher go. In fact I thought that brigade-sized units were not the route to go. This is really the minimum-sized unit for big battle games, unless you have big tables and many players. This is the reason why so few rule systems don’t fit the scope I am looking for. For many players, representing battalions is the essence of Napoleonic wargaming, with classic decisions about line, column and square. I have even read some rather implausible arguments that numbers of battalions determined the effective size and capability of armies more than numbers of men (in fact generals of the time tended to measure army and corps strengths in 1,000s rather than battalions). But even if you reduce battalions to a relatively vestigial role (such as in the very interesting Et Sans Resultât rules) you find you find that a single player can’t control more than a corps. If you want to play with battalions, that is fair enough – but it annoys me when any such battalion-based system claims that it is for big battles, which is often the case. Smaller battles (20,000 or less per side) were quite rare historically, so you are left with refighting a corner of a bigger battle. Or fictional encounters between two corps or reinforced divisions – which, to be fair, can make fun game. With the modern preference for games between smaller forces chosen from army lists, it is not surprising that most Napoloenic rules are based on battalions.

Old school wargamers in the 1970s simply fudged things by scaling down, with each battalion representing a brigade or division, and the table being scaled to fit the battle. But in due course proper brigade-based games were created. I investigated three systems in particular. The first was Volley and Bayonet by Frank Chadwick and Greg Novak, published in 1994. In this system units were represented by square (or sometimes oblong) bases with a standard 3in frontage. The system covered the whole era from the Seven Years War to the Franco-Prussian War. I never played it. The table sizes required for 3in bases was large, and at the time I had few gaming opportunities. But the stripped down nature of the system was inspiring. They also published a very useful scenario book for the 1809 campaign. Next came Age of Eagles. This is based on the ACW Fire and Fury system, a revolutionary set of rules published in the 1990s. Age of Eagles is based on deep historical knowledge, but it is not a stripped down system. The units might be brigades, but they are made up of multiple bases, and perform battalion-like evolutions. I played them once (a recreation of Quatre Bras), but let it go after that. In my view it ia player per corps game – and if you are going down that route I would prefer the vestigial battalions route of ESR. And thirdly there was Sam Mustafa’s Grande Armée and its fast-play derivative. Sam is for my money the best games designer out there, and it showed with this system. Like V+B, its units were brigade represented by squares. The system was based on 3in squares (which gave me a space problem) but I followed the recommended option of 2in squares with special rulers marked in 2/3 inches. This was the system I settled on for many years, using the fast play version with house rules. But a number of features were unsatisfactory, both from a visual point of view, and as a historical representation. Sam moved on and the system gradually became ossified.

This brings me to the 2010s and where I started this blog. I wanted to write my own system. I was focusing on a project to refight Vitoria on its bicentenary. This was definitely a brigade-based battle, and so I keep the brigade-based system using 30-minute moves. These rules are quite clever and innovative (they used playing cards in place of most dice), and they are published on this blog. But Vitoria took all day with four players, though my fellow players were very kind about the rules. Incidentally we did not use my miniatures for this, but my friends 6mm GA bases. This left me the conclusion that I must move forwards to division-based games and one-hour turns.

Divisional-based games do produce headaches, especially for Peninsular War battles, as my Sorauren game showed. But I did have an interesting place to start: Chris Pringle’s Bloody Big Battles. This is not a mainstream commercial system like Blücher with well-produced booklets and player-aids. But it is very well designed and comes with a host of big battle scenarios. The system is based on Fire and Fury, again – but unlike AoE it is properly stripped down. But the big problem is that it is primarily designed for the Franco-Prussian War, and then extended to other campaigns of that era. Small arms ranges were much greater in relation to move distances. But quite a few people used them for Napoleonic games, and so I started out on that path. What worked especially well for me was the way units are built – on variable numbers of bases, based on unit size. I found that this got me much closer to the look I sought than the standard brigade blocks – though trying to use 15mm figures on such a reduced distance scale (1in to 150m) is always going to be a visual challenge.

By this time my journey is well-documented on this blog. At last I was getting regular games as a club member – and the system proved suitable for that. But it was slow going by historical standards, and the cavalry rules did not have the Napoleonic feel. The latter was mainly dealt with when I rewrote them into Big Napoleonic Battles V0, published here, which became our settled rules for club games. But then lockdown hit and I moved away from the club. This year I started to think hard about how to rewrite the rules to address their less satisfactory aspects – notably that a game turn packed less than an hour of action, and so games were going on for too long.

But in a phenomenon that will be very familiar to rules writers, what started as a few tweaks turned into a full-on rewrite and rebalance. To be continued.

Sorauren 1813

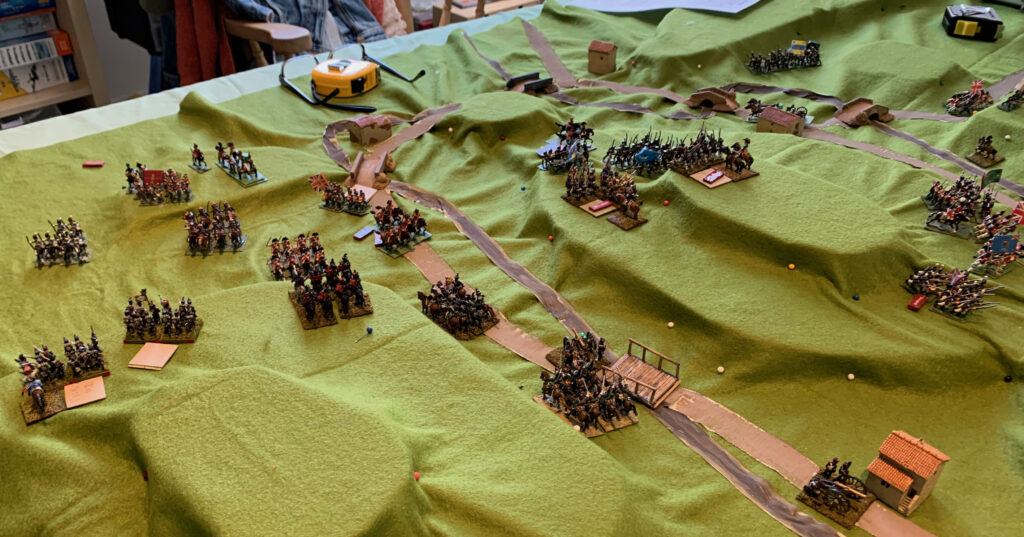
The game at start of play from the French lines. The great hill is in the centre, and you can see my representation of the col, defended by a Portuguese unit. n the far right Pack’s division advances.

At last! My first proper live game in 14 months. My friend Rob came over with his Minifigs of British and Portuguese (with some Brunswickers taking the pace of Spanish) to take on my French army. We always base our games on a historical battle, and this time I chose the battle of Sorauren on 28 July 1813.

This is a medium-sized battle with about 30,000 men a side that is very neglected by historians and gamers. Historians seem to lose interest in the Peninsula War (and its appendix in the south of France) after Vitoria in June 1813. To them this was the decisive battle, and everything afterwards was a side show. But in fact there was plenty of drama, and not least in this battle, which is bigger than many earlier battles – comparable in scale of engaged forces to Busaco in 1810, and bigger than Albuera in 1811. This neglect means that there is little information available on the battle. I tried Googling for wargames scenarios and I got back practically nothing – a few games which revealed little historical research. I didn’t have much time to put the scenario together, so mine too suffered inaccuracies. But researching battles is one of the joys of the hobby for me. Even as an amateur historian you can always add a bit of value to received wisdom with just a little careful research and asking the sorts of difficult questions warmers must resolve but historians can gloss over.

So the background: after Vitoria (incidentally my biggest wargaming project and the starting point of this blog – my maps now come top of a Google search!), the French rapidly evacuated Spain outside Catalonia (another neglected wargaming topic, for another day), leaving garrisons in the fortresses of San Sebastian and Pamplona. Napoleon gave command of the defeated French forces to Nicholas Soult, who reorganised and reinvigorated them with the sort of speed that so often caught France’s opponent’s off guard. He counterattacked, seeing that the allied forces were dispersed. To cut the story short, he massed two corps, those of Clausel and Reille, a few miles from Pamplona after storming through the Pyrenean passes, brushing aside British forces at Roncevalles. The first French forces, Clausel’s corps, arrived on 27 July, but these were not enough to take on the allied forces there, based on the British divisions of Picton and Cole and the Spanish ones of McDonnell (conducting the siege) and Morillo. Reille eventually arrived, but too late to be mobilised fully that day. Soult himself was their together with army level reserves of cavalry and artillery. Also arriving on 27 July was Wellington, who, seeing the threat, immediately summoned reinforcements, of which Pack’s division was the only force within a day’s march. The great man’s presence greatly reassured the allied forces.

I didn’t have much time to research the battle; I was hoping to find something readily available that I could use, notwithstanding imperfections. My first port of call was a booklet by Terence Wise that I had bought for £1.50 in 1977. This was part of the Battles for Wargamers series published by Bellona – I also have the booklet from the same author for Tunisia 1943. The Peninsular War booklet covered the series of battles after Vitoria – mainly Soult’s offensive and Wellington’s counterattack, but also covering Suchet in Catalonia. A nice idea, but the battle map was highly inaccurate (including quite the wrong ground scale) and the narrative was suspect. I went back to good old Oman as my main source. Oman makes mistakes, and he can be irritating in his period way – launching into criticism of the decisions of officers at the time, rather than making much attempt to understand why they took them. But it is proper history, and reasonably transparent about its sources. He also surveyed the ground. Alas few modern authors do this and are more interested in painting a dramatic picture which fits into a broader narrative about the Peninsular War. The only other account I read was that in Lipscombe’s Peninsular War Atlas. This was pretty superficial too. The map is a pretty decent one, though the British forces are depicted as being far too far forward. It does provide additional details on the Spanish, though.

And what about rules? My big wargames project for the last month has been a rewrite of my Big Napoleonic Battles rules to get to a “Version 1”, so succeed my “Version 0” which we used successfully at the club, but which I felt wasn’t right for historical refights. This was a classic case of one idea leading to another, which turned into a radical rewrite, about will I will write separately. I had carried out some small scale trials, simulating the Prussian advance on Plancenoit at Waterloo. but Ithe opportunity of something bigger was too good to miss. These are big battle rules, with divisions being the principal unit – so not all that well suited to the Peninsular War, were the big battles were large fought between brigades of around 2,000 men (as well as Wellington’s habit of deploying individual battalions). The battle is too big for rules based on battalion units (still by far the most popular format) – but one based on brigades, such as Blucher, would have been a more natural choice. That would have been a bigger game though. I would like to find some way of making my big battle rules work in the Peninsula, as a number of battles there could make very good smaller games; so I tried to adapt as best I could.

The most difficult thing about refighting this battle is the terrain. I am a big believer that terrain dictates the course of battles, and that even small details matter. It puzzles me that many historical wargamers seem to take a lax attitude to it – though getting it right is undoubtedly hard work. Which isn’t to say you can’t achieve this with a greatly simplified presentation, just that this requires an understanding of which features were critical. Sorauren was fought over terrain dominated by steep hills. This is tricky for wargamers at the best of time. I didn’t have time to do more than a rushed job of taping some 1in chunks of styrene to the table (in two contour layers) and a couple of thinner bits for lower hills, and throwing my green felt cloth over it. This was completed using paper tape for roads and rivers (painted over with tempera paint) and scattering some buildings and bridges on it. You can see the result in the picture, and its not very pretty. With such steep and complicated hills the time-honoured method of using cloth over formers is problematic. I used map pins, but rumples in the cloth are everywhere.

The central feature of the battle is a large hill referred to by Oman as the Heights of Oricain, but otherwise un-named on the maps, which rises to about 200m above the plain. Wise referred to it as “Cole’s Ridge” – but it isn’t ridge-shaped. This is rather typical of the way historians have tried to bend this battle into the shape of a classic Peninsula reverse slope encounter that historians try to do for all Wellington’s defensive battles. In several important respects I got the terrain wrong, as a close examination of Google Earth revealed afterwards, and these do much to explain some of the deviations of the game from history. If I do this again, I will use more contours, as this is a better way of dealing with many of the important complexities. For most battles two contours is more than enough, but alas not here.

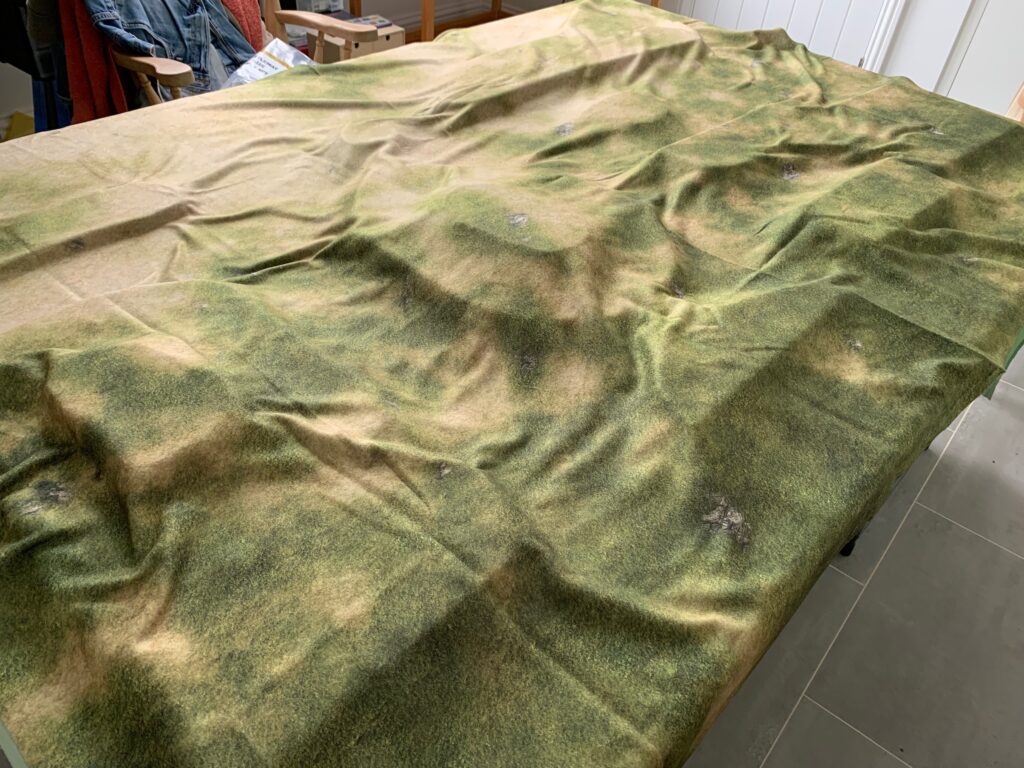
I am also left with the challenge of how to improve the visual appearance of the table. One thing I had in hand is to use a different cloth, or battle mat. The day after the game a new fleece mat from Geek Villain arrived, in their Sicily pattern, designed to represent arid terrain. I had a chance to see how it worked over the formers, though I did not try the pins.

A lot of the same problems emerged as for the felt, as can be seen from the rumples, but the material does fall more easily over the shapes, and the colours are much better. My bête-noire is the over-use of saturated colours in wargames products (like my felt mat) – and this product does not fall into that particular trap. The big question is whether I create the hills to sit on top of the mat, using paint and flock as best as possible to blend in. A point to ponder. Other questions are whether I manufacture lengths of roads and streams to look a bit better than the painted tape – perhaps using caulk. On Google Earth the watercourses are marked by vegetation along their banks, and this may well have been the case at the time – replicating this make make them too wide though.

There does not seem to be too much doubt about the forces involved, fortunately. The only doubt I had concerned the French cavalry. The maps (I also have Fortescue’s – but not his text) show that the French deployed cavalry from Pierre Soult’s division – which did engage with the British hussars on the day, having deployed to the far left of the French positions, alongside Foy’s division of Reille’s corps. P. Soult’s division was in fact a very large cavalry formation, especially by Peninsular standards, with nearly 4,000 men. It is highly unlikely that all of it picked its way across the difficult hill paths to reach the positions shown on the battle maps. I divided this unit into three, and placed one of the sub units with Foy, with the rest backed up along the mountain pass with the artillery. To represent the forces on the table I dropped the normal ratio of 1,250 infantry (or 400 cavalry) to a base to 1,000 (or 333 cavalry), and limited the maximum unit size to four bases rather than six. This reflects the terrain which made it hard for large formations to operate cohesively, as well as the relatively small numbers of the forces involved. Using this system for the French was quite straightforward – each unit was a small division or large brigade. The British infantry divisions were another matter. They typically had 6,000 men organised into three brigades, one of which was Portuguese. The whole division is too big to be a single unit; the brigades are too small. I allowed two units per division, the second unit being Portuguese for Pack and British for Picton. Cole’s division was another matter, as it was reinforced by additional British and Portuguese British brigades, and a couple of Spanish battalions. I represented this formation as four three base units, two British, and one each Portuguese and Spanish.

For the game I chose to start it at midday, an hour before Soult planned to launch his attack, but when the French spotted Pack’s arrival and Clausel responded. In fact I had Pack too far back historically (or I should have started with the British moving first). The objective was for the French to break through to the far side of the table and relieve Pamplona; the game was six turns long. Playing the French, I got nowhere close to this objective, though not radically far from the historical positions. On the their right, the French benefited from Pack’s late arrival, which was compounded by the British component of this formation grinding to a halt due to poor activation throws. The Portuguese took the brunt and the unit was eventually eliminated. But Rob brought forward McDonnell’s Spanish division, which was more than able to to contain the remaining threat. On the French left, Rob could not resist the temptation to use his considerable body of cavalry (which included two fine units of heavies, not actually used on the day), to push forward up the valley. This brought out all of the French cavalry, and I also pushed forward Foy’s infantry. This was eventually reduced to a stalemate, with the French infantry rather battered. Rob then started to move his infantry to the centre to contain the French threat there. Subsequent research showed that this highly unhistorical course of events was shaped by errors in my terrain layout – the river valley was too narrow to take such troop movements while the main heights were being contested. The front of Picton’s position was also more difficult terrain, with a steep slope and a river bed – which would have limited the movement of cavalry.

The main battle was in the centre, as the French tried to take the hill. Cole’s four units looked distinctly vulnerable as they could barely cover the front, against the six French units, some of which were large four-base ones, notwithstanding the steep slopes. It didn’t help I forgot that the British units had a discipline bonus (allowing them to recover more easily from disruption). But once Rob had brought forward the British unit in reserve (Byng’s brigade), the slope was enough to keep the French contained on the British left, while the Portuguese holding the famous col in the centre (inasmuch as anything in this battle is famous) where the slope was not steep, also held their own. But that left two French units to gang up on the Spaniards on the British right. These were pushed back and French breakthrough beckoned. I saw an opportunity to push through to Pamplona; Rob was worried that the French units would turn to take his other units in the rear, where his reserves had been committed. He brought forward Murillo’s Spanish division, which contained the threat to Pamplona.

And there the game concluded. The French objective is pretty much impossible to reach. Even if the battle on the hill had gone better, there was not enough time to get to the other side of the table, especially as there was likely to be some form of last line of defence. It would perhaps have been better to either focus the game on the hill, or perhaps leave a path to victory for the French in destroying a substantial part of the allied army. Not that I had nailed the battle particularly well; I devoted too much strength to the centre, and could easily have deployed an extra unit to the right after the good initial progress there.

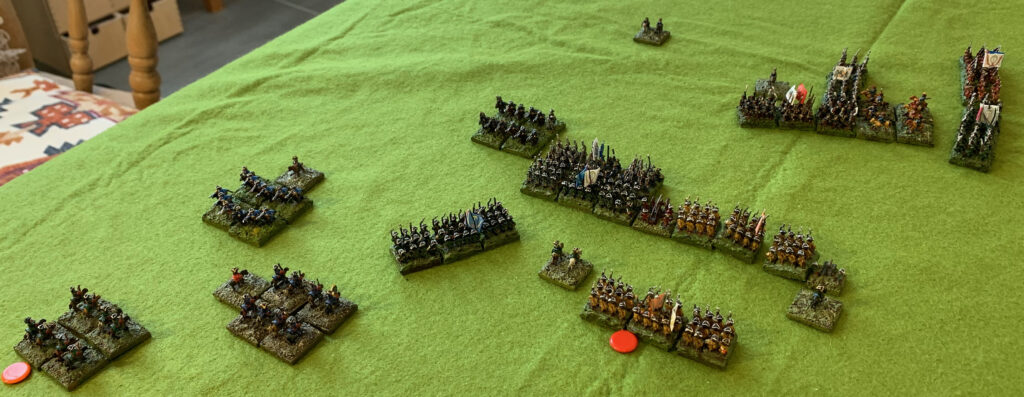
Here’s how the game looked at the end:

As the evening approached at the end. Foy’s division on the far left is looking battered, but the French have made good progress on the left of the hill.

It was very good to have a proper live game at last. But it has left me with plenty of food for thought, about the scenario, the appearance of my games, and the rules.

In Deo Veritas – a trial game for Great Northern War

More than a year a go I bought the In Deo Veritas rules by Philip Garton, which cover 17th Century conflicts. My plan was to use this for my 6mm Great Northern War (GNW) Russians and Swedes. The GNW was actually in the 18th century but the tactics were similar. In fact Philip Garton later brought out a supplement, Captain General, to cover the early 18th Century. I published my first thoughts here. I have now had the opportunity to run a small solo game.

The rule supplement did not add very much in terms of new rules, and its main value is the four extra scenarios. Alas there were no battles between Russians and Swedes – it is in fact quite hard to find suitable historical battles for the Poltava campaign that my figures are based on. It suggested giving all-musket infantry units an extra fire dice, and treating large dragoon units (such as the Russians used) as poor quality cavalry.

In my game I set a small Swedish force of three infantry and two cavalry units against a larger Russian force of six infantry, two dragoon and one cossack unit, plus two artillery. The Swedes were all Veteran except one Trained infantry unit; the Russians were all Raw except one infantry unit and the cossacks, which were Trained. Both armies were divided into two wings (the infantry and cavalry for the Swedes, four infantry and the cossacks, and two infantry and the dragoons for the Russians), with an overall commander for both armies. This captures the basic asymmetry between the two armies which is one of the things that drew me into gaming these armies. The Swedes are heavily outnumbered but should still have the edge – provided that they are aggressive. The battle was played out on a featureless flat table.

The first issue I had was how to adapt to my miniatures. The rules are designed for most of the units to be based on 3 inch (75mm) bases. My units use 20mm square bases, with three for an infantry unit and four for cavalry. These are actually meant to be infantry battalions and cavalry regiments, rather than the brigades of the rules (roughly twice the number of men) – but I glossed over that. I decided to deploy my infantry bases in line, and cavalry units in two by two blocks, and hope that the variation in frontage wouldn’t matter. It didn’t, and the visual effect was good. A trickier problem how to translate the distances – I used them as published. That was a bit of an issue because I was using tiny playing area of about 24 inches by 36 inches. This meant that some of the move distances (especially cavalry) were a bit long – but there was no easy-to-apply conversion factor. As I write I remember that I had made up some rulers marked out in two-thirds inches (“Canadian inches”) to use with Grande Armée – which would have been perfect. But I don’t think these have survived the house move. One of the advantages of having 6mm figures though is that you can use a smaller playing area, so I want to find a way around this in future. My basing system (developed for Gå På!) may be unusual but it is common to put 6mm units on a single base with 60mm frontage – so solving this problem would help more than me!

How did the game play out? The Russians started the game on Hold orders, and the Swedes on Attack. The Swedes tried to focus on the Russian left flank and refuse the right. This might have worked under Gå På! rules, but not with these. In the second turn the Russian right switched to Attack and caught the two of Swedish infantry units as they tried to make their way across, and outflanked them. Meanwhile the Swedish cavalry attacked the Russian dragoons, but one unit stalled and the other only made slow headway. This was when I took the picture above. It was not going well for the Swedes. But slowly they prevailed. One of the left wing Swedish infantry units escaped the outflanking move and charged forward to attack the infantry to its front. Forcing back first one unit and then the next; when the second unit was forced back it had to pass through the disrupted first unit, causing it to rout. Meanwhile the outflanking Russians routed the remaining Swedish infantry unit (the poorer quality one), but effectively lost one of their units as it ran off in pursuit; the other unit had been disordered in the process. The Russian right, facing one Swedish infantry and two cavalry, bogged down their opponents and started to force them back. But then the Swedes renewed their attack and managed to rout one infantry and one dragoon unit. That proved enough to collapse the Russians.

This was an absorbing game and a close fight. The Swedes probably had the edge, but I now see that their army (ex leadership) was worth 1,500 points to the Russians 1,375. Unlike Gå På! leadership did not have much influence on game play, hence the quick switch to attack by the Russians on their right. Whether this is realistic in a bit dubious – there is no activation step for new orders – but it probably helps to create a more enjoyable game. I used the random generator for leadership quality, with the Russians classed as “new” and the Swedes as “professional”. The dice tilted the Russian way and there wasn’t much difference in leadership quality between the two sides. This had very little impact on the game, though, which was surprising. I still don’t understand the difference between an “experienced” and “normal” general in game play. Unless I have missed something 9always possible), leadership quality does not have as much influence on the game as many modern rules.

Overall I found things a bit slower than I expected. I kept having to look things up. It did not help that the game took three separate sessions, the second a few days after the first, the third a full two weeks later, including a holiday. I don’t think the quick reference sheet is all that well designed – and it would help to slim it down for just the troop types within my armies. A second problem was that the rules are quite thin, though the big type and pictures still mean that they are spread over many pages. A lot of issues just aren’t covered, but it can take a bit of a search to realise that. I had to put in place my own interpretations several times, on matters that rule books should be cover, though often don’t. Less is often more, but not always! With a confident games master, though, most of these issues would disappear. This small battle, featuring lots of raw troops, still took quite a few moves more than I expected (I wasn’t counting though – in the region of ten I think, and about five hours). Melée combat quite often got stuck in a draw; even raw units had to be ground down before being destroyed. Some features of the rules jarred at first outing. I found the three stylised orders that each wing is bound to (Hold, Attack, Withdraw) a bit restrictive at first; the Russians on Hold couldn’t send out their cossacks to do a bit of probing. But this made more sense as the game progressed.

The only historical issue I came up with the that it did not reflect Swedish Gå På! tactics well. In attack the Swedish infantry (still pike-armed) only fired a single shot before going in close; the cavalry did not do any prep fire at all, contrary to general practice at the time. In these rules all units fire at each other as they close. I think this calls for some kind of special rule. Swedish cavalry and pike-armed infantry should be allowed to charge attack; when they do so they do not fire before they go in (but must take fire from their opponents) but get a melee advantage, such as an extra die. A further historical issue is that it is hard to reflect Swedish elite (i.e. Guard) units, if their better line ones are classed as Veteran. You can overdo this sort of thing though, and any extra advantage should be quite subtle.

Before I try these rules out again though, I need to prepare my own QR sheet, focused on my GNW troops, and with reduced distances (roughly two-thirds, perhaps using centimetres rather than inches) – and trying to make the layout clearer.

My first article asked whether these rules were an answer to a prayer (to find rules for my GNW figures). The answer is “yes”. All I need now are opportunities to game!

1815 light cavalry for the Prussians

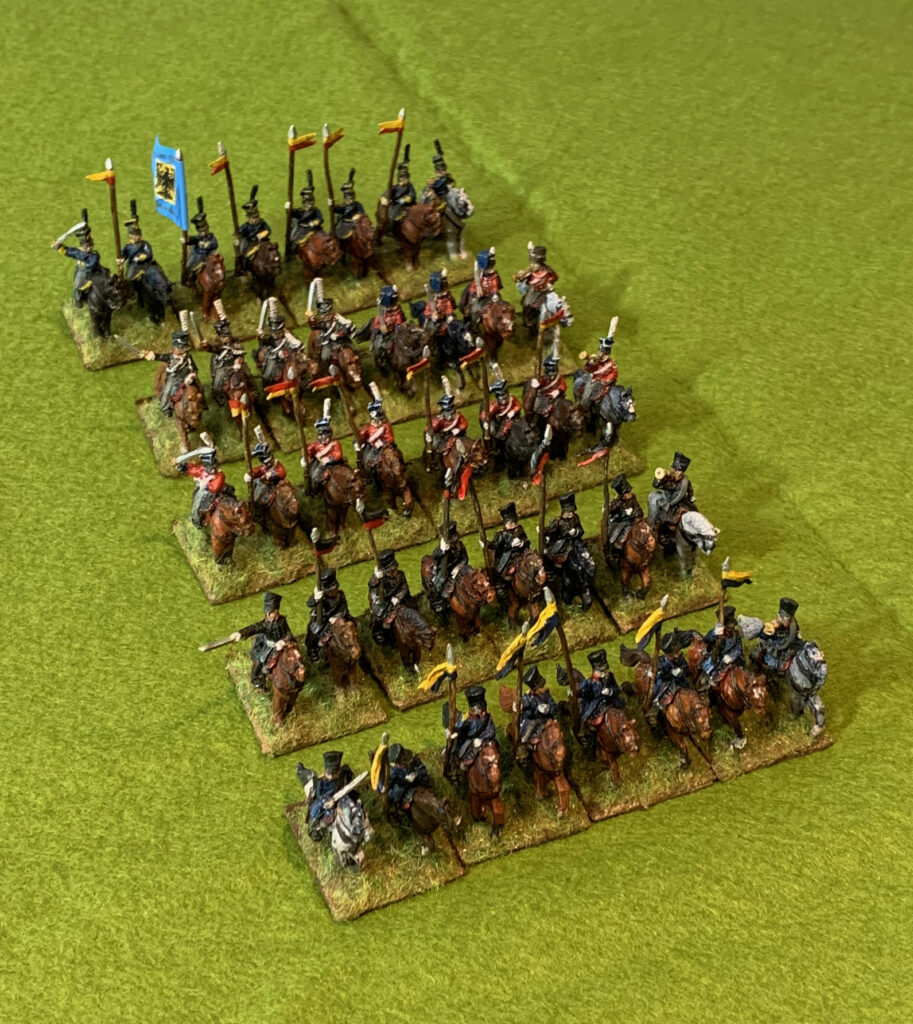
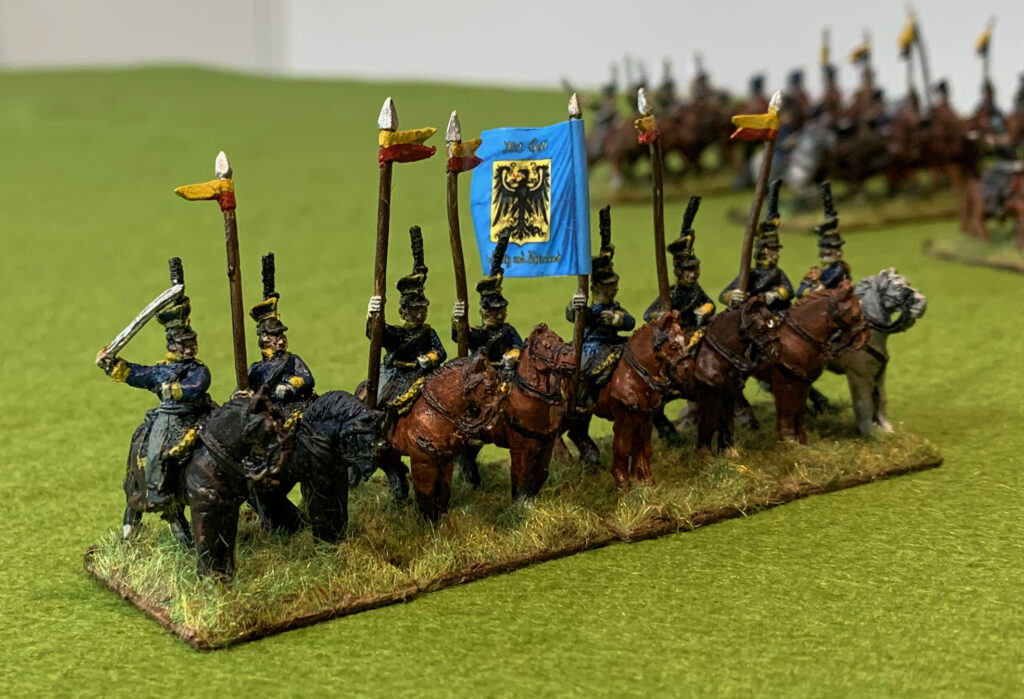
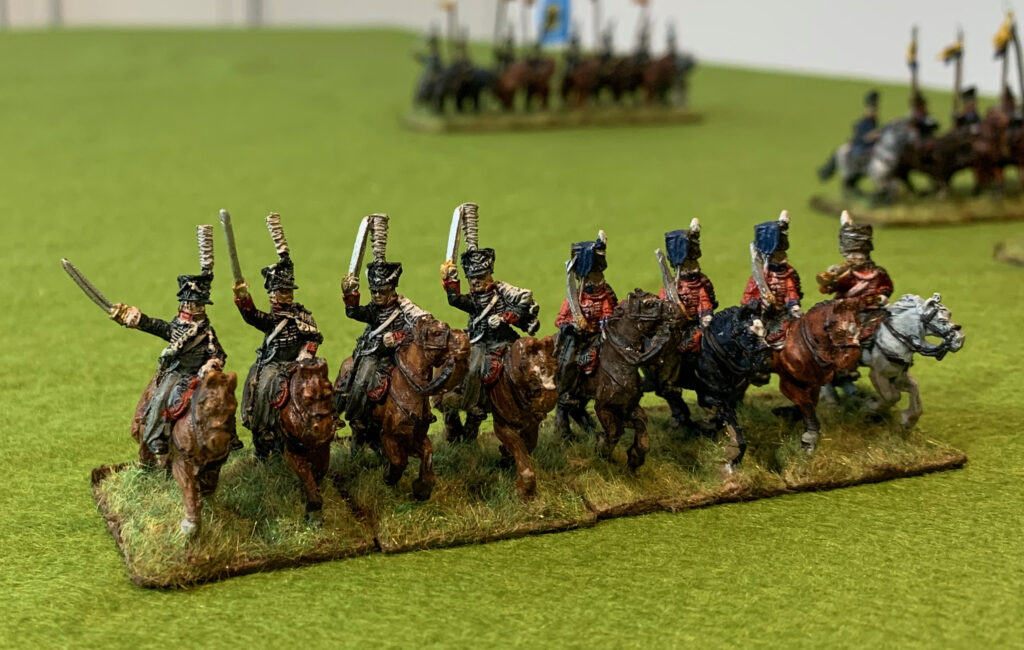
My attack on the lead and plastic mountain continues. For this project I wanted to draw a line under my remaining Old Glory Prussian cavalry. I had two packs of uhlans, with and without czapka, and a mixed pack covering Prussian friekorps, in reality a motley collection of British and Prussian figures from other packs. From these I have painted up five four-base units representing 3rd, 6th and 7th Uhlans, 8th Hussars and 3rd Silesian Landwehr cavalry. These are not outstanding examples of the figure-painters art, and there are minor inaccuracies, as well as the nonsense of that large infantry flag. But they will help to brighten up my 1815 Prussians, who can be a little dull.

The method was to paint the horses first, without riders, in batches depending on horse colour. I’m still developing technique on this. For these I tried oil paint for the first time, having read so many people recommending it. The idea is that you undercoat in white or some bright colour, and apply oil paint (Van Dyck Brown is usually recommended) over it and let it go tacky for about an hour or two. Then gently wipe off the paint with a rag from the raised areas. That leaves a patina of paint on these raised areas but deeper colour in the recesses. and it should dry to a nice off-gloss finish. After some early experiments I restricted this to bay and chestnut horses, which are about 80%. My Payne’s Grey oil paint came out very glossy and hard to work with, and this is what I wanted to use for the black horses. I wasn’t sure how the technique would work for grey and other pale horses anyway. I probably shouldn’t give up on the Payne’s Grey. Some oil medium had separated out and came out of the tube first; I may have mixed too much of this back into the pigment (I’m only using small amounts) – I think excessive oil may be the problem. All the horses were primed in white (using airbrush primer). I painted on Raw Sienna (a lovely orange-brown) and Burnt Sienna (a reddish hue) as undercoat in acrylic for the bays and chestnuts (more of the former for the chestnuts). I also experimented a bit with Yellow Oxide (a Yellow Ochre substitute), but not by itself. Then on went the oil. I rubbed it off after about an hour with a bit of old tee-shirt, better than using kitchen towel or tissue. I used various mixes of Van Dyck Brown, Raw Umber, Burnt Umber and Burnt Sienna, with a little Zinc White mixed in. The results were mostly very nice. The main learning is that it is important that the undercoat and is compatible with the oil layer – if one is yellowish and the other reddish then the effect is rather awkward. While at first I didn’t think the results were markedly superior to my earlier method of using layers of acrylic, the more I handled the figures the more I liked them; I’m not sure what accounts for this.

For the other horses (blacks and greys and a sort-of dun or roan) I used layers of acrylic, starting with Payne’s Grey. I stippled on some white on the some of the greys using the cut down brush I used for the Bf-109. I wasn’t especially happy with these and I think I need to develop technique some more here.

After the horses were painted, I attached riders, ready primed but otherwise unpainted. Nothing particularly special about painting technique to note here. As usual I used muted colours and a bit of white with almost everything. All the figures were finished in a diluted black ink wash. Time to look at each of the units.

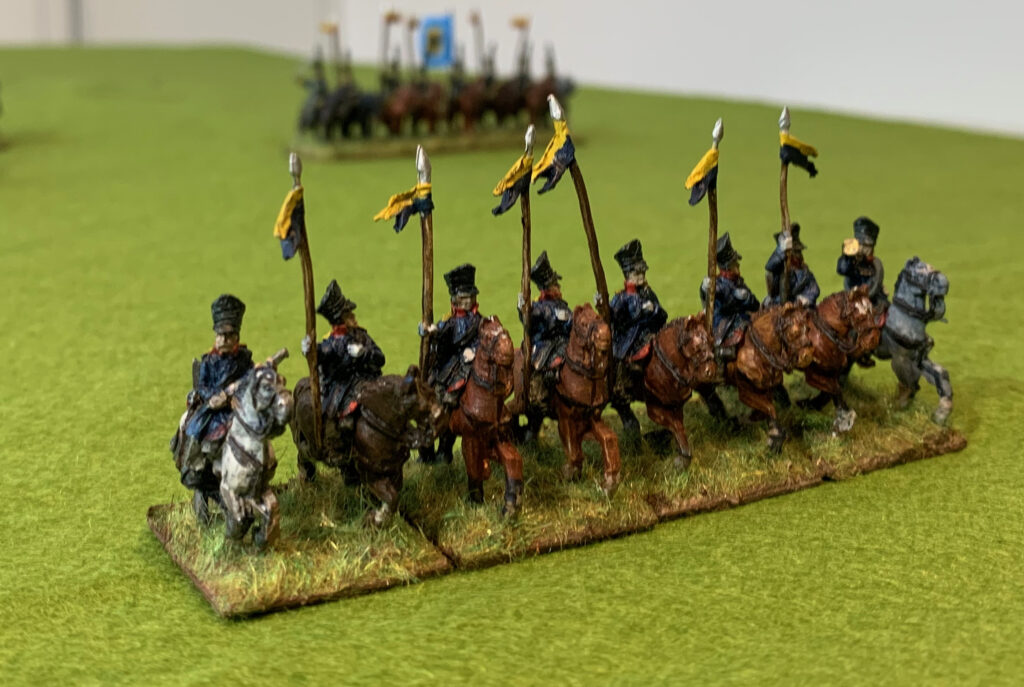
3rd Uhlans

This was the only unit in regulation uniform, with a blue overcoat, red collar and grey overalls. My source for the yellow over dark blue pennons was the centjours website, as it was for all my units. The photo might be unimpressive but I was very pleased with the blue of the coats (mixed from Prussian Blue) which had just the right brightness to set off the red and yellow elements nicely. Unlike my rather disappointing dragoons.

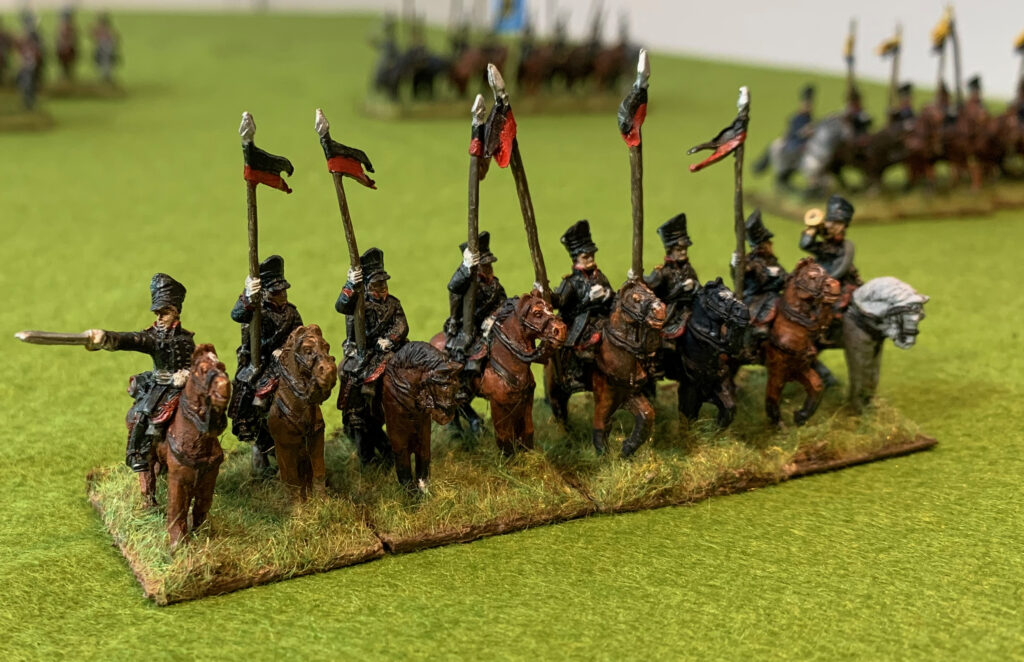
6th Ulhans

The 6th Uhlans were based on Lutzow’s freikorps; the unit was led by Lutzow himself and involved in some heavy and critical fighting, in which Lutzow was captured. I painted up the whole unit in the uniform of the first two squadrons; the third squadron had a hussar uniform and the fourth czapkas in place of the shakos. With so few figures in a unit there are limits to the variation that can be accommodated. I used standard uhlan figures, some of which were included in the freikorps pack, allowing me to dispense with standard bearers. The uniform is black with red piping on the collars and overalls and yellow shoulder-boards. Simple but striking.

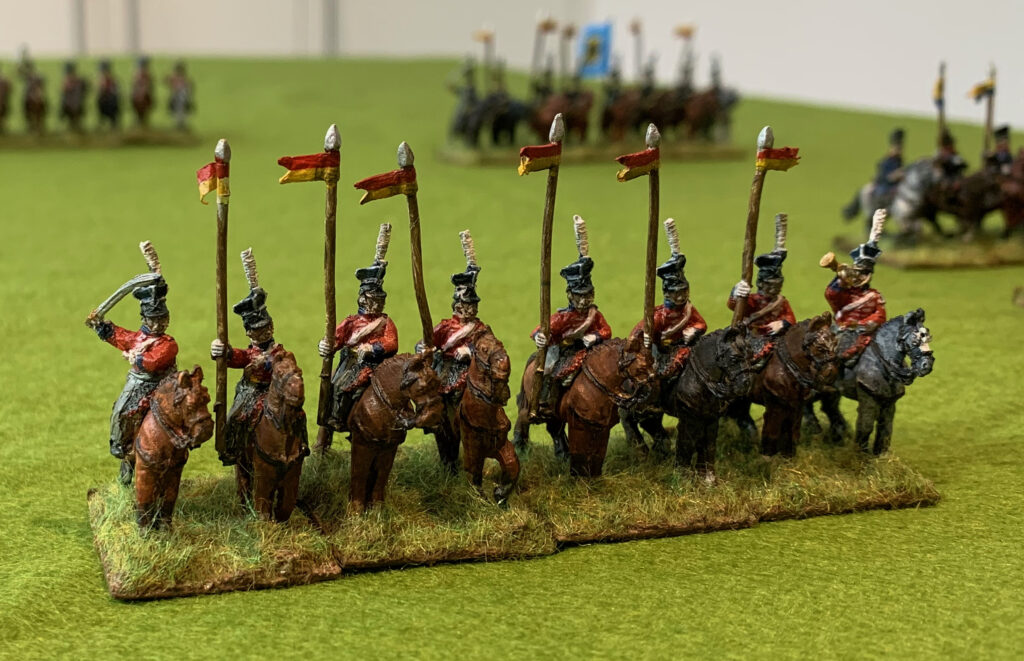
7th Uhlans

This uniform is again based on the first two squadrons, which were formed from Hellwig’s freikorps. The third squadron, formed from Schill’s freikorps, were in blue British hussar uniforms. I had a rather embarrassing pack of Prussian uhlans with czapka to use up – czapkas were not incorporated into the Prussian uhlan uniform until after 1815. This unit, and the 3rd Silesian Landwehr, were as close as I was going to get, though they had lacing on their tunics – and their red jackets were very striking anyway. One problem with this pack was that it had 16 figures, just enough for two units, but including standard bearers, which Prussian light cavalry did not use. I was able to make a pennon from foil and turn one of them into a regular lancer, based alongside the officer. I did attempt to represent the white lacing with paint, but not very successfully. These are not good quality miniatures – the worst of all my Old Glory Prussians. The regular uhlans aren’t great, but not too bad by comparison.

3rd Silesian Landwehr cavalry

Here are the rest of the uhlans in czapka, this time painted as Silesian Landwehr. Apparently the 3rd regiment captured and appropriated Polish lancers’ uniform in 1813 and were still wearing it in 1815. There is no lacework this time, so the the paint job is more straightforward. This time I decided to use the standard bearer figure as designed. I had lots of spare Silesian landwehr infantry flags (from GMB). This is nonsense of course, as the flag would have been too unwieldy to use. But I thought it would add some visual drama and help mark the unit out as landwehr rather than regulars.

8th Hussars

The 8th Hussars consisted of three squadrons thrown together from different formations: the 2nd Lieb Hussars, the 3rd Hussars and Hellwig’s Friekorps (again). I have represented the first squadron, with its black uniform and death’s head insignia, and the Hellwig’s, in their red British hussar uniform with brown colpack. The figures were from the Freikorps set, originally being Death’s Head hussars and British hussars. The saddle cloths are wrong, but these are the nicest miniatures in the set and fun to paint. Overall it looks as if the British figures are amongst Old Glory’s best in the 15mm range, based on my experience with French and Prussians. Some nice riflemen came with this set too. Making a unit out of two such different uniforms is a bit awkward though, but the but these figures would sit respectably alongside the 6th or 7th Uhlans if I needed and extra base or two.

For the bases I decided to go back to static grass, and risk it sticking to the miniatures. I mount my figures on unfashionably small bases, as I want to represent the close formations the troops actually used, as opposed to the loose files. Most people use 30mm squares rather than 25mm. The bigger bases are better for showing off the paintwork, and they also allow more creativity on the bases. There is not much scope for variations my bases, so they get a uniform layer of flock or grass. No space for tree stumps, bushes, etc. This time I mixed static grass from a variety of sources, including a fair amount of beige. The mixing wasn’t overdone, so there is some variation. The beige helps lighten up the bases, part of my battle against darkness and saturation. I used a different glue this time – “strong artist’s glue”, though still a white liquid like the PVA. I did not dilute it. After plastering on the static grass I turned the assembly upside down and tapped the bottom hard, both to knock off the surplus and straighten out the strands. The results were OK, and better than normal. The strands were nothing like as straight as you can get using a static electricity applicator, but the bases are small and I don’t mind if it looks a bit trampled – it’s in the middle of a moving cavalry unit after all. There wasn’t too much trouble with the strands sticking to the figures, and when try only small amounts worked loose. This is just as well as you can’t seal static grass by plastering on dilute PVA. Overall this means that static grass is a bit less hassle than flock, a little unexpectedly, and it is especially suitable for cavalry.

So that’s all my Old Glory Prussian cavalry done. I have a few spare miniatures which will end their days in the corner of the junk box. I have just one Old Glory cavalry pack left: some 15 French lancers, which I want to turn into two units of 8 somehow. I plan just three more Prussian cavalry units; I have AB figures for one each of hussars and landwehr with British shakoes. I also want some cuirassiers for 1813 and 1814 scenarios, but I haven’t bought these yet. But I still have masses of Old Glory Prussian line and landwehr infantry. Do I have a big drive on painting these up, or do I switch to the more interesting AB figures that are also waiting for paint?

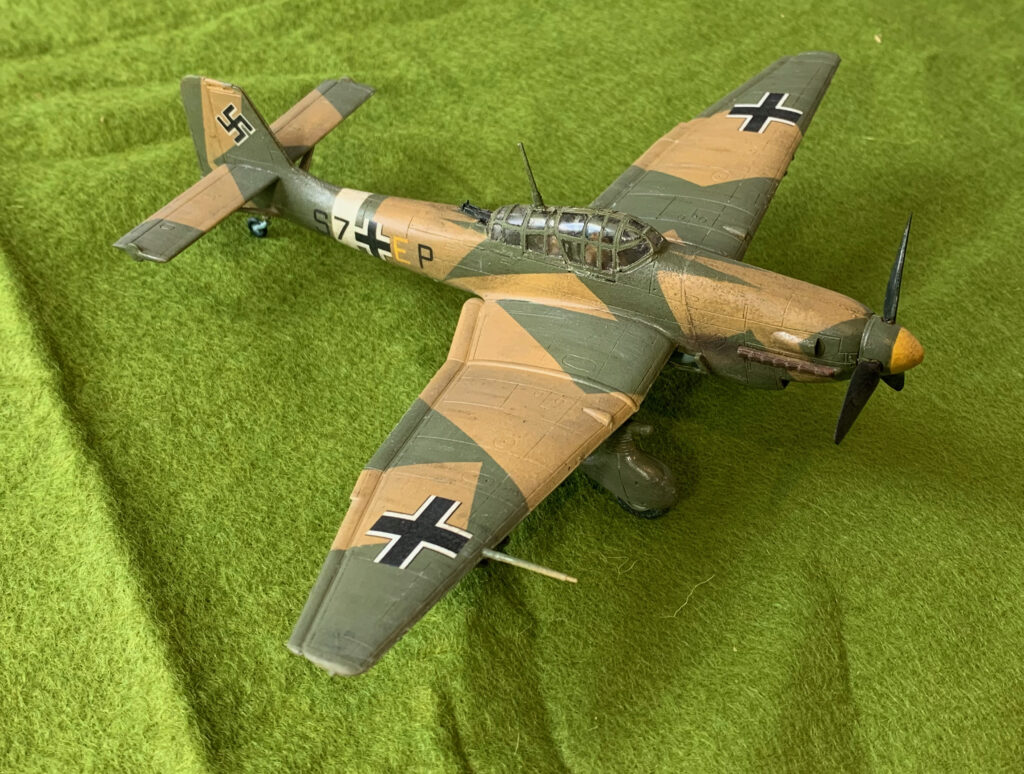
Hobby 2000 Junkers Ju-87 D1 Stuka in 1/72

And so to the last of my trio of Luftwaffe models for Tunisia. I wanted a Stuka as it was such an iconic aircraft, and it certainly did make its presence felt on the battlefield in early 1943. But by then the plane that symbolised the terror of Blitzkrieg was obsolete. It was vulnerable to enemy fighters, and not that effective against dispersed troops and moving vehicles. Latterly the pilots only look them up when there was a lot of cloud cover, which didn’t help to find their targets. It was withdrawn to be used only well away from Allied air cover. This model proved quite hard work, however. At pretty much every stage it took me more time than the two fighter models put together.

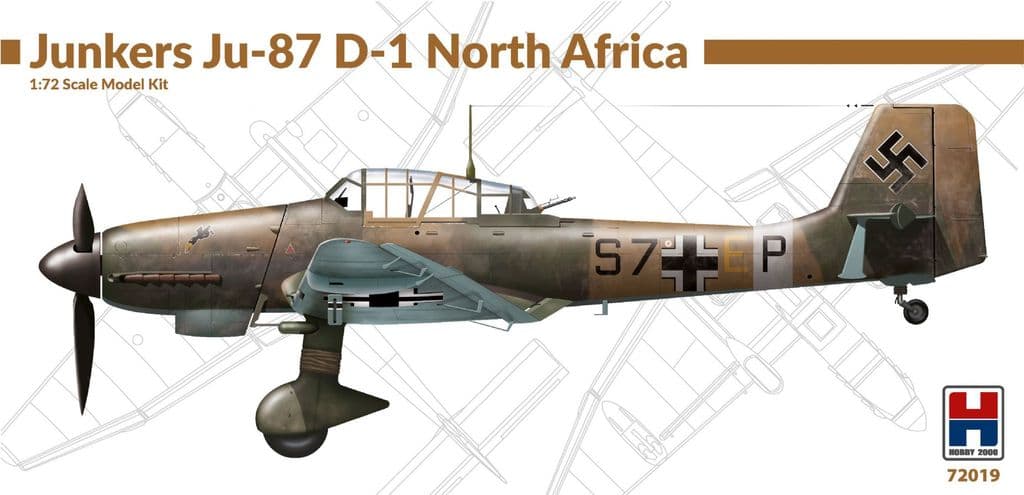
For this project I needed a model for the D, or Dora, which had come into service during 1942. Most models are of the B, which was in service at height of the aircraft’s career. There was not a great deal of choice. If manufacturers prefer the B, their next choice is the G, a similar aircraft which saw extensive service on the Russian front later in 1943 as a tank buster, with two underwing 37mm cannon. This is very similar to the D, which does not have the cannon, but does have dive brakes and bomb pylons. There was a Hobby Boss model of the D, and for once the undercarriage would not have been a problem, but this was really an adapted G without the dive brakes. Instead the best reviewed option was this one from Hobby 2000. This was in fact a reissue of a much older (1990s) Fujimi model. All things equal I would have preferred a later D5 version which had longer wings and 20mm cannon in place of the wing machine guns. But Hobby 2000 had an issue for the D1 specifically covering North Africa, including decals and colour scheme for a rather interesting one with a splinter camouflage scheme with desert sand, featured on the box art. I also bought an Eduard stencil for the cockpit frame; this is complicated and I wanted to give this method a try. In fact one of the improvements that Hobby 2000 have made is to include a stencil of their own, so I have one spare! The model includes all the parts for a G1, the version based on the D1 (and often converted from it). Hobby 2000 also have an issue for the G2, which has the longer wings of the D5. This would need to substitute the (separate) wing sprue from this model to be accurate. The model does not include crew, which I supplied from resin models bought separately (I actually used US crew as stocks of Luftwaffe ones were low).

This model is quite different to the two fighters (or the Hobby Boss P-47) that I had made previously. This is partly because it was never intended as a quick-build, and partly, I suspect, because it is much older. The build was much more complicated. This included drilling holes in the wings to accommodate the dive brakes and bomb pylons – which I didn’t discover until after I had glued the top and bottom together, and had to rapidly pull them apart as this needed to be done from the inside. Mistakes like this didn’t help, but a bigger problem was that I didn’t find the parts to be especially well-fitting. And many of the smaller parts didn’t have clear recesses to fit them into. There was quite a bit of “How is this meant to work?”. A couple of parts I left out altogether. Quite a bit of model putty and filing was needed to cover up the gaps.I suspect that this is an area where model manufacturing standards have progressed. Back in the day (by which I mean the 1970s) I remember using a lot of putty. So assembly took a lot longer than the other models. Of course it is bigger and more complicated anyway.

Unlike the other models I decided to use the scheme and decals in the box. This showed a rather unusual splinter scheme. The box art said that the three colours used should be the three Luftwaffe desert colours of sand, olive green and azure blue. I though that this was rather unlikely. These paints would have been applied in theatre and replicating the complicated factory patterns was not done. Instead the whole upper parts were usually covered in sand, with blotches of olive green on top of that. Instead what I thought had happened was that the ground crew had just used sand to overpaint the black-green of the standard three colour splinter scheme the aircraft would have arrived in (dark green and light blue were the other colours). This was because I noticed from the box art that it was the sand was where the black-green was on the aircraft in the standard scheme. I used the same sand as the two fighters, and mixed the other colours specially. For the blue I started with the bright blue that came with my airbrush order, in the hope that I would create an airbrush friendly paint. Alas this was much too bright. I added a lot of white and brown to cool it down. I didn’t really succeed, I ended up with far too much paint and something too dark and too blue – it was hard to distinguish from the separately mixed azure I made for the Bf-109. The dark green was hard to judge. Studying pictures the contrast with black-green is not that great, so I was quite happy that I had a reasonably authentic colour. But there was a very strong contrast with the sand, when I had been hoping for something much closer to the box art.

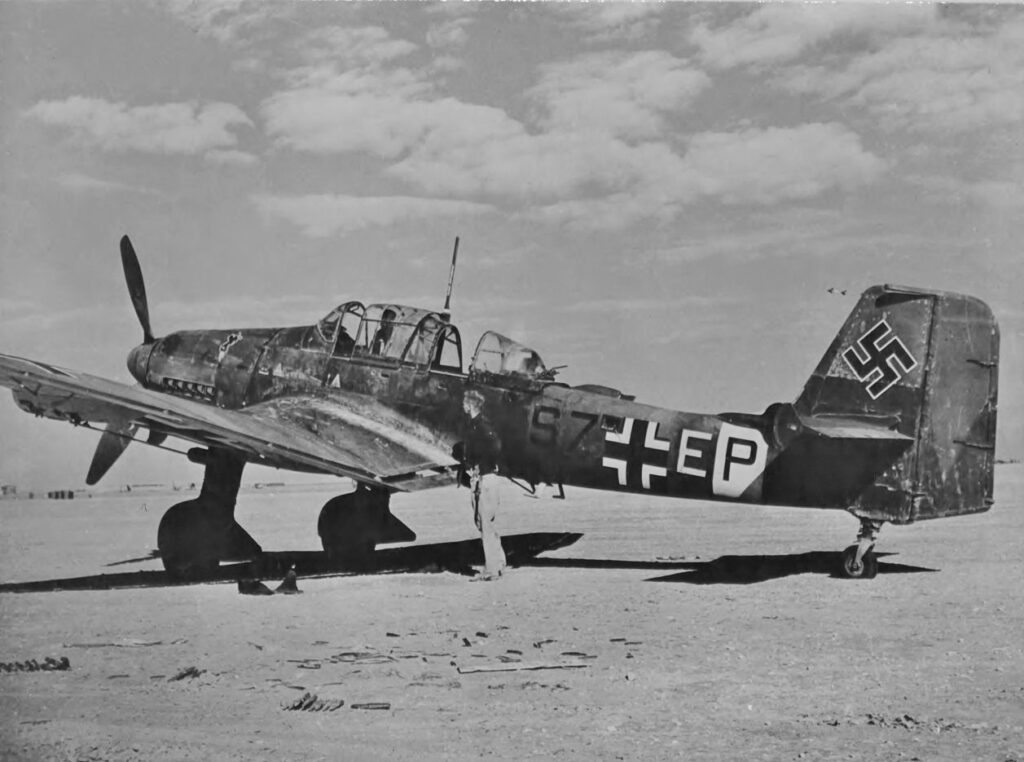
I then saw another interpretation of this aircraft (S7+EP) in the Osprey book on Mediterranean Stukas (which arrived too late) in just the standard scheme. I have only just now discovered the source picture (above) and looks as if Osprey has it right. Look how the yellow E stands out and the black S7 doesn’t. I also made a mistake in the positioning of the white fuselage stripe, which I put further forward than it should have been. This was entirely my mistake as the box art had this right – though a lot of Stukas did have it in this more forward position. So that leaves me with an irony; this is the only plane I have made so far which is based on an authentic aircraft rather than a generic one – and I’ve got it wrong! Researching aircraft colour schemes is all part of the fun, but I’m learning it the hard way.

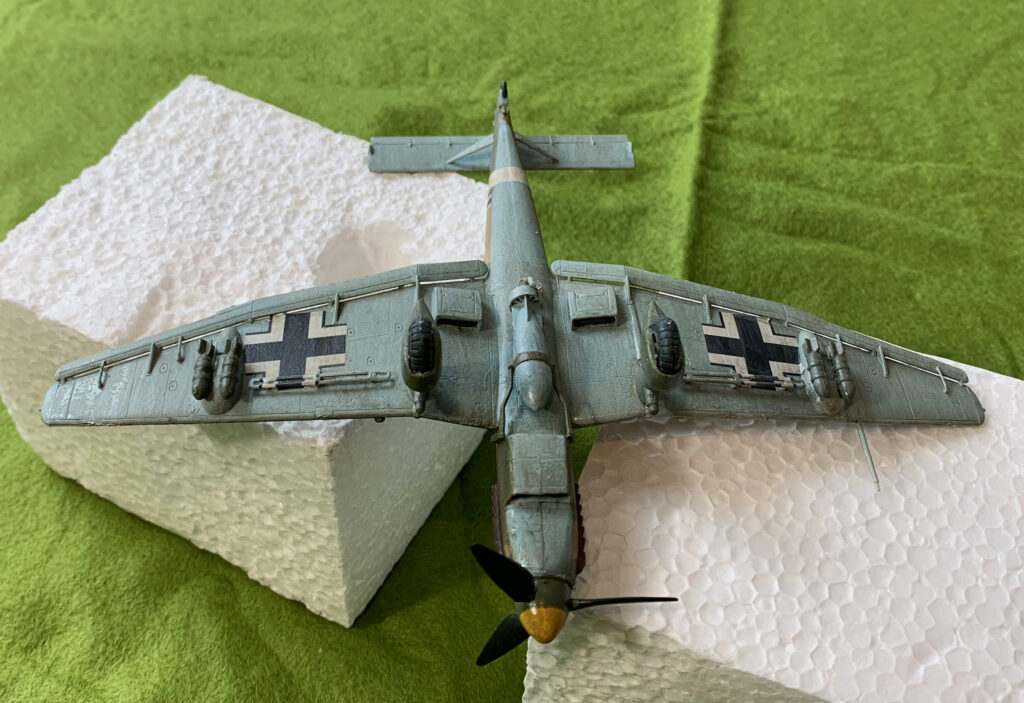
The paint was mainly applied with the airbrush. I had similar difficulties as the other planes with the paint consistency, but apart from spraying a bit of the green on the undersurfaces by accident (I though it would be easier to use the airbrush on the undercarriage than it was) I did not need much correction using the paintbrush. I achieved the splinter by applying the green over the sand, using masking tape. The tape took a long time to put on, but the effect is stunning, however unrealistic. Here is the underside:

Apart from the swastika I used the decals that came with them model. These proved quite hard to move into position, regardless of using generous quantities of fluid – much harder than for the other models or for the 40+ year old ones from stock. The underwing crosses were especially tricky as the air brakes and bomb pylons got in the way. A little cutting was needed. Hobby 2000 supplied the stripes to be applied on top of the air brakes (so that the cross comes out from below); these were a bit fiddly but not quite as hard to put on as I feared, and do look good.

I did the patination after my near-death experience on the fighter models, and I was very hesitant, after all the time I had already lavished on this model. So the upper surfaces look quite fresh, rather than trying to get anywhere near the weathered look you can see on the photo (though in that picture we don’t know how long the plane had been left abandoned for). Still the patination helps to integrate the colours and decals.

Another job that took quite a while on this model was the canopy, as there were many panels on the stencil to first put on and then take off. The result is OK but not better than would be achieved using the old-fashioned paintbrush method – albeit that acrylic paint doesn’t stick that well to the acetate, so you need a primer.

A lot of effort resulted in a nice-looking but unrealistic model, which is only relevant for the first part of my period. But you can’t have a collection of WW2 Luftwaffe aircraft without a Stuka.

Hobby Boss Messerschmitt Bf-109G-2 Trop

And so to the next model in my trio of Luftwaffe Tunisia planes. The 109 was the workhouse German fighter arm throughout the war. They used no other fighter aircraft in the Mediterranean theatre, apart from the brief intervention from the Fw-190s of JG2. I wanted to go for one of the earlier G models. These are very similar to the F, whose introduction give the RAF such problems until the Spitfire V came along. The G had an engine upgrade, giving it superior performance; these early Gustavs appeared in mid-1942. Later ones (like the G-6) had an upgrade to the fuselage machine guns, which necessitated the characteristic blisters each side of the nose in front of the cockpit.

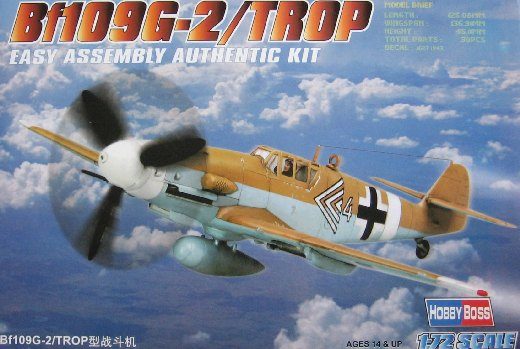
I chose the Hobby Boss kit because it was cheap and simple – just what I wanted when I was still learning how to do model aircraft. I had already bought the Airfix 109G-6, which is suitable for later in 1943. This is probably quite a good kit for my purposes but to represent the G2 would meant removing those blisters – which would be very hard to do cleanly. In fact Zvesda produce what is probably a more suitable model (actually of an F, as well as a later G). I had already experienced Hobby Boss with my P-47, so I knew what to expect. The big problem is that it does not have an undercarriage up option, in spite of the box art (which says it all in my view!). The model is simple and robust apart from that. It actually had more interior cockpit detail than Airfix, though it necessitates the amputation of the lower legs of the pilot. The join between the upper wings and the fuselage wasn’t seamless, and required filing, putty and sanding. The fit of the cockpit canopy wasn’t quite right either (which I failed to rectify). Otherwise my only complaints were that the scoring to denote control surfaces is a bit shallow (like the P-47) and it doesn’t come with a bomb.

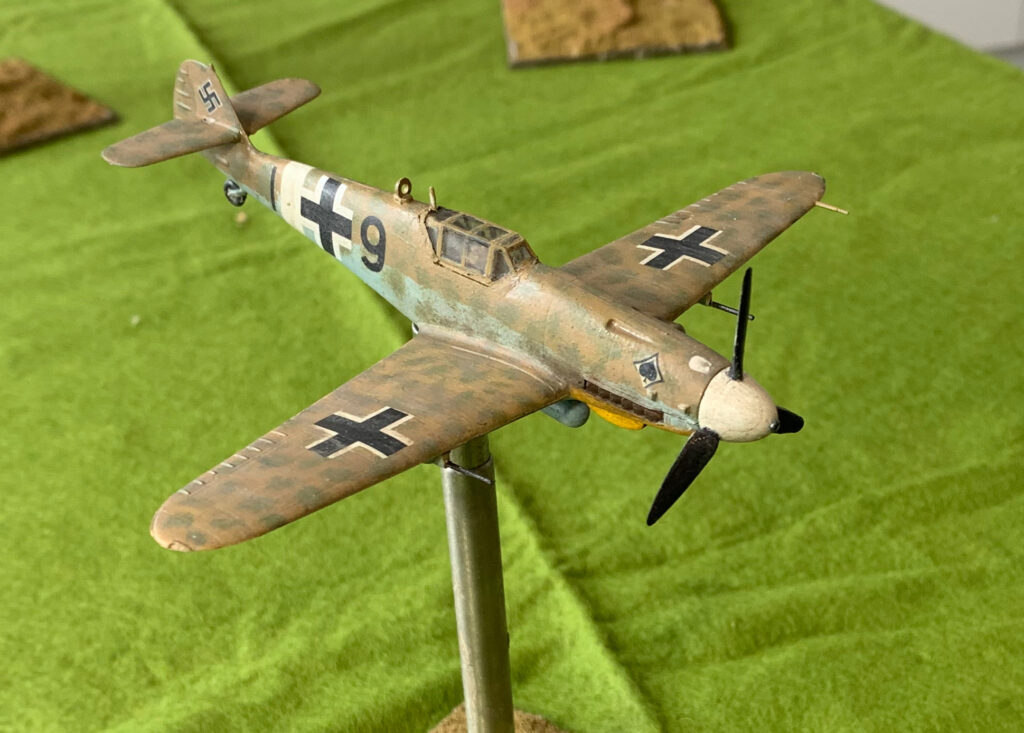
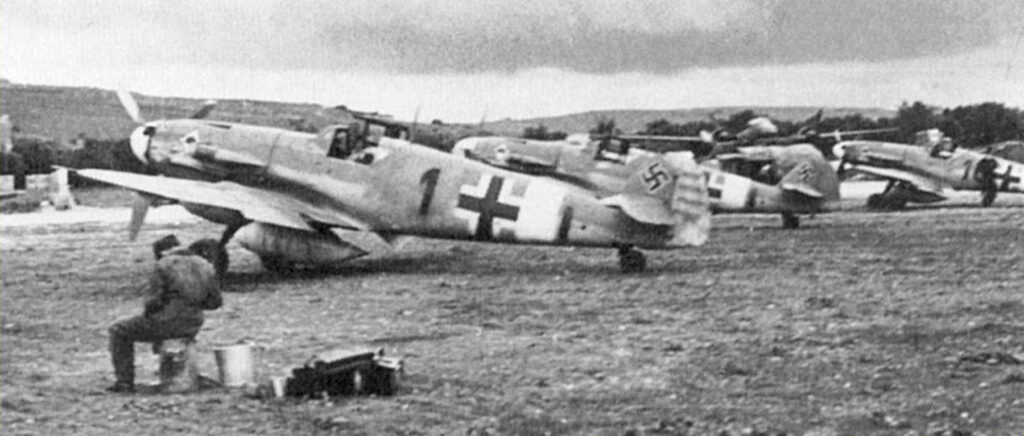
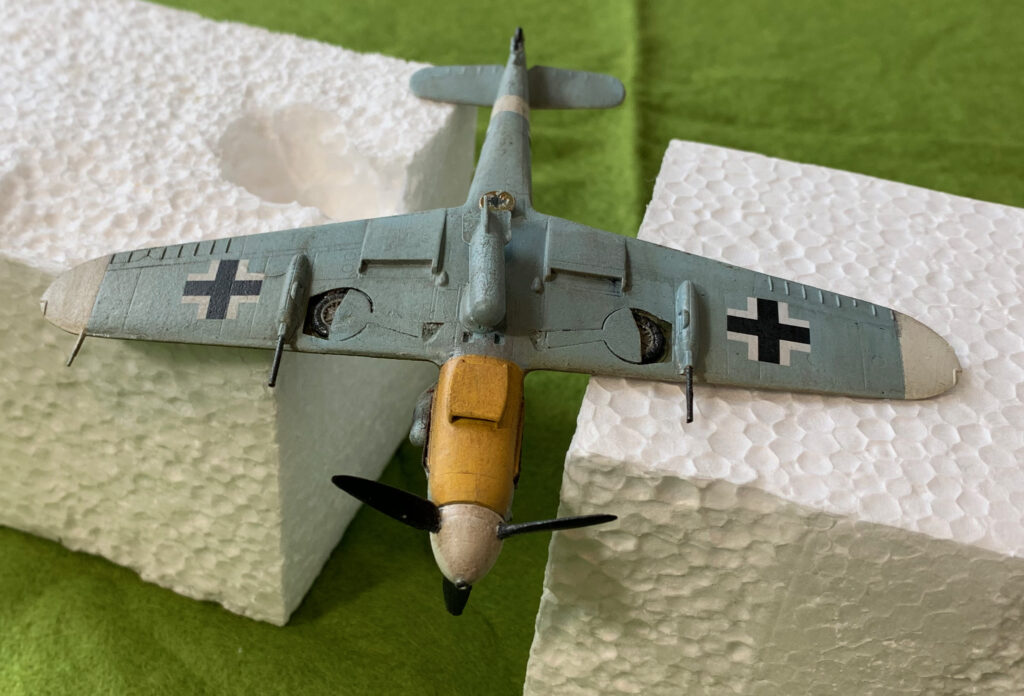
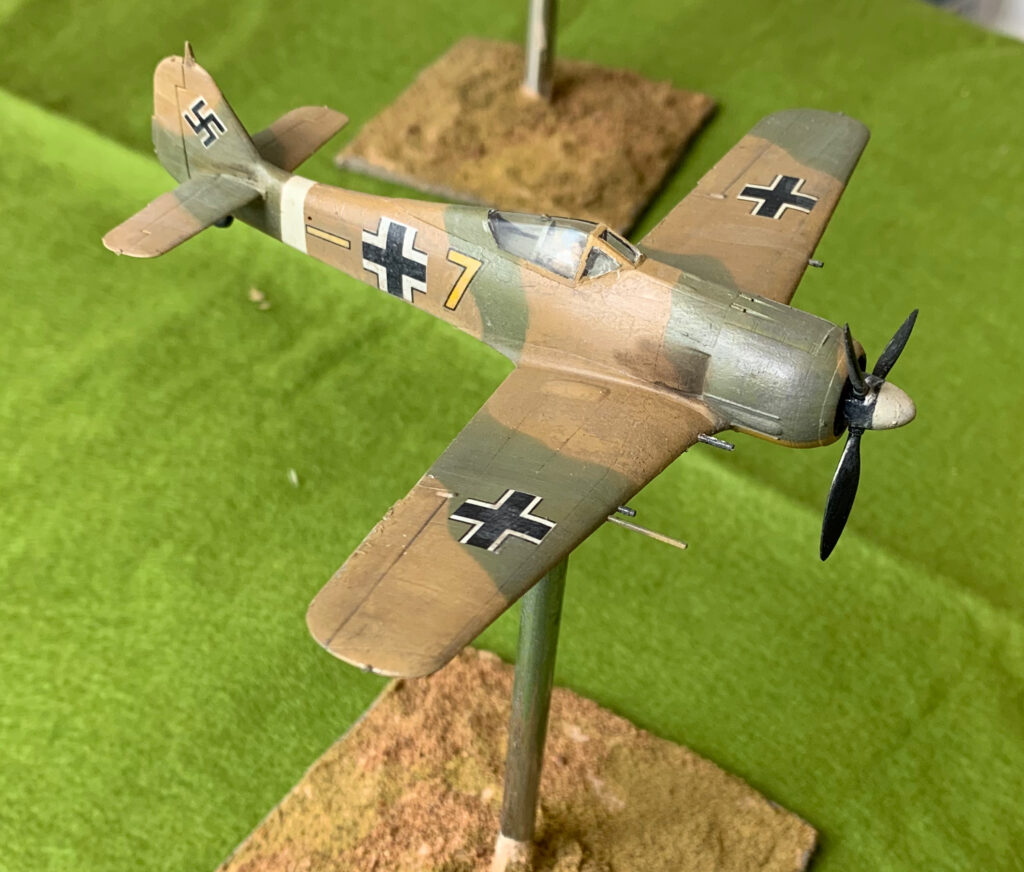
I wanted to represent an aircraft in the classic Luftwaffe desert scheme (as per the box art) overpainted with Olive Green splodges, doubtless to fit better with winter in the greener environment of Tunisia. The model came with decals for such a plane – Yellow 13 from JG53. But this was the plane of an ace pilot (with victory marks on the tail), who was lost in Tunisia. I wanted something more generic. The simplest thing to have done would have been to use the same scheme with a different number (as I did with the Fw-190). But doing yellow number with a black outline looked a bit tricky at the time (in fact I managed it for the 190 without difficulty). I wanted to keep the Ace of Spades insignia for JG 53, so I went for different Gruppe and Staffel – black letters with a downward stroke after the fuselage cross and white band. I was inspired by a picture of Black 1 (see above – another ace, as well as staffel leader), with some aircraft in the background. Evidence for the actual schemes is pretty thin. I have seen Yellow 13 represented with and without the green splodges, and with different shaped ones. Black 1 is usually shown in a very mucky version of the sand and azure scheme without the olive green (a fair interpretation of the picture). It’s actually quite hard to tell on the planes in the background in the picture, especially if the olive green has a similar tonal value to the sand (as was the case for my 190 – but not pictures from earlier in the war), though it should still show up against he blue. I wanted the splodges (“dappling” is the correct term, I think), to help me develop technique for my next batch of German aircraft in the standard grey scheme, which have dappling on the fuselage. Some modellers show splodges on the fuselage and stripes on the wing. I went for splurges on the wing too, following one of the interpretations of Yellow 13.

As with the 190, I had to make decisions about the yellow and white markings. The JG53 109s clearly often had yellow rudders and under the nose. Black 1 had what looks like a yellow rudder – but it looked to me that this was to show off the pilot’s awards and kill marks; it wasn’t clear if the other planes in the background had it. I decided to leave out the yellow rudder, but, like the 190, to have yellow under the nose. I also had white wingtips underneath, following quite a few portrayals of 109s in the theatre. Desert 109s often had white wingtips; I think they were often left off the upper surface to make them less conspicuous on the ground, especially later on. Finally I decided to represent the plane in fighter-bomber mode. Unlike the 190s used by JG2, the 109s do seem to have been able to carry bombs. British soldiers often wrote of being attacked on the ground by “Messerschmitts”, and they were certainly used in this capacity in Sicily. The ID skills of British soldiers isn’t to be relied on though. I suspect a tendency to identify all single engined fighters as 109s, and there were fighter-bomber 190s in theatre (funnily enough aircrew often identified 109s as 190s, such was the reputation of the 190, rather as their army colleagues kept identifying Panzer IVs as Tigers). Anyway as my 190 was a pure fighter, I wanted the 109 as a fighter-bomber. More straightforwardly I put on underwing cannon too, though I don’t know if this staffel had them (though it does look like it from the picture). The early 109 is a bit under-armed, and I am speculating that the extra engine power of the Gustav gave pilots the confidence to take the performance hit of the extra armament.

And so to the build. The biggest problem by far was having the undercarriage in the up position. The wheel wells as modelled were very shallow, and the wheels needed a lot of filing down to fit in. The doors were a poor fit too. I actually found that the doors from the Airfix 109 (those for the down position – they had a different moulding for up) were closer and used them instead. It still took quite a bit of work. As I eventually did with the P-47, I set the doors in plasticine to ensure they were flush. I needed to provide a pilot – I used a resin one from PJ Productions. PJ seem to have this market to themselves, which I find amazing. They are nothing special, and have arms moulded separately, which are tricky to glue into place. Resin is very brittle for such small things. Considering how easy it would be to provide a pilot with the model (as well as undercarriage up), I find it amazing that so few people do it. Only Airfix and Zvesda in the models I have bought. It is even more surprising that Hobby Boss don’t, given that there is surely more demand for this at this end of the market. The cockpit interior, while modelled (an advance on Airfix, which just has the seat), is too shallow, like the wheel wells, which meant that the lower legs of the pilot had to be removed. I have already referred to issues on wing roots (which meant that some panel details were filed off) and cockpit canopy, which I’m sure I could have done a better job of. Incidentally I fixed the canopies in place before painting the exterior in all my models, as I wanted to putty the joins for the non-moveable bits. For this model I masked the whole canopy, apart from the edges, and painted in the frame later. I added a bomb from the Airfix model, which I indent to represent s a pure fighter. There was no means of anchoring it to the pylon though, and it ended up a bit skew.

For the paint job I used the same sand and olive green mixes as the Fw-190. I mixed an azure blue for the underside. I started with an Azure Blue from Daler Rowney, and added a bit of white and neutral grey (and maybe some brown – I can’t remember). The result was pretty much what I was looking for, but disappointingly similar to the standard Luftwaffe light blue I used for the Stuka – mixed by a totally different route. I had fewer problems with the airbrush on this model than I did with the Fw-190. I think this may be because the mixes made up from artists’ paints are a bit thick, though I used copious amounts of thinner for the brush. Anyway I have more to learn on that front. I applied the blue and sand that way. For the olive green dappling an experienced aero-modeller would have thought nothing about using an air brush too – but my skills are nowhere near that level. My first idea was to use cotton wool buds – but these are quite absorbent, using a fair amount of paint that never gets on the model, which then proceeds to dry. Instead I decided to do what I did back in the 1970s – create a stipple brush by cutting down an old paintbrush. This worked adequately, though on one side of the fuselage I got the paint a bit thick, which proved quite hard to undo and redo. The result is still a bit mucky (it’s the other side from the photo above) – though the for the scheme and theatre that’s not such a big deal.

For the decals I used a similar solution as for the Fw-190. The fuselage and lower wing crosses were from the kit (rather better quality than the Zvesda), but it came with the simplified upper wing crosses. I used old Almark decals for the upper wing crosses, the swastika and the number and stroke (which identifies the Gruppe). All pretty straightforward. The stroke came from a separate sheet from the numbers, and is in fact too thin, looking again at the photo. The kit came with Ace of Spades markings, but without the black outline which pretty much everybody shows they had. I had quite a few spares from the old Airfix 1970s 109 model. These broke up slightly and I lost part of the outline (on both sides). Looking at the photo, the border is in fact very thin and the ones with the kit may have been a better choice.

This model suffered much the same problems with the oil paint patination I have described on the 190, with the additional issue that I think I overdid the white on the upper surfaces. The model still looks slightly milky even after the frantic attempts at correction. Here is the underside:

Apart from the skew bomb (which doubtless I will correct at a later point), I was actually quite happy with the underside, unlike the Fw-190. That may just be because there is more going on, with the vents, cannon and exposed wheels, and the colour is more interesting. I wasn’t sure what colour to paint the bomb. I read that the Luftwaffe often painted them blue to fit in with the underside colour, so I chose this. I used my standard Luftwaffe blue mixed for the Stuka (also used for the Stuka’s main bomb) – you can see how little contrast there is. For the exhaust stain I used powdered artists’ pastel, a mix of dark grey and brown. Looking at the photo I could made it quite a bit bigger.

Overall I’m pretty pleased with this model. Incidentally I didn’t notice the white splodge on the nose when I took the picture. I don’t know what it is, but it came off quite easily. Next I will describe the final member of the trio, the Stuka.

My Zvesda Fw-190 model

And so to the first of my three recent models of German aircraft. The Focke-Wulf Fw-190 A4 is one of the earlier models of this classic fighter aircraft. The 190A is one of my favourite WW2 planes from an aesthetic point of view, up there with the Mosquito and Spitfire Mk VIII/IX.

I wanted to model one of the early variants, which were around in early 1943, in one of the Mediterranean camouflage schemes. These early planes were slightly shorter than the later ones (from the A5 on, and the F series of fighter-bombers), which had the engine pushed slightly forwards to shift the centre of gravity, to ease the carrying of bombs. To meet my aim meant going for one of the pure fighter planes in JG2. Some early fighter-bombers were deployed in Tunisia at this time, but they seem to have used the standard European grey colour scheme. This would have made them look very like the A5 fighter-bomber that I plan to make later on. Given this, the Zvesda kit pretty much chose itself. Most models, like the Airfix one, of the 190A are of the later A8, which belongs to 1944. And I wanted a simpler, cheaper model at this stage in my modelling journey.

The Zvesda kit was an excellent choice. It has an undercarriage-up option, and comes with a pilot. Better than that, the fit of the parts is excellent; it needed very little filler. How unlike the kits of my youth! And also better than the low-cost Hobby Boss models. It sells as a snap fit model, without the need for glue. I did use glue, but it was only actually needed it in one or two places. I have just one significant complaint – the Fw-190’s tail wheel partly retracts in flight – but on the model it is in the fully down position. It was a bit tricky to replicate the retracted version. The decals aren’t great either. The only other point to note is that there are no bomb racks included with this kit to make a fighter-bomber version (which would also require the removal of the outer wing cannon) – though not many of these entered service for the A4. Sometimes kits are supplied with extra parts to make different versions, even ones for which instructions and decals are not supplied – not this one. Based on this kit though, Zvesda are the ideal maker of 1/72 kits for wargames purposes. The shame is that they only have a limited range of models. It looks OK for Russian aircraft (unsurprisingly), but otherwise it’s thin. There is no later, or fighter-bomber, version of the Fw-190 – a bit strange given how big a role this aircraft played on the Russian front. But there are a couple of Bf 109s, and they might be a better source for these than the Airfix or Hobby Boss kits that I have bought.

II Group of JG2 (Staffels 4, 5 and 6) was sent to Tunisia in November 1942 as part of a general rush of German reinforcements to this theatre – the unit had been based on the English Channel (the aircraft in the Imperial War Museum that landed in England in 1942 by accident was from JG2). They stayed until February 1943, and were the only Fw-190 fighters to be deployed in the Mediterranean in the war, as opposed to fighter-bombers. Only 109s took up the fighter role for the rest of the war, in a demonstration of the economic principle of comparative advantage – the Fw-190 was generally thought to be a superior fighter to the 109, but the latter was a much inferior fighter-bomber. What colour scheme? The Luftwaffe Mediterranean schemes were always ad-hoc, and that applies even more to Tunisia; there was no manual. Tunisia itself in winter was quite green for the most part, meaning that many of the aircraft rushed in were not given a new paint job at all, like the Fw-190 fighter-bombers. However there is evidence that at least some of JG2’s were. Unfortunately there are very few photos, and even fewer of them are available on online searches, so I’m relying mainly on secondary interpretations. The kit comes with decals for White 14 from 5 Staffel in Tunisia. This appears to simply have blobs of overpainting on the conventional grey scheme (and with the white on the fuselage Balkenkreuz painted out). This wasn’t very interesting. Two other schemes come up in searches: a group staff plane (with black chevrons) in overall sand upper parts, and Yellow 1 from 6 Staffel, either shown in just sand, or in sand with broad olive green stripes. Yellow 1 (1 denoting staffel leader) was flown by fighter ace Erich Rudorffer. I wanted the sand and green scheme, which would give me practice for the similar British schemes (sand and brown stripes), but I didn’t want a famous ace, but something more generic. I decided to do one from the same staffel but with a different number (seven in the end) – fictional, perhaps, but the sort of generic thing suitable for the tabletop. Details on Yellow 1 vary on the illustrations. Sometimes it is shown with white wing stripes – markings which were apparently used by German planes in Vichy France, but these would not have appeared on planes in Tunisia. Also shown are white underwing tips, yellow under the engine cowling and a yellow rudder (as well as the white fuselage stripe which almost all Axis planes in the theatre had). All of these appear on German fighters in the theatre, but not universally. The yellow markings were also used by JG2 planes in their previous posting on the Channel. My speculation is that the upper parts of the planes were overpainted in sand and olive green, but the underparts were left in the pale blue-grey of the original scheme (rather than azure in the German Mediterranean set). Winter in Tunisia wasn’t particularly sunny (it rained a lot), so there was no good reason to overpaint the underside. Besides a large part of the use of aircraft camouflage schemes in this theatre was to make the planes less conspicuous on the ground, as the airfields were quite basic, and there was little cover. Even the Americans were forced to do this in 1944 when they stopped painting their aircraft at the factories. So, I reasoned, they would have overpainted the yellow rudder but left the yellow under the cowling. I wasn’t sure about the white wingtips, but these aren’t very conspicuous, so I left them out.

Here’s the finished model:

And underneath:

There’s not much to note on the build. It was very straightforward apart from the tail wheel. I used the airbrush to prime, but this time with LifeColor purpose made white primer. This went on more easily than standard paint, but there was still a slight tendency to bubble (even though the parts had been washed). The sand and olive green were mixed for use on this and the other models – the sand on all three models, and the green with the 109. The pale blue grey (“white-blue”) was mixed just for this model. I took the darker light blue I used for the Stuka and mixed some white into it. It should probably have been a bit greyer (on the Stuka too). The sand was Raw Siena with a bit of blue and white – and I am very happy with how that turned out. It’s a bit darker than it is often shown, but close to many representations of this aircraft. The olive green is usually shown as been noticeably darker than the sand (which comes out on may photos) but in this case I thought it would be tonally similar. One the one photo I have of Yellow 1 (showing just the nose) the stripes are nearly invisible. I started with Sap Green, mixed in some Yellow Oxide and white. That works well on this model.

I have already written of my traumas at the painting stage. I painted the whole upper surface in sand, and then over sprayed the green on top, using Science Putty for masking. I used this product as an alternative to the more expensive “Panzer Putty”, and it worked pretty well. However the problem with it is that it moves, so you can’t leave it on the model for long. Blue Tac is probably more appropriate. I had to top up a lot of the airbrushed green with a paintbrush. For the decals I used the Balkankreuz that came with the model for the fuselage and underwing, but they supplied the simplified cross for the overwing, which didn’t seem to be accurate. At this stage, and in this theatre, the Germans seemed to use the standard cross with a thinner white band. This, and ID markings and the swastika were all sourced from my brother’s stock of German markings from the 1970s (or even late 1960s), mainly from Almark. Almark still seem to be going, though Scalemates says they started in 1975, my brother’s main modelling activity in 1/72 was long before this, and I generally only needed the swastikas for my models at this time, so I don’t think I bought these. Zvesda do supply swastikas, but, doubtless for legal reasons, they are cut in pieces and a faff to put on. The old decals took a little while to free themselves from the backing paper, but then were fine to manipulate – actually easier than many of the modern ones. Using decal fluid the flash, a big problem back in the day, disappears – though it didn’t help that we usually applied them to matt enamel painted surfaces. For the ID markings I had to put on the yellow markings first, and then the black outlines over them. I am very pleased with how they turned out.

Overall I am very pleased with the result on the upper surfaces, in spite of the nightmare on the oil paint patination. The LifeColor matt varnish has left a faint sheen (or maybe it’s the oil coming through) which is just what I wanted. While American planes in the Olive drab scheme often appear in a very matt finish, this seems less true of Luftwaffe planes. Doubtless the crews kept the planes clean to extract every ounce of aerodynamic performance. The whole effect is cleaner than the P-47, but consistent with a recently-painted aircraft. The patination nevertheless helps to integrate the whole model, including decals, and give it more of a real-world feel. The underside is much less satisfactory. The main problem is that it is too monotonous. Some of the detail could have done with being brought out. The fit of the undercarriage doors is so good you can hardly see them! The patination effect is also much more visible and makes it look a bit mucky. That’s not unrealistic in itself, remembering that this is the bit that wasn’t overpainted, and the underside would have taken a pounding from dust on take-off and landing, but it still doesn’t look quite right. But after the traumas with the oil, I wanted to draw a line under the project, and had no wish to spend yet more time trying to fix it. The underside is not going to be that visible on the table after all.

John Hussey’s Waterloo Vol II – a flawed offering

And now I have finished volume two! I have to say I’m rather disappointed. As with the first volume, the book’s strength is that it tackles the high politics with confidence. But there is a lot less politics in this stage of things. And after a while Mr Hussey’s style starts to grate, on me anyway.

The biggest problem is one that he shares with most other histories of the Napoleonic Wars. It’s too judgemental. This is not done in a sneaky way by hiding facts, but he is too quick to present his conclusions on whether particular actors were good or bad at their job. He is especially harsh on the Prussians. This is how 19th Century histories tended to be written, when the events were still quite fresh, and had some sort of bearing on political and military events. But the distance of time should change the tone, so that the focus, in the words of the great 20th Century historian AJP Taylor, is “what happened and why”. The reader should be given insight. Instead most modern historians, who tend not to be academics, feel the need to join in the ding-dong started by those judgmental 19th Century historians. Mr Hussey has disappeared down this rabbit hole.

The descriptions of the battles (mainly the great day itself) are quite brief. That’s fine: the book was always intended as a strategic narrative. But he still could have presented more clearly what we do know and what we don’t. Too often he simply follows an old narrative that he must know is questionable. For example, when he describes the great cavalry attacks we get a completely conventional British version of events. The cavalry came on; the plucky British gunners fired at them, then escaped to the nearby squares wheeling one of gun’s wheels as they went; the cavalry than retired and the gunners went back to their guns an recommenced firing. This is a very problematic account, that many historians reject (where were the limbers and the ammunition supply train?), and leads neatly into one of the more interesting Waterloo controversies, which is why Wellington seems to have thought that he was let down by his artillery. The suggestion is that many gunners abandoned their pieces never to return, and had to be replaced by Wellington’s reserves of horse artillery. This controversy does not get mentioned. In fact not a hint of this debate is presented. I would also have liked a discussion of the French account of this period of the battle, which talks of their cavalry controlling the ridge for a substantial period, rather than the quick in-and-out of a number of waves, suggested by the British version. Mr Hussey does present a few of the controversies, such as the performance of the Netherlands troops, but the selection seems distinctly random.

On one matter he does choose to stick his head out and break free from the standard British account. He suggests that both commanders failed to realise the significance of the farm of La Haye Sainte, in the centre of the field. He suggests that the French should have pulverised it with artillery and taken it quickly, allowing them to press an infantry attack on the centre. Meanwhile Wellington failed to fortify it, unlike Hougoumont. Leave aside the point that these criticisms are mutually exclusive (if the farm was so easy to demolish, why waste time fortifying it?), and I think this account presents problems. My first thought is that I don’t think I can think of a case where massed field artillery (mainly 6pdrs) ever demolished a brick-built farm – this job was usually left to howitzers, which could set the buildings ablaze. Then again, I’m not sure that a relatively small farm in the open ever proved to be a decisive strongpoint in this era, before that day – maybe that was because they were vulnerable, unlike the much more substantial villages, like Aspern and Essling, that so often dominated battles. There is another issue though – the farm was in a distinct hollow, and sheltered by orchards and gardens. It was not as visible as many assume. From the French side the main feature providing the shelter was the “grand-battery ridge”, a low rise which is where most, including Mr Hussey, assume the French placed their artillery, even if “grand battery” is not an accurate description. At the left end of this feature the farm would have certainly been visible, but only one or two hundred yards from it – and quite vulnerable to rifle fire from the farm and the nearby sandpits. Further to right and the lining up and visibility would have been a problem, as the feature curves back a bit. This seems to sum up the problem of Mr Hussey’s whole approach. If your focus is what happened and why, you would start to look for explanations as to why La Hay Sainte might have been neglected, and why the French made no attempt to concentrate artillery on it. And if you had, you might well have spotted the problem. Instead Mr Hussey wants a bit of ding-dong. Incidentally, I tumbled on the visibility issue when setting out wargames terrain using a contour map.

So given this it is no surprise that Mr Hussey has nothing to say on what I think is one of the big puzzles of the battle – the speed with which the Prussians reached Plancenoit. At 4pm, according to this book (and it is generally accepted) the Prussians were nowhere to be seen. They then started to merge from the Bois de Paris; that is over 2km from Plancenoit. They faced Lobau’s forces of two divisions of cavalry and two of infantry. They had numerical superiority but they had decided to press forward before they had consolidated IV Corps for the attack – with only two brigades (actually sizeable divisions) and some cavalry available. By 6pm, according to Mr Hussey they hadn’t just reached Plancenoit, but they had taken it the first time and then been thrown out. Something about this account does not add up. Unfortunately records on both sides are very sketchy. I think Lobau must have pulled back very quickly without putting up any real fight when the Prussians first emerged.

And of course the book was published before Paul Dawson’s recent research suggesting that French casualties were lower than generally thought (though making sense of that book would be a big project, so Mr Hussey was perhaps fortunate there).

Overall Mr Hussey brings forward little fresh evidence. He has unearthed some neglected insights from some secondary sources from Germany and the Netherlands. His coverage of the more strategic aspects of the campaign – right up to the peace treaty – is welcome, given how many people focus on just four days in June 1815. Here his judgemental style can grate, but it I don’t generally disagree. His account of the climactic day is distinctly weak. Waterloo is one of the most written-about battles in history, and I have still to find a satisfactory account of what happened and why.