The days are getting longer and the afternoon light better. I can get back to painting and modelling, and so resume my 1943 project. When I left off last Autumn I had just started my most ambitious project to date: four tanks for the Royal Scots Greys at Salerno. I have already posted at length on my early research last Summer.
It is ambitious because it is the first, and probably only, time I am modelling a specific unit at a specific time, rather than something generic. It involves conversion work on my models, and producing my own decals.
The first challenge was finding models. I am looking at the M4A2 (or Sherman III) in early format (especially the early mantlet – there is more flexibility on the nose ). My preferred supplier is PSC, but they did not have anything. They have the welded hull M4A1 or the long-hulled M4A4. I went as far as buying the Armourfast M4A2 after good reviews, but without understanding what options it had. There were none and it was a later war variety without any sandguards; the mantlet and nose were later war too. A lovely clean model though, that I will use for a reinforcement platoon. Then I found the Italeri kit of earlier war British configured M4A2s with sandguards. Otherwise I would have resorted to one of the more expensive 1/76 models that are on offer from Milicast.
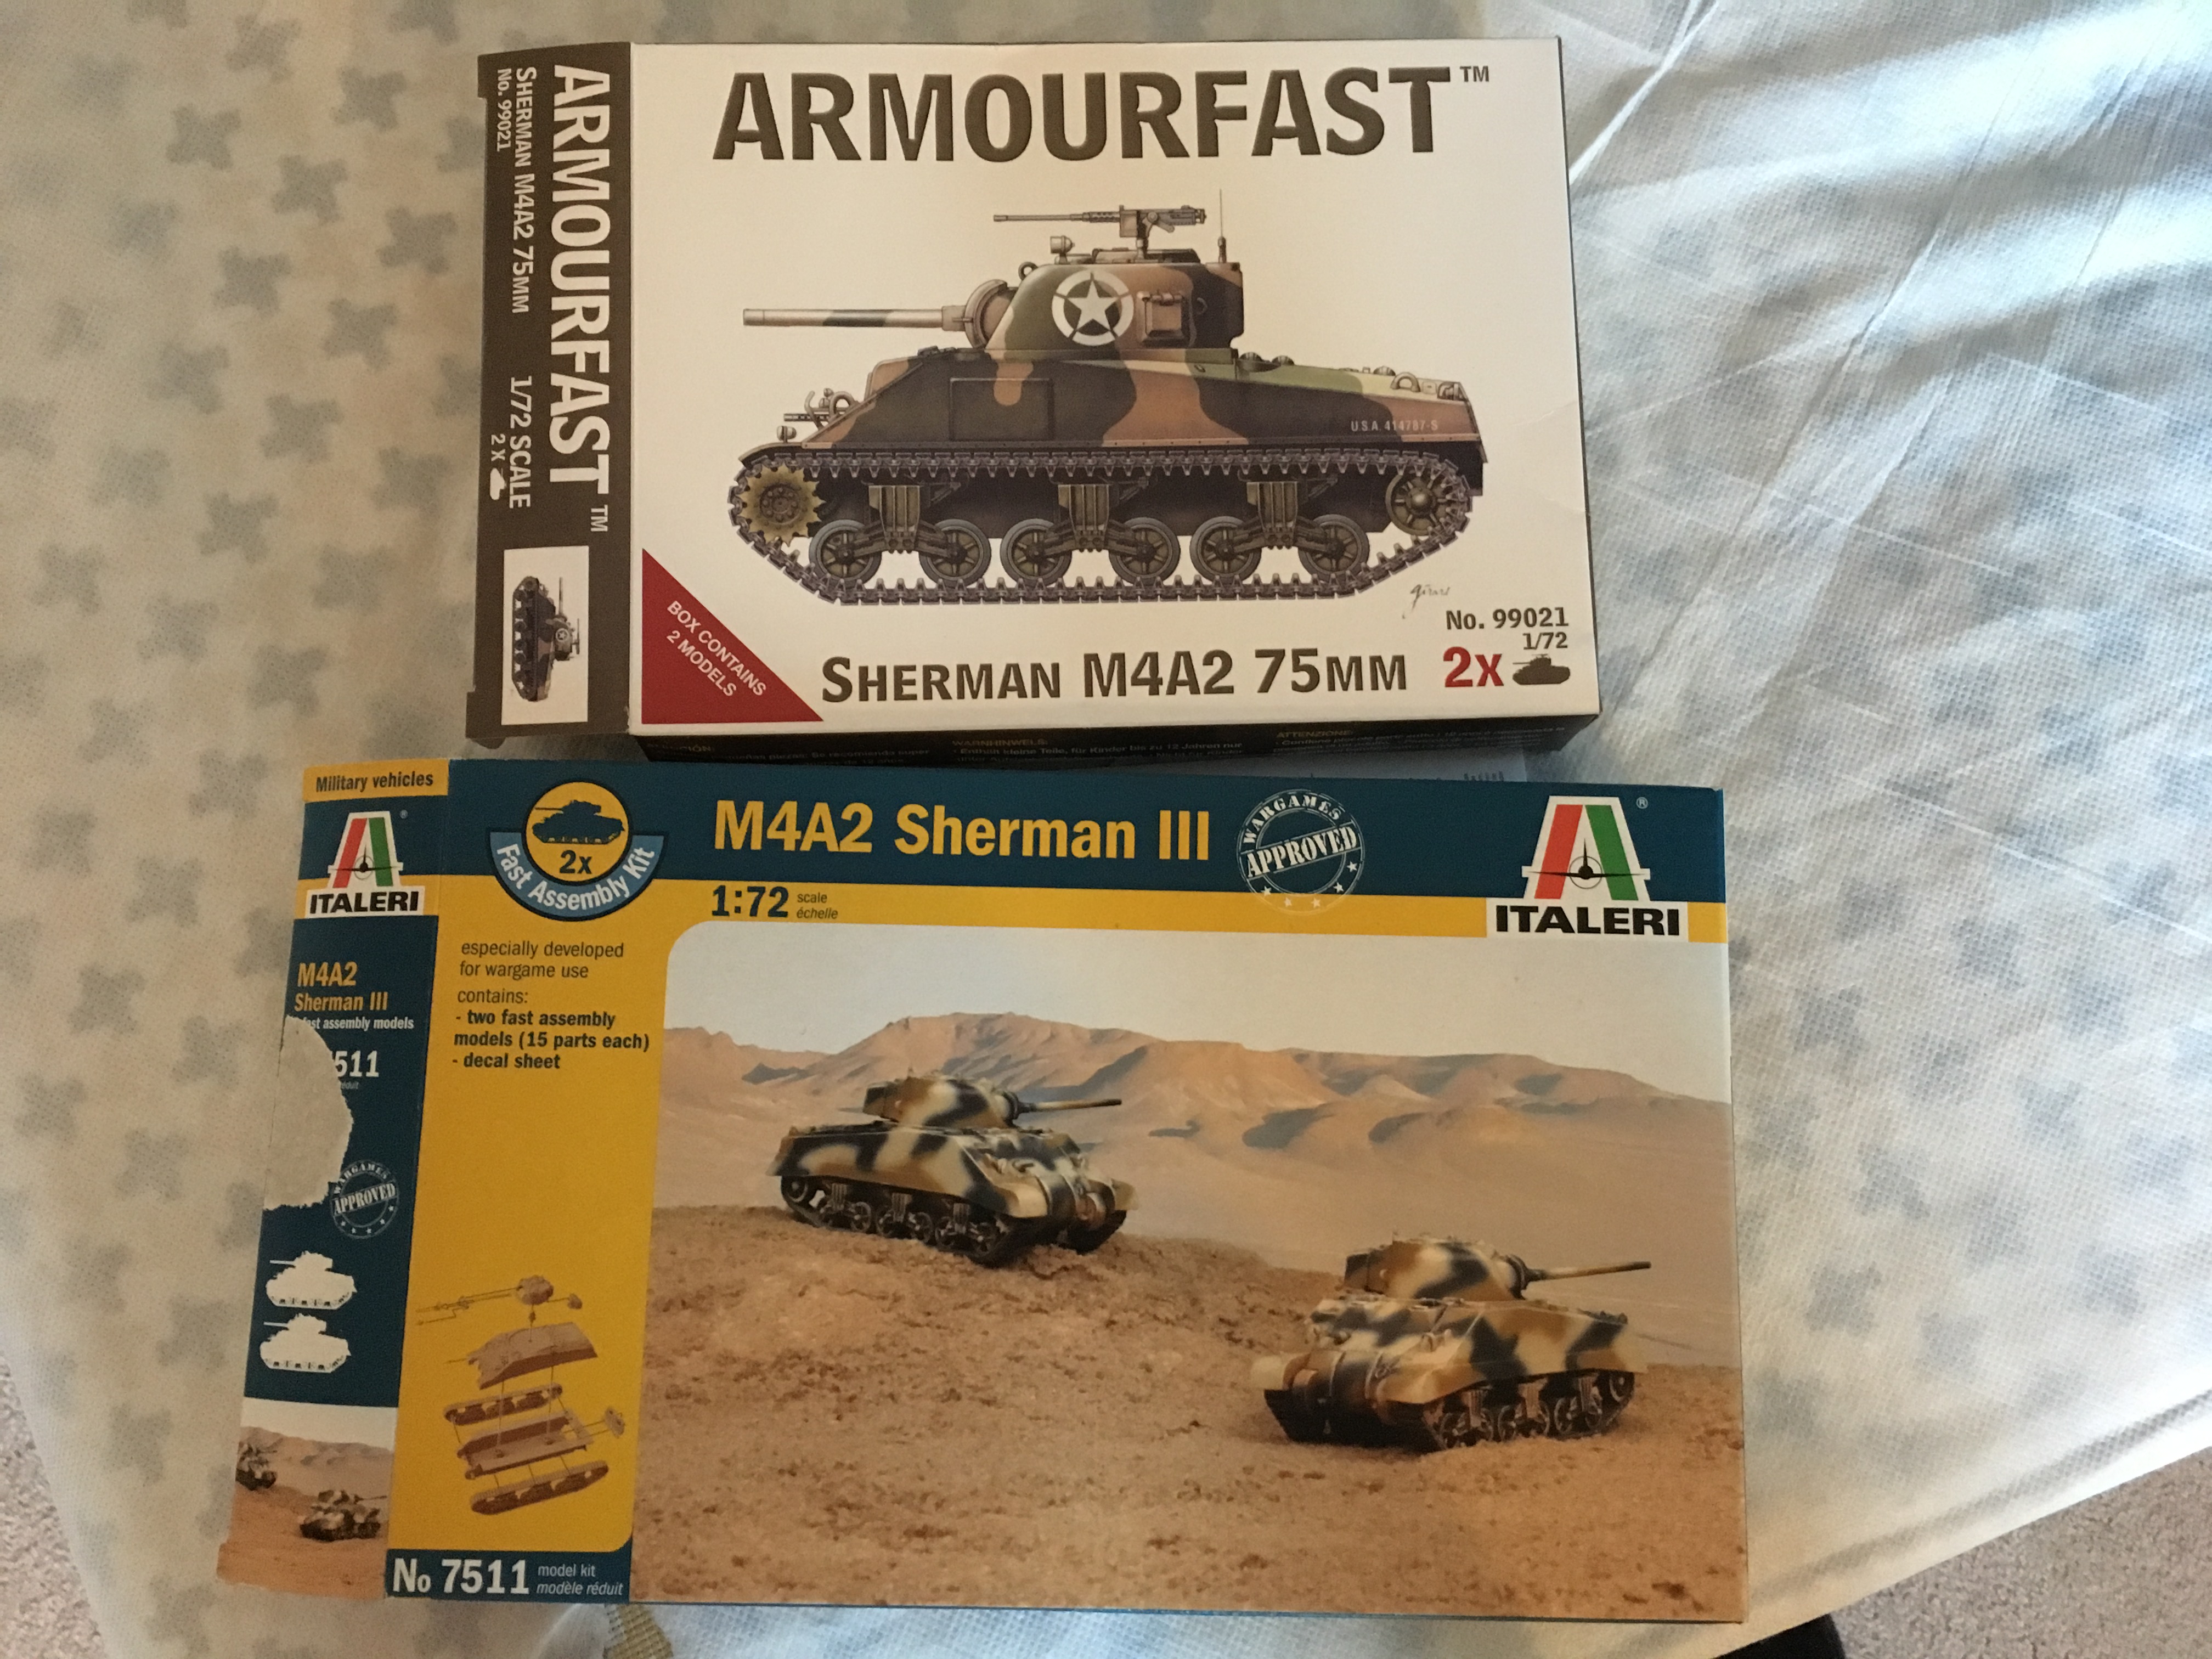
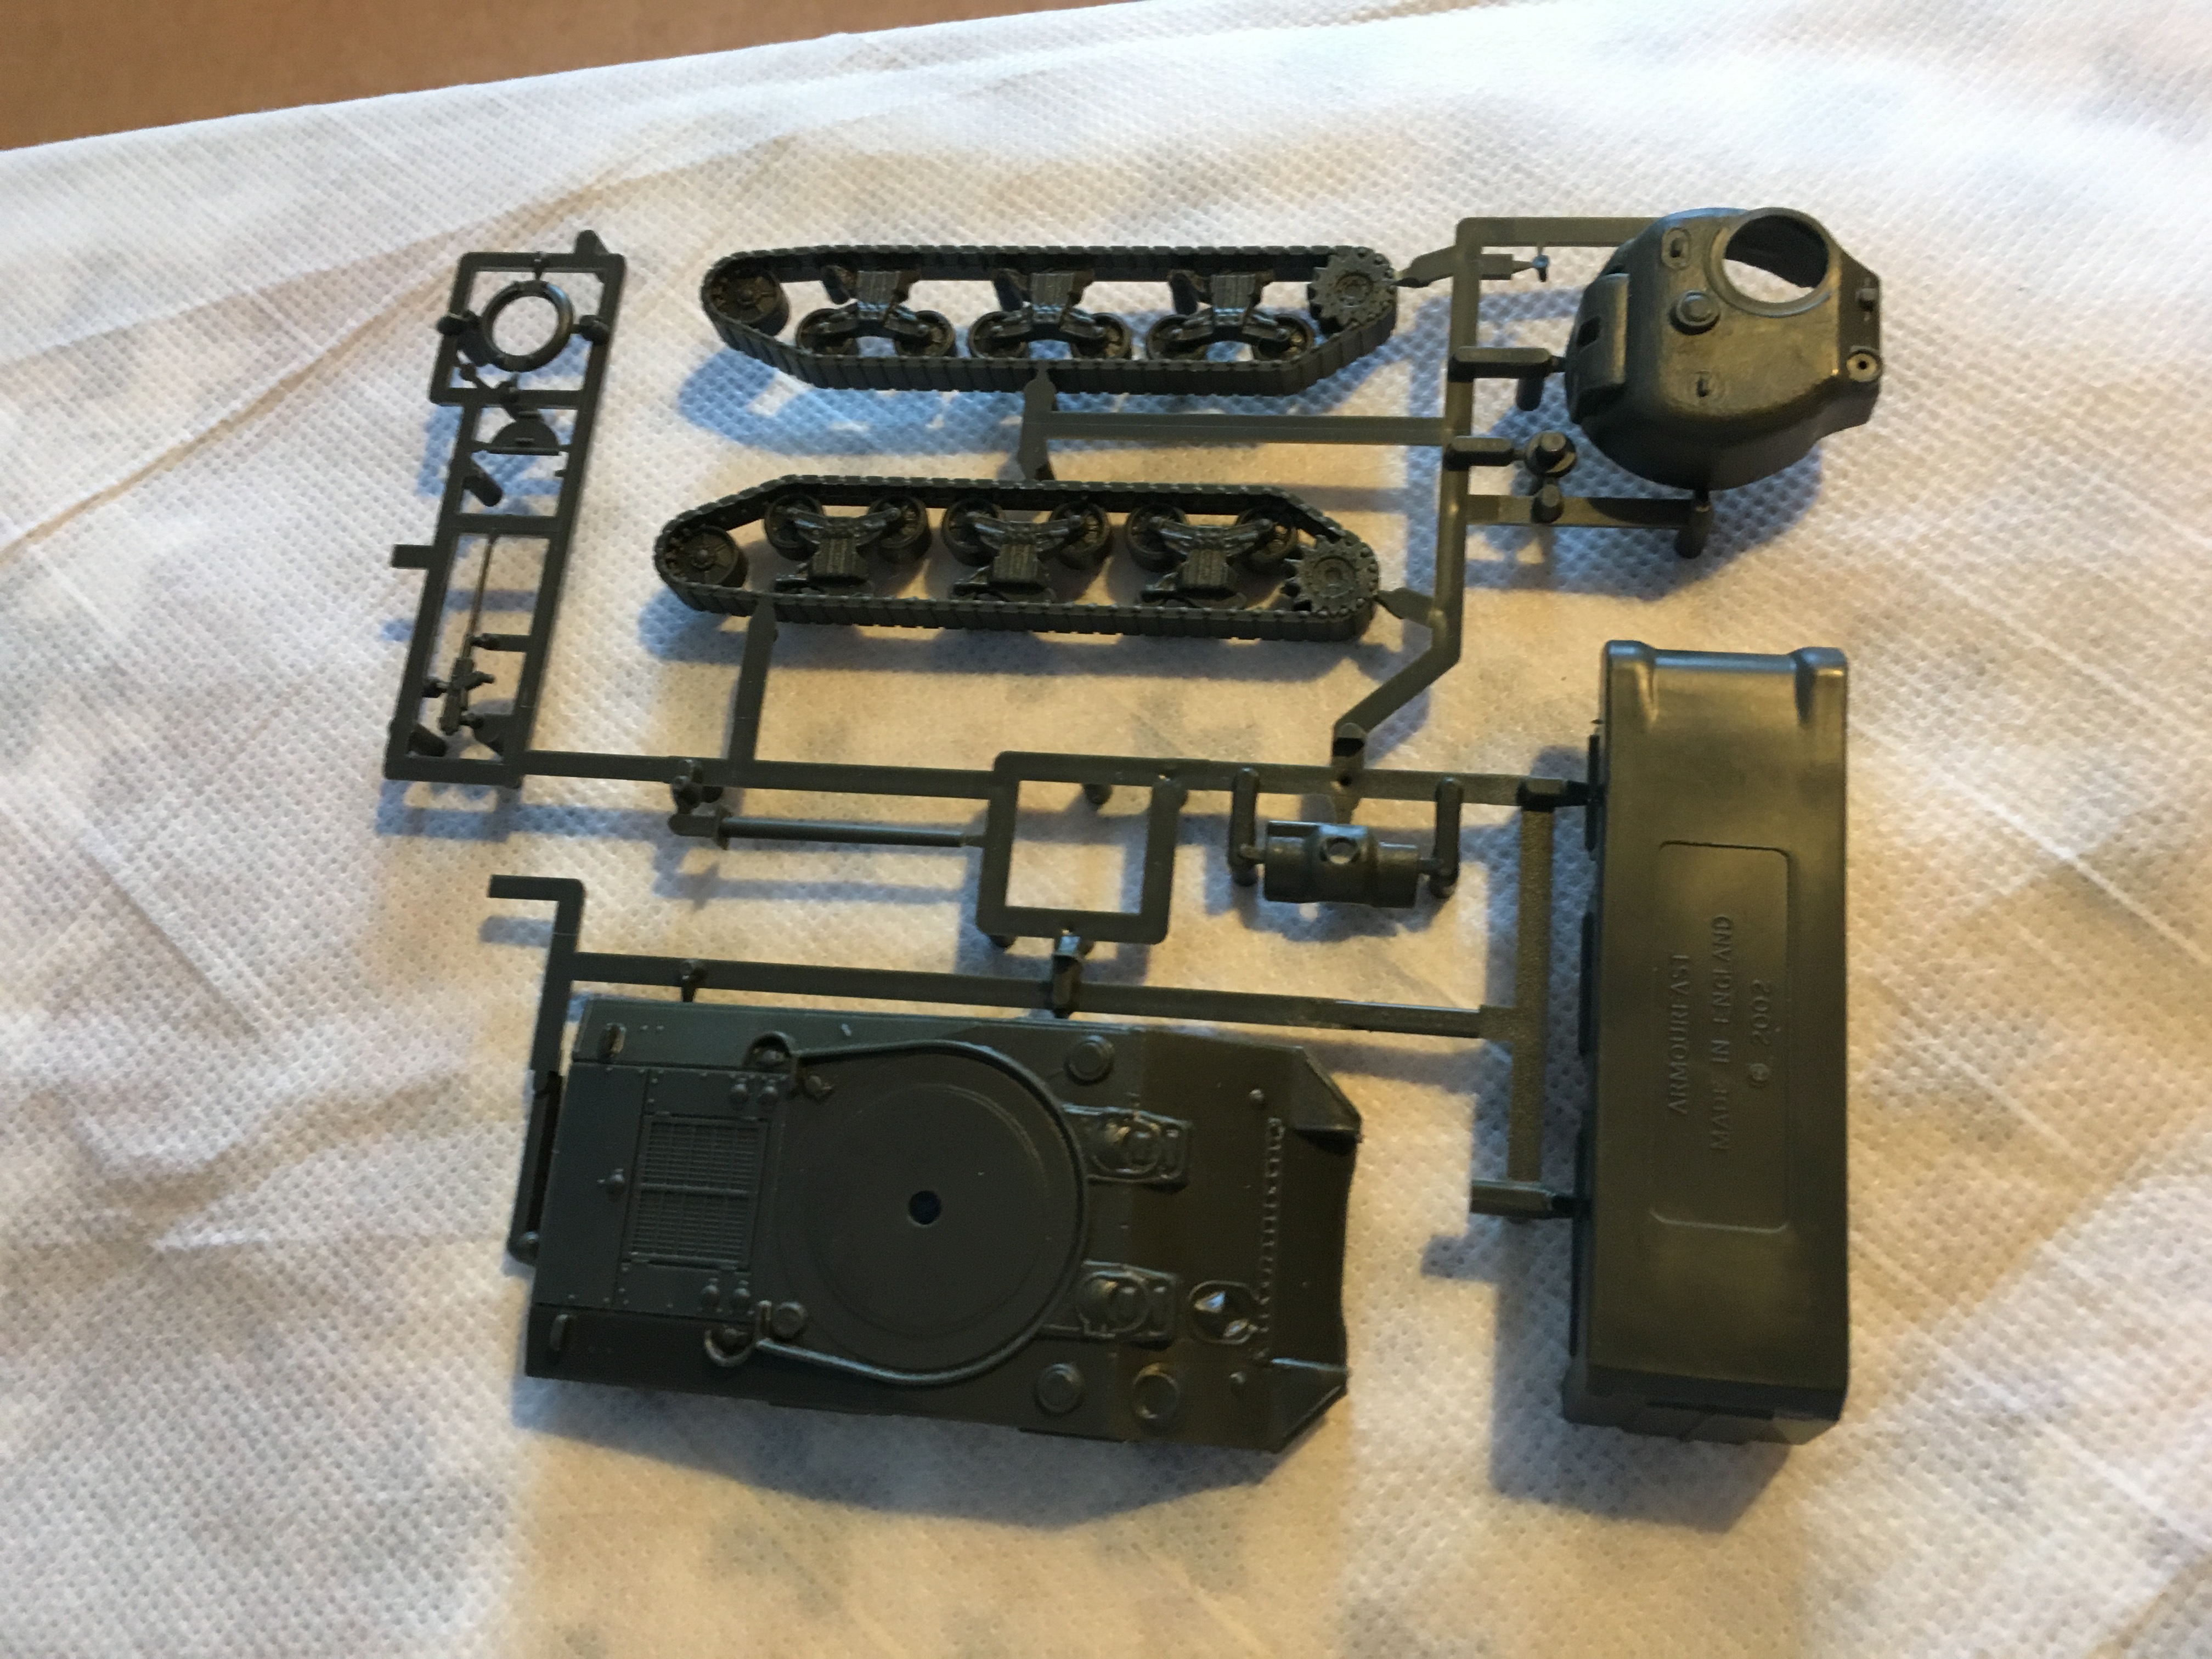
Alas on opening the box it was not all good news. The hatch is moulded closed and in the wrong orientation. The British (and certainly the RSGs) removed the one hatch cover and oriented the other to the rear (rather than having the hatch open to the sides). Besides I want to model my tanks with the hatch open and a commander. Otherwise it is a nice model. It is a snap together wargames kit, not a proper model, but that suits me fine. But that hatch: fixing that is essential to getting the look of the model I want. I am compromising on lots of things – it’s only a wargames model after all – but I can’t on that. The shame is that this is one place that the Armourfast model is unequivocally better: the hatch and the two half-covers are moulded separately. But I can’t even swap turrets as the mantlet looks even harder to fiddle with.
One idea was to use the hatches from my old Airfix Sherman models. I had thought of using these to make up a reserve troop. But although I have some sentimental attachment to them (one of them is one my oldest models), they aren’t very good models, as well as being 1/76 rather than my preferred 1/72. They can’t even be pinned down to one type of Sherman, adopting features from various ones. So I tried prising off the hatches. Alas in only one case was this anything like feasible. The others were too well glued and were badly damaged in my attempt to prise them away. I was able to retrieve four half hatch covers – which are useful. Though it turns out I needed the other four too (more on that later).
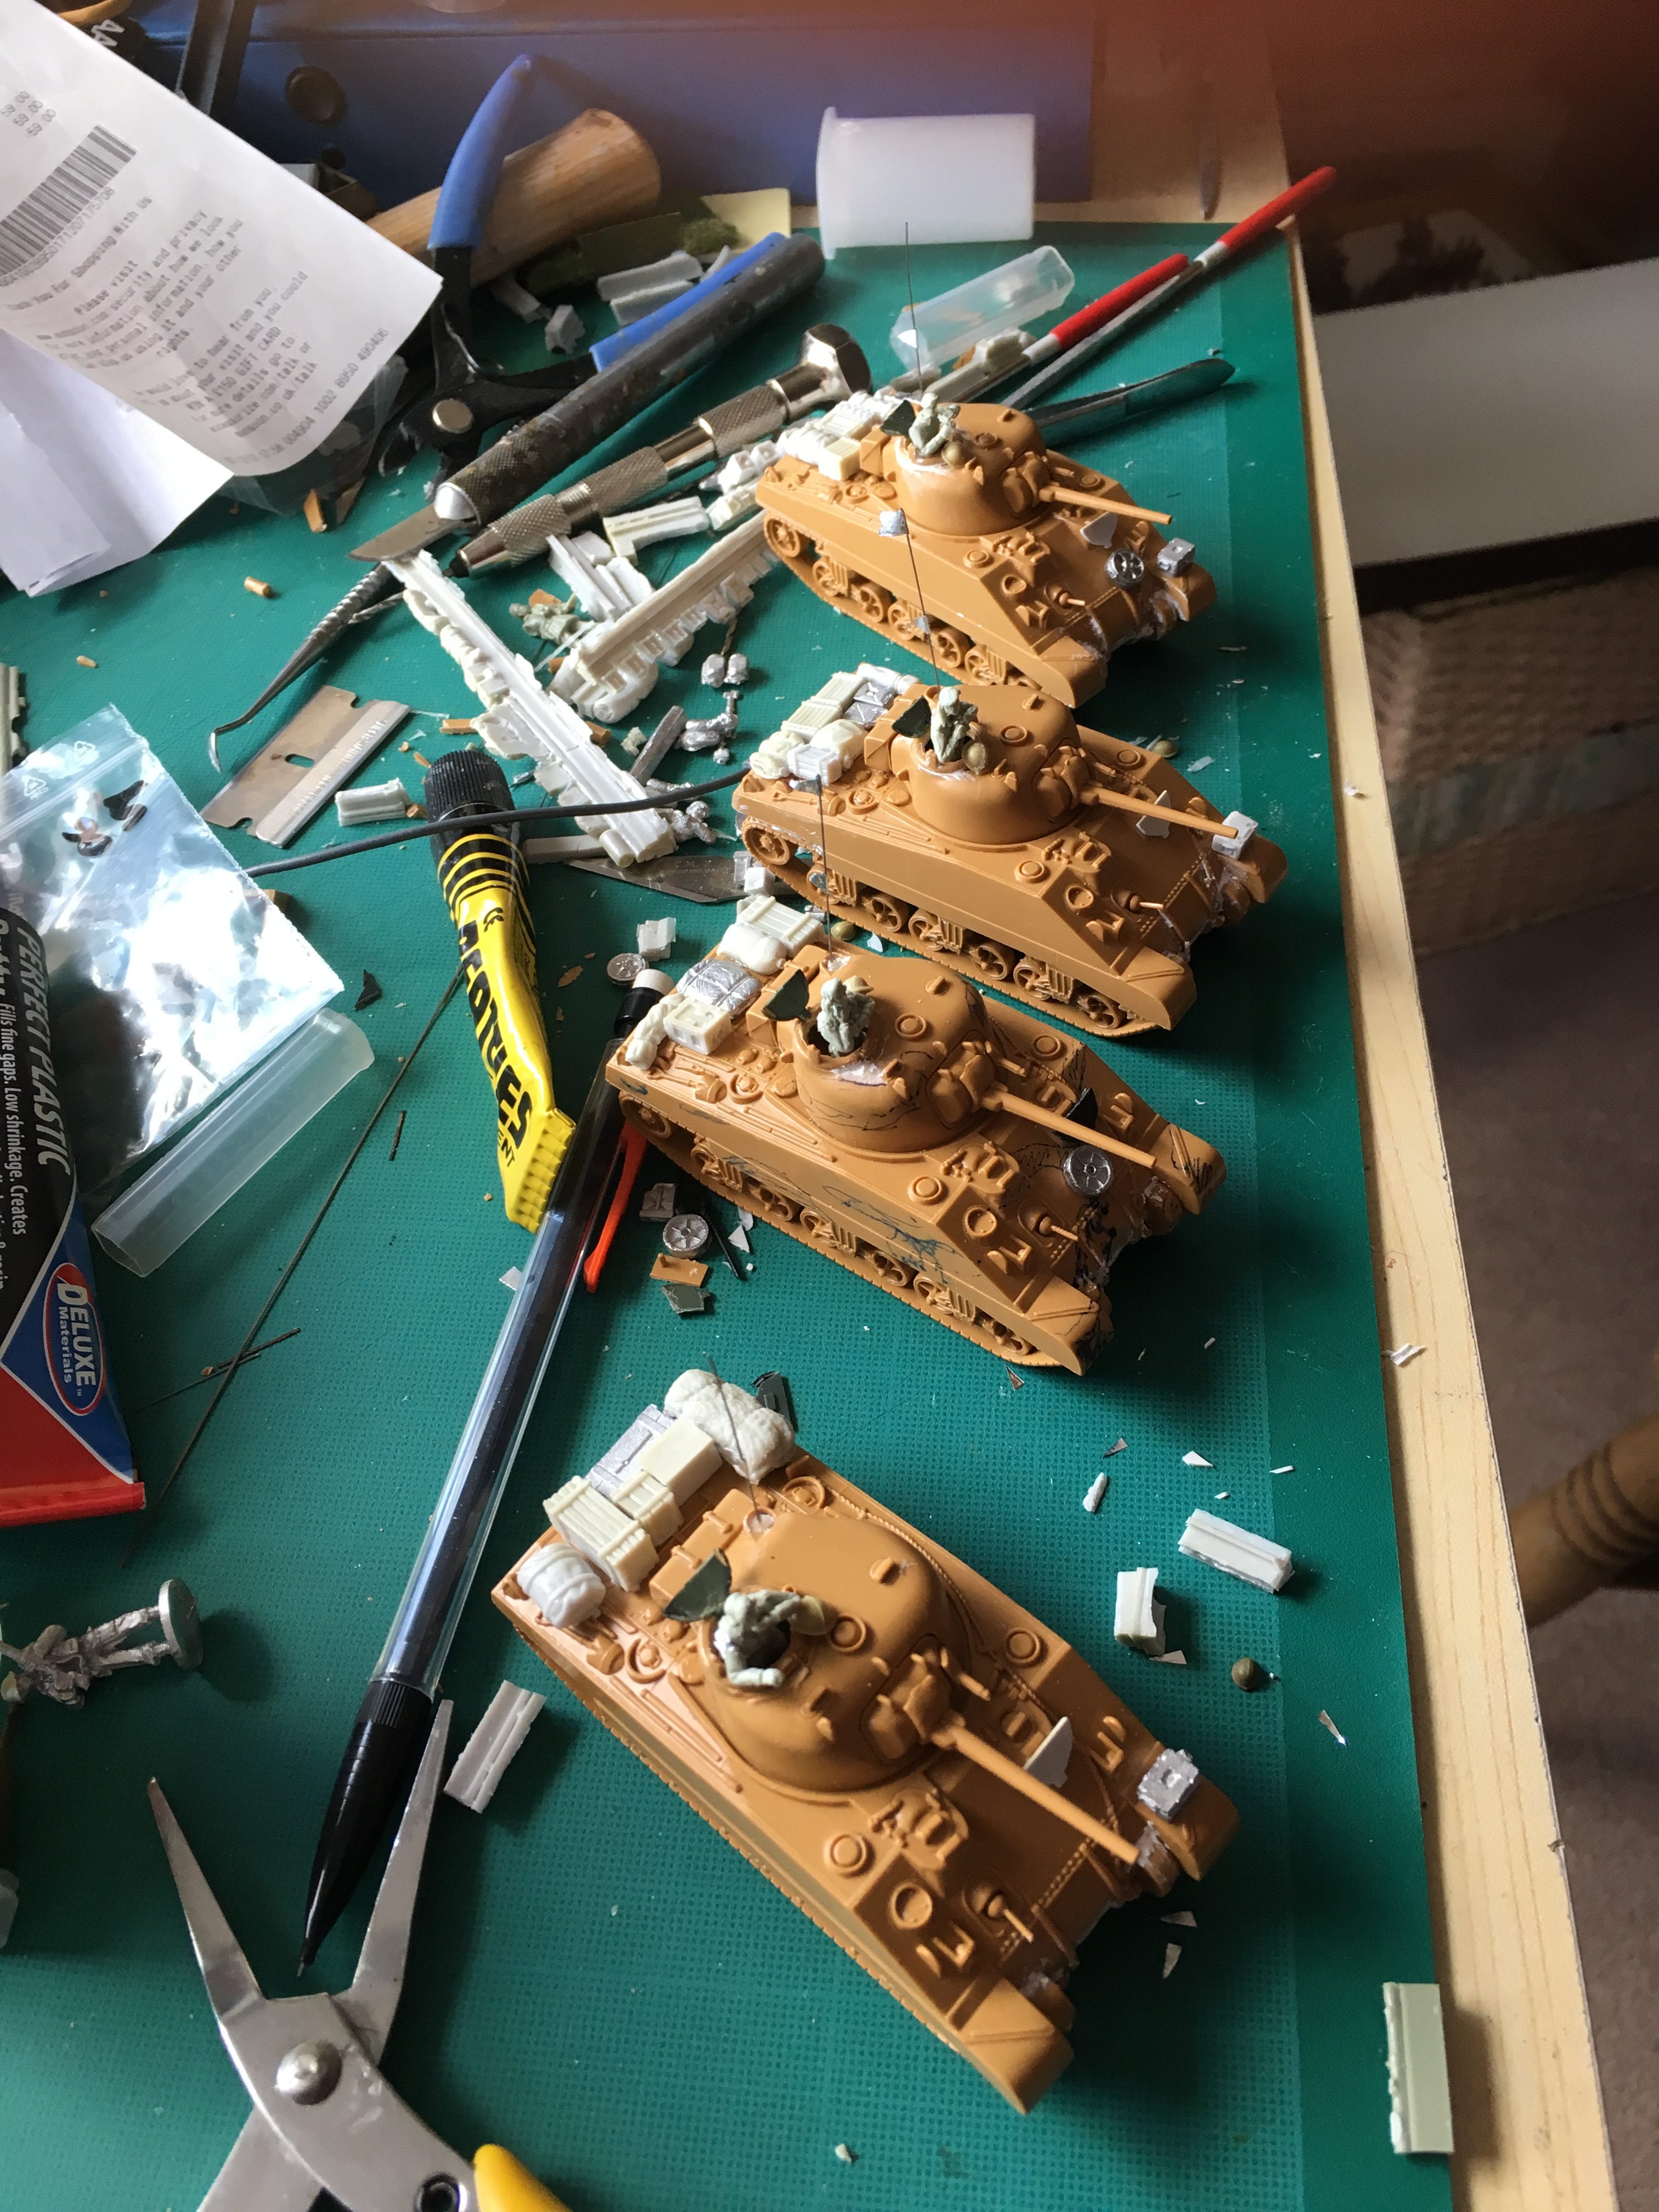
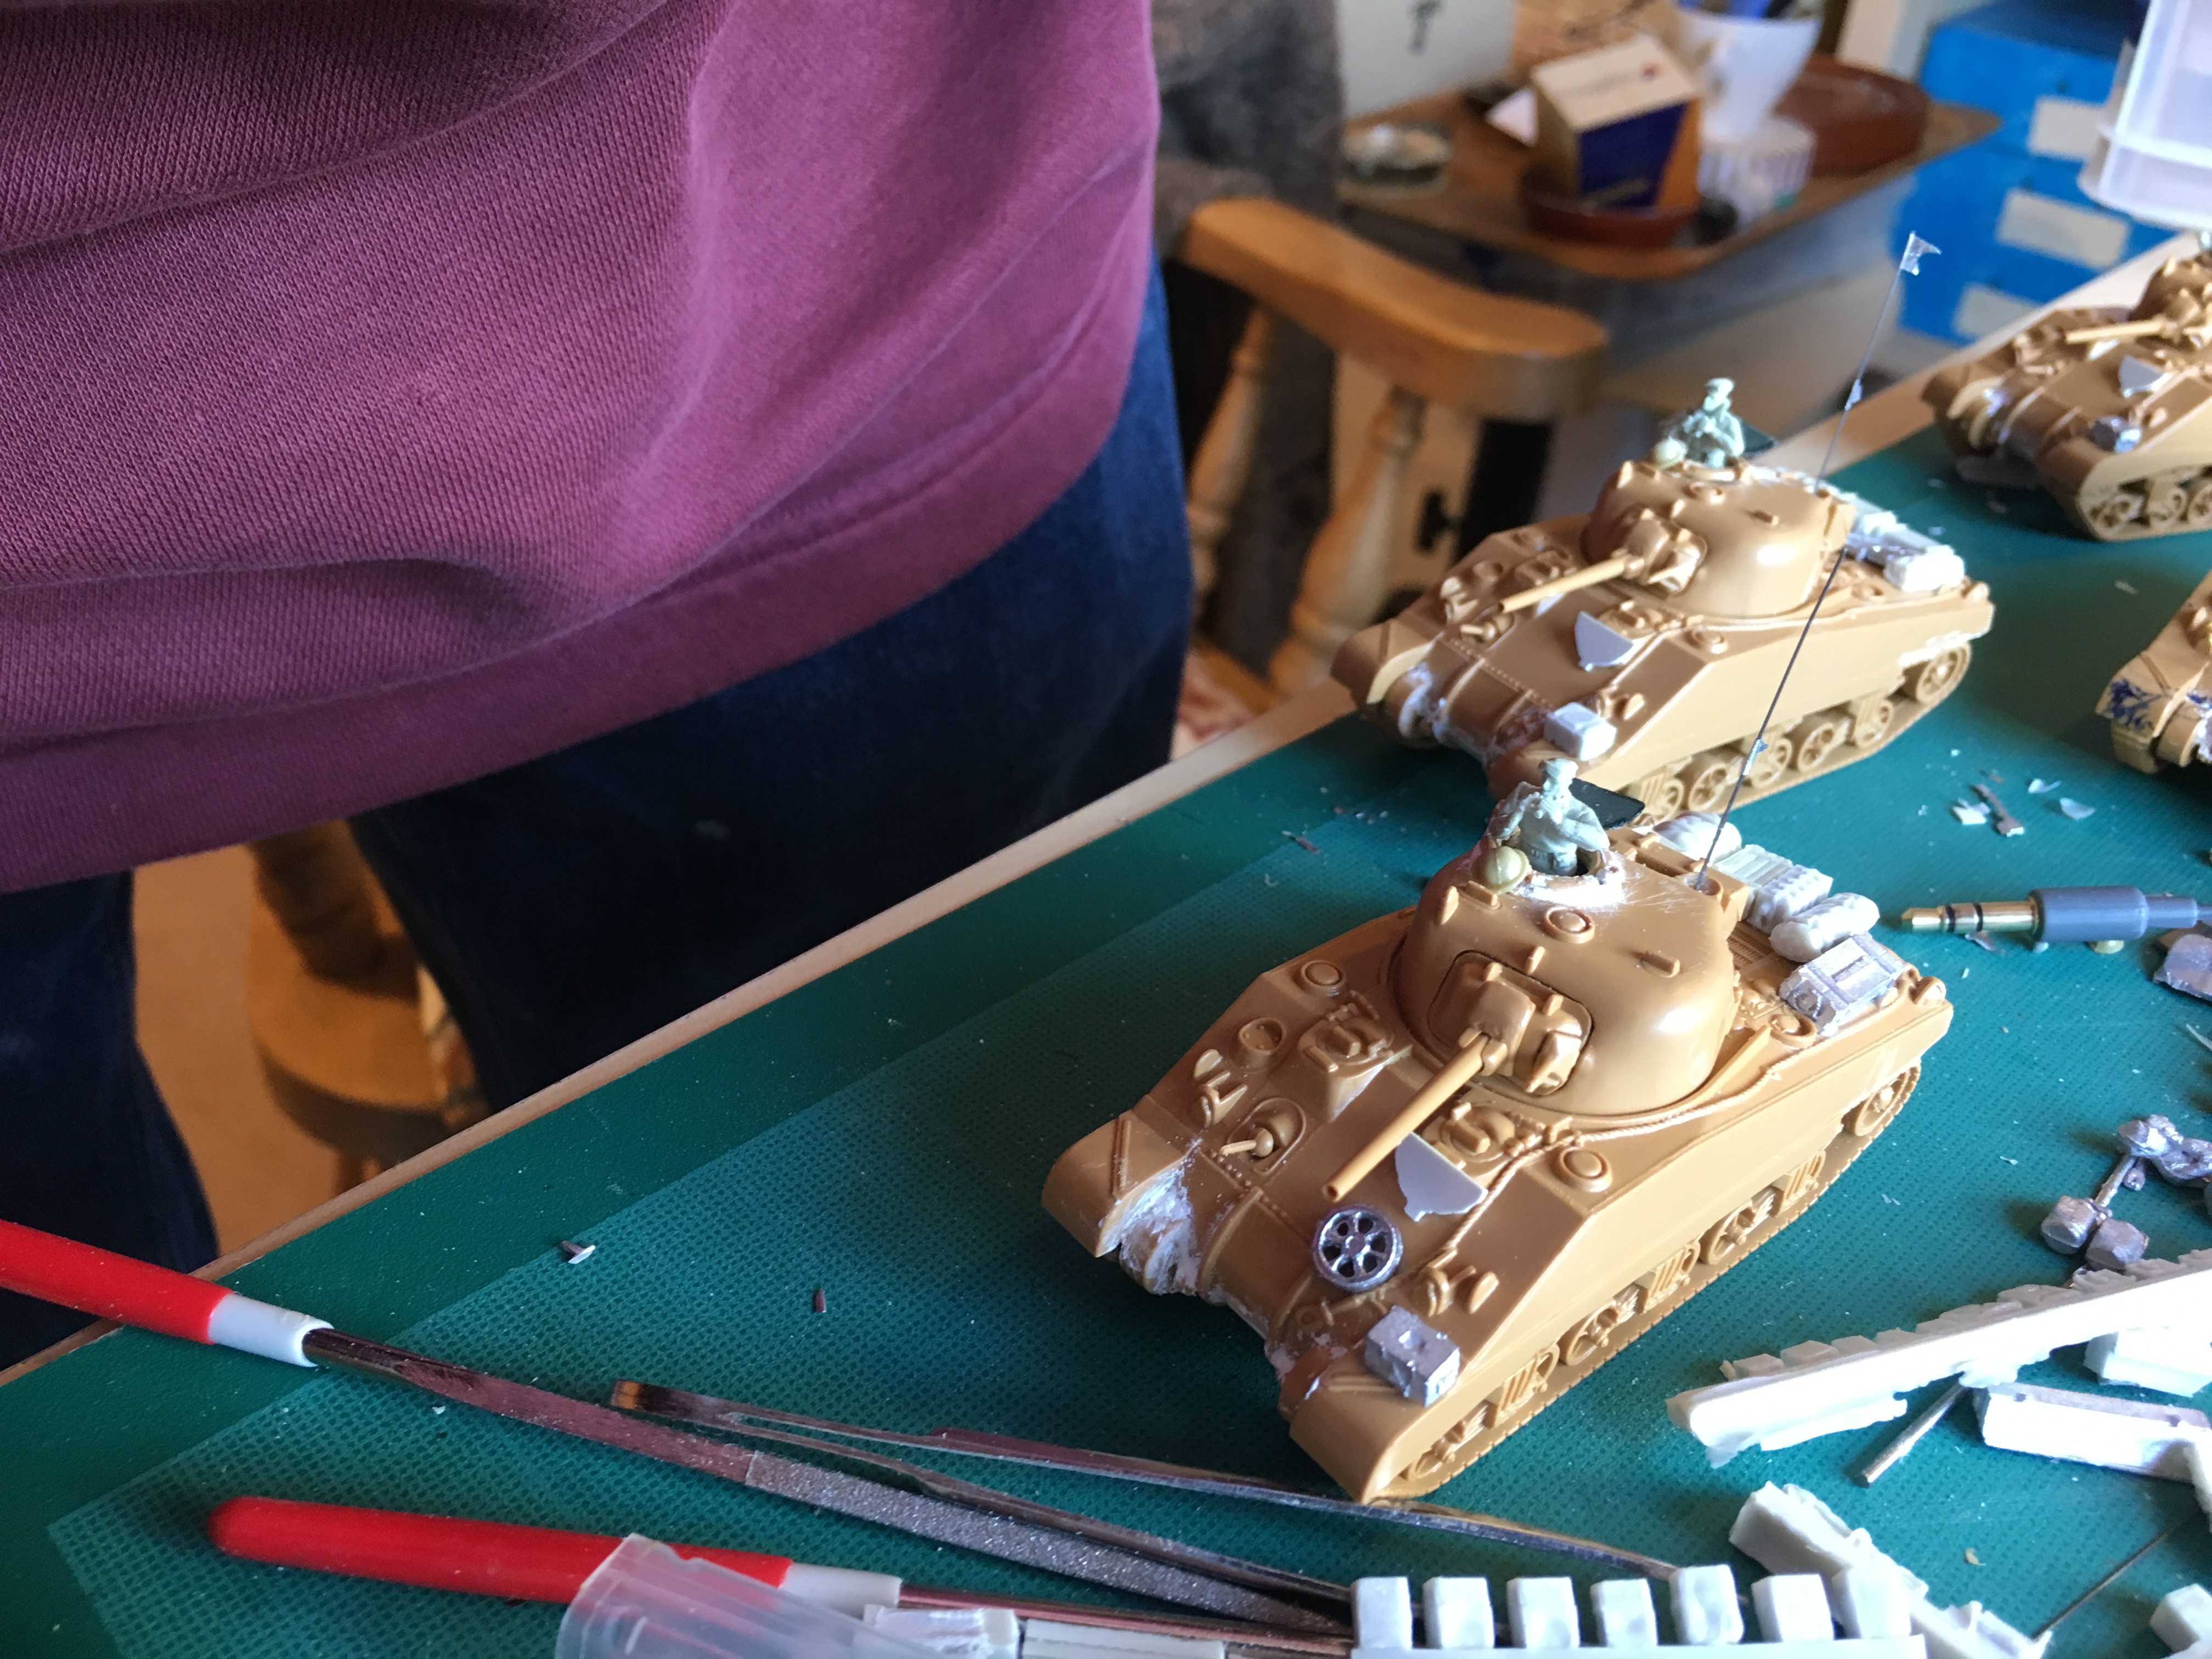
So there was nothing for it but to get out the jewellery saw and try to take off the turret hatches. The first one was much easier than I feared, though there was some damage to the turret mouldings. The next one was much the same. But I must have got a bit complacent, because the next two did not go so well, with more damage to the turret top – though nothing that a bit of filler couldn’t sort out to the standard I need. Next came cutting out the hatch lids to leave the hatch ring. This was not easy. The plastic is quite thick and the jewellers saw only does straight lines. I used drill, saw, craft knife and files to hack out the moulded hatch. After that the hatch ring could be clued back to turret top in its new orientation, with the machine gun bracket to the left rather than the rear. In the last two cases, and especially the last one, quite a bit of filler was needed. After that the half-lid (from the Airfix models) was glued in open position to the rear.
The next operation was on the sand guards. In Italy the British generally removed the rear portion (where they had sand guards at all), and this to me was another essential part of the look. Unfortunately in the Italeri kit, the sand guard is moulded to the upper hull, rather than being a separate part as in the PSC models. One option I had considered when looking at the Armourfast model (no sandguards), was taking sand guards from a PSC model (perhaps the cast hull M4A1), which in turn could be used for the reserve troop. Sawing, cutting and filing my way through the Italeri model, in hindsight this may have been a better option. It is very hard to do this without damaging the remaining hull, and once again filler was needed to do an imperfect job of covering up the mess. For all its virtues I’m really not sure I would start with the Italeri model again.
Next came assembly of the model. Mostly I just snapped it together without glue. I did glue on the bottom hull to the top as there is an unsightly join at the front, which required filler – so it was imperative the join was solid. Given the shape, this fillering was a bit awkward, but surplus filler looks a bit like mud, so no major problem.
Next there was the matter of the tank commander. I used resin models from Milicast. These were slightly small (1/76) and some of the arms had to be glued on, which I found very tricky – but they are much cleaner cut that the PSC figures. Given the difficulties with the arms, I’m not sure I’d use these models again, but go for AB metals instead. Another problem is that the figures are wearing berets, when the pictures from Salerno show the tank commanders wearing standard steel helmets (mid war pattern) (for AB the choice would have been berets or later style helmets). I lacked the confidence to do head swaps, or filing off the top of the heads to fit helmets. Instead I put an appropriate helmet cut from plastic Airfix 8th Army figures near the hatch (following one of the later pictures). The figures are full length, so the bottom of the legs had to be cut off, and I had to jerry rig a platform inside the turret to cement them to.
Next came the aerial. I had successfully used plastic broom bristle for my German tanks, so I used this again. The aerial came either in 4ft lengths, apparently, and the crew fixed one or two together depending on circumstances. The Salerno pictures showed something that looks like more than 4ft to me, so I assumed 8ft aerials, though this made them quite tall (I wonder of they used US aerials, which had 3ft lengths, and so total height 6ft). Using a drop of superglue to fit the aerials on my German tanks had been pretty easy – but this time it proved much harder, as there wasn’t such a good point to attach the aerials to; in the end it was a little messy.
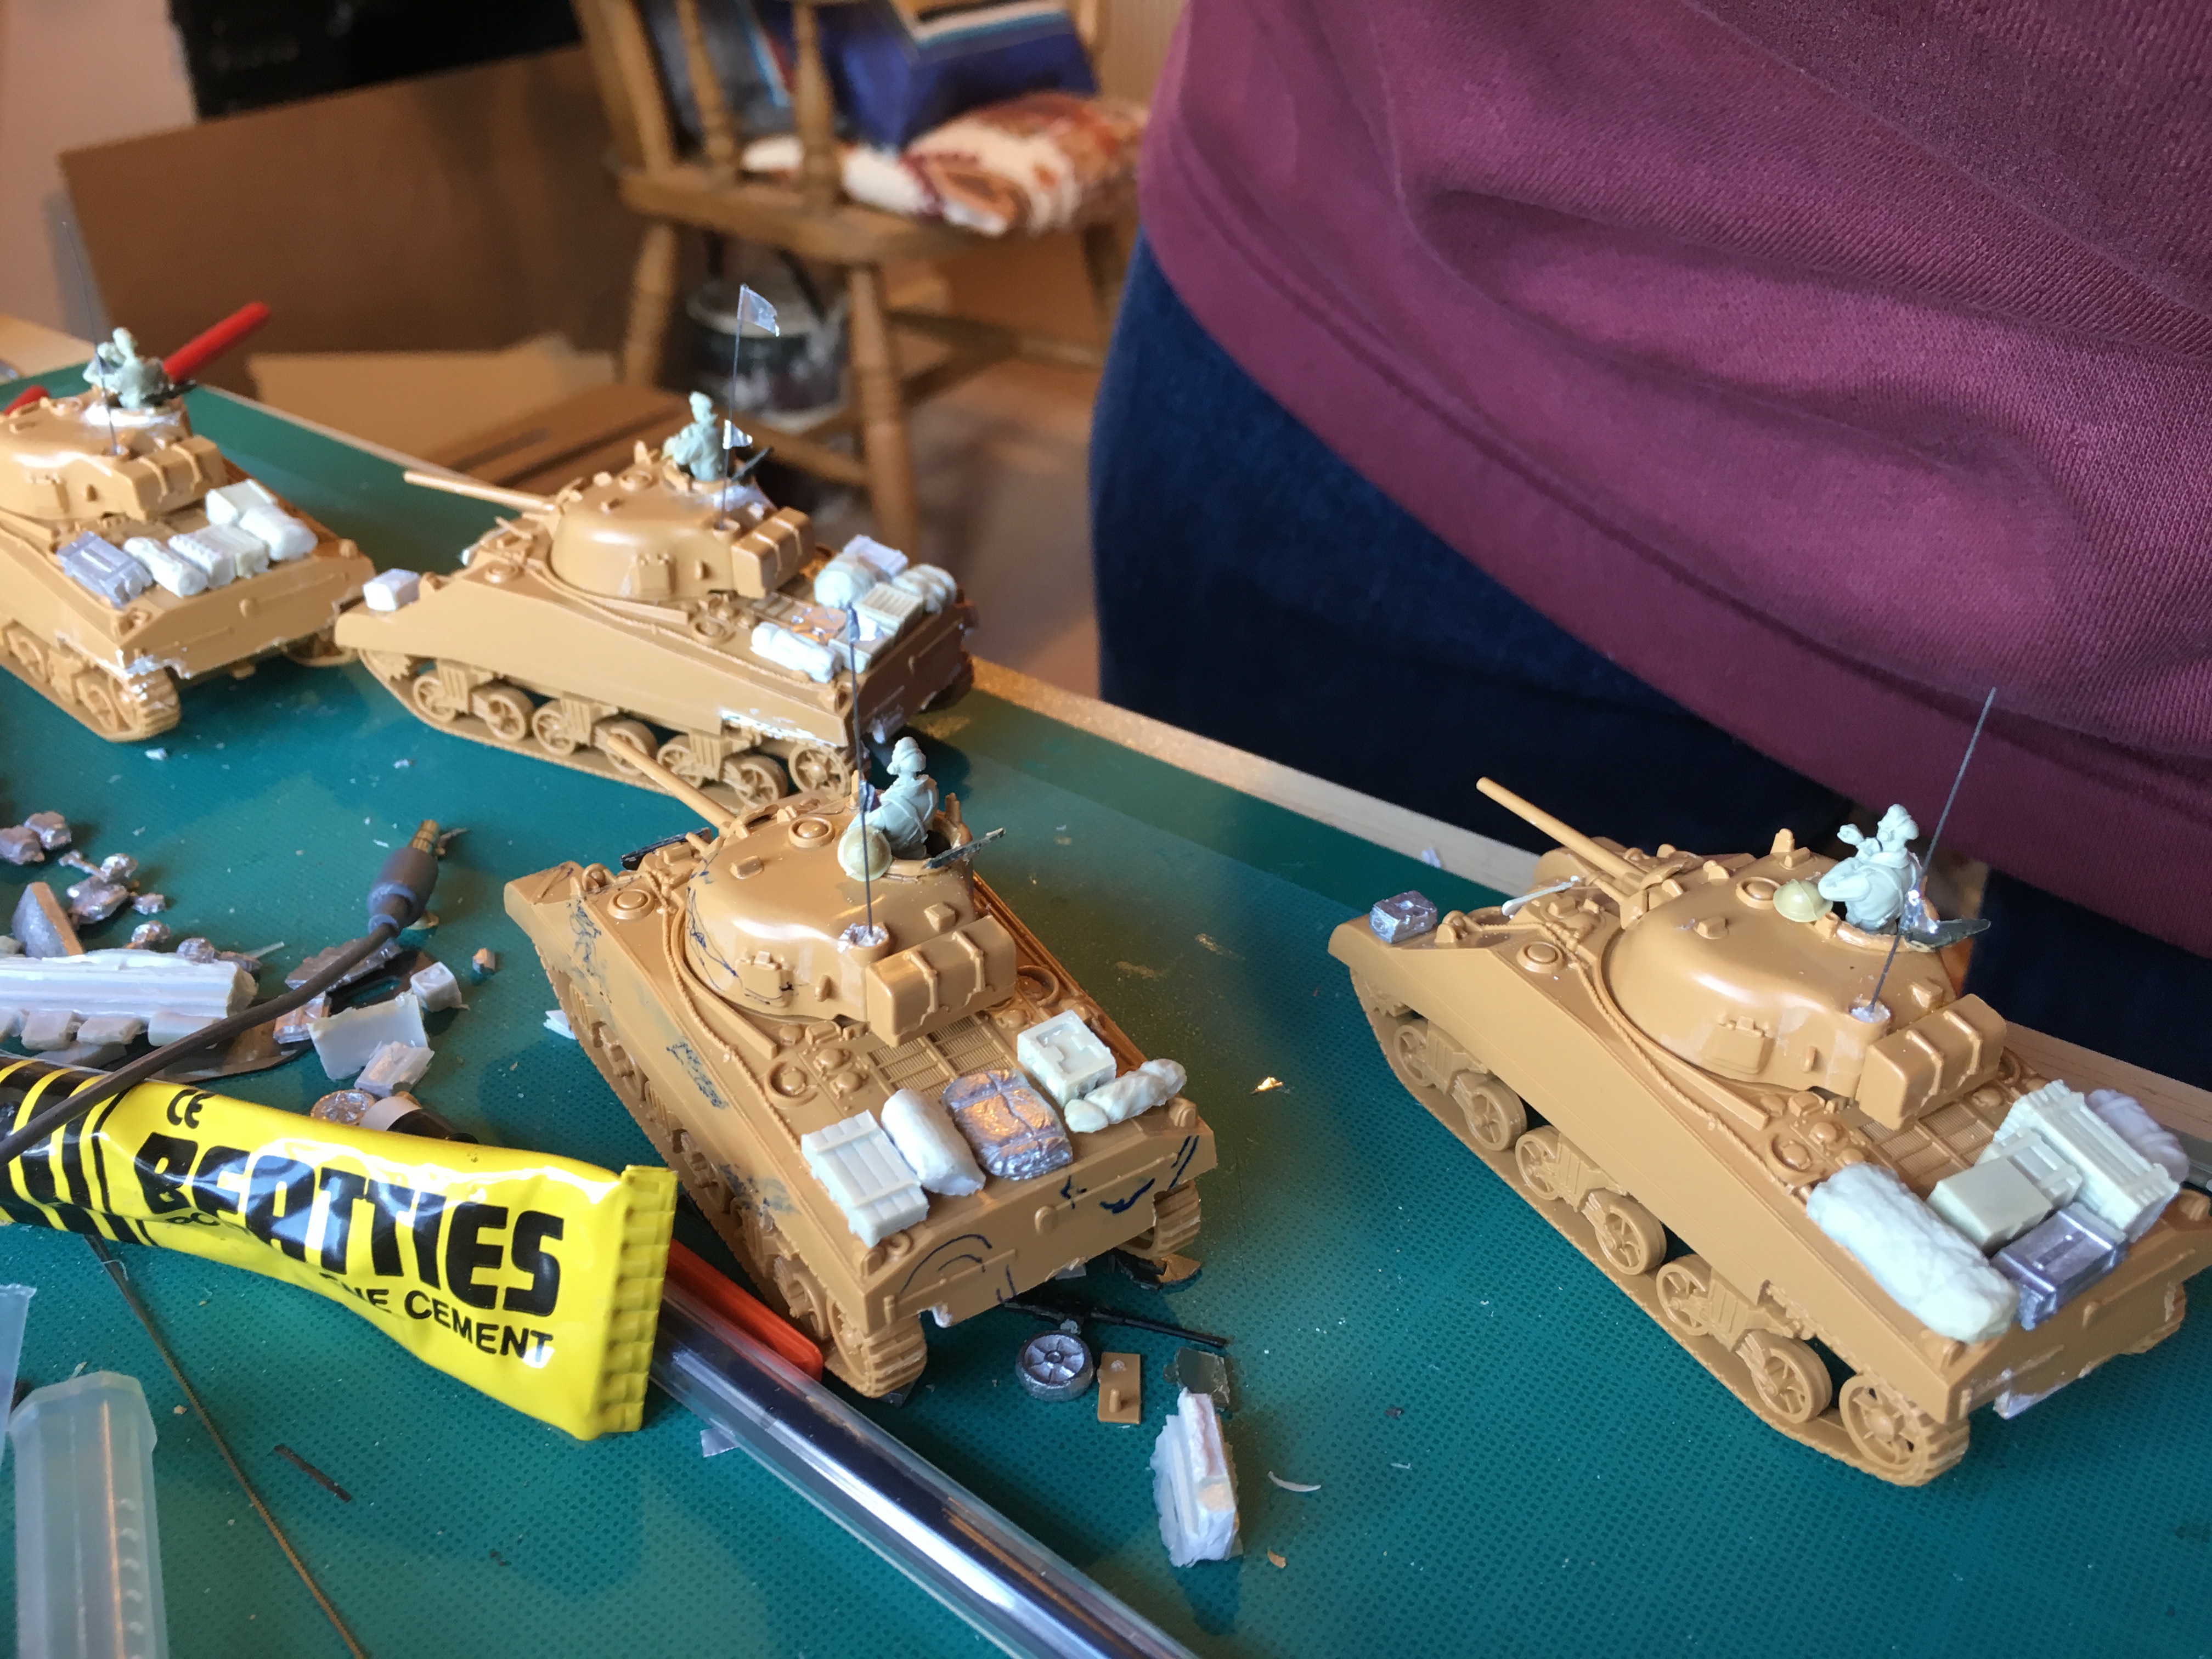
Also the pictures showed that pennants were flown on the aerials. This is another striking part of the appearance. It isn’t clear from the pictures what the flags were. The star decals interpretation is two triangular flags, red at the top and yellow bellow. I decided on a swallow tail flag at the top of the aerial for the squadron leader, and a triangular one for the troop leader. And in the lower middle of the aerial for all four tanks a triangular pennant. Colours are pretty speculative but at the moment I’m thinking of red for the upper flags and sky blue for the lower ones. I cut these from foil and glued them on. This turned out to be very fiddly, but they add a lot to the look.
And on to the final details. The missing hatch half-cover was attached to front of the driver position, presumably as a bit of extra protection. I had to manufacture these from plastic card, using the Armourfast ones as a model. I put on various stowage boxes and tarpaulins mainly from a Milicast resin set. These were mainly on the back. Some pictures show heavily laden tanks (including the Salerno ones, which show them mainly just after being unloaded from the landing ships), but in Italy many pictures also show relatively unladen vehicles. I may have overdone it (the turret cannot be completely traversed in most cases), but it add to the in theatre look.
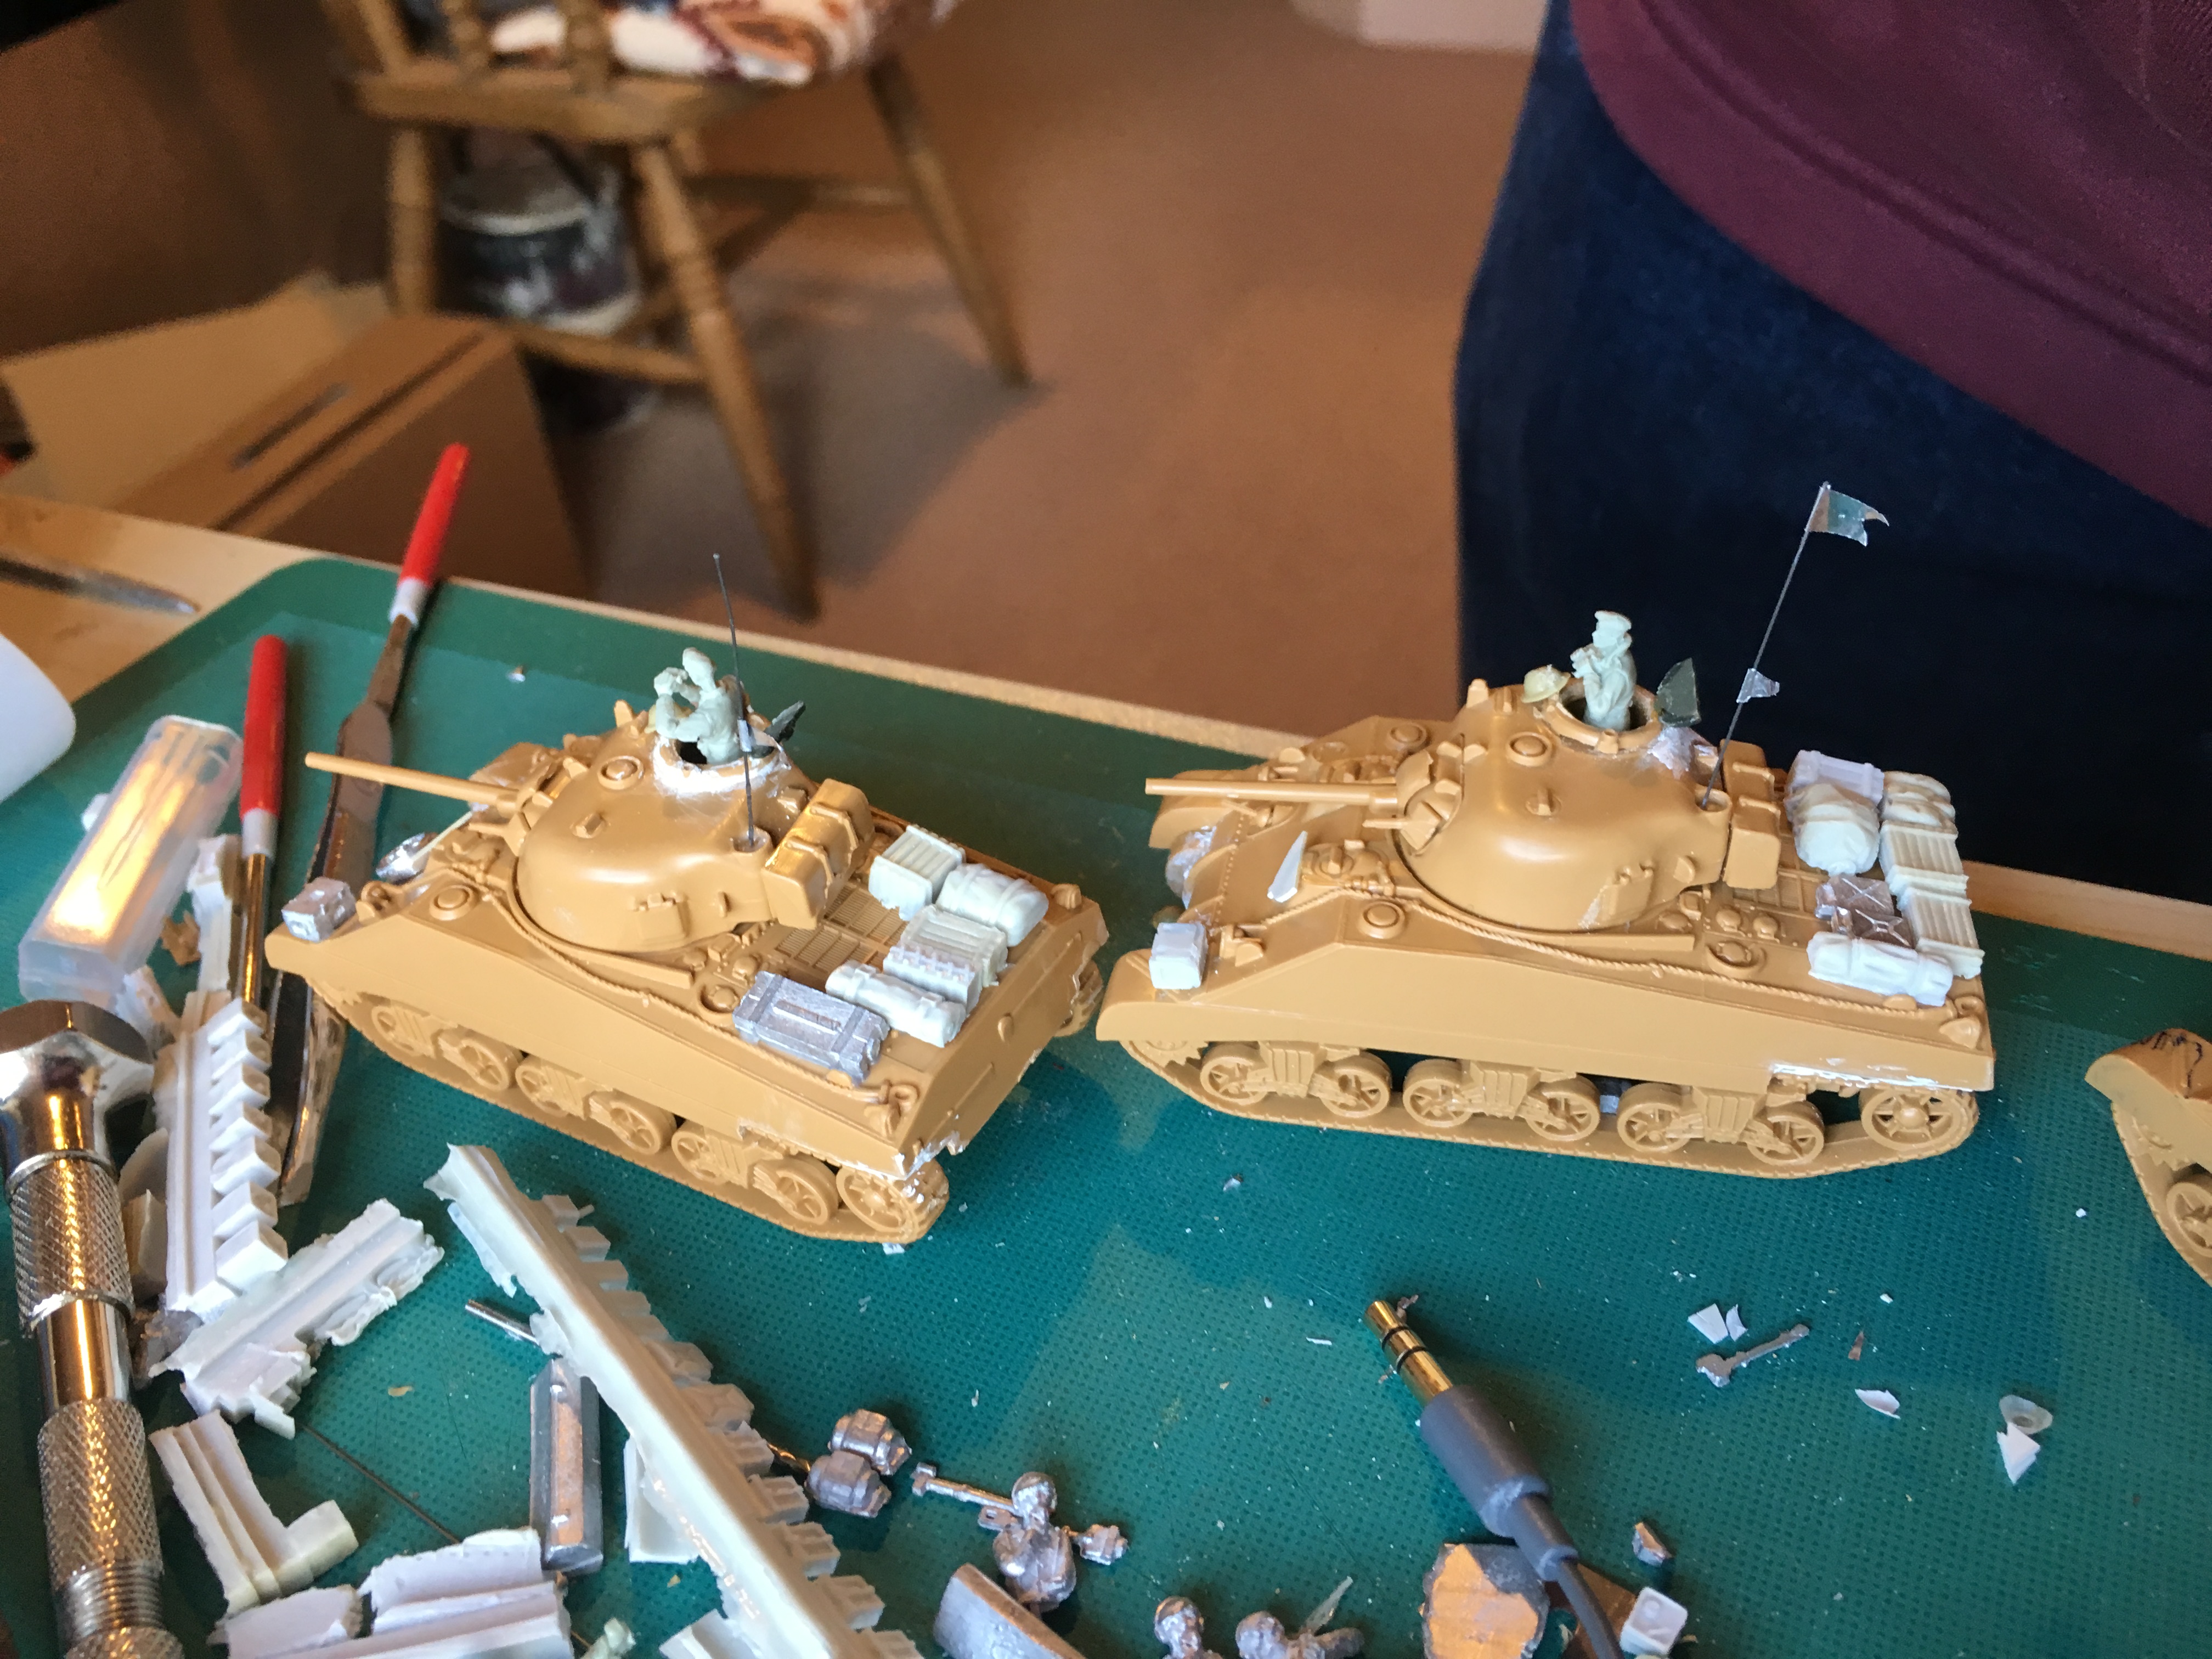
So here they are ready for the next stage: painting: