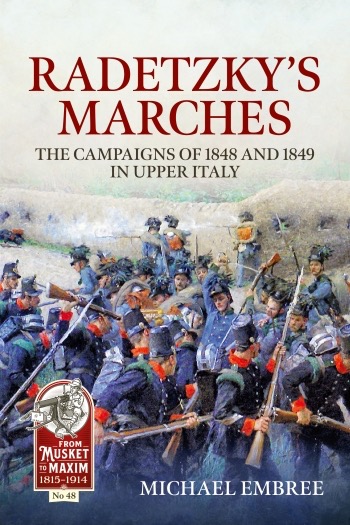
Current edition – mine has a slightly different cover
I have recently read Michael Embree’s Radetzky’s Marches – the campaigns of 1848 and 1849 in Upper Italy. I bought it at last year’s Salute show – the hard back version, a limited edition and signed, bought for the same price as the current paperback edition (£35). I finally got around to reading it last month. It proved to be an interesting read – will it open up a new period for me?
This book piqued my attention for three reasons. First, Radetzky is a familiar name from the Napoleonic wars, but his achievements in the 1848/49 were what made him famous – inspiring the Radetsky March from Johann Strauss the Elder, his most famous work; I wanted to know more. I am increasingly interested in the Italian wars of unification, with plans to refight the second (1859) and third (1866) wars: what about the first? As a regular visitor to Italy on holiday, I’d like to know more. And finally I am interested in the evolution of warfare in the 19th Century. I know a lot about Napoleonics, and I’m gathering more knowledge of the wars from 1859-1866 (encompassing the American Civil War). The wars of 1848-49 (also including the Hungarian uprising) are a way marker in that evolution.
I found the book itself a bit on the dry side. There is all the detail you would want as a wargamer, with the forces involved in each engagement, right down to many minor skirmishes, listed meticulously, with casualties as far as they were known. In this it recalls George Nafziger’s works. The detail of what happened in each battle is a little vaguer: he follows the popular route of using verbatim quotations from eye witnesses to do quite a bit of heavy lifting. For historians to attempt more than this requires an enormous amount of work though: this is as good as it usually gets. What’s missing is atmosphere, and descriptions of the personalities and how many of the decisions were taken – and especially from the Austrian side. I have no better feel for Radetzky’s personality that I started with. There is almost nothing on the political background, especially from the Austrian side. I also missed a narrative on the balance of forces through the various phases of the campaign, or rather campaigns – the actions of 1848 and 1859 were separated by an armistice, and the rise and fall of the Venetian rebellion is separate again. This is in complete contrast to Lieven’s book on the Russians in 1812-1814 – and its strong grasp of the strategic and personalities. Still, it clear why people have suggested that Radetzky’s grasp resembled that of Napoleon in the same theatre in 1795-97.
What about the wargaming possibilities? By this I mean refighting the battles – rather than strategic conflict, which would be very promising for a boardgame or kriegsspiel. There are four biggish battles, but none are particularly easy to wargame. The battles of Santa Lucia and Goito were a bit tentative, without a clear objective for either side – though they could be turned into more decisive scenarios. The critical battle of Custoza is a three-day sprawling affair with none of each day’s actions being lop-sided (first day to Austria, second to Italy; last day to Austria); the grand-tactical level is interesting enough, but this plays out over too big an area for a wargames table, and the whole point is that each side doesn’t know where the other is or where it is moving. Of course, scenarios where one side is badly outnumbered and making the best of things can work, but this is not classic wargames play. The final large battle, Novarra, in 1849 is maybe more promising. The Austrians are outnumbered but have substantial reinforcements on the way – but the difficult terrain could pose a challenge. Overall, if restricted to historical battles, the 1859 and 1866 wars are better. There are lots of skirmish level possibilities though, which this books documents thoroughly.
What about the evolution of warfare? Technologically, this is very close to the Napoleonic period. The muskets were fitted with percussion locks rather than flint locks, which would make them more reliable. The Austrians made extensive use of rockets (which also make an appearance in 1859, but not 1866 as far as I know). Napoleonic rulesets don’t take rockets very seriously and would need attention. The main point of them, as far as I can see, is that they were lightweight and much more mobile than conventional artillery – but much less lethal, although they had their moments.
Tactics seem to be strongly Napoleonic, but the regular forces would be better drilled than was usual in Napoleonic times, and I suspect tactical doctrines a bit more rigid. Both sides made use of specialist light troops, unlike French Napoleonics, though line troops could skirmish if required. There were quite a few irregulars on the Italian side, which were often given light infantry tasks. On the Austrian side, Grenz infantry were still used as light troops alongside the jagers. The quality of the Austrian troops is generally good, including their commanders – these are not the Bruce Quarrie Austrians! The Piedmontese regulars were generally good too in 1848, but seem less well-led, and perhaps cracked under pressure a bit earlier. In 1849 their quality was diluted by massive conscription, and doubtless the confidence of their leaders had been dented.
One striking feature, though, is that casualties seem quite low, when compared both to many of the Napoleonic bloodbaths, or many of the battles of 1859 (Solferino led to the founding of the Red Cross). The casualties in 1866 were also high, but aggressive Austrian tactics can explain that. The terrain was generally quite cluttered, and probably the tactical leadership more conservative when it came to exposing their men. There weren’t many glorious artillery targets, as there were at Waterloo, Borodino, etc., or classic volley moments against dense targets.
After an initial bout of enthusiasm, I don’t think I will be pursuing this. At a pinch I could reuse many miniatures from 1859/66 or even Napoleonics (for the Austrians – though the shakos wouldn’t be right). And terrain pieces would be reusable too. But I have to many other irons in the fire!
However, for a detailed understanding of this interesting and historically consequential campaign, I recommend Mr Embree’s book, though you might want to skip through some of the lists of units and leaders.
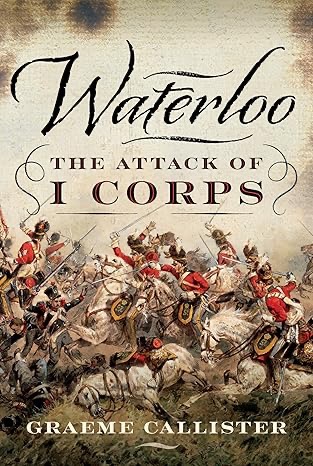
I have just finished Graeme Callister’s Waterloo – the Attack of I Corps. This book was published last year, and is interesting as an up to date history of what has always been for me the most interesting episode of the battle. I can’t help but to view it through a wargamer’s eye though!
And that has always posed a challenge. They say hard cases make bad law. In the same way Waterloo makes for bad wargames rules – it is such an exception battle in so many ways. That is truer of D’Erlon’s attack than any other part of the battle. Indeed it is a test of any set of rules I write: how well it copes with this episode is a challenge indeed. All I ask is that the overall outcome is within the range of possibilities. It rarely is.
Mr Callister’s book follows all the usual sources: the limited number of eye-witness accounts and official reports. To this he has added a detailed examination of the official French personnel records. This was the new trove of data first trawled by Paul Dawson in his very flawed works on the campaign. This helps give a detailed picture of the French units that took part. The Allied units were always more familiar territory, but he has examined the records for these too. He starts the story from Napoleon’s seizure of power and re-formation of his army, and tracks the units of both sides up to the attack of I Corps on 18th June, the counterattack by British cavalry, and the interventions by French, British and Netherlands cavalry after this. I Corps’s Waterloo does not end there, but Mr Callister does not explore its later history – which is a pity.
A thorough analysis of the personnel records does help us rate the troops – though Mr Dawson has done something similar before, with similar conclusions. The French infantry can be rated as “Line” in GDA terms. The ranks were filled with veterans, but they hadn’t had the time to be knocked into fully cohesive units. And many of the veterans were ex-prisoners who hadn’t seen combat for some time. The British of Pack’s and Kempt’s brigades were genuine veteran formations, which can this be Veterans or Drilled Grenadiers. The exception was 2/44th – Line or Grenadier. The Netherlands militia would count as Reservist. It should be noted that these British and Netherlands troops took heavy losses at Quatre Bras, and might be down-graded as a result (the same would apply to Bachelu’s division on the French side, not involved in this combat). The British Heavy cavalry were well-mounted and had high esprit, though not a great deal of battle experience: genuine heavy cavalry, with a Grenadier rating – perhaps Elite for the Life and Horse Guards. The rule about British cavalry not rallying after a Victory very much applies though – including to the Light Dragoons. I’m not so sure where to put the rest of the cavalry, as I haven’t really internalised how the GDA classifications work.
Mr Callister makes one suggestion that I haven’t read before: he says that the French practice of putting the taller men in the front rank would have limited their effectiveness in musketry duels, as the second and third ranks would have been blocked. He expands this idea at length. I’m not entirely convinced. If this was a serious problem I’m sure that we’d have heard more about it. It’s the sort of thing that re-enactors could help us get to the bottom of. Beyond this the book gives an admirably clear account of the course of the combat and the evidence that we have of what happened. He does not discuss the suggestion made by Mr Dawson that Donzelot’s division had dropped behind the divisions on either side and so suffered little in the attack. But he does observe that this division remained largely cohesive after the attack, along with the 85th regiment detached from Durutte’s division.
It is interesting to see how the generally accepted history has evolved over the years. I first read about Waterloo in the 1970s. At this time British historians (and they are the only ones I read) painted the whole episode as a standard French attack as seen repeatedly, so they suggested, in the Peninsula War. Wellington adopted a reverse slope position, which sheltered his troops from artillery fire, and allowed British infantry lines to deliver a decisive ambush attack on the French columns. Then the cavalry went in and finished the job off. Wellington himself talked of the French coming at him in the “same old way”. Bijlandt’s Netherlands division, which was not inured into Wellengton’s cunning ways and stood on the forward slope as “Continentals” were wont to do, got carved up by artillery, and broke as the French approached. This general narrative was supported by numerous accounts of veterans published in the 19th Century.
Then came the revisionists. They had a lot to work with. It wasn’t a classic reverse slope position (which was not a tactic unique to Wellington) as these slopes were gentle and rolling – and not good protection against artillery. Bijlandt withdrew to sheltered position before the artillery bombardment started and his men stood and fought before being pushed back – a record not dissimilar to Pack’s British brigade (which, like the Netherlanders, had suffered badly at Quatre Bras two days before). Kempt’s British did better, but only after Bijlandt’s men had done their bit. The French columns were in fact gigantic brigade or divisional affairs unlike the battalion columns used in the Peninsula, with different strengths and weaknesses (more on that later). Then various details were questioned. The 80-gun grand battery mentioned by early sources (not least Napoleon himself) was perhaps just over 50, and not positioned on the Belle Alliance ridge with the main army, but deployed 400m or so further forward on a slightly lower ridge, which became known as “Grand Battery Ridge”. The infantry started behind the battery on the Belle Alliance ridge and pushed through it to deliver the attack. This is how it is shown in Mark Adkin’s lavish Waterloo Companion, which is everybody’s favourite Waterloo book (including me!).
Then Mr Dawson came along to revise the revisionists. Mr Callister stands alongside this in a much more measured and coherent way – but upholds many of Mr Dawson’s conclusions. I recommend this book.
And now readers, if you tuned in just to find out about this book, and you are a sane and normal person, I advise you stop reading reading right here. I’m now going to scratch the Waterloo itch and talk about a number of issues that this book has raised with me, and which have a bearing on wargaming, as well as historical interpretation. I will divide this with headings into a number of topics.
Gaiters
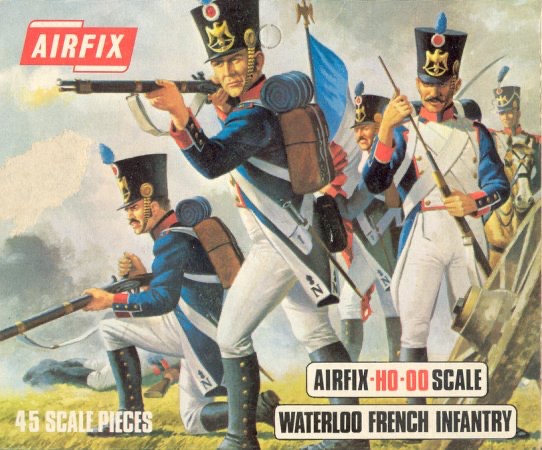
The box artwork for the Airfix infantry that I remember so well. These miniatures have a special place in my heart.
Let’s start with the most trivial. I got into Waterloo back in the 1970s thanks to Airfix’s OO/HO soft plastic figures, produced mostly in a ghastly pale yellow. The French line infantry were not especially accurate (having cross belts and sabres), but they were wearing gaiters and breeches in accordance with parade regulations. I have always felt this is the way French infantry should look. And it is how the bulk of my little men are turned out – they are in mid-war uniform with the gaiters going above the knee.
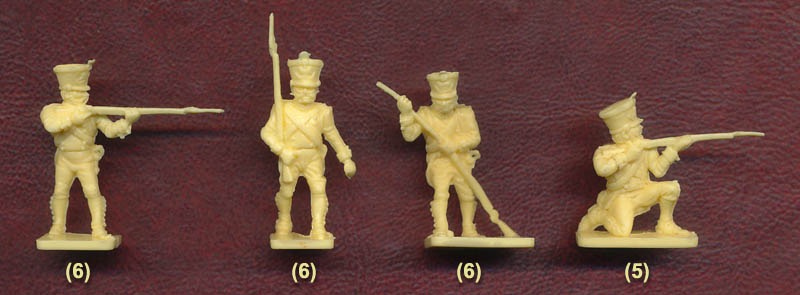
Some of the figures in the box
Alas virtually all figure manufacturers, including my beloved AB, have them wearing trousers, in the belief that this is how they looked on campaign. This is not without evidence. Some contemporary pictures show this. It was clearly how it was in Spain after the troops had been there a few months, and had to source clothing locally. One (not entirely reliable) memoirist French officer claimed that the first thing infantry did on campaign was throw out the gaiters and breeches and replace them with more comfortable trousers. And yet.
I saw a programme on TV many years ago about excavations of French mass graves outside Vilnius, where many soldiers met their end in the winter of 1812. They were wearing breeches and gaiters (the above knee ones too), even after a gruelling campaign (of course they may have purloined fresh stocks on their retreat).
Two of the French soldiers in this account of Waterloo mention that the difficult ground that d’Erlon’s troops had to cross broke their gaiters. They were wearing gaiters! Of course they may have been wearing trousers over the top, but it is small scrap of evidence.
I am planning six battalions of new infantry for my French. These will be the first of my 18mm collection in late war uniforms (gaiters below the knee). These are mainly AB and wearing trousers, as the core is a number of Young Guard figures I bought from a friend a few years ago. However I bought one battalion’s worth in gaiters from Eureka’s own-label range. Unfortunately these don’t have as wide a range of poses, but the core will be properly turned out.
The reverse slope
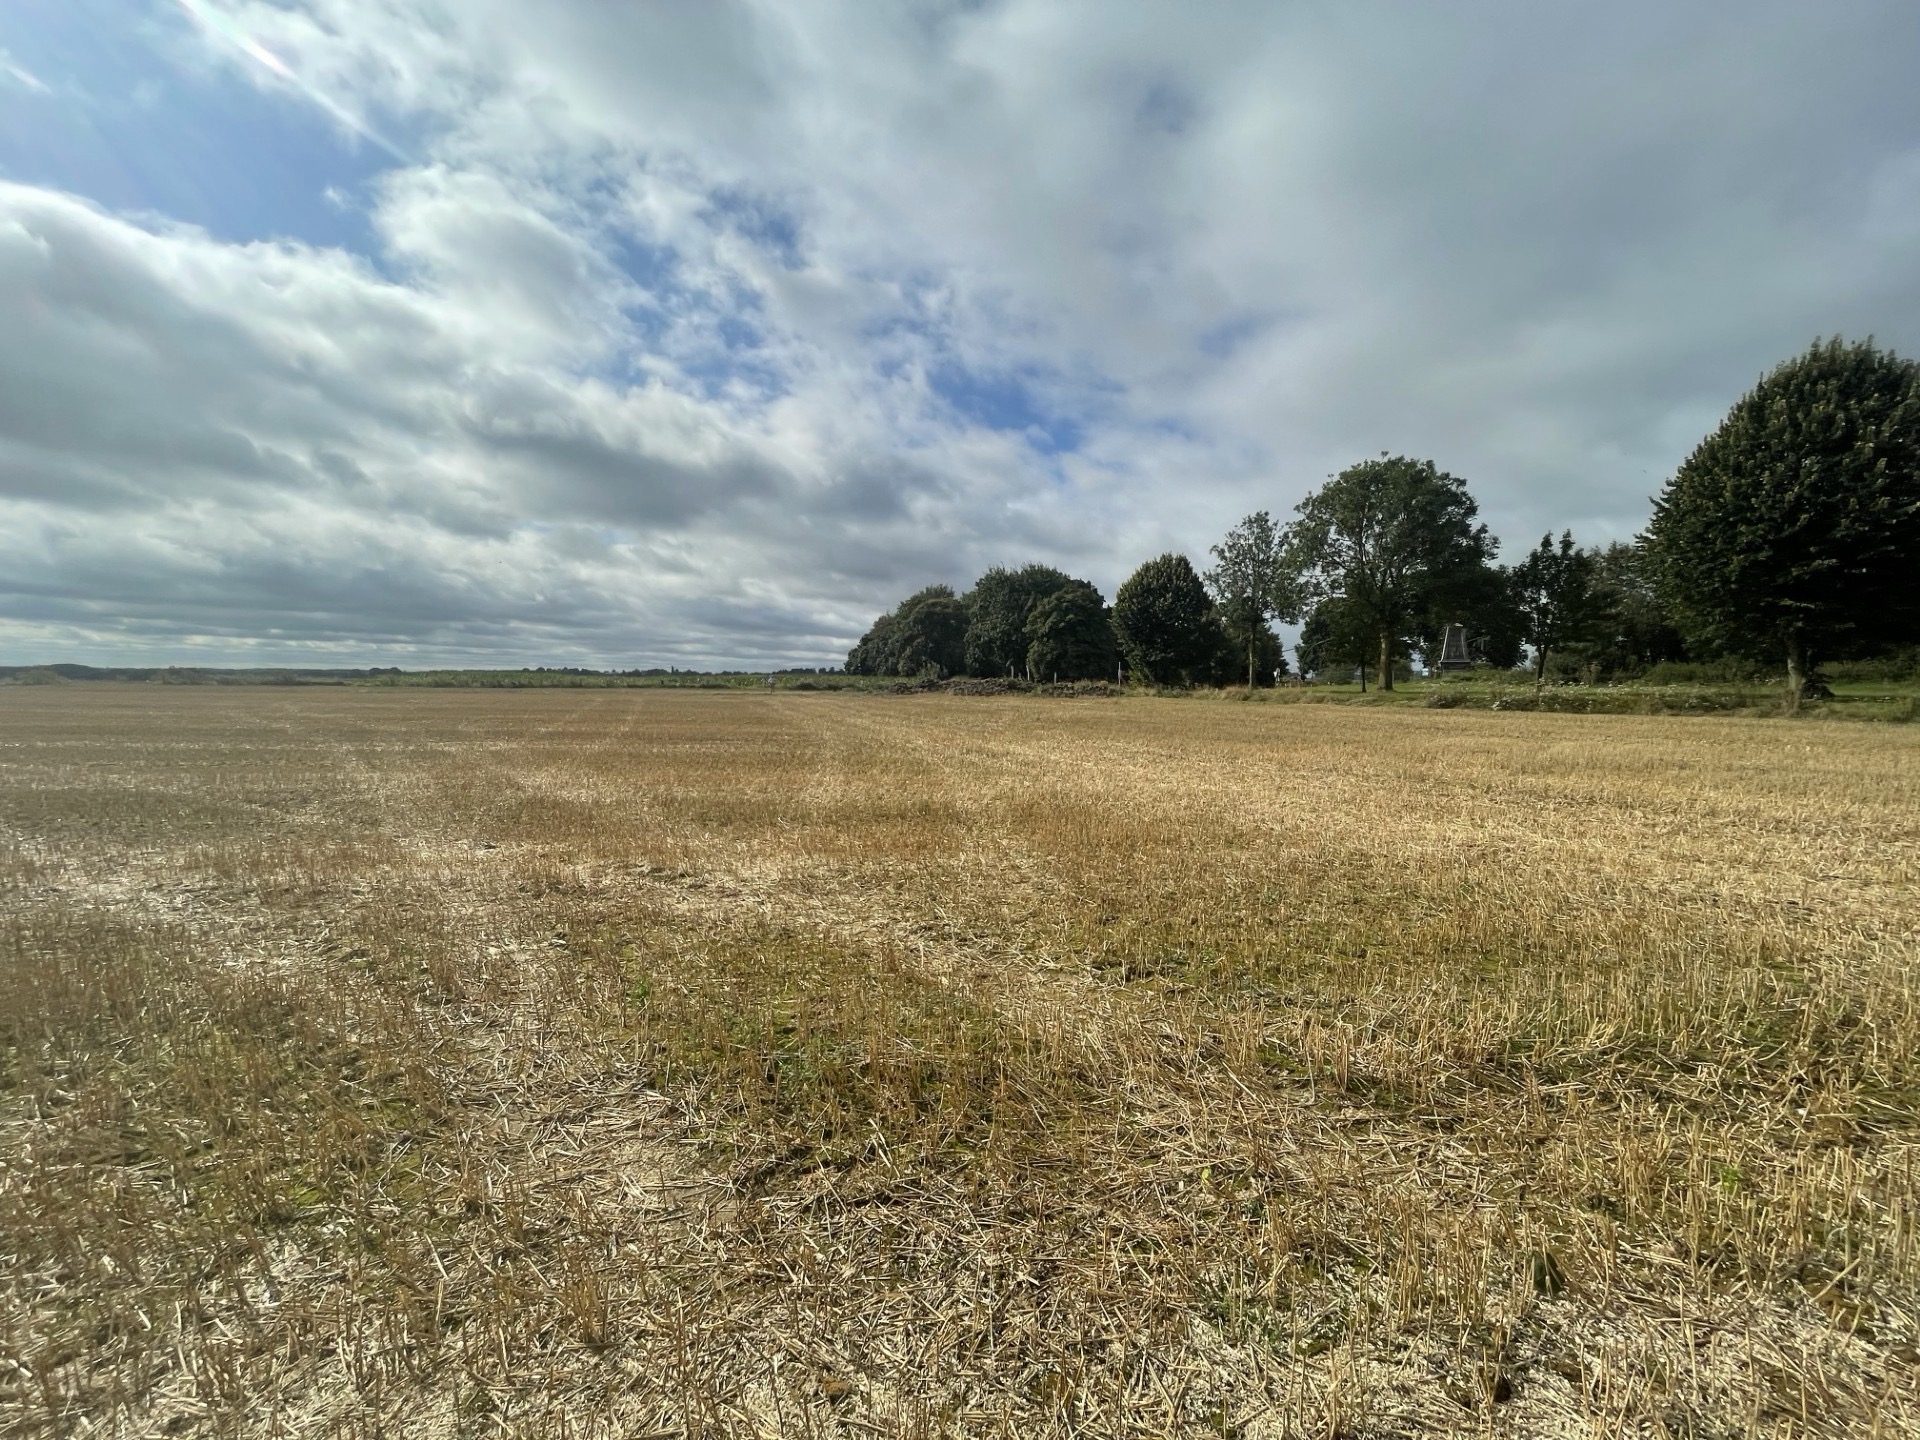
Photo: Andrew Jones posting on Waterloo Association FB page
Mr Callister doesn’t discuss the topography much. He goes along with the general narrative that the Allies occupied a reverse slope position, with only artillery and skirmishers visible from French positions, once Bijlandt had pulled his men back. This is widely corroborated from his sources, from both sides. It was interesting, however, to pick up on Facebook post by Andrew Jones on the Waterloo Association page drawing attention to an article in the Waterloo Journal challenging this. It features the above picture, which is close to the Brussels road, on the eastern side, looking towards the French position – in other words the general area where Bijlandt and Kempt were deployed. It’s hard to discern much relief! It’s possible the ground has been flattened a bit from the building of the memorial mound, and a couple of centuries of agriculture – though the main terrain alterations are to the west of this.
The contention of the article, I think, is that the allied deployment area was in fact visible from the Belle Alliance ridge, and not concealed by a reverse slope. The main evidence cited is the heavy casualties suffered by the British 27th later in the battle when it was in square in this area – mainly from artillery it is thought: it must’ve been visible. Of course while this position may have been visible from the Belle Alliance ridge, which was slightly higher – and which I think is visible on the horizon in this picture – once off that ridge and into the valley, including on the “grand battery” intermediate ridge, then these positions would have been invisible. That might account for the eyewitness accounts saying that the main British positions could not be seen.
What is clear is that Napoleon had a pretty decent idea of where the Allied army was deployed. D’Erlon’s attack was precisely targeted at its weakest point. It is also clear that allied positions, as far back as the third line of cavalry, were exposed to the fire of the grand battery – and sought out hollows for shelter, according to one witness. The British position was more of a plateau with slight folds than a ridge – and still less a reverse slope.
This all reflects an attempt by British historians to ram the battle into a Peninsular War template that not even the Peninsular War, fits that well. It is also suggested that the reverse slope tactic was not widely adopted by “Continental” generals. None of this stands up to close scrutiny. The British position bears a striking resemblance to that adopted by Austria’s Archduke Charles on the first day at Wagram in 1809, fought on another gently undulating plain. That didn’t go well for the French either.
The grand battery
Mr Callister does spend some time discussing the grand battery – and rightly so. It is an interesting topic. Initially it was widely accepted that a battery of 80 guns was deployed on the Belle Alliance ridge – as described by Napoleon himself. But as researchers dug into the data, two problems emerged. The first problem was that while generally corroborating this account, the artillery general of I Corps, Desales, mentions only the batteries from his corps, reinforced by the 12pdr batteries from II and VI Corps. That’s just 56 guns, or 62 if you include the horse battery. The numbers can be reconciled if you include an extra three batteries (24 guns) from the Guard sent over by Napoleon. There isn’t much direct evidence for this, but one eyewitness does mention the presence of guns from the guard. These are usually identified as 6pdr batteries attached to the Guard (not the three batteries of 12pdrs, “Napoleon’s daughters”) – some of which were manned by the Navy. I’m happy enough that these were indeed deployed here, though perhaps under a separate command.
The second problem was the location. The Belle Alliance ridge was located about 1km from the Allied positions, and more like 1,400m to the rearward echelons. Effective artillery range is usually described as no more than 700m. My GDA rules suggest that the Allied forward positions were just within the extreme range of 6pdrs firing from an elevated position (which would count here), but the rearward positions would have been completely out of range of even the 12pdrs.
But fear not! Modern historians found a solution. If you reposition the battery further forward by about 400m to an intermediate ridge, the problem is solved. I think this is a clear case of wargamers trying to rewrite history so that it conforms their rules. This idea took hold after wargaming become fashionable in the 1970s. The trouble is that there is little or no direct evidence for it. And the forward position is very exposed; the left of the position is not far from the forward Allied position of La Haye Sainte. A further problem is that it would have presented a significant obstacle to the advancing infantry. This narrative requires the infantry to form up in their divisional columns on the Belle Alliance ridge, and advance through the battery. This is easily done on the wargames table – most wargames rules allow for the easy passage of troops through deployed batteries – but surely less easy in life, considering the limbers, caissons and such associated with them, and the density of the infantry formation used. There is no eyewitness account of this awkward passage.
Instead Mr Callister suggests that the infantry advanced through the battery before it started firing as individual battalions and assembled into divisional formations in the dip in front of the battery. Once they moved off at least some of the battery’s units then moved forward to the intermediate ridge, as indeed Desales’s account suggests. These advanced batteries were then caught exposed by the British cavalry in their follow-on charge (along with perhaps some still on the ridge behind). This all fits the evidence much better.
And that leaves wargamers with a headache. Why did the foremost military leader of the age, and an artilleryman at that, order an artillery bombardment whose targets were out of range? As it turned out, the artillery did not do much damage – though eye witnesses attribute a lot of this to the soft ground. Others suggest that the fire was too elevated (!). The fire was worrisome enough for the cavalry, some 1,500m away, to take evasive action.
On weapons ranges, incidentally, the von Reisswitz Kriegspiel, a near contemporary source, puts the 12pdr range as 1,500 paces for elevation fire and 2,000 paces for “rollschuss” (i.e. ricochet), that is 1,125m and 1,500m. The equivalents for 6pdrs were 1,200 (900) and 1,800 (1,350); howitzers could reach up to the same range as the guns they were posted with. This is for Prussian ordnance – but these were pretty similar weapons to the French. This puts the Allied troops within extended range, though the rear echelons would have been subject to ricochet rather than bounce through fire. Wargamers often restrict these long ranges not because the weapons couldn’t reach, but because they regard them to be ineffective, based on quotes from soldiers at the time.
Another notable point is that overhead fire by artillery was clearly Standard Operating Procedure. I mention this because the generally excellent rule-writer Sam Mustafa adamantly states that it never happened, so bans it in his rules systems. To be fair in his Blücher grand scale, I don’t think the artillery range issue would be a problem. Neither range nor overhead firing is a problem (or not much) for Bloody Big Battles, a system that is sometimes used for Napoleonics, either. The key is that when designing big battle rules to keep maximum artillery ranges long. The problem comes when trying to scale up rules designed for smaller battles. Ranges that are ineffective for a single battery might not be so for three or more batteries firing together. Also the French seem to have been using something of an area fire tactic – but then again note my comments on the reverse slope that wasn’t. Having said that, fall of shot would be very hard to see at these long ranges, accounting for the poor ranging noted by some observers.
Those columns
Which brings me to the biggest issue raised by this episode: the formation adopted by I Corps’s four divisions. These were divisional columns by battalion. In two cases all 8 battalions in the division were deployed in line and arrayed one behind the other, as little as three paces apart. The other divisions deployed with fewer battalions as they detailed troops on flanking operations (including an attack on La Haye Sainte). This was a huge dense mass of men. I don’t think it has much precedent, perhaps beyond massive pike blocks deployed in early modern times, and by Alexandrian armies in ancient times. It was not an accident; it may have been on Napoleon’s direct orders. Some of the officers thought it unwise, but they all seem to understand what was required.
The first question is whether this formation was unprecedented, or part of SOP, and perhaps used more often than we realise. I remember reading that it was a formation used by French conscripts in the revolutionary wars. I don’t think this was based on much in-depth research. I’m no expert on those wars, and in my various readings I have found no definitive reference to the French having adopted such a formation. Indeed I think that far from being a good way of deploying raw conscripts, it required pretty well-drilled troops to operate. In my various readings I have found just two possible examples, both used by the Austrians in the war of the Second Coalition, 1799-1800.
The first is at the battle of Novi (I think) and it is so insubstantial that it hardly counts. Apparently the Austrians are shown as using the formation on a contemporary map. I don’t know which particular units, and which map. There are some candidates when I search for the battle. I don’t know the history of the battle at all, and I wouldn’t even mention it if it wasn’t for the second example.
This is the attack of the grenadiers at the end of the Battle of Marengo in 1800. David Chandler shows them having adopted this formation. What gives this a bit more substance is that the formation was routed by a small number of French cavalry – in a something close to a rerun (pre-run?) of the events that befell Marcognet’s column at Waterloo.
All of which is a very long time before Waterloo, with no examples from the Empire period that I know about. What did the French think they were doing? One suggestion has been that with a full battalion in line, its firepower would match opposing infantry. Mr Callister dismisses this – citing his theory about the weakness of French infantry fire because of putting the tallest men in the front rank. Regardless of whether this makes sense, it is evident that the troops themselves expected to plough on without a shot. In fact it seems to have been a momentum thing. The front ranks had nowhere to retreat and would be carried forward by the troops behind them. The formation was also very compact, allowing the French to drive all their troops into the target area quickly. Splitting into battalion level formations would have taken much more space. Indeed the French would probably have not been able to send more than two divisions in on the first wave. And managing 30-odd battalion columns would have created its own issues.
The interesting thing is that this appears to have nearly worked. Bourgeois’s two regiment (four battalion) formation on the left pushed Bjlandt’s men out of the way. They were then attacked by Kempt’s brigade. It does seem to have been pushed the column back, but it was by no means broken when the cavalry struck. Something similar is reported with Donzelot’s column, the next in the sequence. The first ranks were pushed back, but the column as a whole did not break. Donzelot’s column also largely withstood the cavalry attack (from the Inniskillings) that followed. It is likely that the thin British line would have exhausted itself before defeating the whole column.
The situation is a bit clearer with Marcognet’s column. It encountered two waves of British troops (the 2/44th and 3/1st, followed by the Highlanders of the 92nd). The first wave seems to have been brushed aside; the second led to some hand to hand fighting (a bit of a rarity in open ground in the horse and musket era), which the French started to get the better of – doubtless the numbers started to tell. And then the cavalry (the Scots Greys) struck, and the French column collapsed completely.
The conclusion from all this is hard to avoid: without the cavalry counterattack, the French would have overwhelmed the troops facing them and reached Mont St John, leaving a pocket on their right – two Hanoverian brigades, a Nassau brigade and two brigades of cavalry, which would have been contained by Durutte’s division. Wellington did have reserves to call on face this breakthrough, but it would have been a very different battle. If the cavalry had struck later, the chances are that the French would have seen it, and closed up their columns to be invulnerable. Uxbridge saved the day.
The massive column is not a formation catered for in wargames rules. Insanity awaits rule-writers who try to devise rules that cover every historical peculiarity. In most rules, battalion is king, and multi-battalion formations are not catered for. In fact multi-battalion squares were commonplace. There are two examples from this episode alone. One of the Hanoverian brigades formed a four-battalion brigade square. The French 85th Line, detached from the rest of Durutte’s division, formed a two battalion regimental square, which withstood the British breakthrough charge easily (which the rest of Durutte’s division appears not to have done – though casualties were much fewer than for Marcognet and Bourgeois). Functionally these big squares are not so different from the small ones, so not a great deal is lost.
The multi-unit column is another matter. When do you treat the units as individuals? When do you look at the formation as a whole? The Waterloo experience points to treating the units individually for the infantry combat, but collectively for the cavalry one. There’s no easy way of doing this. When replaying this attack, players will doubtless form their French units in battalion columns. In grand tactical rules, with units representing brigades or even larger (as with BBB), it is easier to fudge.
Conclusion
The difficulties for wargamers don’t stop with the columns. The cavalry attacks pose interesting challenges too. The British follow-up charge was pretty devastating – especially for the French artillery. The French lancers adopted a sort of open order formation in their pursuit. But in general these are the types of things that wargames rules handle reasonably well.
The challenges posed by long-range artillery fire and multi-unit columns are headache enough if you want to try and recreate this dramatic episode on the tabletop!
Postscript. Andrew Jones got in touch about his reverse slope posting – and I have made some corrections to this post.
One of my current projects is the battle of Ligny on 16 June 1815, one of the precursors to Waterloo, which was two days later. The usual script is that in this battle Napoleon comprehensively beat the Prussians under Blücher, and with a bit of better luck would have destroyed them, so winning the whole campaign. But, as I said my earlier article, a number of mysteries surround the battle, of which the most important was how the Prussians lost when they had such a strong numerical advantage.
But researching the battle faces some tough challenges. The biggest is the lack of French sources. It is far from clear when particular formations were committed and exactly where. Prussian sources are plentiful – I think they had a system of after-action reports – but they are subject to the usual systemic biases that will under-report poor performance. One particular frustration is that I can’t find any detailed casualty figures below corps level (and not even that for the Prussians), even though some authors make reference to these. Casualty figures are an important source of evidence, as noted by the French 19th Century writer Andant du Picq, as they are less subject to fakery (if you ignore after battle bulletins). If any reader knows where this data can be found, please get in touch.
My initial focus is on what I am calling “small Ligny” – the battle for the village of Ligny itself, and the chain of villages and hamlets from St Armand to Wagnelée to the west, involving the Prussian I and II Korps, and French III and IV Corps (minus Hulot’s division) plus Girard’s division from II Corps, from about 3pm to 7pm, when French Guard formations started to get involved. This will lead on to some wargames with my army-level rules. I am also intrigued by the possibility of some divisional level games.
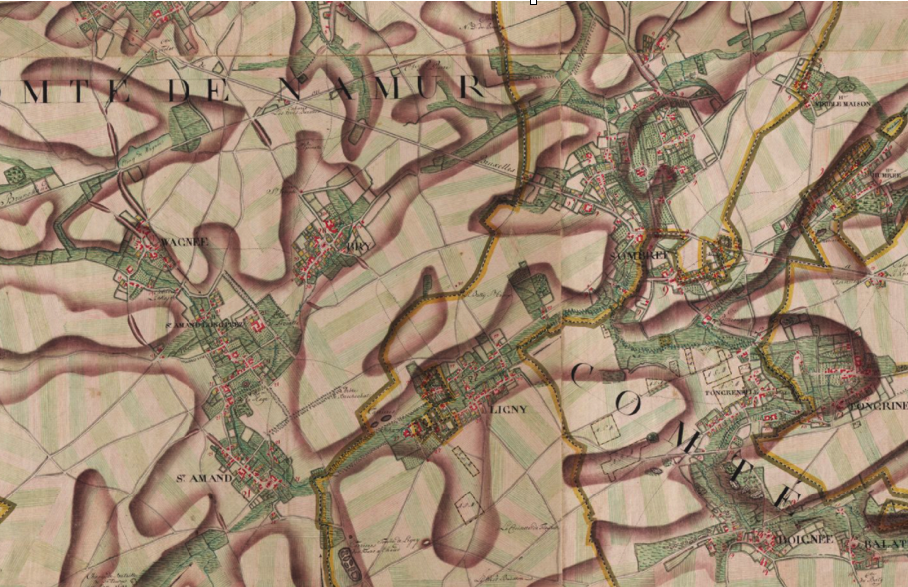
For my first stage of research, I have used work by Dutch historian Pierre de Wit, which unfortunately does not seem to be available as pdf downloads online any more. This is dense stuff but closer to the primary sources than anything else I have seen in English (or French come to that – I can just about access text in that language). The main information I have sought from this is which units were committed and when, in terms of each hour of the battle, corresponding to game moves. My objective is both to understand the battle and to calibrate my rules.
Ligny village
“Small Ligny” organises itself into two main zones – Ligny itself to the south and St Armand to Wagnelée to the west. Let’s take Ligny first. This is quite a compact village, either side of the Ligne brook. On the south bank to the west is Ligny chateau, which was capable of being defended all-round by a garrison of a battalion in strength. There are a number of other substantial farms and a church with yard which became focal points of the battle. The brook was a significant obstacle, with one stone bridge at the eastern end of the village, and a couple of other less substantial crossing points. To the west of the village was relatively clear terrain, on a hillside, which is where the Prussians located a grand battery. To the east was a sunken road, orchards and so on, on the way to Sombreffe, which was clearly difficult terrain, and which does not seem to have been seriously contested.
The village was initially garrisoned by one small Prussian brigade (but remember that Prussian brigades equal other countries’ divisions) of six (large) battalions, of which two were initially held in reserve. One of these occupied the chateau, and held it until after 6pm, when exhaustion and ammunition loss forced a retreat. Over the course of the battle the Prussians fed in 14 more battalions, meaning that some 16,000 men were committed. The French committed just two divisions, in 18 smaller battalions, amounting to about 9,000 men. The outcome can be called a draw: the Prussians still held the village, or most of it, but were exhausted. When Napoleon committed the Guard and heavy cavalry they did not resist – the occupants pulled back to the next line of defence.
This is a very striking achievement, and goes some way to explaining the Prussian defeat. Just what happened here? This is important not just to understanding the battle, but also how to simulate battles on the tabletop. The direct sources tell us little. We are left to speculate, or hypothesise, using circumstantial evidence.
The first point of interest is that while the Prussians committed many more men, the number of battalions on each side was roughly similar. I have seen arguments among wargamers who suggest that when doing tabletop simulations the number of battalions is more important than the number of men – and that using standard units to represent each battalion, regardless of size, gives a fair representation. This view, which I have aways found suspect, is given support by this episode. But interestingly, this battle was not fought by coherent battalion formations, as battalions broke up into smaller tactical units. Still the battalion statistic does point to another factor – the French ratio of cadres (officers and NCOs) was probably higher, though I don’t have statistics on officer numbers for the Prussians. Battalions vary more in size of rank and file than they do in cadres – which tend to be dictated by the internal structure (number of companies, etc). And its clear that the Prussian officer corps was stretched by the fact that they tended to use more junior ranks to handle similar sized formations to the French in 1815 (while the British tended to field more senior ones). The ratio of cadres in regular formations (it’s a different matter in elite units) might make a significant difference to battlefield performance, and in particular to stamina – how long they could keep going when sustaining casualties.
And stamina is the critical issue here. The Prussians kept on having to feed in fresh troops to keep the battle going, while the French could recycle theirs. My guess is that the French the French used one division at the start (3pm), and withdrew it after about an hour, replacing it with the second. Which was in turn replaced by the rallied first division an hour or so after that. So the French are getting two bites of the cherry for each of their units, to the Prussians’ one. So far as I can tell casualties, in dead and injured, were roughly similar on both sides (about 3,000 for this part of the battle). The tactical situation may also have made it easier for the French to pull back and refresh units (replenishing ammunition in particular). To pull back the Prussians either had to go up the hill behind the village, exposed to French artillery fire, or along the road to Sombreffe, and into III Korps’s zone. They do not appear to have done it until the original brigade (Henckel’s) was withdrawn after 6pm.
There is another factor when considering quality of troops and stamina. Nine of the 20 Prussian battalions were landwehr (7,000-8,000 men), and all them from the Elbe and Westfalia provinces. These had only been incorporated into Prussia in 1814, and these units hadn’t been forged in battle – and nor were they so inured into Prussian military tradition. By contrast the landwehr units in the Prussian III and IV Korps were from the established territories of Kürmark, Silesia and Pomerania, which had been part of the great battles of 1813. It is estimated that the Prussians lost 8-10,000 men as deserters at and after the battle. It is thought that the bulk of these were from these landwehr units – though some did come from the more recently raised regular units, like the 25th Infantry regiment. There were 24 landwehr battalions in the two corps; 9 were engaged in Ligny, and 11 (3 after 7pm) in the west. So a very large chunk of the deserters must have come from the landwehr units in the Ligny battle. And that means that half or more of these troops must have fled. I have not found direct corroboration of this. There is a mention in de Wit of the landwehr troops wobbling a bit early in the battle and having to be rallied. But there were no mass routs. But Henckel’s brigade, with three landwehr battalions out of six, lost half its men in the battle according to one historian; it started with 5,000 men; if we say they took 1,000 dead and injured (being the battle the longest, casualties would have been higher than average), it means that 1,500 of the 2,500 landwehr deserted.
What happened? My guess is that at first the landwehr units would have engaged with reasonable effectiveness, but as the battle wore on the feeling among the men that they had done their part, and the imperative to survive and return to their homes, started to dominate, and they found ways of lying low. Substantial numbers may have been able to drift the rear areas. Once the Prussian army started to pull out in the fading light, these men flooded out along the road from Sombreffe to Namur. What this boils down to a very low stamina level in these units. If we try some sort of quantitative evaluation in wargames terms, we might class the French troops as “veterans”, the Prussian regulars, with their weaker cadres, as “trained” and the newly-raised landwehr as “raw”. If we weight veterans as one third more than trained, and raw one third less, we get a weighting for the French of 12,000, and the Prussians of 13,600. This is clearly much closer, and allows other factors, like stronger French artillery, to be brought into account.
Interestingly, not this analysis shows that the Prussians did not derive a great deal of benefit from being on the defensive, in a garrisoned village. According to French accounts, the first French assaults were beaten off with heavy losses, but they then managed to gain and exploit a foothold. This goes against most wargames rules. I have set up two or three games of the Blücher system based on Ligny, and it was hopeless for the French. Attacking the village was battering their heads against against a brick wall, and they soon ran out of infantry. Another interesting wargames point from this part of the battle is that the French artillery were able to rake the slopes behind the village. This almost certainly this involved a degree of overhead firing – and this was tactically important. Most rules systems allow this, but some (like Blücher) don’t.
St Armand to Wagnelée
This was a bigger and more complicated battle. The contested area was three villages along the line of the Ligne brook. To the south was St. Armand, apparently quite an open village, though with a substantial church and yard. Next to the north, with very little gap, came Longpré, where most of the fighting took place. This included two substantial chateaux – La Haye, heavily contested, and l’Escaille to the east, which the French never reached. Most historians of the battle call this village “St Armand la Haye”, but both current maps and the Ferraris map from before the battle call it Longpré. I think using this name is better for clarity. Next north after a small gap is Wagnelée. There was no serious attack on this village that I can see, but it was an important access point to the battle for the Prussian troops. Between Longpré and Wagnelée, at a crossroads, there was a hamlet of just few houses and an inn, which historians usually call “St Armand le Hameau”, but which is more correctly called Beurre-sans-Croûte. Historians generally refer to the whole area as St Armand, but this can lead to confusion.
St Armand, which wasn’t substantially garrisoned, was the subject of the first French attack, which was initially beaten back by Prussian forces waiting outside, but after the first hour it was occupied by the French and not seriously contested – but possibly after a second French division ws committed. Both sides concentrated their efforts after this in and around Longpré. The Prussians mounted attacks from Wagnelée into the open ground behind Longpré, leading to some open battles including cavalry support. The initial Prussian garrison (in Longpré) was just three battalions, plus some jager companies. But as the fight developed they committed some 29 more in the period I am looking at (and 6 more after that), giving 32 battalions or about 27,000 men. The French committed four divisions, and about 20,000 men in 39 battalions. At the end of this the Prussians had clearly won, and the French forces were close to collapse, forcing Napoleon to commit the Young Guard and most of the Chasseurs of the Old/Middle Guard to this sector. However the Prussians did not achieve what they had clearly hoped for: a breakthrough that would threaten Napoleon’s left flank.
We don’t have quite the same puzzle here Ligny village. The Prussians used fewer landwehr units (just 6 battalions); they also cycled their troops to refresh ammunition. They were in fact on the offensive for most of the time, unlike Ligny. Using the same weighting formula as for the Ligny analysis gives the French 26,700 men to the Prussians 25,300. Given that the Prussians ended up on top, it shows a better relative performance by them. That doesn’t seem to be because of better leadership than at Ligny, though. There are two cases of substantial Prussian attacks mis-firing and being defeated through poor coordination. There seems to have been no leadership at corps level, with brigade leadership undermined by the ad-hoc partial commitment of formations. Instead, the French leadership seems to have not to have been of the same standard as that for Gérard’s IV Corps. The III Corps commander, Vandamme, was very experienced but never made it to Marshal; there are numerous cases of questionable judgement across his long career. And one division, Girard’s, which led the attack on Longpré, was not under his direct command. This formation was over-committed and effectively destroyed, with one regiment fleeing in rout. Meanwhile Habert’s division was (arguably) under-committed, though their participation is not clear (it is known that the Swiss battalion that was in this division was not used) – but Vandamme’s orders may well have been unclear. Also the second division from III Corps (Berthézène’s) sees to have been very early to the fight, in contrast to Ligny. All this suggests a less measured management of resources by Vandamme.
Conclusion
It will be interesting to see how my rules work when I try this scenario out. This exercise will doubtless pose further questions. I have not paid so much attention to the artillery for example – but this is best done once the lie of the land is clearer, and that means modelling this on the tabletop. It is amazing how often historians fail to understand how terrain limited the use of artillery in particular battles (for example how hard it would have been to use artillery to reduce the British strongholds of la Haye-Sainte and Hougoumont at Waterloo). This phase of analysis does point to some places where the rules need a review. For example rallying can’t be done close to the enemy – which create problems for units defending terrain, like the Prussians at Ligny and (perhaps) Girard’s division at Longpré. Also how to feed in fresh units into an undity battle for a built-up area, and the role of strong-points – when to represent and when to abstract away.
A further thought concerns lower-level rules, which use battalions as their principal unit. This battle should be a fertile source of scenarios at this level. But it isn’t because rules tend to deal with built-up areas in far too abstract a fashion, usually giving too much benefit to the occupier. Lasalle 2, my go-to rules, would be hopeless. To get the proper feel of the battle you need to represent the structure of the villages – the streets, farms and churchyards and so on – rather than using undifferentiated terrain areas. It also probably means giving a role for company-sized formations. This is a problem that I might try giving some thought to. One episode, though, the attack by Tippelskirch’s brigade on the French flank, which included cavalry support, has the makings of a good game at this level though. What adds to the attraction is that I have actually made a representation of this formation, with four-base battalions, the core of my Prussian army collection.
I’ve had this book for some years, and I’ve grazed from it, especially its account of Ligny. But recently I reread it in its entirety, and that serves to help me refocus on Ligny. I last studied this battle in detail in 2018, producing this article, in which I voiced my frustration with English language historians. That included this book.
This book, of course, is only tangentially about Waterloo – but you need to get the W-word into the title for it to sell, especially if the N-word or the other W-word (i.e. Wellington) doesn’t work. There is a discussion of why Grouchy never made it to Waterloo, which I suppose is link enough.
What this is actually about is the right flank of Napoleon’s assault on Belgium in 1815, and Grouchy’s role in it in particular. As with his other works on this campaign, Mr Field’s brief is to present French sources, which are typically under-represented in English language writing. That gives it a lot of value – but one of my main frustrations with most military history is that it is written predominantly from one side’s sources, and from their point of view. For all that, Mr Field does mention Prussian sources where relevant. My main frustration with the work is the one I raised in my earlier post: he “lets the sources do the talking”. He often uses the quotations as a substitute for his own narrative, and he rarely tries to pull the accounts apart to throw light on what is likely to be inaccurate or belong to another episode in the battle.
The main attraction of this book is its accounts of the battles of Ligny and Wavre, alongside the combat at Gilly. For all the one-sidedness of the sources, the accounts are as clear as any I have read, and his overall judgements seem sound enough. It is notable that he emphasises that the Prussian army wasn’t crushed, as breathless French-sourced accounts tend to suggest. He does indulge in critiques of the various commanders’ decisions though. Most historians do this, though I prefer a little more of AJP Taylor’s “What happened and why” – still it does help to understand that there may have been better choices.
Ligny is my main focus. One of my planned focus points for 2023 (I hesitate to call it a New Year resolution) is this battle, moving towards reconstructing it on the tabletop using my newly developed rules. Alas probably solo. I had allowed myself to be a little diverted by Waterloo, and especially the Prussian role there. I am left with a number of puzzles about this battle:
Why did Wellington, on his visit to the site before the battle, suggest that Blücher had deployed his men on forward slopes exposed to French artillery, drawing the riposte that Blücher “liked his men to see their enemy”. In fact the Prussians were so well concealed that Napoleon was confused as how many corps he was facing. Prussian reserves did have to cross a forward slope to reach Ligny, and did suffer – but their initial deployment was out of sight. Mr Field does not mention this. So much of the British reverse slope mythology is built on this episode – and yet I can’t believe that Wellington completely fabricated the story (though there are no corroborating witnesses).
Where did Vandamme’s corps start the battle? Almost all maps of the battle show it to the west of the St Armand complex, to the right of Girard’s division of Reille’s corps. That leaves a large gap between it and Gérard’s corps. Mr Field remarks on this gap but moves on. I think it is likely that the corps was in fact to the right of Gérard and astride the road out of Fleurus towards St Armand. This is what the language of the French sources suggests, and it also explains how these units came under artillery fire as they approached, as the first-hand accounts suggest, though these aren’t entirely reliable. An early Prussian map shows the corps in the westerly position and I think that most people have simply followed this.
How did the Prussians lose? The big question. They had more men and a decent defensive position. They just seemed to burn through their men more quickly in the two built-up areas. But why? Reinforcements had to expose themselves to French artillery, but that hardly seems enough to account for this. Mr Field does not address this question directly, but his assessment of the casualties on both sides does throw some light on it. They were similar, once you take out the desertions from some Prussian units. That suggests that the casualties in the street fighting were roughly similar – but that the stamina of the French was much better (a bit like the success of the British infantry at Albuera). I think the presence of so many recently established landwehr units (the Westfalian and Elbe units were formed only in 1814) may account for this. It also suggests that the advantage to defenders of built-up areas, a prominent feature of Blucher rules among many others, needs to be rethought.
What happened to the Prussian units that fought in Ligny? Reading the account of the battle, you would think that the Prussian units fed into the village disappeared, but this is clearly nonsense, as they turn up later, but depleted, at Waterloo. Mr Field adds something rather interesting. At the point of the famous Guard attack on the village, there seemed to be few Prussians actually in occupation – accounting for its rapid success in taking the village. This suggests that the Prussian command had been pulling out exhausted units, and had effectively abandoned the village by the time the Guard struck, leaving the defence principally to the cavalry as the French came out of the village.
Could d’Erlon’s intervention have been decisive? The standard French account of any lost battle is that but for one missed opportunity the battle would have been a triumph. In this case d’Erlon’s failure to arrive with his whole corps, and the hesitancy of the troops that did make it, was the missed opportunity. They could have cut off the Prussian retreat and helped nearly annihilate the Prussian army. The first problem with this is that they did not turn up where Napoleon had intended them to – on the road from Quatre Bras. This would have taken them right into the Prussian rear. But this was never a possibility (and Blucher would not have stood at Ligny, or not in the deployment he did, had this been a realistic possibility). Wellington’s army was in the way – a fact that Napoleon had no understanding of. The second problem is that he turned up pretty late, at about 6pm. As Mr Field points out, the Prussians hadn’t collapsed at this point and (though he doesn’t say this), may already have been contemplating withdrawal. D’Erlon may simply have hastened the Prussian withdrawal, rather than annihilating the army.
These are the questions that I hope my efforts will throw some light on!
I have just finished reading this short book published by Helion as part of the Wolverhampton Military Studies series. The cover shows the scope. Its main focus is operations of the British Eighth Army from 1941 to 1943. The earlier campaign between British and Italian forces in 1940 is covered in the same level of detail, but conclusions from it are not integrated with the rest of the book. First Army operations in Tunisia are not covered.
The author, Neal Dando, probably had a lot of fun researching this book, going through the (almost entirely British and Commonwealth) primary sources in depth, and a wealth of secondary sources, and appraising the course of the campaigns. However, the book is quite short and focused on the key theme: the impact of terrain on the British approach. His contention is that terrain is not given sufficient attention as one of the factors dictating the course of events, compared to such things as tactics and leadership. It’s a long time since I have read anything much on these campaigns, so I can’t judge this contention for myself. I think there’s something in it – but it is problematic. Firstly, all historians surely comment on the desert terrain, and suggest that it lent a particular character to events, even if they can be a bit vague on details. Second since much of the function of leadership and tactics is about the use of terrain, it is hard to separate it out as factor on its own – and a bit false.
Still I am a big believer in the importance of terrain in warfare – and feel that it is often not given the attention it deserves. This is reflected in many wargames, which tend to over-simipify and abstract away terrain features. Time and again when studying battles in detail (mainly Napoleonic ones) I have found that terrain factors neglected by historians explain much. One example was how a recent historian suggested that the French grand battery at Waterloo should have blasted away the strongpoint at La Haye Sainte. In fact the lay of the land made that pretty much impossible. And I have often read that it is wrong to think of the Western Desert in WW2 as being entirely flat. It featured many minor undulations, which could have a critical impact on events. You could place antitank guns in hollows and wait for the approaching tanks to be silhouetted on the ridgeline as they approached, for example. How well this is reflected in wargames I wouldn’t like to say – I have played very few desert-based WW2 scenarios. The exception have been some quick club games played on a flat table.
I bought this book as I am trying to put together some rules for my 1943 project, featuring British forces in Tunisia, Sicily and Italy. It has always been clear that terrain had a huge impact on these campaigns, so I was looking for ideas on how this should be reflected. I was pretty disappointed. I understand why Mr Dando does not want to give a detailed narrative of the battles – but I was hoping for something rather more systematic on the analysis of terrain impacts. Something like a description of the different impacts, and the part each of these played in each of the battles. There are brief terrain descriptions, but nothing very systematic on the narrative. There are a few maps, but representation of terrain on these was pretty thin. In fact I’m not actually sure he familiarised himself directly with the terrain, rather than simply relaying what the various primary documents, and a few secondary ones, say. He seems to jump straight to his conclusions with a “take my word for it” approach. On top of that, the book is riddled with minor editing errors (of the sort you will doubtless find on this blog, I’m afraid, but shouldn’t on things you pay money for), including one map mislabelling a German division as Italian. This is the rule rather than the exception with modern specialist publishing, however.
So what were the main impacts? Going was variable, affecting the ability to move different types of forces (one area could be traversed by tracked vehicles but not wheeled ones, for example) – including some steep slopes and cliffs. Terrain could offer a degree over cover (e.g. the use of hull-down positions), but was generally notable for the lack of it; in some places it was impossible to dig in because the ground was too rocky. Concealment was important factor using undulations, wadis and depressions – and there is related aspect of the usability of heights as vantage points for use by direct fire, and most especially as observation points for indirect artillery fire. Most of this is standard wargames fare – though wargamers often fail to bother with gentle terrain undulations. But artillery is usually less well thought about in this era. And yet it’s clear from this book that it was critically important – with battles often resolving around the possession of heights for use by FAOs. This was obviously the case with the mountain warfare in Tunisia – where the entire campaign revolved around the issue – as my reading of the account of Longstop Hill showed.
This book, though, gives me very little data to flesh this out. At one point it mentions a tank attack suffering at at 2,000 yards from enemy lines from artillery fire (6in Italian coastal artillery, apparently). I guess it would not be too hard to make out approaching vehicles at that sort of range, with the usual optical equipment. But fall of shot would have been much harder.
So an interesting but ultimately disappointing book.
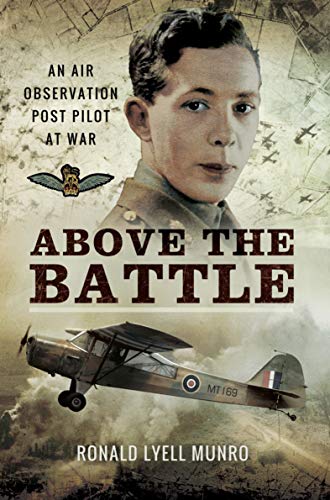
This book attracted my attention recently – and I’m very glad I bought it. It offers insights into a neglected aspect of WW2 warfare and the use of artillery by the British (and Commonwealth) Army. It’s not a long book, and the core of it, Lyell Munro’s memoir, is padded out with other material supplied by his family, including a general background to the history of the Air Observation Post (AOP) in British forces. Alongside the interesting details of battlefield tactics there is a rather charming personal story, told in the good-humoured style so typical of British accounts of the period. This includes his own commentary on Allied strategy in Northwest Europe (he was not involved in other campaigns). Extracts of letters to his future wife are included, and complete letters of hers to him – they met when she was a nurse, but she moved on to be a Wren. This offers an insight to wartime life and love outside the world of cinematic portrayal.
The AOP role developed alongside the rivalry between the Army and the RAF. At the start of the war the RAF had a complete monopoly of military flight. They had developed an army liaison role, using Lysander aircraft for AOP and other duties, including bombing. The Lysander proved to be an unsuitable aircraft for the AOP role – it was too big and heavy, and too fast (i.e. an airman’s idea of what was needed). Besides, RAF crew did not make good artillery observers. Casualties in these squadrons in France in 1940 were very heavy (118 out of 175 aircraft lost), and the RAF gave up on the idea. The Army, and the artillery, did not. They insisted that if you put an artilleryman in a suitable aircraft, it could be of real value. The aircraft would have to be slow and and agile, with an upper wing so that ground visibility was good (which ruled out the Miles Magister – one candidate). It needed to be able to land in small fields close to the front. The slowness was mainly for the benefit of observation, especially of fall of shot. It also, a bit counterintuitively, reduced vulnerability to enemy fighters. The tactic was to get out of the way and hide in the landscape, even landing if need be. Losses were surprisingly light. Munro’s squadron lost two pilots in the air (at least from June to August 1944 in and around Normandy). One was hit by the fire of the battery he was supporting, the other hit an electricity cable. Munro was acutely aware that his chances of survival were much better than that of an infantry officer. I was surprised that no aircraft were lost to ground fire in his squadron. Flying low and slow they were surely vulnerable. Of course they would try to stay well away from any flak units spotted, especially the feared 20mm quads. Infantry may have feared giving their position away. This is a quote from a Tiger tank commander:
That damned English crow is hanging in the sky again. Doesn’t he know there’s a war on? He’s got a nerve, flying in curves and circles over the front like that! A machine gun could easily bring him down. But nothing stirs in our front line. The infantryman there knows that the slightest sign of life will bring down the shells of the enemy – and they will be bang on target. Throughout the intense heat of the July afternoon our infantry lie motionless in the ground, following with their eyes every movement in the sky above.
Ernst Streng – quoted in “Hill 112” by Major JJ Howe MC
The plane that Streng is referring to may well be Munro’s – the day corresponds to the one when he describes a contest with a lone German Tiger. Incidentally he found that 25 pdrs weren’t enough to deal with it, but it did shift when coming under fire from a 4.5in medium gun he managed to bring in. That forced it to take cover in a village, where it was later abandoned.
The AOP squadrons were flown by pilots from the artillery, like Munro, but maintained by RAF crews, and were technically RAF squadrons. They operated from ad-hoc bases very close to the front line. When not in the AOP role they often ferried around army officers, or flew them over operational areas. Later in the war they also carried out successful photo reconnaissance. The pilot was the principal observer for artillery fire, but they took up an additional crewman (volunteers from the ground staff) to be an extra pair of eyes, especially for enemy aircraft – which remained present through the war – including Me-262 jets later on. Munro describes an encounter with an Fw-190 that had shot down a Typhoon – but didn’t spot him.
The AOP role was considered to be a big success. The Americans also adopted AOPs, using aircraft such as the Stinson L-5 Sentinel (the only purpose-designed AOP – an earlier version of which was the first choice for the British AOP – but the Auster could be produced locally) or Piper L-4 Cub. The Germans may have had a suitable aircraft in the Fieseler Fi-156 Storch, though this was notably bigger and heavier than the Allied aircraft. The write-ups say it was used for artillery observation, but I haven’t seen this mentioned in specific battle accounts. It could be that the Germans suffered from inter-service rivalry too. I suspect the Storch was used mainly as officers’ transport and scouting rather than AOP.
How about AOP in wargames? Many rules do provide for them (e.g. Battlegroup and Rapid Fire!). My sense is that AOPs tended not to be used in the thick of the sort of action we like to war-game – when the battlefield would be quite a dangerous place for a little aircraft – but much more during static situations, or lulls, when artillery was being used to pick off enemy positions. They were also used off-table in a counter battery role. Munro mentions that they were used to try and find mortars – but that German mortars were nearly impossible to spot when firing. They would try to guess where they were and direct a general bombardment in that area, to suppress as much as to destroy.
How about AOP for my 1943 project? The Austers were certainly in use in Tunisia and onwards by the British. This is presumably where tactics were refined before D-Day in Europe. The US Navy attempted to use AOPs launched from ships in the invasion of Sicily – but apparently this was a disaster and losses were very heavy. These would have been big and clumsy floatplanes, fine for observing gunnery in naval battles, but lacking the agility to stay out of trouble over land. There were no Austers at Salerno – but I guess appropriate airfields were lacking and it was too long a flight from Sicily, even if they could find smaller fields to use. Apparently an Auster was used to scout out German positions on Longstop Hill – but I don’t think they were used in the assault.
I have a soft spot for the Auster. My first ever aeroplane flight was in one, in Somerset when I must have been about 10 or 11. This was a treat while we are on holiday. I don’t remember too much about it. I’m sure I was told it was an “Auster 8” – but this does not correspond to any model that I can find. But the shape fits my memory – just about big enough to take my Dad, my brother and me, in addition to the pilot. My Mum wasn’t so keen.
I would like to do a 1/72 model of an Auster in 1943 Med theatre colours. I certainly don’ want to do a Lysander instead, as some wargamers seem to. However there’s a problem about finding a mode. AZ Model produced one as recently as 2016 (in Czech colours but no matter), which is also the right model – a Mark III. But they only seem to do very small production runs and there don’t seem to be any around second-hand. Other than that there is the Airfix Auster Antarctic. This is an early Airfix model, but was produced in large numbers over time, so they do turn up on the second-hand market, although sometimes for crazy prices. This is of a later, post-war mark though (and Airfix did do an AOP version, but one appropriate to Korea not WW2), which is moulded in bright yellow plastic and has optional floats or skis. However the undercarriage, cabin and engine are all different, so it would entail some conversion. The best strategy may be to wait for AZ to reissue.
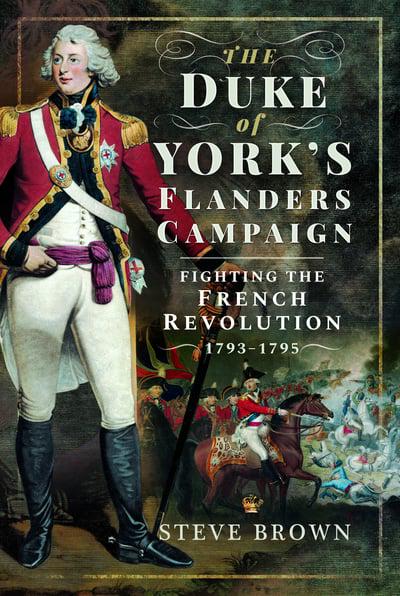
I have long been curious about Britain’s first campaign in the French Revolutionary and Napoleonic Wars – in Flanders in 1793-5. I was curious because I had seen so little written about it. For most people British military history in this era starts with the Maida campaign of 1807 or Moore in Spain 1808-09. There is sometimes a reference to the Anglo-Russian Expedition to North Holland in 1799. How much was the vaunted proficiency of the British army evident before these campaigns, I wondered? So when I saw this history published by Frontline Books, I couldn’t resist it. It proved a most interesting read, and shed light on an episode that wargamers should take more notice of.
The book covers the history of the First Coalition (1793 to 1795) more generally, which I found very useful, before looking at the Flanders campaign in detail. Until near the end, Britain’s contribution to this coalition effort, which was led by the Austrians until they withdrew at the end, was led by Prince Frederick, the Duke of York and Albany, the second son of George III. It was his first experience of military command, but it was the fashion for armies to be led by “princes of the blood”, and this eased relations with coalition allies (the prince was fluent in German and familiar with the dramatis personae of high society in Austria, Prussia and Hanover). Apart from Austria, these allies were Hanover (part of George III’s realm), the Netherlands, and Hesse – with a theoretical contribution by Prussia that failed to materialise. The campaign was a failure for the Allies, mainly because of poor Austrian leadership. This resulted in Austria losing Belgium (as we now call what was then the Austrian Netherlands) to France, followed rapidly by the rest of the Netherlands.
Why did Austrian leadership fail? I didn’t find the book very satisfactory in explaining this. Two main reasons are offered: divergent strategic interests, and outdated strategic doctrines. While these were both doubtless true, I think that Steve Brown fails to explain them properly. What did Austria want to achieve? In the end what undermined Austrian resolve (and that of the Prussians) was a Russian threat to Poland. Was that their worry all along and did that make them hesitate to commit troops deep into France? This idea is not explored. The Austrians were not the only ones guilty of a lack of clear focus – the British government insisted on a diversion to try and take Dunkirk, and diverted troops to campaigns in the West Indies and the Mediterranean. Coalition warfare always struggles when it comes to clarity of objectives – and historians too often moan about this, rather than properly interpreting the conflicting aims. Warfare is politics by other means, after all, and not a be-all and end-all. On outmoded strategic ideas, Mr Brown makes much of the Austrian attachment to the “cordon system”, which let them to disperse forces. This builds on a narrative that was current at the time (the Duke of York himself refers to it), developed later by such writers as Clausewitz, and has been a staple of historians ever since. But that leaves a question: if it was so obviously wrong, why did the Austrians stick with it? If that was actually what they were doing. My main rule of historical analysis is that if you don’t understand how you yourself could have been tempted to take a particular course of action, then you haven’t actually understood it. Nobody defends the cordon system – which means that nobody is taking the trouble to understand what commanders who used it were trying to do. I was not able to pick up a deep enough appreciation of this campaign to develop a view myself. The maps in the book are generally unsatisfactory, and Mr Brown assumes too much knowledge of the local geography.
Mr Brown is a bit better on the tactical details of the battles. These are extremely interesting. There were no great set-pieces along the lines of the Napoleonic period – but rather a series of much more scattered encounters, often relating to the capture of fortresses and strategic towns. The coalition troops fought very well for the most part, with the general exception of the Dutch (whose people were not bought into the defence of royalty and aristocracy). Often Allied troops won out against vastly superior numbers. The French forces were in a state of flux – with elements of the old royal army combining with various flavours of volunteers and conscripts. The French did start to develop tactics that made best use of their advantages – which were mainly numbers – which has been the main historical interest of these campaigns hitherto. This has been dealt with expertly by the late Paddy Griffiths in particular, and this account of the Flanders campaign bears Griffiths out, though it doesn’t dwell on this aspect of the campaign. Griffiths suggested that the French innovations, far from being a new and superior way of war, were developed as a way of using poor quality troops against superior professional armies – and were largely dropped as the French army regained its professionalism under Napoleon. But until I read this book I didn’t appreciate just how effective the coalition troops generally were. The Austrian army was considered the best of the major powers, and their performance in this campaign bears this out (though Mr Brown reckons the Hessians to be the best troops in this campaign). This should provide a lot of interest to wargamers. The two sides provide an interesting contrast. Coalition armies may be nightmare to command, but the variety of troops they incorporate is a wargamer’s delight. And what’s more the coalition’s cavalry arm was very strong – including a substantial British element, featuring Household cavalry, the Union Brigade, and many other units, who had a good campaign. Britain did not field such a strong force of cavalry until 1813, Mr Brown reckons. Of course, the uniforms are totally different to the Napoleonic phase of the wars, but even so this era deserves more attention form the hobby than it gets. If I was in the mood to take on another army-building project, I would be tempted!
As for British tactics, Mr Brown has not much to say – as the British contribution to the coalition effort was not a major one. Many of the British infantry units were freshly raised and of very poor quality. Officers were often inexperienced surplus sons from aristocratic families, who had acquired commissions through purchase. Having said that, the British units generally seem to have fought well enough, using the conventional three-deep line for infantry. They seem to have been used aggressively in bayonet attacks, rather than attempted much with musketry. The Guards units performed well, as well as the cavalry. The weaknesses of the British units was more a question of a loss of discipline off the battlefield, with a lot of looting in particular.
The campaign ended in ignominy, when the Austrians pulled out, and then the French attacked in the winter. The remaining coalition forces were forced into a calamitous retreat where the logistics and discipline broke down and many men were lost. This was doubtless a searing experience for those that were there. And this was something of a Who’s Who of British and Hanoverian officers who were to feature prominently later on, not least of whom was the future Duke of Wellington, who commanded a regiment of infantry. There is an interesting appendix listing these officers who came to prominence later. There are many familiar names on the French side too, such as MacDonald and Vandamme, but most of the famous French names of later were elsewhere. There was another important participant, whom Mr Brown barely gives a mention: Gerhard von Scharnhorst, who served as a staff officer in the Hanoverian army. His experiences of the new French tactics deeply influenced him, and this in turn was very influential in the rebuilding of the Prussian army after 1807.
The Duke of York’s performance was undistinguished, though Mr Brown suggests that much of the criticism he has received is unfair. However, he does suggest that he lacked the gravitas to stamp his authority on an unruly army. He moved on to command the whole British army, where he is reckoned to have done an excellent job, helping to make it become the effective force of the Peninsular campaign. For him, and for the many other British alumni of the campaign, the Flanders episode was a powerful lesson in how not to manage a military campaign. That can certainly been seen in Wellington’s insistence of stern discipline and focused command.
This is an interesting book on an interesting campaign. I think it falls a bit short on the analysis, where it too often follows conventional wisdom, often quoting other historians’ analysis verbatim, and not leaving me with the clarity on events that I had hoped for. The maps are disappointing. But it throws welcome light on an important episode of British military history.
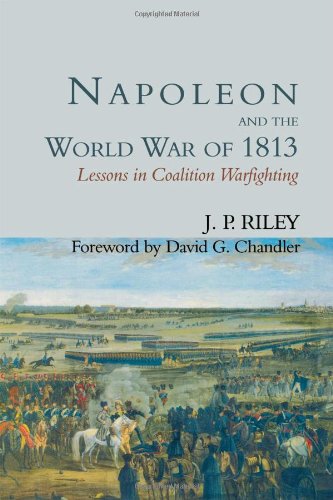
It’s been a while since I have posted anything. I’ve been reasonably busy on the hobby front, but I’m getting a bit bogged down on improving my terrain – which involves many parallel paths with a rather distant endpoint. Meanwhile I have been reading a bit, and I’m reporting back on this book by Lieutenant-General Jonathan Riley (or J.P. Riley) published back in 2000. I remember reading a review of it in The Economist, and I eventually picked it up at a bookstall in Salute a number of years later; it languished a number more years before I eventually read it. Since my Napoleonic hobby projects are increasingly focusing on 1813, after 1815, it struck me as relevant.
The book is a high level account of three campaigns in 1813: in Central Europe, with the decisive battle of Leipzig, in Spain (with Vitoria as the centrepiece) and in North America, especially in Canada as the War of 1812 played out. The nominal theme of the book is the study of how multinational coalitions work in warfare, where he draws out parallels from later wars, right up to NATO. The coalitions are self-explanatory in the case of the first two campaigns (and include Napoleon’s armies in Central Europe, albeit that the French allies were highly subordinate); in Canada the British side is presented as a coalition between the British government, French and British colonists, and the Native American tribes (which he, back n 2000, is able to call “Indians”, though his account does accord them full respect). The narrative and the commentary on coalitions don’t integrate entirely satisfactorily though – the narrative tends to take over, and it is not especially penetrating on his main subject. I read a very interesting study of coalition fighting a few years ago which was based on a research thesis by an American military academic, which used the Russian-Prussian alliance in 1813 as a case study – and which got much more into the weeds of coalition warfare. It was able to do this because the researcher got behind the mainstream campaign accounts and into some of the telling details. An example was the complaint that Russian generals were a bit too free and easy with exposing their troops to artillery bombardment, according to their Prussian subordinates.
General Riley does hit on some important insights, though, showing features of coalition warfare which military historians tend to present as command failures. It is the nature of coalition warfare that campaigns only continue for as long as common objectives remain agreed. For example as the allied armies reached the Rhine at the end of the year they stopped; some commentators (starting with, at the time, Jomini) regretted this as a wasted opportunity, as Napoleon was vulnerable. But the allies had never agreed to enter France as a coalition, as some members (notably Austria) had reservations about what might happen next – they liked the idea of a reasonably strong France, and were not signed up to a restoration of the Bourbons. The coalition simply had to stop to consider their next move, and see if Napoleon would come to terms. This in turn delayed Wellington’s invasion of France. This is not unlike the first Gulf War after Kuwait was recaptured more easily than many thought. The coalition could not simply proceed to Baghdad.
I was a bit disappointed with the campaign narratives for Central Europe and the Peninsula. The book was never meant to deliver anything special here, but it is very British Old School, based on secondary sources in turn derived primarily from British and French sources. Doubtless this was under the influence of the great historian David Chandler, who contributed the forward. His work was largely where I started my serious history reading back in the 1970s, but we’ve moved on. The Central Europe account is very much centred on Napoleon, with the deliberations of the allies treated very superficially – a big weakness for a book on coalition warfare. I am still none the wiser as to why the allies did not withdraw after the first day of Dresden, for example. And he keeps to the generally accepted story that Napoleon nearly beat the Army of Bohemia on the first day of Leipzig, with the day being saved by the intervention of Tsar Alexander. I simply don’t think that Napoleon had enough hours in the day to accomplish what he needed to do to win the battle, and this story has evolved from the typical French historian’s downplaying all Napoleon’s failures. The allied armies of 1813 were very resilient, had plenty of cavalry, and were very hard to beat properly. But I don’t know enough about the events of this day to present a convincing case – or any opinion on the Tsar’s intervention. The focus on Napoleon and the French also brings forward the lack of initiative shown my most of his senior commanders – and this is discussed as a downside of his highly centralised system of command and control. This is fair enough, but the obverse is not commented on. This is that the allied subordinate commanders often showed good judgement and initiative – something that had not been noted earlier in the wars.
I had similar problems with the account of the Peninsular campaign. Here the problem is the tendency to shoehorn the account onto a very standard British stereotype, of the French coming on “in the same old way” at steadfast British infantry, and increasingly steadfast Portuguese and Spanish, with every encounter being on a ridge. I have only researched Vitoria properly, where General Riley does underplay the French tactical successes, without being seriously wrong on the overall narrative. For Sorauren I noted that he did not follow Oman’s somewhat more nuanced narrative, and went for a very old-school version that this was a typical encounter – though I don’t think the overall distortion matters all that much in the end.
General Riley’s account of the War of 1812 was much more interesting, as this was something I knew little about. The actual campaigns are not all that interesting in themselves – though doubtless a good source of small scale encounters of the sort that make interesting wargames without all the difficulties large scale battles bring. The interesting bit was the differing interests of the various groups, from American settlers to Canadians to native Americans. I hadn’t appreciated that one of the big issues that drove the original conflict between the colonies and home government in America was that the colonists wanted freedom to displace the Native Americans – which is why the latter sided with the British. It goes to show just how ethnically-centred the concept of freedom was that drove the American revolution.
Overall this a flawed book that hasn’t aged well; I wouldn’t recommend that anybody buy it. The subject matter is interesting, but we can surely do much better these days. Good military history demands confident coverage of the big stuff – the bigger context and politics – and a willingness to look hard at the small stuff. General Riley does the first part well enough, but is disappointing on the second.
My 1943 project focuses on British troops in the Mediterranean that year. I started it as a teenager in the late 1970s, but suspended it, like so much else, when I left home in 1979. I have so far focused my research on two campaigns: Tunisia in January to May (and especially the First Army) and Salerno in September. Between these two comes the battle for Sicily in July to August, which I have neglected. I bought these two books to start to fill the gap.
The first is James Holland’s Sicily ’43. Mr Holland seems to be one of the most popular British historians of WW2 at the moment, but this is the first of his books that I have read. I am impressed. This is how history should be written for general consumption. Wargamers will find that it lacks detail, but it should offer inspiration for further research – or may put them off trying to recreate the combats on the tabletop altogether – more of that later.
The 38 day battle for Sicily (starting from the date of the invasion itself rather than the pre-campaign, as the cover of the other book does) has been somewhat neglected by historians – along with the rest of the subjects of my 1943 project. In between the battles of the Western Desert 1940 to 1942, and Normandy and north west Europe 1944 to 1945, and the Russian Front 1941 to 1945, Tunisia, Sicily ad Italy don’t get much of a look-in. Inasmuch as historians have dealt with it, they have tended to be very critical of the Allied command. They have suggested they were too cautious, and should not have let so many Germans and their equipment get out at the end. Mr Holland seeks to set the record straight.
In this he is mainly convincing. Only on one issue do I think he needed to say more – could the Allies have succeeded with a smaller invasion launched earlier? The Axis defence was in disarray at the start of the attack, and things would have been even worse if the attack had been conducted earlier. The key is the Etna area in the north east. This was very easy to defend, and the Germans managed to do so successfully with reinforcements sent in shortly after the invasion started – and most of all with airborne troops. The Allies would have had to get there very quickly to head this off, across terrain that made movement difficult. It probably was too risky, at a time when the Allies did not want defeats – but it would have been worth exploring this a bit more by looking at the resources available to both sides. Incidentally one of the interesting aspects of Sicily was the use of airborne forces. Theses were an innovation for both Allied powers, who learnt the hard way the difficulties of inserting them directly into enemy territory. There were disasters, especially for the British glider troops, and the shooting down of many American transports by friendly fire by the navy. The Germans showed that they had learned the lesson by using airborne forces for a rapid insertion behind their own lines, mostly landing the troops in airfields. It turned a rout into a hard-fought battle which bought time and cost the Allies many casualties.
Mr Holland’s style is to range from the top command to the front line, not neglecting the experience of civilians caught in the middle. He looks at all participants sympathetically – this is the best way to draw out telling insights. Too many histories just look at one participant (based on the sources most readily accessible to the author); this can be good for drama, but not so much for understanding what was happening and why. Another mistake is historians being too eager to criticise the decisions of participants. My rule of thumb when doing historical analysis (which I developed as a history student) is that unless you understand how you yourself could have taken a decision, especially a bad one, you have not understood why it was taken. That requires a sympathetic approach. It also makes more enjoyable reading – though that may just be down to my personal taste. Mr Holland scores well on both counts. It is fluently written too, another plus in an era when history writing is often badly edited. I found some clichés, such as the frequent use of “to say the least”, a bit annoying, but that’s small stuff.
The second book, which is shorter, and which I read first, is not so well-written: Eagles over Husky by Alexander Fitzgerald-Black. It concentrates on the air campaign, and plays to my increasing interest in the use of air power in support of military campaigns. It too seeks to set the record straight – as a number of authors criticised the Allied air effort in the campaign. The air forces were accused of fighting a private war and not supporting the armies well enough, and then letting the Germans get away at Messina. Mr Fitzgerald-Black has little difficulty in putting the counter-arguments. For my taste he overdoes it; Mr Holland comes to the same conclusions, but with much less argument. Mr Hamilton-Black feels it is necessary to take apart the criticism line by line, showing how it is not based on facts. This is a bit tiring for readers like me, as it just seems to give air time to nonsense.
That’s my only real criticism of this work though. It draws heavily from sources on all sides to give a convincing picture. Like Mr Holland he combines a strong strategic narrative with many vignettes of the action. He makes an interesting case that the Allies forced the Germans to make a similar commitment of resources to this theatre as the eastern front (while Kursk was going on) and the north (where the Allied strategic bombing had got going), but suffered vastly more losses than in either other theatre. The campaign was an important step in the breaking of the Luftwaffe across the whole continent. Perhaps that argument can be challenged – but I’m not the person to do it!
So what is in the Sicilian campaign for wargamers? There is quite a bit of interest at a strategic level – but his can only really be tackled in a board game (which I think has been done). A Rommel-style grand-tactical game may be feasible, most easily for the Axis counterattack against the Americans at Gela, where you even get to use a unit of Tigers. (Incidentally Tigers proved hard to use in the difficult terrain and primitive roads – they mostly broke down through being over-worked). The early battles are pretty unsatisfactory from a gaming point of view though, one or two episodes excepted. The defence was very disorganised; the Italians have little stomach for a fight, and the Germans lacked decent leadership; the main challenge for the Allies (and it was considerable) was logistics. Later the fighting got much tougher; a Rommel game would encounter the sorts of problems with mountain warfare that I described for Longstop Hill in Tunisia.
Tactical gaming is more promising, but a bit limited in a different way. There are a lot of important clashes at company and even platoon level, as it was hard to deploy larger formations in the terrain. The problem for the Allies was crossing open (but rough) terrain which exposed their troops to concealed weapons and indirect fire, while canalising them onto mined roads. Their trump card was plentiful artillery and air power. I don’t think this makes for a great tabletop game. There is much less of the Normandy-style fighting in close terrain. Still you can create a game with orchards, olive groves, farms and villages. It should really involve hills and rocks too. A battle for a hilltop village could be visually very attractive, if much harder to recreate than a bit of bocage country. You get to use German paratroops too.
As for air power the key is finding a game where the player chooses between air superiority, interdiction and close support – out of scope for a tactical game, but a possibility in an expanded Rommel-style game perhaps. Air superiority was settled very quickly though.
I have not settled on rules for my 1943 project. I have just bought a second-hand copy of Chain of Command, and this looks very promising. There are other good systems for one-to-one games (Battlegroup and I ain’t been shot Mum) which I’m a bit less convinced about. Rommel also looks quite exciting – but hard to use out of the box in this theatre. I would like something in between – Rapid Fire! and Fistful of TOWs nominally fill that space, but I’m not that happy with either. The long journey continues.
And now I have finished volume two! I have to say I’m rather disappointed. As with the first volume, the book’s strength is that it tackles the high politics with confidence. But there is a lot less politics in this stage of things. And after a while Mr Hussey’s style starts to grate, on me anyway.
The biggest problem is one that he shares with most other histories of the Napoleonic Wars. It’s too judgemental. This is not done in a sneaky way by hiding facts, but he is too quick to present his conclusions on whether particular actors were good or bad at their job. He is especially harsh on the Prussians. This is how 19th Century histories tended to be written, when the events were still quite fresh, and had some sort of bearing on political and military events. But the distance of time should change the tone, so that the focus, in the words of the great 20th Century historian AJP Taylor, is “what happened and why”. The reader should be given insight. Instead most modern historians, who tend not to be academics, feel the need to join in the ding-dong started by those judgmental 19th Century historians. Mr Hussey has disappeared down this rabbit hole.
The descriptions of the battles (mainly the great day itself) are quite brief. That’s fine: the book was always intended as a strategic narrative. But he still could have presented more clearly what we do know and what we don’t. Too often he simply follows an old narrative that he must know is questionable. For example, when he describes the great cavalry attacks we get a completely conventional British version of events. The cavalry came on; the plucky British gunners fired at them, then escaped to the nearby squares wheeling one of gun’s wheels as they went; the cavalry than retired and the gunners went back to their guns an recommenced firing. This is a very problematic account, that many historians reject (where were the limbers and the ammunition supply train?), and leads neatly into one of the more interesting Waterloo controversies, which is why Wellington seems to have thought that he was let down by his artillery. The suggestion is that many gunners abandoned their pieces never to return, and had to be replaced by Wellington’s reserves of horse artillery. This controversy does not get mentioned. In fact not a hint of this debate is presented. I would also have liked a discussion of the French account of this period of the battle, which talks of their cavalry controlling the ridge for a substantial period, rather than the quick in-and-out of a number of waves, suggested by the British version. Mr Hussey does present a few of the controversies, such as the performance of the Netherlands troops, but the selection seems distinctly random.
On one matter he does choose to stick his head out and break free from the standard British account. He suggests that both commanders failed to realise the significance of the farm of La Haye Sainte, in the centre of the field. He suggests that the French should have pulverised it with artillery and taken it quickly, allowing them to press an infantry attack on the centre. Meanwhile Wellington failed to fortify it, unlike Hougoumont. Leave aside the point that these criticisms are mutually exclusive (if the farm was so easy to demolish, why waste time fortifying it?), and I think this account presents problems. My first thought is that I don’t think I can think of a case where massed field artillery (mainly 6pdrs) ever demolished a brick-built farm – this job was usually left to howitzers, which could set the buildings ablaze. Then again, I’m not sure that a relatively small farm in the open ever proved to be a decisive strongpoint in this era, before that day – maybe that was because they were vulnerable, unlike the much more substantial villages, like Aspern and Essling, that so often dominated battles. There is another issue though – the farm was in a distinct hollow, and sheltered by orchards and gardens. It was not as visible as many assume. From the French side the main feature providing the shelter was the “grand-battery ridge”, a low rise which is where most, including Mr Hussey, assume the French placed their artillery, even if “grand battery” is not an accurate description. At the left end of this feature the farm would have certainly been visible, but only one or two hundred yards from it – and quite vulnerable to rifle fire from the farm and the nearby sandpits. Further to right and the lining up and visibility would have been a problem, as the feature curves back a bit. This seems to sum up the problem of Mr Hussey’s whole approach. If your focus is what happened and why, you would start to look for explanations as to why La Hay Sainte might have been neglected, and why the French made no attempt to concentrate artillery on it. And if you had, you might well have spotted the problem. Instead Mr Hussey wants a bit of ding-dong. Incidentally, I tumbled on the visibility issue when setting out wargames terrain using a contour map.
So given this it is no surprise that Mr Hussey has nothing to say on what I think is one of the big puzzles of the battle – the speed with which the Prussians reached Plancenoit. At 4pm, according to this book (and it is generally accepted) the Prussians were nowhere to be seen. They then started to merge from the Bois de Paris; that is over 2km from Plancenoit. They faced Lobau’s forces of two divisions of cavalry and two of infantry. They had numerical superiority but they had decided to press forward before they had consolidated IV Corps for the attack – with only two brigades (actually sizeable divisions) and some cavalry available. By 6pm, according to Mr Hussey they hadn’t just reached Plancenoit, but they had taken it the first time and then been thrown out. Something about this account does not add up. Unfortunately records on both sides are very sketchy. I think Lobau must have pulled back very quickly without putting up any real fight when the Prussians first emerged.
And of course the book was published before Paul Dawson’s recent research suggesting that French casualties were lower than generally thought (though making sense of that book would be a big project, so Mr Hussey was perhaps fortunate there).
Overall Mr Hussey brings forward little fresh evidence. He has unearthed some neglected insights from some secondary sources from Germany and the Netherlands. His coverage of the more strategic aspects of the campaign – right up to the peace treaty – is welcome, given how many people focus on just four days in June 1815. Here his judgemental style can grate, but it I don’t generally disagree. His account of the climactic day is distinctly weak. Waterloo is one of the most written-about battles in history, and I have still to find a satisfactory account of what happened and why.