Category Archives: Historical analysis

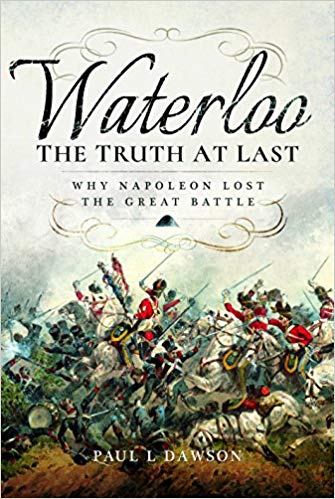
Waterloo – the Truth at Last by Paul Dawson

This is an utter disaster of a book. I was very critical of Paul Dawson’s companion book on Quatre Bras, but I started this one on the main battle of the campaign more hopefully. But that wasn’t to last. I have gained a few new insights, but I would only recommend this book to Waterloo fanatics who don’t have a blood pressure problem.

Mr Dawson’s claim to have found the truth rests on some new data that he has unearthed in 2016 from the French archives, with unit rolls and casualty reports. The best bit of the book is the Introduction where he explains what these are and what he did with them. If he had confined himself to presenting this material along with some basic interpretation, then this would have been fine. Alas he wanted to write a much bigger book in too short a space of time – a task that would have defeated a more talented writer than Mr Dawson.

What to say? Based on another book I have been reading, it is a very left-brained affair. Right-brained skills of common sense and grounding in context are absent, as is any empathy for the reader, or anybody else. There is a lot of formulaic repetition, and the book is padded out with short biographies of the French participants that really don’t tell you very much at all. A few of these would have provided a bit of colour: repetitive lists should be in an appendix if they are to anywhere, rather than interrupting the main text. A lot of his conclusions look very shaky. For example he rightly puzzles about the high casualties suffered by Donzelot’s division in d’Erlon’s corps. He points out that it was not hit by the cavalry charges which destroyed Marcognet’s division – something that I did not know, but for which he provides compelling evidence. He then assumes it must have come from attacks on the farm of La Haye Sainte. Elsewhere he criticises historians for describing the battle for Hougoumont as a version of Rourke’s Drift. But if he’s right about Donzelot, the battle for La Haye Sainte, was a Rourke’s Drift with muzzle-loading muskets and rifles in place of the Martini-Henrys. In fact the issue is mainly to do with large numbers of men posted as missing – and I suspect this has something to do with being caught by the Prussians at the end of the battle while the French army was disintegrating. That’s just one example of how he makes breathtaking leaps to conclusions, while criticising others for wandering beyond the evidence.

Alas weak analysis and loads of extraneous data are far from the only problems. There appears not to have been an editor. This is not something publishers do these days, so authors have to rely on their own self-criticism and make use of friends. But Mr Dawson doesn’t seem to be a good self critic, and probably was in too much of a hurry to allow friends to do much editing. The book is disorganised (the chapter heads are random), riddled with errors and in places incoherent. There are many quotes, which Mr Dawson mostly leaves uninterpreted (he said something somewhere about letting them speak for themselves). Often these are in the wrong places, sometimes they appear more than once, and frequently  it isn’t clear how he draws the conclusions from them he does. And much of the analysis is contradictory. For example he bangs on quite a bit about how Lobau held off the Prussians for hours near Frischermont, before later concluding that he must have retreated rather rapidly, given his low casualties. There are no maps. Maps are more than just a decoration. They make things much clearer for a reader and force authors to face up to contradictions in the evidence. This failure is evident in his extremely confusing account of the Prussian advance to Plancenoit.  Contrast this with Mark Adkins’s account (which Mr Dawson likes to pick holes in), where maps are central to the narrative, and he presents a clear account of the same episode.  Of course, trying to put together a clear account of this complex battle with its many contradictory sources, with maps, and disciplined editing takes time – and this work was published not much more than a year after its central research. So he should have attempted something much less ambitious.

So what were the useful bits? The new data clearly has value. But it is problematic. The casualty data was compiled in chaotic conditions after large numbers of men had deserted, and others and had been rounded up as prisoners. There are large numbers of missing. So it is very hard to separate the battle from the aftermath. Mr Dawson does try to take this on, but not very successfully. The most useful thing I learned was about d’Erlon’s first attack. I have already mentioned that he shows that Donzelot’s division was not broken by cavalry at this time, which almost every account I have read has suggested. The data also help clarify what happened to the other divisions. This is very helpful. When devising wargames rules, I keep coming back to this episode to see how well any new system copes. That it now appears that the three regiments of the Union Brigade concentrated on just Marcognet’s division (and then moved on to one of Durutte’s brigades) makes much more sense of things. Another valuable insight comes at the end of the book when he looks at the data on the level of experience of the French army. He convincingly shows that it was not composed largely of veterans – but was comparable in experience to the Prussian, Netherlands and Hanoverian contingents (and unlike most of the British, which were in true veteran formations). The Guard seems to have been a shadow of its former self. This is contrary to what many historians have claimed, but does help make sense of both Waterloo and Quatre Bras.  I am also a bit clearer on what happened at Hougoumont, where the involvement of the different French regiments was very variable; not all of them seem to have been fully committed.

That’s about it. I am left with a number of mysteries. First and foremost is the advance of the Prussians. I really can’t make sense of the sequence of events – though Mark Adkins’s version looks entirely plausible. I want to do more work on this, and maybe I will find some nuggets if I trawl back through Mr Dawson’s book. But the absence of evidence from the French side must itself be quite revealing. I haven’t been able to find much from the Prussian side either – and Mr Dawson doesn’t seem to have bothered much with the Prussians, in spite of lecturing us on how important this episode was to the whole battle. This runs alongside the other big mystery of the campaign, which is why the Prussians did so badly at Ligny. One theory, that the French had tougher, more experienced troops is now looking shaky. Back to Waterloo  another mystery is why Bachelu’s attack was beaten back so easily. Mr Dawson makes a big deal on how this episode is overlooked by historians, but doesn’t throw light on how the whole division appears to have been beaten back by four battalions of the KGL in square formation. One theory is that they had been messed up by the fighting in Quatre Bras – but in his other book Mr Dawson suggests that they were not as heavily engaged as many thought. Perhaps they were low on ammunition?

Waterloo is the gift that keeps on giving. You would have thought that after all this time we would be quite clear on what happened. Alas no. This book offers some new evidence, but isn’t worth over 500 pages.

Ligny 1815. The failure of English language historians

I like to focus the development of my Napoleonic rules around specific battles. Waterloo and Quatre Bras are regulars. My most recent finished rules were developed to refight Vitoria. As my latest rules stagger towards the playtest phase, I am focusing on the battle of Ligny on 16 June 1815.

This battle was fought on the same day as Quatre Bras as Napoleon attacked three out of the four corps of Blücher’s Prussian army. In spite of being outnumbered for most of the day, he scored a remarkable but costly victory – which might have been enough to win him the campaign, had not the Prussians withdrawn towards their British-led allies, instead of on their line of communication. In spite of its importance, and a scale that matches Waterloo, this last victory of Napoleon is rather neglected by historians. But it is an interesting battle nevertheless. At the heart of it is a mystery: how did the French perform so well against a numerically superior enemy?

I have four English language books focusing substantially on the battle. There is Andrew Uffindel’s The Eagle’s Last Triumph, my edition published in 1994, though I think there is a later version out there. Then there is Peter Hofschröer’s 1815, the Waterloo Campaign, the first in a two part account of the Waterloo campaign published 1998. Next is John Franklin’s Osprey: Waterloo 1815 volume 2, published 2015. Lastly, relatively fresh off the press, is Andrew Field’s Grouchy’s Waterloo, published 2017. Alas all these accounts are deeply flawed. There is a further important resource: Pierre de Wit’s website, The Waterloo Campaign.

I am at the beginning of my study of this battle, and I have focused mainly on is opening stages. But it is enough to  confirm the usual flaws in Napoleonic military history in the English language. Actually these flaws are almost certainly not confined to the Napoleonic era, and not tot he English language either; it just what I know. There are three problems: “lamppost syndrome”, a lack of forensic analysis, and poor maps.

By lamppost syndrome, I am referring to the story of the drunk found at night scrabbling around under a street lamp. “What are you doing?” he is asked; “Looking for my keys,” he replies. “Did you drop them there?”; “No, but I can see here”. Historical writing concentrates too much on where the evidence is, and especially if there are first hand accounts. And yet important things happen in places where these accounts do not exist, and you can’t understand what is going on until you try to work out what happened where the evidence is thin. The second problem I have called lack of forensic analysis. The word “forensic” really means associated with criminal justice, but it has now assumed a wider meaning that I am using here. And that is a careful piecing together of the witness evidence with other evidence, and an understanding of what is physically feasible. In the history of this era this  evidence includes the lie of the land, casualty figures, and an understanding of the technology and human capabilities. On top of this must come the persistent examination of motive: why did somebody do that? All this is familiar enough to viewers of television crime dramas or readers of detective fiction. Given the popularity of these genres, it is very surprising that so few modern military historians want to turn detective. Not all writers are as bad as each other. For an example of how it should be, there is  Rory Muir’s masterpiece on the battle of Salamanca, though even this lacks a decent map, a problem I will come to.

But what we usually get is mistakes by one author being repeated by the next uncritically, and very little in way of genuinely new perspectives. There is one interesting example in the early stages of Ligny: the defence of the village of St Armand, where the battle started. The normal story is that the village was defended by three battalions of Jagow’s brigade, and the French attack encountered bitter resistance. In fact a careful study of the evidence (as Mr de Wit makes clear) shows conclusively that these three battalions were in the nearby village of St Armand la Haye (or Longpré), which was more defensible and closer to the Prussian positions. And all the other Prussian infantry is accounted for. In fact the French faced artillery fire from the hill behind the village, and few skirmishers, and that was all. They quickly took the village, but found it impossible to move beyond it. The Prussians (Steinmetz’s brigade) then counterattacked.

So how do our four accounts handle the episode? Mr Uffindel gives us a lot of drama (“corpses littered the streets”) and sticks to the story that they had to fight hard to push out the unidentified Prussians. Overall his account is extremely thin on this stage of the battle. Mr Hofshröer, a German speaker, makes much more use of Prussian sources. He initially says that Jagow’s three battalions were in St Armand, he then goes on the say that the French found the village largely unoccupied, and then gives a very muddled account, including quotations from officers of those three battalions. At various points he suggests the fighting was in St Armand, St Armand la Haye, and then the neighbouring St Armand le Hameau (or Beurrre). Mr Hofshröer is a controversial author and in my view completely unable to tackle his subject forensically. His value is in his extensive quotation of German language sources. Mr Franklin is a more careful author, but tends to focus on French sources. He suggests that the French had to fight hard to capture the village, with the first brigade of Lefol’s division having to call in the second. Again there is extraneous detail (“the front files were decimated”) . Finally Mr Field: he is explicitly majoring on the French sources, and he likes to quote at length; there are two accounts of this episode: one from General Lefol, and one from Captain Gerbet of the 37 Ligne. This reveals the source of  a lot of the colourful detail of Messrs Uffindel and Franklin. After these extensive quotes Mr Field says that the village (though a strong position, he says) was lightly held and the French did not face determined resistance. But he makes no attempt to reconcile this with Gerbet’s account of a rather fierce struggle. I suspect it conflates episodes from later in the battle. Incidentally the statement that St Armand was a strong position is not my view, and that is one reason why the Prussians decided not to hold it strongly. As with other works, Mr Field is unwilling to pull apart his witness statements, but at least he is more transparent than other authors, and he is careful with his facts.

And the maps? Wargamers love a good map, from which they can create a decent table. 19th Century historians did too, but they generally compiled them without properly surveying the ground, and with only a schematic representation of relief. A simple matter, surely, to take modern contour maps, and use these as a basis for updated maps? Alas, far too often not. For Vitoria I had to do this for myself, and the two maps I did are now nearly top of the Google ratings for maps of the battle. All the offerings on Ligny are flawed.

Mr Uffindel doesn’t try. He illustrates his work with schematic diagrams that do not attempt to give a feel for the terrain. Mr Hofshroer gives us two detailed maps. One gives us a representation of relief, but taken from Ferraris map of the 1760s, and with no detail of the extent of the villages, and with a later highway missing; this is not actually all that helpful: what you need is a contour map. There is then a reproduction of a Prussian military map, with lots of detail, including the initial troop dispositions. But no contours. The Prussian dispositions look accurate to the battalion – but it shows Jagow’s three battalions in St Armand and not la Haye. This may be the source of the error in other accounts; perhaps these battalions went there first but were moved to somewhere less exposed. Hofshröer does have a proper modern map showing both Quatre Bras and Ligny, which is decent enough but lacks detail for the individual battles, though it illustrates what Napoleon intended with d’Erlon’s corps very well. Franklin has only Osprey’s 3-D maps, which promise more than they deliver. You can’t see the folds of the ground. He has Habert’s division of Vandamme’s corps in a different place to everybody else, interestingly enough. This is clearly wrong in my view. It is shown on the right of the corps, in a position that looks exposed to artillery fire; it came into action on the left. Of course it may have started out on the right.

And what of Mr de Wit? This is a very valuable resource, as he squeezes as much as he can from from the evidence. It is pretty heavy going, though. He can be quite forensic, but he suffers severely from lamppost syndrome. This is less a defect for Ligny, so far, than it is for the Prussian advance at Waterloo, which has big gaps. There are no maps. He does include some very nice surveys of the terrain, mentioning anything from the era that has survived, and including some old photographs of various features.

And so, like Vitoria, I am going to have to piece together my own account, and map. This will take a while, but it is a part of the hobby I love.

1871 – a lesson in the art of wargames design

As winter draws on and daylight vanishes, my pursuit of the 1943 project has come to a halt. The next step involves a lot of painting, and daylight is a big help. Also I need 2-3 hour sessions, and these have been in shorter supply over the last couple of months. Instead I have returned to my original project: writing rules for army-level Napoleonic games. After so many false starts, I have had a bit of a breakthrough on this, and I am closing in on a prototype version that I can try out solo on the tabletop. It has been my main activity of the quiet Christmas period. Alas this is fast drawing to a close, and progress may halt again.

I have allowed myself one diversion, however. I bought a copy of Bruce Weigle’s latest rules: 1871. Bruce’s rules cover a later period than the one that I am interested in, but they have intrigued me. I have bought them all, apart from the original 1870 rules (apart from 1871, these are 1866 and 1859). These are fascinating wars, which I would take to the table if I had time. The evolution from Napoleonic times is interesting, and the struggle to adapt tactics to changes in technology is of real interest. I have not been very interested in the contemporaneous American Civil War, but these battles between the professional armies of old opponents in the Napoleonic wars seems to offer something that conflict doesn’t. One of the many aspects that makes it so interesting is that the armies were deeply interested in what actually happened so that they could develop tactics. That has left historians with a lot of detailed accounts of what happened; and the wars were short, which meant that fewer participants were killed before they could describe what they had seen (though the battles were often very bloody). No doubt it helps that standards of literacy had advanced too.

Two things drew me to Bruce’s rules. First was the simply wonderful presentation of his games, with huge trouble taken over terrain boards, for his 6mm figures. These look, much, much better than the fashion for 28mm miniatures allows; the pictures of these in wargames magazines leave me cold, in a way that I find pictures of bruce’s games inspiring. Even though I struggle on with my 15mm figures (20mm for WW2), there are many lessons to be had from his terrain boards. The second interesting thing is the rules themselves. They have been carefully calibrated against the course of historical battles, move by move. At the same time Bruce tries to make them as playable as possible. This is a struggle that I deeply appreciate, when so many rules focus on playability and half-baked ideas of historical authenticity. There is much to learn from this. I have played a few games of 1870 and 1866 with my friend George, who built up 6mm armies for the games, which has given me a better understanding of the system.

These new rules are particularly interesting. Not so much for the period covered – I’m less interested in the Franco-Prussian war than in the other conflicts – but for how the rules have been developed. Bruce’s mission is radical simplification. He says that they are much faster to play, while leading to similar results. That looks evident. The quick reference sheets are down to two sides from four. This means chucking a lot of detail and nuance overboard – things that historians may say were important, but which turn out not be. For instance: there is little distinction between different types of artillery. The Germans get a longer maximum range and a dice advantage. The French mitrailleuse is simply treated as an artillery piece with a shorter maximum range. This is ruthless, given how much ink has been spilt on this early machine gun. There is much to learn from how Bruce has achieved his stripping down. Incidentally, I see a similar ruthlessness in Chris Pringle’s Bloody Big Battles (BBB), though the choices are different. It covers the same period, but it is a very different game. My aim is to achieve something between the two for the Napoleonic era.

There was an unexpected bonus to 1871. At the back there is familiar section on how Bruce builds his boards (there are delicious examples in the book – including a table for Sedan with its city defences). He says little about these exhibition boards in this publication, but he does describe a much quicker way of creating quite respectable “test” boards. There may be some answers here for the creation of my tabletops, though these will never be in Bruce’s league. He uses a cloth pinned over polystyrene formers, with tape roads and acetate rivers pinned on top.

What of the rules themselves? They are what I describe as Corps-level rules. A single player will struggle to control more than one large army corps, though multi corps games feature in the scenarios, these will work best with more than one player per side. The ground scale is 1 inch to 100m (or 4m per mm). The basic playing piece is a stand with 30mm frontage which is nominally a battalion, organised in regiments of three. In common with earlier rules the 1871 rules give a “half-scale” and “quarter scale” variants. Both use the same distance scale, but the main units are battalions of two or four bases respectively. More interesting perhaps is the “two-thirds” variant, in which the main unit is a brigade of four bases, losing the correspondence of playing pieces with individual battalions. This is to allow bigger battles, like Sedan. There are a couple of interesting issues raised by this. First is whether the number of playing pieces should be based on army organisation (i.e. battalions), or on the numbers of men. Bruce has gone heavily for the former, as has David Ensteness his Napoleonic system Et sans Résultat. The argument is that the organisation structure drove the way battles were fought, and were written about. I’m not persuaded, and I would prefer to see the number of bases based on the number of men, setting the ratio to approximate to a battalion. Still, Bruce has made his system work, albeit he allows for a difference in average battalion size between the French and Prussian armies. How this works amongst the depleted formations of the later battles in 1871 I would be interested to know. A second issue is how well a rules system translates between different levels – how well does 1871 work at army and division levels? I suspect this is harder the more streamlined you make the rules, because different aspects are important at different levels. My view (following the world’s leading games designer, Sam Mustafa) is that different levels need different designs.

A further point about 1871 is its simultaneous move structure. When I started wargaming in the 1970s this was very fashionable. But since then (as indeed before then too), games have usually been based on alternate moves. I don’t want to develop the arguments here: but Bruce’s simultaneous system helps give the rules a simulation flavour, which is a nice contrast to the fashion the very “gamey” fashion of modern rules, such as Sam Mustafa’s. But it comes at a cost. It does require a certain standard of gentlemanliness  between the players (which, to be fair, I haven’t found lacking in my games) – and quite a lot of if-you-do-that-I-will-do this discussion. In fact quite a lot depends on who gets their move in first on the table. While playing I it did yearn for a bit more structure. But that’s just a quibble. I haven’t played them, but these new rules look a real advance on the previous versions, and they are better written too (the earlier ones left us with quite few “what does he mean?” puzzles and gaps), though the proof of that pudding is in the eating.

Could 1871 be used for Napoleonic battles? I’m tempted to try, especially when and if Bruce publishes his adaptation of the 1859 system to the new approach – the Sardinian army is pretty close to the Napoleonic smoothbore standard. Still, reading the book (which has welcome levels of explanation and historical illustration, I am very struck by how different the Franco-Prussian War is from was Napoleonic predecessor. At the moment I think David Ensteness’s system is the best for Napoleonic corps level games (to be clear, they are meant for army games, but with one player per corps). The 1871 system offers the potential for something more streamlined.

It is worth contrasting these rules with the other I have been studying for this period, if only for lessons in game design, which is BBB. BBB is an uncompromising Army-level game, though it is based on the Fire and Fury system for ACW, which is a corps-level game. By comparison, this feels much more gamey, with a less precise correspondence to historical reality. In particular the move distances look a bit low if the average turn is supposed to represent one hour. I have used the system in a full scale game only once, for Waterloo, and it was impossible for the Prussian advance on Plancenoit to be accomplished in the historical time. But its advocates use it to refight historical battles, and claim that it works well enough in general; I can’t dispute that.

If I ever do start wargaming this period (I fancy building an Austrian army), I will look no further than the 1871 system for gaming, with BBB as a backup.


Can WWI be a wargame?

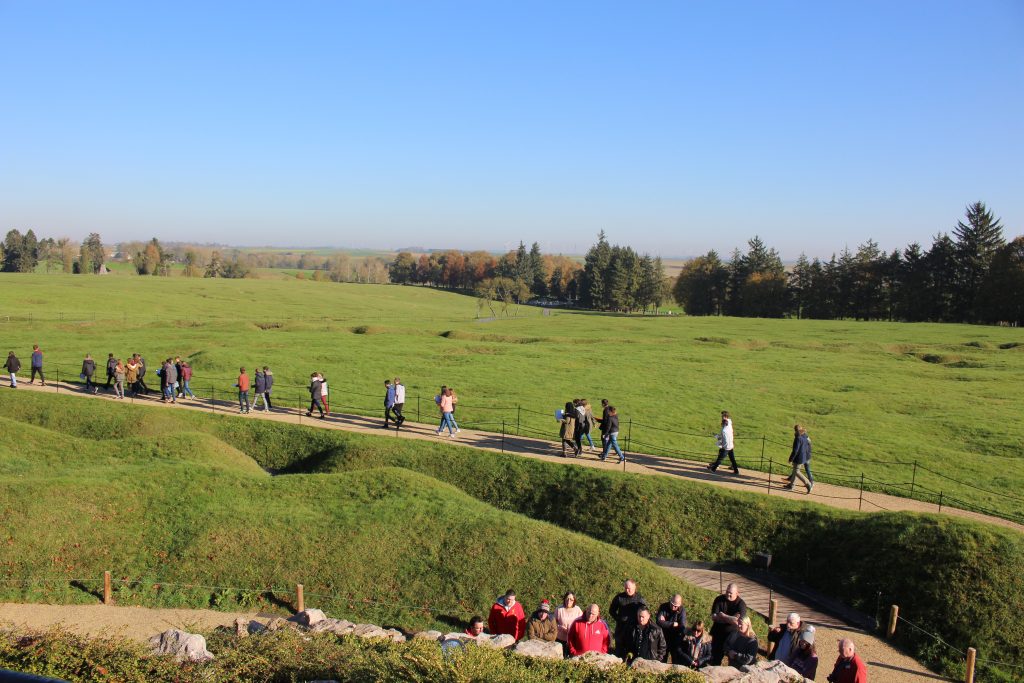
Newfoundland Park, Beaumont-Hamel, Somme valley, France

On 1st July 1916, the Newfoundland Regiment, part of the second wave of assault, crossed from the second line of trenches, in the foreground of the picture,  to the first line, which you can see in the middle distance, over the top because the communication trenches were clogged with wounded from the first wave attack. They did so under fire from the German positions, in front of the main line of trees, and suffered heavy casualties. They then went over the the top again to attack the German positions. They only got as far the small group of trees you can see between the positions. They suffered 85% casualties from their 780 men, including all the officers: the highest ratio of a dreadful day.

Last week I went with my wife and a friend on a battlefield tour of the Western Front to WW1, conducted by Tim Wright (his company is Lost Generation – and I can heartily recommend, including the bed and breakfast managed by Tim’s wife Gill). The scale of the loss of life is completely breathtaking, and made so visible in the graveyards and memorials. Moving as that was, I am also a wargamer with an interest in military history. The experience made me reflect on the nature of the war, and how it compares with what came before and after. And always the question: how do you wargame it? And as this is  wargaming blog, it is these reflections that I am going to concentrate on in this post.

WW1 (1914-1918) forms one of the two main links between the two periods that I have been studying in particular: the Napoleonic Wars (1793-1815) and WW2 (1939-1945). The other link are the wars fought in Europe and America in the 1860s or thereabouts – which I am also taking a growing interest in. What struck me on this tour was the similarity between WW1 and the Napoleonic era in one special respect: the compactness of the battlefields. The British Somme theatre was a matter of a dozen kilometres; this compares with the larger Napoleonic battlefields, and the density of men to frontage occupied wasn’t much less. The gap between the two sides at the art of the battle was if anything even closer than in Napoleon’s time, as the picture shows. WW1 battlefields were deeper though – as artillery ranges were so much longer, and the artillery lines were a few kilometres back from the front. This is in contrast to WW2, where the densities were quite low, and a large part of the task of field commanders was finding out where the enemy was. Reconnaissance forces played a critical role, and patrolling became an important task for most troops, instead of being reserved for specialist forces like light cavalry. In WW1 troops had to stay under cover for as much time as possible, or suffer devastating casualties from artillery – but you would hardly describe the battlefields as “empty” in the way of WW2 ones.

A second observation from the tour was how terrain dominated the fighting. The ground around the Somme could not truly be described as hilly, but it definitely rolls. In England the closest comparison is probably Salisbury Plain (where my father lives, and which I have just returned from) – which is where the British forces trained. There is quite significant relief, fairly frequent villages and farms and lots of woods; the field boundaries are minimal (unlike the Wiltshire countryside off the Plain); there are hollow roads and ravines that can provide important cover. One point of interest is how well the Germans selected their ground; that takes a good eye, since the differences between the strong and not so strong positions are often quite subtle. As they were retreating from the Marne, they did have the luxury of choosing the ground – but our guide Tim wonders whether they had developed ideas on this before the campaign was even opened – a Plan B. Moving north from the Albert region, the northern Somme valley, where the British fought, to Arras and Ypres, the main other regions of the fighting for the Commonwealth troops, the ground flattens out considerably – it becomes more like East Anglia or Lincolnshire in British terms. But there is still relief, and the same principles apply. The hardest fighting was over positions which offered better visibility, such as Vimy Ridge near Arras, and Passchendaele near Ypres. This is something WW1 shares with earlier and later periods. There is an obvious reason for this in WW1 and WW2 – the provision of positions for observe and direct artillery fire. But it is more than that. It matters for shorter range weapons too, like machine guns – or smoothbore artillery come to that. And there is the psychological effect of being able to  seem more or less; this was very apparent from our walking of the fields. We might add that soldiers before the era of motorised transport (and often after) tended to be heavily-laden. Walking up slopes takes its physical toll (a fact mentioned by the French at Bussaco, for example – the slope was steep but distance quite short). Wargamers struggle to do the effects of relief justice, though. It is often very hard to represent accurately on a tabletop, never mind reflecting it in the rules. The ground around Ypres shows that even subtle slopes can matter a lot.

My third big observation from our tour is the issue of command and control. WW1 is an important moment of transition. Before then men and junior officers were supposed to follow orders to the letter regardless of how stupid they looked. Relatively few men were allowed, and mentally equipped, to take big command decisions. In the 18th Century, when armies coordinated through forming great battle lines, this mattered little. In the Napoleonic era there became a  pressing need to articulate armies with corps and divisional levels of command, and also to develop greater tactical initiative in light troops. But by the start of WW1 things seem to have moved on little. At the Somme this took the form of detailed plans of attack, which were supposed to be followed regardless of local glitches (like not having knocked out the enemy machine gun posts). The men were not briefed at all; which was a problem given the rate at which officers became casualties. The Somme showed how disastrous this approach was, and new methods were developed – and not just by the British; the Germans had their own problems, even though their thinking was already ahead. Clearly there were similar issues in the French army too, from some of the fictional dramas I have seen – though I know a lot less about them. It became crucial that battalion, company and even platoon commanders could take decisions based on what the enemy actually was and what he was doing.

And so what does all this all mean for wargaming? The main lesson that I took away was not even to try. WW2 is hard enough, but at least you can create interesting skirmish games which are not so unrepresentative of the fighting, since the troops were so dispersed. But it is very hard to see how you get a decent game out WW1 battles – at least on the Western Front in 1915-1917. The openness of warfare on other fronts and at the beginning or the end of the war may offer fewer problems, and offer a clearer idea of what the point of a game is. One of the issues with the type of fighting in these mid-war battles is working out who won; people still argue over it. So much of it was about the relative expenditure of resources. That is not a promising basis for a game.

I have already taken on too much with WW2; I will not be tempted into WW1, even though the era has its own very special fascination.

Barossa and Bussaco: unsatisfactory histories

Back to the Napoleonic Wars. I have been doing a little steady reading of accounts of the Peninsular War. English-language histories of battles between the British and French are very stereotyped – one of my ambitions is to develop an alternative narrative of the infantry tactics in particular. My hope is that my reading will shed some light on. This time there was less light than I hoped.

The first book was The Battle of Barossa 1811 by John Grehan and Martin Mace, published in 2012 by Pen & Sword. This battle near Cadiz was dramatic and historically important – though often overlooked by historians, because it was away from Wellington’s main army. Though the book centres on the battle, it takes on the whole siege of Cadiz – which is interesting enough. But the book is a big disappointment. Though quite well written it is little more than a rehash of British accounts of the affair, with no attempt to extend the usual sources; all the (limited) primary sources are British, as were the overwhelming majority of secondary sources. If recent Napoleonic history teaches us anything, it is that new insights are likely to come from overlooked foreign sources. Since this particular campaign is neglected, that would be particularly the case. So far as the main historical narrative is concerned, the main feature is the tense relations between the British and the Spanish, and between various Spanish factions. This very nearly led to disaster in the battle itself, where the British contingent ran into a superior force of French, with the Spanish failing to come to their aid – they nevertheless secured a remarkable victory. Alas this book throws no new light on proceedings, and contents itself with condemning the Spanish inconstancy. 200 years on we really should do better than that. And as for the battle itself, the narrative is the familiar one. There are no new insights, and no attempt to pull the usual accounts apart and put them back together again. Tactically it is an interesting battle, but I’m going to have to do that pulling apart myself if I want to get to the bottom of what happened and why.

My reading on Bussaco, the main battle during Masséna’s invasion of Portugal in 1810 is a bit different. This is an important battle, and much has been written about it. It is usually characterised as a standard French column versus British line encounter – but I wanted to understand how much that was based on actual evidence, and how much people were filling in the blanks with how they think it must have happened. It started when I picked up a translation of Colonel Pelet’s account of the campaign. Pelet was a senior aide to Masséna. I was drawn to this book because it contained a very interesting account of Ney’s attack, describing an intense skirmish duel between the French troops and the Light Division. This account is widely quoted in forums and such. It is an interesting and colourful account of the campaign from the French perspective. It was translated by the American academic Donald Horward. This drew me to Horward’s account of the battle: The Battle of Bussaco, published in 1965; I managed to find a second-hand copy, formerly belonging to the late Paddy Griffiths.

Horward’s book is quite slim but interesting. This is proper history, unlike so much of the amateur stuff published these days (including that book on Barossa). The sources have been properly compared, and the disagreements and controversies tackled head-on. It is quite interesting because it is written mainly from the French perspective; and in fact there seem to be a lot of French sources. His account of the battle itself has a very different feel to the normal ones based mainly on British sources. I only wish that more history of this quality was written today. For comparison I read the relevant chapter of David Buttery’s 2007 work Wellington against Massena, which I had bought but not read, and René Chartrand’s Campaign Osprey, which I had read before.

Chartrand and Buttery do not see the need to pick apart the standard British account, nor refer to controversies – but prefer to dramatise things a bit. For the former, that rather goes with the Osprey format, which allows little space for analysis. Buttery can’t resist filling in the blanks a bit – though Horward does that a bit too. Horward always describes the British artillery as raking the French with “grape and canister”; in the same cases Buttery says they fired shot. (This was also the first battle in which shrapnel was used, though Wellington was unimpressed). In one passage Buttery describes the British using rapid fire tactics – even though this was against British doctrine at the time. And I’m afraid that reveals a major limitation in all three works. They aren’t actually interested in the French and British tactics, and so they don’t press the evidence very hard.

My working hypothesis on Bussaco was that French tried to use heavy skirmish tactics to beat the enemy, but were thwarted by the superior skirmishing ability of the Light Division. The evidence doesn’t really hold up for this. There was indeed a lot of heavy skirmishing (in contrast to Vimiero and Talavera), but the most important encounters were between denser bodies of men. And the French suffered a clear disadvantage from exposed flanks, even though they had superior numbers. This fits the column and line thesis – but that doesn’t quite work either. The terrain was very broken, by steep slopes, crags and gorse. It was very difficult for either side to hold formation. Descriptions come through as disorderly melees. The tiredness of the French advancing up steep slopes with packs may have been a factor, as well the momentum of the fierce Anglo-Portuguese counterattacks. And the Allies did not have it all their own way. Foy was able brush aside the Portuguese 8th and 9th Regiments (probably only one battalion of the 9th); Buttery and Chartrand dismiss this as being down to overwhelming strength but that looks far too glib in view of how the French struggled to use numerical superiority elsewhere (Foy outnumbered the Portuguese by about 2:1).

Foy’s attack, effectively the third and last wave of Reynier’s corps was actually remarkably successful, capturing the plateau at the top of the ridge. It looks to me that at this point Reynier had Picton beaten. It required well-time reinforcements from neighbouring divisions (especially Leith) to restore the situation. If the French had reinforcements at the ready, perhaps the outcome would have been different. But Junot’s corps was in completely the wrong place. And that leads me to an observation relevant to the grand tactical level, and more relevant to my rules project. The Anglo-Portuguese were able to beat off the French easily enough, but at the cost of considerable disorganisation. If there were French reserves ready to exploit this disorganisation, then they had an opportunity. That’s how Foy’s brigade captured the summit at Bussaco – though by then the French were themselves disorganised.

I have less to say on Ney’s attack. It strikes me that the terrain here was much more complex, and that I need to look at it again to get any new insights.

Borodino by Alexander Mikaberidze

This book (published in 2007) has become the definitive book on the great battle of 1812, as the Russians downloadsought to stop Napoleon as he approached Moscow. It is not quite the biggest or bloodiest battle of the era – but it wasn’t until the First World War that as many combatants were killed in a single day.  It lies almost at the point when Napoleon’s military career turned from triumph to disaster. Both sides claimed victory. Tactically the French had the better of the day – with the Russians abandoning the field overnight. But the Russian army was unbroken, and soon enough turned the tables on the French.

One of the many recent developments in the writing of Napoleonic history has been the availability of Russian sources. The Russians kept rather extensive records, perhaps contrary to western European prejudices. However in the Soviet era history was regarded as a purely political exercise. Access was restricted only to historians who would offer a politically correct version of events – which meant glorifying the Russian achievement rather than trying understand what happened and why. Mr Mikaberidze examines the sources afresh, as well as giving interesting details on the historiography of the battle.

The book mainly focuses on the events of the the three days: the battle of Shevardino on 5 September, the main battle on 7 September, and the moves on the day in between. Events leading up to the battle, and after it, are covered only briefly – though he does review the criticism of Barclay and his replacement by Kutusov in some depth. The point of view is distinctly Russian, which compensates for the distinctly French-sided view of earlier histories in English – reflecting the availability of sources, as well as the language skills of British and American historians. Which is not to say that the French-Allied side of things is neglected in this book.

What the book does best is to analyse each episode. He describes the various accounts, and then evaluates which he thinks is closer to the truth. This is good, solid history. He doesn’t follow the fashion of adding colourful novel-like descriptions of events, filling in the missing bits from his imagination. Or the alternative fashion of relying too heavily and uncritically on eye-witness accounts to carry the narrative. He does quote eye-witnesses extensively – and this gives a lot of colour – but he evaluates them too. Controversies are dealt with in some depth. By the way various myths are dealt with – for example that the early death of Russian artillery commander Kutaisov meant that many Russian reserve batteries were never deployed. This is just untrue.

If the book has a failing, it is that the analysis does not go up a level. I find two issues of particular of interest. The first was Napoleon’s conduct. Mr Mikaberidze pretty much accepts the standard view that had Napoleon been more vigorous he could have achieved a much more decisive result, missing more than one opportunity – most famously not committing the Guard, but also exploiting some of his earlier success more decisively. Interestingly this view is not shared by the great military philosopher Clausewitz – who was actually at the battle, working for the Russians as a staff officer. This is quite interesting. What would have been the practical outcome of a “more decisive” result? It would not have hastened the capture of Moscow, which Napoleon thought would end the war. Neither, on the way things actually worked out, would it have made much difference to the catastrophe that enveloped the French later. It might have taken a little longer; the French might have got a few more men out. Would these extra achievements have warranted extra risk or damage to the Allied army? A discussion on this would have been illuminating – and may have gone some way to explaining Napoleon’s apparent apathy. He surely was physically ill – but perhaps he saw no reason to rise above that. The reason that the French Empire’s glory days were behind it was less perhaps that his generalship deteriorated, and more that his opponents made fewer mistakes.

A second question I find of interest, given my interest in simulation – though it’s not one that I have seen discussed properly anywhere – is the discrepancy in losses between the two sides. The French-Allied losses across the two days of battle were in the region of 35,000 men from an army of over 130,000. The Russians had a similar number of men, or perhaps more, although it included 30,000 or so Opolchenye – militia of much diminished military value, that was not heavily engaged – but their losses were significantly higher – perhaps as many as 45,000. Given that they adopted a defensive posture, this raises the question of why they suffered higher losses. A similar discrepancy does not emerge in the great battles on the Marchfeld against the Austrians in 1809. The Russian tendency to use dense formations in the face of artillery fire is often mentioned – but the French clearly attacked in dense formations as well. To me it speaks of the highly effective use of artillery by the French army in support of its attacks – though it is still a bit of a mystery. It also is striking that no major formation on either side broke. This may reflect the nature of the fighting, as much as the motivation of the troops.

These are quibbles though. There is a lot of material in the book that will allow simulators to gauge the realism of their models. This book inspires me to take this battle on as a future project. Even if hat will not be for some time to come!

A Bold and Ambitious Exercise – the British in the low countries in 1813-1814

This book covers a neglected episode in the Napoleonic wars: the British Bergen-op-Zoomexpedition to the low countries (on the modern Dutch-Belgian border), which had its climax in a disastrous attack on the fortified town of Bergen-op-Zoom. It is written by Andrew Bamford, and it is a thoroughly competent work. It forms an intriguing backdrop to the Waterloo campaign rather over a year later.

There isn’t a huge amount of history to tell. The book briefly covers an earlier episode when British troops cooperated with Wallmoden’s force, including the battle of Gohdre. There were three actions of significance. Two attacks on the Antwerp suburb of Merxem, and the attack on Bergen-op-Zoom. Mainly the book is about the dealings with the nascent government of the Netherlands under the Prince of Orange, and various Prussian, Russian and Saxon allies, as well as Bernadotte, as Crown Prince of Sweden. This is an interesting vignette on how allies behave to each other, weigh strategic priorities and behave with incomplete information. The way in which the British scraped together the forces required for the mission, in spite of Wellington’s still raging campaign in Spain and the south of France, as well the USA’s attack on Canada, is also interesting. The force was an odd mix of veterans and raw troops. Its leaders, from Peninsular veteran Graham down, where generally quite capable.

The writing of military history in this era is no longer a mainstream pursuit, and is largely left to enthusiasts and amateurs, with the odd professional whose main expertise is elsewhere. So the quality tends to be very uneven. Mr Bamford handles his task confidently, being able to tackle grand politics down to small-scale tactics with ease. Some of his arguments about who was to blame for what, building on old controversies, is a bit laboured, but overall the book is very well written. Thankfully he resists the temptation to fill in colour (“the sun glinted on the frosted trees, etc. ..” Yuk!). In common with so much British writing, the sources are almost entirely British; for all that it does not feel biased.

I have only a few quibbles with the book. The maps aren’t very good. A strategic map would have been useful; the general map of the campaign area is very bare. The plans of Bergen-op-Zoom are not as helpful as they should be (I can’t tell the difference between ditch or rampart; there are no streets) – though the ones of Merxem are good. On the great battle itself I was left with a puzzle. The most important question to my mind was whether if the largest incursion, made by General Cooke with the Guards, amongst others, had been more active, could the town have been taken? This is mentioned as question, and Cooke’s passivity is criticised – but an analysis of his options and how plausible each was would have been useful. Could he have forced his way through to the Antwerp Gate and secured it?

What else did I get from this book? I am struck with how well even this scratch British force performed, which says a lot for the traditions of the British army. Command broke down in the battle of Bergen-op-Zoom (generals behaving like subalterns was one contemporary criticism), but troops and officers behaved bravely and fought well. I would like to understand a bit more about how this sort of success was achieved.

Another intriguing point is how the political connectedness of the Guards casts a shadow on the writing of history. The conduct of the two senior Guards men, Cooke and Lord Proby, was questionable to say the least. But all the official criticism was heaped on others (especially the dead General Skerett) – and history has tended to follow their lead. And the whole episode is neglected, lest serious questions are posed. Some say that too much glory is given to the Guards at Waterloo (largely the same units – the second battalions) – which seems to reflect the same phenomenon, if with rather less justice. Also that Guards generals (the convention was that Guards could not be led by mere line officers) were often unenterprising, as Cooke was in this case. Proby, who was duly promoted to generalship later, is portrayed as downright defeatist and even (though Mr Bamford does not use the word, I will) cowardly. This Guards immunity is something historians and simulators need to allow for.

The attacks on Merxem lack the meat to make into a good wargame.  The attempt on Bergen-op-Zoom is another matter. It would be hard to do. You would need a much better map of the town than the ones in the book, though. And how you would allow for the fog of war and difficulties in communication I don’t know. But the forces are well balanced, and it should be an exciting game.

Three of the four British attacks gained entry to the town, and the forces on the failed attack were switched rapidly to one of the successful points. That gave the British more troops in the town than the French – but the British did not seem to know what to do once they got in. The French did not understand where the British were coming from at the start, and tended to overreact. But they acted decisively and made use of their central position. These are exactly the elements of a good game.

.

Wagram 1809

I have just finished reading Eric Gill’s account of the battle of Wagram in the third volume of his Thunder on the Danube series. I want to use this post to reflect a bit on some of the implications of this battle for those interested in simulation.

Ever since I first read about Wagram as a teenager in David Chandler’s Campaigns of Napoleon, I have been deeply fascinated by it. It has massive scope, the second biggest battle of the era, and with more coherent narrative than the Leipzig, the biggest.  It resembles Borodino in some ways, but is less linear. And it shows the Austrian army in a good light – an army that is a bit of an underdog in its treatment by historians in the centuries since, lacking a major national champion. They lost, but with honour intact – no worse than what the Russians achieved at Borodino – though in a strategic context that meant an honourable defeat was not good enough, unlike the Russian battle.

Also this is a battle taking place on a nearly featureless plain – closer than most real battles to the sort of thing we try on a tabletop. It begs to be refought as a simulation – though it is just too big. One day I might give it a try! May be I can develop a doubled up version of DTN to bring it within the range of feasibility. Episodes from the battle could be used as a testbed for rules – though since the various sub-battles tend to blend into each other, this would be a challenge.

Mr Gill has made good use of sources on both sides, and is on the whole pretty objective. He is a little too judgemental for may taste – but then almost all historians of Napoleonic military history are. I prefer my history to be about what happened and why, to quote AJP Taylor. Mr Gill has lots of bad things to say about Charles and the Austrian decisions when compared to Napoleon and the French. This is not unjustified – but I find this type of writing a bit of a bore. I would like to understand why they reached the decisions they did. And there is always a slight suspicion that the Austrians are being judged to a higher benchmark that the French.

More seriously, I could have done with the account providing a bit more detail; it could have added 50% in length easily. This contrasts with the excellent detail the author provides in some of the smaller engagements of the campaign. As a result I find a number of things puzzling. Why did the Saxon infantry collapse on the second day? They don’t seem to have been directly attacked. There is also a lack of detail over the encounter between Oudinot’s corps and Hohenzollern’s – even though the former suffered very high percentage casualties. Gill vaguely alludes to artillery being responsible in both cases – but this does not seem to be based on solid analysis. A third mystery is that in Massena’s march from the centre to the flank, he reports them coming under heavy artillery fire. But they were covered by the famous Grand Battery – which surely would have drawn the fire, and masked the movement?

Unfortunately I don’t think any of the other books I have that cover the battle will do much to illuminate these issues. For a simulator it is this habit of historians to drop into airy explanations that is particularly frustrating. We want to look at the data! One reason to try to simulate episodes from the battle.

Three issues from this battle struck me particularly: command and control; panic; and weapon ranges. I have already reflected a bit on command and control in my thinking aloud piece on my new rules. The difference between the two sides seems mainly to be a the corps level. The Austrians had only recently introduced a corps system, and they seem to have had very limited planning capability, relying on detailed plans drawn up by army HQ; it says something for the strength of the Austrian army HQ that they were able to produce these detailed plans as quickly as they did. But Napoleon found it much easier to watch and wait – and then give his corps instructions at a high level. This difference explains a lot about how the battle unfolded. As the second day got going Charles was chasing around adjusting the plan to take care of events – while Napoleon was able to calmly direct things from a distance. This difference is certainly worth trying to replicate in a simulation.

It is interesting, though, that when Napoleon made a spur of the moment decision to attack the (concealed) Austrians on the first evening, that the hastiness of it all meant that the French attacks were conducted inefficiently, especially by corps commanders less able or less trusted than Davout (who only made a gentle probe – perhaps all Napoleon intended). The corps needed to be given time to digest orders in order to deliver them efficiently.

As for panic, this poses a particularly interesting problem for simulation. Mr Gill’s account points to two particular occasions when substantial elements of the Austrian army started to panic and flee, having to be rallied by the senior officers, up to Charles himself. The first was on the evening of the first day when the Army of Italy  caught the Austrians off guard. The second was early on the second day (featuring many of the same troops, perhaps significantly) when the French retook Aderklaa and launched an attack beyond. The problem isn’t explaining these events – it’s understanding why these are the only two. As the battle developed, the Austrians suffered many further reverses, from one end of the line to the other. But they held firm. Disorder might appear, but as the French cavalry arrived to take advantage, the Austrians recovered composure and beat them off. In the general withdrawal the Austrians did lose a few battalions crushed by cavalry attacks, but their overall composure is quite striking. What made troops panic on a few occasions, and but not on many others?

There were panics on the French side too. Both the attacking forces in the two Austrian panics suffered the same fate, as the Austrians successfully rallied and counterattacked.  It is worth adding that on both occasions the French pulled themselves together and play a key role later in the battle. The Saxon infantry gave way on both days; the second time, it would appear, based just on an artillery bombardment. These panics don’t cause the same difficulty. They resulted from attacks that got out of hand and became vulnerable. The Saxon collapse on the second day is more of a problem – since ordinarily it takes a flash of cold steel to cause a disorderly retreat – though these men had suffered very badly the previous day. These incidents will repay study when assessing the way combats and higher level morale work.

The issue on artillery and musket ranges is based on a general impression rather than detailed  evidence. The quotes Mr Gill uses (especially from French witnesses) stress a lot about the strength of artillery and fire and bullets that the men endured – borne out, of course, by the high casualty figures. A striking figure is that the French artillery fired something close to 100,000 rounds – about 200 per piece present. That sounds a lot, but Austrian losses were about 38,000. Most of them would have been as the result of artillery fire. So the hit ratio for artillery was at least 25%; the Austrian rate would have been very similar. Each artillery piece cause 50+ casualties. That strikes me as being quite high given the generally primitive technology. Both sides reported instances of the opposing artillery firing too high at even close ranges.

Now one of the issues with creating simulations is that the quoted effective ranges are quite short: 100-200m for muskets, 500-1,000m for artillery. It is often stated that it was waste of time engaging targets at greater ranges than these. In terms of my wargames rules these maximum ranges are about 1 inch for infantry weapons and 3-7 inches for artillery. Not far at all; most units, most of the time are out of range.  Now while there were some close encounters at Wagram, particularly in the key villages, my impression is that a lot of the combat took place at longer ranges. Something doesn’t seem to be adding up; the usually quoted effective ranges seem to be too short.

One potential resolution to this puzzle is the idea that projectiles were still lethal at well beyond the effective aimed range, especially artillery – but also musketry which was often aimed too high by inexperienced troops (veterans advised to aim for the feet). Perhaps in the flat and open terrain of the Marchfeld a lot of the casualties were caused by projectiles that had missed their primary target. Though we read of lucky artillery shots that might kill a dozen in a single blow, we don’t read of entire infantry units collapsing under fire – even in front of the French Grand battery. This all speaks of a generally high and widespread attrition,n rather than artillery units crushing anything in their path. However, being caught in an “en potence” position with fire from two directions, as happened to Rosenberg’s and Oudinot’s corps and the Saxons, seems to have been particularly lethal. Since simulations tend to focus on direct hits and ignore the effects of indirect fire, this is interesting. But then again, the slow casualty rate from indirect fire was not as disruptive to morale as sudden impact.

Plenty to reflect on from this epic battle.


W