Tag: Wars of 1859-71

  • Hobby update – October 2025: mainly Custoza

    This bottle of Custoza wine was as close as I got to the battlefield during my recent holiday on Lake Garda.

    I’ve decided to do things a bit differently on this blog. I’m not posting stuff often enough. This isn’t helping me to get engagement with other hobbyists. The problem is that I haven’t been posting until I feel I have something to say – which usually means finishing a project – or perhaps exploring an issue in (like mixing paints), which takes quite a long time to write about. But my life, even though I’m retired, has quite a few other things in it other than the hobby. We go on holidays; we have people to stay; I’m chair of governors at the local primary school; I’m on a number of online committees; sometimes I just like to go for a walk or see something with my wife; and there’s the garden. The hobby has to squeeze into this agenda, and often involves a number of parallel activities which take time to resolve. There a quite long stretches when I don’t finish something, or don’t feel I have time to write a long blog piece.

    But often people just like to know what you are up to. My plan is to do regular hobby updates – at least one a month. These may not take long to write (though this one is quite long) – but should be enough for any followers to have an idea about what I’m doing. This is the first and I’ll cover what I have up to since the last post, in July, following my rather unsuccessful game for the Battle of Medenine (1943) in June, featuring innovative game mechanisms.

    Games

    I have played just one miniatures game in the period – an Arab-Israeli scenario from the 1967 war, using Cold War Commander. This was with my regular London group of players (mainly from my ex-club of South London Warlords). This was entertaining but a bit one-sided (to the Israelis) – though John, who put the game on, didn’t think it was unrealistic. We used John’s 6mm miniatures – I particularly liked the way he used colour flashes on the back of the base to denote unit ID, without the use of labels. The rules I was a bit less impressed with. I had used the very similar Blitzkrieg Commander before, with a similar reaction.

    After this the London group has met a couple of times, but playing a board game – Here I Stand – representing the Reformation in Europe. We played it quite a bit a few years ago – it’s an excellent game but no miniatures! We have one more round to go, in November.

    Meanwhile my commitments conspired against my regular club’s days. I haven’t been able to play there since March. Thankfully I’ll be back on 2 November. We haven’t decided on a game yet.

    Projects

    The Medinine game was a bit of a downer for me. I am a long way from having a decent system for brigade level games in 1943, after having devoted to quite a bit time to trying, and getting things ready. And as for my attempt to create sangars from modelling clay and bits of model railway ballast – I really don’t want to relive that. I decided to give 1943 a long rest. I have plenty else I want to do.

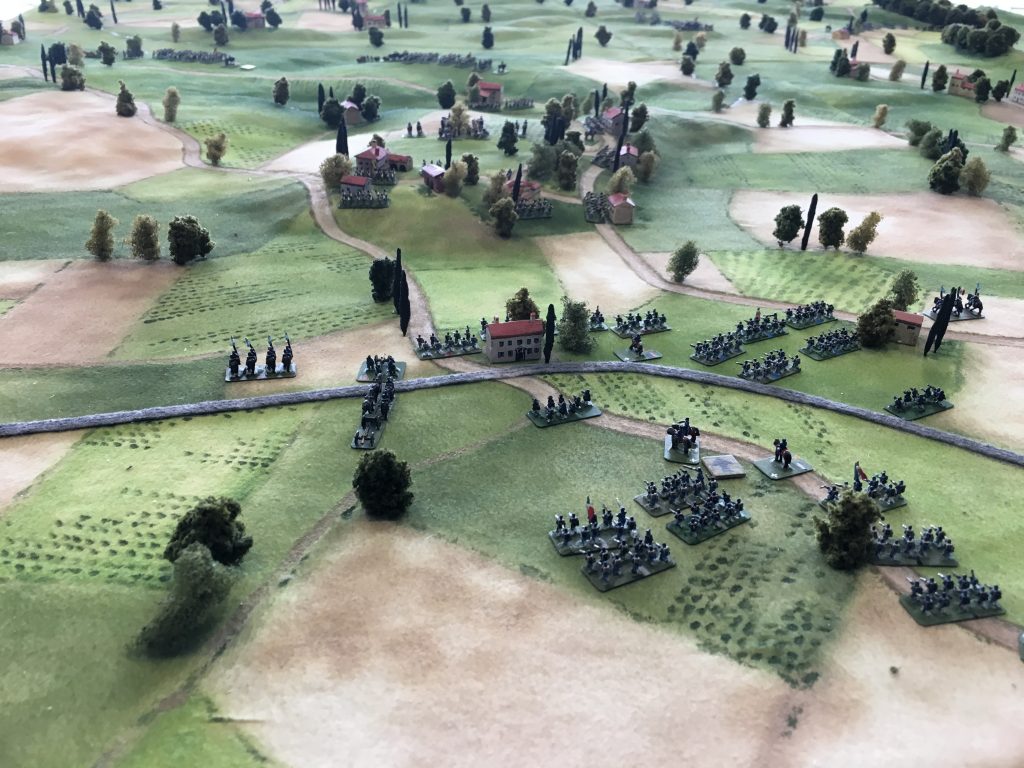
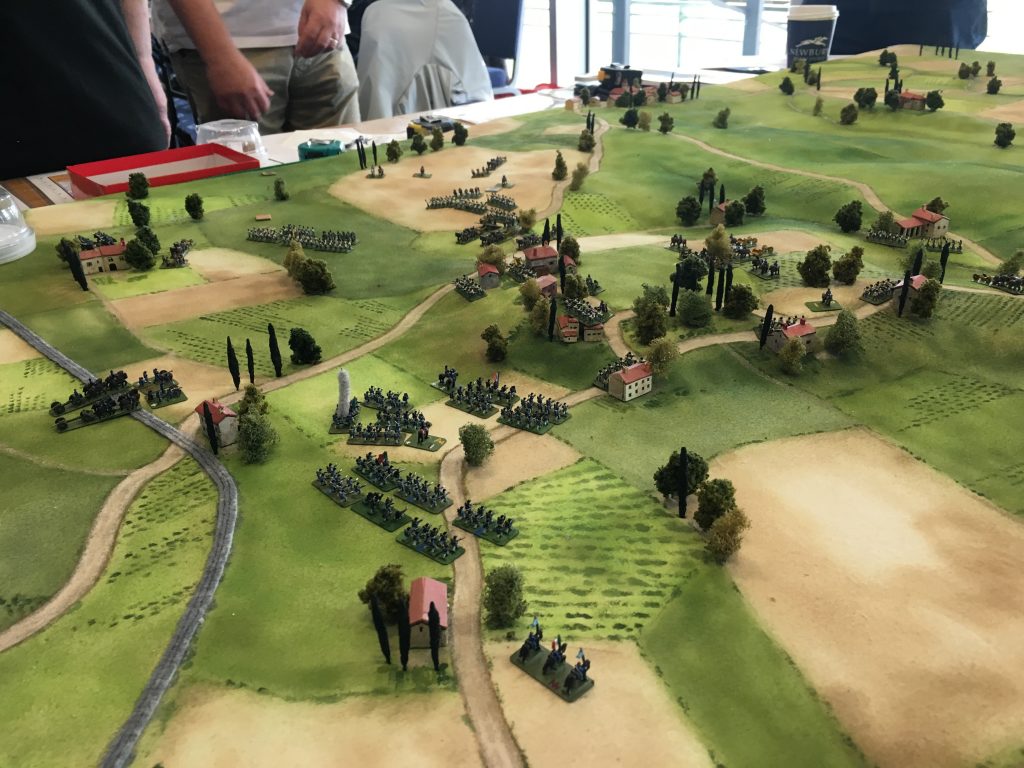
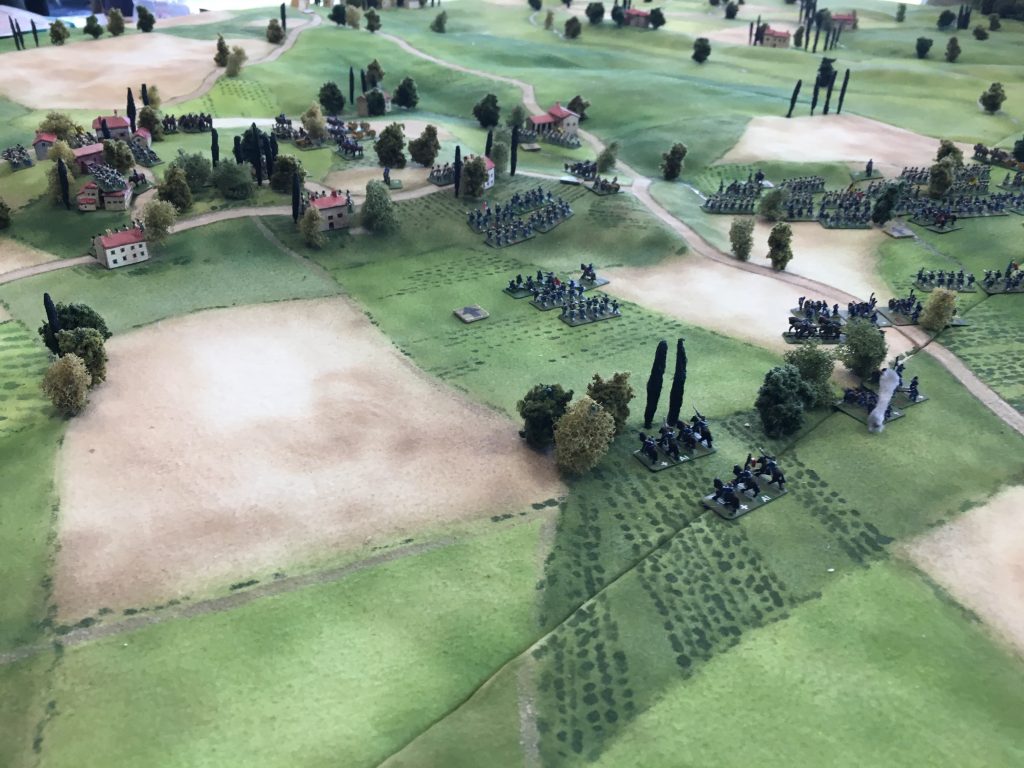
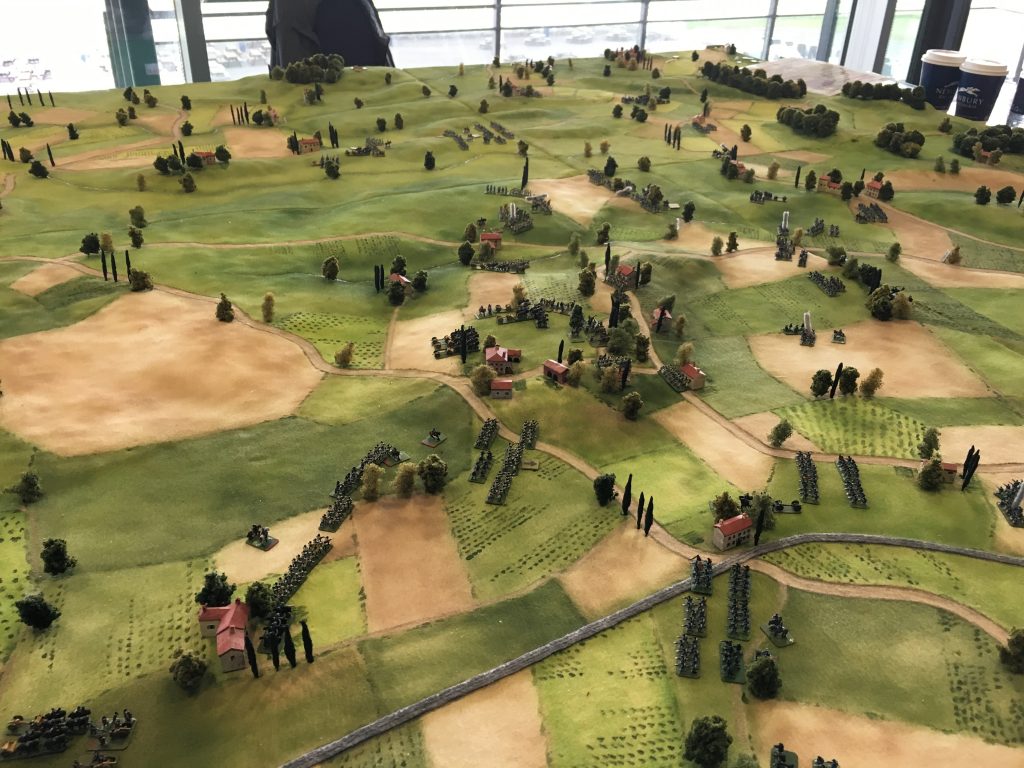
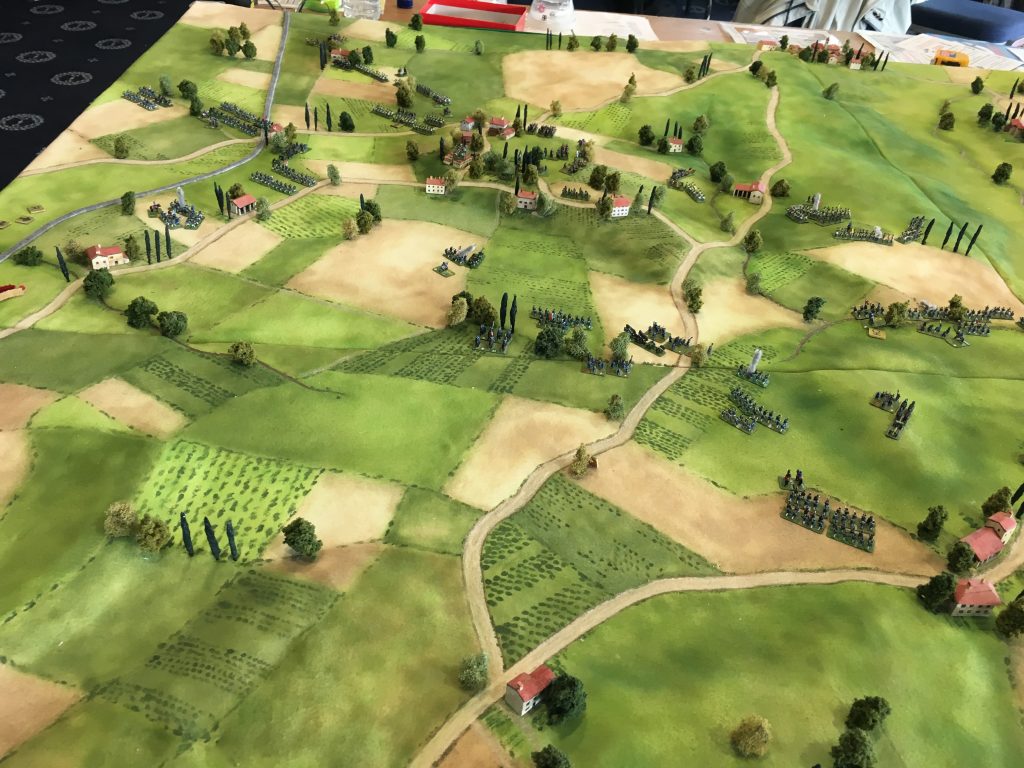
    So I have returned to the battle of Custoza in June 1866 in the Third War of Italian Unification (there was also a battle there in the First War in 1848), using home-produced rules. This has been interesting on a number of levels.

    Custoza was the main land battle in that war. Taking advantage of Prussia’s attack on Austria, the Italian army attacked the Austrian-occupied province of Venezia. It ran into the Austrian army near Custoza, just southeast of Lake Garda and southwest of Verona. The Austrians were outnumbered but won, forcing the Italians to retreat across the Mincio. However the outcome of the war was soon decided by the Prussians at Koniggratz a few days later, and the Austrians gave up Venezia. The Italians also suffered a naval catastrophe at Lissa.

    The battle looks as if it would make a great close-fought and evenly balanced war-game. It is especially interesting because the Austrians used their system of stosstaktik, which proved so disastrous against the Prussians, and is usually written off as being utterly stupid. The Austrian infantry formed into close columns (in divisions of two companies, in contrast with the more typical Napoleonic battalion columns), and went as quickly as possible for the enemy in a bayonet charge. It was no disaster at Custoza, but the Austrians suffered heavily casualties (more than the Italians), so the evidence isn’t conclusive. But it should create an interesting dynamic on the tabletop.

    I started this project in 2023 (here and here), and painted up my first batches of figures then, using Pendraken’s 10mm figures. I did one batch each of Italians and Austrians. I also started work on some rules – named Forge of Nations.

    Miniatures

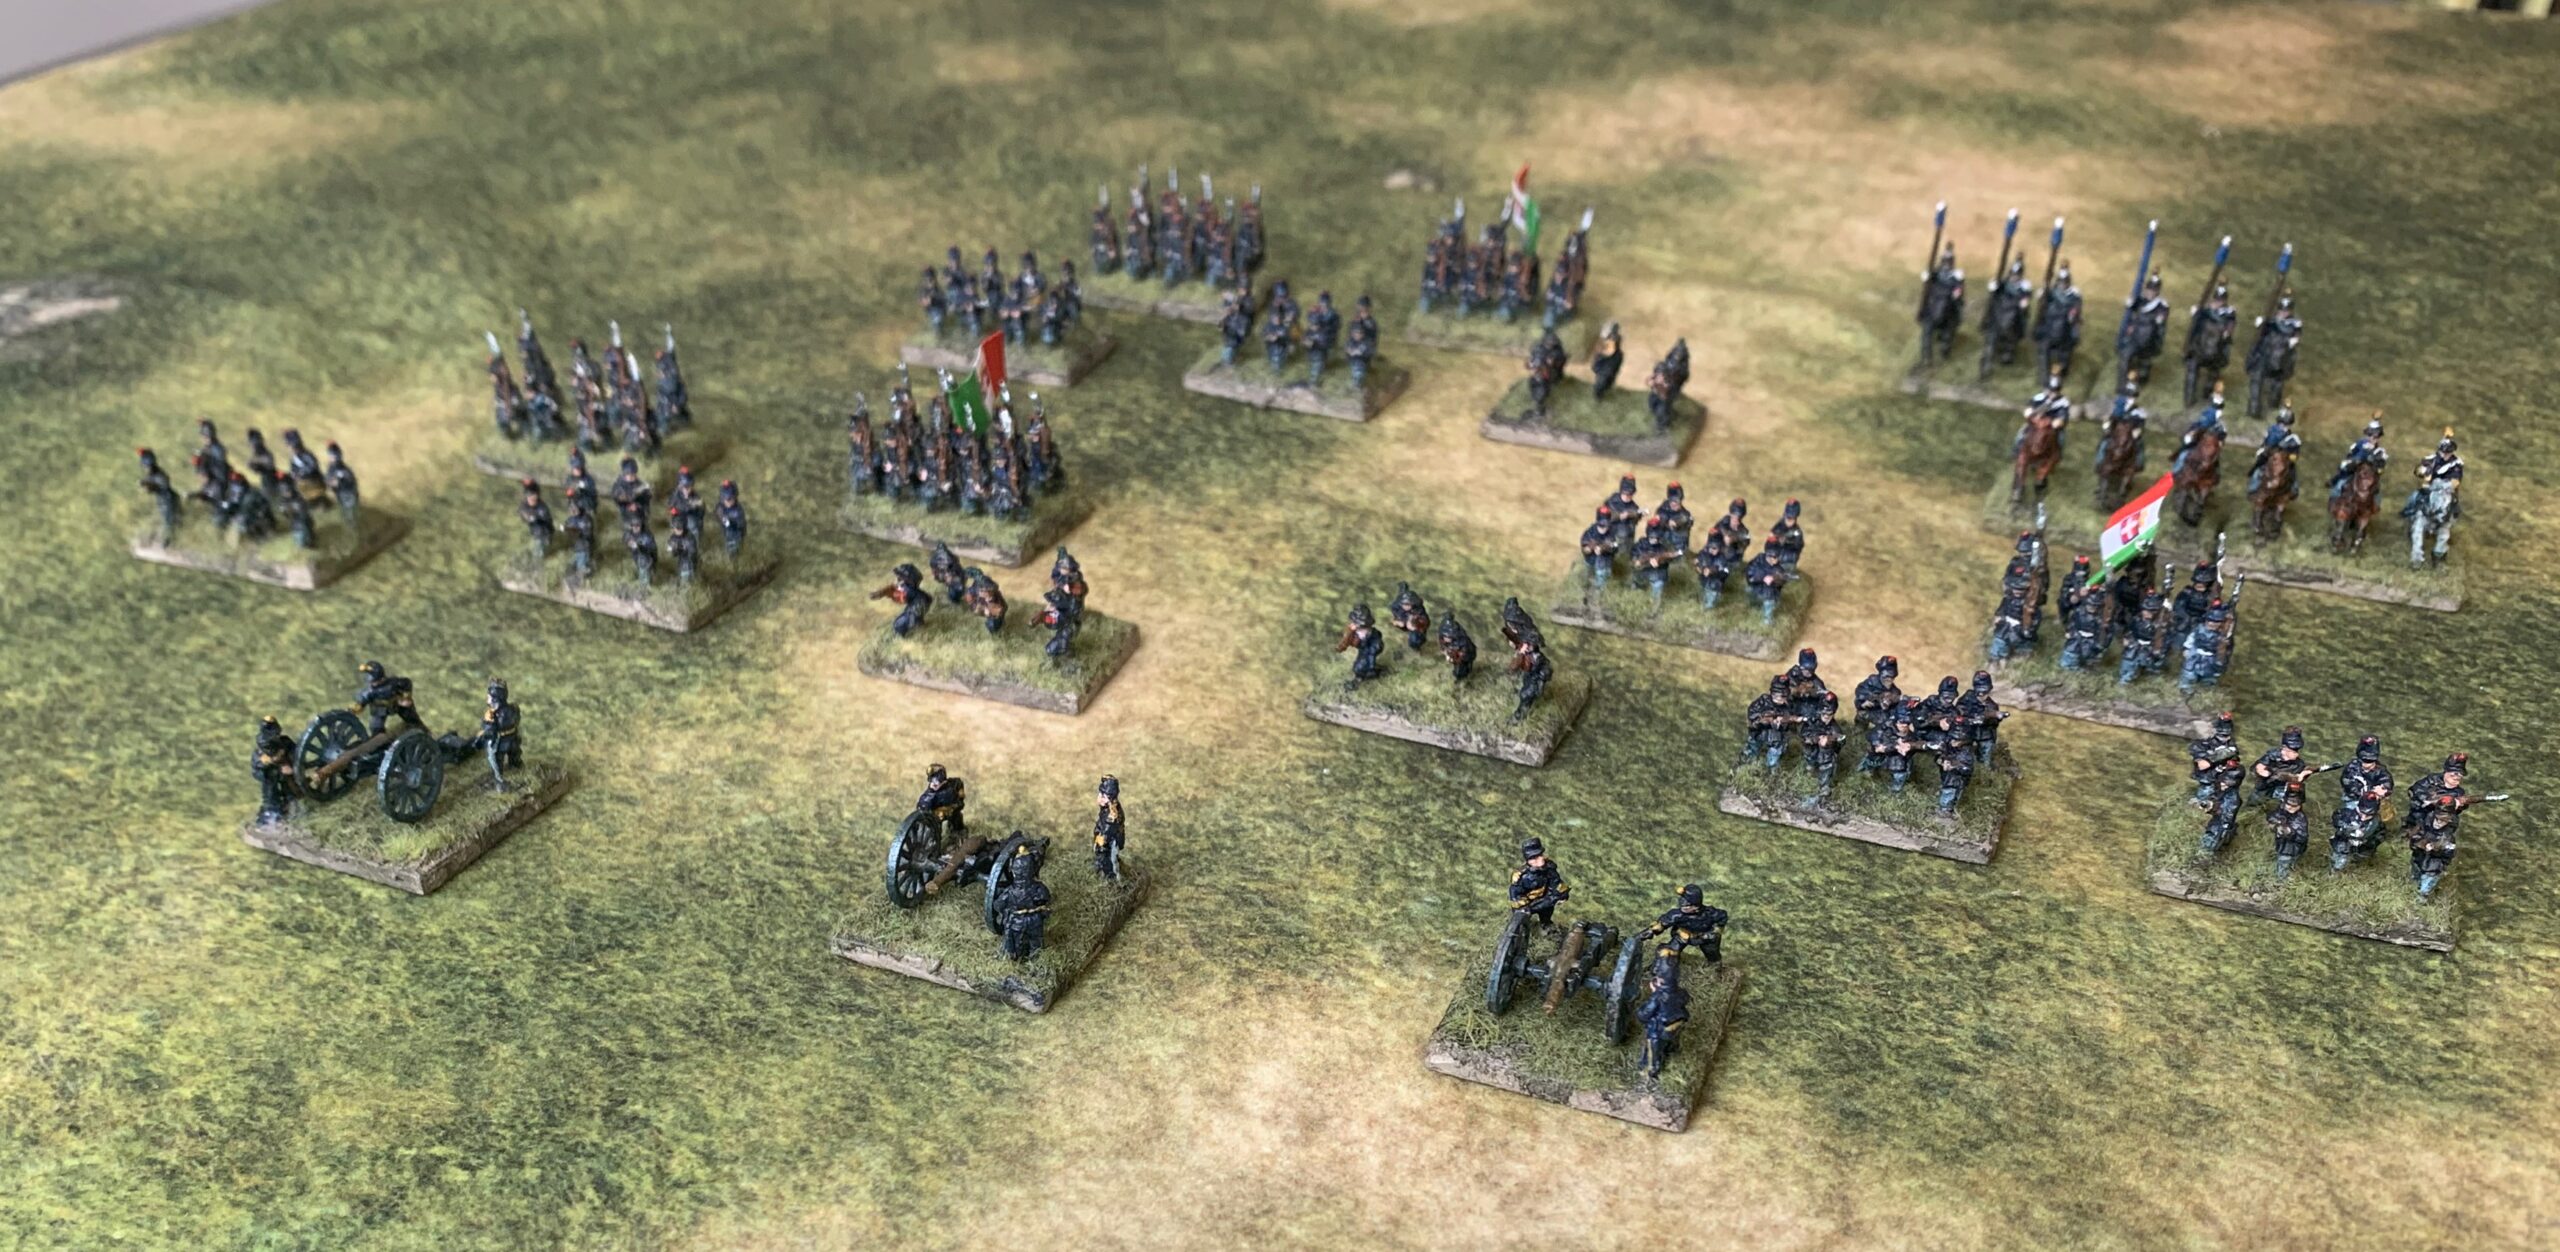
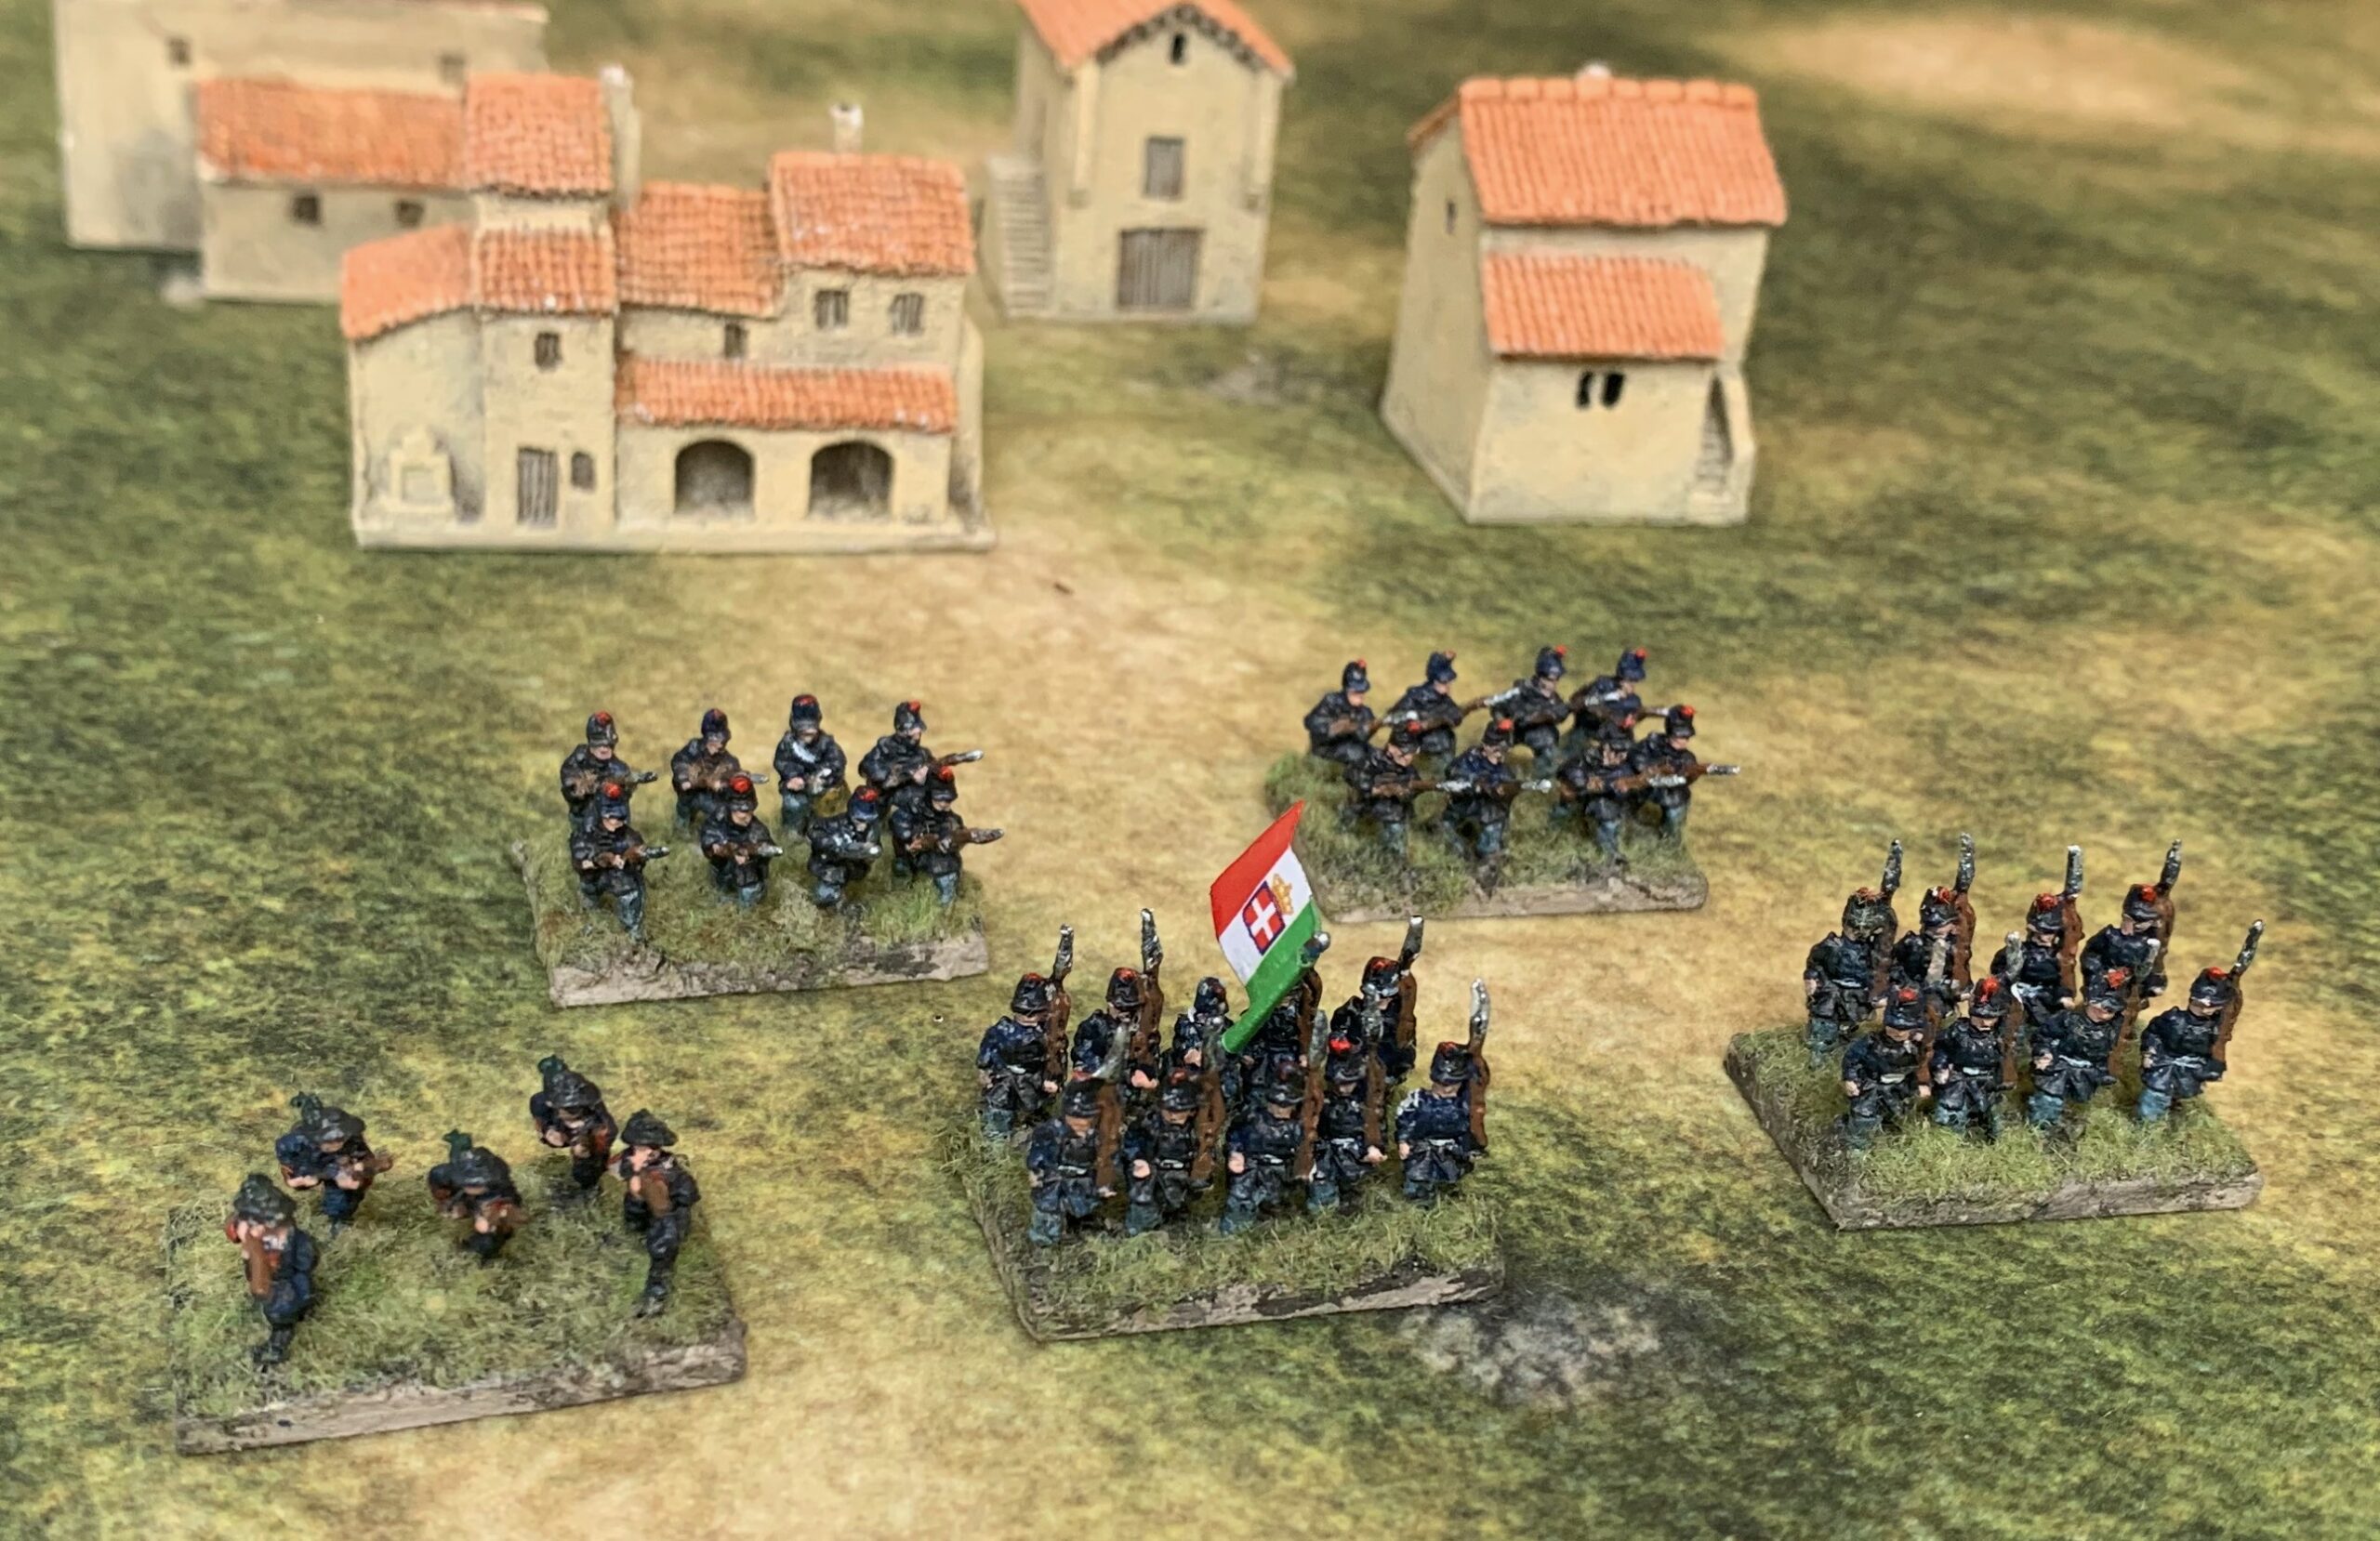
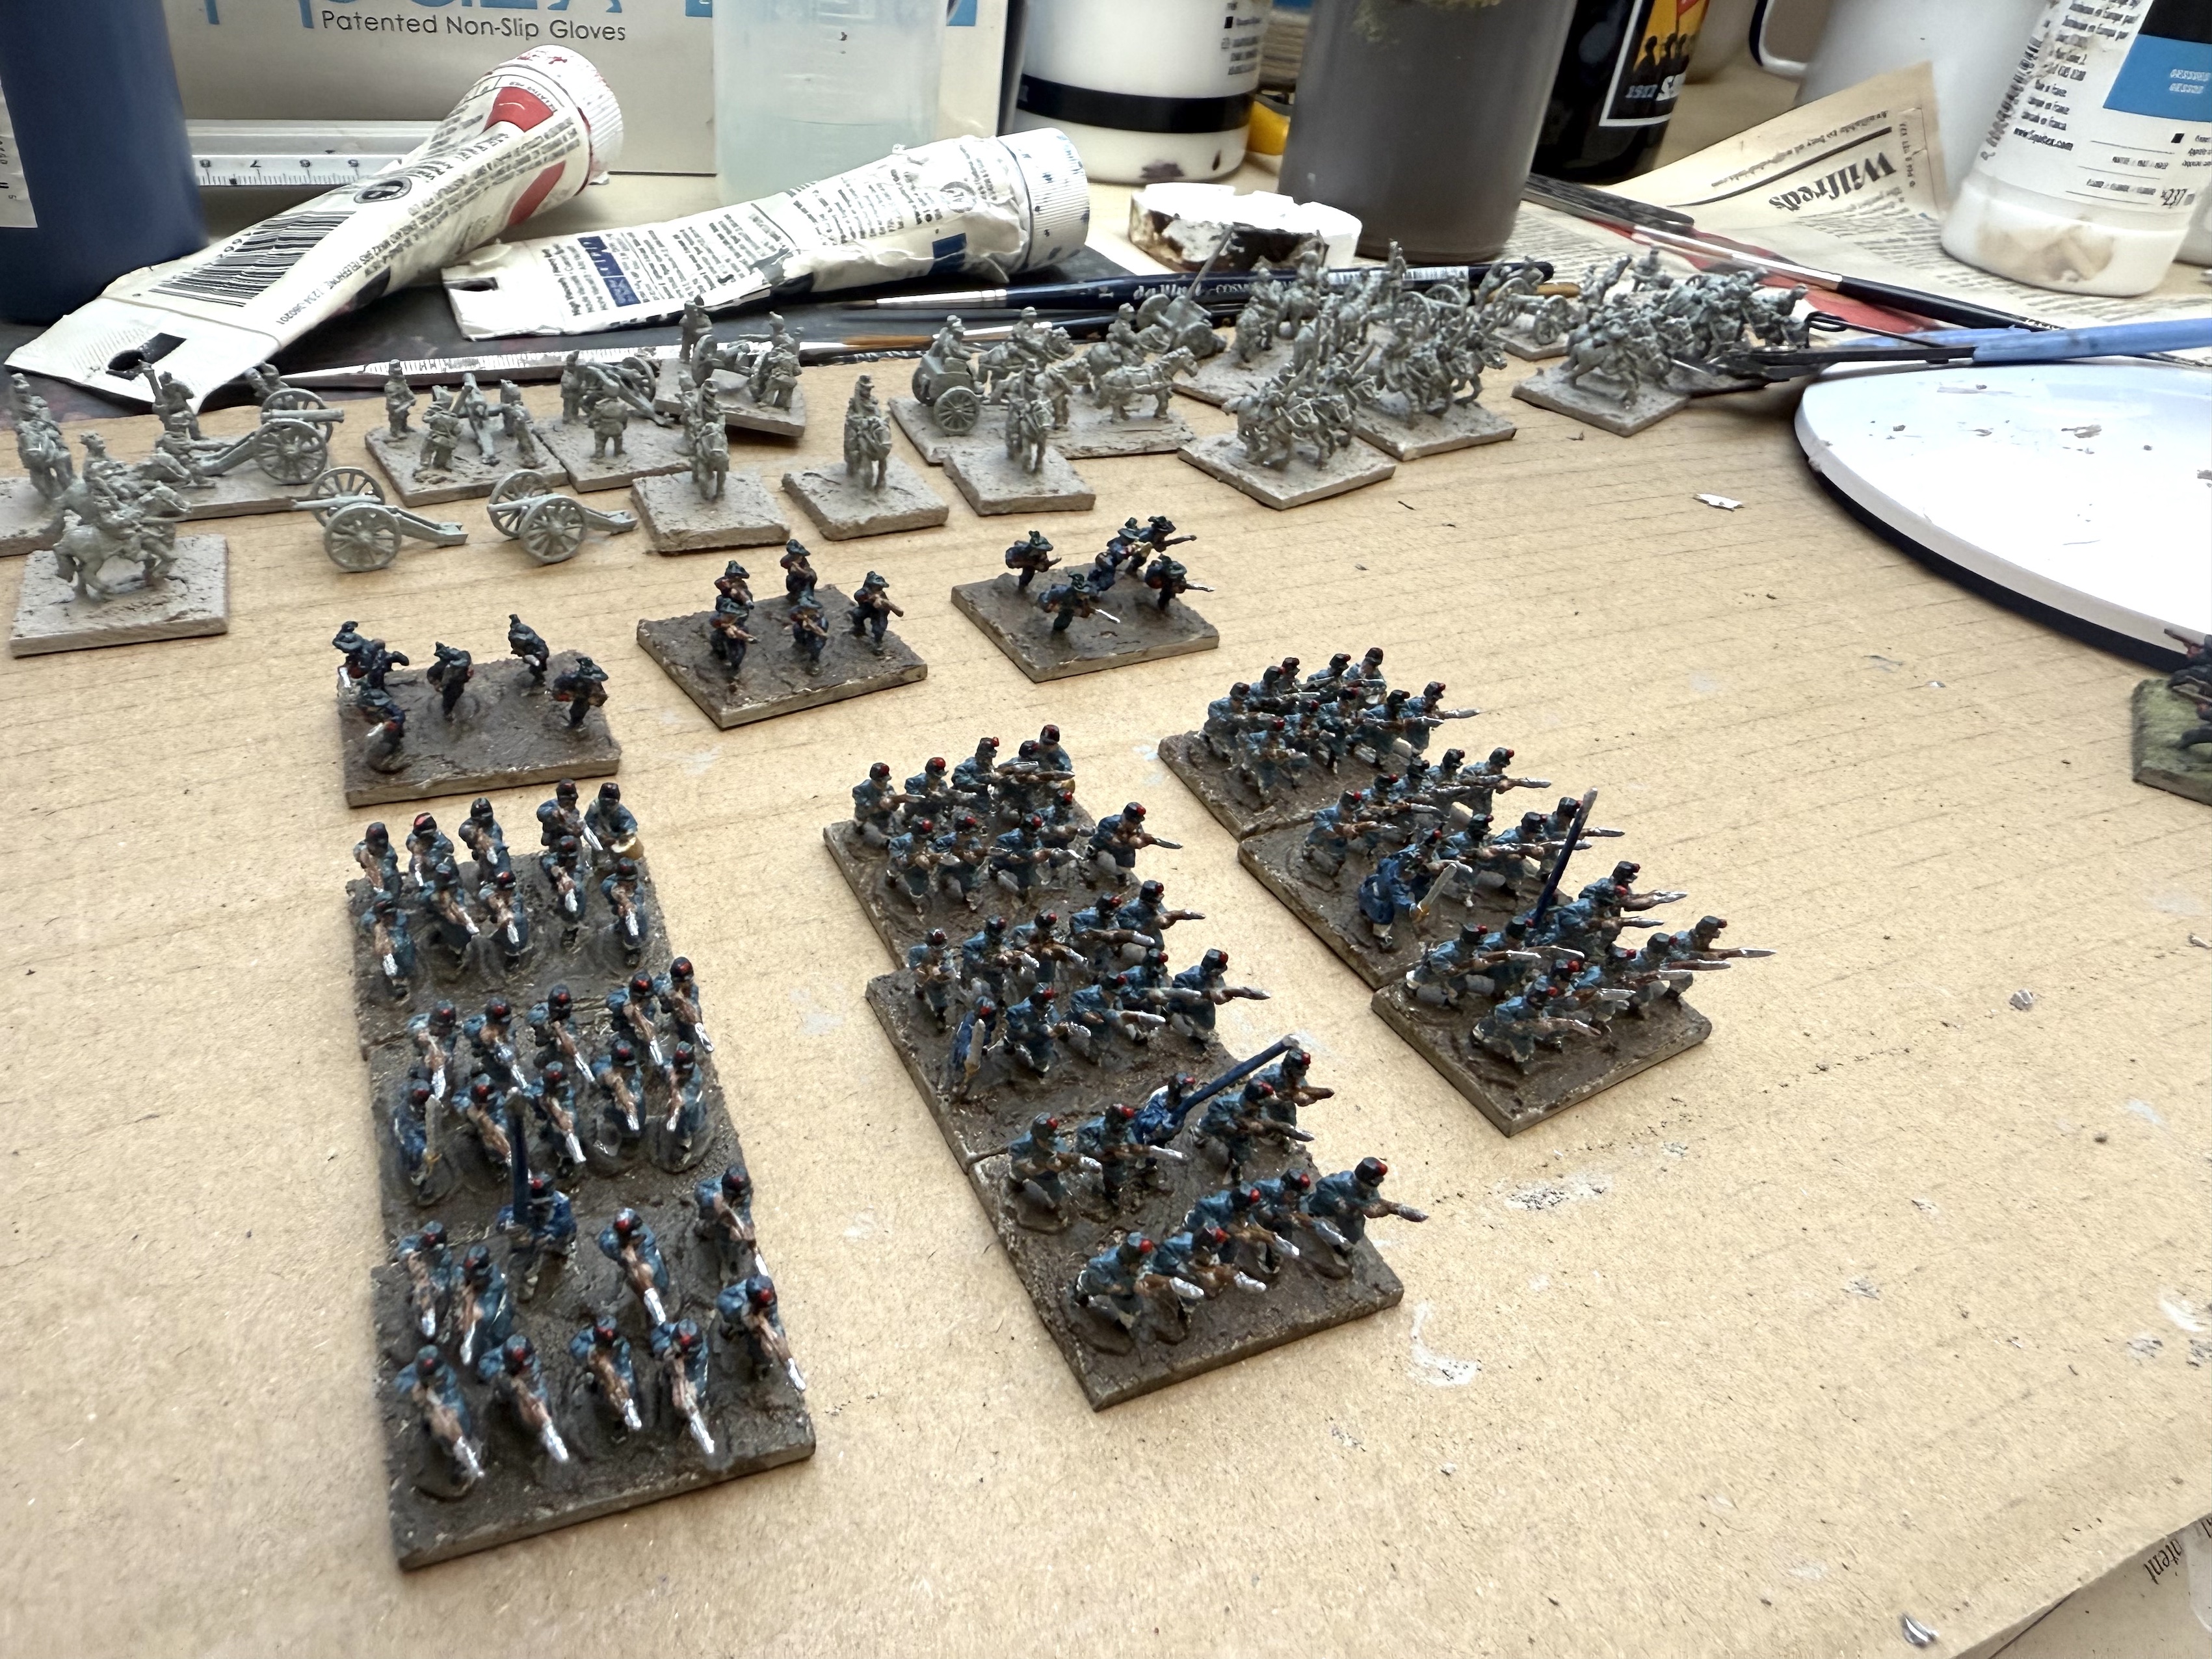
    I cleared up the considerable mess from the Medenine game from the Studio – the hobby room I have above the garage, nominally shared with my wife, though she has almost never used it. And I then did practically nothing until last week. I picked up the Italians from my last order from Pendraken, featuring all arms and generals. After basing and priming the complete batch, I decided to focus on the infantry – 9 bases of 10 line infantry, and three of 5 bersigelieri. After three sessions these are now ready for finishing (wash/glaze with a dark shade; flocking the bases).

    The Italian infantry are ready for finishing. The cavalry, artillery and generals are primed in the background

    Research

    As it happened we went on holiday to Lake Garda a couple of weeks ago. We stayed at Salo on the western shore, but were taken bus to Verona on two occasions. The route crossed the northern edge of the Custoza battle site (from which the Austrians advanced), but it was difficult to see much. The modern motorway was a corridor of ugly modern engineering and the view across country was often obscured. This is the best I could do:

    View from our coach. I think this is looking towards the village of Custoza itself. The vineyards in the foreground are doubtless modern, but this provides some indication of elevation and tree cover.

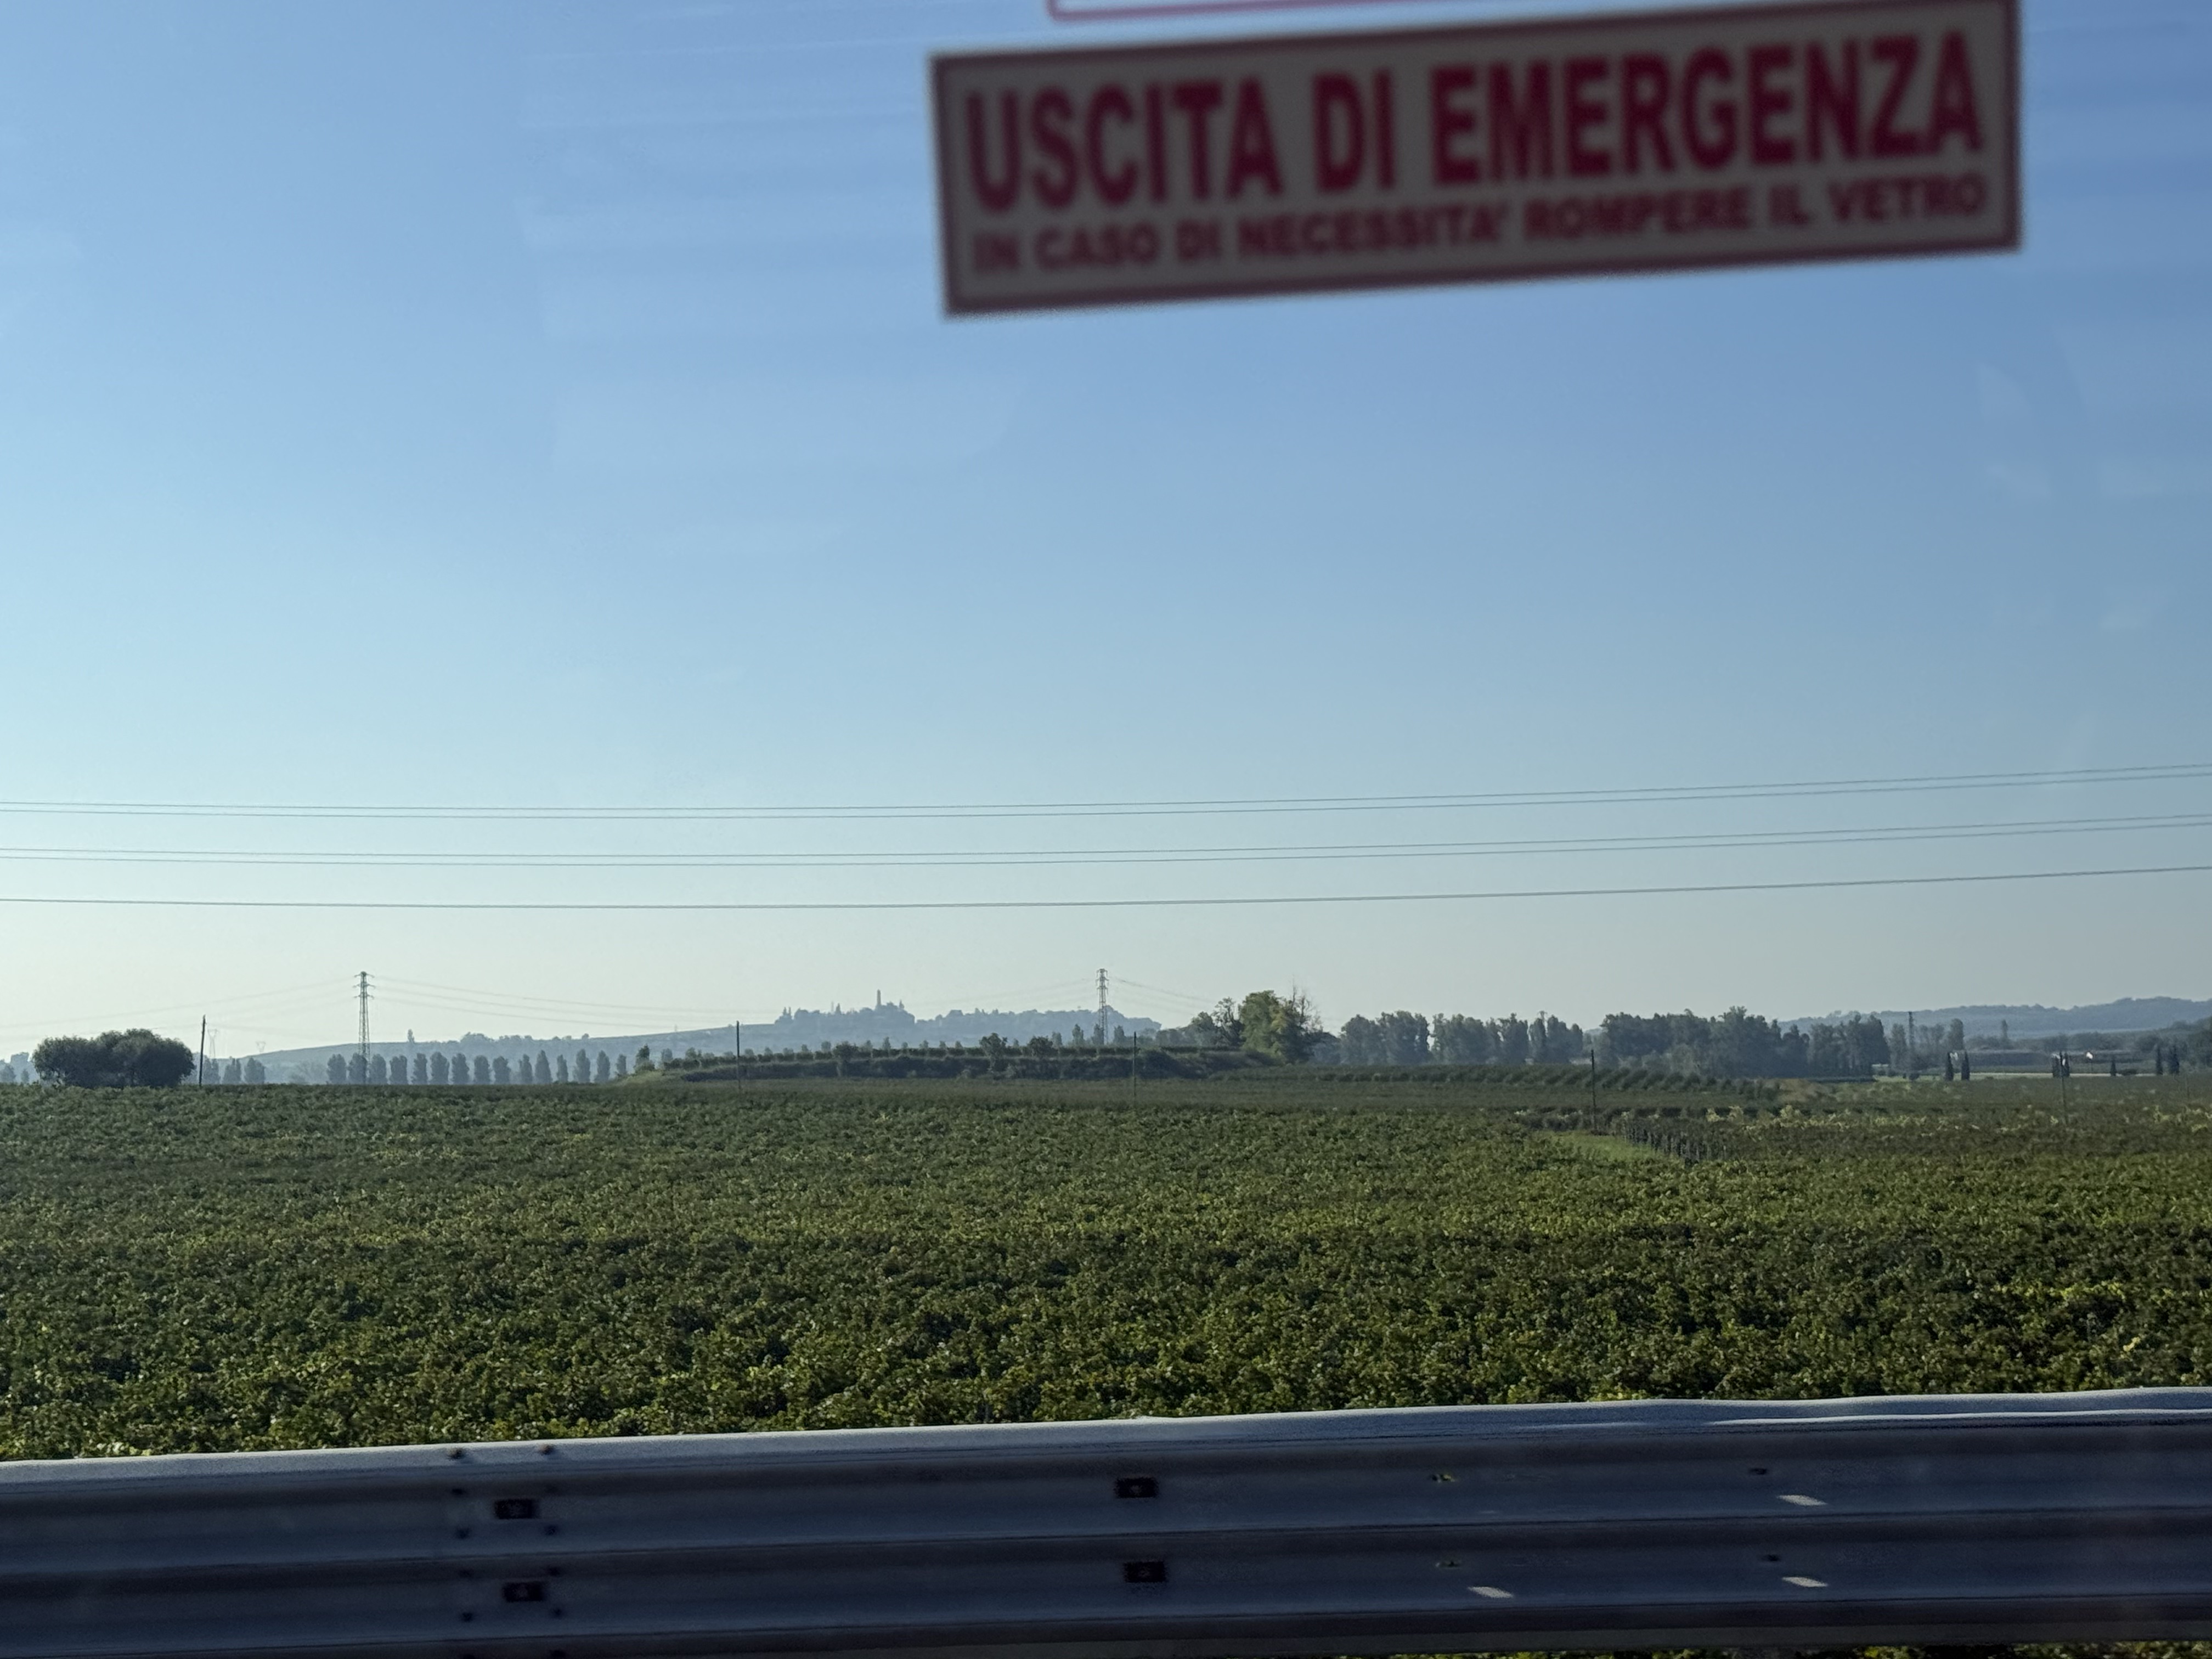
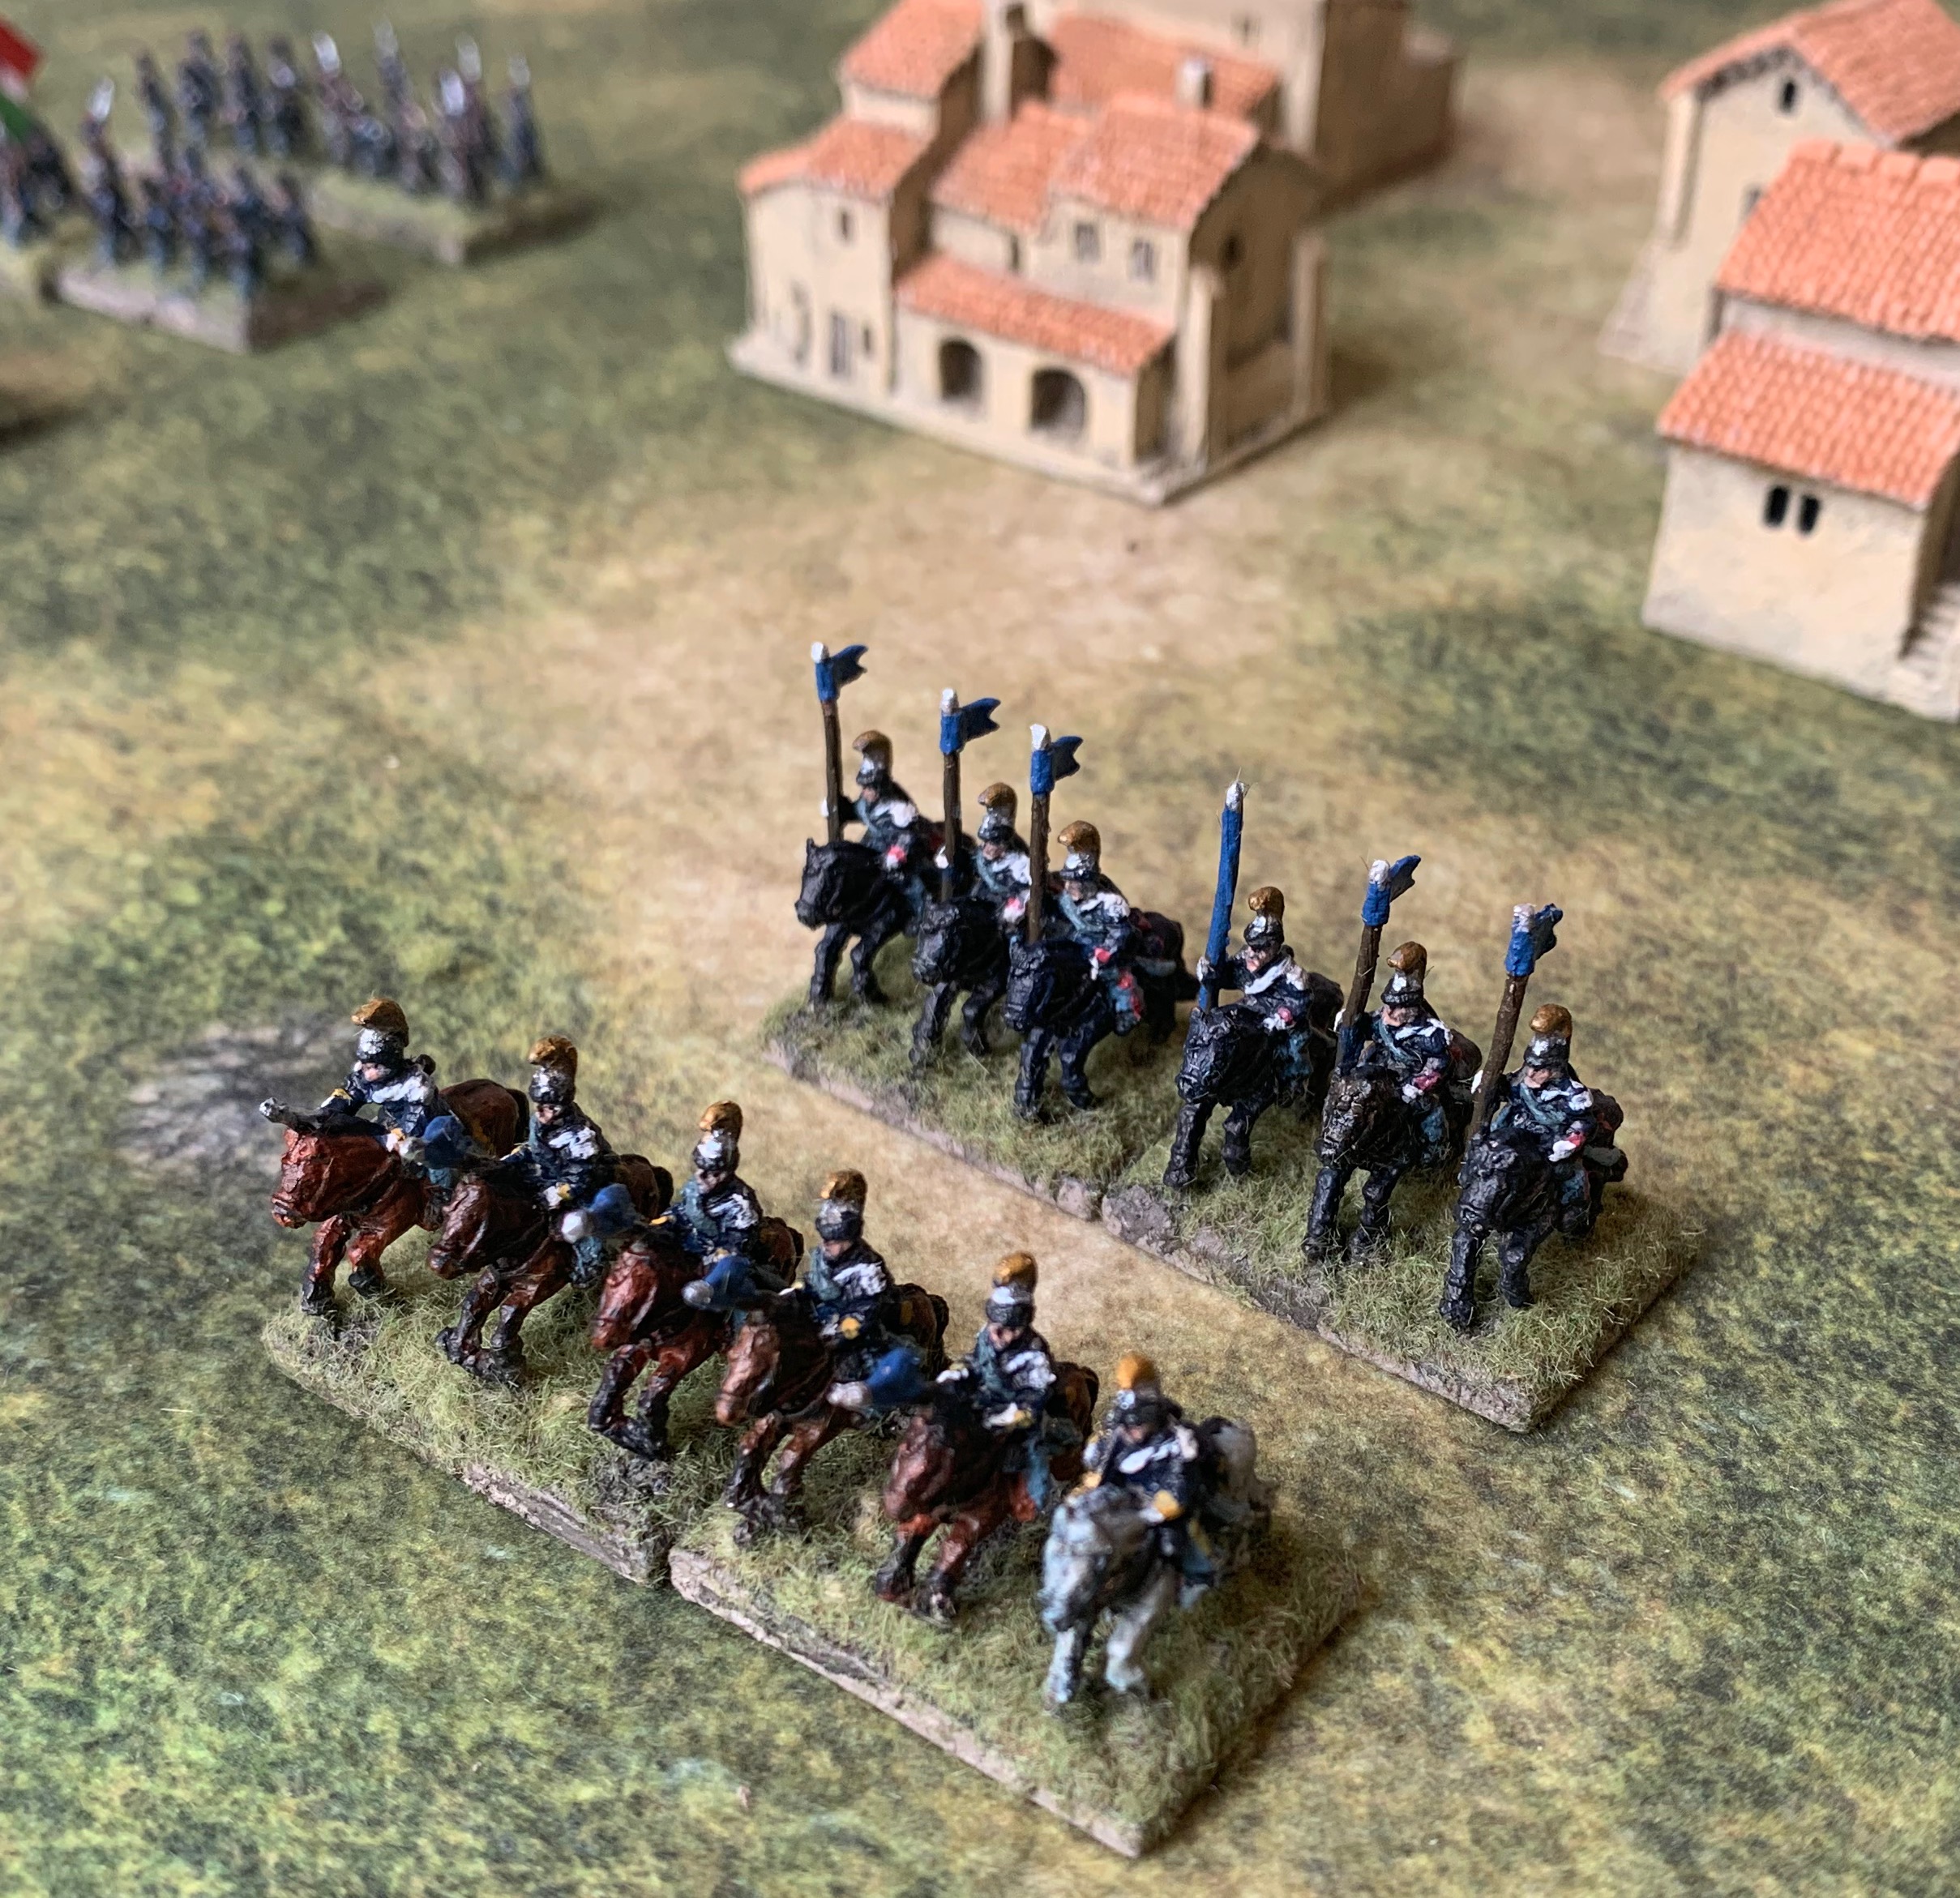
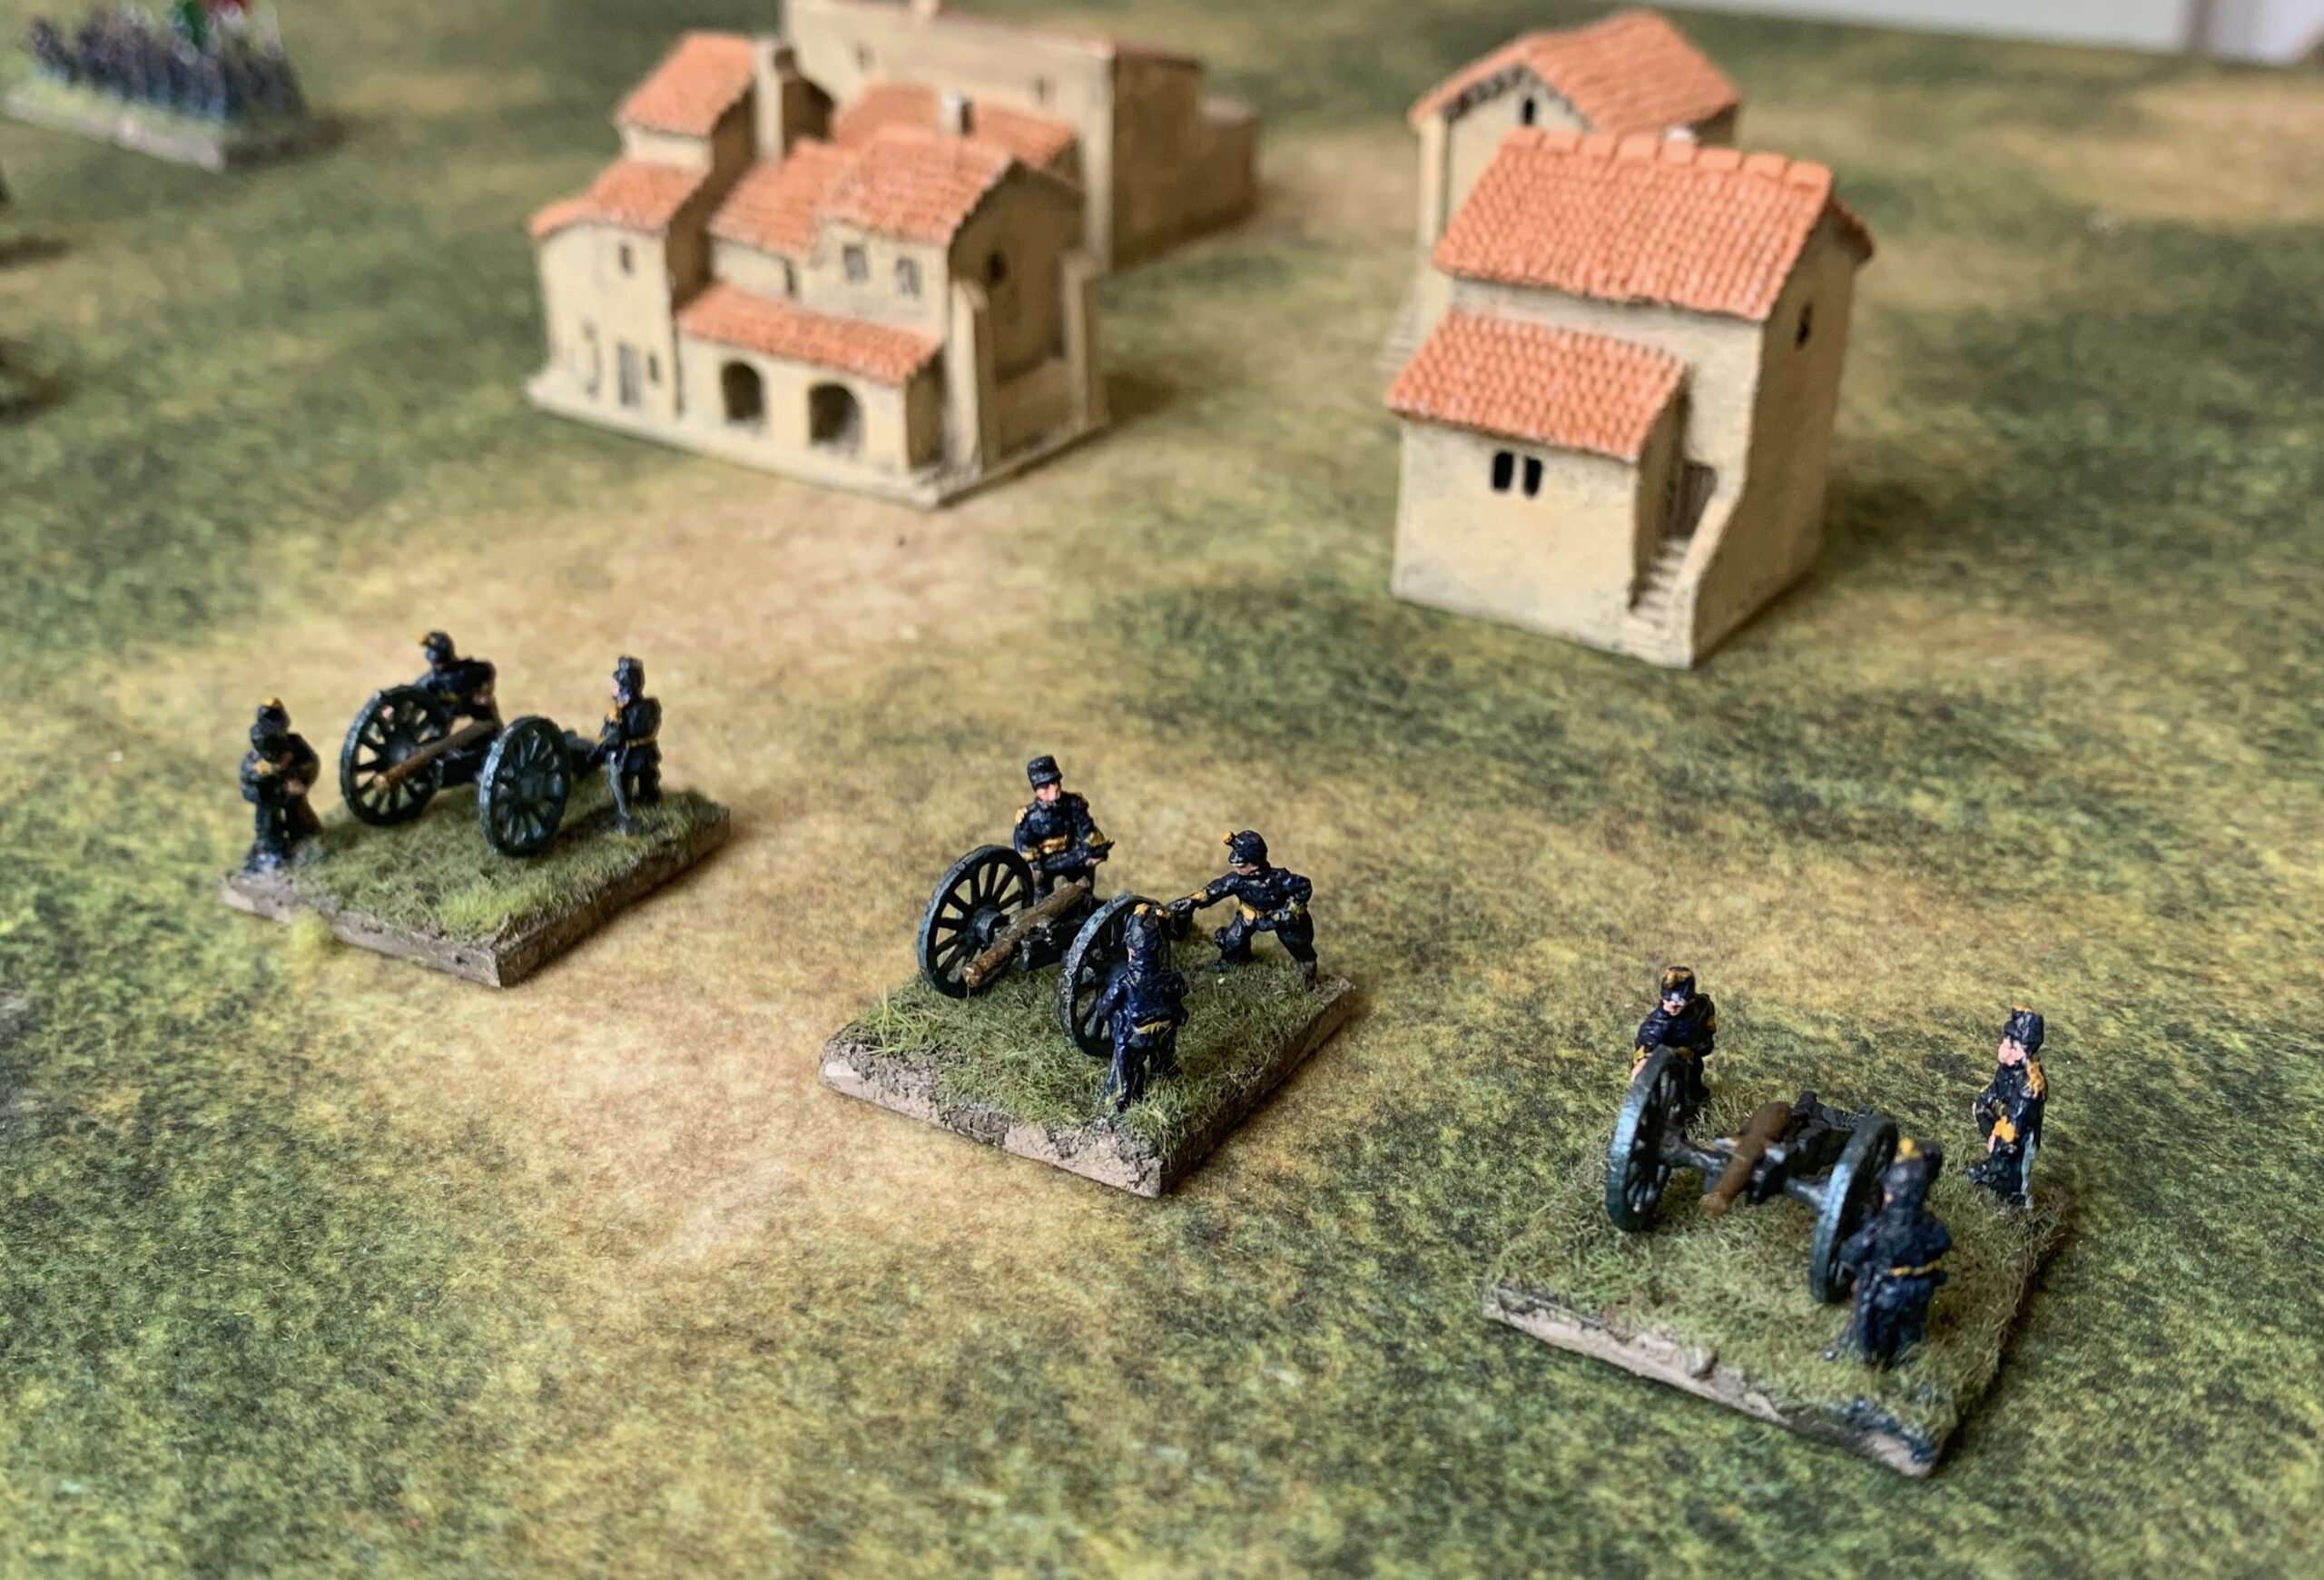
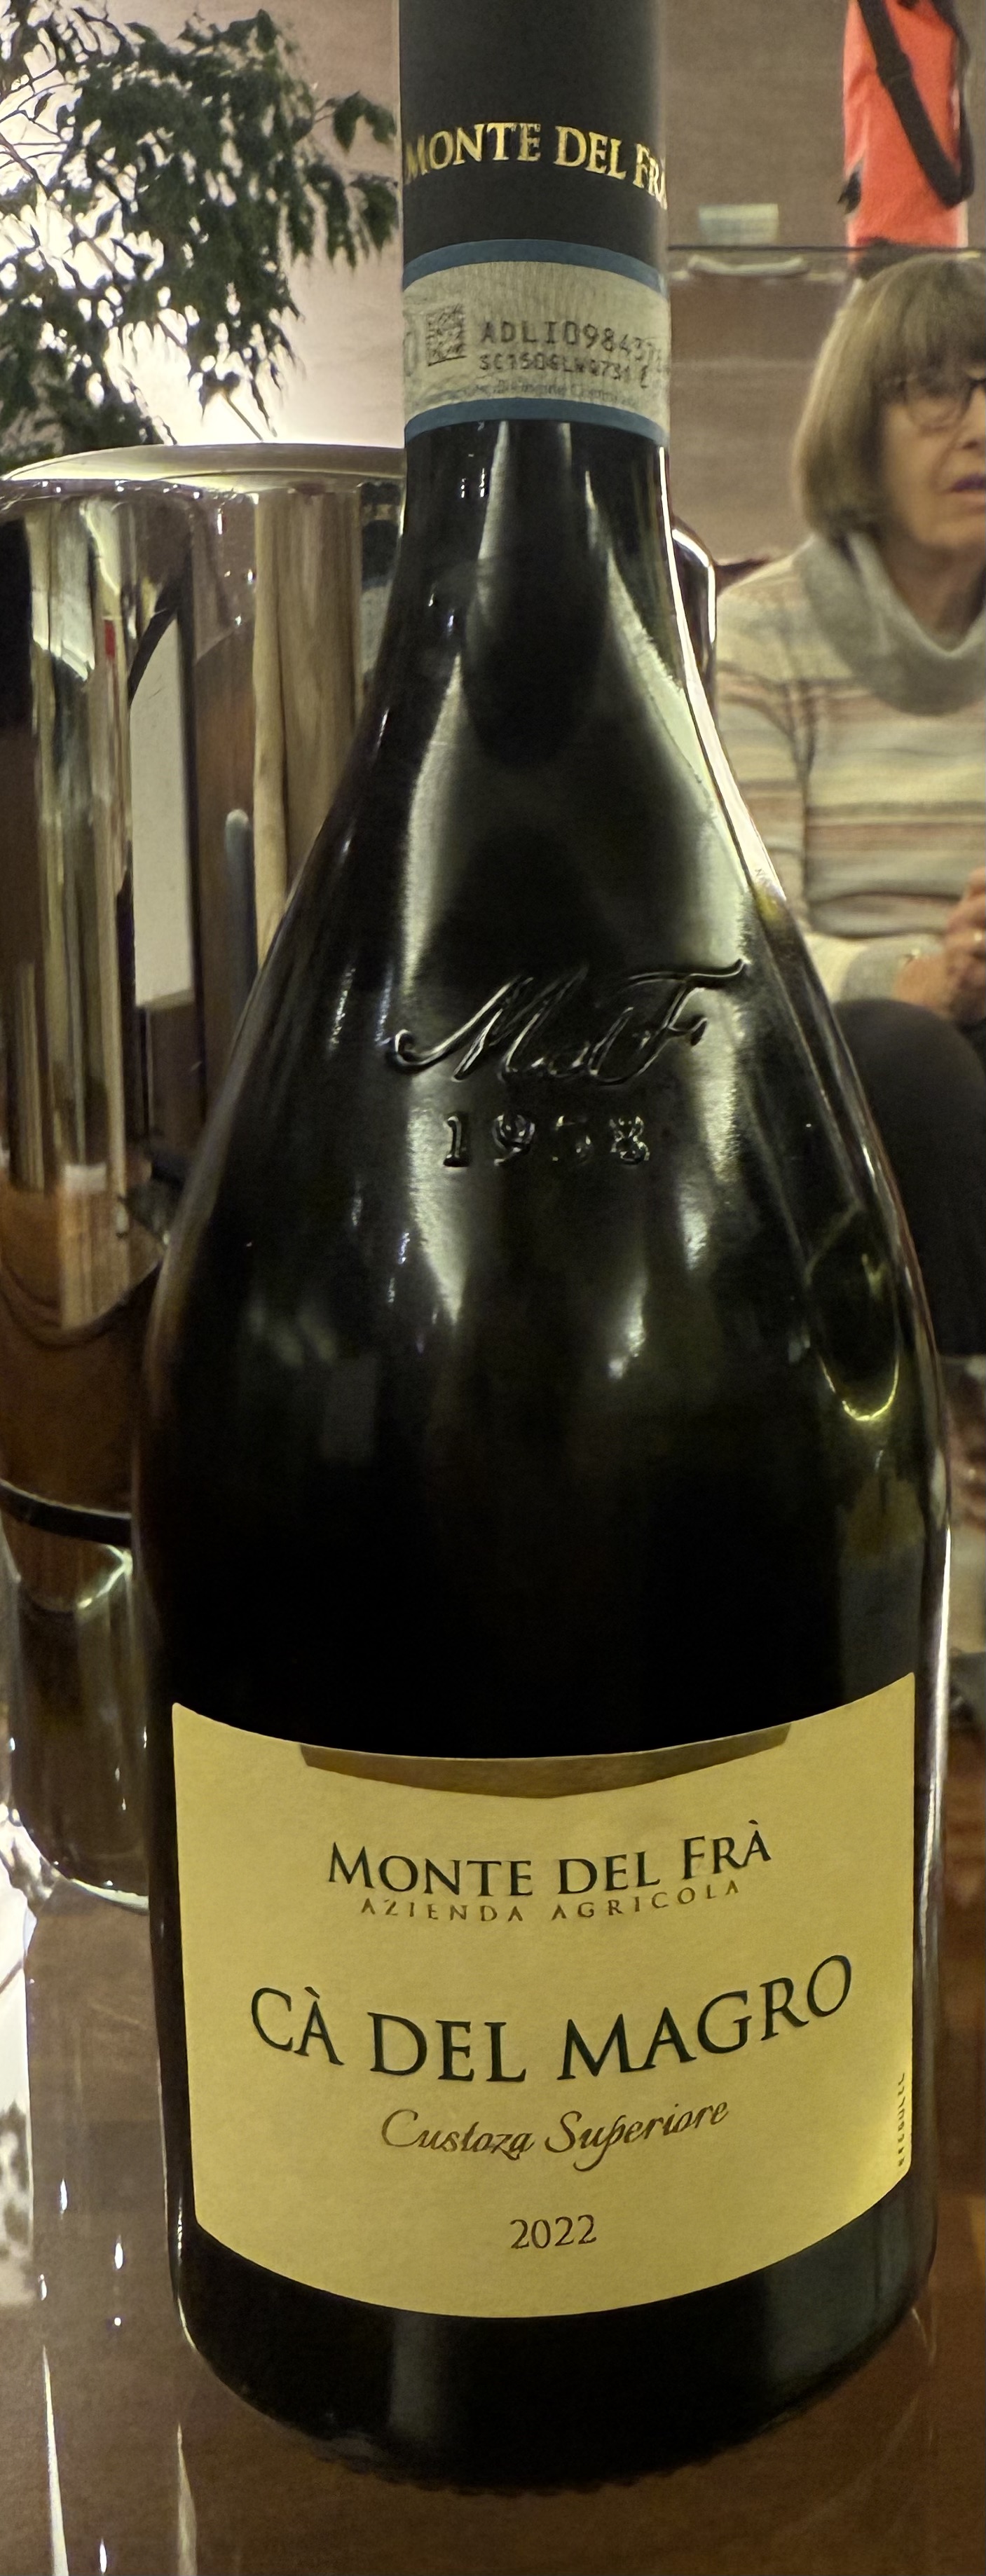
    It was interesting to get a general feel for the terrain. The hills dominate the battlefield, but were surprising gentle. This is an area of morainal hills sitting between the mountainous pre-Alps and the flat plain of the Po River. The land is agricultural, and there are a lot of vineyards (the produce of which we sampled, see above), and trees, especially on field boundaries. This limits line of sight, though artillery still played an important role in this battle – doubtless because there were elevated spots with better visibility. It will also be interesting to consider how to present the table visually. The miniatures are relatively boring in appearance (both sides fought in greatcoats, notwithstanding the heat) – so good looking terrain will help. It would be quite nice to take the game to a show but that’s a long shot.

    Interestingly, the coach also passed San Martino, at the northern end of the battlefield of Solferino (1859), from the Second War of Unification). I played the Piedmontese (Italians) in a beautiful recreation of this battle hosted by Bruce Weigle at Newbury. The road went right through where my troops were operating. There’s a monument to the battle, which is seen as a glorious Italian victory.

    Rules

    I have probably spent more time on this activity than anything else. I can do this from the study in the main house, meaning that it’s easier to do short sessions between other activities.

    Forge of Nations is designed to cover 1866, including the Austro-Prussian war and 1859. This is but the hors d’oeuvres to the Franco-Prussian war in 1870-71, of course – but that is still a distant prospect.

    I had produced a first draft in my first pass at the rules in 2023. This copied quite a bit from my Carolus Rex Great Northern War rules. However, I moved away from the randomised activation of different commands to a more conventional I go/you go system, which is easier to run in multiplayer games. But I wanted to use the card system described in my previous post – with a Move deck to regulate movement, and a Cohesion deck to evaluate combat and rallying.

    I think the Move deck is a sound idea, and I want to persist with it. But I have been reflecting on the feedback I received on the Cohesion deck. It replaces dice throws, but comes over as a bit of a black box. Gamers have an intuitive idea about dice odds – and seeing how they land is part of the entertainment. Game design is a careful blend of innovation and conservatism, so I thought I would create a dice system that largely replicates what the cards were meant to do.

    My idea is to have one distinctive die to reflect unit quality (D6 for D class, D8 for C, and so on, and then one D6 in place of each card in the old system, which reflect the attacker’s circumstances, such as weapon and range. You add each D6 result to the unit quality die – and see whether it meets a target number – which is adjusted to the unit circumstances. Each fail is a hit. A high score might an Elan result. We’ll see if it works.

    Philisophical reflection

    It is quite common to design a rules system based on one campaign or period, and then extend it into others. It is interesting to understand how this starting point influences the system. I am hoping to extend my 1866 rules into not just the 1870 war, but back into the Napoleonic and Revolutionary wars, and even into the next version of Carolus Rex, my Great Northern War system.

    This is evident from the two different rule systems that I have used that have this battle in scope. One is Bruce Weigle’s 1866 – which is a development of his 1870 system. An interesting feature of this is that it makes extensive use of a “suppression” result for firing. 1870 was probably the first major war where troops often went to ground when fired on – as breech-loading weapons could be fired from the prone position. It is one reason why, in spite of a huge advance in the lethality of firearms, casualties did not escalate (or so I read – casualities in the FPW were still high). This doesn’t seem to have been a feature of the 1866 wars – perhaps the last in history where this applies. The Prussians had breech-loaders, but since their opponents didn’t, they don’t seem to have gone to ground. Still “suppression” could still reflect a hesitancy to move when under fire, and doubtless that is why bruce retained it.

    The second system is Chris Pringle’s Bloody Big Battles (BBB). Chris also developed this originally for the FPW, so far as I can tell. But it is based on the Fire & Fury system used for the American Civil War. Going to ground wasn’t a feature of that war either. This is a more abstract system than the 1870 series, with a higher level of scaling (typically a base represents double the number of troops) – so doubtless Chris felt that representing suppression specifically was a needless complication: he has been ruthless in keeping the mechanisms as simple as possible, which is one of the great strengths of the system. However, the European wars of 1859-1871 were not the ACW, even though they are contemporary with it. The weapon systems (for the Prussians in 1866 and both sides in 1870-71) were different and this played a critical role in tactics – but BBB does a careful job of representing this. The use of cavalry was different too – the Europeans clung to the romance of the Napoleonic era, insisting that the charge into close combat was the most important cavalry tactic, and retaining pretty uniforms in many cases, while largely neglecting firearms. The Americans were much more flexible, often deploying cavalry on foot, using firearms – which proved to be the way of the future. BBB retains this approach, with cavalry being very similar to infantry in the way it is represented. Cavalry didn’t play a big role in the European wars, so this doesn’t matter that much. But if you start on the European side of the Atlantic with your system, you would try a bit harder to reflect the possibilities of the grand charge – as the Weigle rules do.

    My rules use much the same scaling as BBB, but the base articulation of 1866. Bases move individually, and are not organised into rigid units. Cavalry have a more Napoleonic feel. If I take them into 1870, I will need to reflect suppression in some way, but for now I’m ignoring it.

    What BBB and 1866 share, with very different mechanisms, is strong command friction. Command and control is heavily devolved – the direct influence of corps and army commanders is limited – and subject to heavy activation tests. This clearly reflects how things worked in this period – and it is one of the reasons that I find that BBB does not translate so easily into the Napoleonic era – when the action was much more centrally directed, but subject to less friction. This will be interesting to reflect in my rules.

  • 1866: my next project

    My new 10mm Italian troops all together

    I began 2023 determined to focus on completing projects already started, my Napoleonics in particular. This didn’t last long, as I worked on reviving my Great Northern War armies and developing a rule system to use them. That show is now done. I have now decided to start a brand new period in a brand new scale. What is going on?

    The main thing I hadn’t reckoned on was a revival of my actual gaming. I’m now part of a monthly “club” of half a dozen players from my old club, South London Warlords, that meet in the home of one us. I need games that are conducive to this format. I am also in the process of joining a more local club in Tunbridge Wells. Where that will lead I’m not sure – but that I will need material ready for the club game format. I can put on a game of Lasalle 2 readily enough with my Napoleonics – but these rules are unfamiliar to my fellow gamers. And I hesitate to suggest that they buy a rather pricey rules booklet. These published rules aren’t easy to scan to distribute, even if that was legal – and the clever activation system is a bit awkward in a multiplayer format.

    I have been eyeing European wars of 1859 to 1871 for some time. I have been buying Bruce Weigle’s rules, playing the odd game with my friend George, leading up to participating in an 1859 game (part of Solferino) led by Bruce himself at Newbury in 2019. I am also owner of Chris Pringle’s Bloody Big Battles rules for the period, and tried to adapt them to the Napoloenic era – and acquired his extended scenario book. In addition, I have wanted to try out 10mm miniatures. It then struck me how suited this period is to the multiplayer format. On the battlefield the army command function had comparatively little influence, with corps and divisional commanders playing a more decisive role on the day (the army commander doing more to set the day up). Historically it is a very interesting period, marking the transition from smoothbore to rifled to breech-loaded infantry weapons and artillery. The battles were mainly between well-trained regulars, and the short wars meant that there was comparatively little of the complexities of attrition (until 1871, anyway). This makes the wars cleaner than the overlapping American Civil War, as well as the armies being a bit more interesting to look at, including the continued use of shock cavalry.

    Three ideas converged. The first is that I wanted to play the battle of Custoza in June 1866. This was a close fought battle between the Austrian army and the Italians – and an interesting counterpoint to the disasters faced by the Austrians to the north against Prussian needle-guns. The second was that I wanted to try 10mm figures. My much loved 18mm Napoleonics are bigger than ideal for big battles, and I find 6mm (which I use for GNW) a bit wee. I wanted to see if I could get 10mm figures table-ready quickly by streamlining the painting process. Third I wanted to try basing figures 30mm by 20mm. My Napoleonics are on 25mm square bases, and my GNWs are on 20mm squares. These look fine when combined into multi-base units. Oblong bases look better when on their own – which they are for Bruce Weigle’s system, for example. This base size looks good for 6mm troops, and I thought they’d work well for 10mm too.

    Perusing the Pendraken website, I saw that they did Italians for the period in 10mm. That tipped me over the edge and I made an order, to see how they looked. And I was off. There was a big psychological release being involved in a brand new project in a new period – one not weighed down by questionable decisions on scale and basing made long ago. I now understand why so many gamers do it so often, notwithstanding having failed to complete earlier projects. I have acquired a number of books, and I’m researching the history eagerly. My initial aim is to mount a game for Custoza. The starting point is the BBB scenario for the battle. BBB rules are perfectly workable (I think they work much better for this era than Napoleonics) – but they are still rules for smaller scales being made to work for big battles, with a rather artificial feel in that context. This criticism can’t be made of Bruce Weigle’s system (the 1871 rules adapted for earlier periods – which is what we used in Newbury) – which in particular allow bases to move individually without being forced into constrained base-to-base formations. But these rules aren’t really suitable for the sort of game format I’m planning – they’ll take too long. Besides they are designed for rather smaller battles (there is a Custoza scenario, but it doesn’t cover the whole field for the whole battle). So, fresh from success with my Carolus Rex GNW rules, I’m looking to make my own.

    How about the Italians? I bought a Pendraken “army pack” with 90 infantry figures, 30 command figures, 30 Bersaglieri, 15 cavalry and 3 guns. Unfortunately they sent me the 1849-59 version, not the 1859 to 1866. The infantry were in tunics rather than greatcoats, the cavalry were dragoons rather than light cavalry, and I had grenadiers in place of Bersaglieri. I decided I quite liked to the look of the earlier infantry, and the dragoons were nice, and perfectly usable, too. The grenadiers were the main problem – but Pendraken were happy to send me a pack of Bersaglieri (they offered to replace the whole order, of course). So what I have is more an 1859 army than an 1866 one. Since 1859 is on the more distant agenda, that’s not a worry.

    The next question was how many figures to put on a base? My first thought was 10 infantry or four cavalry. There is room. But then I thought I could get away with 8 and three respectively – since looser formations were starting to be used in this era. I mounted all the line infantry at 8 to base, except one flag base with 10, to see how it compared. For the Bersaglieri I put then five to a base. This is the result (with the 10-figure flag base):

    I made up three groups of four line infantry bases and one Bersaglieri, 15 infantry bases in all. Unfortunately I think the denser basing looks better – and illustrations from the era often show dense deployments. My plan is to mount my next batch, which will be Austrians, at 10 to base (or 5 or 6 jagers),and see how they look en masse. The Austrians particularly favoured dense formations anyway. The flags, incidentally, are from Pendraken. Given the general dullness of the troops (many wore greatcoats in the filed), the flags are an important feature. The Pendraken flags are quite basic, but do the job. They don’t do cavalry flags though, which might be a problem. Talking of cavalry, here they are:

    These represent “line cavalry” or dragoons – the nearest the Italians had to elite heavy cavalry, of which they had four regiments. I have representatives from two regiments. A denser basing would be justified here too – but the pack size is 15, one short of what I need for four bases. Since I will (probably) be operating the cavalry in brigades of two or four bases, life is going to be harder if I can’t get four bases out a pack. With three to a base I might even get and extra base. With the cavalry present only in small quantities, that proved decisive, and I will stick to three figures a base – the look is perfectly satisfactory. Here’s the artillery:

    These are 8-pounders, the typical Italian artillery piece, which were rifled in 1866 (but not in 1859). They look distinctly like Napoleonic smoothbores to me, but Leon from Pendraken assured me that he did research them, and I know no better. Reliable information on the Italian army of the era is hard to come by, and I’m very thankful that Leon took the job of producing this range on. I have found little consistent information on the line infantry. The Osprey, which covers the topic only briefly, has no pictures of standard line infantry of 1866 – or the Piedmontese army from before. Pendraken supply four crew figures for each piece but I didn’t like one of them. I thought I might reserve four crew figures for heavier weapons.

    I will leave description of how I have prepared these figures to another post, when my Austrians are done. My hope is that I can get these troops table-ready quickly. Much more quickly than my 18mm troops, and even the GNW 6mm ones. The jury is out on that. The uniforms are quite simple, and the figures small enough not to need much detailing. Piping and braid need not be attempted! Even the black facings on the Italian infantry present so little contrast to the dark blue coats that I didn’t attempt it. The Austrians wore their greatcoats in the field (removing the tunics underneath in warmer weather), which will be just as simple. This batch of 15 infantry bases, four cavalry and three artillery took a bit longer than I hoped though. I will need over 70 bases of Italians alone if I follow the BBB scenario. I think I will try bigger batches, but of one troop type. This will be pretty boring, but hopefully faster. For the first Austrians though I will do a similar mixed batch, though.

  • Playing an 1859 game with Bruce Weigle

    The Italians mass for their attack on San Martino

    It was my privilege to play a game with Bruce Weigle at the Colours show at Newbury Racecourse last weekend. Bruce is famous for two things: his rule system (and series of informative rule books) for the series of European wars fought out between 1859 (Second Italian War of Independence) to 1871 (close of the Franco-Prussian War), and for his superb terrain boards for his 5mm miniatures, which give you the feeling of being there. Our game was the Battle of San Martino, on the fringe of the main battle of Solfarino in 1859 (which was so bloody it led to the foundation of the Red Cross). It has caused me to reflect on wargames terrain.

    The attack develops as Austrian reserves rush in of the left

    First, a little about the game. The scenario is the Austrian defence of the villages of San Martino and Pozzolengo from an onslaught by the Italian (or more correctly, Sardinian) army. I commanded the division of Italians on the left, who carried out the first assaults on San Martino. These did not go well. The Italians were armed only with smoothbore muskets, had weak artillery, and inferior morale/discipline. Though I was careful to ensure that each regiment I sent in had one alongside it that could conduct a follow up attack, fire from the defenders, artillery or rifles, stopped the attack on all three (or was it four?) attempts before they could close. By this time Austrian reserves, which under the scenario conditions were supposed to be unlikely to get involved, were hurtling up on my left, and I had to reorganise to face these off. There were a number of small but spectacular cavalry forays that wargamers find hard to resist, and that generally ended badly, but the main fight petered out. I considered realigning my attack to sweep round to the left of San Martino, but the Italians’ chances were better elsewhere (especially after I had drawn in those reserves), so that was not to be. Meanwhile Italians to my right flooded in, while the Austrians were quick to commit. This developed into two fights. One was a further assault on San Martino, which got further than my attacks, but also failed. And then there was a sweep to the right of the village. This did unexpectedly well, and suddenly an opportunity to attack Pozzolengo, the main prize (which would cut off the Austrians committed to San Martino), opened up. But the Austrian regiment whose rout had opened up this chance rallied, and did enough to delay this attack so that time ran out for the Italians. Bruce had always said that the scenario was hard for the Italians to win (historically they claimed a victory, but really it was an orderly Austrian withdrawal after the rest of their army was thrashed by the French). But both Austrians were more aggressive, and the Italians more successful than he had seen before – he awarded it to the Austrians marginally.

    The Italian centre attacks San Martino

    We used Bruce’s 1871 rules, adapted for 1859 technology. He has published rules specifically for 1859 (the same book also with rules for the 1864 Second Schleswig War with Denmark); these are a version of his original 1870 rules, of which there is a further version for 1866 (Prussia’s war on Austria). After 1866 Bruce decided that the rules need a streamline, leading to his much simpler 1871 rules, which has a two-page quick reference sheet, rather than a four-page one. The adaptions for 1859 are in fact quite straightforward, and fully contained within the QR sheet, which is published online, albeit without explanation (the small Italian battalion size reduces their combat performance, for example). I was familiar with the 1871 rules (see my initial comments here), but never used them – though I had played with the 1866 and 1870 predecessors with my friend George, who at Colours commanded the Italian centre. The basic playing piece is a battalion, mounted on a 30mm wide stand. The scale is one inch to 100m. To start with we needed quite a bit of help from Bruce. That slowed things down as he was in quite high demand from members of the public (which, after all, is what a demo game is all about), but we mastered the basics quite quickly. The most interesting feature was the simultaneous move system; this was more problematic as it helped a lot to have the umpire’s arbitration, and depends a lot on both players being fair minded. And some people are pushier than others… but it does give the game a stronger simulation feel. Other than that I don’t have much more to say on the rules system from my article when the rules were released.

    At the close, from the Italian left

    The main thing I hoped to learn from the day was not about the rules system, but the terrain presentation. Is there anything that can be taken from Bruce’s fantastic table that I can use for more ad-hoc games without the creation of a detailed board? What helped to give the terrain its authentic look? The first point is scale. Quantity beats quality, and the smaller the terrain scale, the more you can cram in. The terrain scale is 1:4,000. The terrain features about 1:500 (or more, maybe), and the troops about 1:300. Some wargamers, in larger scales, get upset when the doors in their buildings are too small for their miniature soldiers. But scaling the buildings to the miniatures comes at a huge cost, both because you must have fewer buildings, and the tendency for those buildings to look toy-town by having oversized doors and windows. So 6mm buildings with 15mm figures is probably a price worth paying.

    Second is irregular shapes: the sinuous roads and streams and the irregular field boundaries and woods. We often use standard sections made up straight lines and sharp bends for roads and rivers/streams (which are generally too wide for the terrain, though not the figures). We don’t usually bother with field boundaries outside skirmish games, though at least the availability of printed terrain cloths is helping here. Third is sculpted hills with natural shapes, blended into the terrain. Fourth there are the trees. Lots of them are scattered as embellishments to villages, roads and rivers. And wood boundaries are marked by a continuous line of trees, with the interior left open but coloured dark green. This is an idea of genius though he could go even better by showing the undergrowth layer that is usually at the edge of woods (i.e. so the wood boundary is a sort of tall hedge rather than a line of trees). You tend not to see rows of tree trunks when looking at a wood from outside – foliage grows where the light is. And finally there is a more subtle point that has only just occurred to me – the use of unsaturated colours – in other words colours with a bit of white in them. Saturated colour comes on bright and strong, and are OK when you are representing strong sunshine an clear air (the Sahara perhaps), but not so much in northern or central Europe. Also there is a scale effect – colours become less saturated with distance, or the more air the light has to travel through. Since small scales represent a greater distance between model and viewer they should be represented in less saturated colours. This is a well-established technique when painting models and figures (often achieved in the weathering effects rather than the original paintwork), and I use it a lot in my 20mm WW2 models. But terrain is more of a problem, because of the use of pre-coloured materials (dyed cloth, flock, teddy-bear fur and so on) which tends to be saturated. Bruce hand paints his scenery (within airbrush often) onto white T-shirt cloth, allowing a more faded, water-colour look. I think this adds to the authenticity.

    At the end. Pozzolengo in the foreground

    And on the other side of the coin, what does Bruce not bother with? There is little texture to boards, which are essentially painted cloth. That painting is quite artful, with subtle shading for slopes, but it is flat. No teddy bear fur here. The vineyards and characteristic of this part of the world are just painted in. Of course the small scale of both men and terrain helps here.

    There are good reasons why wargamers don’t do what Bruce does, but there may be ideas that we can use. A printed or painted cloth for one, more sinuous pre-made roads (using caulk, perhaps), and the more imaginative use of tree models. Hills are a big headache – and always have been for me. In the 1871 book Bruce suggests shortcuts to achieving a good-looking board without going through the whole rigmarole. He suggests the age-old technique of placing a cloth over polystyrene formers, of which he has a collection. Historically precise matching of contours is not needed for the sorts of games we play. The problem is that the cloth needs to be pinned in place. In fact pins are useful for a lot of terrain items, including trees, since they do away with the need for obtrusive bases. But what do you pin into? When playing “away”, such as at the club or a friend’s, it is not practical to bring large boards with you, leaving you with hard surfaces that in any case should not be damaged. Besides you don’t have much time for set up and take down. One answer (that increasingly I see at the club) is not to represent relief at all, and play on a flat surface. We did this for our Shiloh and Antietam games, as well as the Waterloo scenario. Other terrain features can dominate hills, and in our large scale games weapons ranges aren’t that long. Where a ridge line is important (as with our Waterloo scenario), alternative ways can be found to simulate it (we used a hedge), or perhaps just mark it unobtrusively.

    Food for thought. There is an important difference to Bruce’s tables though: I am trying to create tables for 15mm or 20mm miniatures. These are bound to look different, and some of Bruce’s effects will be impossible to achieve. But I still think we can do much better.

    At the end from behind the Italian centre. San Martino is in the upper centre and Pozzolengo on the top right. This picture gives an idea of the overall effect of the terrain board.