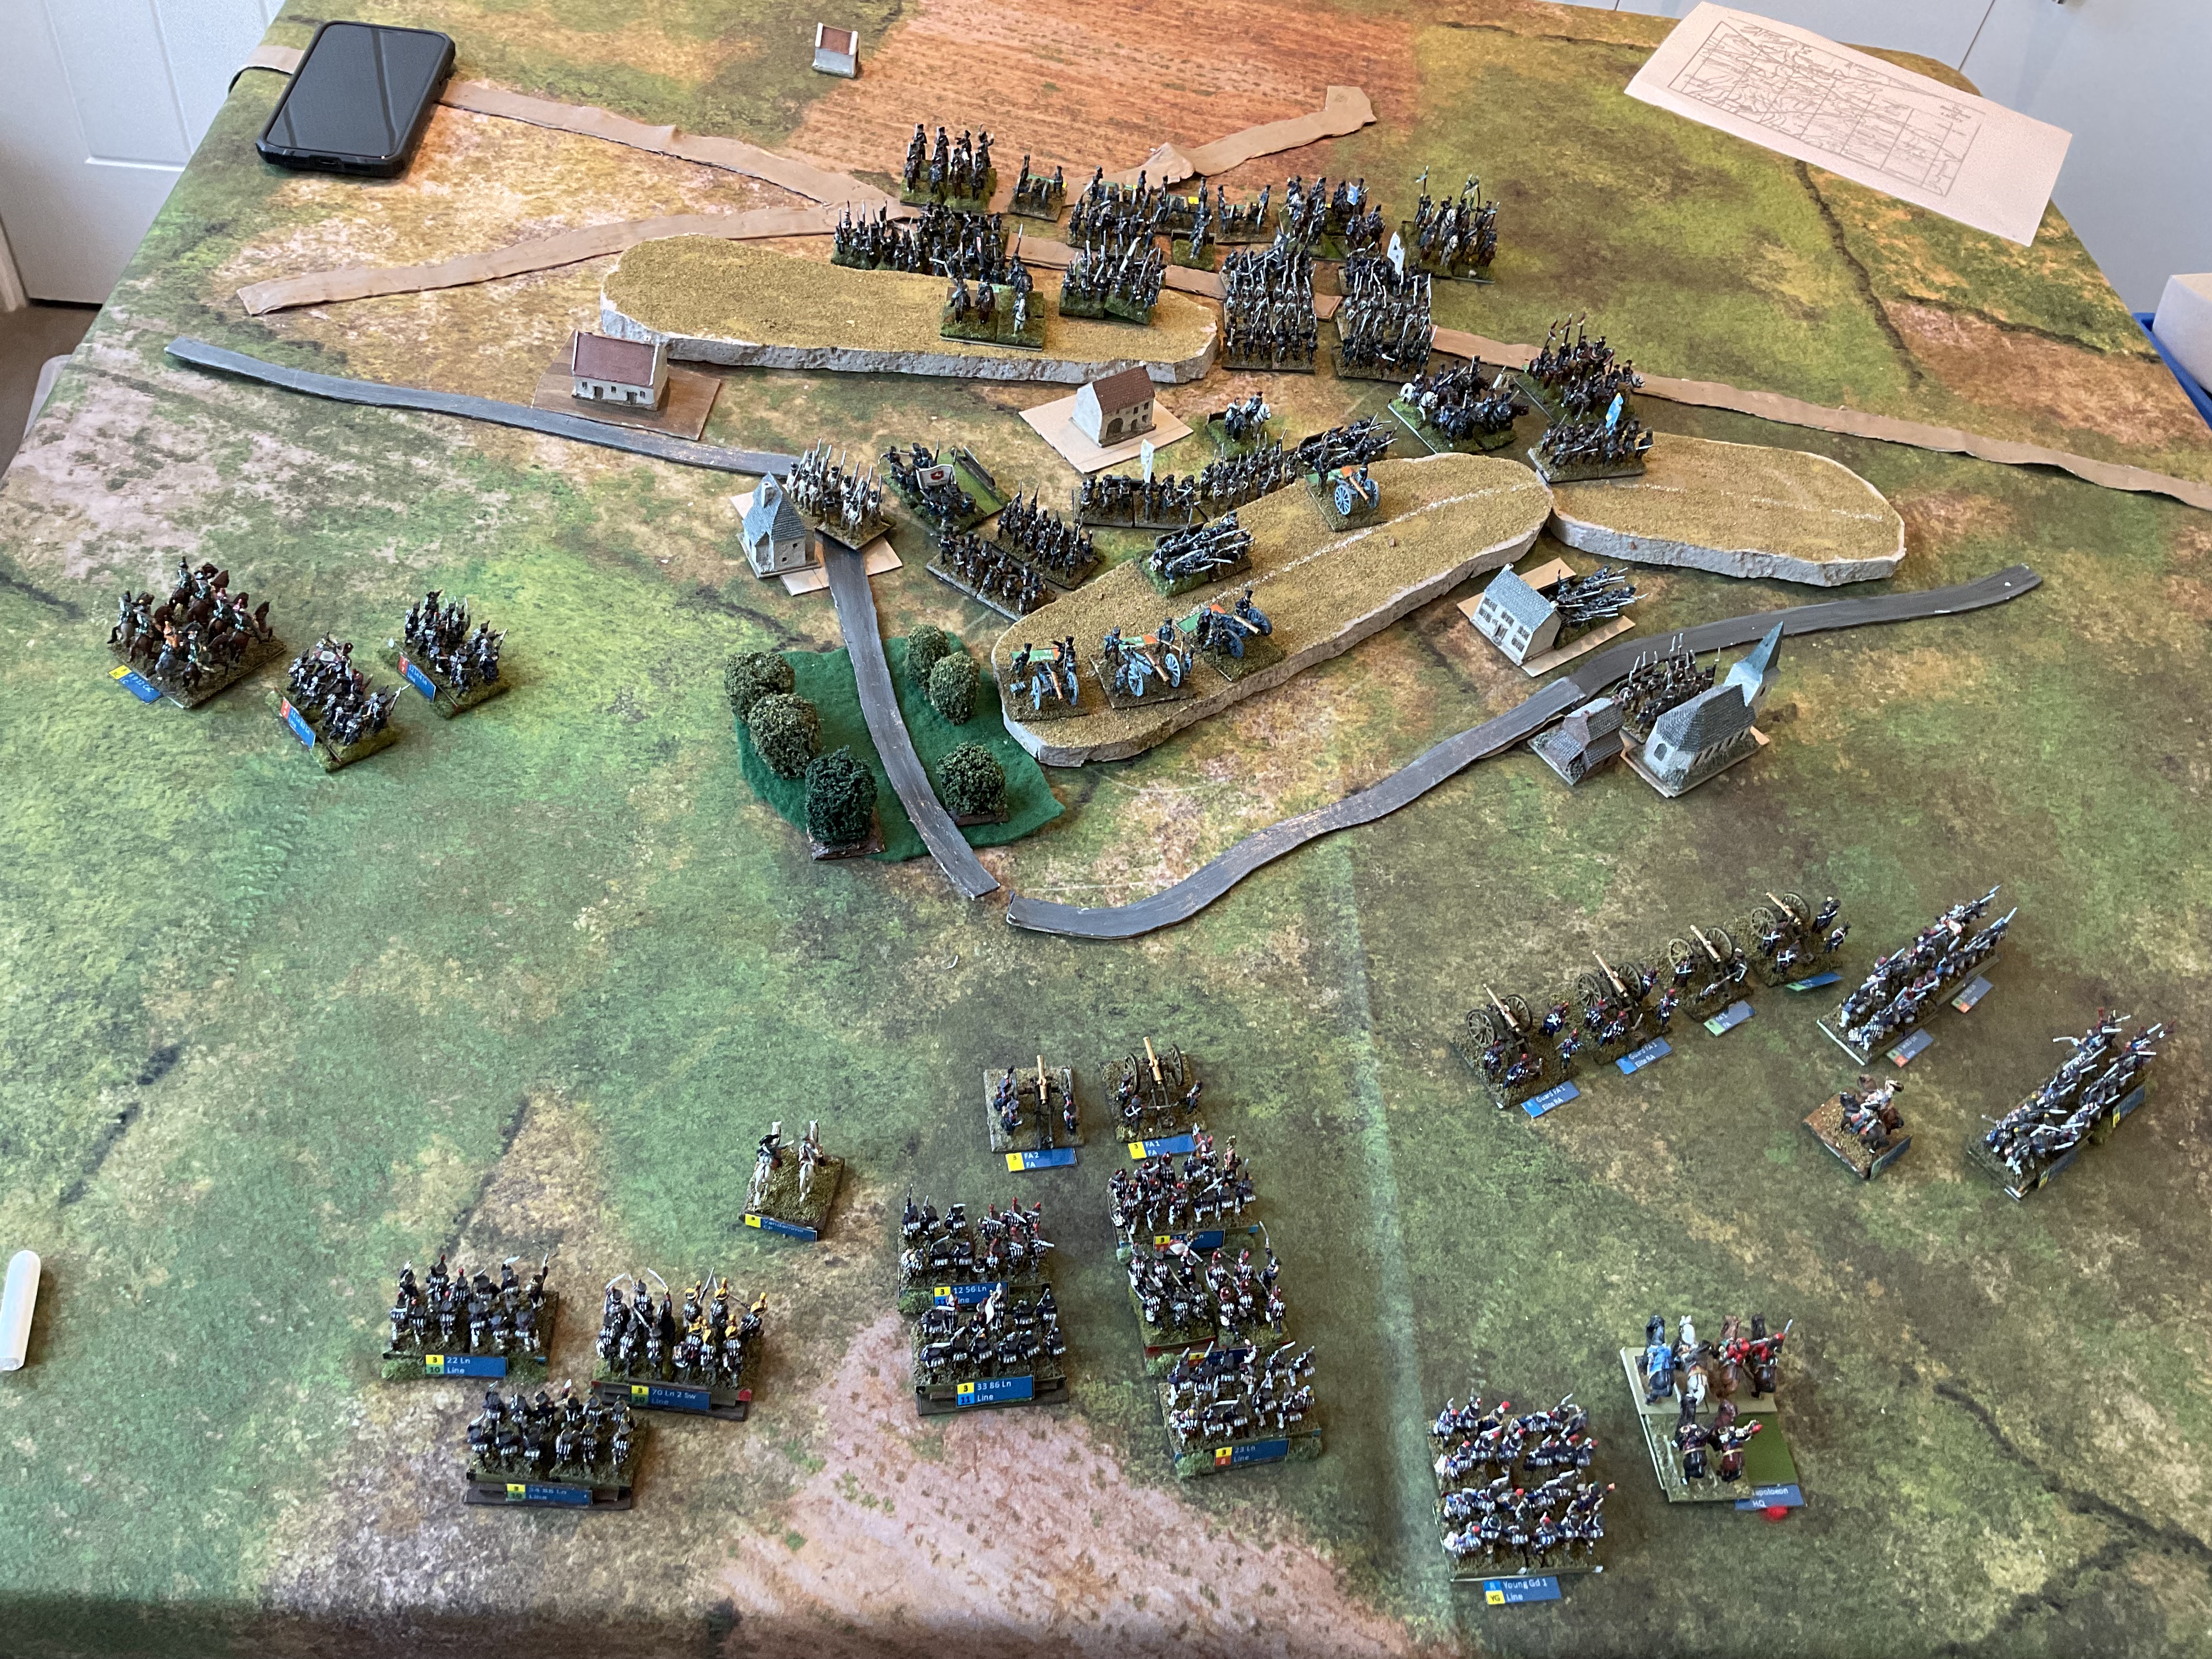
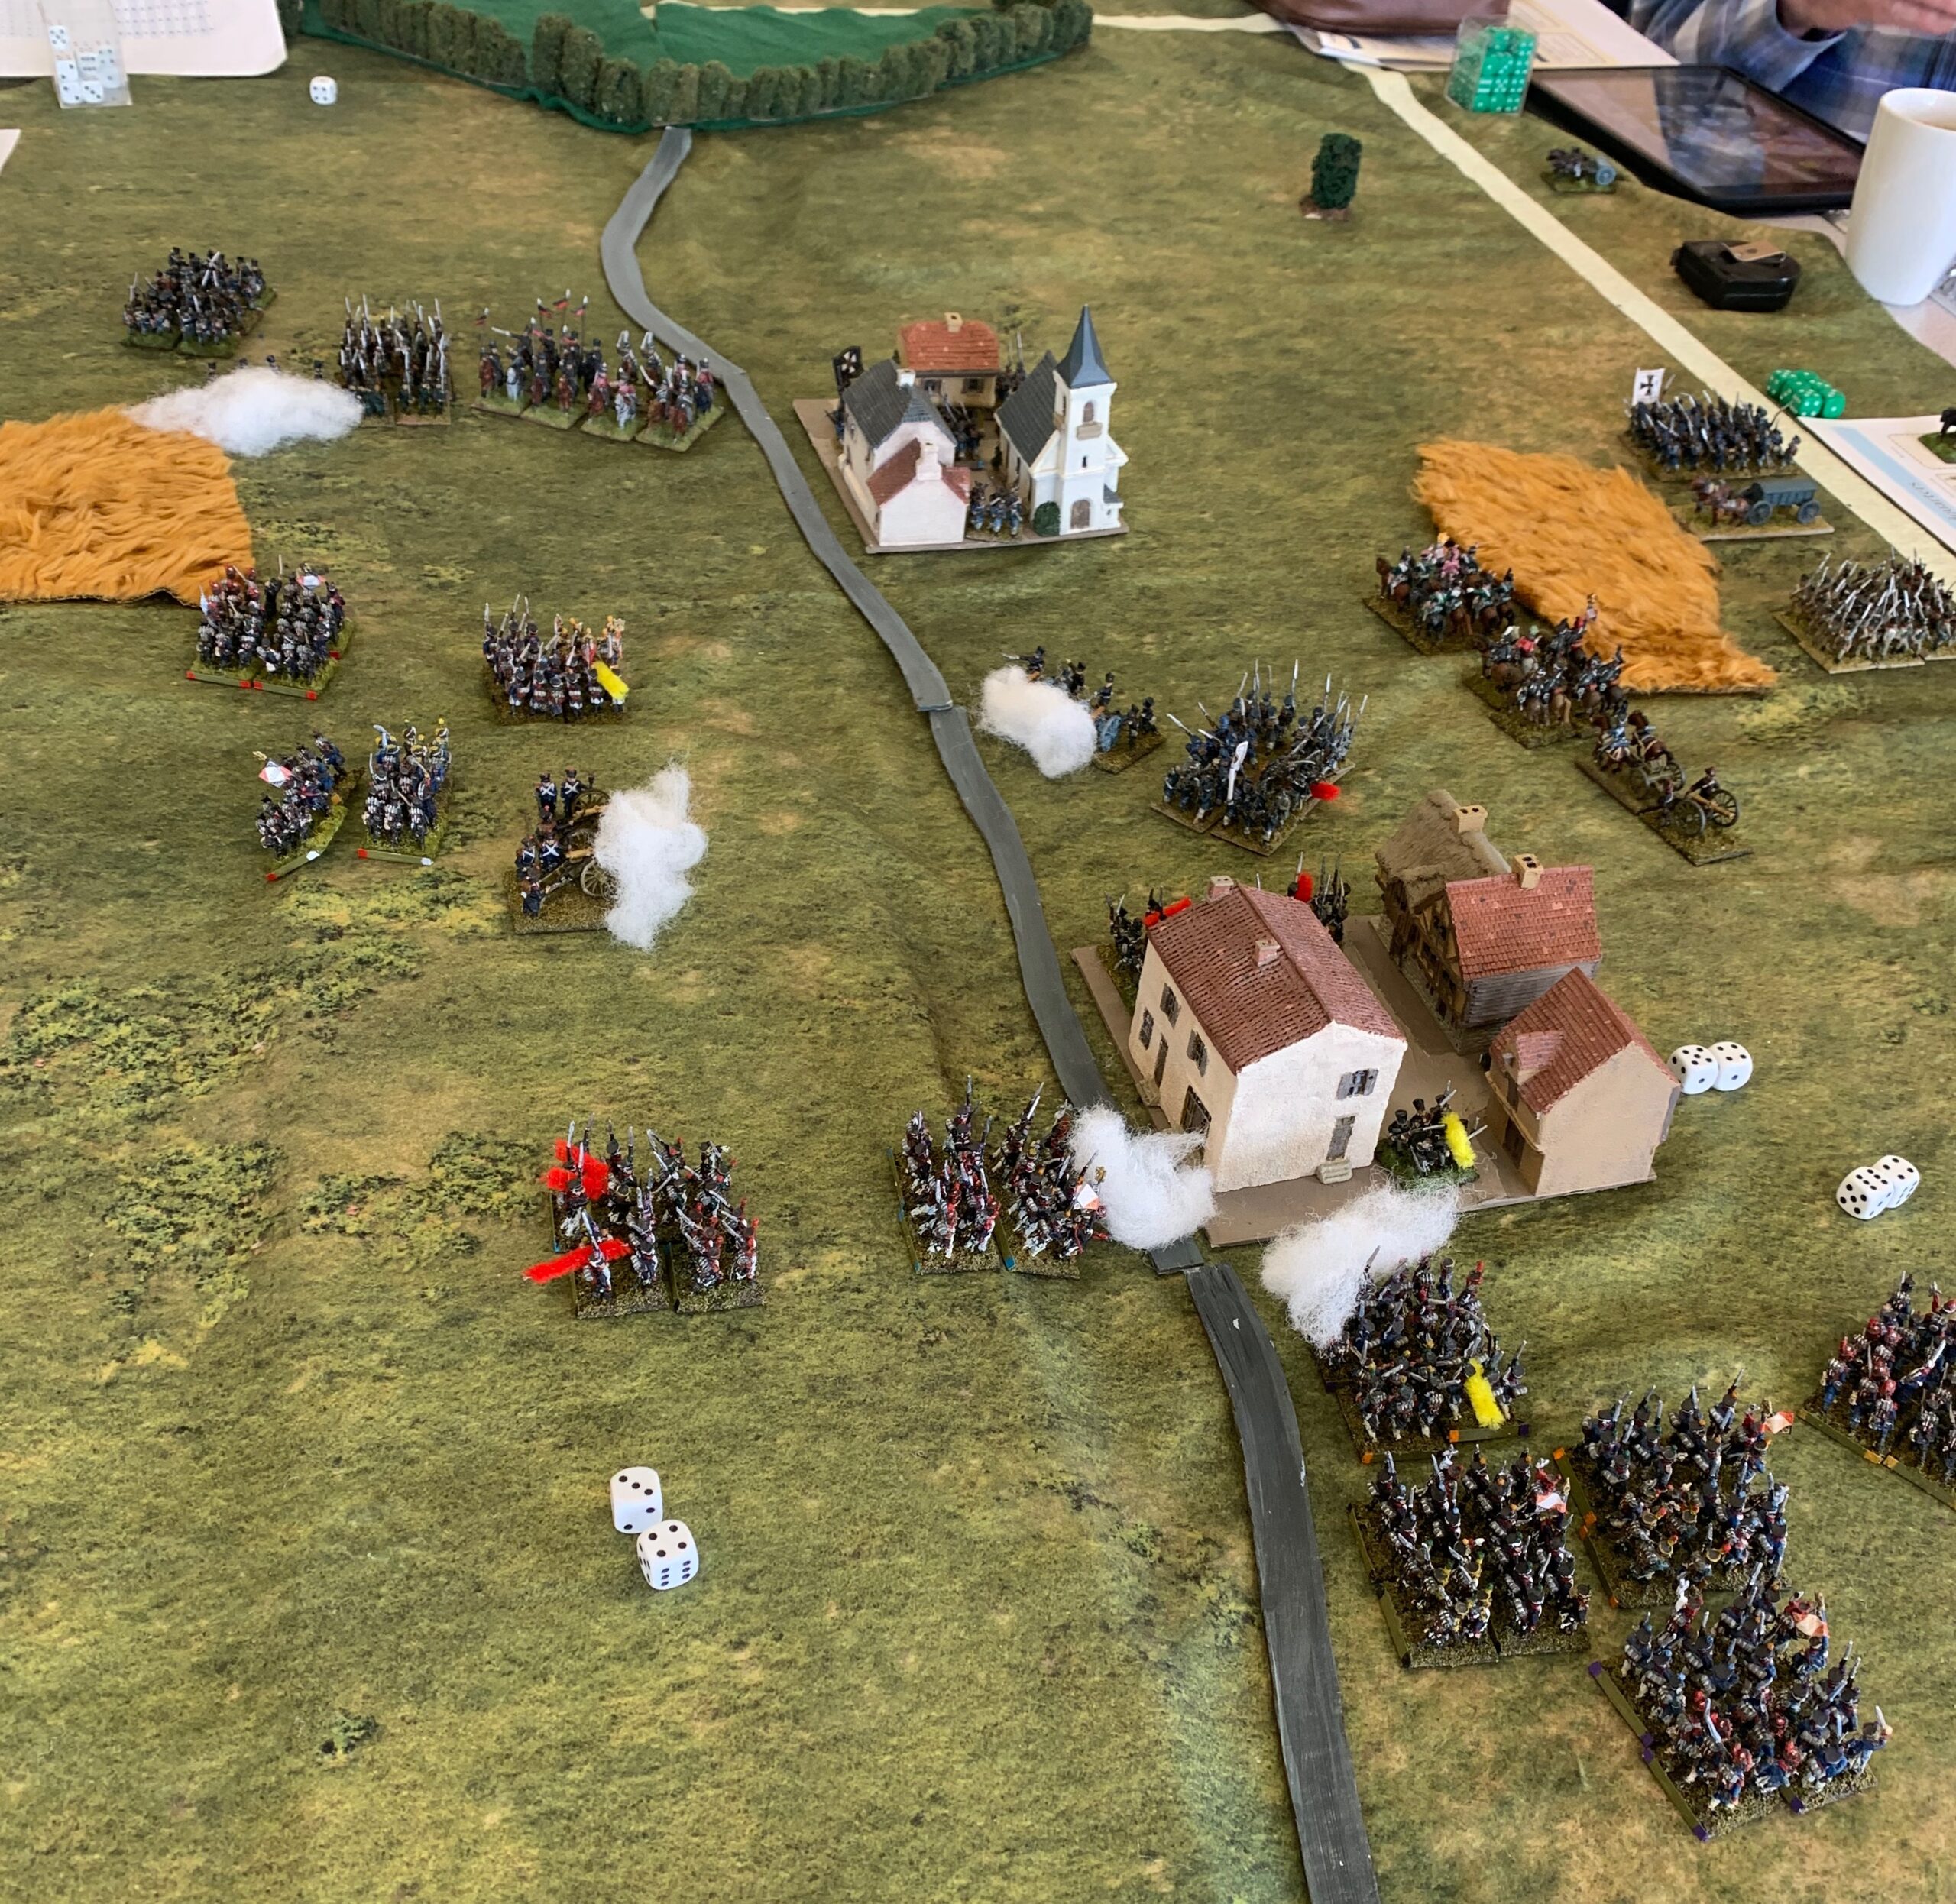
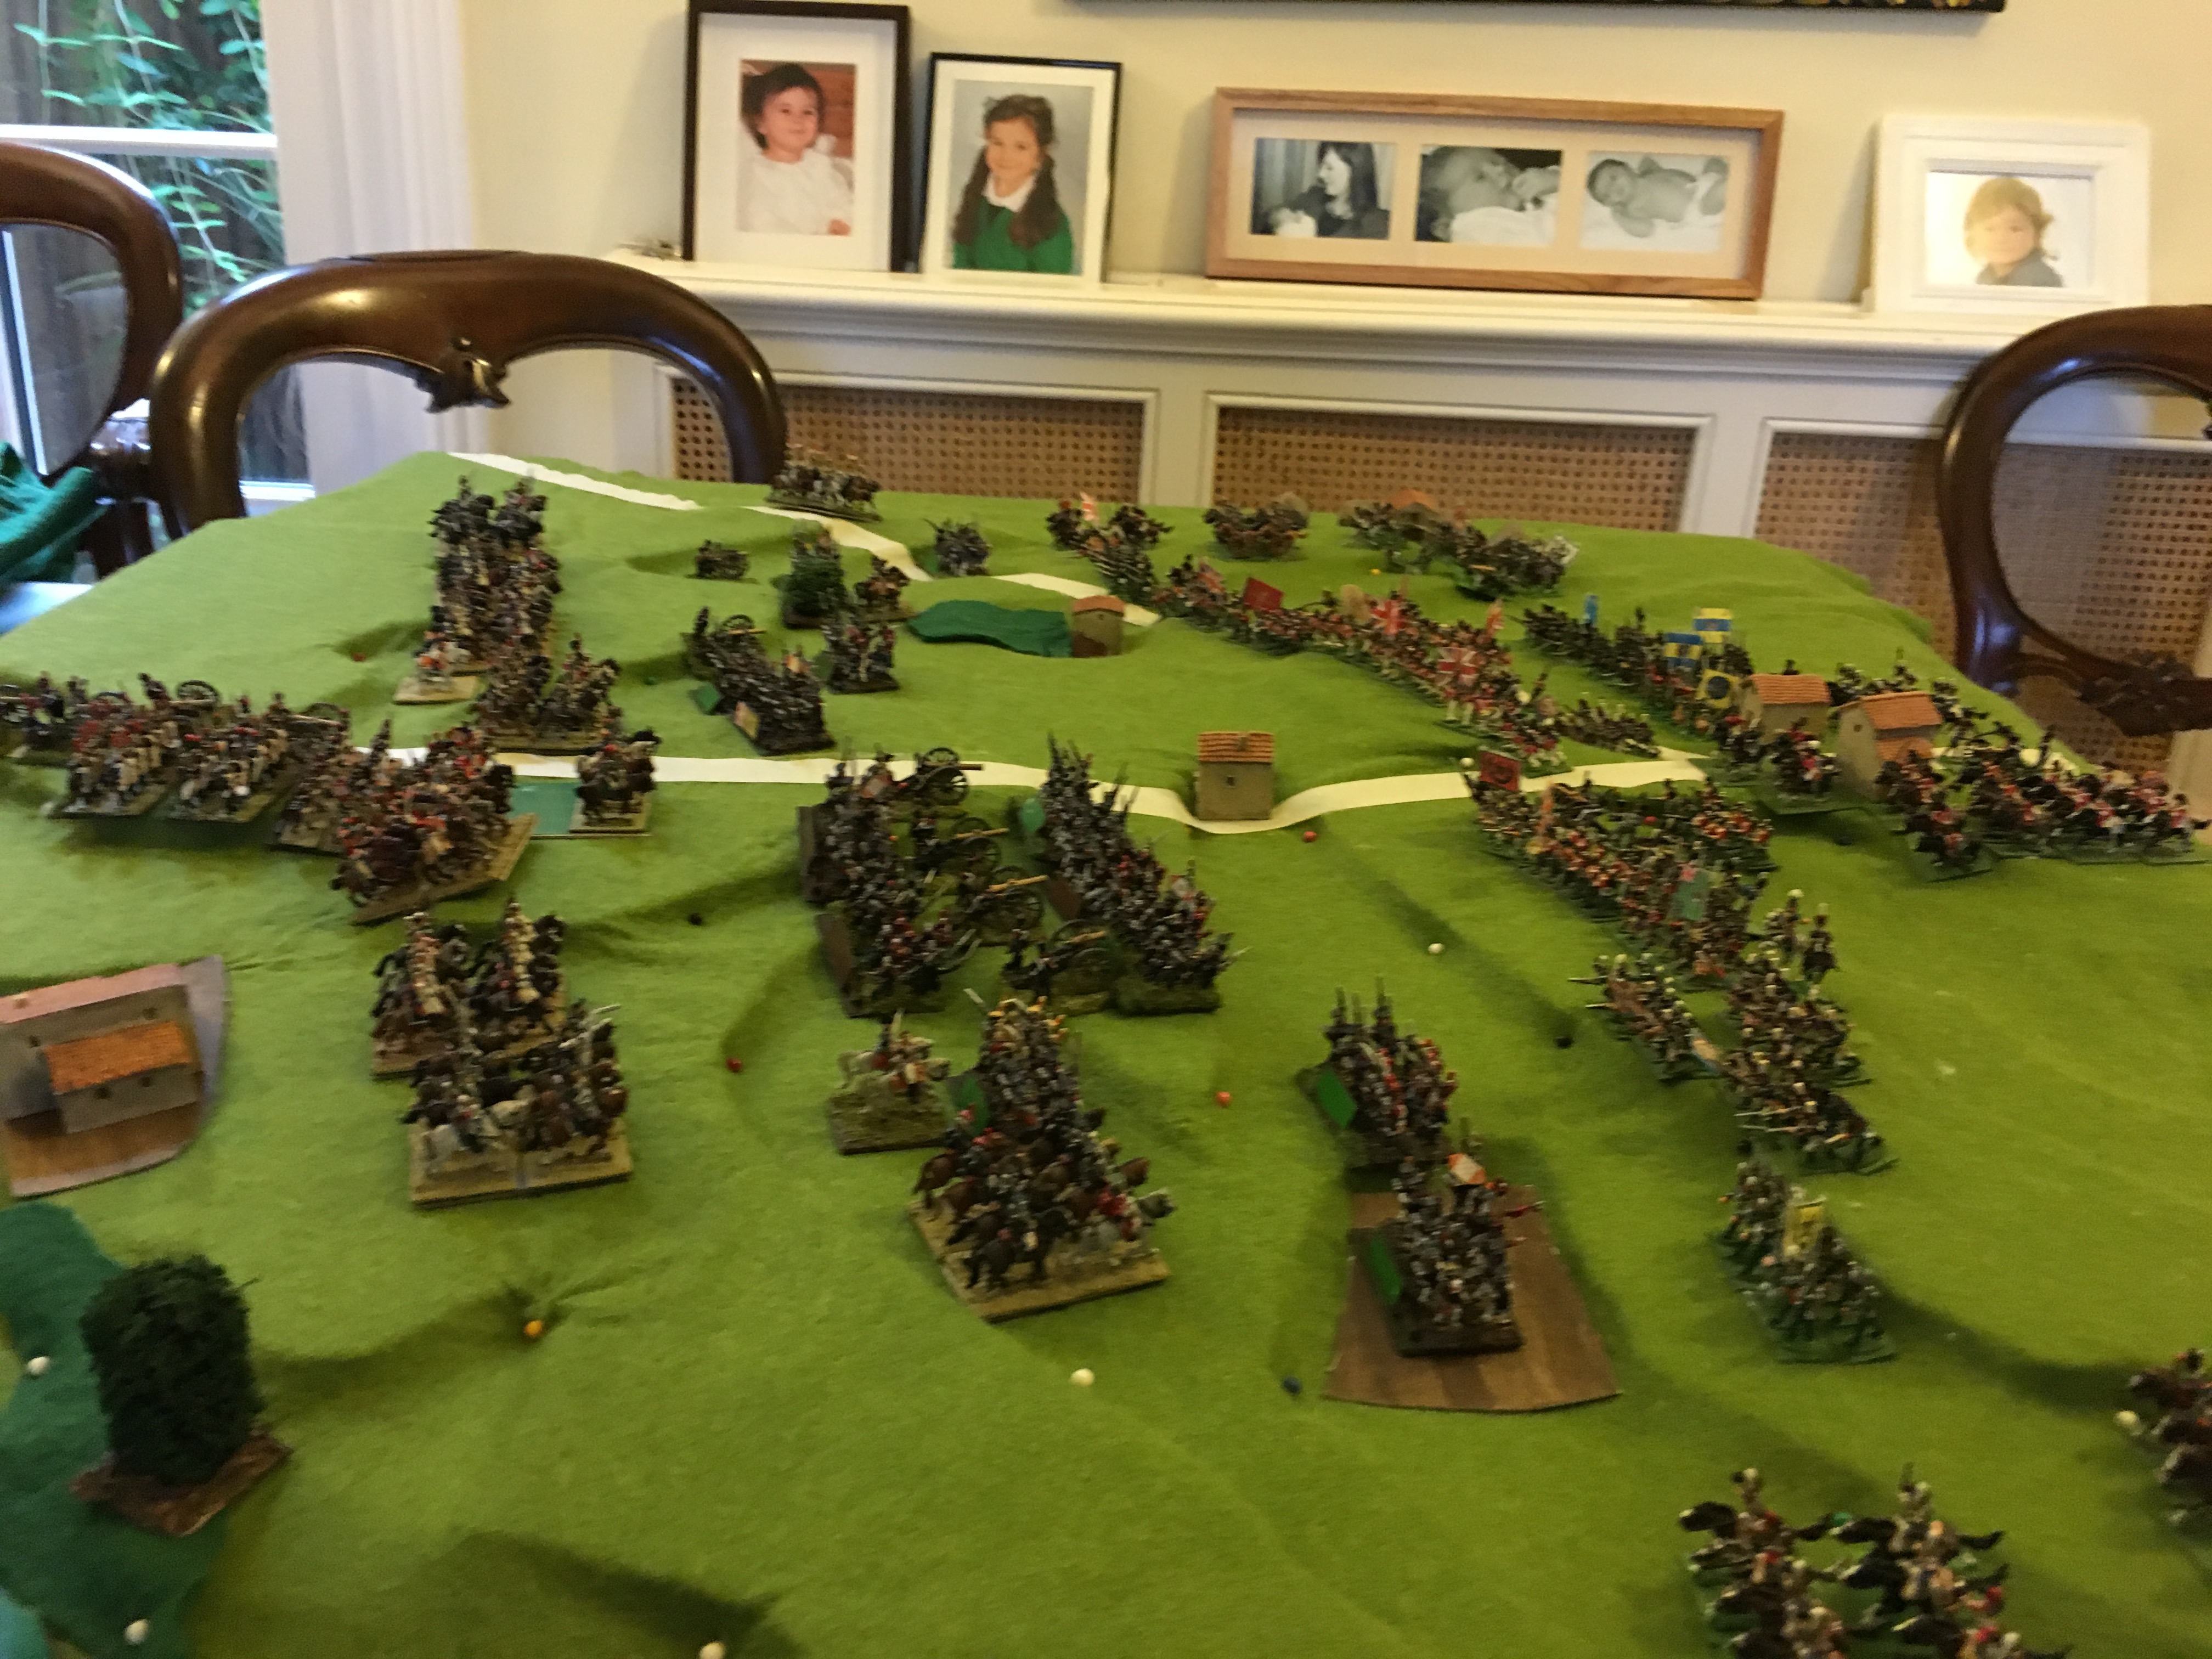
Category Archives: News

Impressionist figure painting – my 6mm GNW army

Six Russian infantry units and regimental artillery. The new Swedish cavalry is in the background

After getting back into the Great Northern War, it was time to bolster my rather limited armies, and run down my lead mountain. My biggest deficiencies were Russian line infantry and Swedish cavalry. So I have painted up six units of Russian infantry, and two units each of Swedish line cavalry and dragoons. I added in some regimental artillery, and a Swedish general. It is some years since I last worked on 6mm figures, so this is quite a break from normal.

The miniatures are from Bacchus, and were all bought back in 2012. I bought a job lot from a friend who had decided to take a different route on his GNW forces. I then developed an absurdly ambitious plan to build up my armies, and bought loads more from Baccus. Then I got distracted when about half had been painted up, and the painted and unpainted figures lived in a plastic box for a decade or so, rarely seeing daylight. I had enough painted up enough for an interesting game, but choices for force composition were very limited. My plan was to paint up two more batches (this is the first), amounting to half or so of the unpainted ones, and then stop – unless a particular need arises.

My original figures were painted in a manner quite similar to my larger 18mm ones. I painted them up before mounting on bases, and put quite a bit of detail on them. Even the barrels on the muskets. But I noticed that this was taking quite a long time, for a scale which was supposed to be quick! This time I wanted to take a different approach – more inspired by Impressionist painting. Impressionist paintings are beautiful from a distance, but make a lot less sense closer up. This is harder than it sounds!

The first step was to mount them on the bases. Apart from the artillery, these are mounted on 20mm squares of MDF, which I had bought along with the original figures, and of which I have more than I will ever need. The regimental artillery is on 15mm squares. I find this system of basing very attractive – though it is what caused my friend to abandon his miniatures, and buy in others mounted on larger bases, with one base to a unit. Baccus produces its infantry figures in 20mm strips of 4 side-by-side. Three of these fit comfortably on a base one behind the other. Historically formations were four deep, with about 150 files (i.e up to 50 per base). So these bases are both too shallow and too deep! Nevertheless this basing recalls contemporary representations in pictures. This would be easy if I could simply plonk the strips on the bases. But there are two problems. Firstly the command strips (supplied at a ratio of one in five in the packs) only have one standard bearer, along with an officer, flanked by two drummers. I like a good proportion of my units (typically the first battalion of a two battalion regiment) to have two flags. That means cutting up the command strip, and then the line strips to make room for the spares. The second problem applies to the Russians only. Russian infantry at this time was armed with a small proportion of pikes (one in eight); I read now (this wasn’t in the literature in 2012) that these were deployed in every other file in the front rank. I decided to represent this, rather than just plonking a strip of pikes in the back row of the centre stand, as I did before. I decided to distribute them PMPM; PMMP; MPMP – so that the pikes would be on the corners. That means cutting up the pike strips, and also the musketeer strips for the front row. Each pair units uses three command strips, three pike strips and 12 musketeer strips. You can just about see how this works on this close-up:

My representation of the Butyrski infantry regiment

The cavalry is more straightforward. These are come in strips of three, fore-and-aft, so they have to be cut up anyway. I mounted the Swedes three to a base, the cavalry staggered to represent the arrowhead formation, the dragoons side-by-side. Actually the Swedish dragoons fought in the same manner as the cavalry; they were equipped to fight dismounted, but I don’t know of them doing this ever in a significant battle (though I know almost nothing of the later war years), unlike their Russian counterparts. Still this mounting serves to distinguish them on the tabletop. Here are the four Swedish units:

The Swedish cavalry, with the dragoon units alternating

I mount the figures in a matrix of acrylic medium mixed with model railway fine track ballast and raw umber acrylic paint. This is the same method as before. The ballast is something I have had for decades: it is finer, lighter (in weight) and more uniform than the sand I use in bigger scales. It gives the surface some texture. After the assembly is fully set, I primed them with gesso mixed with paint. I went for an overall pale grey-green shade (it has to be pale because of the gesso). This is equivalent to the ground in a canvass painting (thinking back to the Impressionists) – the idea is that the colour doesn’t jar if it shows through (modern painters sometimes use a bright ground, thinking that it adds to the effect when it shows through – not appropriate for the wargames table!). Since it was going to be difficult to paint the bases between the strips, I wanted something that would merge with the base colour comfortably – hence the green element. I was overthinking that – in future just mixing in some raw umber (of which I have industrial quantities, thanks to a mistake by my supplier) with the white gesso will be fine. I used an old paintbrush to do the priming, covering both figures and base. I gave some thought to using an airbrush, but actually it can be a little hard to get airbrush paint into nooks and crannies, and getting between the figures and rows wold be tricky. It didn’t take too long with the brush, but it looked awful afterwards, though a lot better after cleaning with brush soap.

Next was the mass painting stage. At his point I treated all ten units and extras as a single batch, though no colour applied to all of them. I started with the horses, using various shades of brown, with some Payne’s Grey, so get a variety of bays, chestnuts and blacks – with a few greys, mainly for the musicians. Also I applied the main coat colour (blue, red or green), and then dark grey for the tricorn hats. For all this, I used my now standard technique of mixing artists acrylic (mainly Liquitex – as their tube design is easily the best, prolonging their life, as well as being excellent quality). No faffing with oil paints as I do with my 18mm horses. All mixes have a bit of white in them. The red was dramatically dulled down (from Cadmium Red Hue) to reflect cheap dyes and campaign weathering; the green (Sap Green as a basis) and blue (Prussian Blue Hue) were dulled down somewhat less. The horse colours (Raw Umber, Burnt Umber, Raw Sienna and Burnt Sienna) didn’t need much mixing beyond a touch of white – though the Siennas are a bit bright and I mixed a bit of the Umbers in.

After this I concentrated on finishing each unit in turn. The Russian units were in pairs of battalions from the same regiment, and each pair was treated as a batch. My worry was that if I did each colour for the whole assembly, I would start to lose the will to live, as the results would take so long to show – as well as the greater likelihood of mistakes. What did I paint? Flesh on the faces and hands; red or yellow facings on the cuffs only; brown for the muskets (where easy to reach) and the hair at the back of the head for the back row; dark grey for the pikes, cavalry boots and the scabbards for the rear ranks only of the infantry; I used a paler brown for the pistol pouches on the front of cavalry saddles . Accuracy was not a priority: blobs here and there where I could reach the spot with a brush. I ignored the legs of the infantry and the neckerchiefs; these aren’t visible enough. Finally some detailing. The hats got trim of white, yellow or gold. This detail really stands out when viewing the figures from above; similarly the karpuses had a contrasting lining colour (white or yellow – against he red main colour); silver for the bayonets, sabres and the pike trips; visible straps on the backs got quick attention too. The drummers and officers got a little more work (including the flags for the cavalry – a base colour, edging and a blob in the middle). And that was it. The final step was to wash the figures with diluted ink (peat brown or black).

Then, of course, there are the bases. I don’t go for the fashion of elaborate works of art; I don’t want the bases to draw attention away from the figures, and ideally I want them to blend with the table. At this scale my normal techniques of using flock, sand and/or static grass wouldn’t work – the strands and grains are too big – I just used paint and the texture arising from the basing material (i.e. the model railway ballast). It took me a long time (i.e. trial and error) before I settled on a shade of green that wasn’t too verdant or too grey – a combination of black, white, Yellow Oxide and just a little Sap Green. I then gave them a heavy highlight of a white and yellow mix. I also used a white and Raw Umber mix on some of them. I was left with the issue of the base sides. The MDF I am using for the bases is very chunky – typically I use much thinner material for bases, so as to blend better with the table. But I like the feel of the chunky bases, and it certainly makes handling easier – you can grasp the bases rather than the figures. But what to paint them? At first I tried a green to match with the table surface – but then I noticed that these edges were often shaded. I thought a bit of countershading might work, so I used a white and Raw Umber mix. Whether or not the countershading works (not really light enough from the pictures above), I did like the overall result.

The infantry represent three Russian regiments – Astrakhanski, Butyrski and Schlisselbergski, with two battalions each. Uniforms were subject to the colonel’s whim at this stage, and there was a lot of variation. Evidence for particular regiments is patchy, and my sources back in 2012 disagree with the most recent ones (a book from Helion), so there’s a lot of guesswork. I gave the Astrakhanski and Schlisselbergski green coats with red facings – the most common scheme, which later became the standard. I gave both of them a carpus for headgear in place of the usual tricorn – because I had a lot miniatures with these hats which needed using up (Bacchus don’t appear to sell them any more for the Russians) – these I coloured red and yellow and red and white (one of my existing regiments has a green and white karpus – allowing a ready distinction between the three units). The Butyrski regiment I gave red coats faced yellow, with tricorns with yellow trim. I haven’t given them their flags yet – I’m waiting for colonel’s flags with eagles, though I have coloured company flags from Baccus. I painted the regimental artillery crew in the uniform of the parent regiment (though with tricorn hats in all cases), but the gun itself in red, as used on the bigger guns.

The Schlisselbergski infantry.

The Swedish cavalry represent the Småland and Nyland Indelt regiments, along with the Gyllensterna and Taube dragoon regiments. These all had the standard Swedish blue uniforms; I decided not to try and represent the yellow breeches or coat turnbacks, with facing colours (yellow, red or blue coat colour) on the cuffs only. On the Swedish infantry it will be worth a dab of yellow on the front for the breeches and turnbacks for the front rank at least.

The Nyland Indelt cavalry

And that was it. Alas my photography at this scale is a bit weak, so I’m not giving much of an impression of the result. They are a bit dark maybe (but they need to fit in with my earlier figures) – perhaps an example of the rule that you should use paler colours for smaller scales. But the results work on the tabletop – the Impressionist approach works, and is certainly quicker than attempting too much detail (and correcting minor mistakes). I did need to repaint the bases on my earlier figures to make the assembly more coherent – but I didn’t like these earlier bases anyway – they were too bright and too dark. I will move straight on to next batch, which will add four Swedish infantry units, along with two more units for the Russian Guard, a Swedish heavy gun, a Russian mortar and more limbers.

Carolus Rex – my Great Northern War rules

My trial game using IDV reaches its climax

I have mentioned that I have a small 6mm (Baccus) collection of Swedish and Russian troops for the Great Northern War in the period 1708-09. I offered to bring these out for a game with my South London Warlords friends at one of our regular meetings in Beckenham. The game had to be postponed, alas, but it has got me going on an interesting project: developing a set of rules that I can use with these miniatures with friends not inured in rules systems or the period.

There was no time to develop new rules for the planned game in January. My idea was to use Helion’s In Deo Veritas (IDV) rules, by Philip Garton. I reviewed these a while ago (here and here) for use with my GNW forces – when I thought they were an answer to a prayer. They are really designed for an earlier era, but I thought that it didn’t matter much; indeed Helion and Philip brought out Captain General, a supplement to take them into the early 18th Century. They are pitched at exactly the right level for the games I want to put on.

The problem for the January game was that the format isn’t very user-friendly – the rules are spread over 66 pages with lots of nice pictures and large script, and four pages of quick reference tables in smaller script. This is how publishers like it – Osprey’s Lion Rampant is the similar. Scanning them to prepare other gamers is deeply impractical, as well as a breach of copyright. I like my rules to be compact, allowing the minimum of time to check things out. The rules are also a bit vague in places. This doesn’t seem to bother most people – IDV has a fan club, and people are generally complimentary about the presentation in reviews. One reviewer does try to deal with some of the ambiguities, sharing a correspondence with Philip. I have tried contacting Philip via Helion on a couple of queries, but without luck. What I decided to do was to write my own compact version of the rules, tailored to my basing system and the troop types I was using, with a couple of extra rules to cover the peculiarities of the Swedes, and dealing with aspects of the rules that I felt were unclear. This came to six pages (just) in 10 point script with a two-page quick reference. I then ran a trial scenario at full strength (illustrated above), after having already played a game with the original. This showed the need for a few adjustments, but the rules were suitable and ready for my January game.

But then some serious health issues arose with my wife. We were going in and out of hospital, with the prospect of a big operation in February or March. This meant having to apply an isolation regime, in case of picking up an infection that would throw everything off kilter. My January game was off, and any February one was looking very shaky. This was a big blow, but the enforced idleness gave me an opportunity. Some aspects of IDV were a serious problem for me, applied to this particular period, even though it gives a thoroughly entertaining game. And there were other, lesser things I wasn’t so keen on. I now had time to write my own rules taking in aspects of IDV that I liked (which in turn were largely culled from other systems – such is the evolution of our hobby), and combine them with ideas from other rules. And one set in particular: Gå På (GP), by Thomas Årnfelt. These were the rules that brought me into the period, and which I had used quite a bit. They were innovative, and used the GNW as their starting point, rather than tagging GNW on to the wars of Louis XIV – the unusual Swedish army was handled with proper attention. But the rules are too complicated to throw at my club colleagues for a quick game. The core rules are 35 pages, with only a few line drawings for padding. A lot of time in games was spent trying to find a particular rule to check something. There’s a further problem: poorer quality armies (including the Russian one) were prone to collapse, even when they had a substantial numerical advantage. It was hard for the Swedes to lose, even with a half the number of men, provided they were handled aggressively. Regardless of whether this is historically sound (which I don’t think it is for the Russians in 1708/09), it didn’t make for good gaming. The friend that I had played so many games with gave up on them after a while. The problem could be addressed by weighting the Russians with guard and veteran units, but that is a bit artificial.

The biggest problem by far for me with IDV is that the armies are too responsive – there isn’t enough friction, and this is not impacted by quality of leadership. There is friction – with the use of Attack/Hold/Withdraw orders constraining choices, and restrictive rules concerning direction changes. But against this move distances are long for the standard 4ft by 6ft table which speeds things up a lot. My test scenario was inspired by the battle of Holowczyn in 1708. The Russians are dispersed across the table, with a river and marsh separating one substantial division from the rest. The Swedes need to get across the river, and tackle the Russians piecemeal before they can concentrate. I played it twice with IDV, and both times the Russians had no difficulty concentrating and destroyed the Swedes before they could properly establish their bridgehead. In the historical battle (admittedly fought over a bigger area), the Russians never came close to concentrating properly, and were defeated without many of their troops being engaged. The Swedish-Russian conflict was one of asymmetry. The Swedes had a small, high quality army, with effective and aggressive leadership. By this time, the Russian army was no pushover (unlike the pre-modernised army at the start of the war), but it was inferior and ponderously led. Beating it required manoeuvre. That is what makes the pairing so interesting. This simply can’t be reflected in IDV.

My solution was not in fact derived from Gå På, though it does have a system for doing so. Instead I used the PIP system, invented by Phil Barker and his friends, and used in the revolutionary De Bello Antiquitatis (DBA), and developed in Horse, Foot, Guns (which I have done a similar rewrite job on for Napoleonics). You throw a dice, and this gives you points with which you can spend on moving units around. I applied this a wing level (renamed “divisions”) , using an average die, and dropped the orders system. The orders gave an interesting dynamic, but there is less need to contain the players with the PIP system. There are plenty of other changes, but I have kept the system where the divisions are activated at random using cards (before joint shooting and close combat phases), as this gave a really good chaotic feel to the games. I particularly wanted to reduce the dice throwing in shooting and close combat (you throw for hits, then saves for both sides in IDV), and simplify other throws, where the number of modifiers was too heavy. Most dicing involves two six-sided dice, instead of either just one, or multiples. I reran the trial game, modifying the rule mechanisms after a couple of moves when they weren’t working. This time the Swedes won comfortably, though the Russian army did not collapse. But their poorer quality units were no pushover; towards the end one standard (D class, as I am calling IDV “Raw” and GP “Green”) unit routed a Swedish A class one, though admittedly taking it in the flank. I think the outcome turned on a few decisive throws and card draws, and on a different day there would have been a very different outcome; fortunes swung either way. But the Russians only had ten infantry units (two B, two C, six D) to the Swedes’ eight (two A, four B, two C), so they probably should have had been up against it.

I am pretty pleased with the result, which I have named Carolus Rex in honour of Karl XII of Sweden, the central personality in this conflict, but I’m making one more significant change – which is to cut down the move distances to more like GP ones from the ones based on IDV. That’s to constrain manoeuvring round the flank without the other wide being able to react. This needs to be play tested before being unleashed on the public – but I won’t be doing that just yet. If anybody wants to see what I’ve come up with (the rules are now just over 7 pages of A4 in 10pt script, with a two page quick reference) then get in touch. They are designed for a very specific period and forces, but should readily work for later encounters between Sweden and Russia (the Swedes have fewer high quality units), and to the Danish and Saxon armies too. Earlier Russian or Polish armies though, never mind Ottomans, would require some new troop types. I’m also not so sure about Western European armies – where fire discipline was better developed by some armies, and three-deep lines (from four) began to be used. They are designed for GP basing, with three bases to an infantry unit, in my case 20mm square. At the smaller scales it is now fashionable to have single base units, 60mm-90mm wide. The rules could be used for this, though march columns would need to be dropped (they were rarely used in proximity tot the enemy anyway) and the shooting rules would need to be adapted.

This has been an interesting exercise. My earlier rule-writing efforts (Napoleonic and WW2) have been steeped in history. This time my historical knowledge is relatively light, and I have a strong focus on playability. In two cases I think I may have sacrificed faithfulness to history to playability. I have made the units quite easy to manoeuvre, in an era before such innovations as cadenced marching were in widespread use. But players get frustrated when they can’t do things, and I have noticed a modern fashion to take the faff out of moving units around on the table (Sam Mustafa’s Blucher and Lasalle rules for Napoleonic wares for example). Second it is relatively easy to rally units to bring them back into battle. This is actually quite hard in IDV and GP. But I have just four cohesion states (Good Order, Disordered, Shaken and Broken) and no casualty removal. It’s quite easy to knock a unit into Shaken or Broken status with some moderately good dice, so for playability purposes I thought there needed to opportunities for recovery. In my trial game the Russian commander spent practically the whole battle scooping up shaken and broken units, rallying them and sending them back in (not always successfully). I really don’t know how historically faithful this is. Still in the real Holowczyn I think there were reports of the Russians doing this – so I might not be so far off the money after all!

Next I need to paint up some more units to give me more options in future games.

Update 3 February

No matter how hard you try to draw a line under rule writing, the brain moves on. I said above that I am using the PIP system for giving orders to units to move around the field. I’m having further thoughts on this. I had already decided to go for the idea of generals moving from unit to unit to issue orders in person, rather than using such ideas as “command distance”. This is based on the idea that staff systems had yet to develop, and that most communication was in person (though admittedly orders would tend to be valid for more than a single move). This may be another case of game play getting ahead of history. The general would be limited by an overall movement allowance (generous at 24in), with the number of orders issued limited by PIPs. But what if instead of PIPs I used the die score to determine movement allowance? Say 3in per pip, which (using an average die) would mean 6in to 15in – but putting no limit on the number of orders. Perhaps a cost (say 2in) for each order. You could keep track using a D20. A low score represents the general gathering information and trying to decide what to do. I remember reading Paddy Griffith saying wargamers had little concept of how generals had to manage their time…

RS Models 1/72 P-38F Lightning

The box artwork

And so to the P-38 – which proved a nightmare. I wanted one of these iconic aircraft, in the early F variant that would have been in action in 1943. The RS Models kit was the only show in town, and the online review on modelling madness.com didn’t alert me to any major issues. Still the overall result looks fine if you don’t look too closely!

The P-38 at this stage of the war was primarily an escort fighter, assigned to bomber formations. Although it was outperformed in combat by the Bf-109, the primary German interceptor of the time (the Fw-190 being used mainly for ground attack), the P-38 had an impressive range, and so was able to accompany the bombers on deeper missions. Bomber crew gunners liked them because they were instantly recognisable as friendly. Although on occasion they took heavy losses, they did a decent job of keeping the fighters away from the bombers. The interest from my point of view though was that on critical occasions, such as the campaign for Sicily and at Salerno, they were used as fighter-bombers. Their range was a major asset, and they could manage a decent bomb load too.There’s also a bit of nostalgia. One of our favourite models as children was an old Airfix P-38 made up to a very nice standard by my elder brother.

The main problem with the model was that the parts didn’t fit together properly, and, as with a lot of modern models there were no lugs and recesses to hold things in place. Problems began with the undercarriage doors because, as is often the case with modern models, there is no undercarriage up option. Modelling with the undercarriage up means trying to fit badly fitting doors into the wheel well openings. For this model, the fit was more than bad. This wasn’t made easier by the curvature, which was particularly pronounced and complicated on the booms. It took an immense about of time of cutting filing and sanding to get anywhere at all, and in the end I applied liberal amounts of filler too, both the cover gaps and build up. Even after all this effort, the result was pretty clumsy – at least I won’t be looking at the underside that often:

The next challenge came when trying to assemble the central fuselage. There was no room for the interior assembly, and the bottom was too narrow. Cue more frantic cutting and filing, and a bit of bodging too. And when I finally managed to get this assembled, the match between the lower and upper assembly was poor. More filing, sanding and and filler. If you look closely you can see where I’ve tried to build up the surface with filler to get something reasonably smooth. There were similar, though thankfully lesser, problems almost everywhere in the assembly. The result was that the whole thing took much, much longer to put together than any other model I’ve done, with a fairly mediocre result to show for it. But it is acceptable within my “don’t look too close” criteria. The lumps and bumps don’t show up in the photos at least!

The problems didn’t end there. I left the cockpit off before painting, to add on later, saving me having to mask it. But, of course, the fit was terrible (I can’t believe I didn’t check or notice this beforehand). So I needed to cover the gap with filler – which meant more paint and patination to try to blend it in with the rest. This didn’t altogether work, and the finish on the inner-upper wing is a bit rough.

The final problem was all my own fault, though. I applied the decals on the booms in the wrong place – with the insignia on the air intakes, and the ID letters on the rear boom. I was able to remove the insignia decals (which came with the kit) and replace them with one from the sheet I bought from eBay (I had already used these on the wings to get the right size), in the correct place, in front of the intake. But the ID letters should be on the intakes – and I didn’t have anything in stock to do this (the model decals look too big anyway). So I left them! The plane modelled is one of the schemes in the box, except that I was trying to model it earlier in its career – as it would have been at Salerno or Sicily. I left out the kill/mission marks from the nose, but left the nose art on the port nose – actually surely too far forward as it was probably only there to make room for the mission tally marks.

One further thing is worth remarking on. The red on the spinners and under-wing tips is quite bright – you wouldn’t think I did quite a bit of dulling down on the original pigment. Red spinners were a standard Allied ID feature for fighter aircraft. The British used Insignia Red (used on the national insignia) which was quite a dark, dull red, so as to be less conspicuous. I had read that the US equivalent paint was much brighter, until they dulled it down later in the war. So I’ve tried to represent the earlier version. I used the same shade on the other two models assembled in this batch. I should have dulled it down a little more though!

This is an iconic aircraft, and I’m glad I have one for my collection. But if I want to do another one I will start with a different model, perhaps converting a later version.

My Airfix B-26 Martin Marauder

The box artwork

The first of my latest batch of aircraft models for to describe individually is the B-26. I bought this kit back in the late 1970s, as a gift to my younger brother. But he was losing interest in modelling and left it in my parents’ attic, from whence I rescued it during one the their periodic clear-outs as they moved and downsized. Since then it lurked in my attic. After moving house in 2020 I decided that I was going to assemble this model – indeed it sowed the seed of the idea of my 1943 aircraft project. I have always liked this aircraft.

Along with the B-25 Mitchell, the B-26 Marauder was one of the two principal medium bomber types in US service in WW2. More B-25s were produced, and many more survive today – but, apparently, more of the B-26s were in use in the European theatre. That is certainly true of the Mediterranean in 1943 – three bomber groups were in operation, compared to two for the B-25. The B-25 had a longer range, and so more useful in the Pacific, I read. Still Catch-22, set in the Med, featured the B-25. The B-26 had a bit of a tricky reputation, as it required quite a high landing speed – and there were quite a few accidents in the early days. Tweaks to the design, and better training, overcame the problems, however, and the overall casualty rate was lower than the B-25 in the end. I guess that was because it was faster, and so harder to intercept. Anyway, to my eye it is much better looking, with its cigar-shaped fuselage, compared to the boxy B-25.

I wanted to make an aircraft as it would have appeared in September 1943, when B-26s supported the Salerno battle. That meant a plain olive drab and grey scheme, and no large battle number on the tail – so characteristic of later on (they were introduced a month or so after Salerno). The insignia had the red outline. I wanted to depict an actual aircraft, where I was limited by two main factors. First, the model depicts a later variant, with a distinctly different tail gun position (and may be differences too). That ruled out quite a few planes in operation in 1943. Second I wanted to be able to make up the tail numbers from as few sources as possible, including the original Airfix decals. This pointed me at number 41-34925 “Kismet” from 37th Squadron of 17th Bombardment Group. This plane survived the war, completing many missions. One tricky issue was nose art, which I was really not keen to get into. The illustration I found from Mark Styling showed this plane with quite simple nose art (apart from the many mission markers visible in later line). It has the word “Kismet” with further words “Sine Qua Non” in a curve below – all quite small and in yellow lettering. No cartoon characters, bombs or busty ladies. This would not have been impossible for me to put together and print off, though yellow printer ink would not have come out strongly without a bit of white ink to give it body – but I didn’t fancy doing it. Besides I noticed on pictures of planes in action in 1943 that nose art was often absent (see below) – so the model has nothing.

The completed model from the front.

The first stage of the project was to paint and assemble the interior. The model came with three crew figures: two for the cockpit and one for the gun turret. I had already used on of the cockpit figures for my P-47, and since the remaining one would not have looked right next to one of the PJ figures, I put two from PJ in the cockpit. The turret figure was quite crude, with a huge circulardvice in place of his hands to provide a pivot for the guns. I decided to keep it, and in faction can’t see much through the turret plastic, so this didn’t matter. The online sources did not give any consistent colour for the interior, though it is usually represented as green – a mix with the chrome-yellow primer in use. I decided to follow another source, which said it was a mix of black and treated aluminium. You can barely see it though! The transparencies are quite thick, so visibility is not perhaps what it should be.

Assembly came next. This was much easier than for my P-38 model – the fit was generally OK, and there were lugs and recesses to hold parts in the right relative positions. Still it was not as tight as some more modern kits that I have assembled – though not the other two in this batch. I should have spent a bit more time filing down parts to get the fit a bit tighter, especially the bomb doors and the engine nacelles. Fairly liberal amounts of filler were needed in places, causing some of the panelling detail to be lost. – and I needed to use tape to keep the fuselage together while the cement was setting. One issue worth mentioning was transparencies. Except at the rear and nose I stuck these in before painting. The cockpit canopy because I wanted to use filler to ensure a seamless join with the fuselage; the various portholes, etc. because they had to be stuck in from the inside, and the turret because it looked too tricky to do later. These had to be masked. The main problem was that I used specialist glue for canopies – after problems with superglue causing damage – and these had weaker adhesive properties than I was used to. One of the side windows fell into the body of the fuselage, and could not be recovered. I had to bodge a replacement carved from sprue. I had to do something similar to one of the wing lights which I dropped on the floor and couldn’t find. Incidentally in the kit there are windows for the two openings at the bottom back of the fuselage, just under the tailplanes. In 1943 these openings were ports for a machinegun, so I left the transparencies out – though I did not attempt to show include the weapon.

From the rear quarter

I have already outlined the strategy for painting and finishing. The decals required were minimal. I got the national insignia with the red outlines from eBay. The tail numbers were a combination from the original model and an ancient Airfix P-47 kit (which were slightly duller – which I tried to correct with a bit of yellow paint). The overall result is a bit darker and greener than often depicted (for example in the box art above) – though I think the artificial light mixed in with the natural light in the picture makes it a bit greener. It is meant to show a relatively new plane, not quite as weathered as normal. Here is a new contemporary picture of planes from 17 BG in flight:

https://www.fold3.com/image/161317974

These are planes returning from a raid on Sardinia in November 1943, shortly after the big battle numbers on the tail were added; No. 17 (Uden Uden’s Oil Burner) has a damaged engine from flak and is limping home, escorted by the others (from a different squadron) – it did make it to safety and went on the complete many more missions. Both it and 97 behind it were candidates for my model, but the tail numbers weren’t as easy to source. Incidentally I can’t see any nose art on either the plane – though the front plane at least was photographed later in the war with nose are on both sides. Sometimes it was just on the port side. This picture shows the slightly weather-beaten matt look, with not much contrast between the olive drab and grey. No 17 has a lot of paint damage on the tail, but not much elsewhere.

And here’s the underside:

The underside

The weathering is a bit heavy-handed – but I have no photos of what it would have looked like in practice. The underside did get a hammering from the dust airstrips – but I don’t know how that looked!

There’s plenty on the model that could have been done better – but I’m glad its decades in the attic weren’t in vain!

Three US planes for 1943

The new trio overflying the wargames table: left to right: the A-36, the P-38 and the B-26

Back to aircraft modelling. The next batch of 1/72 planes in my 1943 project represent the Americans. These are a B-26 Marauder bomber, a P-38 Lightning fighter, and an A-36 Invader/Apache fighter-bomber. Since my main focus is on the British and Germans, these were the only American planes that I initially planned, although I now plan to do a P-40 as well, but not in the olive drab scheme like these, but the RAF one. As usual I will use this post to describe the common aspects of the project, and then publish separate posts for each model.

This project took quite a bit longer than expected – something I have said about each of my most recent projects – it’s probably age! Two things in particular held me up. First the B-26 model is a big one, compared to the single-engine types that I have attempted so far; and the P-38 isn’t a small one either. Bigger models do take more time. Second, none of the models were particularly easy to put together, and the P-38 the worst of all the models to date – worse than my Stuka and Hurricane. And that takes a lot more time, as you attempt to reconcile ill-fitting parts, and then patch up the results with filing , sanding and putty. It doesn’t help that I model with undercarriage up, which only the B-26 kit (a 40-year old Airfix job) catered for, and as with all long projects I then went through a flat patch – especially since the studio where I assemble my models is in the garage block, and not part of the central heating system – so it was pretty cold in the patch of freezing weather we had. One afternoon was just too cold for me to try! Still, they were finished in time for Christmas.

Another view

The steps I went through were the painting of the interior and crew, assembly (easily the most time-consuming phase), priming and painting with the airbrush, and then the various finishing steps, including decals. Not a huge amount to say about the first stage. I had to supply my own crew figures apart from two from the B-26: I dipped into my stock of figures from PJ Productions. I will describe the assembly process for each model in my later posts, as each was a very different experience. The painting and finishing processes were pretty similar, so I’ll say something about that now.

In spite of my frustrations, I persisted with the airbrush for these models. I used white primer from Vallejo. I then mixed my own paints for the main event. For the undersides I mixed a neutral grey from the black and white paint pots that came with the airbrush. For the olive drab I mixed the basic colours using Liquitex artists paints, mixed with Liquitex airbrush medium and on occasion with thinners. The airbrushing was hit and miss. Sometimes things went well, and the paint left the brush with a nice flow. I haven’t managed to get a precision spray yet, but I don’t think that is supposed to be the strength of this particular model. On other occasions I couldn’t get the flow right at all – it came out too thin, or wouldn’t come out properly at all. As a result the process took more sessions than it should. The primer tended to clog on the nozzle, and it needed wiping quite frequently. This didn’t happen for main paints so much (and not at all on the olive drab mixes) – but these were prone to clogging further back in the mechanism when they weren’t too thin. One thing I discovered to be a bad idea was mixing in the cup – by adding thinner to a mix that was a bit thick, for example. I had been encouraged to do this by a video tutorial. I think the thicker paint tended to get into to the system and clog it before being mixed properly. If mixed separately to the right consistency, and then put in the cup, things went much more smoothly. I like to think I’m getting the hang of the airbrush, but I’m not sure, to be honest. It produces a lovely finish, but is it worth the trouble?

I used two mixes for the olive drab. For the P-38 and A-36 I used the usual yellow oxide/black/ white combination (though I may have started with neutral grey and yellow and tweaked with black/white). This was the as same as for my P-47 trial model, but a bit lighter. For the B-26 I wanted something a bit greener. I started with Sap Green, and mixed various things into it. The first attempt was too green, but with tweaking I got a satisfactory result, looking close to a lot of artist’s portrayals of the aircraft. This was a bodge as I kept adding different things to the mix, though, and I can’t say precisely how I got there. My general rule is to only use two pigments/premixes and white for mixing – that makes it much easier to replicate. I would need a different method to repeat! The first mix was to represent a more weathered finish – the colour reportedly turned quite brown after exposure to the elements. The second, which is closer to the commercially available mixes, was for a newer aircraft. I am pleased with both results. Incidentally the pictures were taken on a dull day (I gave up waiting for the sun!), so there’s a lot of artificial light in the mix, which tends to make things a bit greener.

The A-36 alongside my P47 model, showing the paler version of olive drab

I used a combination of tape and Blu Tak to mask. This included the canopies for the A-36 and (mostly) the B-26. I left the canopy off for the painting stage for the P-38 and the B-26 nose and tail to be stuck on later. This was a mistake for the P-38, as it was so ill-fitting it needed filler and more paint later. Blu Tak works better than magic putty, as I needed it to stay in place for days. The magic putty is easier to put on, though, and I did use it for varnish spray.

After the decals came the oil paint patination: small blobs of oil pigment in various colours (white, Payne’s grey, yellow ochre and raw umber) brushed vigorously into a very thin layer with a fore-and-aft or up-and-down motion. The paint did not spread as easily as before – perhaps because of ageing, or perhaps because it was colder than normal – but nothing that a little extra linseed oil couldn’t sort out. I’m getting better at this – I have had a tendency to over-apply; and there was the disaster of trying to apply over matt varnish! The undersides were left looking pretty messy – but with the dust from Mediterranean airfields, I gather that they did get into a bit of a state. This stage left the models with quite an appealing off-matt finish: but photos of US planes in theatre usually show a very matt finish. So I sprayed on Winsor & Newton matt aerosol spray, which leaves a very matt finish. I protected the decals with some gloss varnish first – though I doubt there was a real danger from contact with matt varnish – but I wanted to play safe. The next step was to represent a bit of paint damage using a silver/pewter coloured pencil. I didn’t want to overdo this; I think ground crews were usually quite diligent in repairing damage. But it’s usual to represent quite a bit of damage on a B-26 – they were especially exposed to flak explosions – so I tried a bit harder on this, though still quite subtle. Finally I applied some powdered pastel in various mixes of grey and brown. The biggest job here was applying the exhaust stains on the A-36. I couldn’t see anything comparable on old photos of the P-38 though, and not on the B-26 either. In the end it did a similar job to the oil paint, in producing a rather weather-beaten finish, with the effects of air flow as well. On the B-26 I tried to show a bit of differential weathering on the canvas control surfaces – but not very successfully. With the high-matt finish for these models, I could have skipped the oil paint stage, I think. For my British and German models, where I like the off-matt finish that the oil leaves, it’s a different matter.

As usual, close examination of these models reveals a lot of things I could have done better (or in the case of the P-38 model, defects I couldn’t quite remedy) – but I’m not comparing myself to the master-hobbyists. I want good-looking models from a respectable distance – and that is what I have ended up with!

Terrain in WW2 North Africa

I have just finished reading this short book published by Helion as part of the Wolverhampton Military Studies series. The cover shows the scope. Its main focus is operations of the British Eighth Army from 1941 to 1943. The earlier campaign between British and Italian forces in 1940 is covered in the same level of detail, but conclusions from it are not integrated with the rest of the book. First Army operations in Tunisia are not covered.

The author, Neal Dando, probably had a lot of fun researching this book, going through the (almost entirely British and Commonwealth) primary sources in depth, and a wealth of secondary sources, and appraising the course of the campaigns. However, the book is quite short and focused on the key theme: the impact of terrain on the British approach. His contention is that terrain is not given sufficient attention as one of the factors dictating the course of events, compared to such things as tactics and leadership. It’s a long time since I have read anything much on these campaigns, so I can’t judge this contention for myself. I think there’s something in it – but it is problematic. Firstly, all historians surely comment on the desert terrain, and suggest that it lent a particular character to events, even if they can be a bit vague on details. Second since much of the function of leadership and tactics is about the use of terrain, it is hard to separate it out as factor on its own – and a bit false.

Still I am a big believer in the importance of terrain in warfare – and feel that it is often not given the attention it deserves. This is reflected in many wargames, which tend to over-simipify and abstract away terrain features. Time and again when studying battles in detail (mainly Napoleonic ones) I have found that terrain factors neglected by historians explain much. One example was how a recent historian suggested that the French grand battery at Waterloo should have blasted away the strongpoint at La Haye Sainte. In fact the lay of the land made that pretty much impossible. And I have often read that it is wrong to think of the Western Desert in WW2 as being entirely flat. It featured many minor undulations, which could have a critical impact on events. You could place antitank guns in hollows and wait for the approaching tanks to be silhouetted on the ridgeline as they approached, for example. How well this is reflected in wargames I wouldn’t like to say – I have played very few desert-based WW2 scenarios. The exception have been some quick club games played on a flat table.

I bought this book as I am trying to put together some rules for my 1943 project, featuring British forces in Tunisia, Sicily and Italy. It has always been clear that terrain had a huge impact on these campaigns, so I was looking for ideas on how this should be reflected. I was pretty disappointed. I understand why Mr Dando does not want to give a detailed narrative of the battles – but I was hoping for something rather more systematic on the analysis of terrain impacts. Something like a description of the different impacts, and the part each of these played in each of the battles. There are brief terrain descriptions, but nothing very systematic on the narrative. There are a few maps, but representation of terrain on these was pretty thin. In fact I’m not actually sure he familiarised himself directly with the terrain, rather than simply relaying what the various primary documents, and a few secondary ones, say. He seems to jump straight to his conclusions with a “take my word for it” approach. On top of that, the book is riddled with minor editing errors (of the sort you will doubtless find on this blog, I’m afraid, but shouldn’t on things you pay money for), including one map mislabelling a German division as Italian. This is the rule rather than the exception with modern specialist publishing, however.

So what were the main impacts? Going was variable, affecting the ability to move different types of forces (one area could be traversed by tracked vehicles but not wheeled ones, for example) – including some steep slopes and cliffs. Terrain could offer a degree over cover (e.g. the use of hull-down positions), but was generally notable for the lack of it; in some places it was impossible to dig in because the ground was too rocky. Concealment was important factor using undulations, wadis and depressions – and there is related aspect of the usability of heights as vantage points for use by direct fire, and most especially as observation points for indirect artillery fire. Most of this is standard wargames fare – though wargamers often fail to bother with gentle terrain undulations. But artillery is usually less well thought about in this era. And yet it’s clear from this book that it was critically important – with battles often resolving around the possession of heights for use by FAOs. This was obviously the case with the mountain warfare in Tunisia – where the entire campaign revolved around the issue – as my reading of the account of Longstop Hill showed.

This book, though, gives me very little data to flesh this out. At one point it mentions a tank attack suffering at at 2,000 yards from enemy lines from artillery fire (6in Italian coastal artillery, apparently). I guess it would not be too hard to make out approaching vehicles at that sort of range, with the usual optical equipment. But fall of shot would have been much harder.

So an interesting but ultimately disappointing book.

Limbers. Lots of them

The 19 French artillery limbers

What to do about artillery limbers in Napoleonic wargames? Back in the day (we’re talking the old Airfix plastics in the early 1970s here) I would faithfully make up four horse limbers for every gun (about two per side…). But it was a faff, and took up a lot of space on the table. When I took up 15mm metal miniatures in the 1980s, I moved to two horse limbers, using old Minifigs. Then I started ignoring them altogether, in accordance with the changing fashion. But I decided that I wanted them for my current project, and while I’ve been doing them in parallel with the guns for the Prussians, the French were sadly neglected. Until now. I wanted to finish the French artillery for my 1815 project. That meant four more deployed artillery bases, a caisson model (useful for Lasalle)… and 17 new limber assemblies.

I wasn’t looking to do an A1 job on the limbers – they don’t have a staring role on the table. To keep the space down, the horses were reduced to just two – and I am making no attempt to include the limbered gun. The limber will simply be put together with the deployed base to show limbered status, and then removed to somewhere nearby but out of the way once deployed. Artillery limbers and caissons did take up quite bit of space historically – but they could be spread out and fitted around other units when deployed. They were only a serious nuisance when the guns were in transit, especially on roads – hence why I wanted them on the table.

First I needed to source the models. I already had two limbers painted up – for the French Guard. This was mainly sourced from an AB model, which had six horses. I took one pair away and put it with a Minifigs limber. I considered taking two more horses away to create another limber – but I didn’t need to do this to get the right number, so I left the rather impressive four-horse limber for the Guard 12 pdrs. I had an unpainted AB line caisson, also with six horses. I could take four horses from this – though annoyingly the riders (with saddle, etc) had gone awol in the two decades or so that I owned the metal. So far as the actual limbers were concerned, I had 12 Minifigs ones, including the one I had already used for the Guard. These were four each of new Minifigs French, old Minifigs French and Old Minifigs Austrian. There is a difference between the Austrian and French limbers, but not one that hits you in the face. I’m sure the French took over captured ones… The problem with the Minifigs limbers is that the wheels are too small (though this may be realistic for the Austrian ones) – but this was easily solved as I have lots of spare wheels from my old Minifigs artillery, which I have replaced, including plenty of the right size.

That left me six limbers short. The easiest solution would have been to buy more Minifigs ones – but these struck me as being quite pricey, given that they don’t come with horses. I needed lots more horses, but I only wanted to use the Minifigs ones for horse artillery. In the past I have found that Naismith Miniatures produce limber horses that work well (I used them for my Prussians). But I couldn’t find them at the time – though I have now at Keep Wargaming (but out of stock). I decided to buy six limbers from Essex miniatures – which came with four horses and two drivers each. I was short of horses and drivers, so that worked out fine. I already had a pack of French Guard horse artillery drivers. With a bit of juggling, and using my Minifigs horses, it meant I had enough of everything – and I didn’t need to use my old Minifigs riders, which I didn’t much like.

Artillery crews

Two Guard horse guns in the middle, flanked by two line guns

I found that I was four artillery crews short for my Waterloo French – two each for line foot and Guard horse, though I had a surplus of line horse bases. I bought the Guard crews from AB, and used up some spare line crews left over from earlier projects – in greatcoat, I think from Fantassin. Nothing special to note here. I followed my convention of two crewmen for horse guns, and three for field guns. The AB figures were pretty nice – I have been disappointed in their French artillery in the past, including the Guard foot. Not a very good picture I’m afraid, as I’m still learning how to get the best out of my new camera. probably just as well as the figures a slightly impressionistic and untidy. They pass the 3-foot test though.

The caisson

I’ve had this AB model lying around for a couple of decades, and I have finally got around to painting it up. Lasalle 2 requires a baggage marker for each side – and a caisson is the easiest way to do this. As noted above though, in my time of ownership the riders/saddle arrangement went AWOL – and I couldn’t find them. I expect they will turn up when I least expect it. The rider figures weren’t a problem – as I had spares from Essex. The saddle arrangement had to be reconstructed, which I did with paper and plasticine. It doesn’t stand up to close examination, but it is OK from a distance.

The line foot limbers

I needed eleven of these. Six of the limbers were from Essex, the rest were a mix of French and Austrian from my old Minifigs. I attached an ammunition coffret to each one. I had lots from my previous artillery models, which usually come with one tor two. Two pairs of horses came from my AB caisson, the other nine came from Essex. That leaves me with a couple of spares from Essex – though there was a bit of a muddle with my order, which meant I had a little difficulty getting the right sort. I will most likely recycle these into my Prussians. All the riders are Essex. I painted the coats grey.

The line horse limbers

I needed four horse artillery limbers for line batteries. I used Minifigs for these, from my existing stock. Though I have no real liking for the Minifigs style, I thought their dynamic pose was suitable for horse artillery. Three of the limbers are new Minifigs (actually now a bit dated…), whilst the other was one of my old ones; the same is true of the horses. The older version is on the top left of the picture. All the riders are new Minifigs Guard horse ones – which sport plumes. I painted the costs blue to distinguish them from the foot units. The sources vary on whether artillery drivers wore blue or grey coats – and they probably wore both colours. The blue coats, the plumes, and the Minifigs horses and riders served to distinguish them from the foot artillery.

The Guard limbers

Guard limbers: foot at the front, horse at the back

I have two batteries each of horse and foot for the Guard not counting the “Young Guard” batteries, which were not in fact distinctive from their line colleagues. The foot limbers were, as explained above, taken from the AB models, with the addition of a (new) Minifigs limber model. These were already painted up. The only change I made was to overpaint the deep green on the limbers themselves with the more correct olive green. The uniforms are blue, based on the sources I had at the time – though they are usually shown as grey, at least at Waterloo. The two horse limbers were painted up pretty much as the line horse limbers, except for the red plumes and shako cords. I didn’t have any of the newer Minifigs limbers left, so I used older versions.

Method

The horses were painted using oils, apart from the single pair of greys. I matched each of the pairs as bay, chestnut, black or grey. For the oil painted versions I undercoated with acrylic Raw Sienna or Burnt Sienna, or for a few of the blacks, Payne’s Grey mixed with white. I then overpainted with various mixes of oil paint, and wiped off the highlights when partially dry. The mains, tails and lower legs of the bays (and the very dark bays posing as blacks) were then painted in Payne’s Grey. This is the technique I’ve been using on my last few batches, and the results are generally good. With so many horses to do I hurried through this a bit. Some experiments that I thought I might do (underpainting the bellies of some of them in a paler colour, for example) I never got round to doing. I bodged the greys in acrylics, based on a dark undercoat of Payne’s Grey – I still don’t have a satisfactory method for these.

So far, so normal. I then decided to do the bases next, as I have had difficulties when leaving this to last. I used my normal thick paper, backed by magnetic sheet, with acrylic medium, sand and paint to set the figures in. The use of paper was a mistake, as the bases were larger than my normal infantry and cavalry ones, and had a lower density of models fixed to them – they had a tendency to warp. I usually rely on setting them on a metal box lid and hoping that the magnetic material will keep them true. Alas the paper peeled away as the warping effect was stronger than the gum backing of the magnetic sheet! This took a bit of fixing. I use such a thin material to stop the bases being too clumsy, and blending in better with the table. In future I need to either use something more rigid, like plasticard, or something thicker, like mount board for the artillery and limbers. The finished base was painted an earthy colour (Raw Umber with a bit of white). And then I applied short static grass. I struggle to get the static grass to stand up straight – but looking a bit windswept and trampled is OK. I used a mix of green and beige grass, and I was really pleased with the result. Hitherto my bases have tended to be a bit dark – which doesn’t do justice to the miniatures – but I got it right this time; the secret is mixing in the beige. Alas it leaves me with the problem of what I do about the bases on my current stock. A couple of experiments with putting lighter material on top of the current flock were not very satisfactory. The other issue is the static grass adhering to the figures. I could not avoid this – but it was no worse than when I have applied the flock after the miniatures have been painted.

The next step was to paint limbers, men and the accoutrements with my usual artists’ acrylics. The limbers and caisson were painted using a mix of Yellow Oxide, Mars Black and a small amount of white. These are the same three pigments that I use for German Dark Yellow, US Olive Drab and German tropical uniforms for WW2. The pigments are cheap – so it’s not surprising that their use is so widespread. Yellow Oxide is simply the industrial age version of Yellow Ochre – which is actually what the French used for their artillery equipment, mixed with a bit of black (which distinguishes them form the Austrians, who used straight ochre); the black must have been quite strong to render the result green. The colour is often represented as a much bluer green in illustrations – but there is clear evidence that it was in fact an ochre-based shade. As for the uniforms – these weren’t substantially different from the infantry and cavalry I have discussed many times. I am using Idanthrine Blue instead of Prussian Blue as the base these days – it is a hint redder, and looks a bit smarter – a consideration when painting Guard units.

Finally the men got a wash. I used Peat Brown ink for the faces, and black ink heavily diluted in water for the rest. Using a water-based wash did not work on the oil-painted horses of course – the alternative of alkyl leaves a glossy finish, and I like the natural finish of the oils. They don’t really need a wash anyway, unlike the men, which were significantly lifted. I also used the wash on the caisson, but not the limbers.

Conclusion

And that was it. This was a big project, and took me quite a few weeks – for the usual reason that I had too many distractions, and then lost a bit of motivation. Limbers and artillery are not as exciting to paint as infantry and cavalry. And the result is a bit messier (or impressionistic) that normal. The limbers aren’t the stars of the show, I reasoned, and I wanted to move on. I’m glad it’s done. To have finished my French artillery feels like a big landmark.

Valour & Fortitude – an interesting approach to rule writing

This month’s Wargames illustrated (No 418) features an intriguing set of Napoleonic wargames rules. The rules themselves come in an 8-page supplement; the magazine features three articles based on them: one is an interview with the author, Jervis Johnson, and the other two set out a scenario and show how it played out in a demo game. The rules are a venture of Perry Miniatures and can be downloaded for free here. What is intriguing about them is not how they play (which I haven’t tried, and I’m not sure I will), but how they are written. The brief was that they should be no more than four pages long. In the booklet the four other pages are taken up by the front cover, an introduction by the author, a Q+A and Easily Missed Rules page, and the quick reference sheet.

The pedigree of the rules is unimpeachable. Jervis made his name at Games Workshop, including the writing of the classic Blood Bowl. His helpers and play testers are a Who’s Who of British wargaming – including Alessio Cavatorre and Rick Priestly, as well as the Perry Brothers. This group is responsible for such classics as Bolt Action and Black Powder, amongst the most popular rules systems here. According to Jervis, the initiative came about because he was fed up with leafing through rulebooks to try and find and check particular rules. This means not just engineering the rules tightly, but setting them out and writing them concisely. It’s not a new idea. Phil Barker of Wargames Research Group developed his DBA system for ancient warfare in 1990 on the basis that it would cover one side of A4. And these rule writers like their systems to be comprehensive – not leaving key things unsaid (alas all too common – my frustration with the Iron Cross system, for example). Writers often assume the answers to be obvious – but in fact much time is wasted looking for rules or explanations that aren’t there.

Some of the ways in which this objective has been achieved might be considered trivial. The font is quite tight and the page quite big (slightly under A4) – though there is proper paragraph spacing and use of headings. There are no pretty pictures or examples of play. These might sound trivial – but the extra space taken up by pictures does come with a cost. Examples of play do have a practical value – but they can be kept out of the main text. The approach is the exact opposite to that taken by Sam Mustafa in his Honor system (of which I have Blucher, Lasalle II and Rommel). The page size of these is small, the font large and there is quite a bit white space; there is a scattering of pictures (though not as many or as big as some rules); there is a lot of explanation and there are quite a few play examples. This makes the rules easy to read at the first pass. But it does make it harder to look things up mid-game (though a decent index helps). This makes an intriguing contrast – as Sam’s rules also major on basic simplicity, and nothing being included unless it really adds value.

There is no doubting that V+F is a tough read at first pass, though the language is simple and clear. I am reminded of Phil Barker – whose rules were tight but often had to be read several times over – but they are not nearly as bad. A lot of the Q+A and easily missed rules section boils down to “Yes, the rules really do mean that”. Another device might be seen as a bit of a cheat – quite a bit of the system is moved to “special rules” specific to the units involved. This includes such basics as squares, skirmishers and open order. But the core rules do stand as a coherent whole – and the idea is that (like Black Powder) they can be used to cover a vast period – the 18th and 19th Centuries at least – so the core rules should not contain period specific items. The special rules themselves take up no more than a page – though the focus is really just the 1813-14 campaigns in Central Europe (No British, for example). This is actually good design. I have tried to tackle Phil Barker’s Horse, Foot, Guns rules – which have a similarly large period ambition (though at a higher scale). While these are also very simply engineered at heard, they are so clogged up with period-specific features that they pretty much unusable in the original form. I rewrote them myself for use in Napoleonic games.

Jervis’s approach to rule-writing in V+F has a strong appeal to me. I am something of a rules-lawyer, I’m afraid. I really, deep-down want the game to be played out according to what the rules say, and will argue points if I really find it important (though I hate the use of loopholes). So having a set of rules that is tightly written and simple is something I like. When writing rules I do watch the page count. I knew that my house rules for Iron Cross had failed when they ran to 8 pages! I do aim for more like 12 pages than four – but then my scope is a bit wider. My systems are quite tightly period-specific, and I feel need for a little explanation and the odd example.

What of the rules themselves? They are designed to showcase Perry Miniatures’ gorgeous 28mm figures, and are for classic divisional-level games, with six or so battalions per player. They fit into the Lasalle space. The mechanisms are simple but flexible. For example in movement, figures can be moved in any direction, so long as they retain formation and no single figure exceeds the maximum move distance. The turn is simple I-go-You-go, Fire, Move, Melee. They suggest halving the distances for smaller scales or tables, or substituting cm for inches. In fact almost all critical distances are units of 3in, so a two-thirds scale would be easy to do – which would work well for my 18mm figures on a 6ft by 4ft table.

I have quibbles, of course. For defensive formations against cavalry the Austrians use Battalion Mass and everybody else the Square. The former is just an attack column with all its mobility – the latter requires a formation change and is immobile. In fact in this period the Prussians and Russians also used the Battalion Mass tactic instead of classic squares – and these seemed to have been no less vulnerable to cavalry. But they did require to be closed up, and probably weren’t that mobile when on full defensive. In fact I feel that all armies (including the French) could be given both special rules. That’s easy to fix. A bigger issue is that built-up areas seem to be treated as networks of Rorke’s Drifts, and readily defensible with just a quick occupation. This really misses how BAU combats worked. I prefer the Lasalle system, but I don’t really like even that. Most built-up areas simply couldn’t be readily “garrisoned” in the rules sense, and most fighting took place in the open streets. Well that’s a special hobby horse of mine that I haven’t seen any system at this game level deal with well. The huge over-simplification of movement and formation-changing won’t be to everybody’s taste (with similar simplifications to firing and melee) – but Lasalle makes similar compromises in the cause of speed and simplicity. It does keep the game flowing.

As for the rest, I would have to see how the rules play in practice – but I don’t plan to drop my attachment to Lasalle so this may never happen. Nevertheless the approach to rule-writing certainly has given me pause for thought.

Above the Battle – memoirs of an AOP. Why can’t I find a model Auster?

This book attracted my attention recently – and I’m very glad I bought it. It offers insights into a neglected aspect of WW2 warfare and the use of artillery by the British (and Commonwealth) Army. It’s not a long book, and the core of it, Lyell Munro’s memoir, is padded out with other material supplied by his family, including a general background to the history of the Air Observation Post (AOP) in British forces. Alongside the interesting details of battlefield tactics there is a rather charming personal story, told in the good-humoured style so typical of British accounts of the period. This includes his own commentary on Allied strategy in Northwest Europe (he was not involved in other campaigns). Extracts of letters to his future wife are included, and complete letters of hers to him – they met when she was a nurse, but she moved on to be a Wren. This offers an insight to wartime life and love outside the world of cinematic portrayal.

The AOP role developed alongside the rivalry between the Army and the RAF. At the start of the war the RAF had a complete monopoly of military flight. They had developed an army liaison role, using Lysander aircraft for AOP and other duties, including bombing. The Lysander proved to be an unsuitable aircraft for the AOP role – it was too big and heavy, and too fast (i.e. an airman’s idea of what was needed). Besides, RAF crew did not make good artillery observers. Casualties in these squadrons in France in 1940 were very heavy (118 out of 175 aircraft lost), and the RAF gave up on the idea. The Army, and the artillery, did not. They insisted that if you put an artilleryman in a suitable aircraft, it could be of real value. The aircraft would have to be slow and and agile, with an upper wing so that ground visibility was good (which ruled out the Miles Magister – one candidate). It needed to be able to land in small fields close to the front. The slowness was mainly for the benefit of observation, especially of fall of shot. It also, a bit counterintuitively, reduced vulnerability to enemy fighters. The tactic was to get out of the way and hide in the landscape, even landing if need be. Losses were surprisingly light. Munro’s squadron lost two pilots in the air (at least from June to August 1944 in and around Normandy). One was hit by the fire of the battery he was supporting, the other hit an electricity cable. Munro was acutely aware that his chances of survival were much better than that of an infantry officer. I was surprised that no aircraft were lost to ground fire in his squadron. Flying low and slow they were surely vulnerable. Of course they would try to stay well away from any flak units spotted, especially the feared 20mm quads. Infantry may have feared giving their position away. This is a quote from a Tiger tank commander:

That damned English crow is hanging in the sky again. Doesn’t he know there’s a war on? He’s got a nerve, flying in curves and circles over the front like that! A machine gun could easily bring him down. But nothing stirs in our front line. The infantryman there knows that the slightest sign of life will bring down the shells of the enemy – and they will be bang on target. Throughout the intense heat of the July afternoon our infantry lie motionless in the ground, following with their eyes every movement in the sky above.

Ernst Streng – quoted in “Hill 112” by Major JJ Howe MC

The plane that Streng is referring to may well be Munro’s – the day corresponds to the one when he describes a contest with a lone German Tiger. Incidentally he found that 25 pdrs weren’t enough to deal with it, but it did shift when coming under fire from a 4.5in medium gun he managed to bring in. That forced it to take cover in a village, where it was later abandoned.

The AOP squadrons were flown by pilots from the artillery, like Munro, but maintained by RAF crews, and were technically RAF squadrons. They operated from ad-hoc bases very close to the front line. When not in the AOP role they often ferried around army officers, or flew them over operational areas. Later in the war they also carried out successful photo reconnaissance. The pilot was the principal observer for artillery fire, but they took up an additional crewman (volunteers from the ground staff) to be an extra pair of eyes, especially for enemy aircraft – which remained present through the war – including Me-262 jets later on. Munro describes an encounter with an Fw-190 that had shot down a Typhoon – but didn’t spot him.

The AOP role was considered to be a big success. The Americans also adopted AOPs, using aircraft such as the Stinson L-5 Sentinel (the only purpose-designed AOP – an earlier version of which was the first choice for the British AOP – but the Auster could be produced locally) or Piper L-4 Cub. The Germans may have had a suitable aircraft in the Fieseler Fi-156 Storch, though this was notably bigger and heavier than the Allied aircraft. The write-ups say it was used for artillery observation, but I haven’t seen this mentioned in specific battle accounts. It could be that the Germans suffered from inter-service rivalry too. I suspect the Storch was used mainly as officers’ transport and scouting rather than AOP.

How about AOP in wargames? Many rules do provide for them (e.g. Battlegroup and Rapid Fire!). My sense is that AOPs tended not to be used in the thick of the sort of action we like to war-game – when the battlefield would be quite a dangerous place for a little aircraft – but much more during static situations, or lulls, when artillery was being used to pick off enemy positions. They were also used off-table in a counter battery role. Munro mentions that they were used to try and find mortars – but that German mortars were nearly impossible to spot when firing. They would try to guess where they were and direct a general bombardment in that area, to suppress as much as to destroy.

How about AOP for my 1943 project? The Austers were certainly in use in Tunisia and onwards by the British. This is presumably where tactics were refined before D-Day in Europe. The US Navy attempted to use AOPs launched from ships in the invasion of Sicily – but apparently this was a disaster and losses were very heavy. These would have been big and clumsy floatplanes, fine for observing gunnery in naval battles, but lacking the agility to stay out of trouble over land. There were no Austers at Salerno – but I guess appropriate airfields were lacking and it was too long a flight from Sicily, even if they could find smaller fields to use. Apparently an Auster was used to scout out German positions on Longstop Hill – but I don’t think they were used in the assault.

I have a soft spot for the Auster. My first ever aeroplane flight was in one, in Somerset when I must have been about 10 or 11. This was a treat while we are on holiday. I don’t remember too much about it. I’m sure I was told it was an “Auster 8” – but this does not correspond to any model that I can find. But the shape fits my memory – just about big enough to take my Dad, my brother and me, in addition to the pilot. My Mum wasn’t so keen.

I would like to do a 1/72 model of an Auster in 1943 Med theatre colours. I certainly don’ want to do a Lysander instead, as some wargamers seem to. However there’s a problem about finding a mode. AZ Model produced one as recently as 2016 (in Czech colours but no matter), which is also the right model – a Mark III. But they only seem to do very small production runs and there don’t seem to be any around second-hand. Other than that there is the Airfix Auster Antarctic. This is an early Airfix model, but was produced in large numbers over time, so they do turn up on the second-hand market, although sometimes for crazy prices. This is of a later, post-war mark though (and Airfix did do an AOP version, but one appropriate to Korea not WW2), which is moulded in bright yellow plastic and has optional floats or skis. However the undercarriage, cabin and engine are all different, so it would entail some conversion. The best strategy may be to wait for AZ to reissue.

Towards a WW2 grand tactical game system

My 1943 WW2 collection of 20mm miniatures, vehicles and aircraft has absorbed a lot of my creative energy. It is a project I started in the 1970s while still at university, but abandoned as I moved to a professional career, inhabiting bedsits. When I eventually returned to hobby activities, I took up with 15mm Napoleonics to the exclusion of all else. And then a few years ago I found some of my old models (and plastic figures) in the loft, and decided to revive the project. It was a sort of homage to my teenage self.

My focus is on British and German forces – who were then engaged in the Mediterranean theatre, starting in Tunisia, and moving on to Sicily and Italy proper. I like this rather neglected period because both sides’ armour was quite well matched (apart from the odd Tiger tank), and the panzerfaust and panzerschrek infantry antitank weapons had not come into use (British PIATs did make their appearance in the later part of the period, though, and the Americans had their bazookas). This gives it a different dynamic to the popular 1944 period, with the Allies struggling to cope with Panther and Tiger tanks in their Shermans, with deadly infantry weapons potentially lurking in every bush. I was not drawn to the Western Desert battles either, as these were too dominated by tanks, and I like a bit more terrain.

But I am left with a problem: what rules to use? Back in 1978 I was using WRG rules, which were quite advanced for their time – but the world had moved on. They took no account of troop quality, for example. I still use them as a reference work, though, for things like weapon ranges and spotting distances. These rules used one-to-one scaling, with 1mm to 1m ground scale. The writers recommended the use of 1/300 models, but you could get an interesting game with 20mm ones. The nearest equivalent in scope these days would be the Battlegroup system. I did use these once at the club, but they weren’t very popular with my fellow gamers. I moved on to Iron Cross, which worked for a while, but I soon became dissatisfied.

In fact it was clear that I am looking for more than one system. A one-to-one skirmish system, centred on infantry, with a low ground scale, not far off 1/72. I have two promising candidates for this: Chain of Command, and Disposable Heroes. Then, getting whole companies on the table top, there could be O-Group or Battlefront WW2. These aren’t ideal for 20mm, but can be made to work. My current lack of a club or regular gaming opponents, alas, means that I haven’t tried any of these systems out yet. While I think about how to solve that problem, I have a clear wish to go for something bigger-scale again, that I can use for historical scenarios. Initially I am focusing on a Tunisia battle: Hunt’s Gap (or Ksar Mesouar), fought over three days at the end of February 1943. A decent scenario can be made out of each of these days – or they can be strung together as a campaign. I have been interested in this battle, where a British force held off Germans equipped with Tigers, since the old days, when it featured in an old Bellona booklet by Terence Wise on the Tunisia campaign.

There is an obvious candidate for this level of game: Rapid Fire!. This is an old school system often played with 20mm models, but with each vehicle representing abut half a dozen real ones, and each infantryman about 10 real ones, organised into companies. We tried these out in a game at my club, when I was still in London. They produced an entertaining enough game, but I really didn’t like them. The first problem was that they suffered from the move and fire issue, common in old-school rules. In this it is easy to move your forces forward, fire at the enemy and destroy them before they can fire back, unless those enemy had reserved their fire in the previous move; this creates a sort of forward ambush jeopardy that feels wholly unrealistic (incidentally my old WRG rules avoided this with a Fire then Move mechanic). Still this was not as bad as another popular system, A Fistful of TOWs, and I could probably live with it. The bigger problem is that it is an out-and-out bath-tubbing system. That means that although each vehicle may represent half a dozen, for game-play purposes it is just one. Once hit, it is usually totally destroyed. There are even rules for the crew baling out. You should really expect units of this size to sustain various levels of damage before being destroyed – and baled out crews have no role. These are really skirmish rules but scaled so that you can bring in big bits of kit onto the table that would normally be well to rear (which is exactly what I want to do). It simply does not feel like a clash between brigades of troops.

What I wanted was something with more of a board game feel. The closest system I have found for this is Sam Mustafa’s Rommel. This is played on a square grid, at 1km per square. But this is too high scale for what I want, abstracting away a lot of the items of kit I want on the table – such as antitank guns, headquarters elements, and so on. This is a system that can be scaled up successfully, but not scaled down. In any case it does not adapt well to the sort of terrain that my 1943 battles where fought in, where rough ground and steep slopes played an important role, with high ground being of critical importance for observation, even at the grand tactical level. And things took longer to unfold, with battles often taking days. (It would not be too hard to bring these terrain factors in with a house rules, it should be said – and one day I may well try this).

Still, what I have taken from Rommel is that, like a board game, a grid is a good idea. Apart from simplifying many of the game mechanics, it makes handling artillery and concealment easier, by giving clear definition to locations. That leads to the choice of squares or hexes. Squares are how the human brain organises space – especially if we think of the grids on the maps in use in this era. That is why it makes sense for Rommel to use them. But natural features are easier to fit onto a hex grid. I’ve seen great-looking hex-gridded board games. And since the natural terrain is such a dominant part of the battles I want to recreate, it makes sense to use these.

My next step was to look for board games to use as a basis for my game. I had seen an article in a magazine where somebody had had successfully done this (albeit for 10mm miniatures in a Cold War setting). I asked for pointers from fellow gamers at my old London club on the Facebook forum. They pointed me to several games, of which the most relevant seemed to be the ancient Avalon Hill Panzer Leader, and a rather more recent Nations at War system. But I quickly ran into a serious design problem, relating to the models I want to use. With 20mm models a hex of anything less than 6 inches (150mm) point to point (or 130mm side to side) is going to be too cramped. I need to be able to fit two or three units into a hex comfortably, and four at a pinch, with maybe some terrain items too. On a reasonably sized table each hex needs to represent about 400m across. In these board games it is more like 250m per hex. You can stack counters, so board game hexes can be quite small. I have to have a lot fewer hexes on the table than the typical board game, even with a much bigger playing area. Starting from scratch you would use much smaller models. With 6mm models you could go down to two inches, or three with more breathing space.

These are 6in hexes (corner to corner) with some of my 20mm models. Three tanks a single hex could entail spillover into neighbouring hexes. The hexes can’t be any smaller.

From a gaming perspective, big hexes are perfectly viable – this is what Rommel achieves after all. But this has a profound effect on game mechanics. Still, there is much to be learnt from these board games. But it does look as if I will have to build the system pretty much from scratch.

What then should the design priorities be? The first point of departure from most WW2 systems is that these battles are not primarily encounters between rival tanks. Even Tigers have a tough time when not seriously opposed by other tanks. Success comes from combining armour, artillery and infantry. Allied artillery was often decisive – and yet it is often a bit of an afterthought in games systems. One thing a player has to do is to prioritise artillery targets carefully. And spotting is critical – with vantage points taking on a special significance, with visibility on the level often very limited.

But there is a reason that tank battles dominate wargames: it makes for a dramatic game – “cinematic” is a word people often use. Not all warfare makes a great game. WWI Western Front battles are very absorbing subjects for historical study, but, apart from the early drama of 1914, they are very hard to make into good wargames. “What’s the point of it?” one friend asked me of one friends’ WWI system. There can be a lot of hard slog in the 1943 battles that I am studying (in contrast to those being fought at the same time in Russia in much more open ground). There have to be important tactical choices, and plenty of jeopardy and swinging fortunes. I’m not quite sure how to get this. But 1944 Normandy battles are enduringly popular amongst wargamers – and that faces many of the same challenges. So it should be possible!

I love writing wargames rules. But it’s a slog. It could be a while before I’m ready with this!