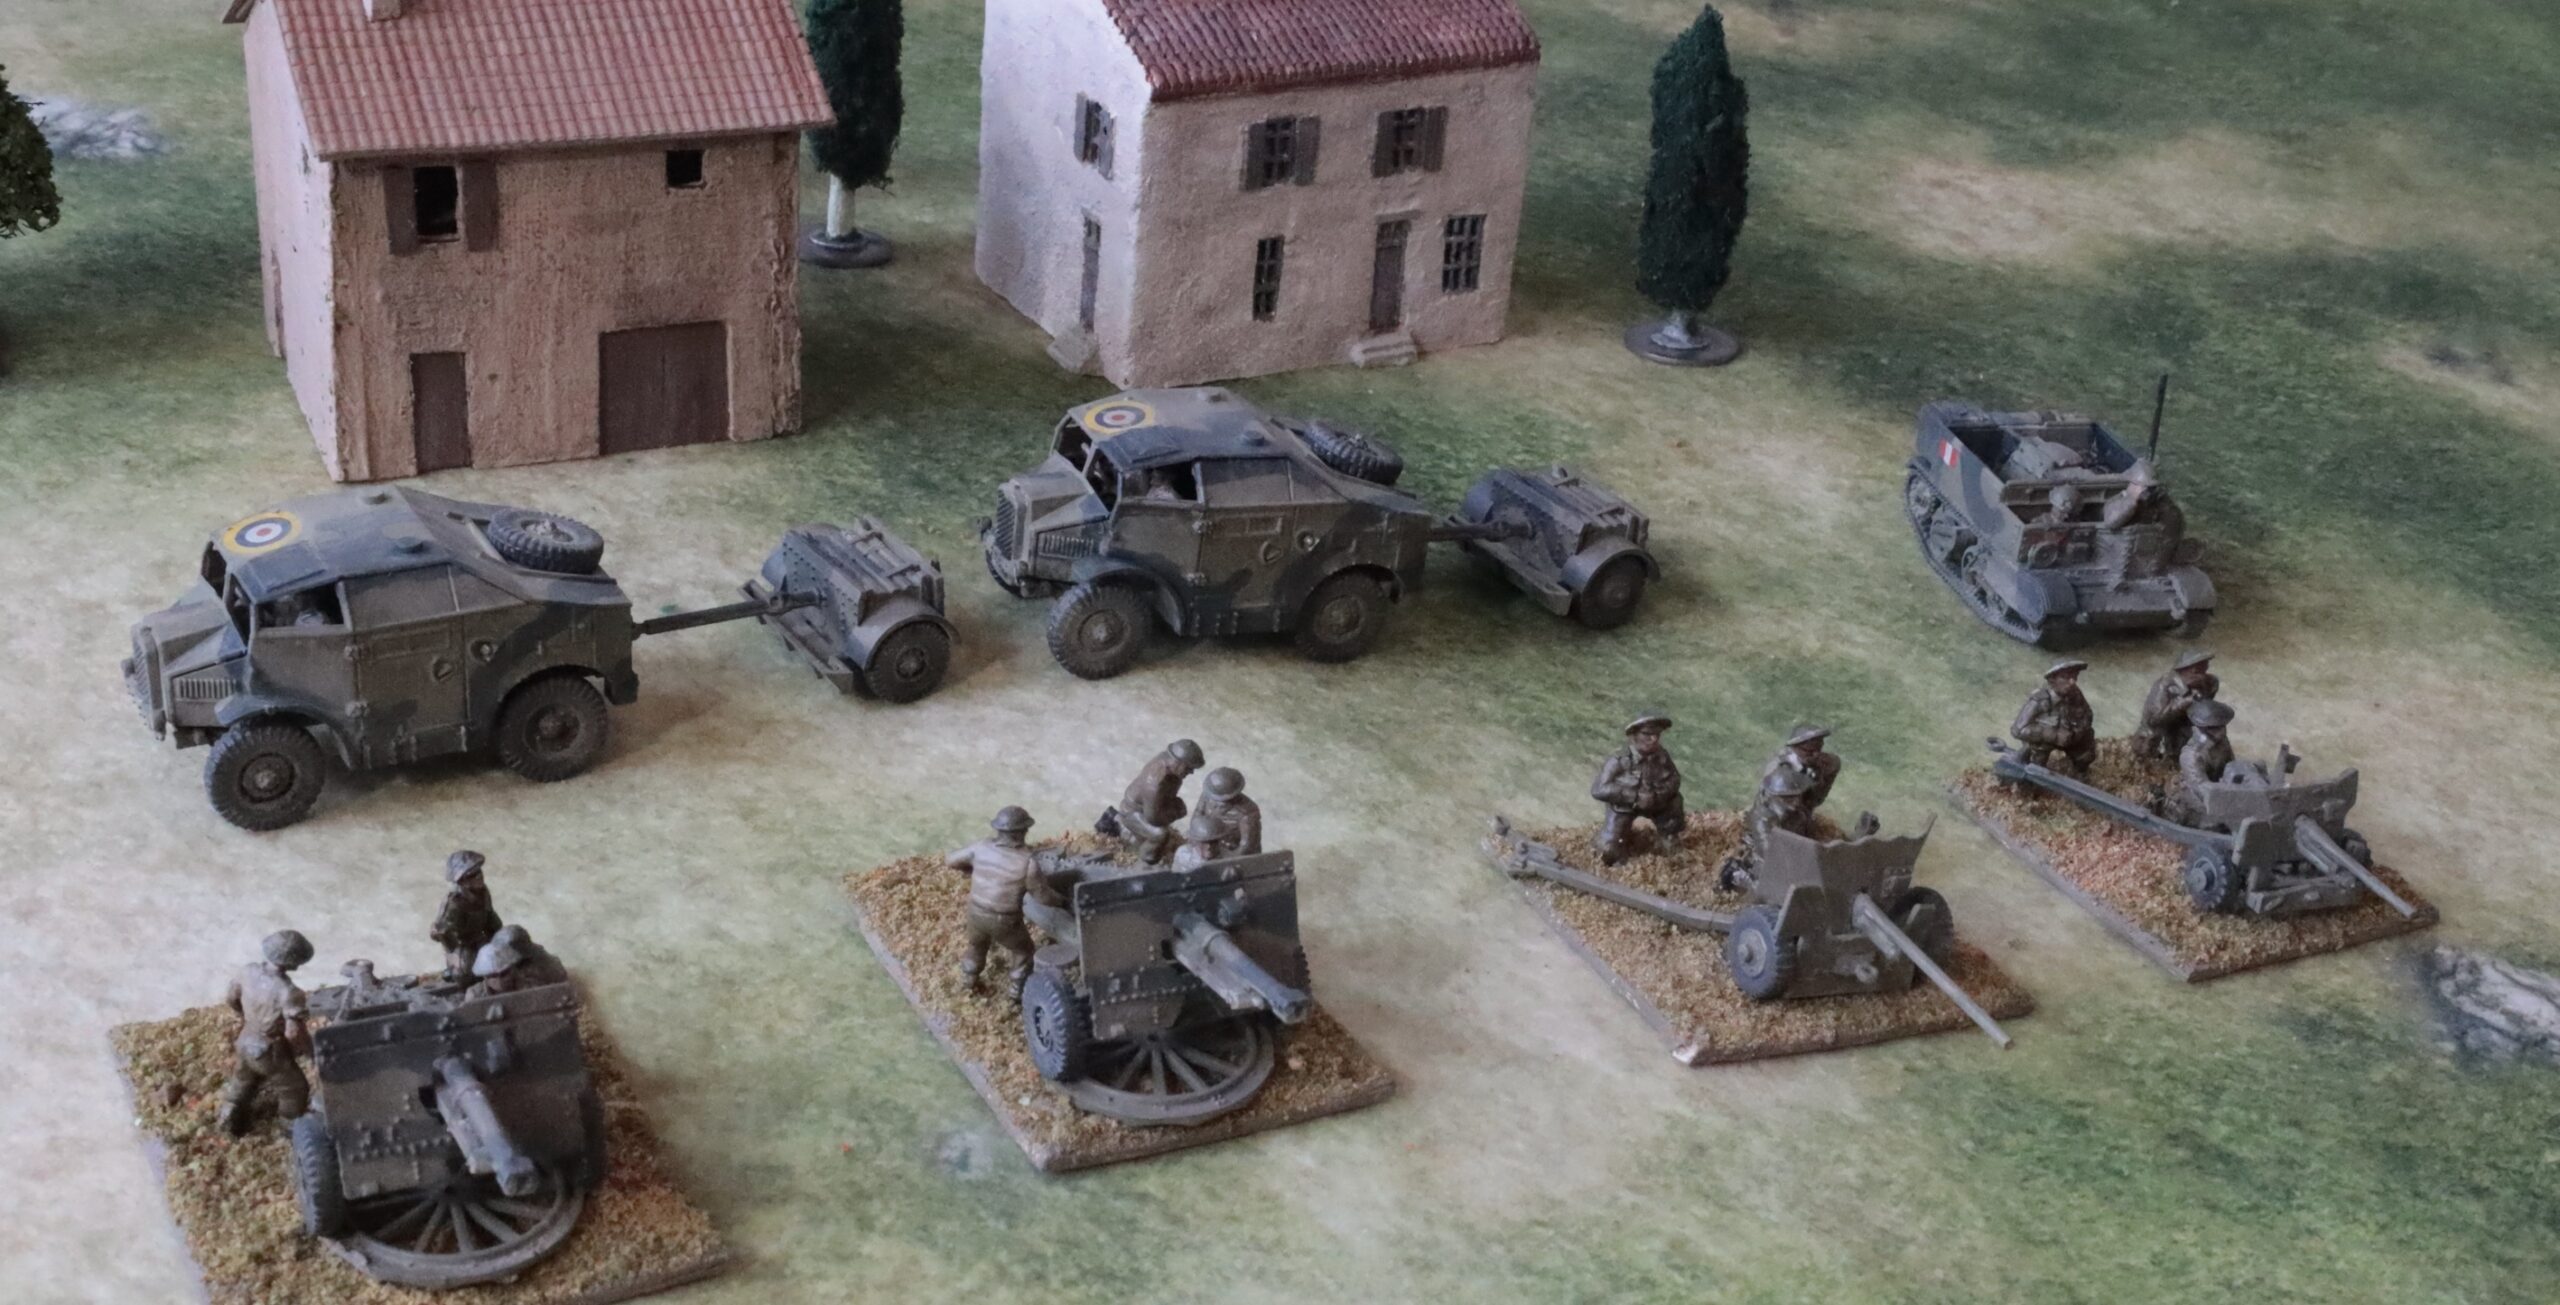
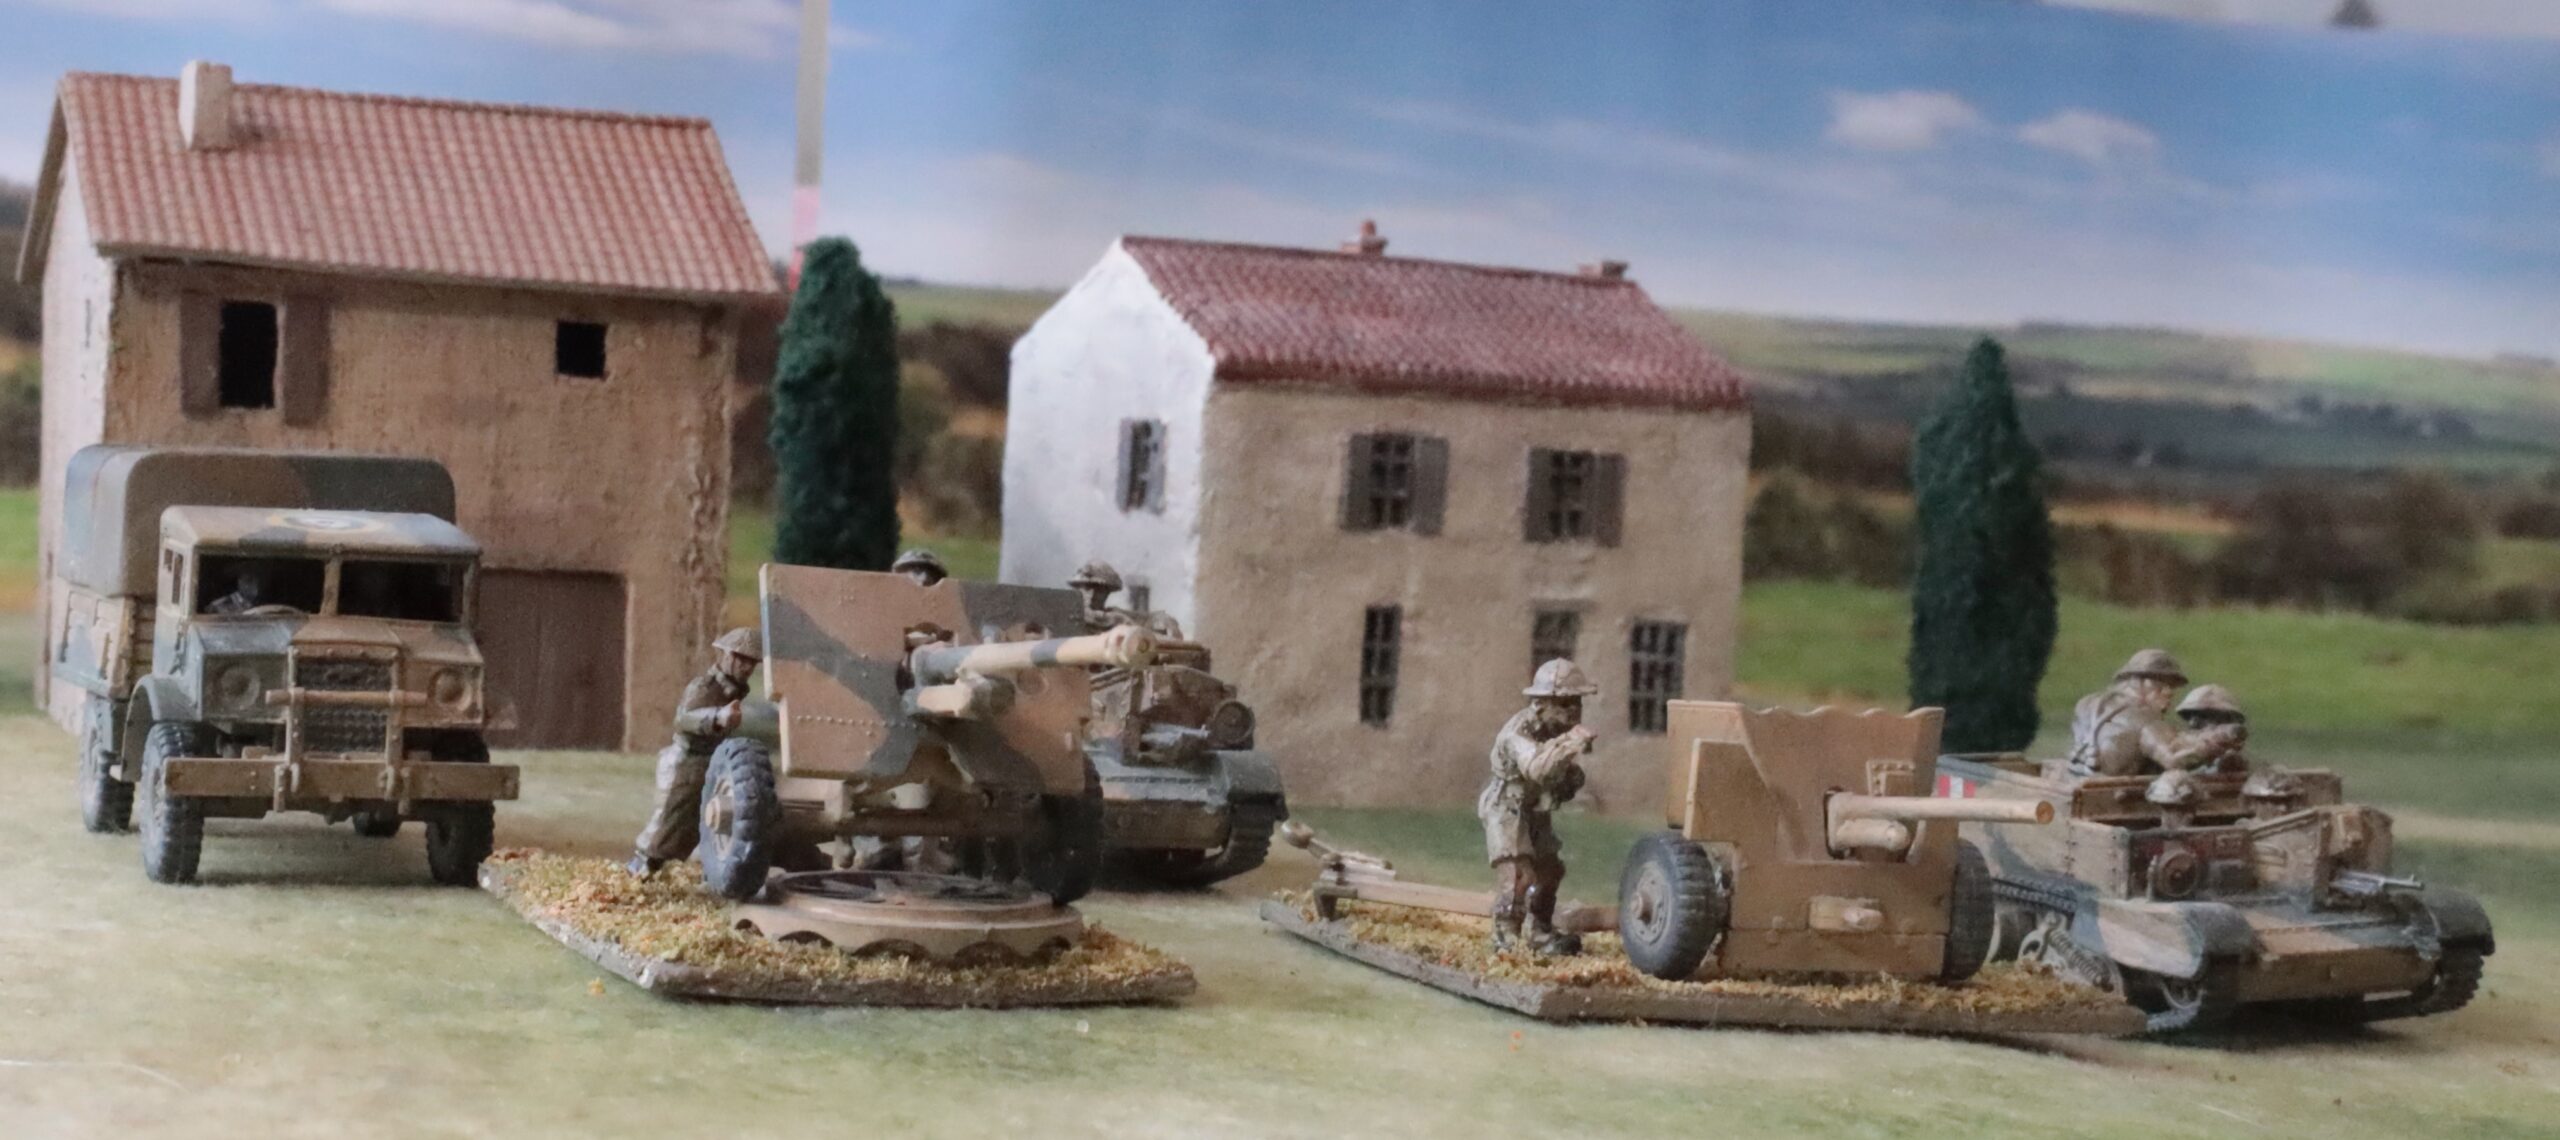
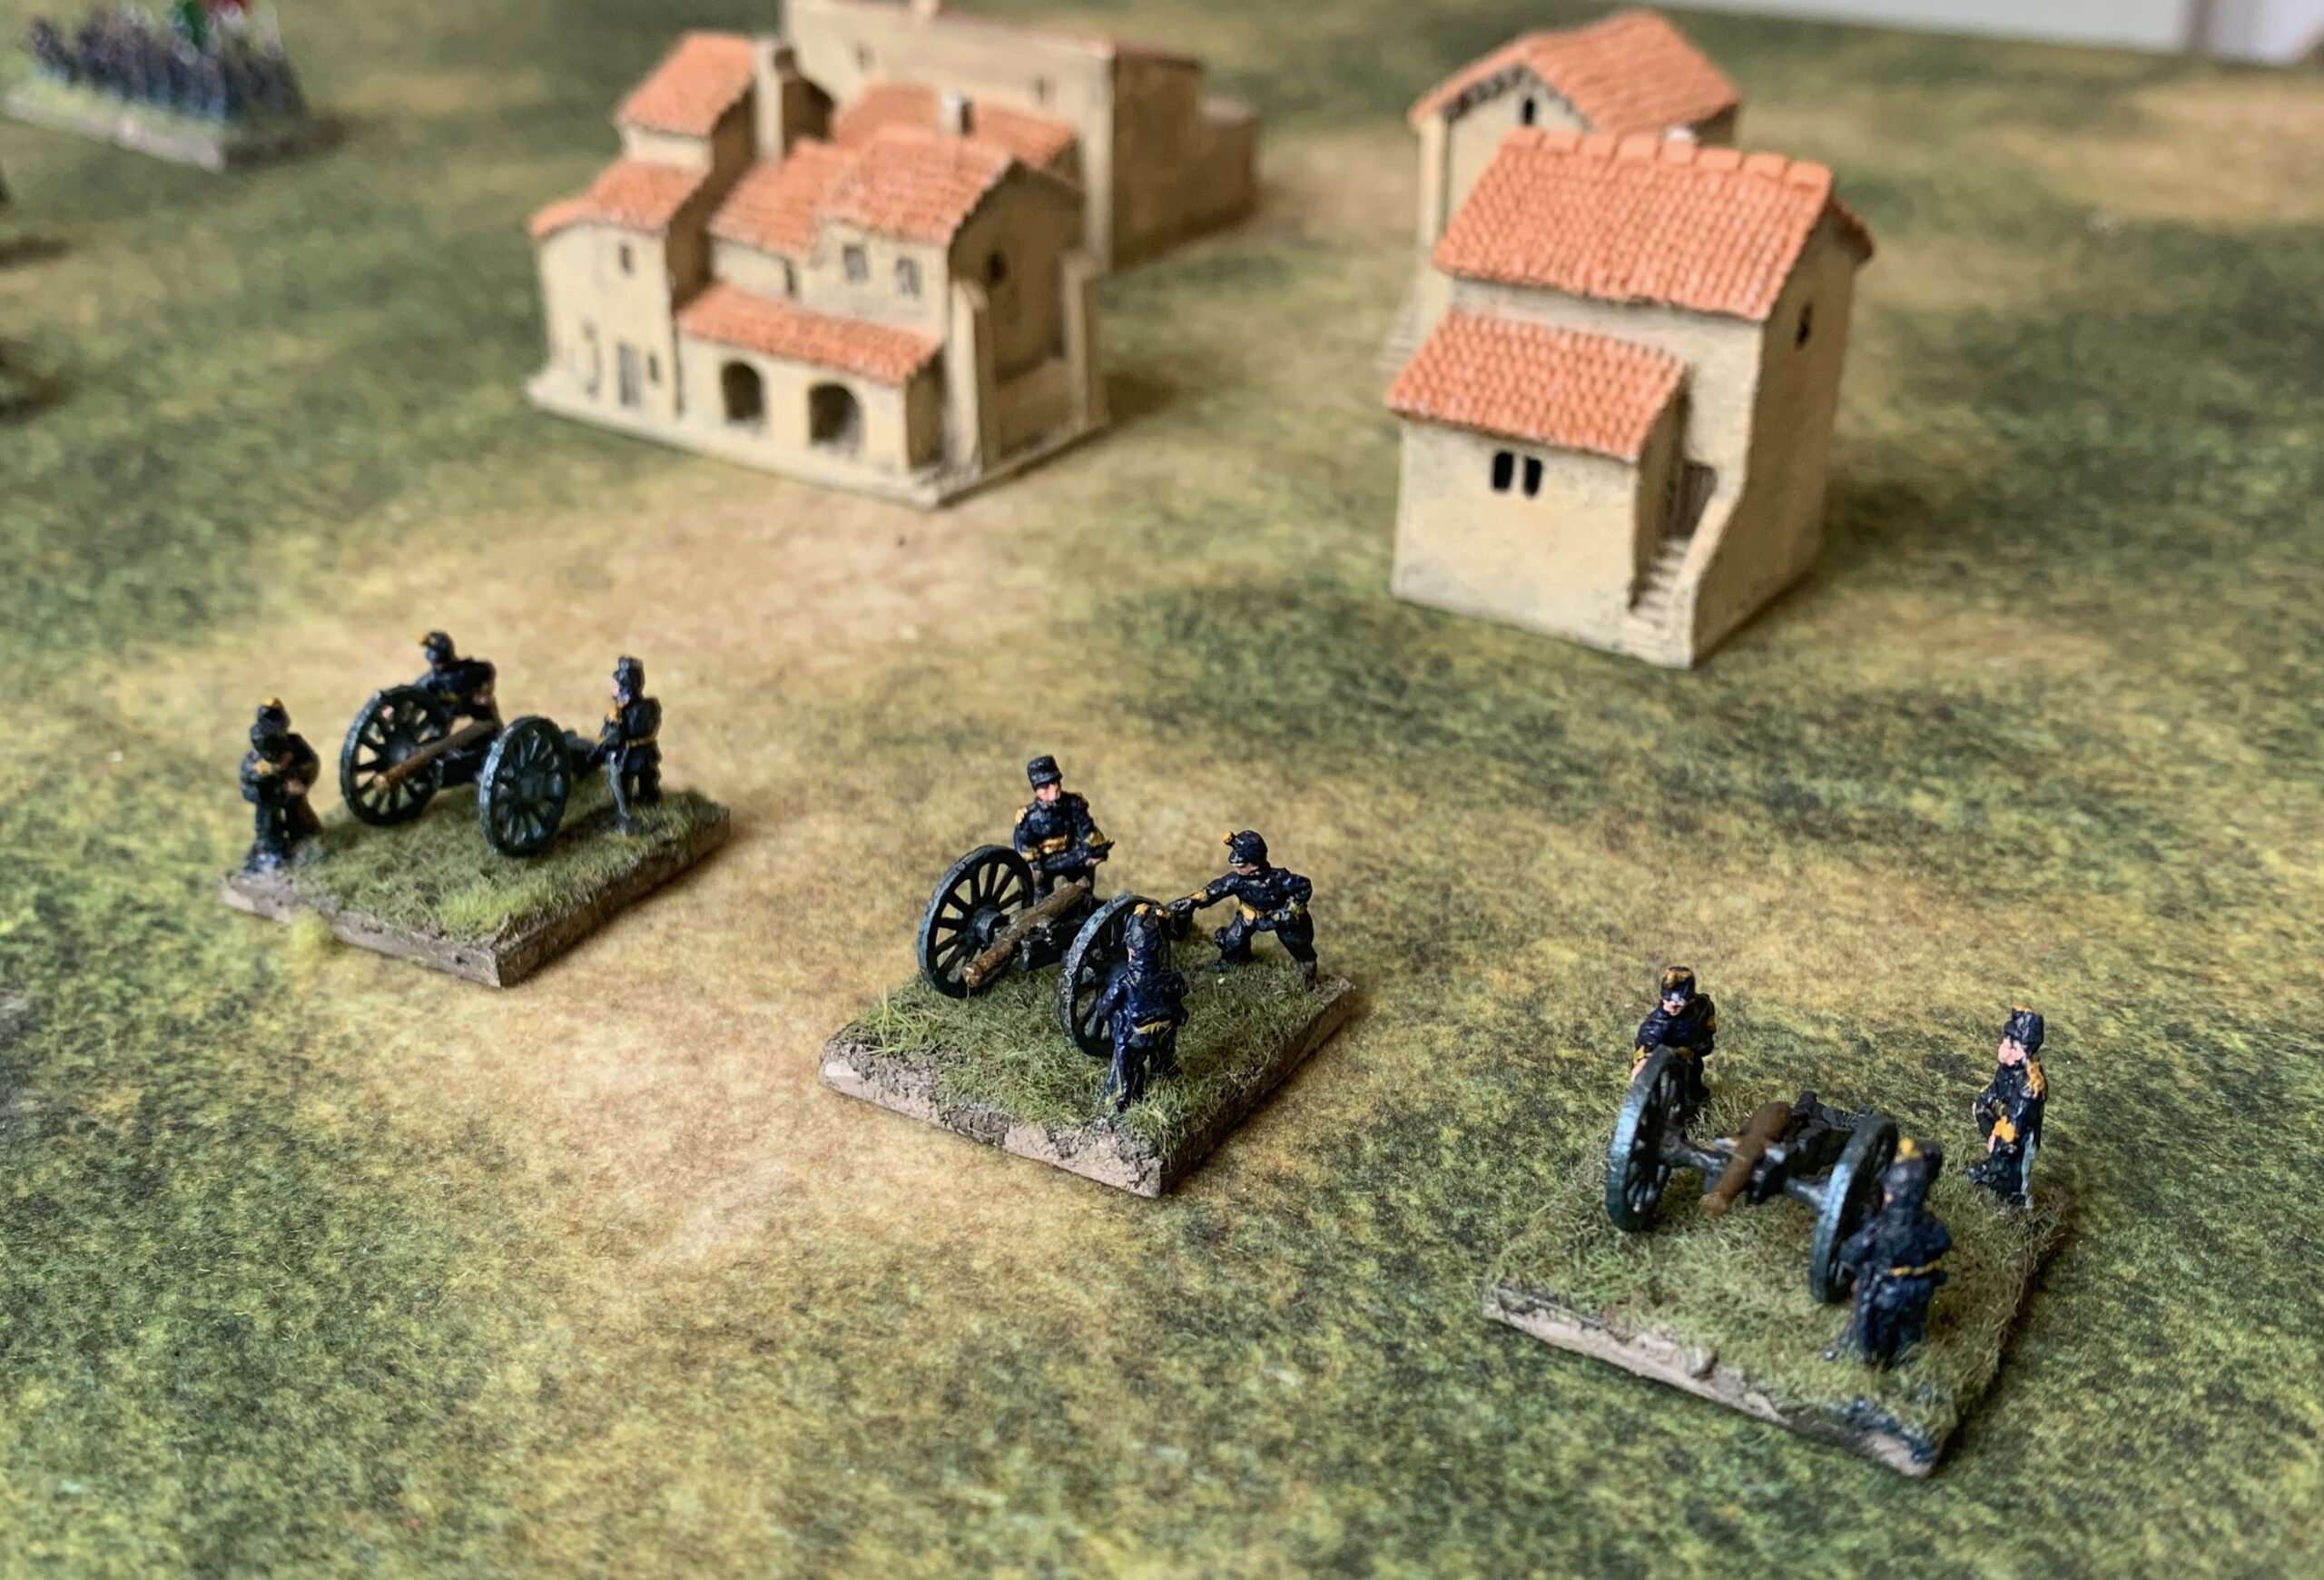
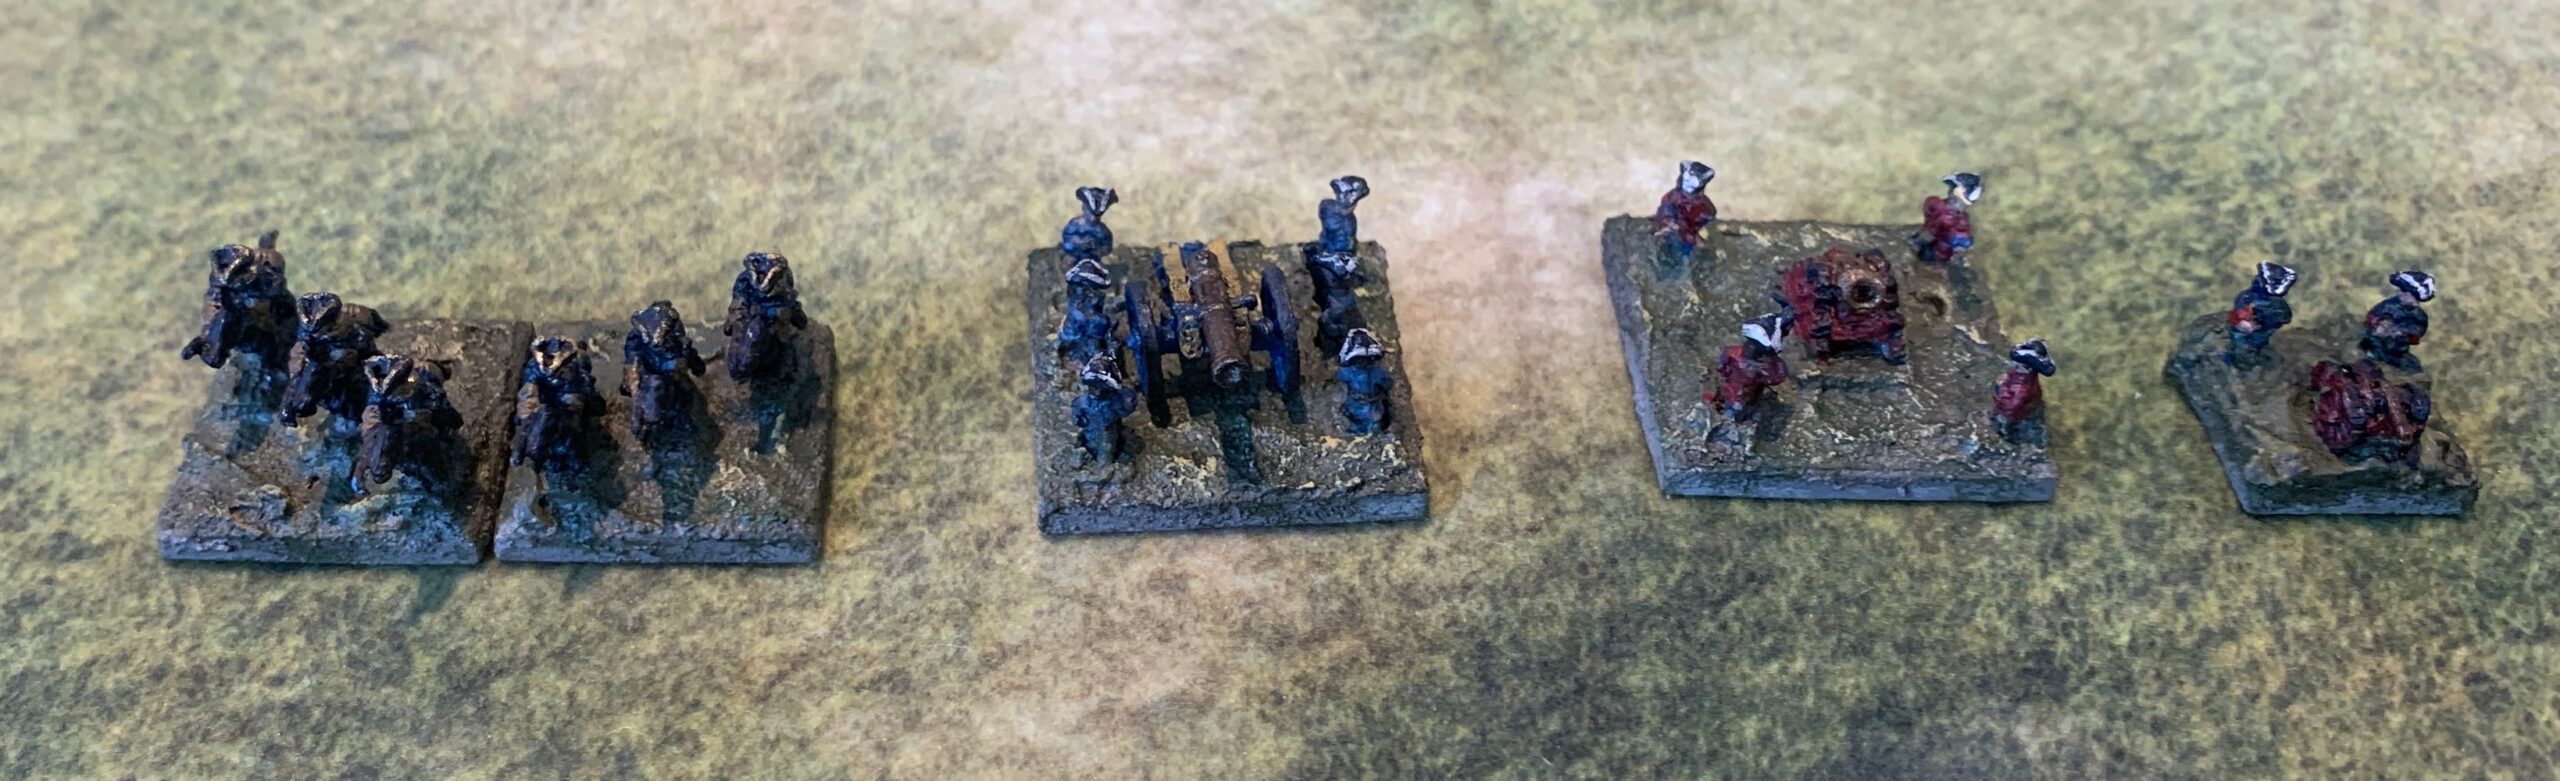
This time I continue with my description most recent batch of figures and models for my 1943 project, as I build up enough forces to run a scenario for Medinine, by talking about the artillery. These comprised two 25-pdrs, three 6-pdrs and a 17-pdr Pheasant. The above picture is of four of the six weapons, together with two Morris Quads and limbers and the carrier OP. These are items I painted in the Light Mud and Blue-Black scheme introduced after Tunisia, ready to be used in Italy. Missing are the two 2-pdrs that I will need, because I didn’t have the models when I started the batch, and found that I needed a second crew assemblage anyway.
Let’s start with the 25-pdrs. These were the workhorses of British artillery in WW2. In the desert, and on at least one occasion in the Tunisian hills, they served as direct fire support, taking on a role as antitank gun. I’m not sure how much of my artillery I will actually use on the tabletop – because even at Rapid Fire scale they would mostly be off the table – though I think Rapid Fire players like to stretch things and put them on. Still I’ve been buying the models: I have two more 25-pdrs and two 5.5in guns in stock, and a number of German guns too. In the Medenine scenario the antitank guns looks a little thin (though more than adequate historically), so I thought it appropriate to have at least a pair of 25-pdrs ready to act as a last line of defence.
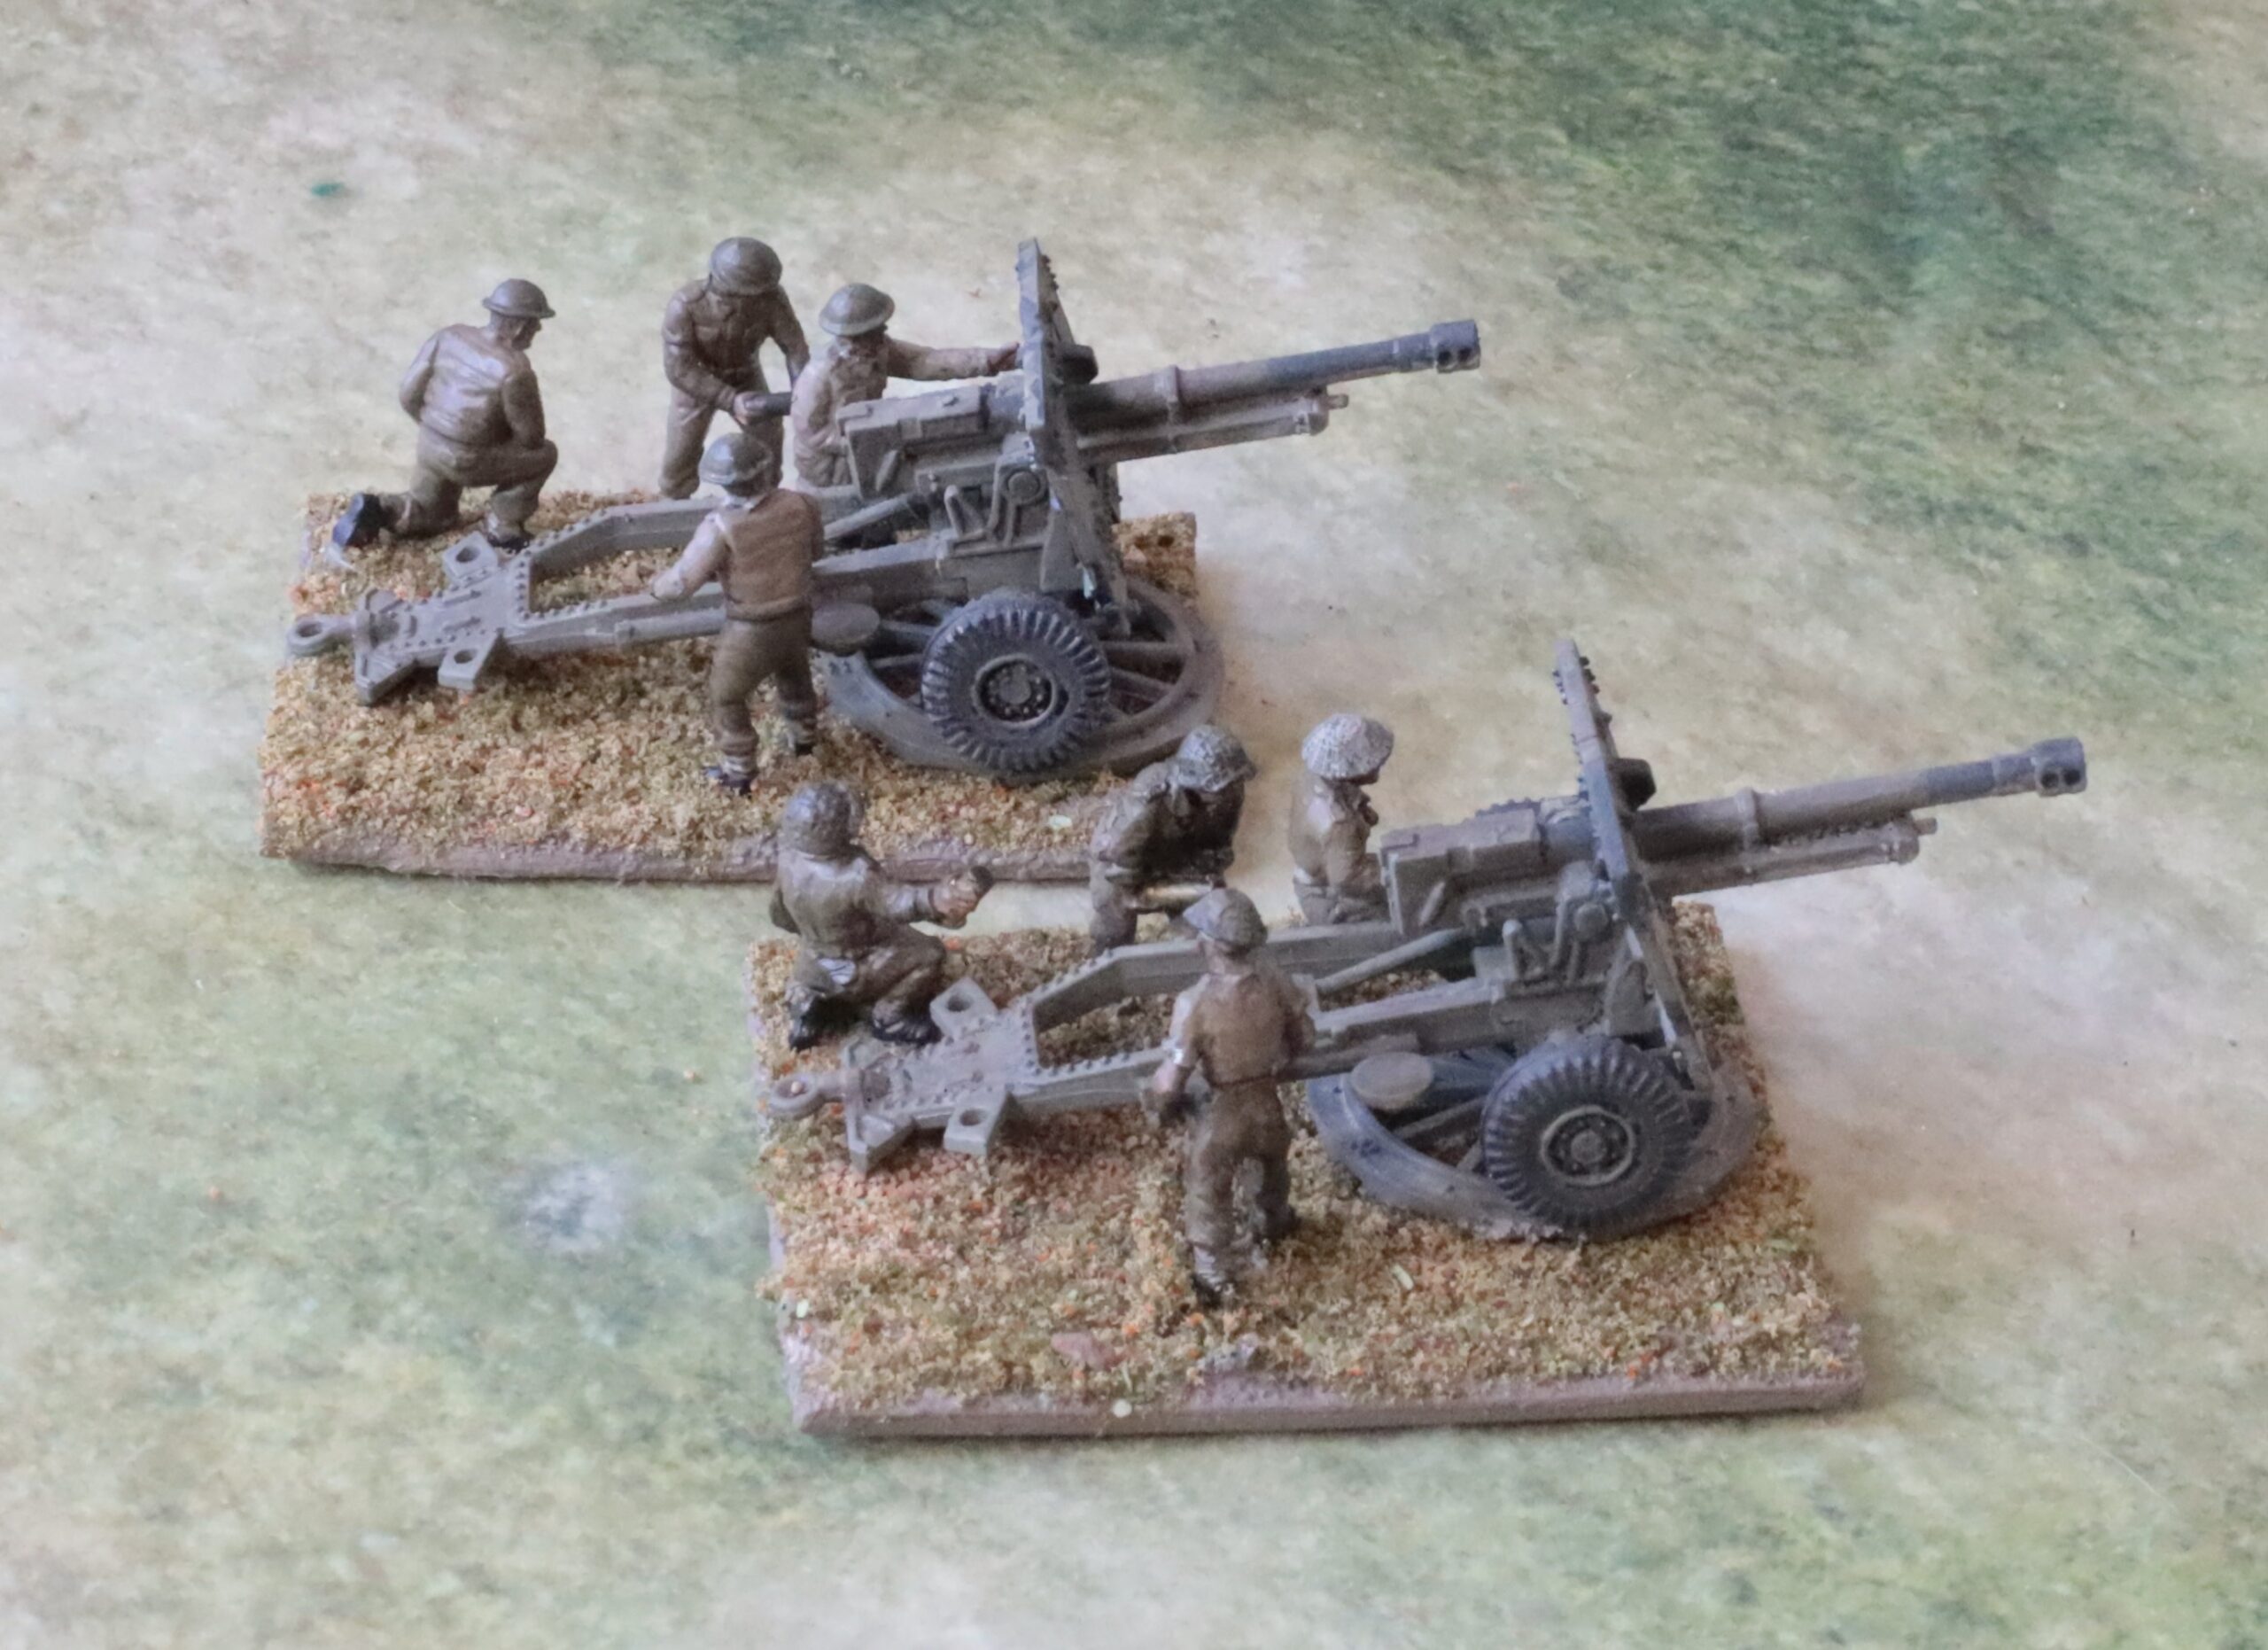
My 25-pdrs. The one in the foreground has an AB crew; the other has a PSC crew with a head-swap.
I had a box of two 25-pdrs with a Morris Quad in hand (together with another with the CMP Quad, as PSC had run out of the Morris sets). I used this. The first decision was whether to use the parts for the later version, with muzzle-brake. I didn’t have definitive information for when this was introduced. A lot of pictures show the earlier version in North Africa – but there are pictures of the later version in Italy in 1943 (or so the picture captions say) – so I decided to go for this, painted up in the Light Mud and Blue Black scheme. Next was the question of crews. I bought one set of eight figures from AB; I only wanted four on the base, so I hoped to get both crews. But they only had one seated figure, and I thought this was critical – otherwise it would be just a group of people staring at the gun. I decided to use the PSC figures for the second gun. These aren’t nearly as good, but good enough, I think. They supply two versions: Western Desert with men in shorts, and North West Europe with late helmets and scrim. I wanted neither, so I decided to head-swap the African heads onto the later bodies. This wasn’t actually that hard. The AB crew have the later helmets too, but I decided to overlook that (as I have on half of my infantry) – and it wasn’t as blatant as on the PSC figures.
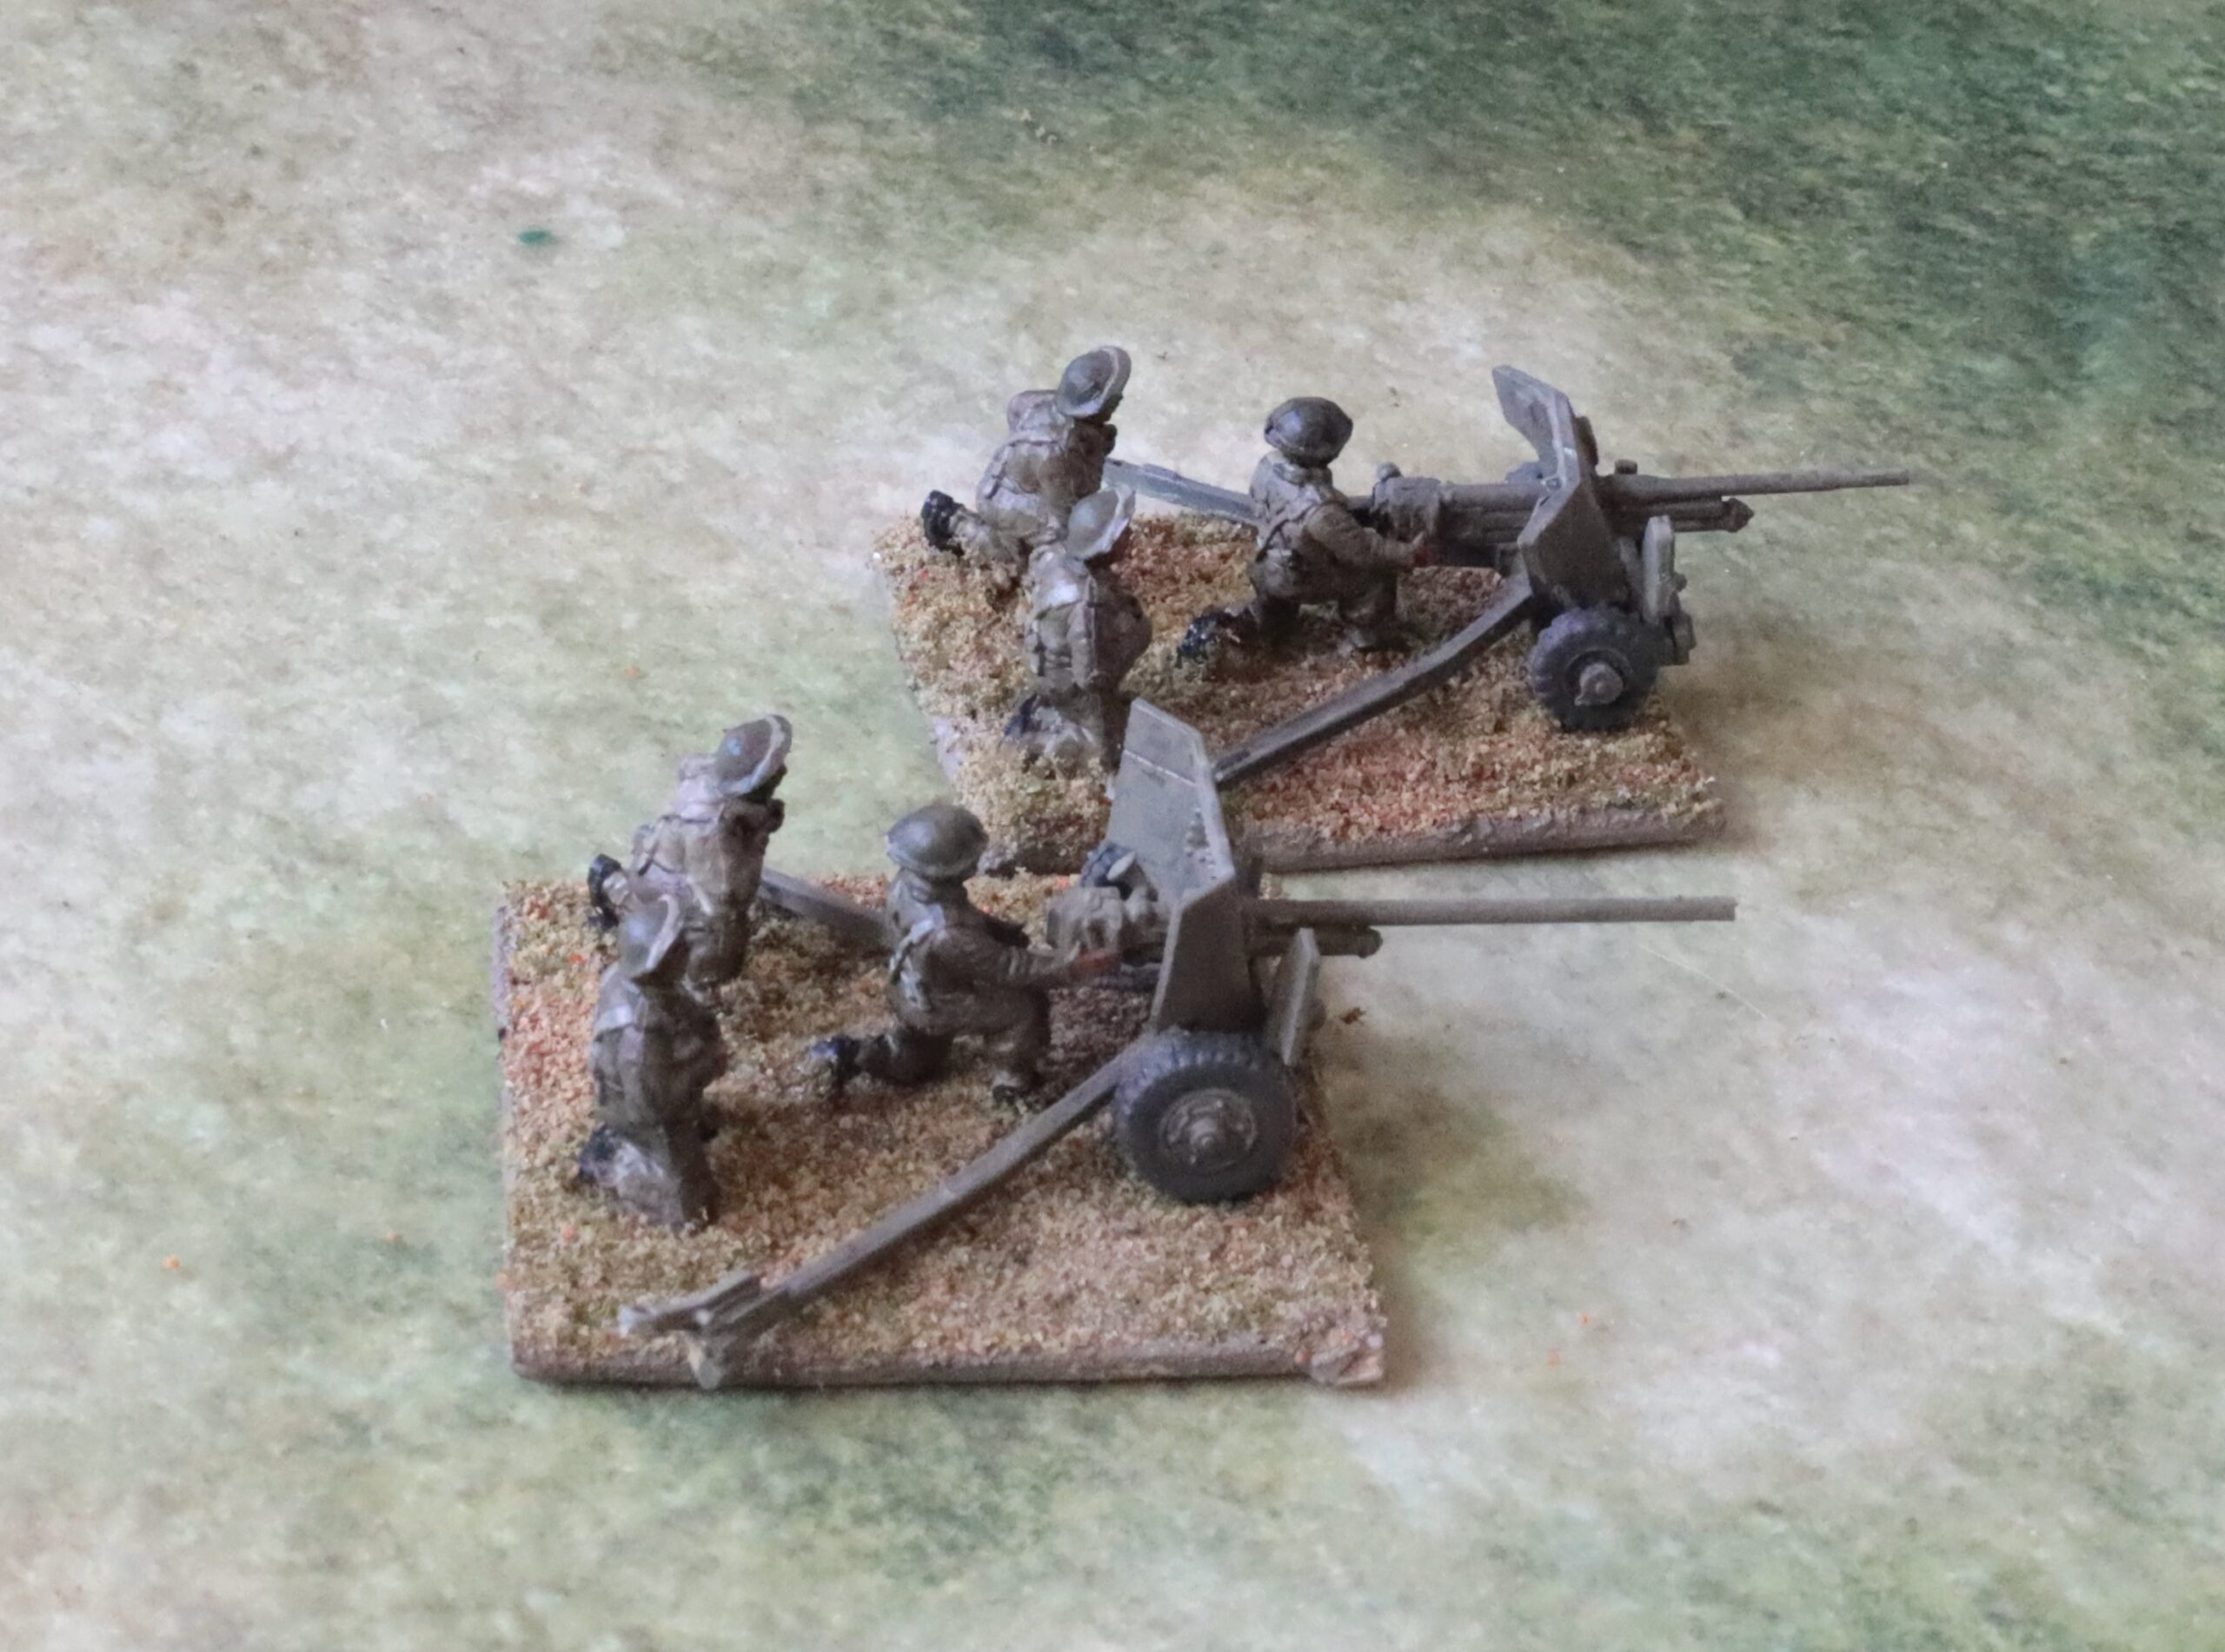
Next come the 6-pdrs:
The two 6-pdrs in Light Mud. The one in the foreground is Valiant; the other is an old Airfix one. Both crews are Valiant.
I needed three more of these to go with my one existing model, one of my old Airfix ones. I had another old Airfix one that just needed a paint job. The cheapest way to source a couple more (with crews) looked to be to get the Valiant models, for which I found a decent review. Alas I think they look wrong, when compared to the photographs in theatre. The Airfix ones look better, though I have no reason to think they are particularly accurate – that wasn’t an Airfix strong point at the time. But it looks low and mean, just like the pictures. A second issue is that I wanted the earlier version of the weapon, with a shorter barrel and no muzzle brake. I followed the advice on the Valiant box, but it just didn’t look right either! I am so dissatisfied that I have bought the PSC box of two 6-pdrs with Loyd carriers, hoping these will look better. The Valiant crew figures were OK, though, and in the right uniform for 1943 – though they are too big. Four were provided, though I only used three. For the third crew I used bought AB desert castings with a crew in shorts, just for variety.
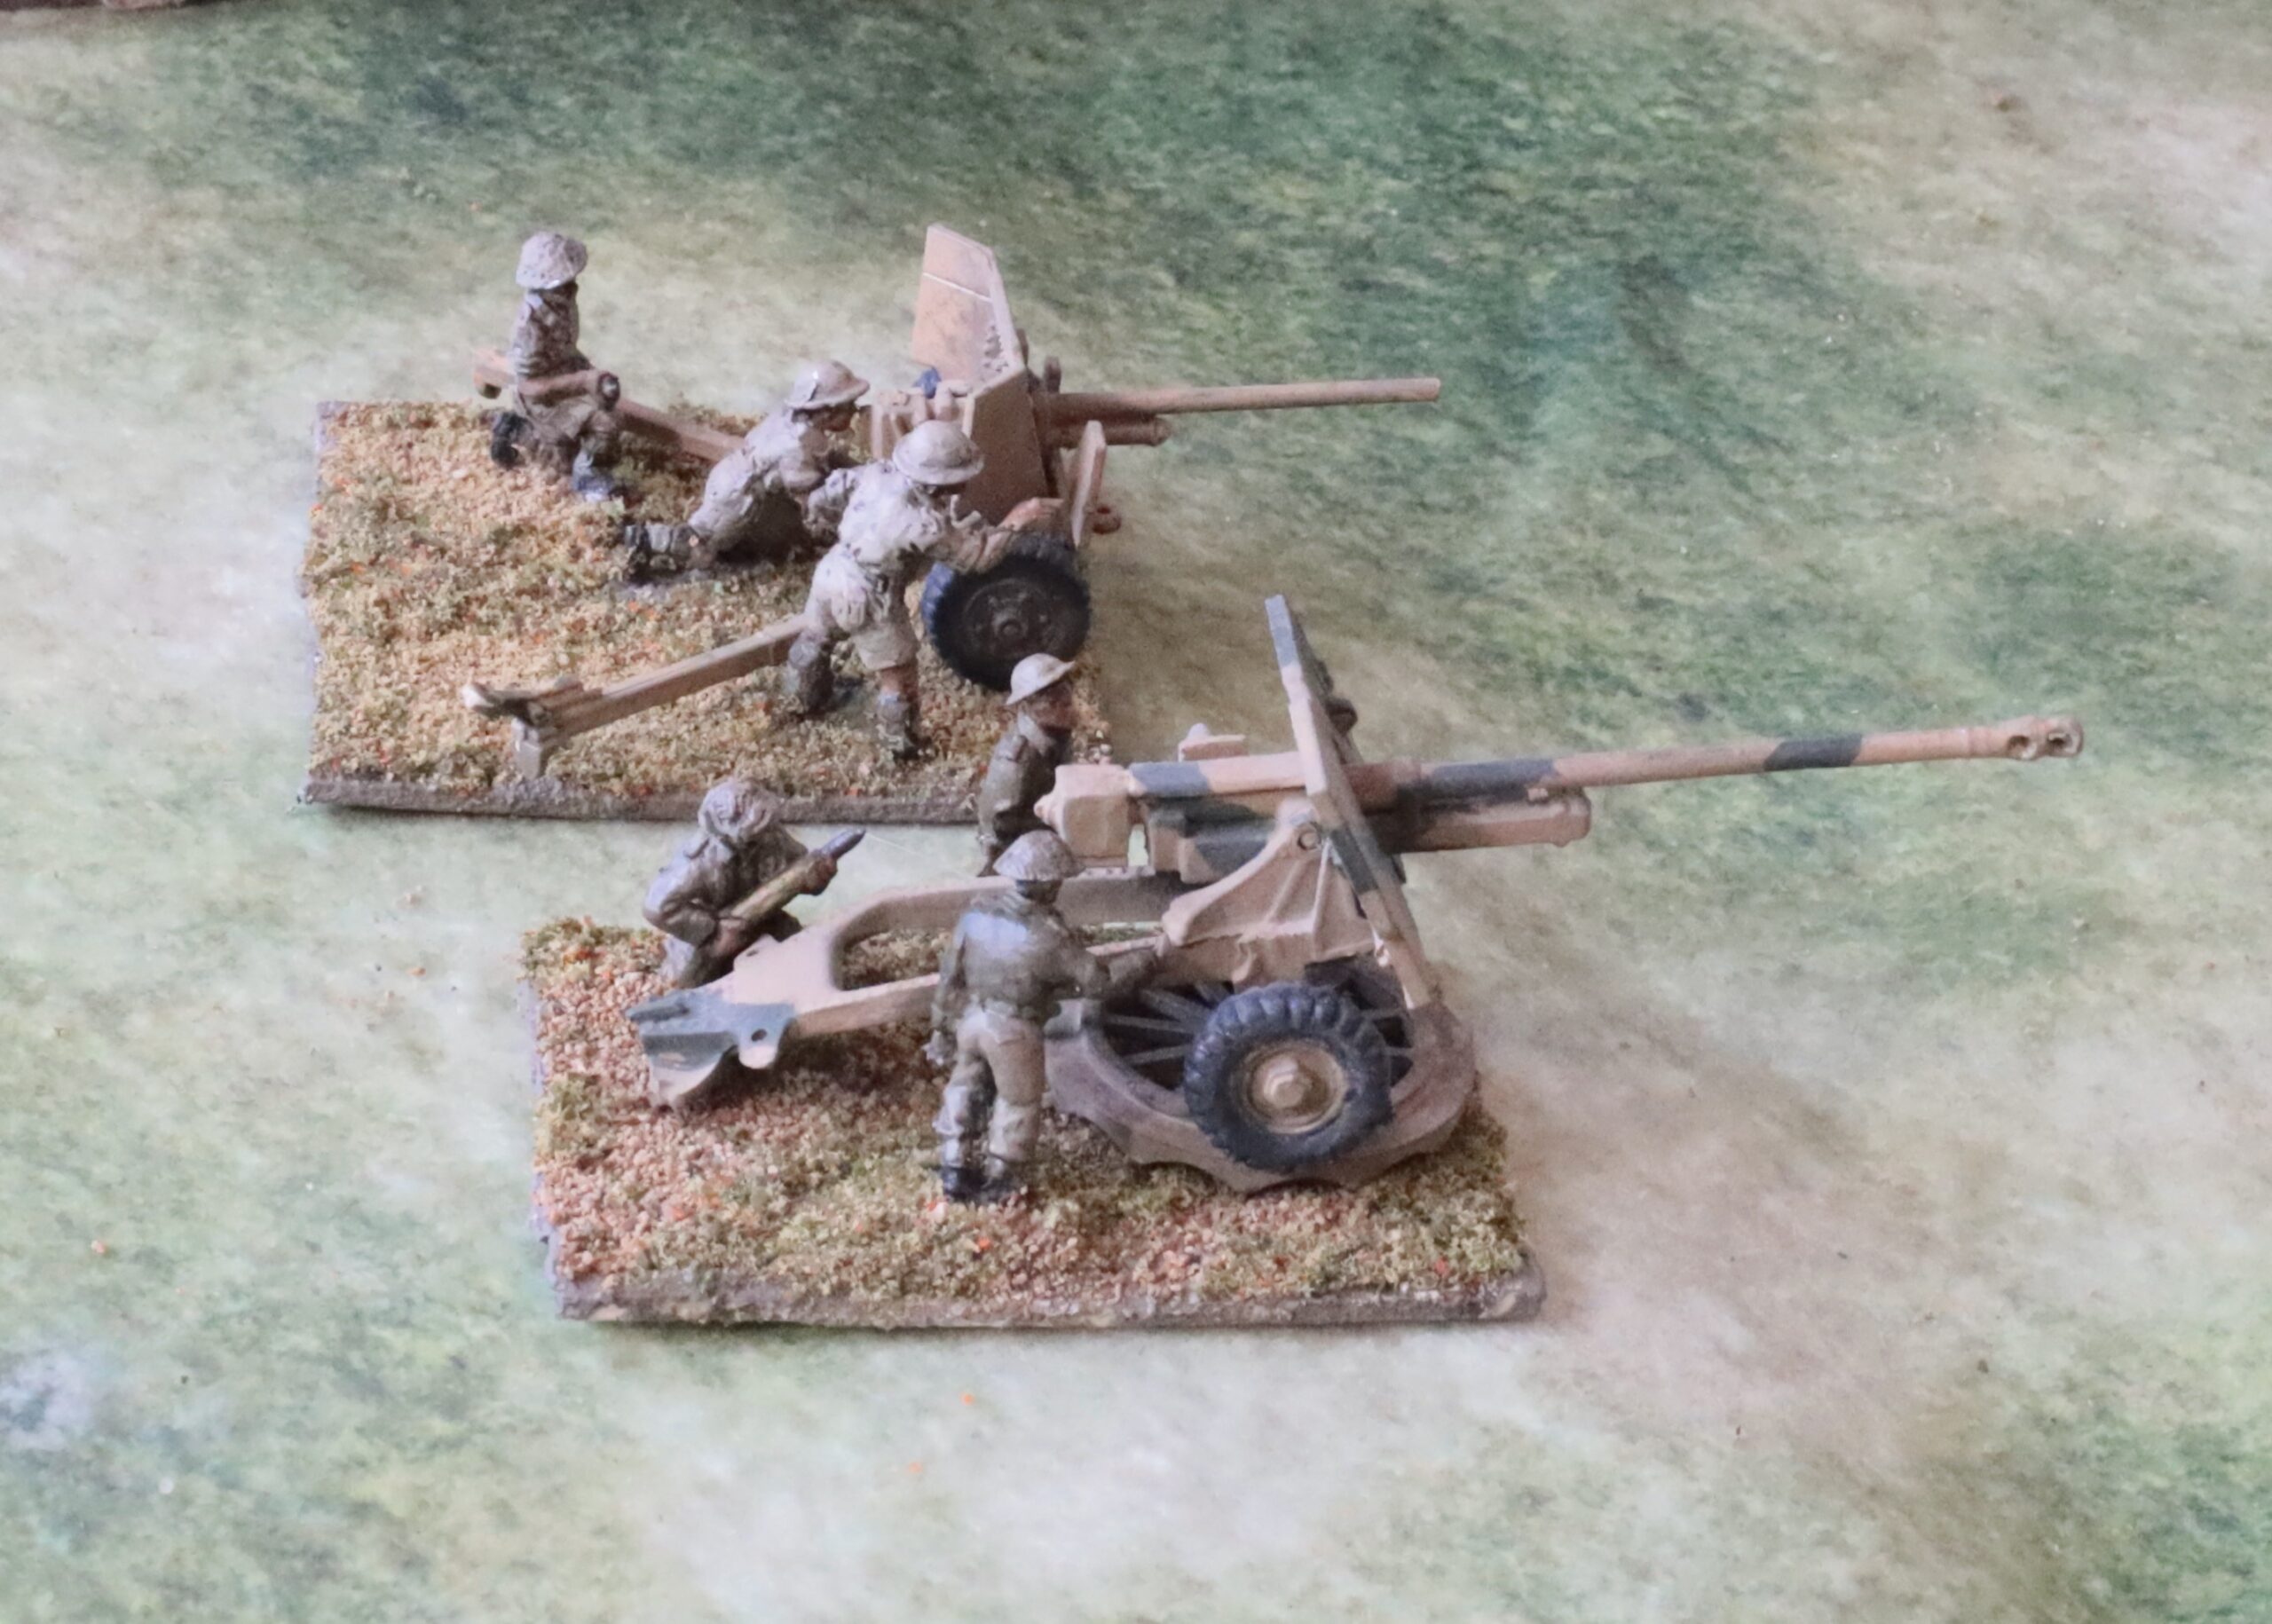
Finally there was the 17-pdr Pheasant. Here it is with the third 6-pdr:
Old 17-pdr Pheasant conversion with SHQ crew, with the second Valiant 6-pdr in the background, with AB crew
As I said in my previous post, the Pheasant was something of an afterthought. I don’t think that this weapon was used in Medinine, but the 7th Armoured did have them at the time, and they would have been an option for the British. Actually they probably weren’t that suitable. Their big virtue was their range – but if they had opened up at long range (and the 17-pdr went off with a very spectacular flash and bang) they would then have been picked off by the German artillery and mortars. Plus they were bigger weapons, harder to conceal in the desert. This model is one I made back in the 1970s from and Airfix 25-pdr and a Panther gun barrel. Very basic, but I adjudged it good enough. I had plenty of SHQ crew, which I brought into play. These are slightly smaller than AB figures, and so more appropriate for this slightly smaller-scaled model. Here’s a different angle, including the three vehicles I painted in desert camouflage:
I will describe how I painted the models in my next post covering the vehicles. The process for figures I have already described – they were painted alongside the infantry.
It’s been a long absence since my last post. I don’t tend to post until a project is complete, and my most recent project has been a big one. As usual lots of life has intervened to slow things down. But I also have a lot of half-finished projects lying around, especially on the rules-writing side, which is not conducive to regular posting. Still, I now have something definite to report.
Following my last post for Rapid Fire! for hexes in December, my focus has stayed on WW2. We played two games, loosely based on episodes at Salerno. They weren’t particularly interesting. Much depended on encounters between tanks and antitank guns, turning on a small number of D6 throws. Infantry proved pretty useless. The first game at least had a close finish, but the second was an overwhelming British victory as the Germans failed to make any impression on the British Shermans, while the British scored hits pretty much every time. Scenario design was partly at fault, I’m sure – but the whole thing reinforced my dislike of the bathtubbing aspect of the rules. Too much hinged on too few dice throws. But I like scaling of RF, allowing bigger battles using 20mm figures. So I have embarked on writing my own rules – which will be part of a rules family stretching from Great Northern War to Napoloenics to the 1859-71 wars and on to WW2. It is surprising how much the game structure and mechanisms can overlap. That’s the idea anyway.
But I needed a scenario to focus on. Salerno is tricky at this level, especially if you leave the Americans out (they had more tanks, which makes it easier to design good games), and I think I need more experience with the system to work out how to design decent scenarios. Similar things can be said for Sicily. But Tunisia is another matter – there are more tanks!. As it happens the Rapid Fire crew have two Tunisia scenarios (or scenario groups): Medenine and Tebaga Gap. These are among the last desert battles, as the 8th Army fought their way into Tunisia – and so fit into the desert battle series that has been designed for Rapid Fire. I picked Medenine – the last major German tank attack in Africa- though allied tanks were only marginally involved. The scenario is based on the central of the three principal thrusts, with the 15th Panzer Division’s attack on 131 (Queen’s) Infantry Brigade of the 7th Armoured. I decided to set out on two large batches of model-making and painting, first for the British and secondly for the Germans. I started with the British.
For the British I needed two four-company battalions (actually this was more than I needed for this scenario – but I’d need more troops for Tebaga Gap), each with a 3in mortar (with carrier), a 6-pdr and a 2-pdr AT gun, and a carrier platoon. In addition I needed Royal Artillery support with a further two 6-pdrs and a battery of two 25-pdrs – and brigade command, for which I wanted a Dorchester ACV. Mostly field artillery at this scale is off the table, but I wanted the 25-pdrs on the table as a last line of defence should the panzers (eight panzer IIIs and Panzer IVs) push their way through the four 6-pdrs and two 2-pdrs – although historically they didn’t. I already had all I needed for one battalion except the 2-pdr. For the second battalion I bought in AB Tropical infantry (four packs of 10 plus support weapons). These are a recent release, and work pretty well 1943 British infantry in this theatre (unlike my earlier British infantry, which are more appropriate to Normandy 1944). In addition I had PSC 25-pdrs with Morris Quads in stock. I bought in two extra 6-pdrs from Valiant, to use with an old Airfix one I had in stock, and an AB desert crew. On top of this I decided to bring into service an old Pheasant 17-pdr I had made up in the late 1970s from an Airfix 25-pdr and a Panther gun barrel; I compared it to the parts in the PSC 25-pdr kit (which can be made up into a Pheasant), and it didn’t look too far off. I had some crew available bought a number of years ago from SHQ. I needed more carriers – I still have three of my old Airfix ones (three are already in service with AB crews and look jolly nice too) – but I decided these didn’t come up to snuff. I needed crews. The AB ones look fantastic, lifting my rather ropey old Airfix models to the heights, but they took a lot of work to fit, as well as being pricey. Also I needed one as a 3in mortar transport and, more complicated, as the all-important OP for the 25-pdrs. I decided to go for the PSC variants set, which has seven models which include an OP and 3in mortar transport – as well as one with a 2in mortar in firing position, which I can use for a carrier platoon. Finally there was the question of transport. Strictly this wasn’t needed. The British positions were essentially prepared and static – the lorries would have been well to the rear. The antitank guns were carried on portees, but they were lifted off these into dug-in positions – keeping these weapons concealed was tactically critical. Still, I had three Bedford QL lorries in stock, and I thought it was time to bring these into the picture, together with one of my PSC 15cwt CMP light trucks.
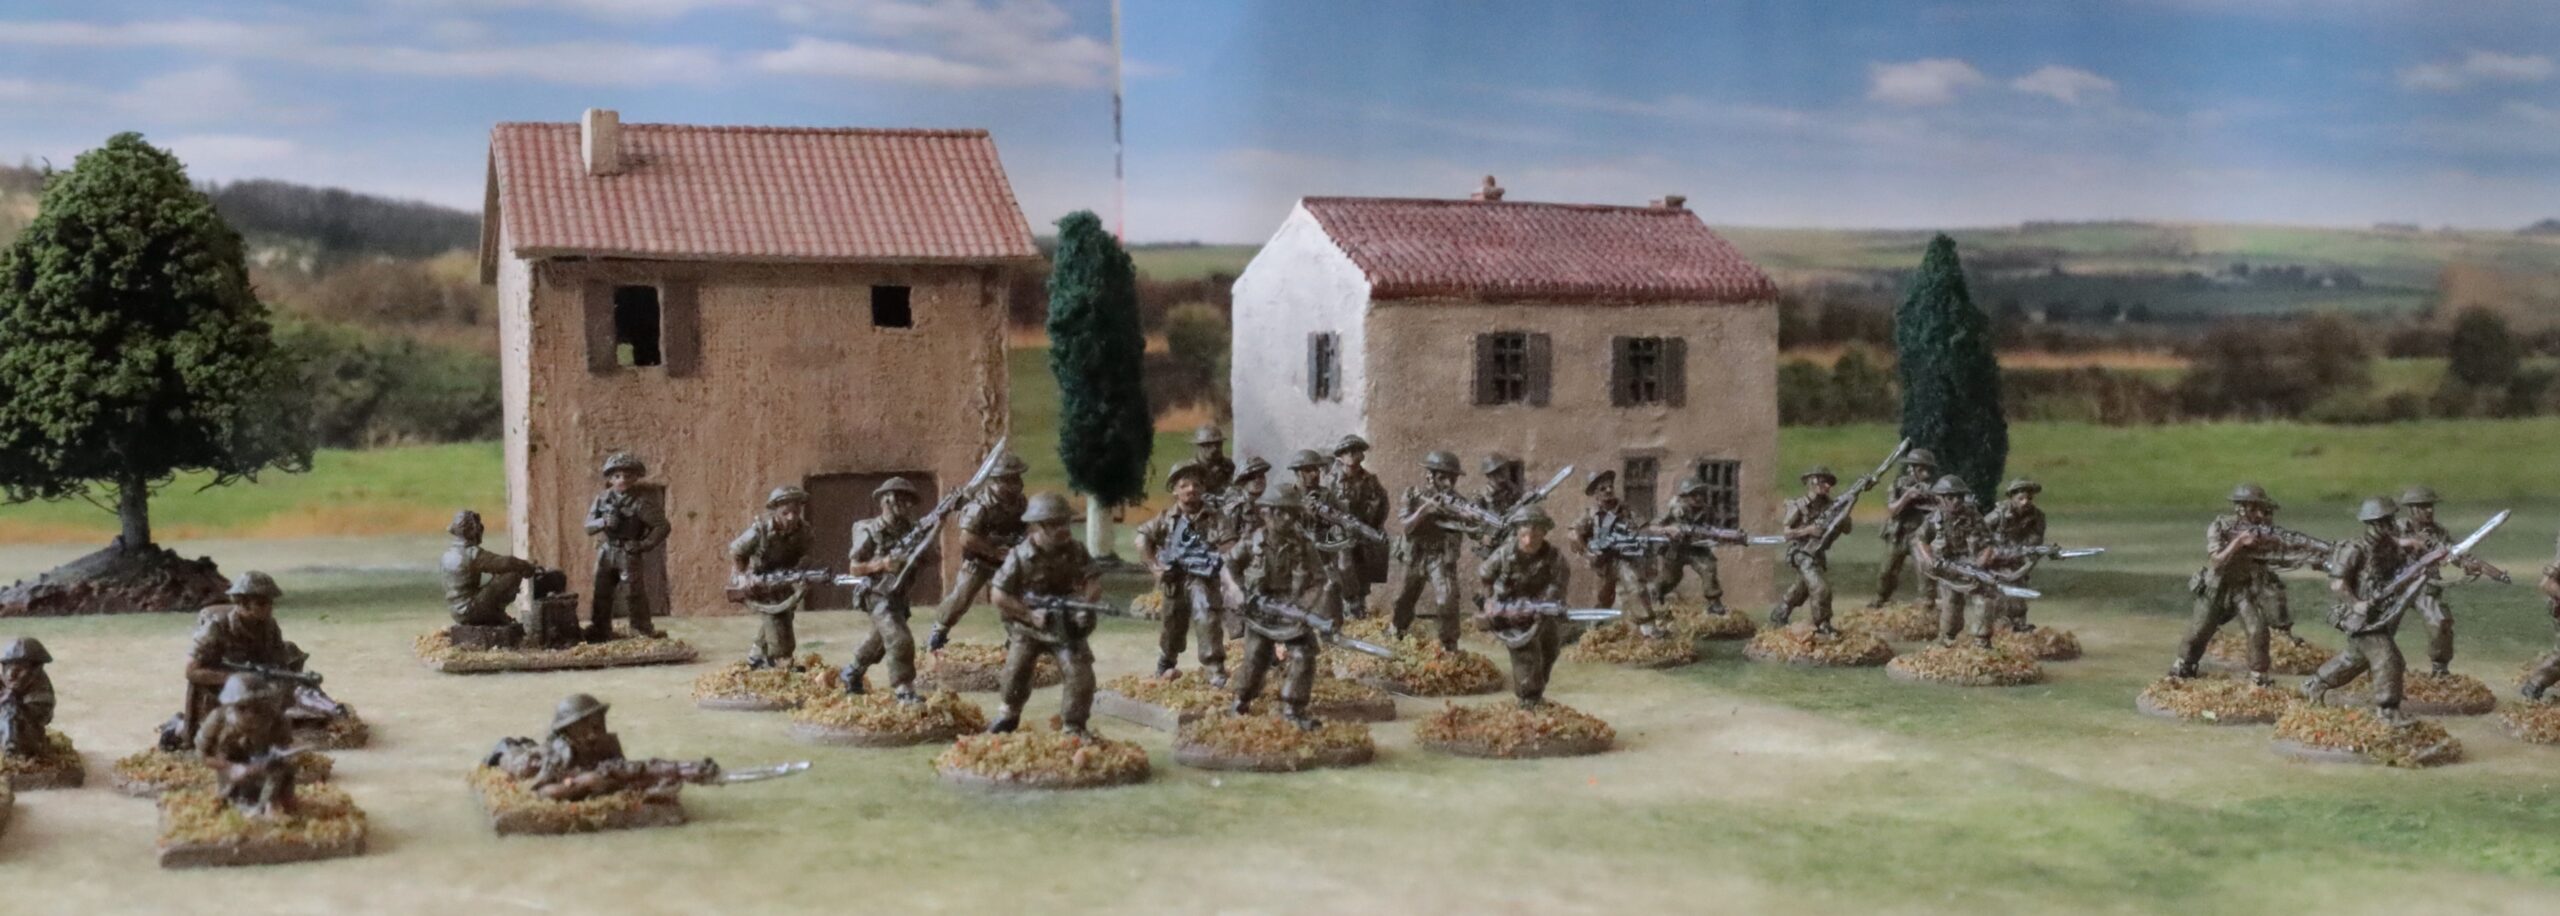
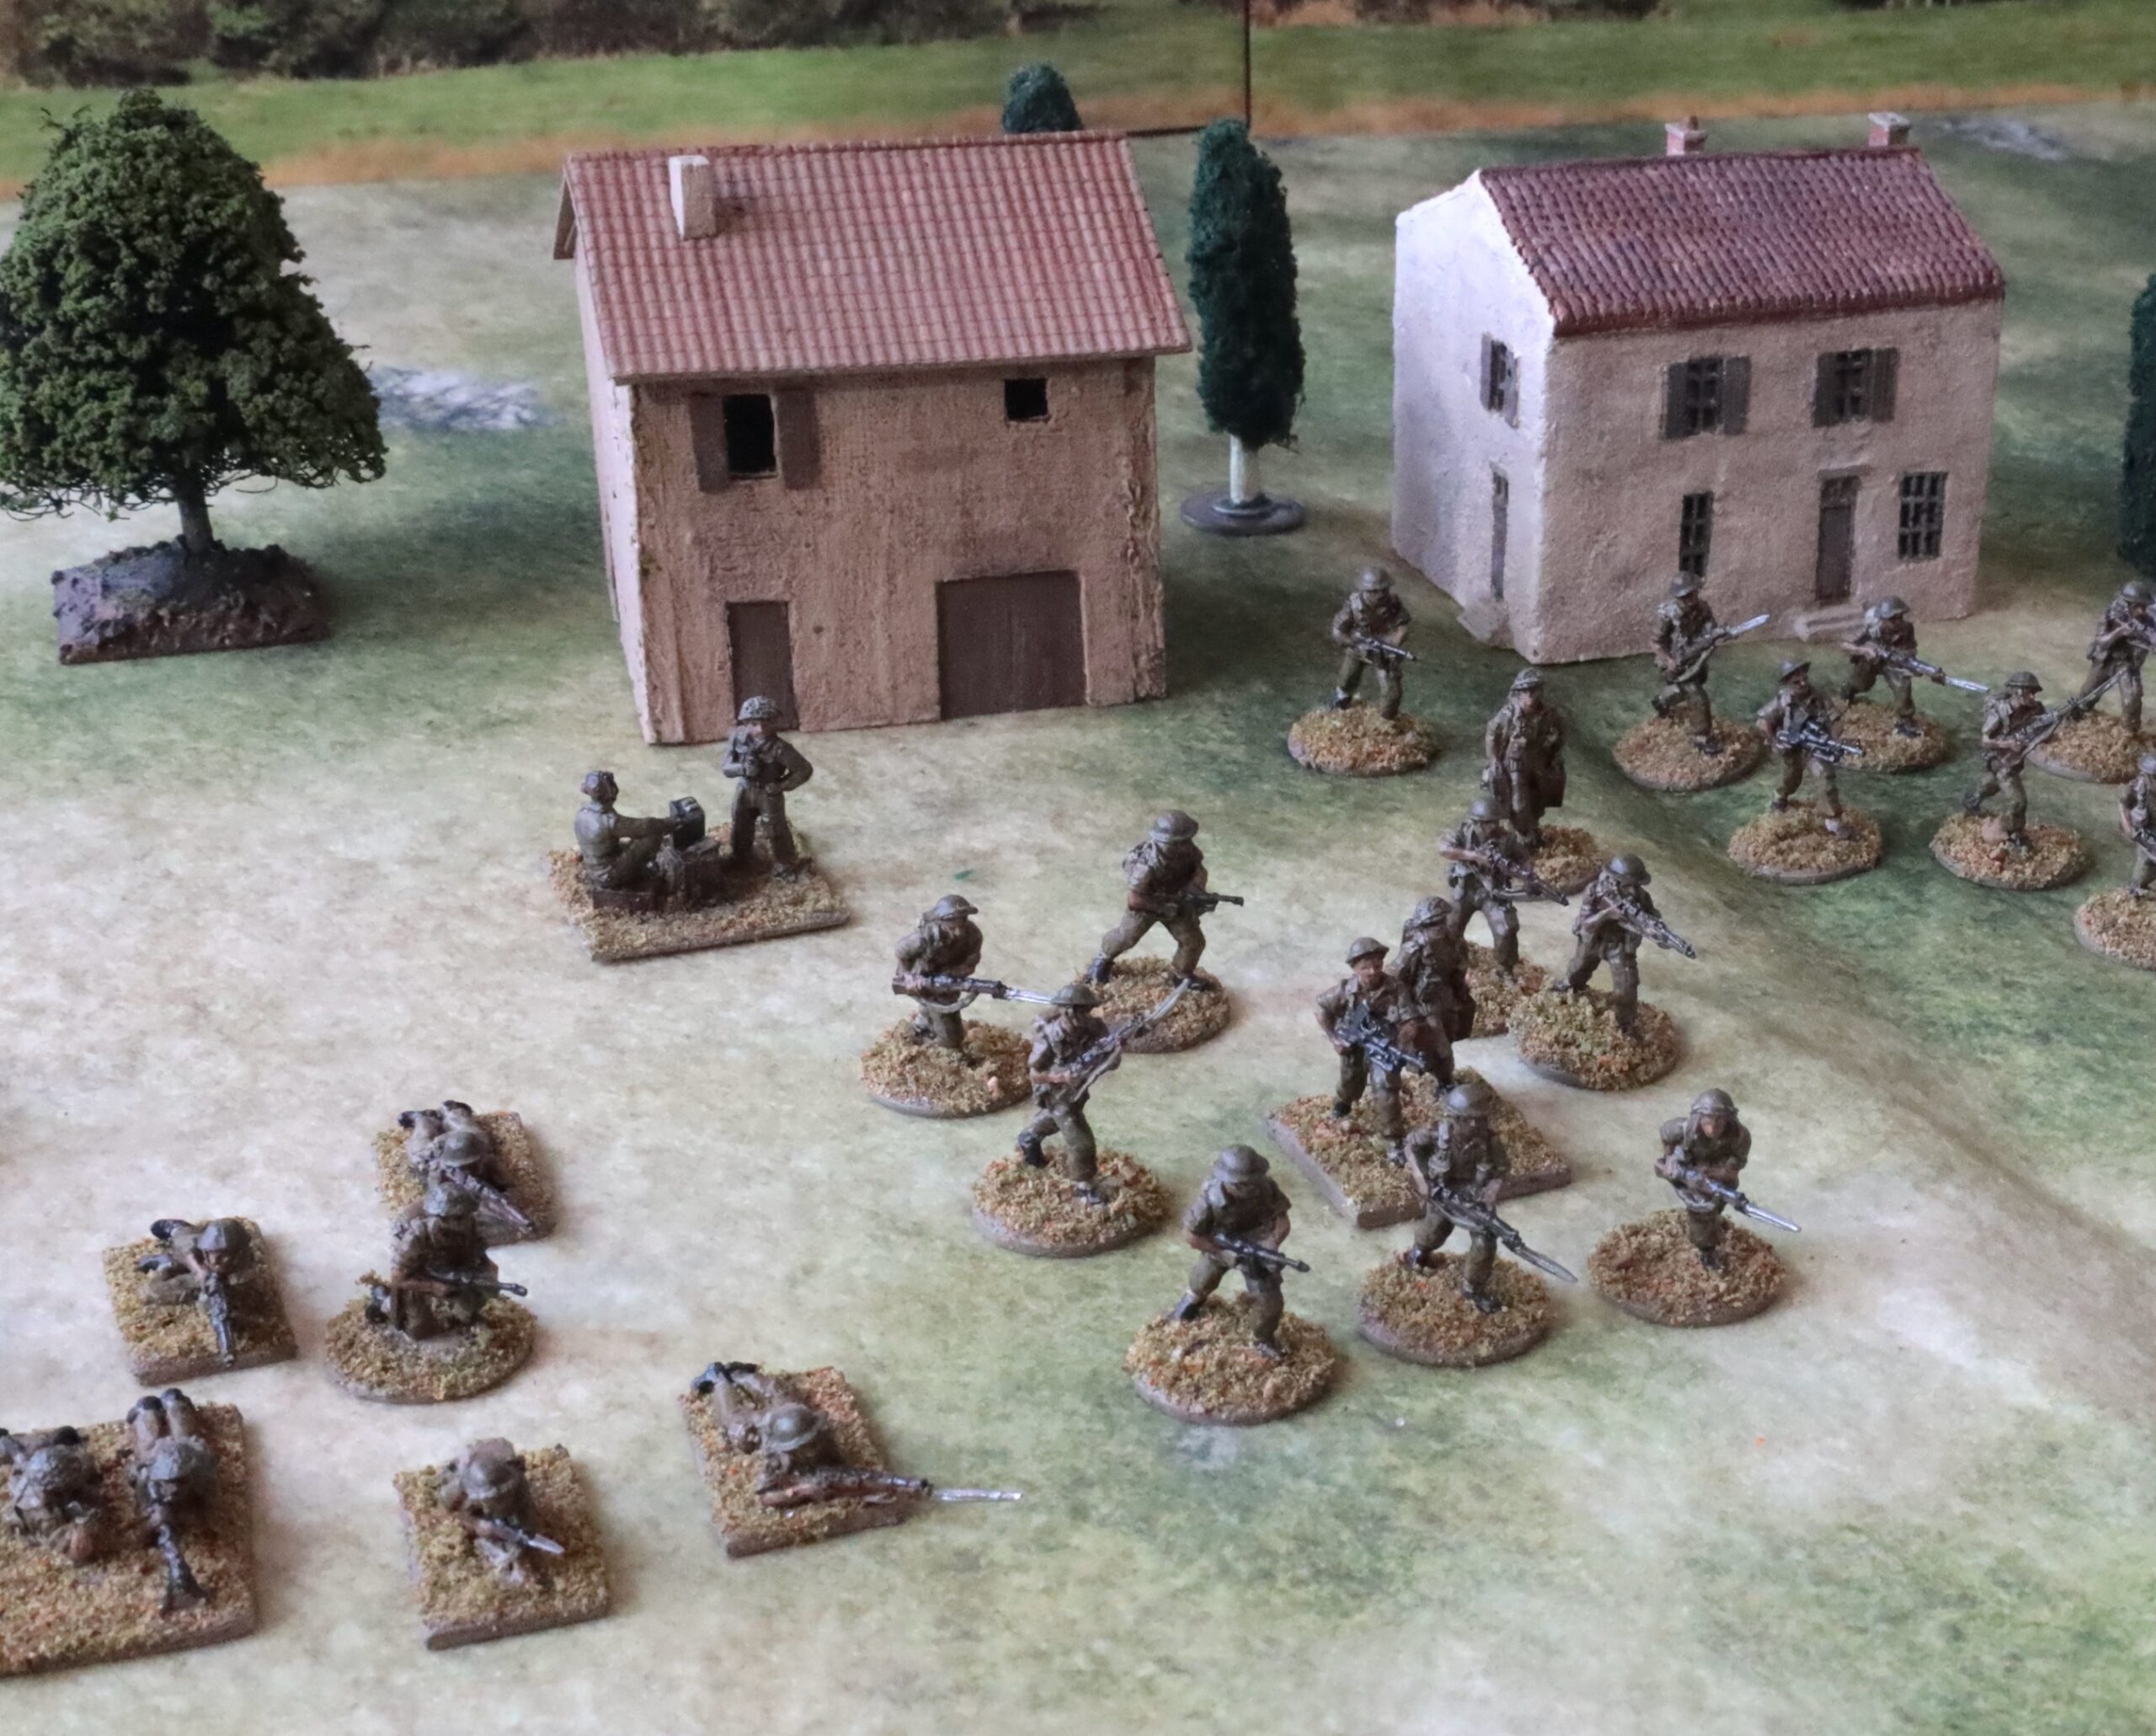
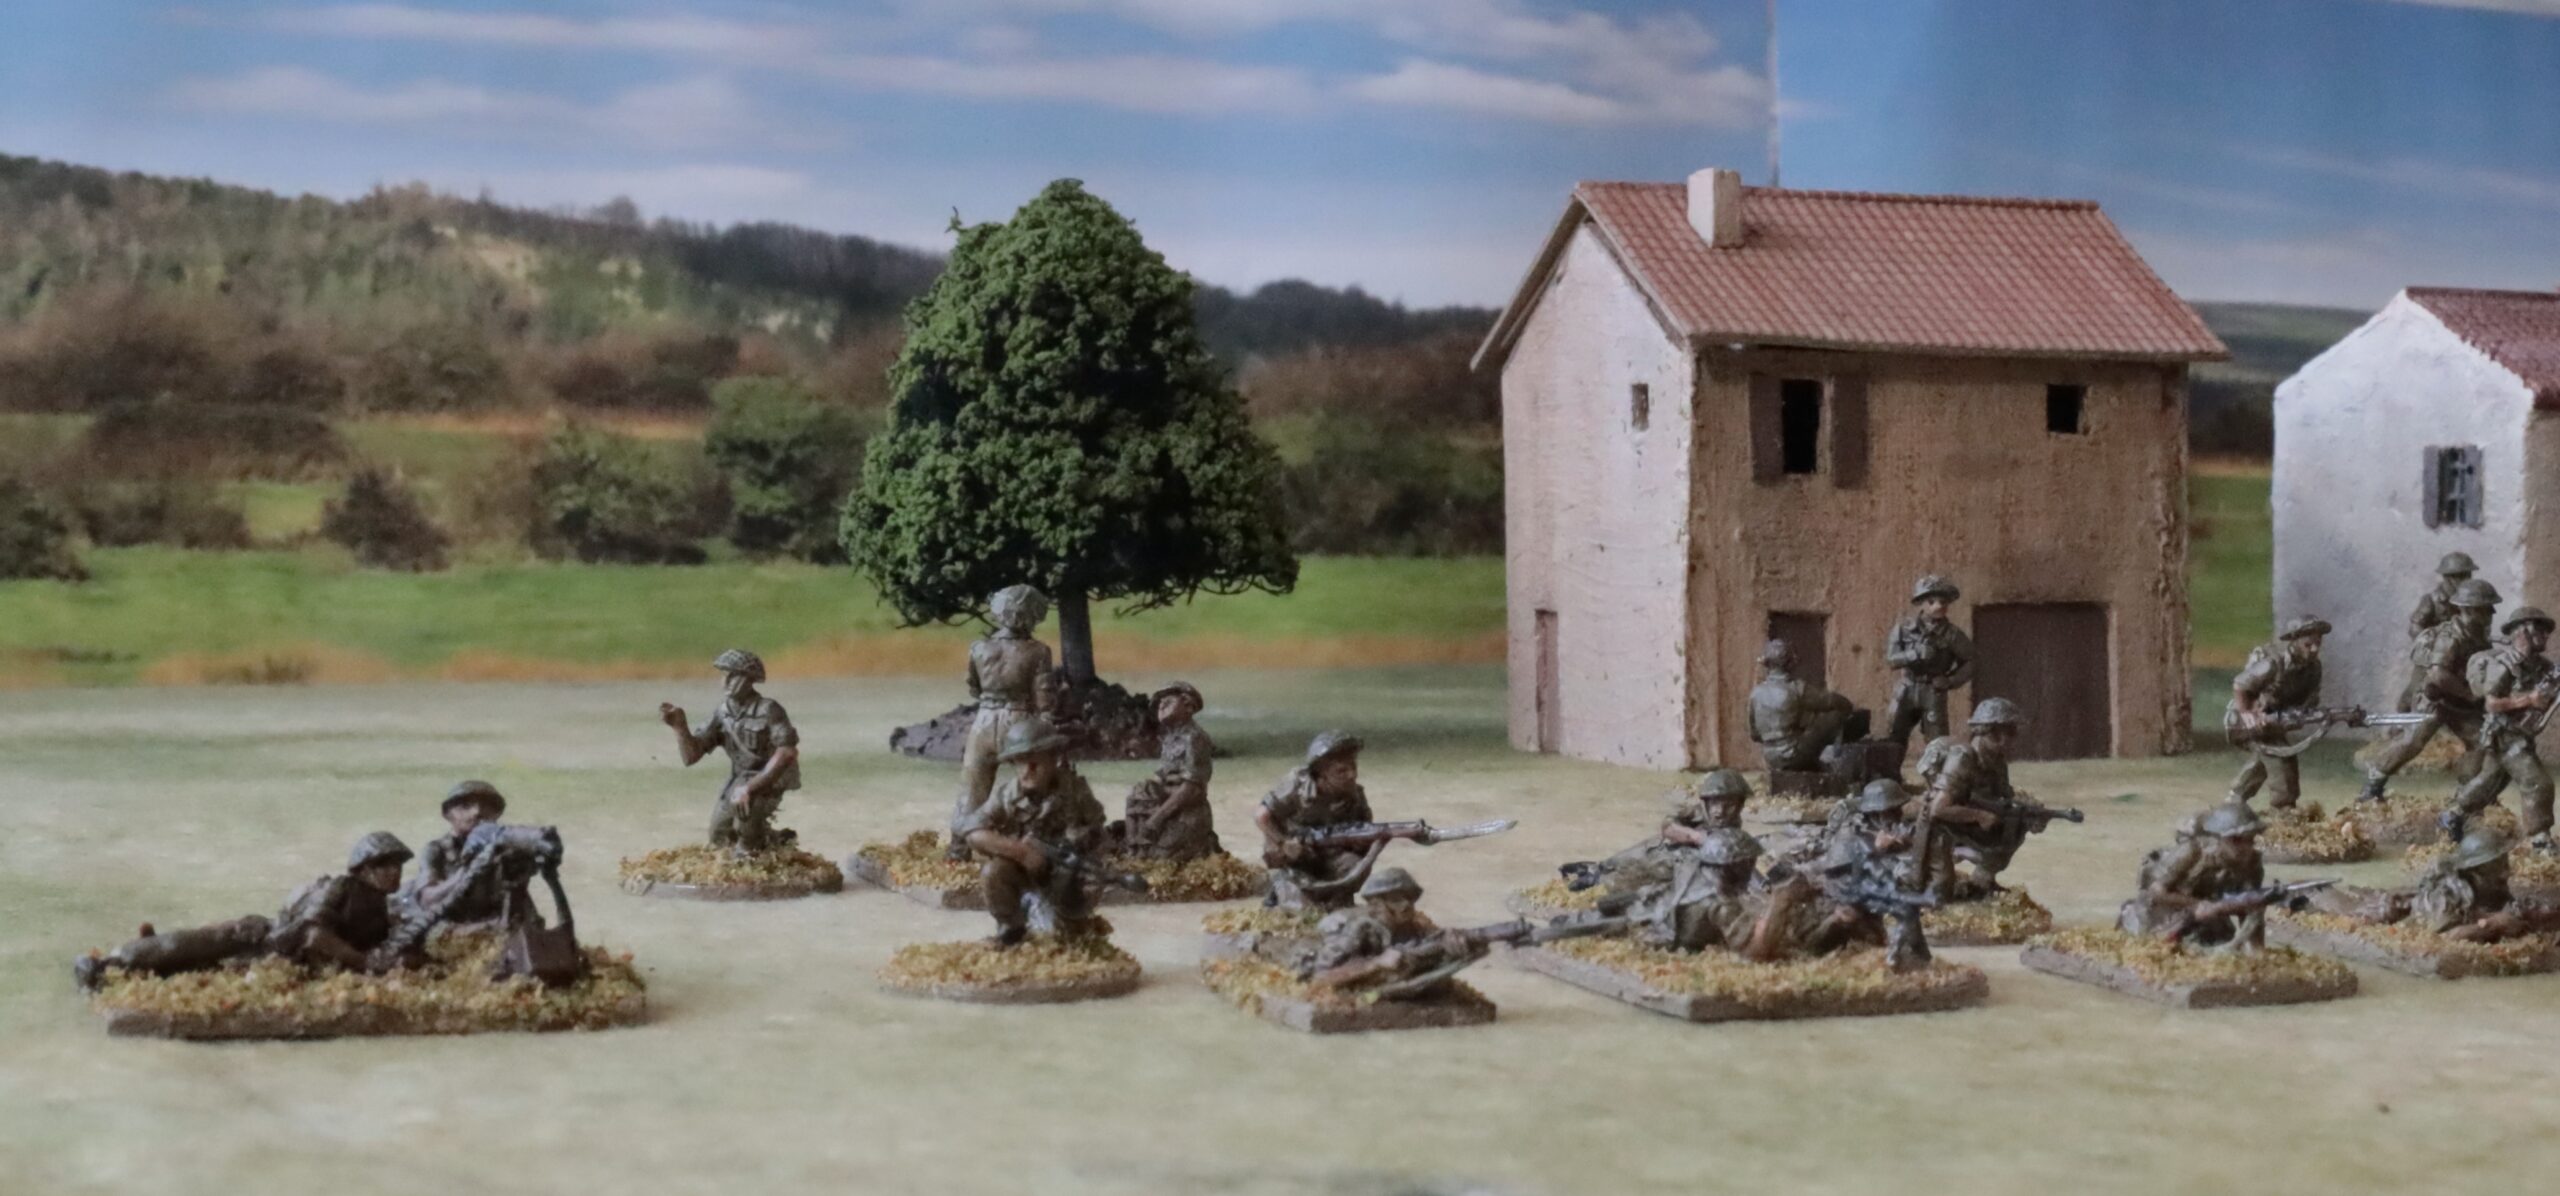
So for this project I assembled some 50+ infantry and artillery crew figures, three 6-pdrs, three carriers, three Bedford lorries, two 25-pdrs plus quads, a CMP light truck, and 17-pdr Pheasant. For this post I will stick to the infantry. Here’s a different perspective on my group photo:
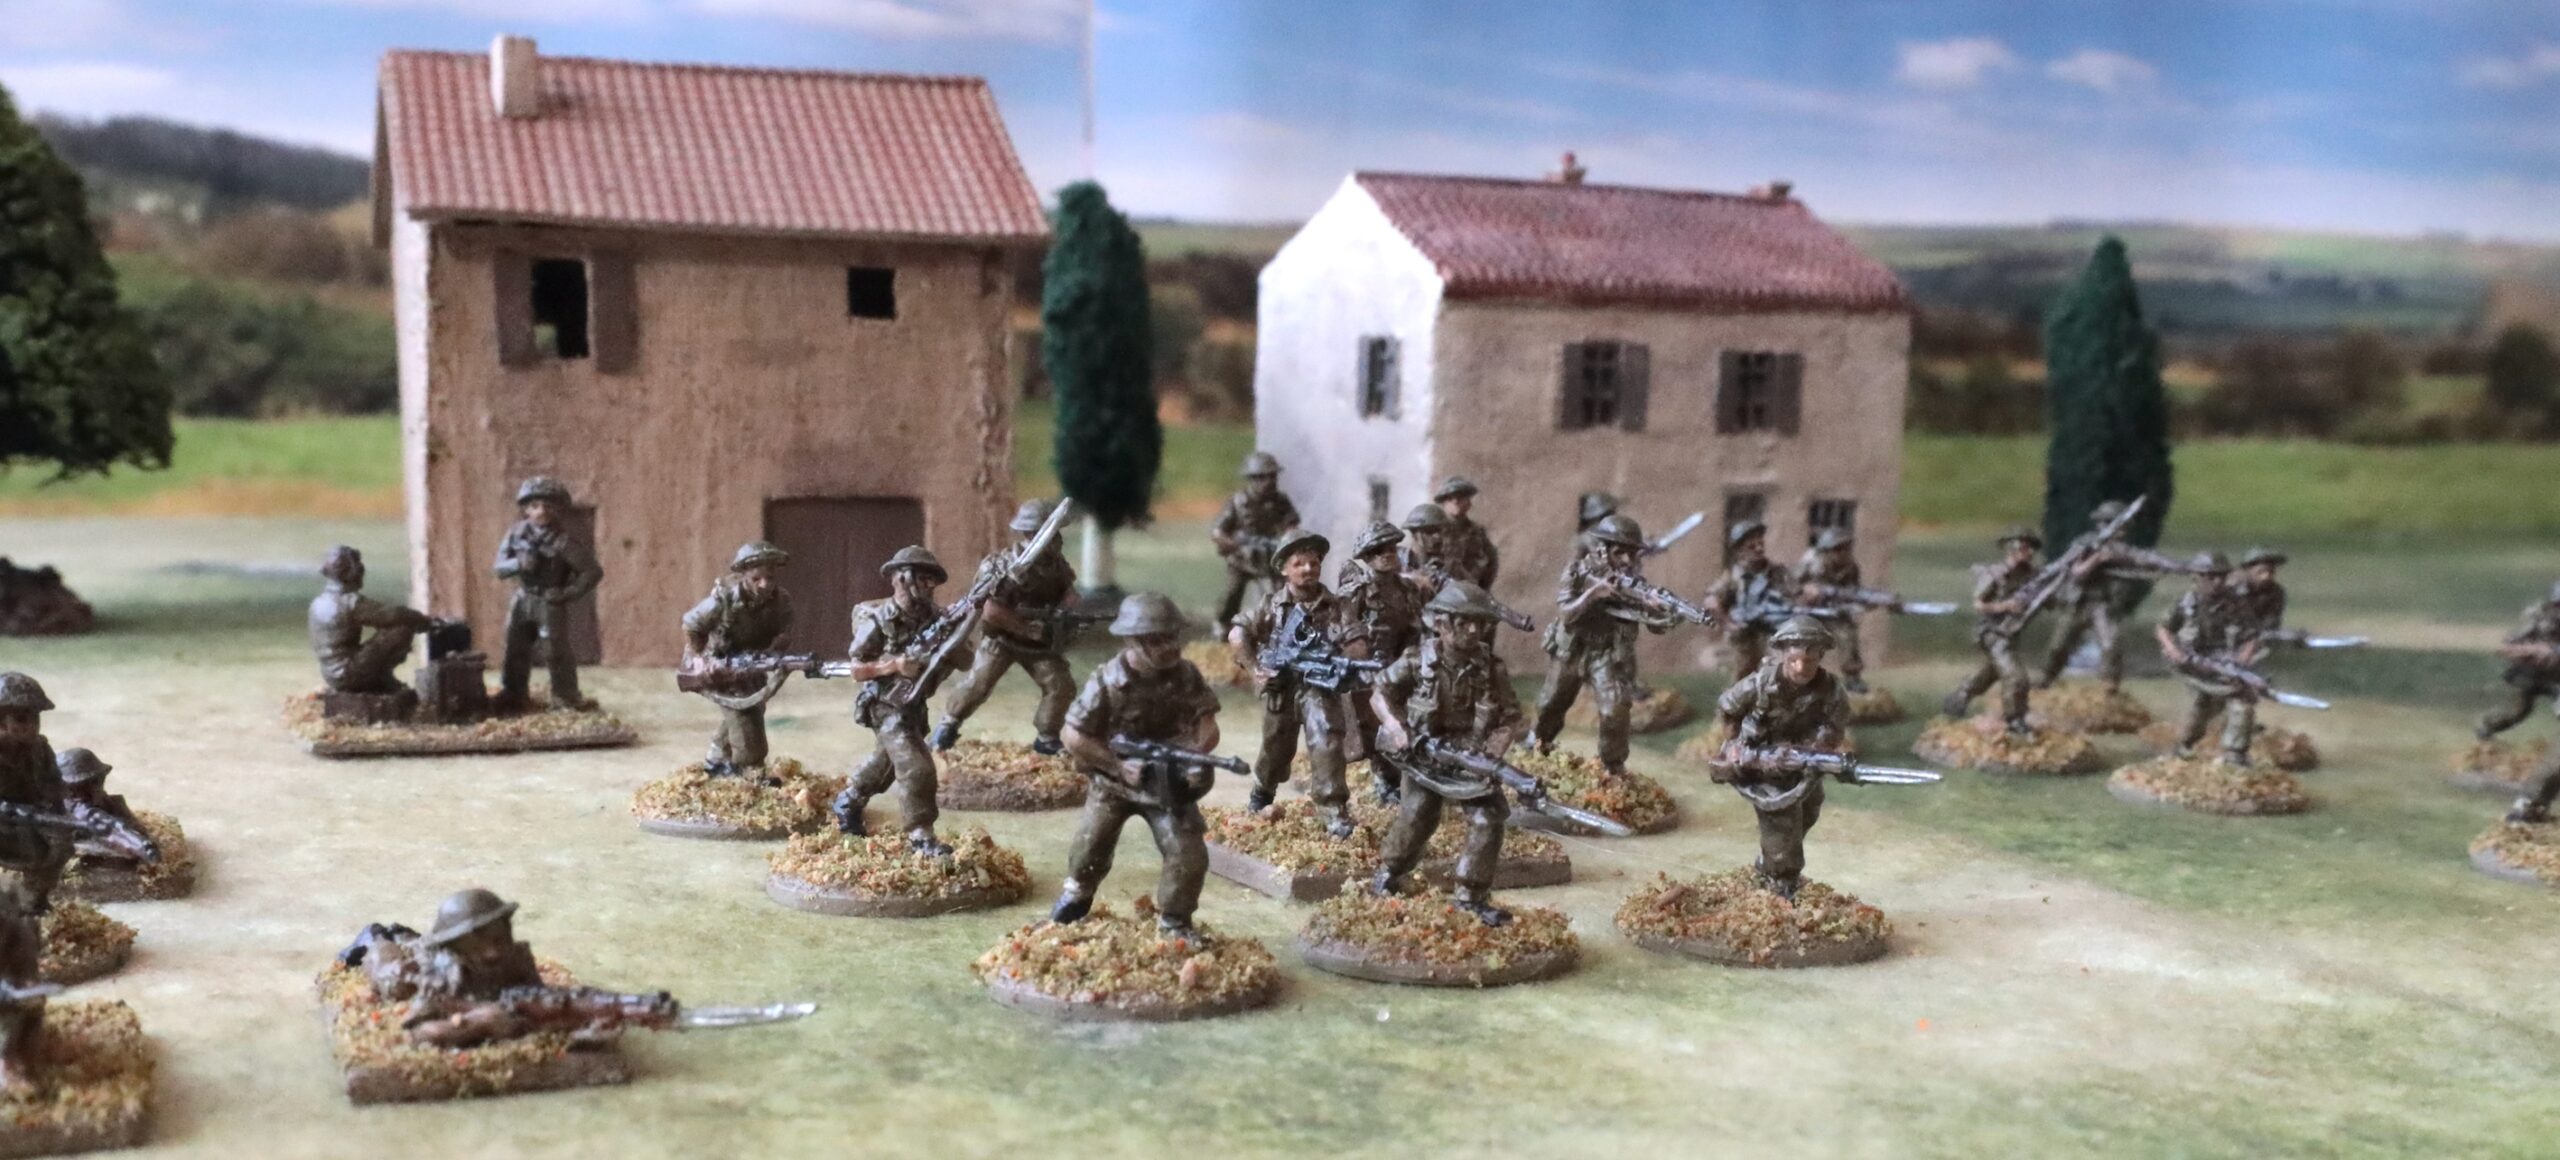
And another, closer up…In the background you can also see a battery command element for the 25-pdrs, which got swept into this photo:
And this one catches the Vickers gun on the end. Loyal readers may notice I have been trying to improve my photography. This now includes a backdrop photo bought from a model railway shop (online). This depicts a a very English looking winter or early spring scene – and I need to pay attention to the join! But it does make the picture look a lot better.
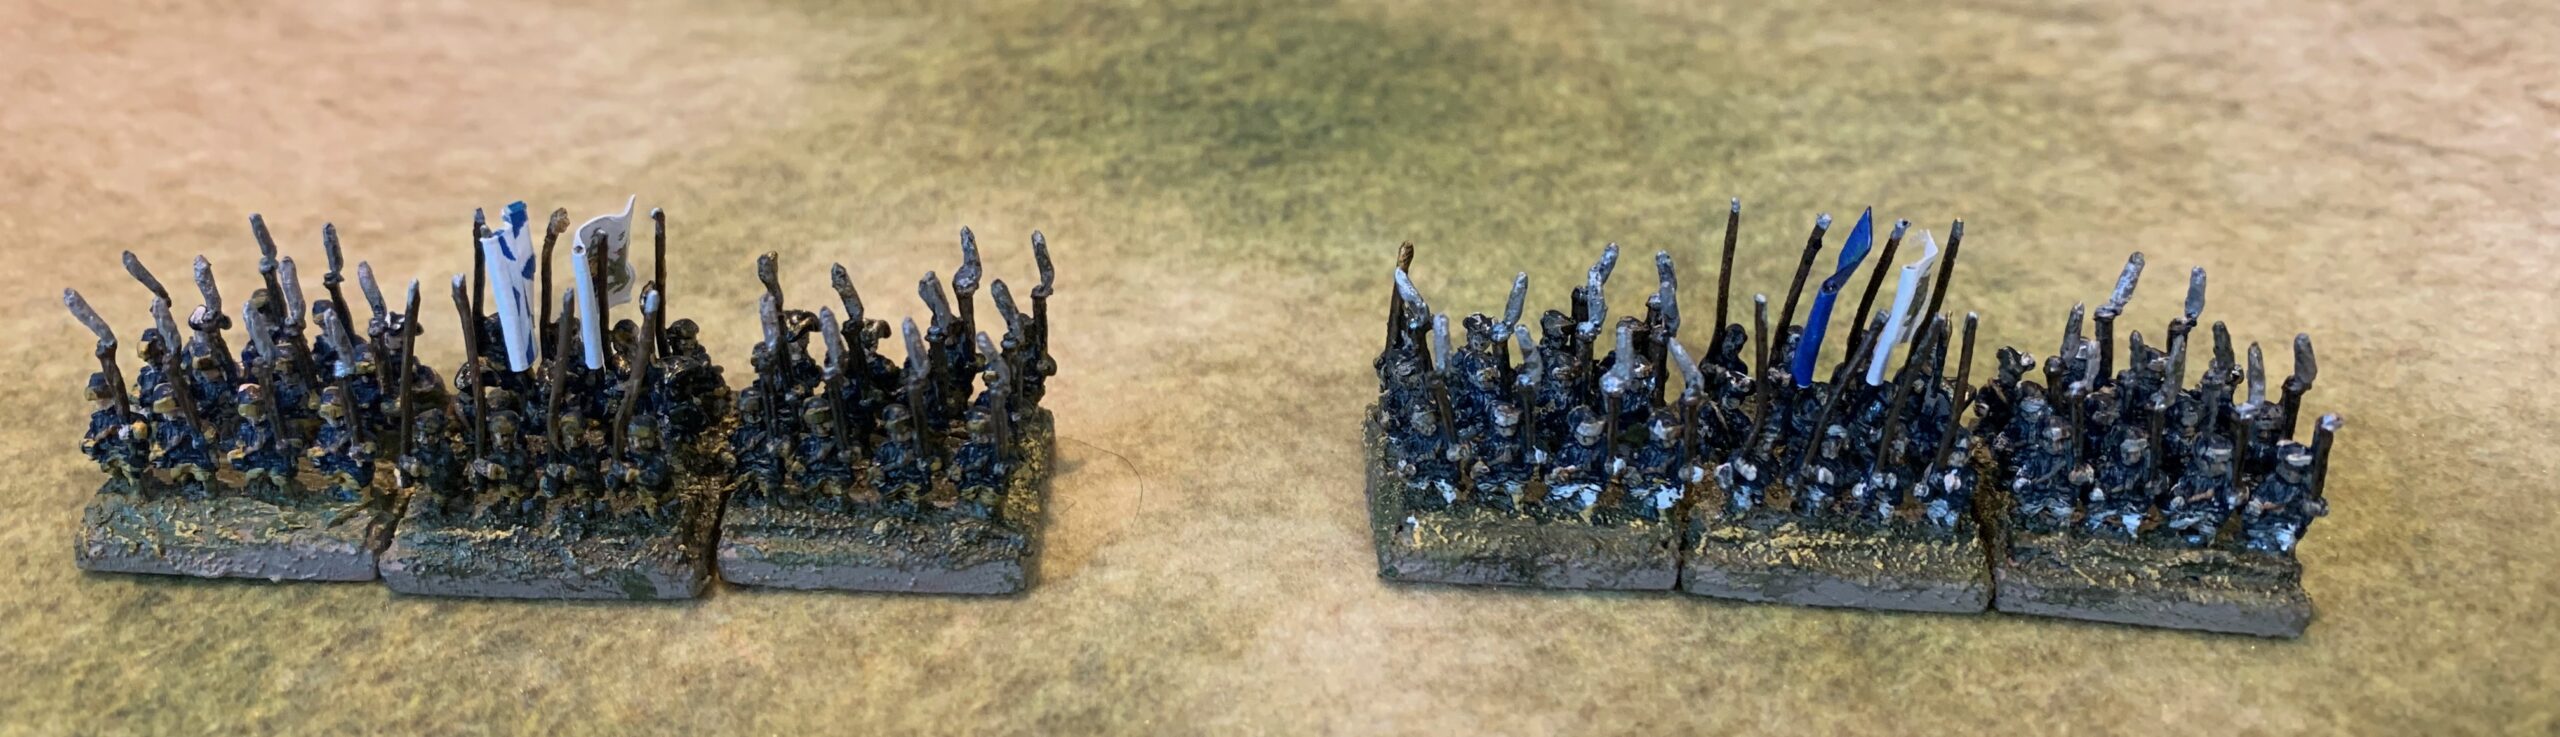
As I already said, these are from the recently introduced AB 20mm British “tropical infantry” range, designed to cover the Med and Far East theatres, when troops weren’t wearing shorts (North Africa) or Burma hats. This works pretty well for my 1943 project – they are wearing the earlier version of the helmet, without scrim, and they are using Tommy guns rather than Stens. In Tunisia it was pretty cold, so even the Eighth Army had abandoned their shorts (though they don’t seem to have bothered with the gaiters, and their helmets were still painted sand) – but their sleeves weren’t rolled up. In Sicily it was pretty hot, and many troops adopted shorts, though not as consistently as in the Western Desert. For Salerno, these figures are just right; later in Italy it tuned cold and wet. I’m making no attempt to get the figures, vehicles and guns to look exactly right for each scenario – and if there is one episode that I’m focusing on, it is indeed Salerno, in spite of my struggles with scenarios. So this range was perfect. I had three packs of advancing infantry, one prone infantry, and a Support 2 pack, with a 3in mortar and Vickers gun. The Support 1 pack has a flamethrower, 2in mortar, AT rifle and a PIAT – and I will doubtless get these later – but I have plenty of 2in mortars and PIATs in the later uniform. (PIATs were not in use in Tunisia – so I could probably have use the AT rifle).
The bases are mainly metal washers, but the prone figures and support weapons required bases cut out from mount board. I decided to have only two crew for the mortar and Vickers (three were provided in the pack) to keep the bees size down. These were plastered with the usual mix of acrylic medium, sand and paint (a mix of white and raw umber) to integrate the figure bases. Once mounted the figures were given an undercoat of artists’ gesso (which is white) mixed with some raw umber. The raw umber and white mix gives a nice neutral grey-brown colour, which is now my go-to base colour for figure paining across all eras. It means that any gaps in painting don’t show up. Then came the usual paint job in various mixes of Liquitex artists’ acrylics. For the uniforms this comprised Raw Sienna (orange-brown), Titanium White and Prussian Blue (not much of the last of these, but it’s needed to get khaki), plus a little green for the helmets. The flesh was based on white and Burnt Sienna (red-brown), but once I get the palette going I keep throwing in bits of this and that. This came out a bit on the dark side, but I did want to get tanned flesh, but with a slight pinkish hue. I’m not entirely convinced, but it probably roughly simulates how my own fair flesh would look in those conditions. I’m painting less detail on the figures these days, so the water bottles and bayonet sheathes did not get more than cursory attention, for example. One innovation for this batch was the use of a light/magnifier. My short-range eyesight is pretty decent, but this in fact proved a big help.
Once the basic paint was laid down I was left with the vexed question of how to finish. With my previous WW2 figures I have used ink washes or oil medium glazes, followed by matt varnish spray. This leaves a very harsh matt finish which I don’t really like – though it’s quite fashionable these days. I have recently tried to moderate this by applying a little not-so-matt varnish with a brush – on flesh, weapons and helmets, but I have been rather underwhelmed by the result. As an experiment this time I mixed some black and brown ink into some Liquitex matt varnish (which is very fluid and dries off-matt). Alas I overdid the black ink and the effect was too dark. I had to go back to the figures highlighting the paler bits, including the flesh. This took me to the margins of the level of shine I can tolerate on WW2 figures (I have a much higher tolerance for earlier eras), but brought out the wonderful AB castings very nicely. I need to go a bit easier on the black ink (the stuff I have is extremely powerful), but otherwise I think I’ve found a good technique.
For my rules system I will need to mount these men in pairs on temporary bases – as I have already done with my other infantry using lower-adhesion Copydex. I still want to be able to use as singles if I want to try platoon level games. Next time: the artillery.
Wargamers are like butterflies, flitting from project to project. Alas I conform to the stereotype. Earlier this year I diverted to my Great Northern War armies. I then moved on to a twin-track: my 1866 project (Austrians and Italians in 10mm) and my 18mm Napoleonics, using Lasalle 2 rules. I put my 20mm World War 2 project on ice, after some rather irksome kit building, and having lost my way on rules. Now I’ve turned back to these with a vengeance.
I have at last been getting regular games at a local (-ish) club: the Tunbridge Wells Wargames Society. At first I played Lasalle, but after a few games I wanted a bit of a change. Then my wargaming partner, Rod, said that he was building up some armies for WW2 using the Rapid Fire! Reloaded system. I had long had it in mind to run my WW2 games using a hex-based system, and even bought a games mat marked in hexes. What if I tried adapting Reloaded to hexes? And so my other projects were put to one side.
Reloaded is the latest in the Rapid Fire! system, which I have used before (I have the 2005 edition), and commented on a few times. They date from the 1990s and were revolutionary in their time, breaking out of the complexity that had dogged WW2 systems before then. They feel very old-school today though – an old-fashioned I-go U-go turn system, and a bang-you’re-dead combat system, without such ideas as suppression. They are designed for 20mm (but workable with 15mm – 28mm) models, and though there is no formal distance scale, they are broadly consistent with 40m to the inch. One model tank represents about 5 real ones, and one two-figure infantry element a normal-sized platoon. The rules are heavily “bath-tubbed” – it is played as though the scale is 1:1, which is something that I struggle with, but makes the rules seem less abstract. This approach is one way of getting a lot of large-scale kit on the table – and arguably more honest that systems like Bolt Action which pretend they are platoon-level.
But for a simplified, fast-play game RF became quite complicated. The basic rules cover 45 pages of A4, admittedly with lots of pictures. The authors (Colin Rumford and Richard Marsh) obviously decided that there was a market for a stripped-down version, and Reloaded is the result. The basic rules (without the sample forces and scenario) cover just 8 pages – though without pictures. They’ve done a pretty decent job. There is no complicated fire table, or observation table, for example. I raised my eyebrows a few times (on the treatment of auto cannon, for example), but then realised that the issue didn’t matter that much. They are bit more abstract – but that is actually a good thing at this scale – as attempts at detail look like bath tubbing. I started to become a bit more surprised at some of the detail left in – for example the extra range given to very high velocity anti-tank guns (e.g. 88s and 17pdrs).
How about converting to hexes? When ordering the mat (from Tiny Wargames – who have a very flexible service), I decided to go for hexes with 3in sides – so 6in from corner to corner, or 5in between the sides. This is pretty big as these things go. They needed to be big for 20mm models, though, especially if they are sharing the space with terrain, such as buildings. My original idea was that more than one tank would be able to occupy a hex. Smaller hexes would certainly have been possible. Larger hexes make the game more abstract – but that speeds things up.
The first thing to tackle was how the game elements occupy the hexes. I decided to have each element facing a hex-side, rather than a corner. This generally how board games for the era work, and it means that elements move forward in a nice straight line. It doesn’t work so well for earlier eras, as you can’t line units up side by side in straight lines. More than one element can occupy a hex, but I soon decided to limit the “stacking” to one large vehicle (models more than 60mm long – most mid-war tanks, Sdfz 251s and medium trucks) or one artillery piece, at least the size of medium anti-tank guns (Pak 38s or 6pdrs). I decided to limit infantry to four bases, with each element assigned to one hex-side, and no more than one per side. A small vehicle (Bren carriers, Sdkfz 250s, jeeps, etc) is the same. I might want to simplify this to suggest a maximum of one element to each hex-side, with large vehicles taking up two opposite sides, and hence preventing other large vehicles from occupation. This complexity results from using larger hexes, of course. With smaller hexes you might have just one or two elements, with vehicles unable to occupy buildings hexes.
For distances, the basic premise is that six inches converts to one hex, or five inches for the longer distances. That only gave me a small number of issues: infantry crawling (3in) which wasn’t too hard to represent (place the figure across the hex-side in the first move). Heavy tanks (9in cross-country) were a bit more of a problem, as I didn’t want to create a rather untidy half-move rule just for them, so I have let them have the normal two hexes cross country for tanks, but reduced road movement by a hex. I dithered about giving them a single-hex move cross-country, but decided that this would slow things down too much. For my 1943 setting there are only two vehicles in scope (given that Valentine tanks were largely out of it by then): Tigers and Churchills, both mainly applicable to Tunisia. I only have Tigers table-ready at the moment, and these should definitely be given the benefit of the doubt. Many rules give them normal tank speed (though they did struggle a bit with the terrain, especially in Sicily). I also needed to decide on firing arc – where I was generous, allowing fixed guns to fire through adjacent hex-sides. This is in keeping with the RF rules, which are generous too. Where the original rules divide direct HE fire in six 8in range bands to decide chances of hitting, I decided to use a D10- instead, with a maximum range of ten hexes (so that you need to throw a 10 to hit at ten hexes, etc.).
By far the biggest conversion issue was close combat, as the use of large hexes makes this much more abstract. I decided to resolve this with an exchange of fire, followed by a dice-off (following the Reloaded rules for this final stage), with the winner being left in possession of the hex and the loser being forced to retreat. This hasn’t been play-tested yet. There is a big difference in the treatment of built-up areas. RF treats each model as if an individual building. In my hex system, a building hex (which may have just one building model so as to leave enough room for a large vehicle too) is treated as an area composed of several actual buildings, without an attempt to resolve occupation in detail. It will be interesting to see how this works out in actual play.
I had a little time to think about terrain. I don’t have much that is directly usable. I experimented with scratch-building an appropriate building using cork floor tiles, of which I have a plentiful supply. You can see the result in the picture. The roof is cardboard overlaid with Noch N-gauge pantile sheet, which I happened to have in stock; I even had some plastic pantile ridge tiles – though I don’t remember where I got these from. There were some learnings, but the result is a nice robust model, which is hollow, so that I can remove the roof and place an infantry element inside. Cork tile also lends itself well to creating ruined buildings. My idea now to build several models using the same technique, in various sizes – but not ruins just yet. I also tried my hand at making some cypress trees – which I didn’t quite finish. There’s a lot more work to do before I start getting the table looking a bit more authentic. Fitting terrain into the hex grid is a further challenge.
Another view of the newly build building model – also cypresses with unfinished bases.
For the rules’ first major outing, last Sunday, I devised a simple scenario, based very loosely on the Salerno beachhead, between two battalion-sized battlegroups. The Germans, attacking, had three Panzer IVs, and Panzer III flamethrower (these were used to devastating effect in the early days of the battle, before they were knocked out by the Allies). The British were supported by a single Sherman, and a 6pdr, and hadn’t had time to dig in. Both sides had a battery of field artillery. In RF terms the Germans had 200 points and the British just over 100 – about half the size of a normal attack-defence game. The game took us about three hours, even allowing for a fairly slow pace for unfamiliar rules. Casualties were heavy. Infantry vanished like snows in summer as soon as they became the focus of attention. The 6-pdr knocked out two Panzer IVs as they approached, while return fire proved ineffective. It was only destroyed by artillery late in the game. The Flammpanzer did for the Sherman in a move-and-fire manoeuvre as it came over a hill. In the end it was a race to see which side’s infantry failed their morale test for 50% casualties. This proved to be the British, though the Germans had passed two tests by this stage.
The rules produced a fast-paced game but are deeply flawed if you are looking for realistic representation of warfare. Most of the flaws are with the original RF system, and not the Reloaded one though. Some things, like move-and-fire are so much part of the core system that I won’t change them until I produce my own rules in the same space. But there are some minor tweaks to deal with things I consider to be anomalies:
One change I made on the day was to treat static infantry as being in soft cover, for both observation and firing purposes – as crawling infantry already are. It is normal field craft for infantry to go to ground and use any limited cover.
Vehicle machine guns are very effective (three fire dice) when static. This includes both mounted light machine guns used in Bren carriers and the Sdkfz 250/251, and hull machine guns in tanks. When dismounted a carrier platoon or only gets two fire dice. Hull machine guns were defensive weapons where the gunner had limited visibility. Turret machine guns were more effective but had limitations too. I think LMGs mounted on APCs get one die whether moving or static. Hull machine guns likewise get a single dice – and I would limit their range to the adjacent hex. A static turret machine gun gets two dice. Medium machine guns, mounted on sustained fire mounts and fully crewed, still get 4 dice.
Not in the Reloaded rules, I would give HMGs and autocannon a limited AP capability – 6 and 5 respectively – limited to small arms range. This is in the main rules, except that heavy autocannon (37mm or 40mm) have more range.
Light mortar: I think it is simpler and more realistic to treat these as a direct fire weapon, with a range of 6 hexes, using a D6 to determine hits.
I also want to ease the process of indirect fire support, so that any company can call in direct fire support (mortars or infantry guns) and artillery OPs can call in direct resources too. But limit this by making all calls by a separate observer subject to the comms test. That comms test needs to be made a bit more sophisticated, but that’s a job for another day. Each weapon can only be called once, and each observer can only direct one weapon per turn. This is really a down-payment on a more sophisticated system, which I’m basing on Battlefront rules.
I also need to cover HE fire on buildings hexes where the occupying troops haven’t been observed. The hex needs to be easy to hit, but which hex-side gets the effect needs to be randomised.
We’ll come back to these rules for another game in January. Alas I won’t have much time to add to my limited available troops on the tabletop, or terrain. But I can focus longer-term painting efforts on building a 400 point army for each side. Meanwhile I am working on ideas for my own rules in this space.
Back to the 1866 project. September and October were largely taken up by holidays and gardening, and figure painting took a back seat. The result was that this second batch of 1866 troops was a bit protracted. It will be a while before I’m ready to refight Custoza.
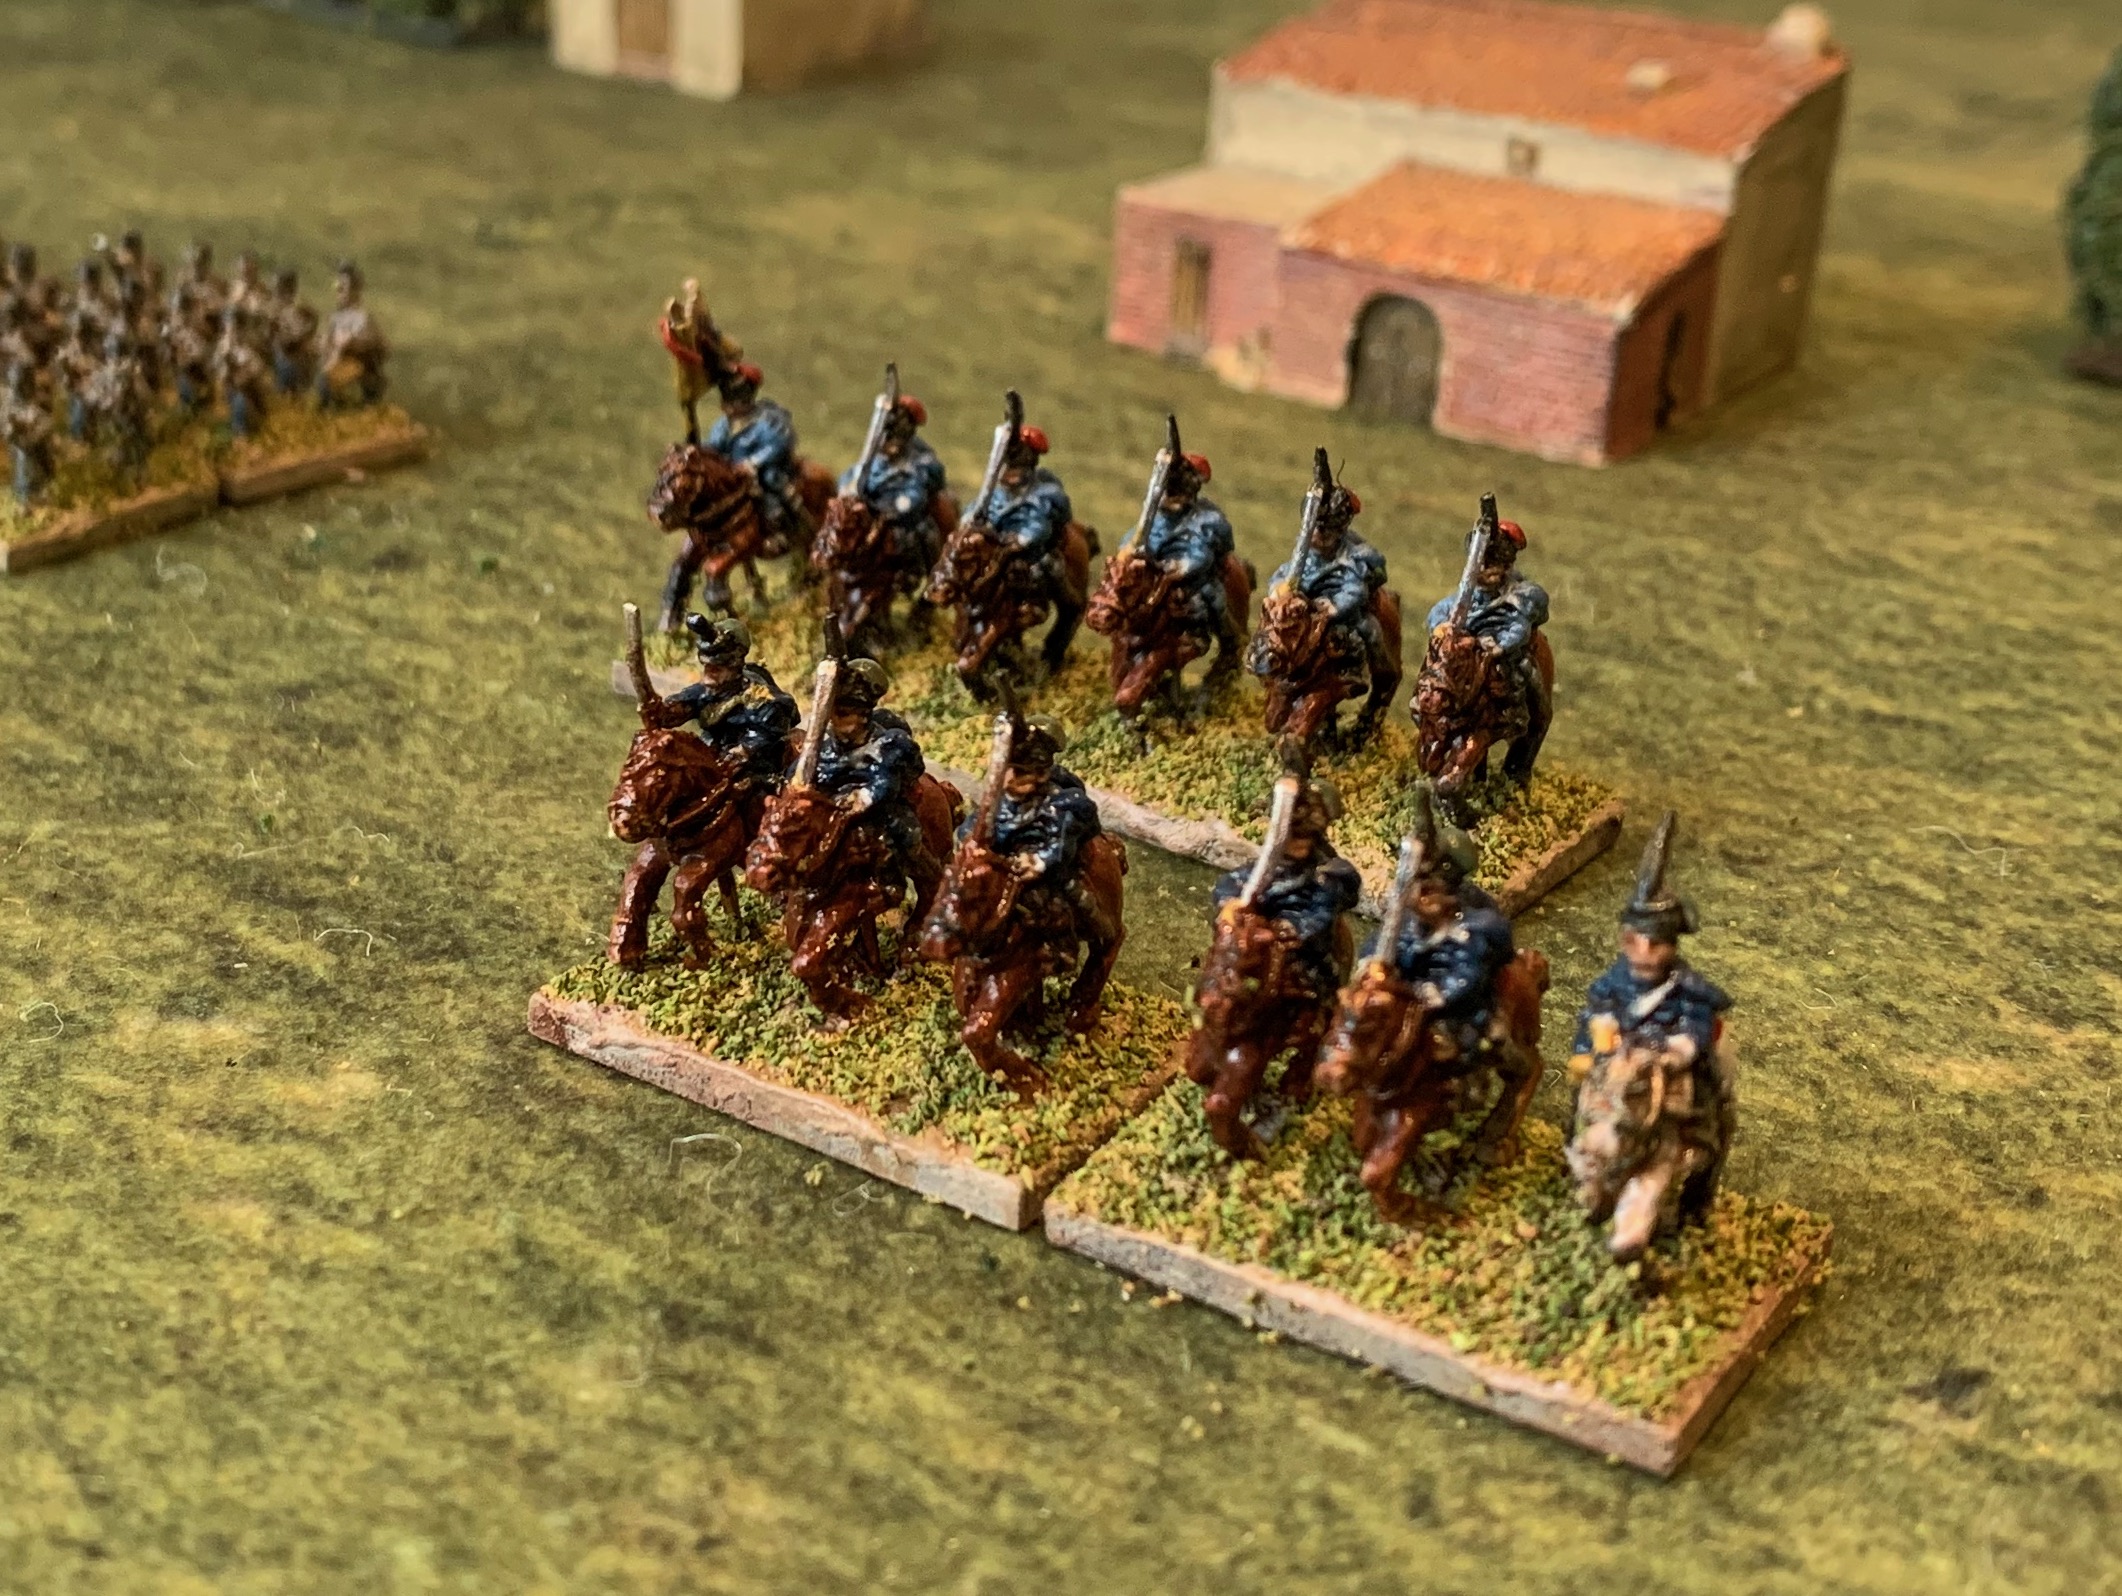
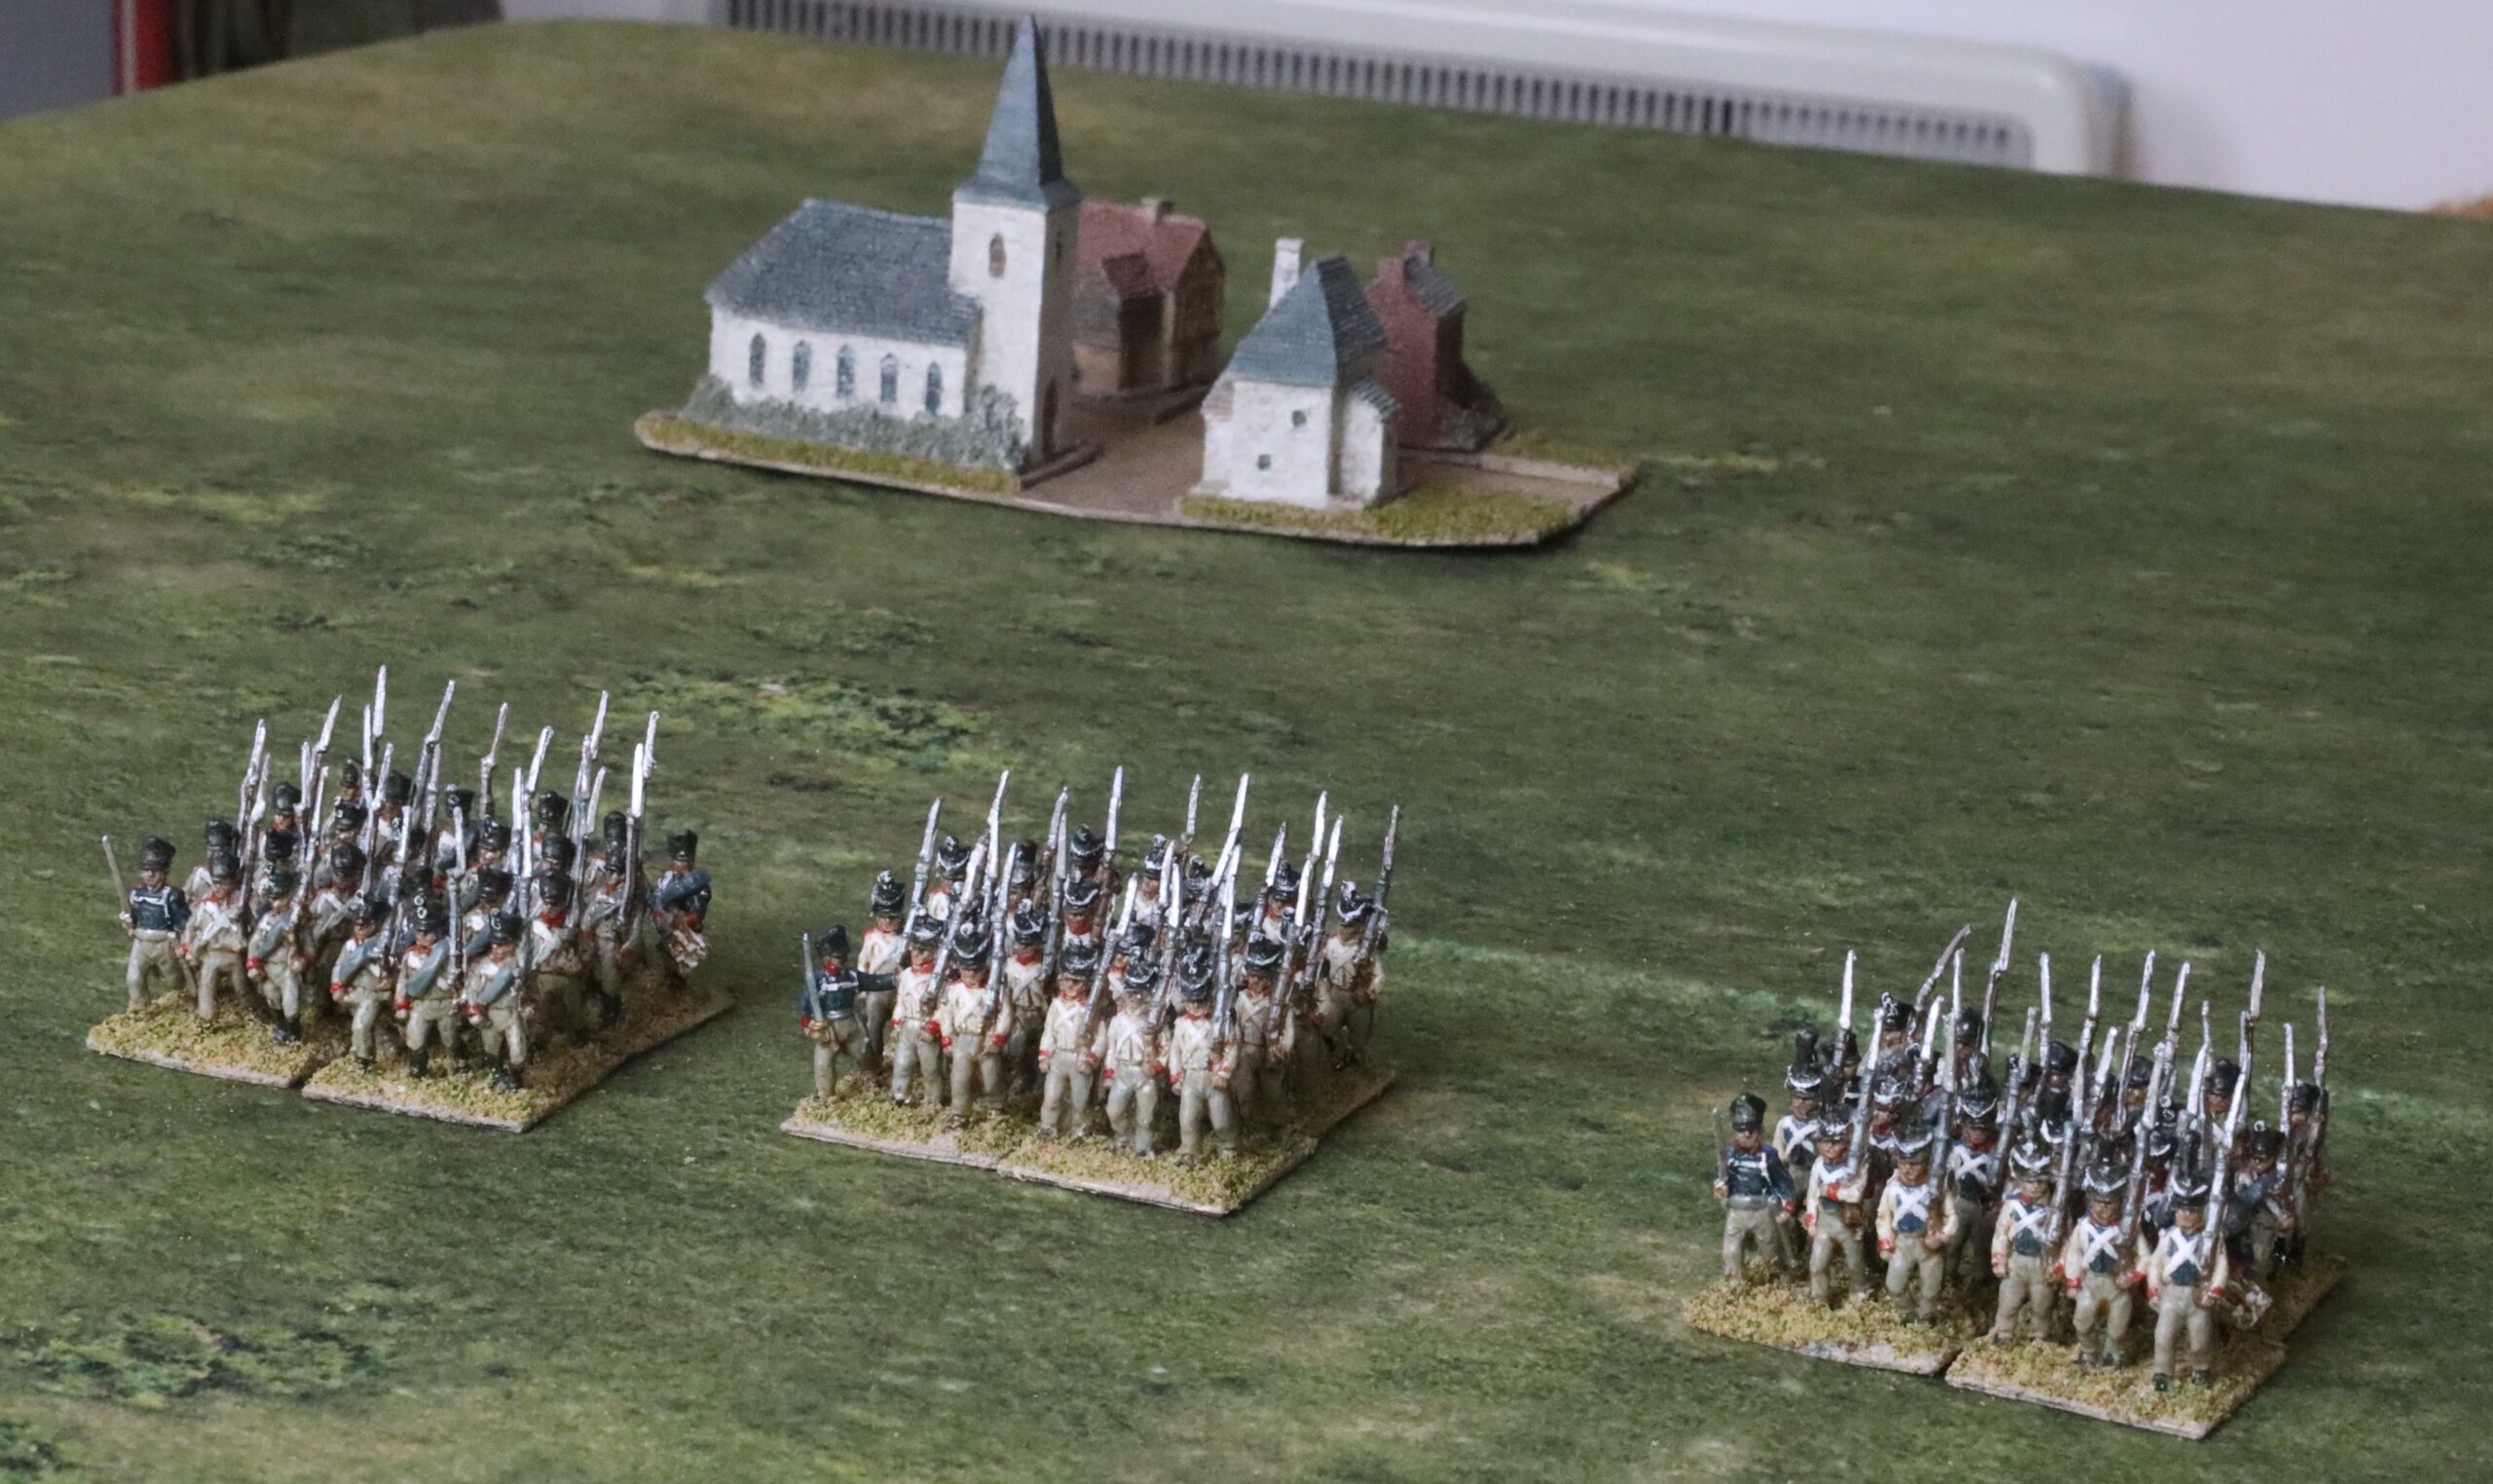
The figures are 10mm from Pendraken, whose range from this period is unmatched. In appearance and detailing they are closer to larger 6mm (such as from Baccus and Adler) than they are to 15/18mm. They need to be deployed en masse and not a great deal of attention needs to be paid to details. They are providing pretty much what I hoped for to recreate the big battles in the age of Bismarck. I have already introduced this project here with my first batch of Italians. Those figures were more appropriate to 1859 (Solferino, etc) than 1866. These, on the other hand, are very much on period. The infantry are in greatcoats, and the cavalry have updated uniforms.
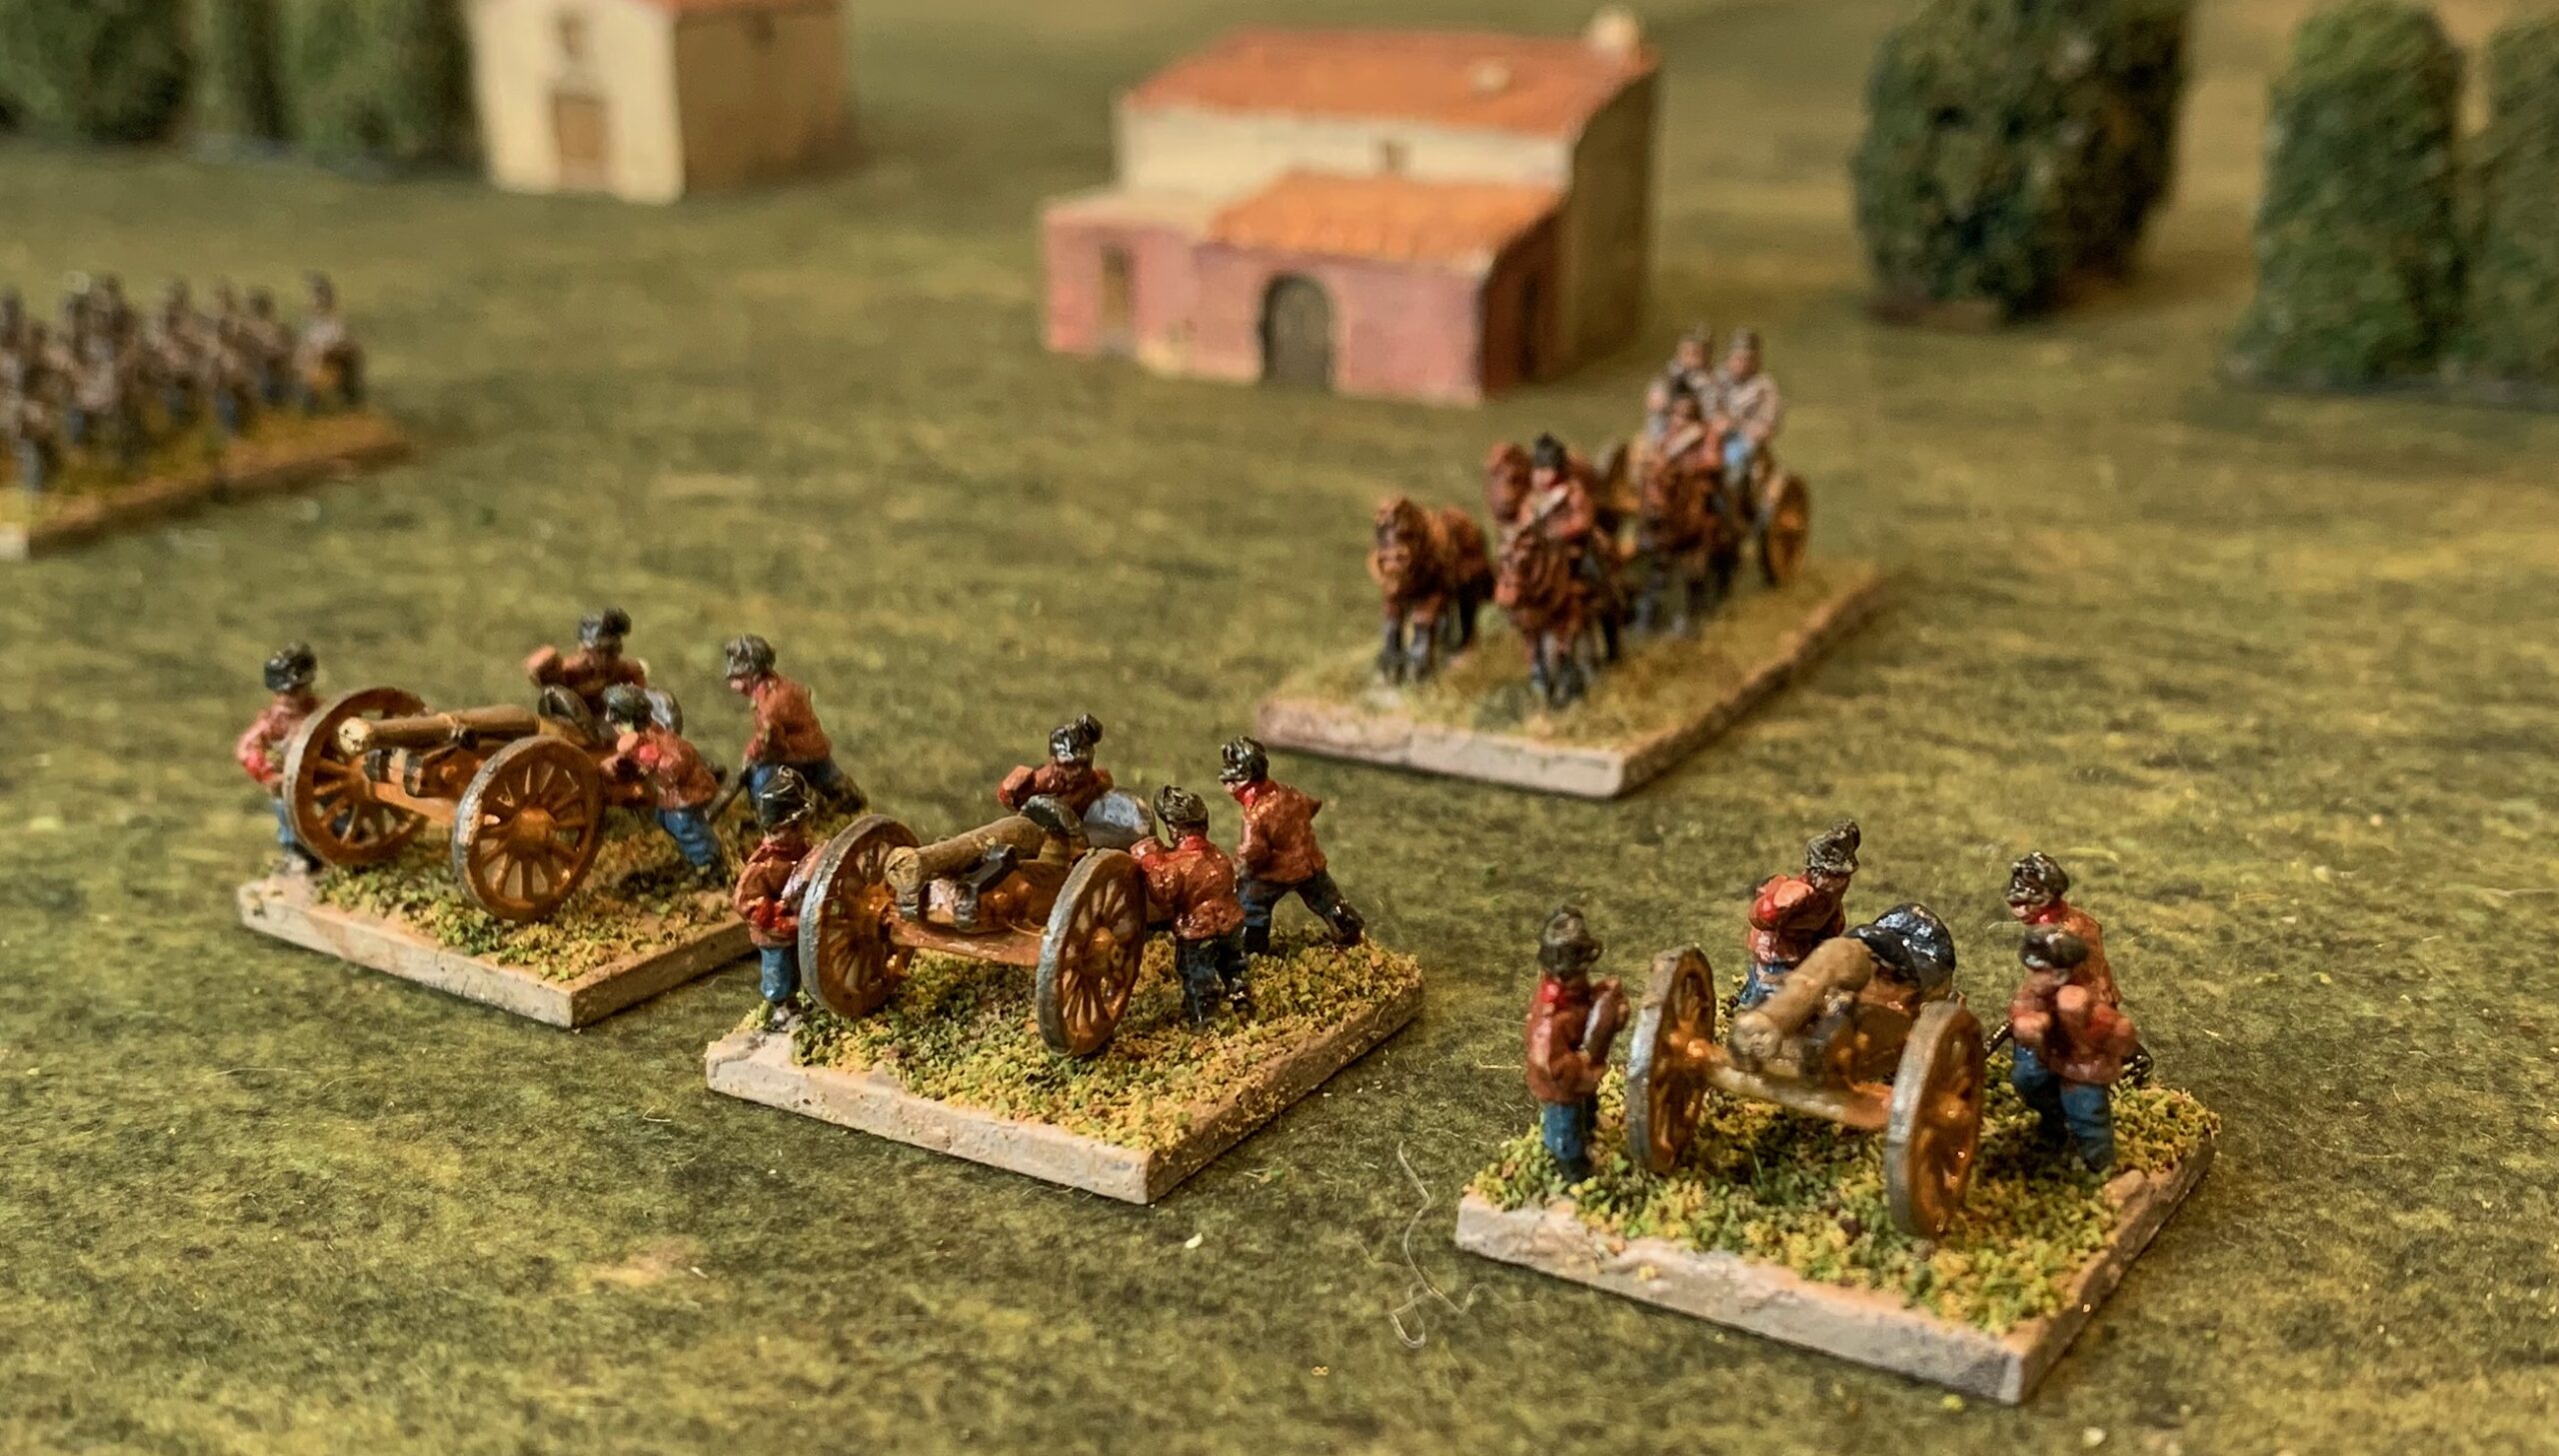
Like the previous batch, this is a three arms package – though not using Pendraken’s army pack this time. The infantry was a mix of Germans and Hungarians (not that it is easy to tell the difference) – enough for 12 bases of line infantry and three of jagers. The cavalry were hussars (4 bases). The artillery were 4 pdr rifled guns, with one limber (there are two to pack, but I only painted one this time). In addition I painted up three generals (from a pack of 5). I bought laser-cut mdf bases from Pendraken: 30mm by 20mm for the infantry and cavalry; 25mm square for the artillery; I already had plenty of 20mm squares for the generals. This is enough for one three-brigade corps (as was the organisation of the Austrian Army of the South – the main army had four-brigades corps) under the system that I am developing.
Here is a closer look at the infantry:
And even closer:
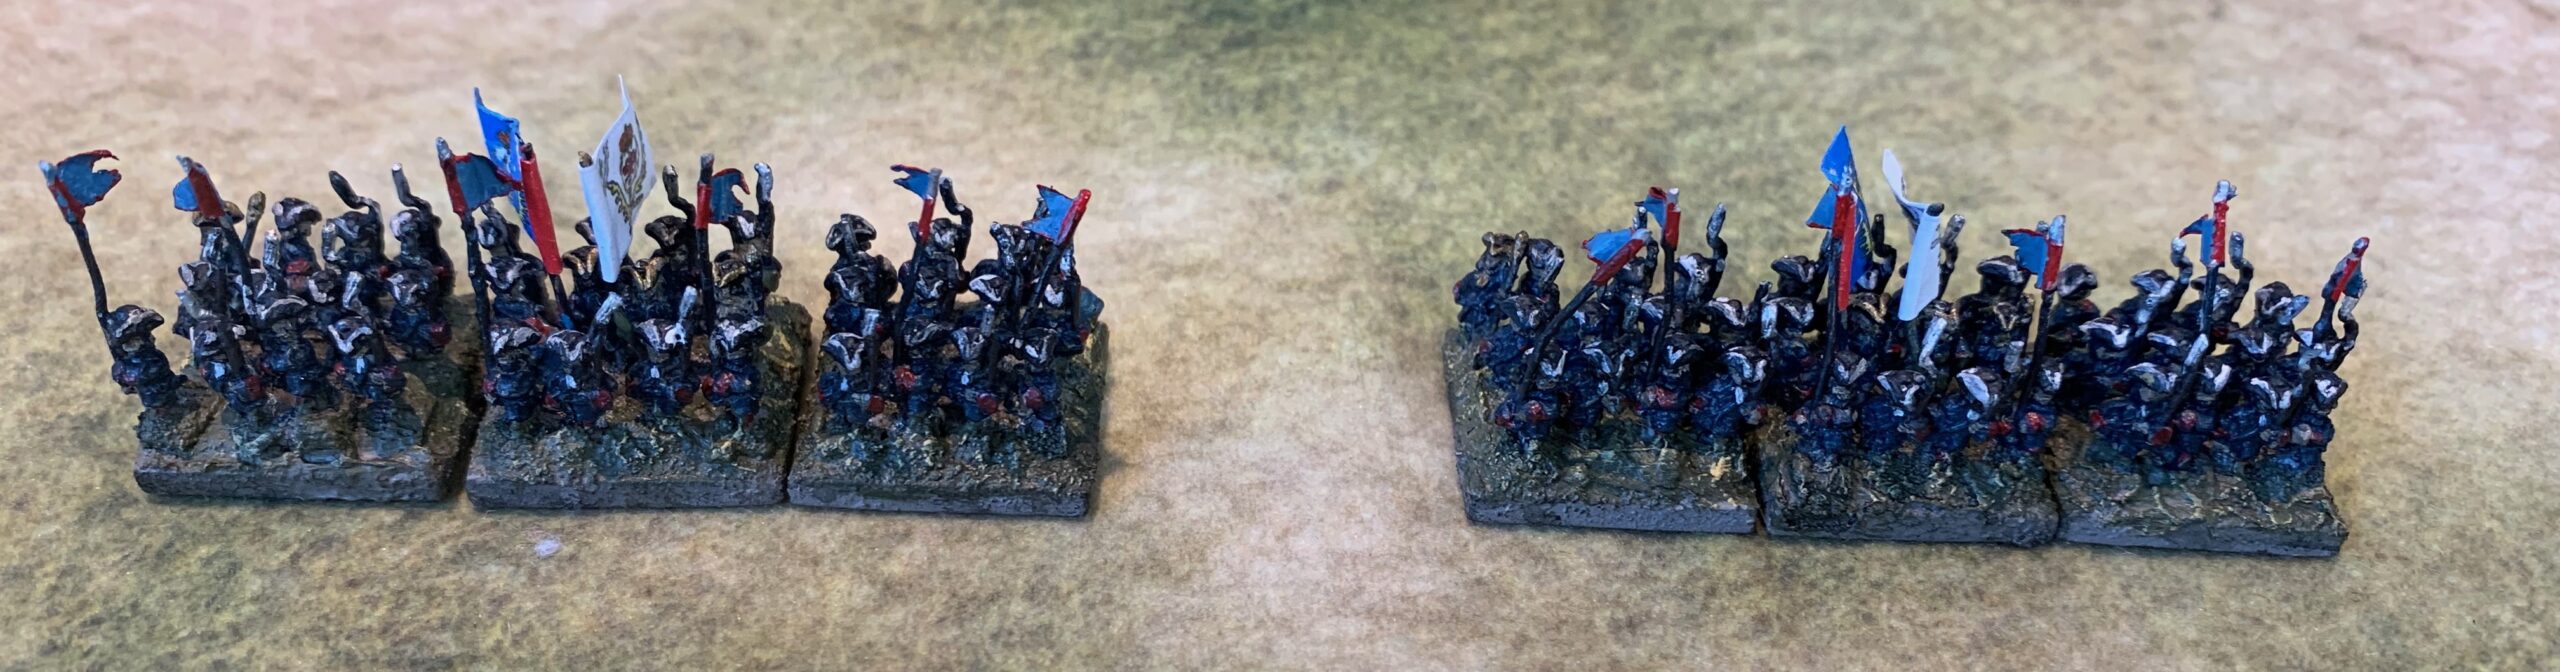
The troops are in the regulation greatcoat which the troops had to wear even in the heat that June. Funnily enough the Italians used the same system, making the troops remarkably similar in appearance; both sides suffered from the heat. The most distinctive feature of the Austrians was the blue trousers (visible because the front skirts of the greatcoats were buttoned back – as with the French and Italian practice) – contrasting with the bluish grey of the Italian uniform trousers. At least the hats are slightly different. One more distinctive feature of the Austrians was that their webbing was pipeclayed white, rather than left dark. However the pose for these figures has the arms and musket in front of the body concealing this. With figures so small it is not worth trying to represent this, apart from the drummer. That at least makes them quite simple to paint. The jagers also wore the greatcoat – though not always, apparently – so I might do some without – perhaps to represent the elite Kaiserjäger. I painted the generals in their grey field uniform. They all came in the same pose, which means that they won’t look right if paired up to represent more senior commands. There don’t seem to be any good figures to represent ADCs, and a charging hussar (I have some spares) won’t look right either. I think will have to use infantry officers.
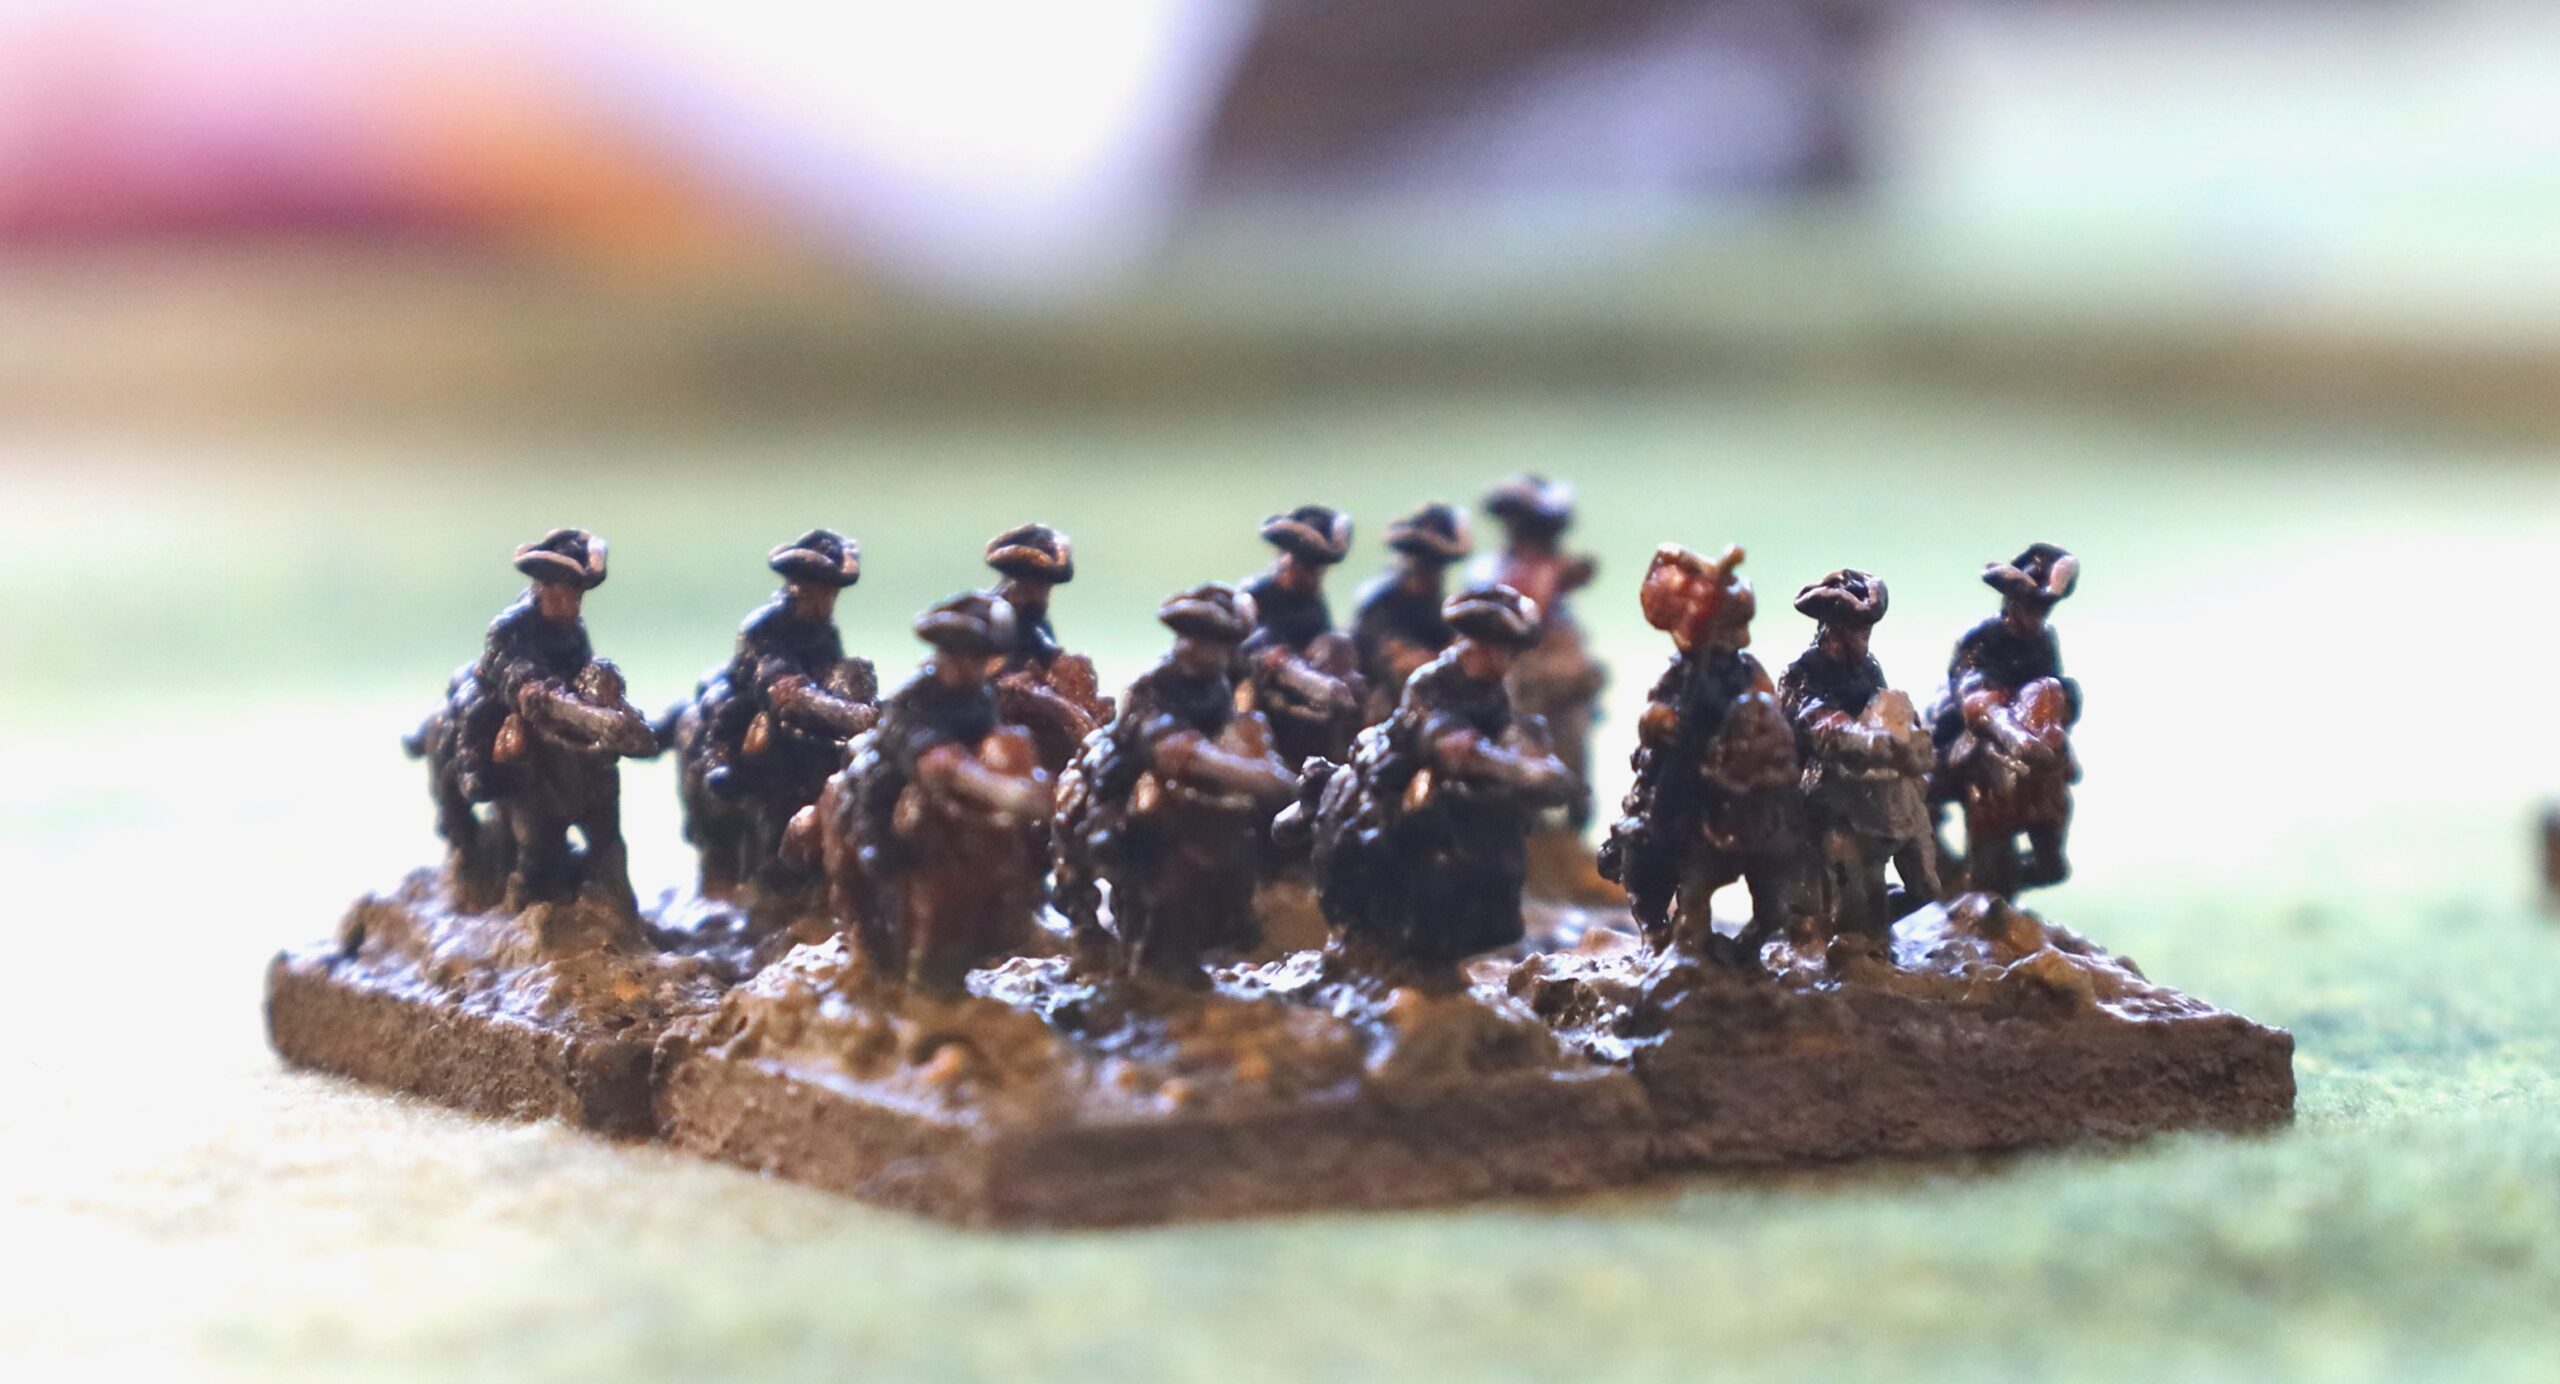
Moving on to the cavalry:
These are hussars. My system is to represent a regiment (4 squadrons) in two bases. One pair of bases is painted up as the 1st Hussars, which were at Custoza, and the other as either the 4th or 6th regiment – neither of which were in Italy, but which provided a nice contrast, with their light blue uniforms and scarlet cap bags (compared to dark blue and green). The uniforms were much simplified from the Napoleonic era, and not much detail was possible at this scale.
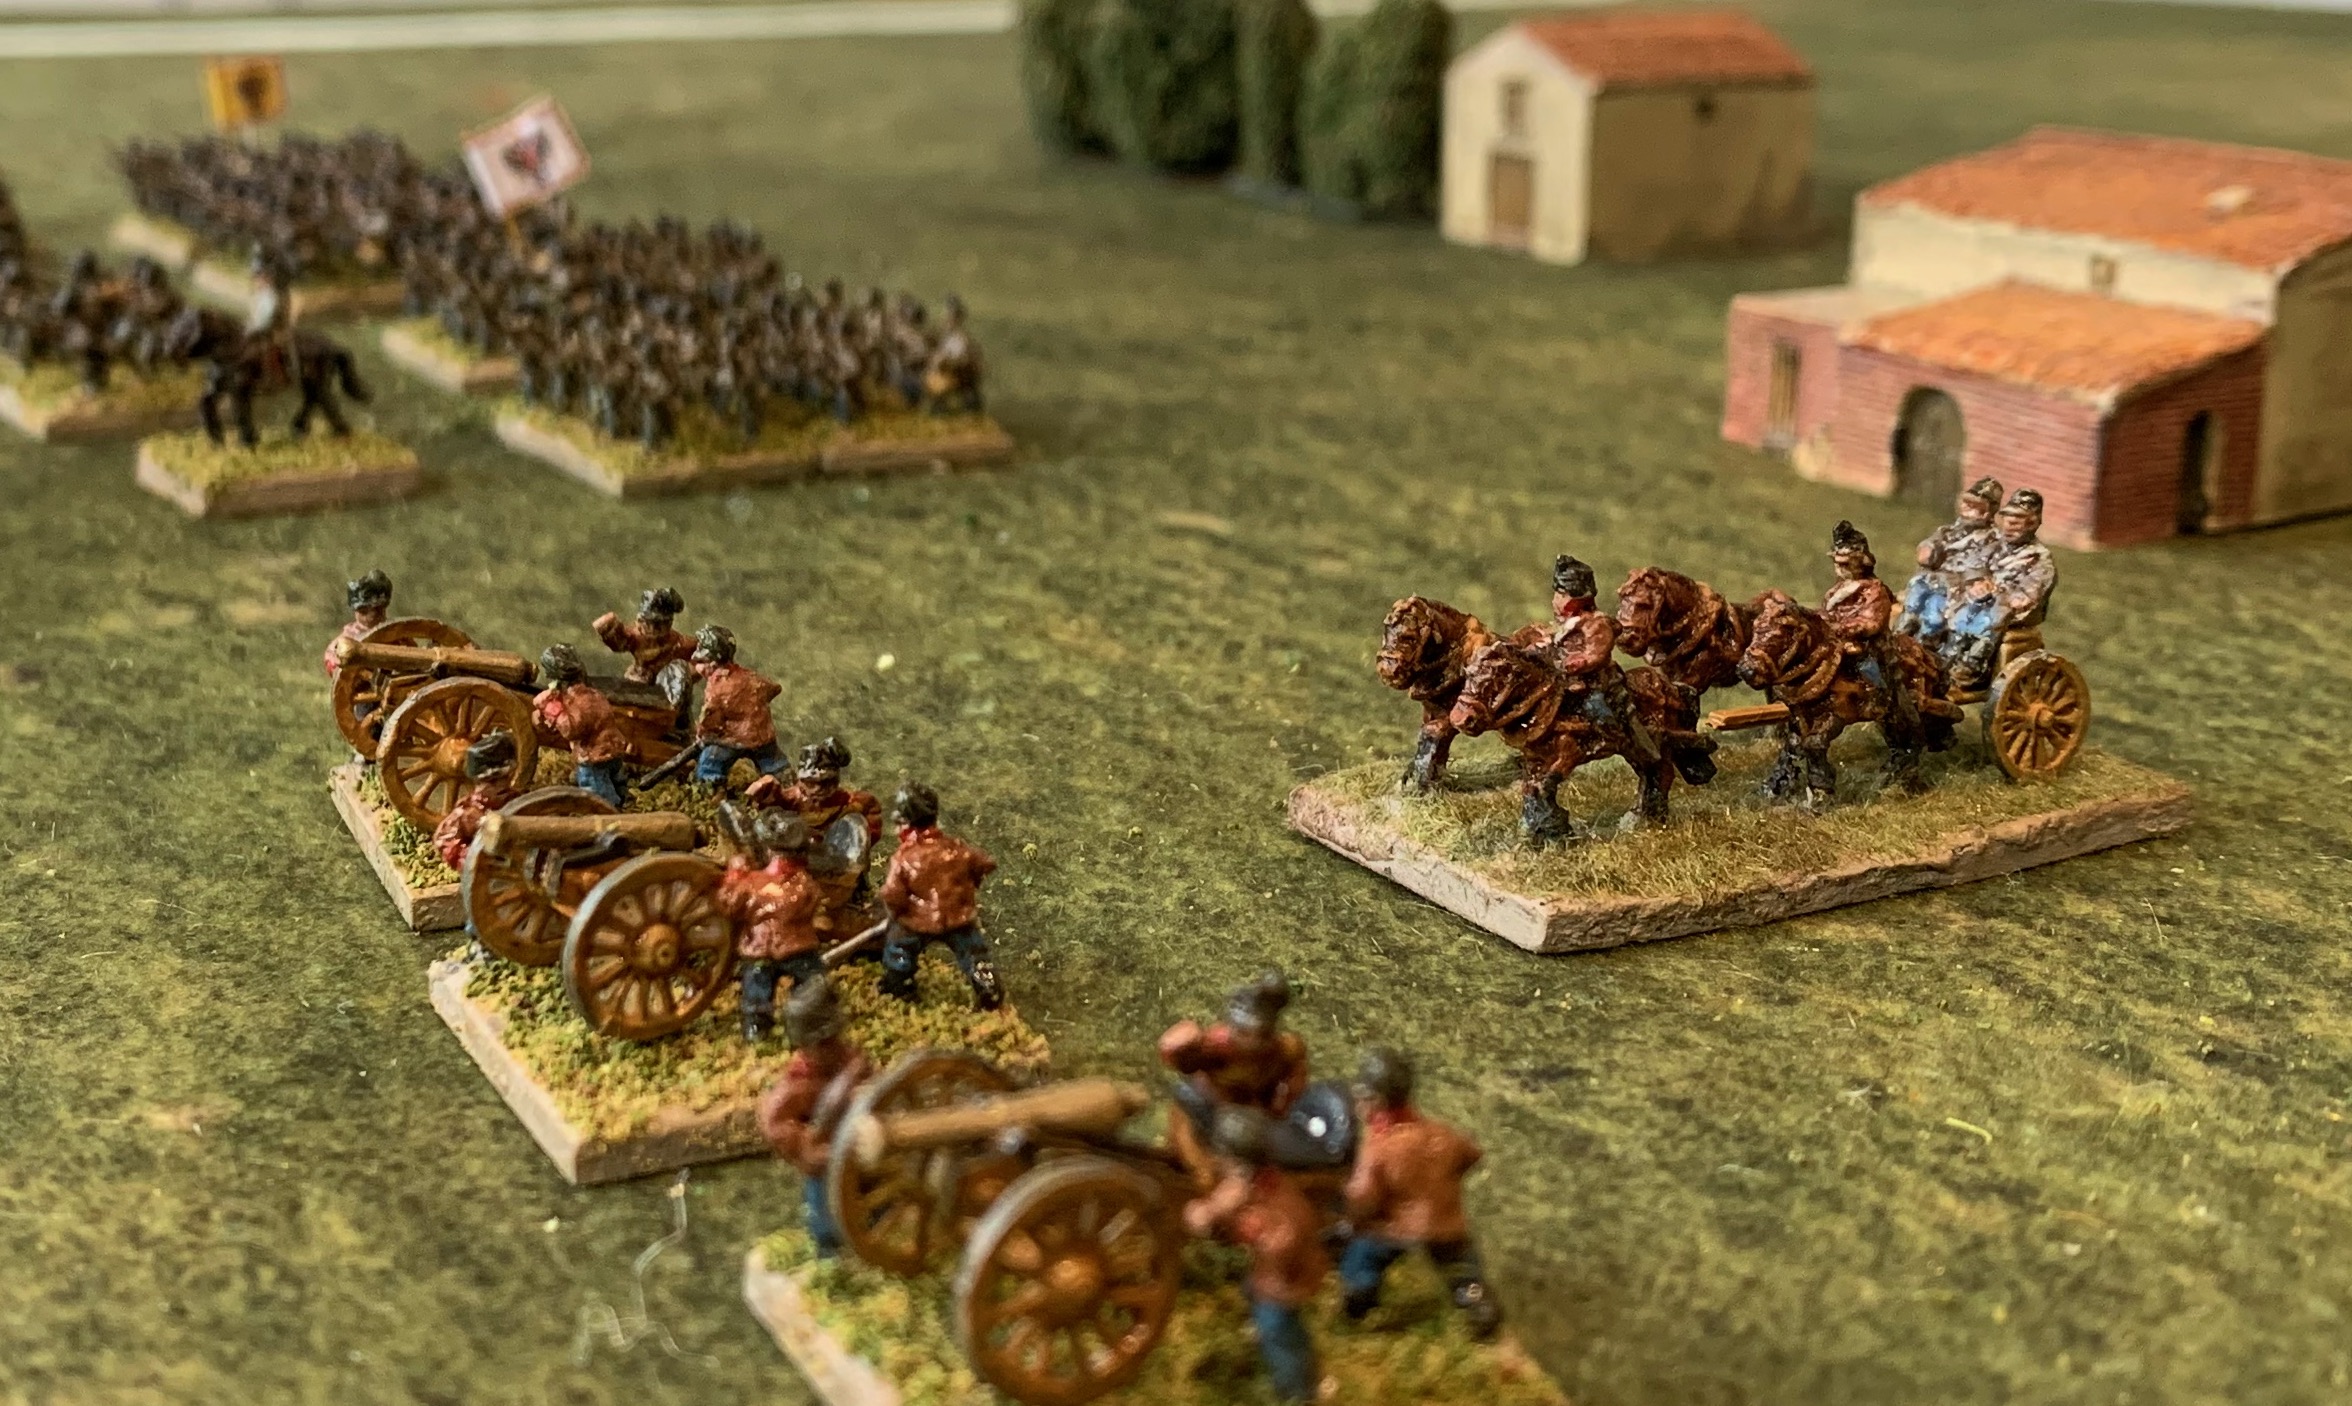
Moving on the artillery:
These are rifled 4-pounders. The trail seat on these Pendraken figures is a bit clumsy though. I may try cutting it down in future. I have put four crew figures on each base (as opposed to three for the Italians) as the Austrians had 8 guns to a battery rather than the usual 6. The mounting is a bit too tight for this though – in future I think 30mm by 25mm would be better. Looking ahead, I want to have some heavy 8-pounders as well. Pendraken don’t make these, so this might be a bit of a challenge. The woodwork was apparently not painted, unlike in the Napoleonic era – but I haven’t seen any clear colour representations of how it looked. As far as I can see it was a bit redder than than the ochre paint used beforehand – which suggests it was stained or varnished in some way – otherwise it would soon start looking a dull grey. I opted for a slight orange-brown, though I can’t say this screams “unpainted wood” to me.
How did I get the raw metal figures ready for the table? The first stage was to mount them on the bases (10 to a base for line infantry, 6 for jagers), set in a matrix of acrylic medium with a mix of white and raw umber paint. I didn’t mix any textural material (such as sand or model railway ballast) in as I do for larger figures, as I thought this would make the basing a bit trickier and slower, with the grains getting between the base of the figures and the mdf mounting. I had previously tried plaster filler, but this proved even trickier. I can’t say I have found the ideal basing matrix – but mounting such individual small figures in dense formation (6mm figures are usually come in strips) is quite tricky. I hoped I could just squish the figures into blob of matrix, but wasn’t that easy. After the matrix had hardened I painted the whole assembly, base included, in white gesso mixed in with Raw Umber paint to create a dry earth colour. After that came the main job of painting, using my usual artist’s acrylic paint. Obviously it was tricky to reach lots of places on the infantry bases, with the figures so close together – but if you can’t see it there’s no point in painting it. This was much rougher and readier than my normal 18mm painting. There was very little in the way of striking high contrast detail to lift the figures (such as white cross-belts, facings, plumes or hat pompons). It still took a few sessions. There really is no good way to speed this up. I used oil paints on the horses, mimicking the technique I use on 18mm – but it was messy and it was hard to overpaint reins, etc. With little positive benefit (the figures are bit small for the wiping technique to create high/low lights) – so I won’t be doing that again. Given that these are armies assembled in peacetime I made the horses on each pair of bases look similar with only small variations (and grey for the trumpeter).
These figures needed a wash or glaze with a thin dark colour particularly badly to bring out the moulded detail that could not be picked out in paint. Like my Italians I used a glaze made with a supposedly fast drying oil medium, mixed with a little brown oil paint. This did an excellent job of distributing the dark pigment to the lowlights, but the finish was too glossy: I wasn’t looking for ultra-flat, but there are limits. After giving it 24 hours to cure I started to apply the basing material – flock or “turf”. This was a big mistake as the basing material stuck to the touch-dry but still slightly-sticky glaze, and I had to abandon it. I then decided to apply matt varnish (which I had done for my Italians) – using some old Winsor & Newton varnish designed for oil paintings. This is nasty, sticky stuff where the flatting agent tends to separate out in the bottle and is very hard to mix back in. I had to take out a quantity of the runny stuff and the some of the gunky flatting agent to mix together in a small batch. Thankfully the result was the right off-matt finish. It was only after this was thoroughly dry that I went back to applying the basing material – just flock this time, as I decided that the turf didn’t look as good (though I used it for all my Italians). Applying flock to the tightly-packed infantry bases was still pretty hard to do with it sticking to the figures themselves. This is hard enough in 18mm! I frequently had to use a large brush and water to clean up the figures. For my 6mm I don’t bother with flocking at all, though I use a textured basing matrix. But that leaves the smooth metal bases visible and didn’t want to do that for the larger figures.
The base flocking/turfing is good enough, without looking particularly good. I will stick with the flock in future, but with variations on the bases with large exposed areas. The main thing I need to change for the next batch is low-lighting glaze. I need to get it in done one coat, without the need for an extra coat of varnish. I have acquired some acrylic matting medium to try out. This is milky when wet but turns transparent when it dries. This will make it tricky to judge the right to amount of ink to mix in. A challenge for next time.
The final step was the flags. For the infantry I used the Pendraken printed paper ones. The cavalry standard was moulded metal – which I did a rough and ready paint job on – which wrks OK at arms length. The flags are important for such relatively dull figures.
I have ordered the next batch of miniatures. I will concentrate on doing a large batch of Italian infantry. This isn’t very exciting but I’m hoping to generate a bit of speed so that I have enough figures for a decent game as soon as possible..
The game swings decisively towards the Prussians as their cavalry arrives on the far side of the table
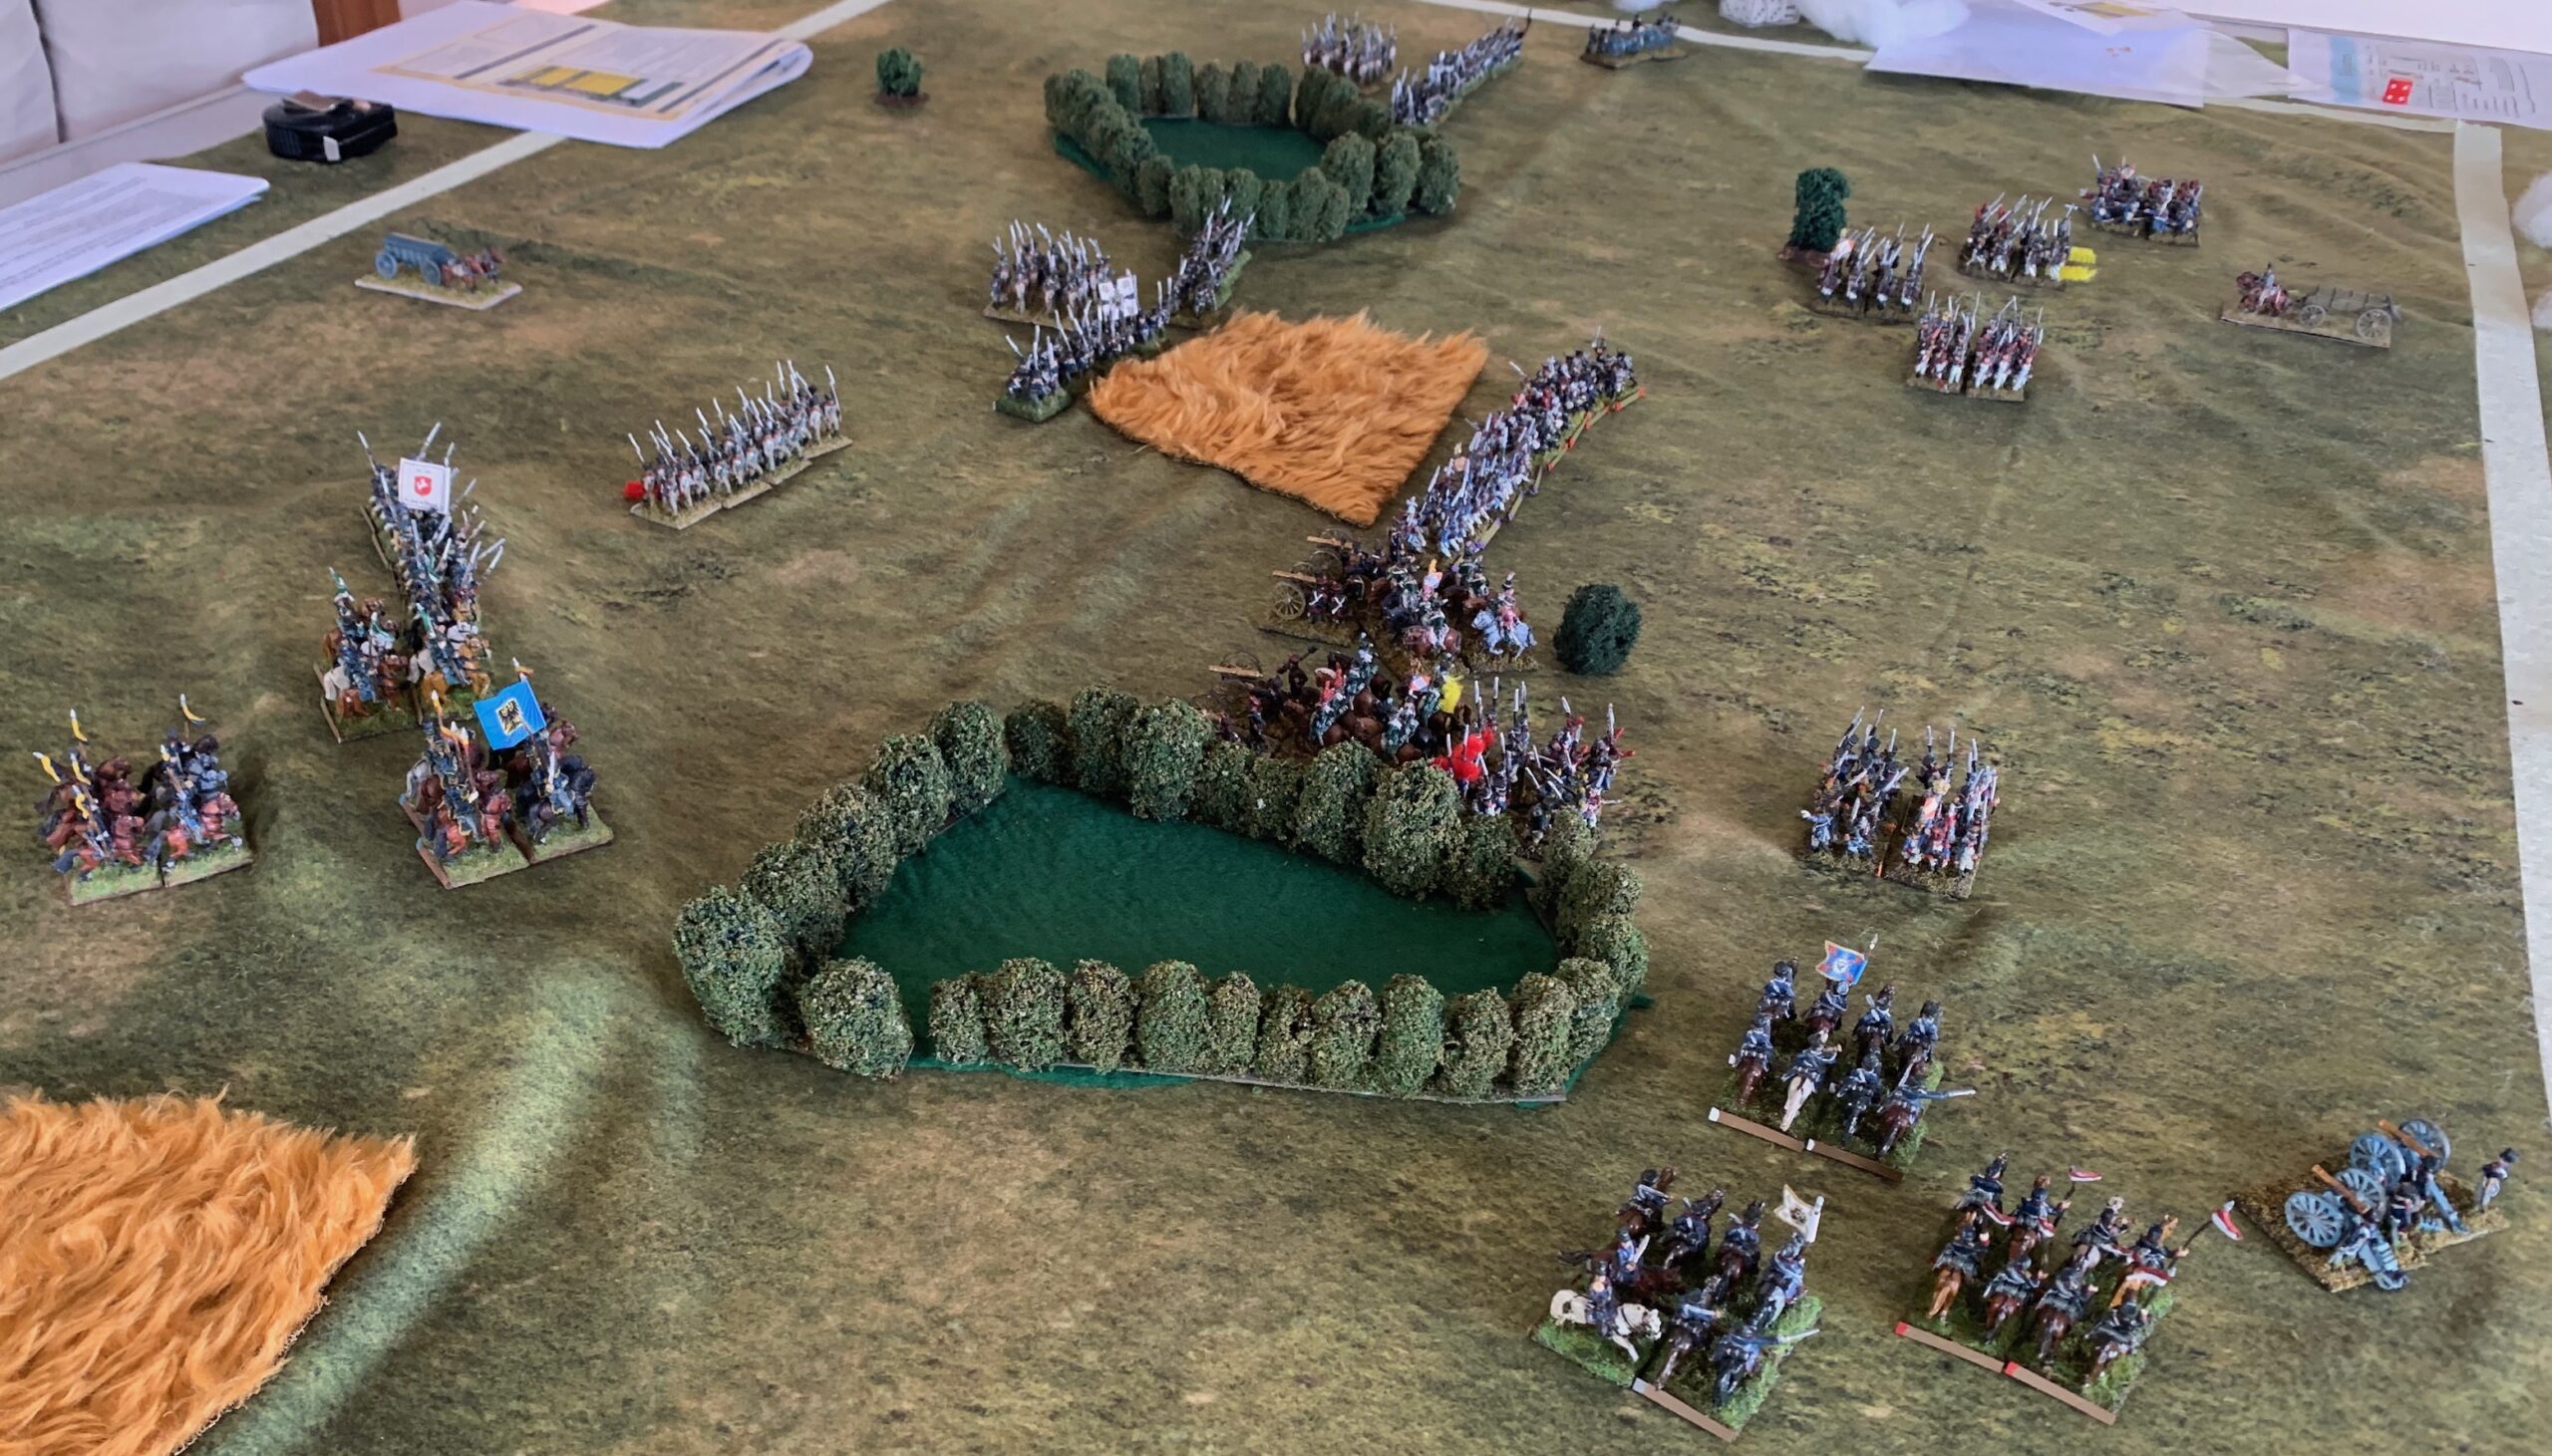
I am slowly working my way into a new wargames club – the Tunbridge Wells Wargames Society. Yesterday I put on a game of Lasalle 2 with another new (or in his case, returning) member, using my 18mm Napoleonic French and Prussian miniatures. I am slowly warming to these rules, but I’m still getting used to them. Some further thoughts on the system follow.
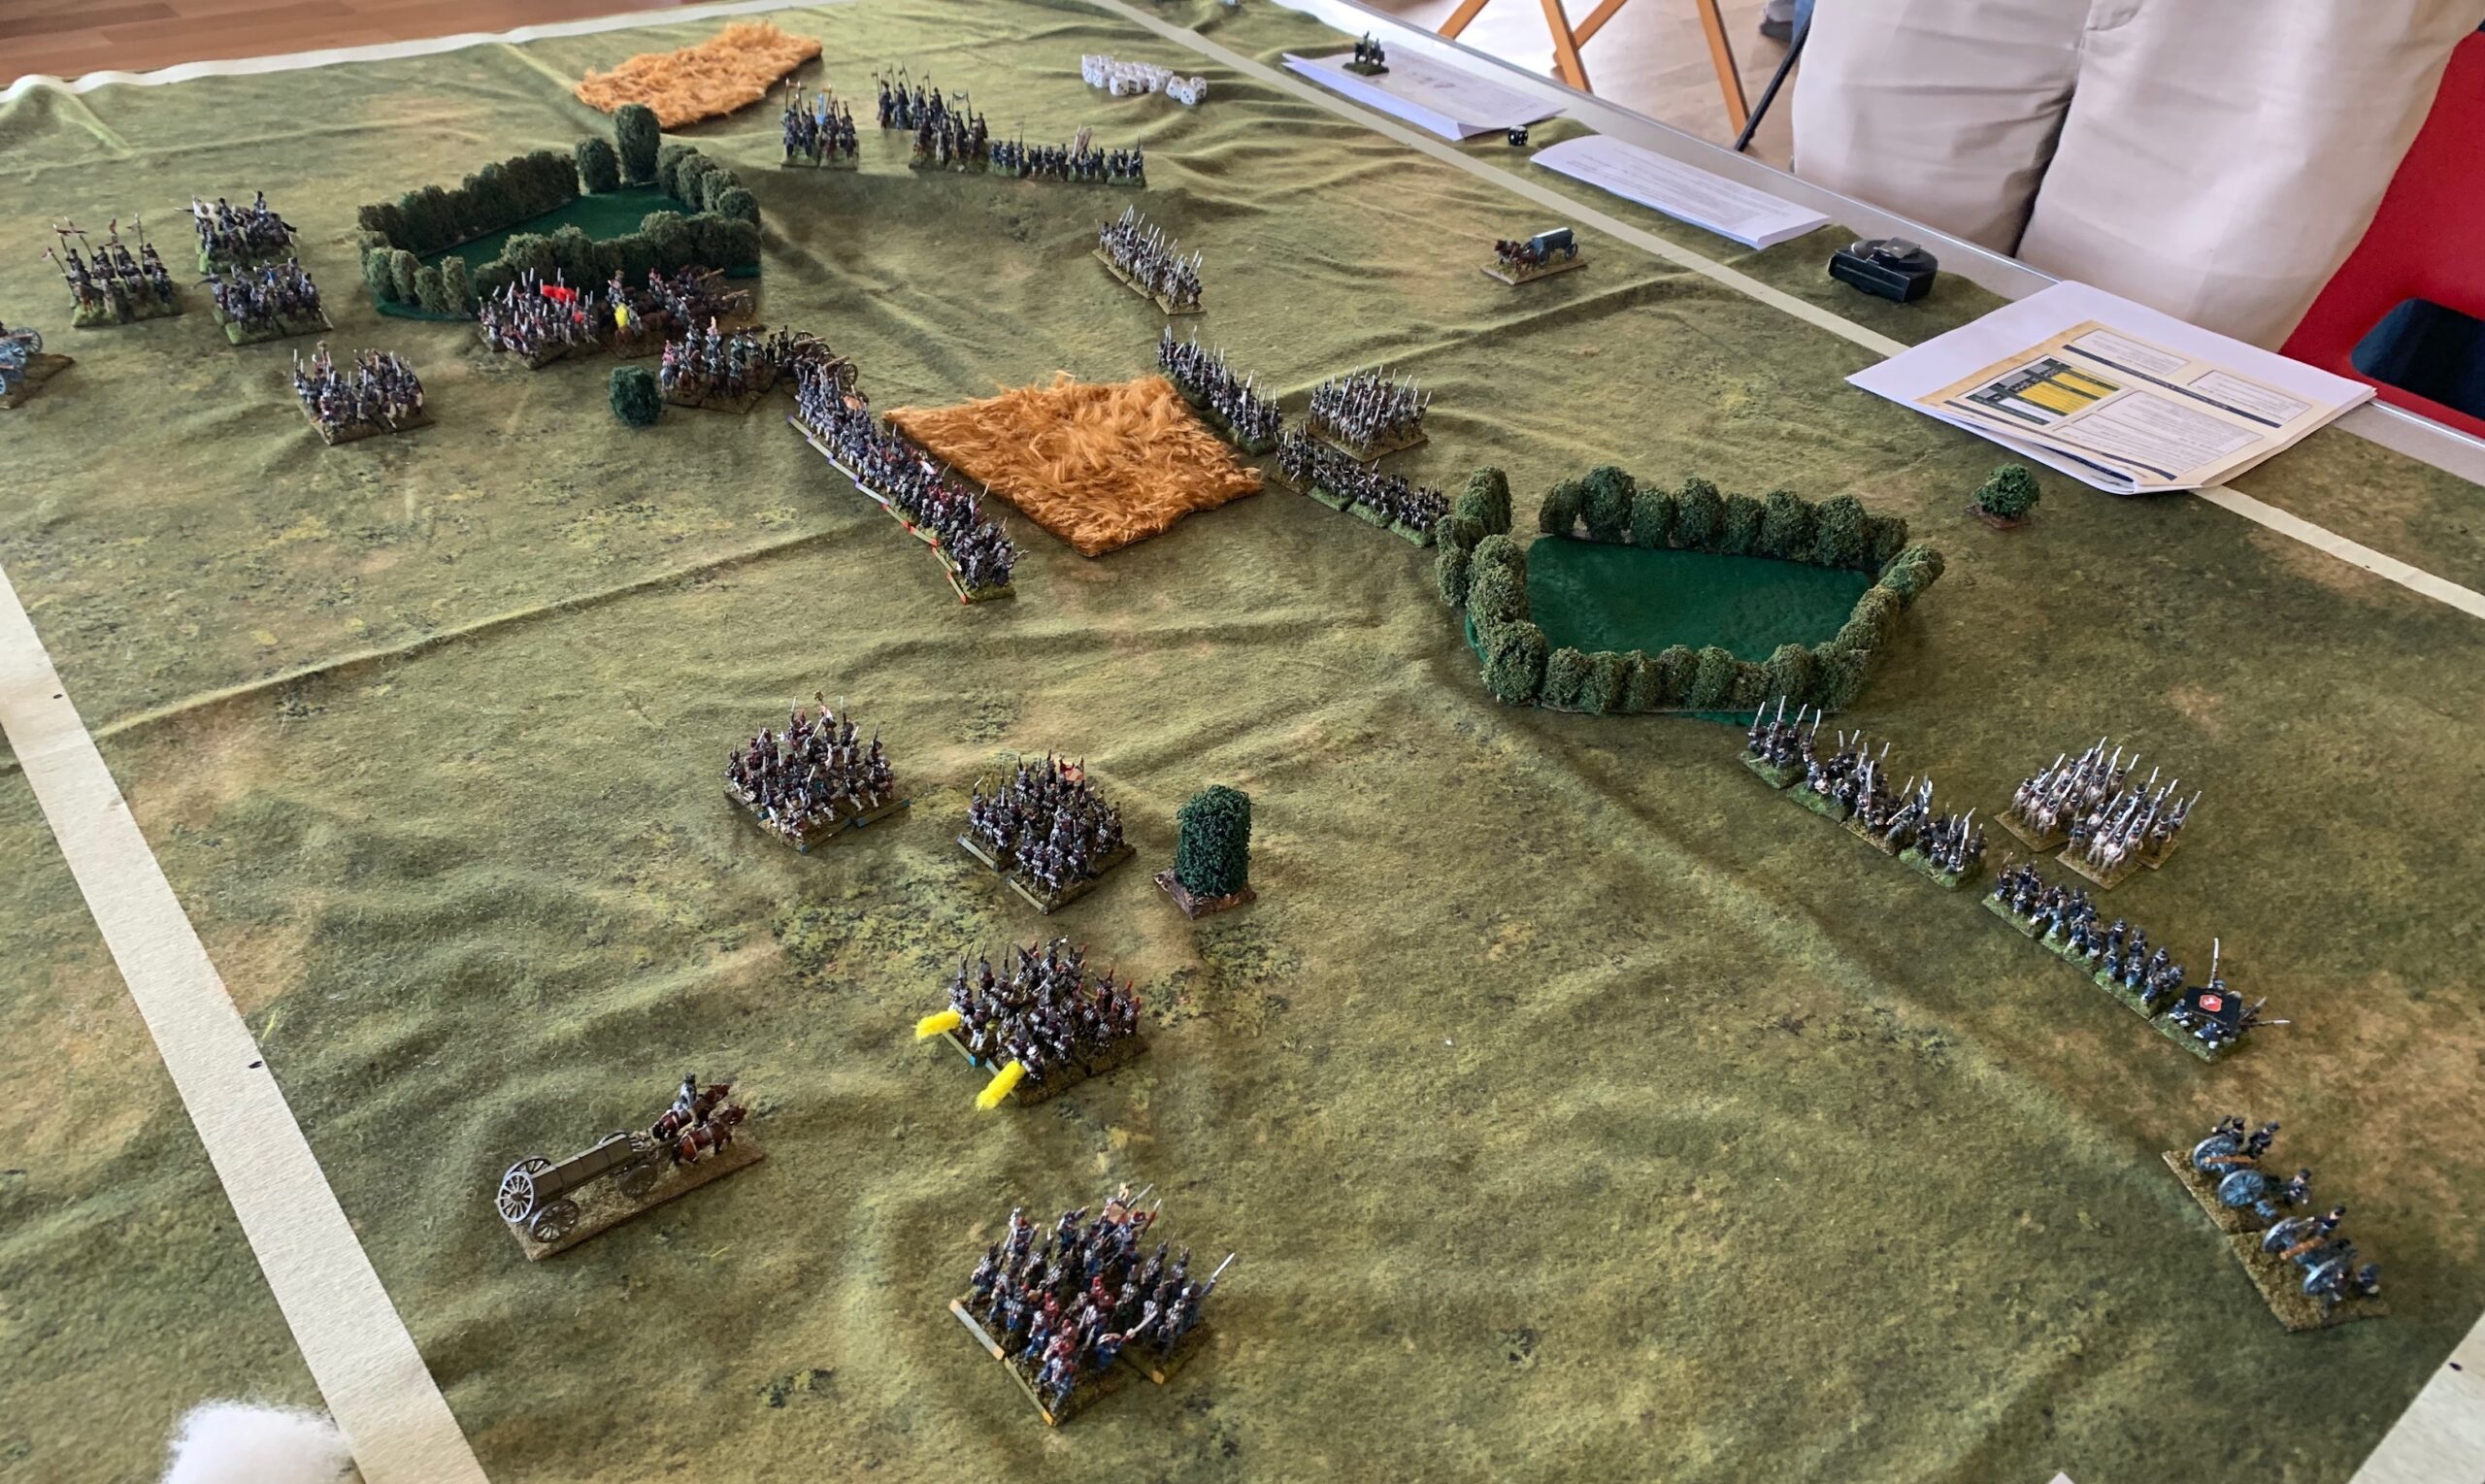
We used scenario 8 in the book “Marching to the Guns”, with the “small” forces. I expanded the game squares to 10″ from 6″ (my figures are on 1″ bases – the runs tailor everything to base width, or BW), to make the table less crowded. The orders of battle were based on the clash between Tippelskirch’s brigade and Habert’s division at Ligny in 1815. The Prussians were the larger army, with their 9 infantry battalions on the table to start, with two brigades of cavalry (one Landwehr) from the corps reserve coming in on their right flank as reinforcements. The French had two brigades of four infantry battalions, plus a brigade of two units of Chasseurs, all on the table at the start (Habert’s division actually had two brigades of six battalions – but their unit sizes were smaller than the Prussians’). They held two of the three geographical victory points at the start, meaning that the Prussians needed to be on the offensive. All the French infantry were treated as veterans, with only three of the Prussian units their equal. The three Landwehr battalions were treated as raw Landwehr, and the 25th Regiment (represented by a mixture of my freshly minted 23rd and 29th regiments) was treated as veteran Landwehr, to reflect the unsettled nature of this unit in 1815. Both sides had one foot and one horse battery each, with the horse battery being part of the Prussian reinforcements.
The Prussians, played by my opponent Rod, (organised into three “brigades” with units of the three regiments mixed up, in accordance with Prussian practice at the time) advanced on a broad front, with each brigade advancing side by side, in a “two up” formation, with the foot artillery on their left. They were content to be quite passive until their reinforcements arrived. This proved to be an effective strategy, as, playing the French, I spied an opportunity to be aggressive on my left flank, against his weakest brigade. I pushed some infantry forward, supported by the cavalry. I hoped that the Prussian reinforcements wouldn’t arrive until later (as had been the case in my only previous game, for another scenario). But on turn three, just as my strategy looked as if it might mature (and after a Prussian Landwehr unit delivered a devastating volley on my leading unit), both cavalry reinforcement brigades arrived, threatening to overwhelm the left flank. I managed to extract my cavalry and the attacking infantry in time, with my artillery (both units operating as a combined battery) destroying the offending Landwehr unit, but I was on the back foot thereafter, continually conceding ground on the left in order to avoid disaster. Rod kept throwing cavalry at my infantry squares on the left, but his reserve Landwehr unit was brought forward, and destroyed the left-most French infantry unit (which had been subject to that devastating volley). This and the other Landwehr unit were the only two units to be destroyed when we called stumps at Turn 12 (this was a nominally 10 turn game, but the rules say the time limit should be extended by up to four turns on a bigger table). One further infantry unit on each side was near destruction (my infantry was being quite aggressive in the centre), and some of Rod’s cavalry was looking a bit ragged. But I had lost one of the VPs, and he had the “carnage” bonus as well, because I had lost the more valuable unit. I could see no prospect of reversing the tide, so conceded.
We were both pretty tired by this point, after about four hours of play. It was Rod’s first experience of these rules, and its rather unusual mechanisms, and only my second game. Several times I needed to look things up in the rule book. In my previous game, played much more aggressively by both sides, there were always tricky decisions on how to use MO points – but this time that was rarely so. But this relatively cautious approach carries risks of its own, of course. The Prussians could easily have run out of time, especially if their reinforcements had arrived later.
From the opposite side of the table at the same time. The Prussian cavalry descends n the French left flank
Overall my impression is of a beautifully crafted game system, which produces an interesting and challenging game. The mechanisms ensure a nice flow with good engagement by both players right through the turn. But those same mechanisms give it more of a feel of a game of toy soldiers than a simulation of history. As to how faithful the tabletop results are to historical scenarios, the jury remains out so far as I’m concerned. Certainly the outcome of Tippelskirch’s attack in 1815 was entirely different – it ended in disaster, with probably only one of Habert’s brigades involved. That was because of the difficulties of coordination on the Prussian side (their cavalry never got seriously involved) – which weren’t helped by a large village in the middle of their deployment area. That says more about the scenario setup than the rules, though – except that the rules will allow more coordination between infantry and cavalry than the historical norm. My main requirement though is for a game I can use on club days – which is very much at the game of toy soldiers side of things. The main problem there is adapting the game mechanism for a multi-player format.
My main concern for now is getting the terrain rules right. In this scenario I introduced fields of standing corn, a feature of the 1815 battles, and important in this episode of Ligny. I had to establish a house rule for this, as the “standing crops” terrain was more for muddy fields of cabbages than man-high rye. I really don’t like the rules on built-up terrain; one reason for choosing this scenario is that it did not involve any. They adopt the classic wargames idea of built-up area patches of about 2-3 base widths square, which must be cleared of terrain models as soon as troops enter. But built-up areas consist of buildings and walls which completely break up formations (and usually only occupied by skirmishers), and streets, where most of the action took place. I like to represent this structure on the tabletop, without the need to remove building models. To do that I need bigger built-up area segments (six base-widths square should be OK, and/or 3-4 BW ones with a single building in an enclosure). With my 10 BW terrain squares, this is not in fact much of a problem. The rules don’t need all the much modification beyond this: the combat, cover and garrison rules work well – indeed much better than most rules systems I have used. The impact on movement needs one or two house rules, though. Moving through a built-up area in battle formation should be hard work, as you have to break down the formation, pass through, and rebuild on the far side.
Another area requiring more work is the tabletop presentation. I want to get a nice-looking but portable table set-up. My Geek Villain “Autumn” cloth, shown, works fine for what it is. I taped on a table boundary, which is a bit of a faff – but I’m sure that there are easier ways of coping with this. I’m pleased with my representation of woods (inspired by Bruce Weigle), using strips of trees made from 3M scourers and coarse flock – though the green cloth interior needs to be a better fit. This looks much more like a real north-European wood than a few free-standing trees sitting on some green cloth. For those built-up areas I am going to need some 10mm building models. My existing models are mainly 6mm, which I can get away with for big battles (where I can’t use big BUA footprints), but look wrong on this format. I have a few on order now. Streams will be a problem; I haven’t seem any that look right that haven’t been built into terrain boards. Beyond that I need elements of eye-candy – fields, free-standing trees, roads and so on, to give more of an impression of real countryside. You can see from the pictures that I used teddy-bear fur for the standing corn. This is good when troops wade through it, rather than on top, but the more usual doormat pieces look a lot more like cornfields! One problem is that clubs (and friends’ houses) tend to have hard tables, so things can’t be pinned in – and I don’t want to hump around soft boards.
For now I’m going to keep my faith with Lasalle. Only of the prospect of multiplayer games becomes serious might I consider alternatives.
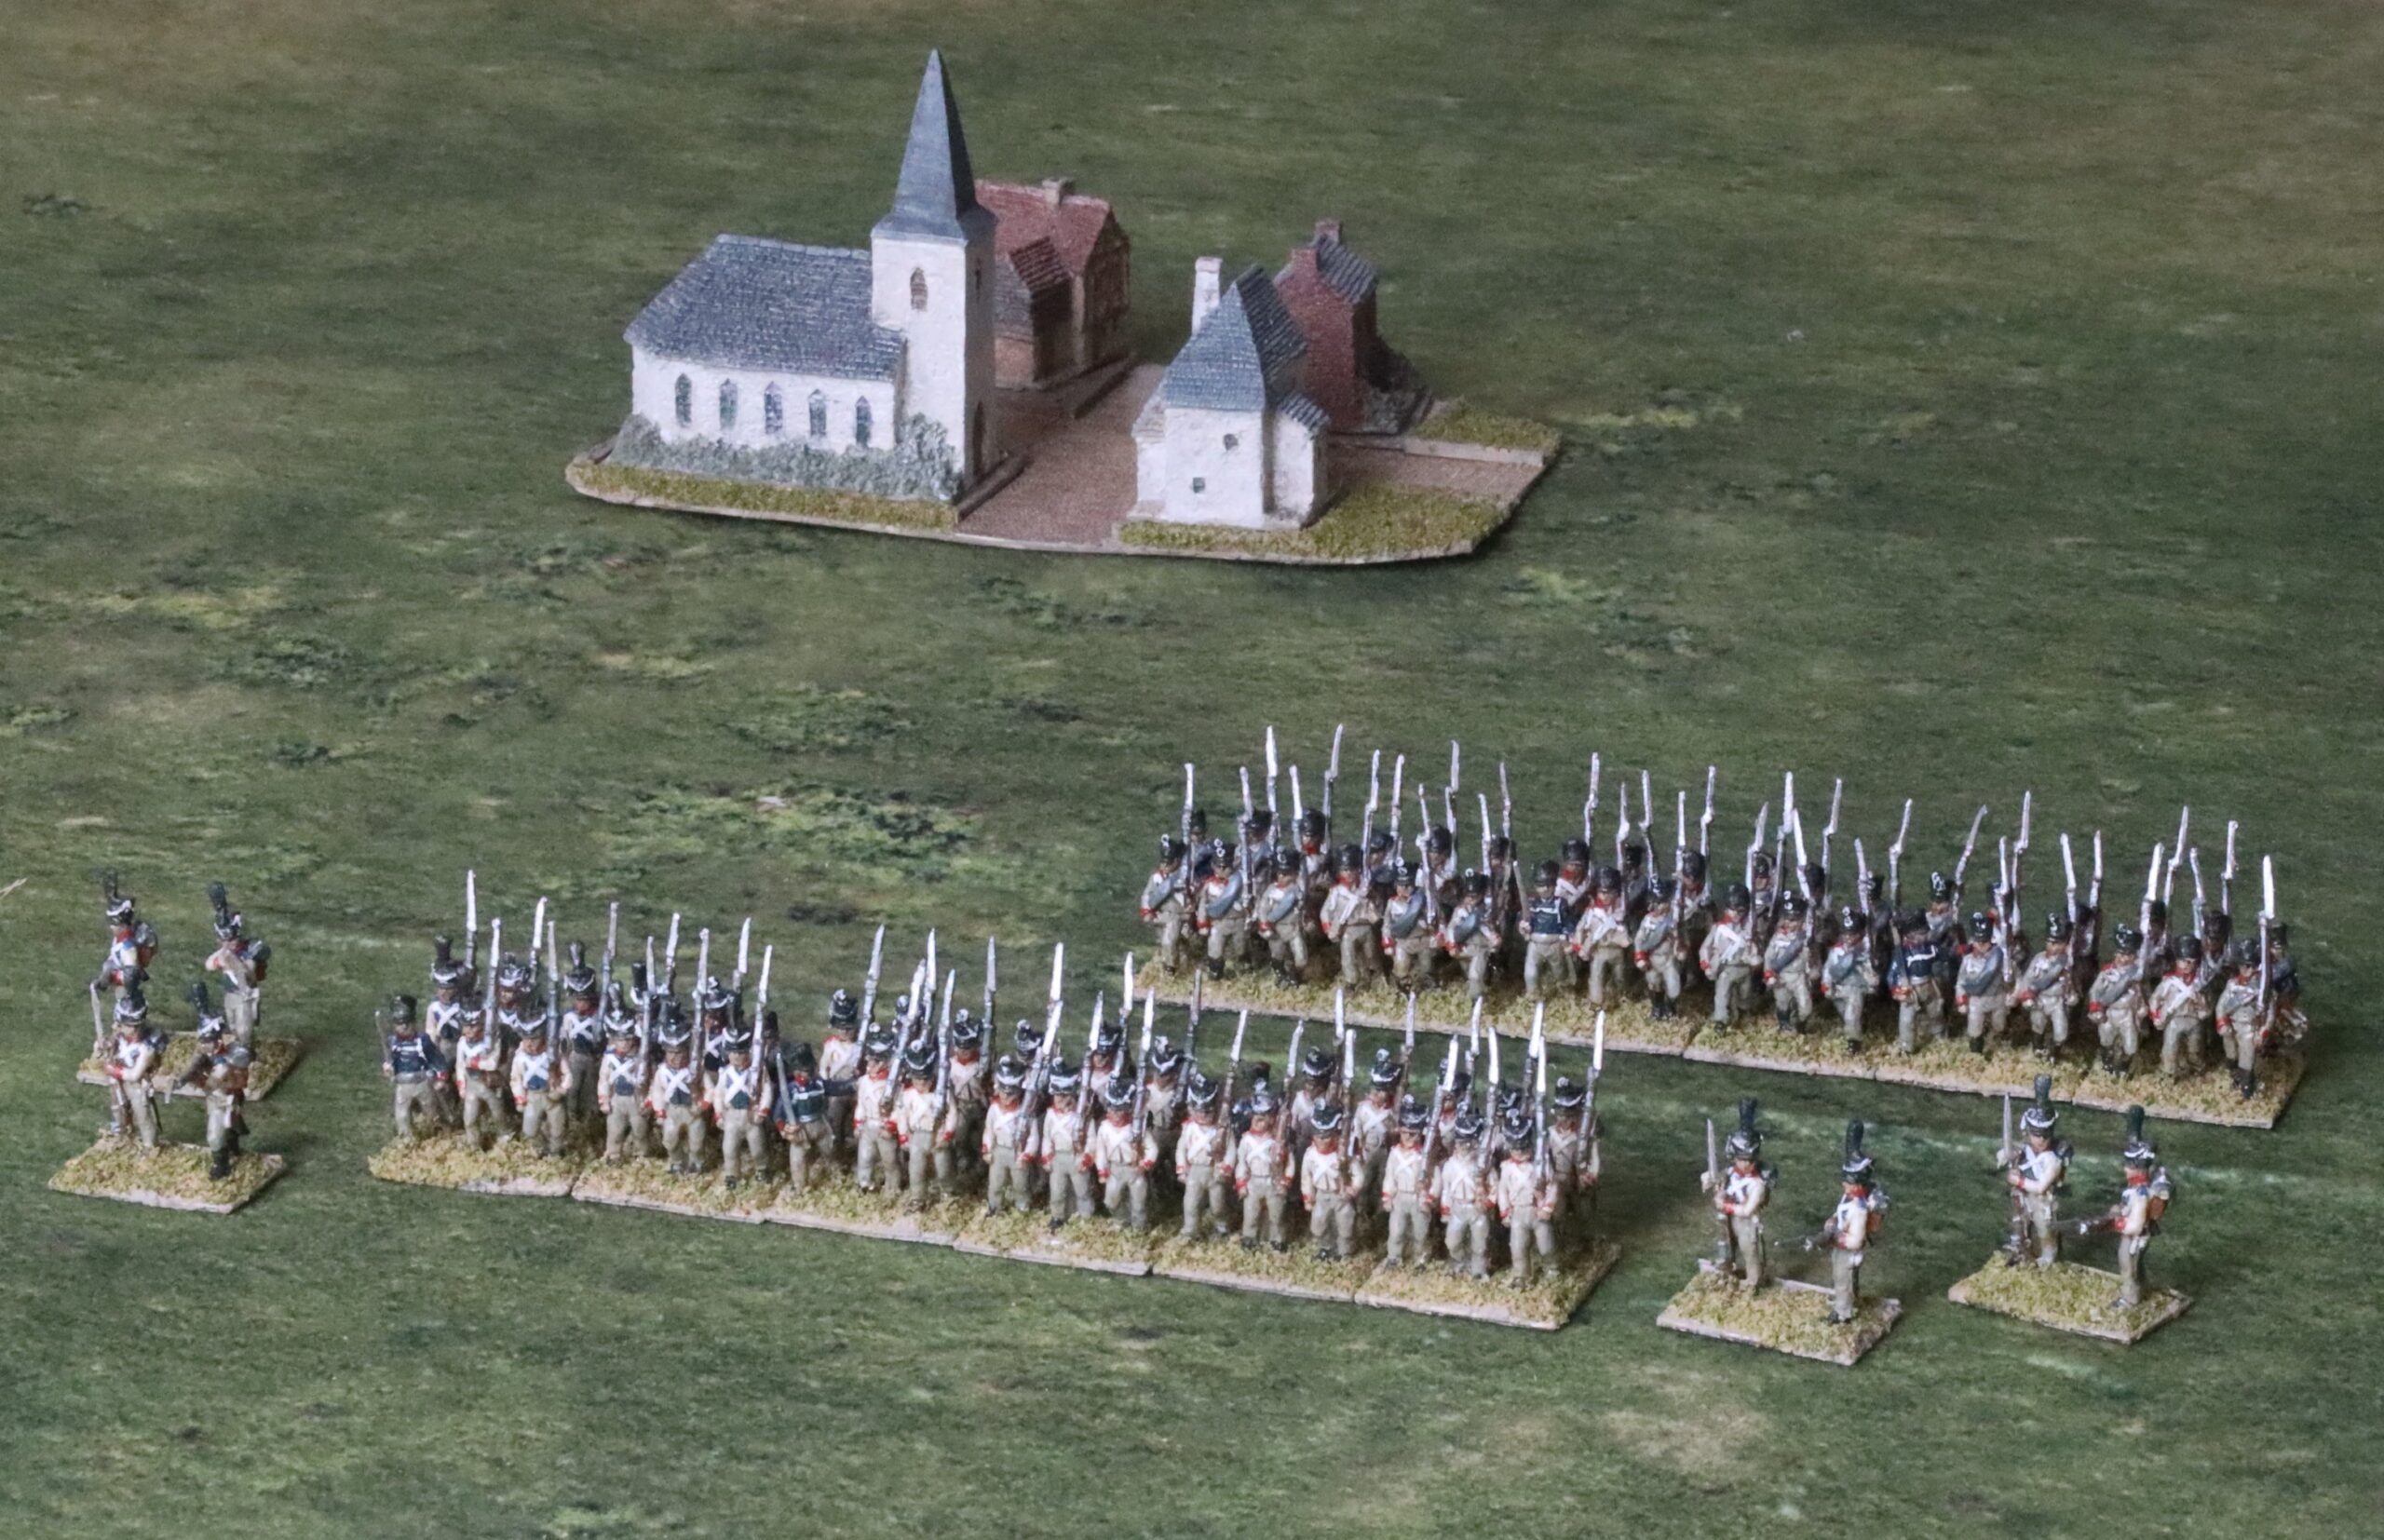
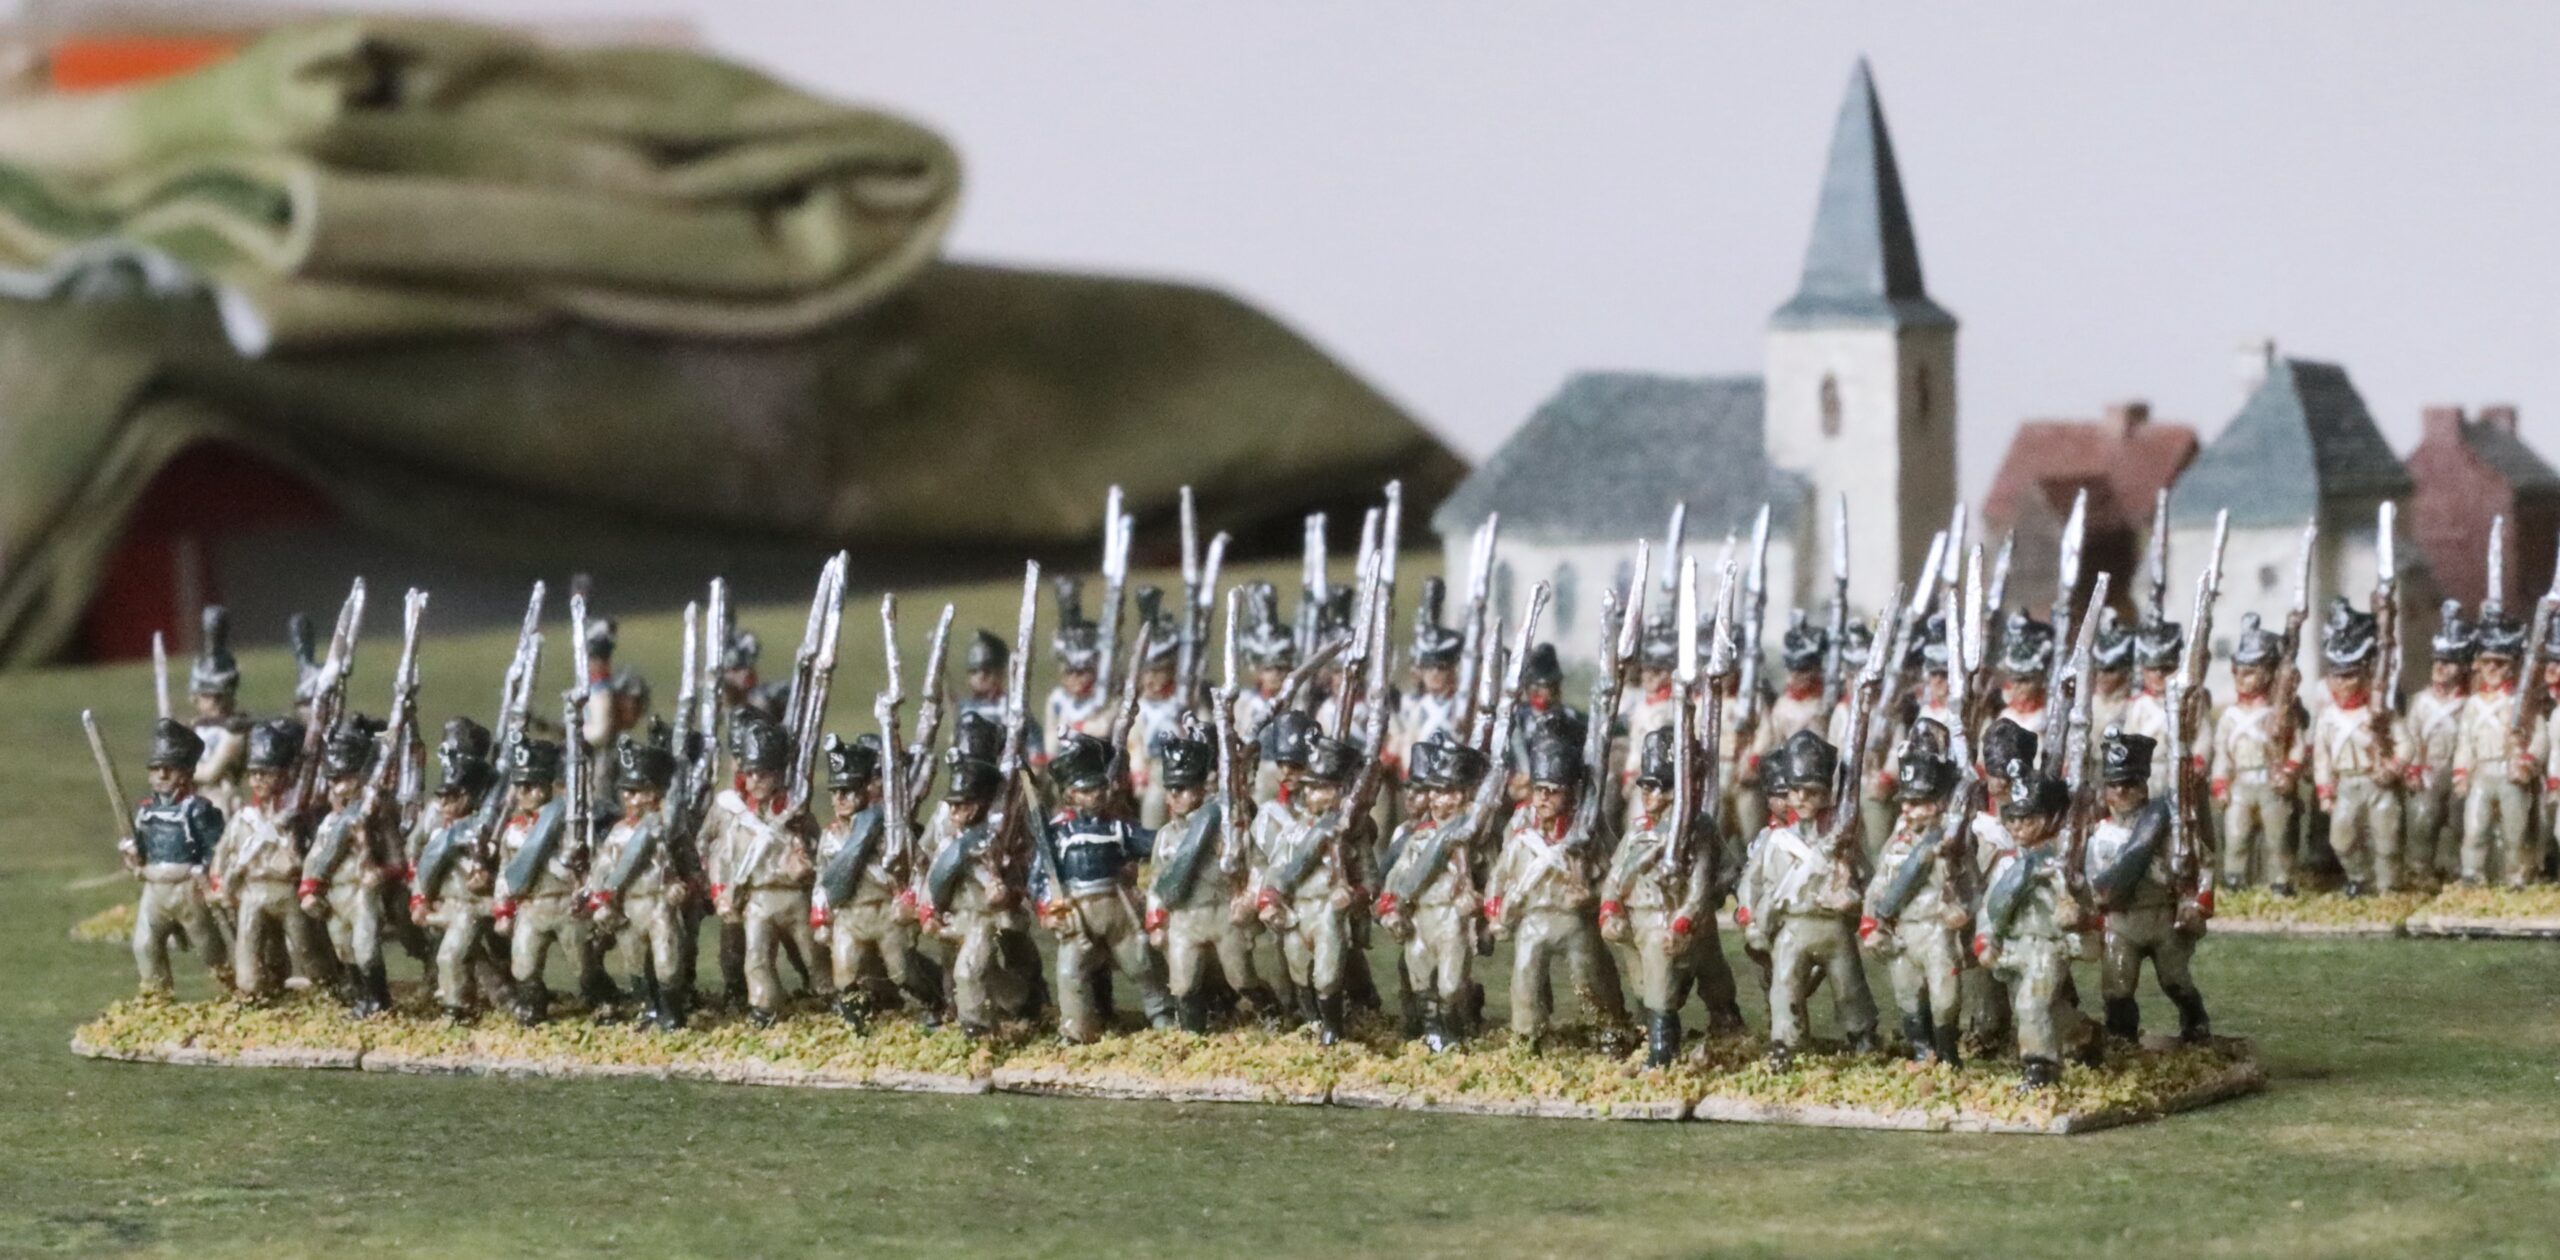
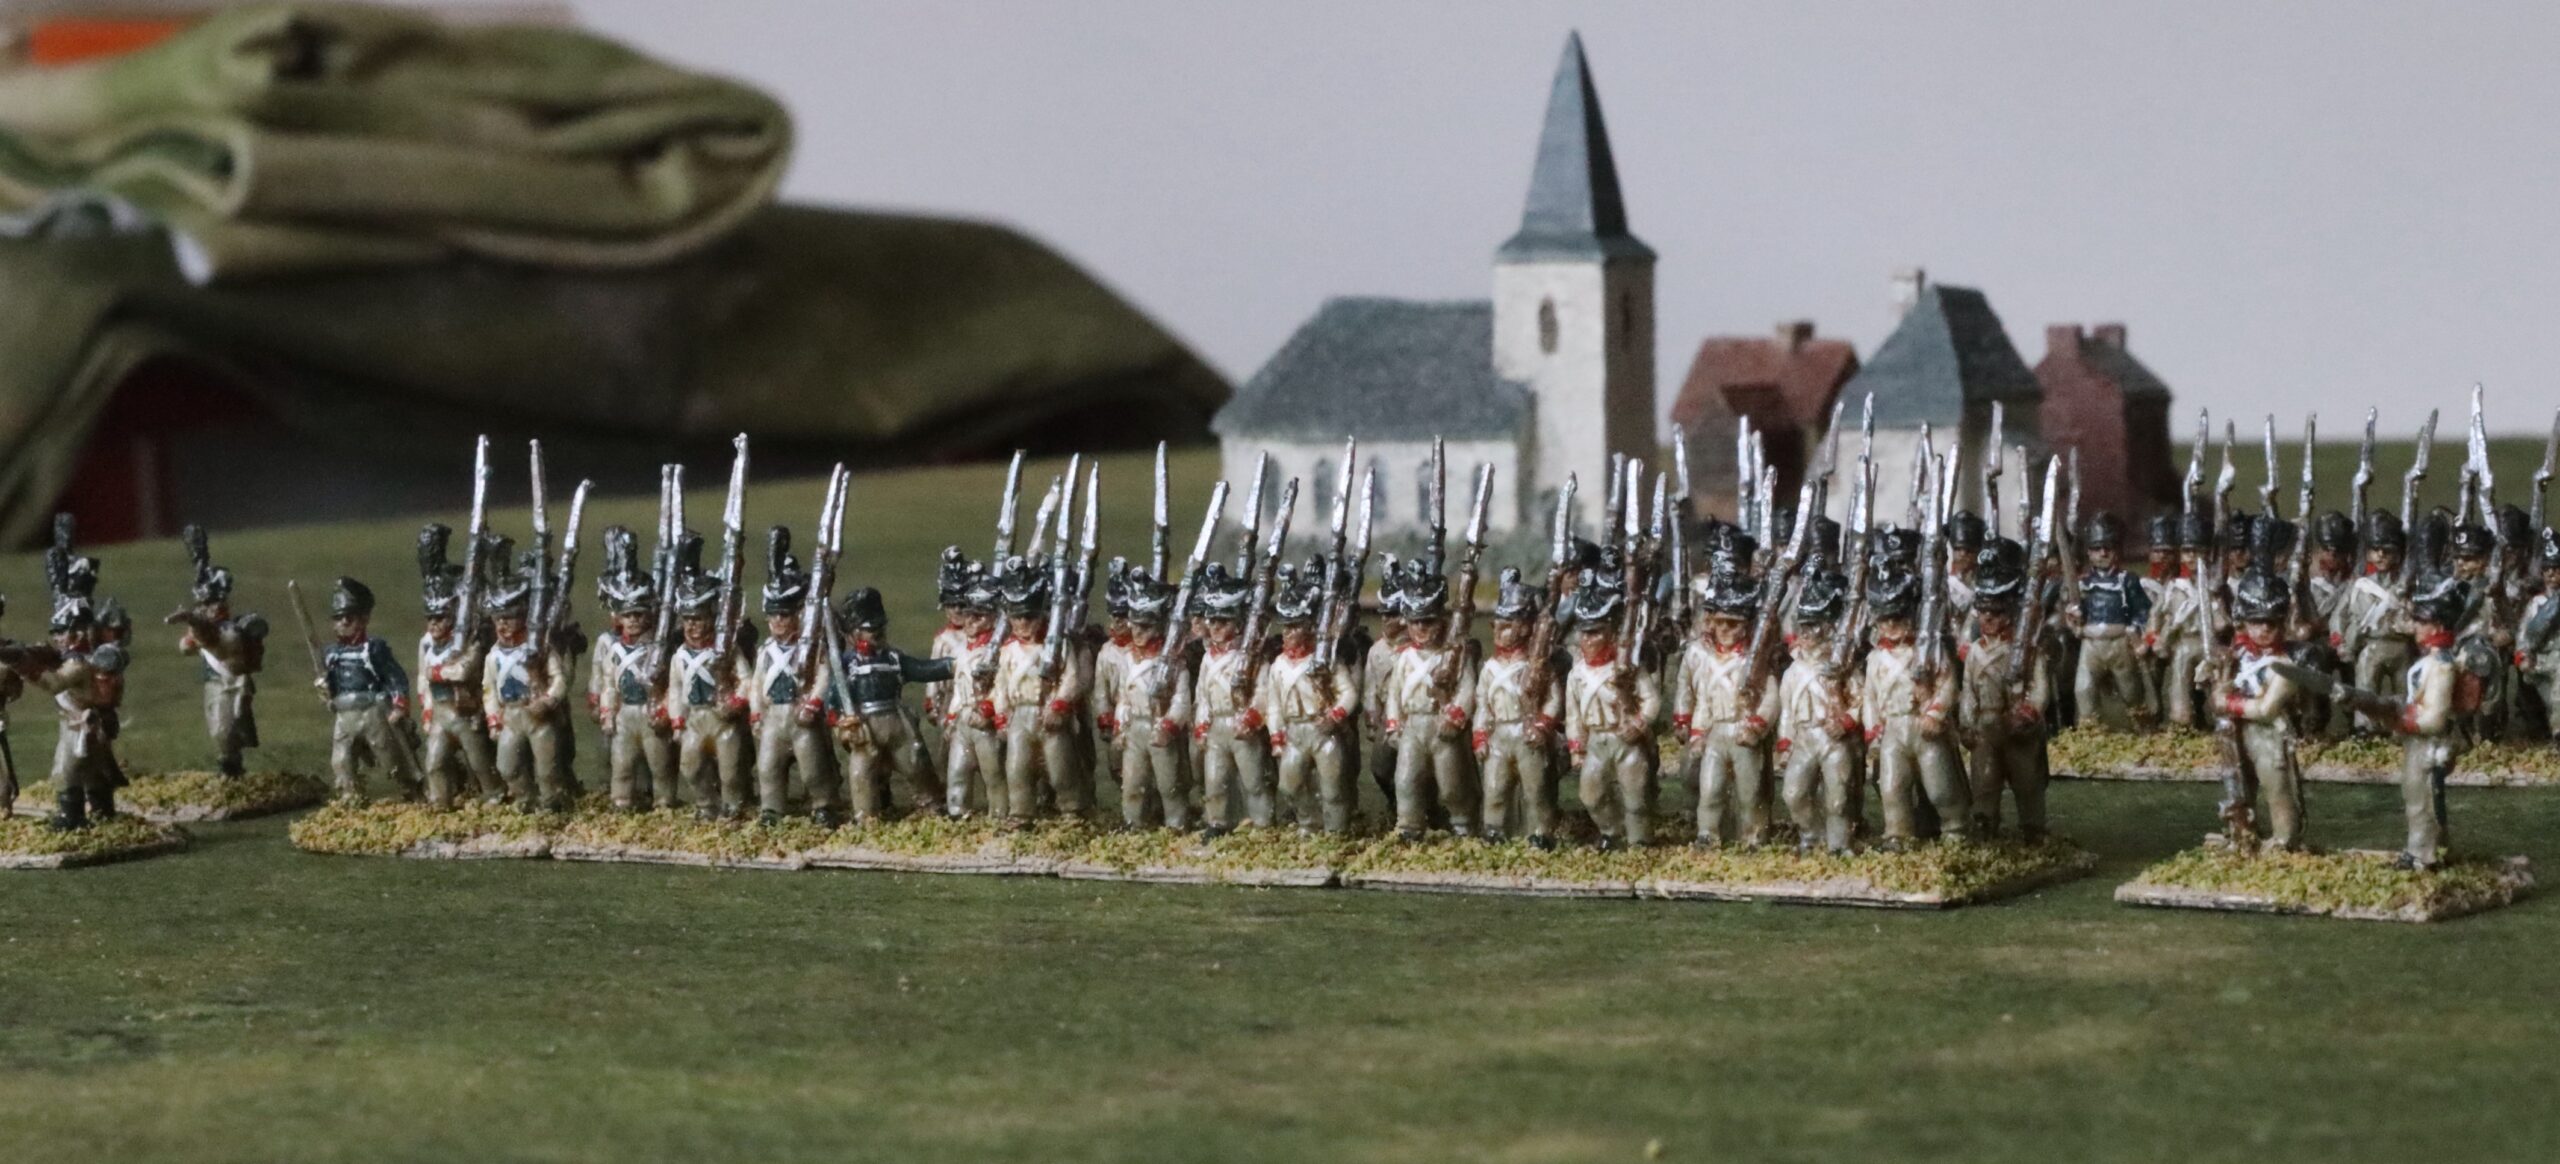
My top project for the moment is 1866. But while I was waiting for my next order of miniatures from Pendragon (they cast to order, which takes a little time – a small cost for such an extensive range) I thought I was tackle something from of my Napoleonic 18mm lead mountain. Next in the queue were the Prussian 21st and 29th Infantry regiments, as they appeared at Ligny in 1815.
The figures are entirely from AB – the first of my Prussians to have more than a scattering of figures from this source, as opposed to Old Glory 15s. They are wonderful castings, making up somewhat for my rather hurried painting. I had bought them a number of years ago, when I started to plan my Ligny project, and my supplier was grumbling a bit about my small order sizes (as I had asked them to provide command packs without standard bearers – which they did, to be fair). At that time my plan was that each regiment would have six bases of six figures (on 25mm squares), with some skirmish bases (two to base of 25mm by 15mm). I painted up two bases to represent each battalion. At the time I was thinking I might use rules which had two-base battalion units. My main grand tactical system has each base representing about 1,250 men – 2 to three bases per regiment – organised into brigades/divisions. Since then I have adopted Lasalle 2 for tactical games – which uses four base battalions. So six-base regiments make little actual sense on the tabletop. Also I don’t need the skirmish bases these days. I started off with three 12-base regiments (when I modelled Tippelskirch’s brigade), but went smaller after that to achieve more variety – and I am getting that. With the figures already bought, and no need to increase the overall numbers, I have stuck to my original system.
Prussian infantry in 1815 fall into roughly three categories. The original regular regiments (1 to 12 I think), dressed in the full regulation Prussian uniform and with official standards. Then there were the new regiments (up to 29), formed from the reserve regiments and a collection of other corps. The men had not yet been issued with their new uniforms (though the officers had bought theirs), so they wore a wide variety of uniforms from their previous formations – they also had to wait for their standards. The third category were Landwehr – which in turn can be divided into veteran (Silesian, Pomeranian and Kürmark in Blücher’s army) and newly-formed (Elbe and Westfalian) – all in variations of standard landwehr uniform. In that middle category my plan was to have the 25th Regiment (with 12 bases) based on Lützow’s freikorps but with others added in; the 21st with British-style uniforms (which I painted up a few years ago); and then the 23rd and 29th that were the subject of this batch.
The 23rd
The 23rd Regiment were one of the reserve infantry regiments, and had a grey uniform with a tailless jacket – in 1813 there were not the resources to uniform these regiments properly, so they used either imported British-style uniforms (originally destined for Spain or Portugal) or these scratch grey uniforms. In 1815 it was brigaded with the 21st Regiment (and a regiment of Elbe landwehr). One battalion was committed (later in the day )to each of Ligny and St Armand, and the third not committed at all, and presumably part of the rearguard as the Prussians withdrew. I used AB’s reserve infantry for the men, and standard command packs (though no standard bearers) for the officers and drummers (this probably wasn’t accurate for the drummers, but never mind). Two of the reserve infantry figures were in fact in standard uniform with tailed tunic. If I’d had more presence of mind I would have painted them up as NCOs in standard uniform, like the officers and drummers. But it was too late by the time this thought struck. AB did not produce any suitable firing figures for the skirmishers, so I did not produce any. I (regrettably) have no use for them in any of the rules systems anyway. I like the visual appearance of skirmishers, but it is so hard to give them a role in games systems that doesn’t just clog things up.
The 29th
The 29th regiment. The Fusiliers (grenadiers) are on the left.
The 29th Infantry Regiment were one of two regiments (the 28th was the other) formed from two regiments of Berg infantry incorporated into the Prussian army, after serving in Napoleon’s armies. The French repeatedly urged them to desert back to their old allegiance – but to no avail. The 28th was badly mauled prior to Ligny in the rearguard actions. The 29th was committed to both Ligny (the Fusilier battalion) and St Armand (the Musketeer battalions) – and much earlier in the day than the 23rd (they were in I Corps, not II Corps like the 23rd) – and so would have seen much more fighting. The 29th was formed from the 2nd Berg regiment, and its Fusiliers were based on the combined grenadier battalion. I wanted two bases to reflect these ex-grenadiers. For the men I used AB Saxon infantry, which are a reasonably close fit. In fact, the shako cords would have gone, and there would have been a black and white Prussian cockade on the front of the shako. These might not have been that hard to incorporate – but my aim is to get these unpainted figures table-ready as quickly as possible. The command figures are standard Prussian (though again, not accurate for the drummers – such a shame you can’t buy figures individually any more). In the battle the men were told to wear greatcoats because the officers stood out too much in their dark uniforms. I bought one pack of eight Saxon grenadiers for the Fusilier battalion. Even with two command figures that left me two short – I used normal line infantry, but put them in the second rank. this time AB did have suitable firing figures for skirmishers. Since they had plumes I painted them up as Fusiliers. I will find a use for them some day!
The standard uniform for this regiment was white with red collar, shoulder straps, cuffs and turn backs – but white lapels, piped red. The ex-grenadiers had a black plume and blue lapels – which apparently all the Berg infantry had when allied to the French. The trousers for this unit are usually portrayed as white, but my of the sources suggests they were grey in 1815. That’s what I chose to represent. For Lasalle I will quite likely combine two bases from this unit with two bases from the 23rd – and the grey trousers would make this less jarring.
Technique
The idea these days is to try to get the figures table-ready quickly. So I based them first, using my standard technique of acrylic gunge mixed with sand and white and raw umber paint as the matrix. The bases are thick paper, with magnetic sheet backing. The hope is that thinner bases blend with the table better (though I do use thick bases for 6mm and 10mm miniatures, for ease of handling) – accepting the risk of warping. That’s one reason I don’t use a water-based basing matrix. I still let them cure on a flat metallic surface – but they still bend a bit.
After basing they got an undercoat. I use white gesso mixed with a little Raw Umber acrylic paint (student quality). I have seen some debate on Facebook as to whether a special undercoat is necessary. For metal figures I have no evidence that specialist paint is needed for adhesion – though plastics are a different matter. Gesso is meant to tighten as it dries, so reducing the risk that detail is swamped – a risk if applied thickly with a standard brush – but not so much if applied from a spray can or airbrush. I’m not so sure that this is a significant effect though. The best primer for shrinkage purposes I have used was a specialist metal primer from Citadel – which dried in a lovely thin coat. But the massive tins this comes in are not very convenient! With the miniatures already based an airbrush or rattle-can would have been hard to use – even with figures un-based I have never been able to get complete coverage with this method, so I only use it in model planes or vehicles. I used an old brush to apply. The Raw Umber (combined with the white of the gesso) gives a nice neutral tone than doesn’t jar if left unpainted.
After the primer I put on the basic colours: the grey, off-white and blue for the tunics and trousers, brown for the pack and a dark grey for the shakos and boots. These were all acrylic artist colour mixes, using Titanium White, Prussian Blue Hue, and Raw Umber. I didn’t use any black or grey pigments on this occasion (getting the grey by mixing the brown and blue). I also applied the flesh – using white mixed in with Burnt Sienna. After this I decided to try putting on the wash, following the experiment I ran with my 10mm 1866 figures. Except this time the wash wasn’t a water and ink mix, but oil paint (Umber) and medium. This is a great way of doing a wash (or glaze, more correctly) as it distributes the pigment better. But it leaves a semi-gloss finish that doesn’t take further paint well, and a very bad idea when there is further detailing to add! After this I applied the detailing – facings, weapons, etc. This was the most time-consuming phase of the whole project and took me about three two-hour sessions, each of the previous phases taking a single session or less. To finish the paintwork I gave the figures a coat of matt varnish – again applied with a brush. This varnish still leaves a slight sheen (unlike the rattle-can stuff).
The final step was flocking the base. I used a mix of fair standard scenic flock – mixing it to ensure that it wasn’t too dark, and not mixing it to throughly so there is a little variation. I have been experimenting with short-cut static grass recently – but since my 18mm Napoleonics mainly use flock, I decided to to stick to this. On this occasion the mix was paler than any of my other Napoleonics – I think this brings out the figures better. I don’t spend a great deal of time doing up bases – as I pack them tight with miniatures, leaving little room for anything else.
Conclusion
Left to right: 23rd, 29th and combined – organised for Lasalle
My final picture shows the new units ready for Lasalle. I have a game coming up, and I’ll give these new units an outing then. Incidentally the mat that they are standing on is a new acquisition – Geek Villain’s Autumn Grassland. I already have Geek Villain’s Sicily mat – but that has too much beige games set in Waterloo. I love the fleece material though. I chose the Autumn mat because it was the most muted of their grass offerings – and I am very wary of the colours being too bright on commercial products. Some of the greens are a bit strong, but the colour texturing is quite nice. I wish they did a mat with a pattern of fields but no roads or other terrain details! The buildings in the background are 6mm from the Total Battle Miniatures 100 Days range, painted by me.
Overall I’m quite pleased with these. The glaze is a bit heavy-handed, and some of the detailing is a little sloppy, but they meet my standard perfectly. I think I now have enough infantry bases to run a game for Ligny – and the cavalry is there too for the Prussians at least. I need to finish the artillery next. After that I have a nice lot of AB Landwehr figures which I want to paint up as Silesians, and then I want paint up the remaining bit of OG standard Prussian infantry to use these up as well as some spare flags. After that there two more cavalry units before I draw a curtain on the Prussian lead mountain.
I began 2023 determined to focus on completing projects already started, my Napoleonics in particular. This didn’t last long, as I worked on reviving my Great Northern War armies and developing a rule system to use them. That show is now done. I have now decided to start a brand new period in a brand new scale. What is going on?
The main thing I hadn’t reckoned on was a revival of my actual gaming. I’m now part of a monthly “club” of half a dozen players from my old club, South London Warlords, that meet in the home of one us. I need games that are conducive to this format. I am also in the process of joining a more local club in Tunbridge Wells. Where that will lead I’m not sure – but that I will need material ready for the club game format. I can put on a game of Lasalle 2 readily enough with my Napoleonics – but these rules are unfamiliar to my fellow gamers. And I hesitate to suggest that they buy a rather pricey rules booklet. These published rules aren’t easy to scan to distribute, even if that was legal – and the clever activation system is a bit awkward in a multiplayer format.
I have been eyeing European wars of 1859 to 1871 for some time. I have been buying Bruce Weigle’s rules, playing the odd game with my friend George, leading up to participating in an 1859 game (part of Solferino) led by Bruce himself at Newbury in 2019. I am also owner of Chris Pringle’s Bloody Big Battles rules for the period, and tried to adapt them to the Napoloenic era – and acquired his extended scenario book. In addition, I have wanted to try out 10mm miniatures. It then struck me how suited this period is to the multiplayer format. On the battlefield the army command function had comparatively little influence, with corps and divisional commanders playing a more decisive role on the day (the army commander doing more to set the day up). Historically it is a very interesting period, marking the transition from smoothbore to rifled to breech-loaded infantry weapons and artillery. The battles were mainly between well-trained regulars, and the short wars meant that there was comparatively little of the complexities of attrition (until 1871, anyway). This makes the wars cleaner than the overlapping American Civil War, as well as the armies being a bit more interesting to look at, including the continued use of shock cavalry.
Three ideas converged. The first is that I wanted to play the battle of Custoza in June 1866. This was a close fought battle between the Austrian army and the Italians – and an interesting counterpoint to the disasters faced by the Austrians to the north against Prussian needle-guns. The second was that I wanted to try 10mm figures. My much loved 18mm Napoleonics are bigger than ideal for big battles, and I find 6mm (which I use for GNW) a bit wee. I wanted to see if I could get 10mm figures table-ready quickly by streamlining the painting process. Third I wanted to try basing figures 30mm by 20mm. My Napoleonics are on 25mm square bases, and my GNWs are on 20mm squares. These look fine when combined into multi-base units. Oblong bases look better when on their own – which they are for Bruce Weigle’s system, for example. This base size looks good for 6mm troops, and I thought they’d work well for 10mm too.
Perusing the Pendraken website, I saw that they did Italians for the period in 10mm. That tipped me over the edge and I made an order, to see how they looked. And I was off. There was a big psychological release being involved in a brand new project in a new period – one not weighed down by questionable decisions on scale and basing made long ago. I now understand why so many gamers do it so often, notwithstanding having failed to complete earlier projects. I have acquired a number of books, and I’m researching the history eagerly. My initial aim is to mount a game for Custoza. The starting point is the BBB scenario for the battle. BBB rules are perfectly workable (I think they work much better for this era than Napoleonics) – but they are still rules for smaller scales being made to work for big battles, with a rather artificial feel in that context. This criticism can’t be made of Bruce Weigle’s system (the 1871 rules adapted for earlier periods – which is what we used in Newbury) – which in particular allow bases to move individually without being forced into constrained base-to-base formations. But these rules aren’t really suitable for the sort of game format I’m planning – they’ll take too long. Besides they are designed for rather smaller battles (there is a Custoza scenario, but it doesn’t cover the whole field for the whole battle). So, fresh from success with my Carolus Rex GNW rules, I’m looking to make my own.
How about the Italians? I bought a Pendraken “army pack” with 90 infantry figures, 30 command figures, 30 Bersaglieri, 15 cavalry and 3 guns. Unfortunately they sent me the 1849-59 version, not the 1859 to 1866. The infantry were in tunics rather than greatcoats, the cavalry were dragoons rather than light cavalry, and I had grenadiers in place of Bersaglieri. I decided I quite liked to the look of the earlier infantry, and the dragoons were nice, and perfectly usable, too. The grenadiers were the main problem – but Pendraken were happy to send me a pack of Bersaglieri (they offered to replace the whole order, of course). So what I have is more an 1859 army than an 1866 one. Since 1859 is on the more distant agenda, that’s not a worry.
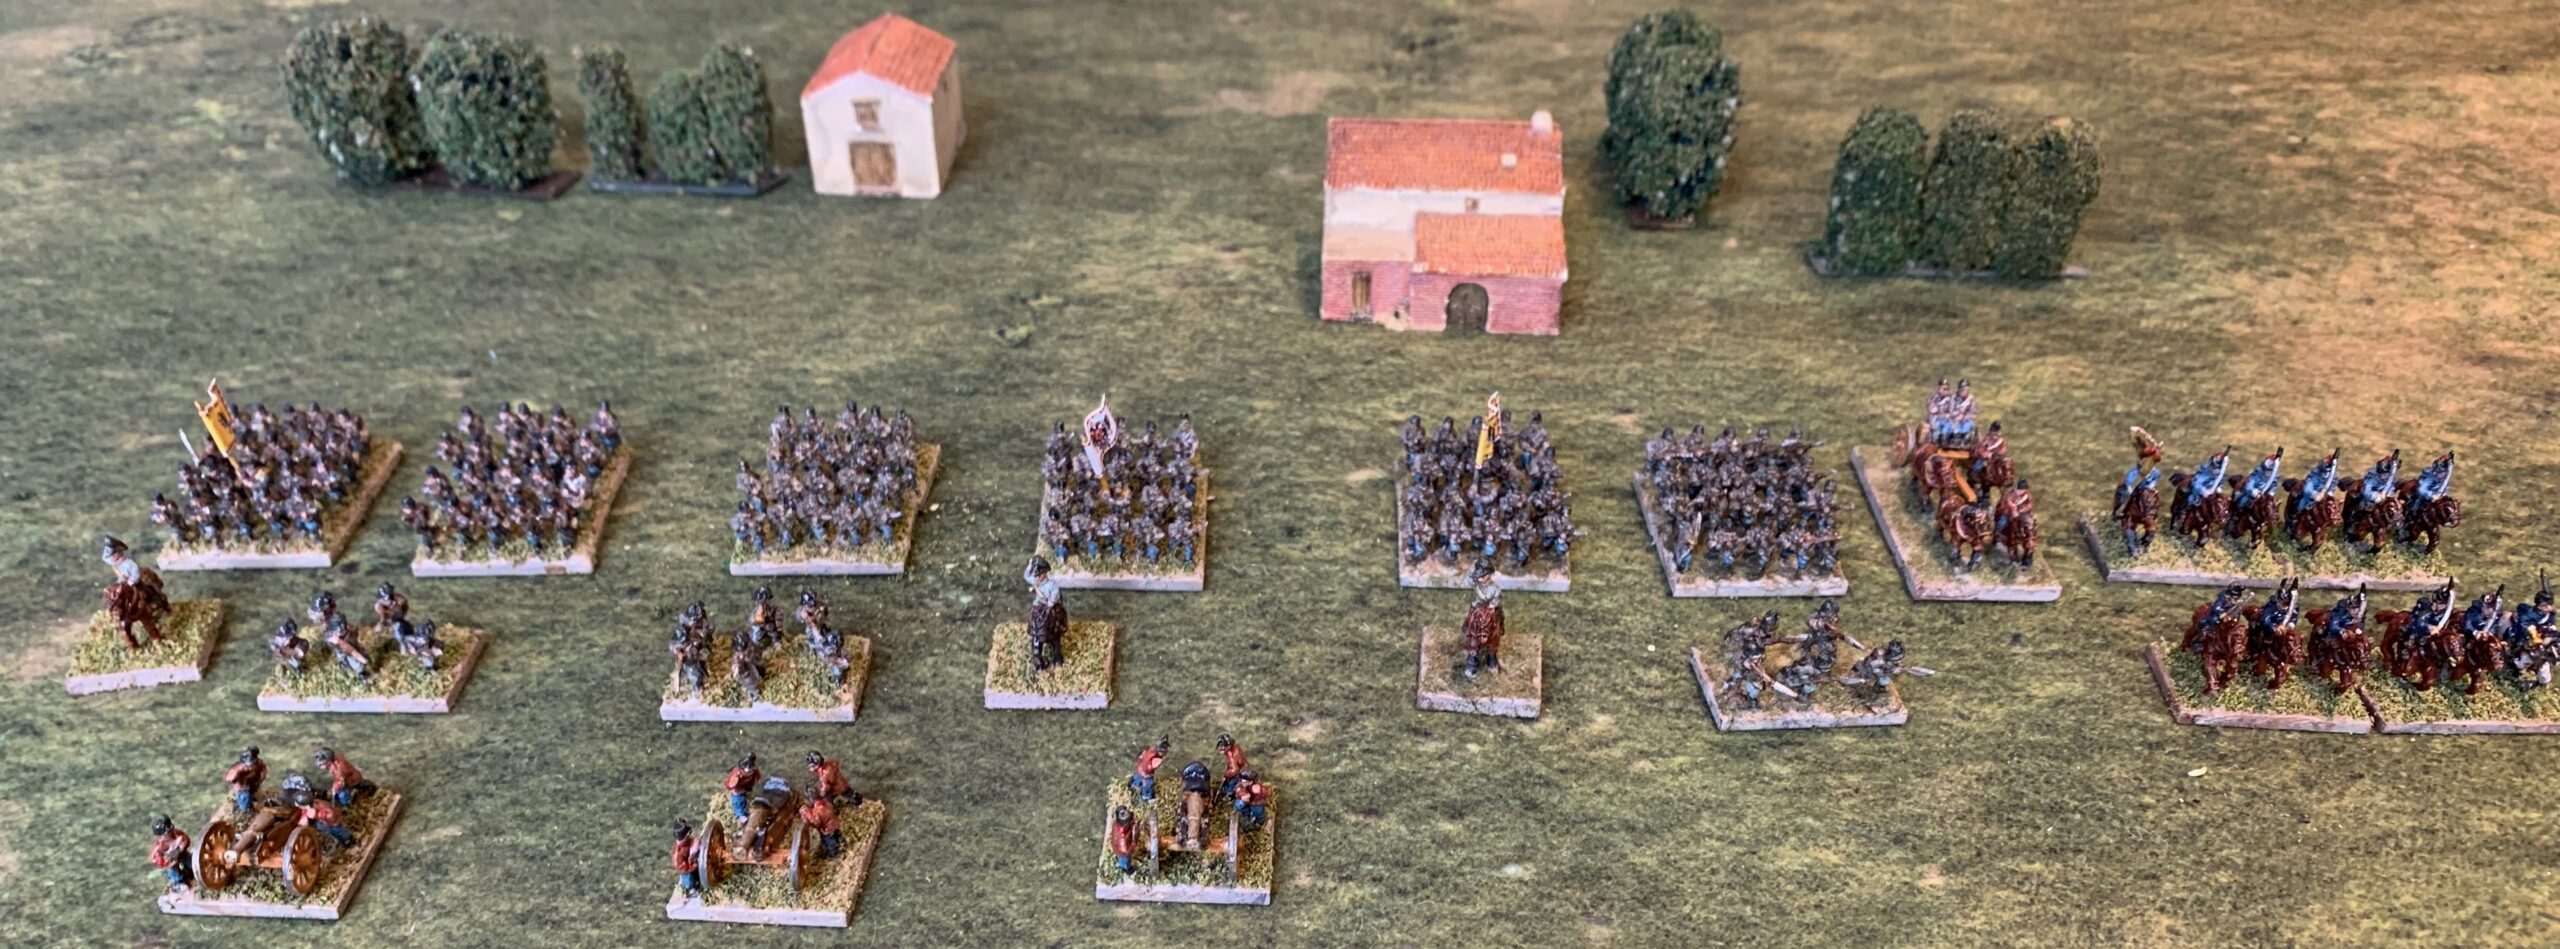
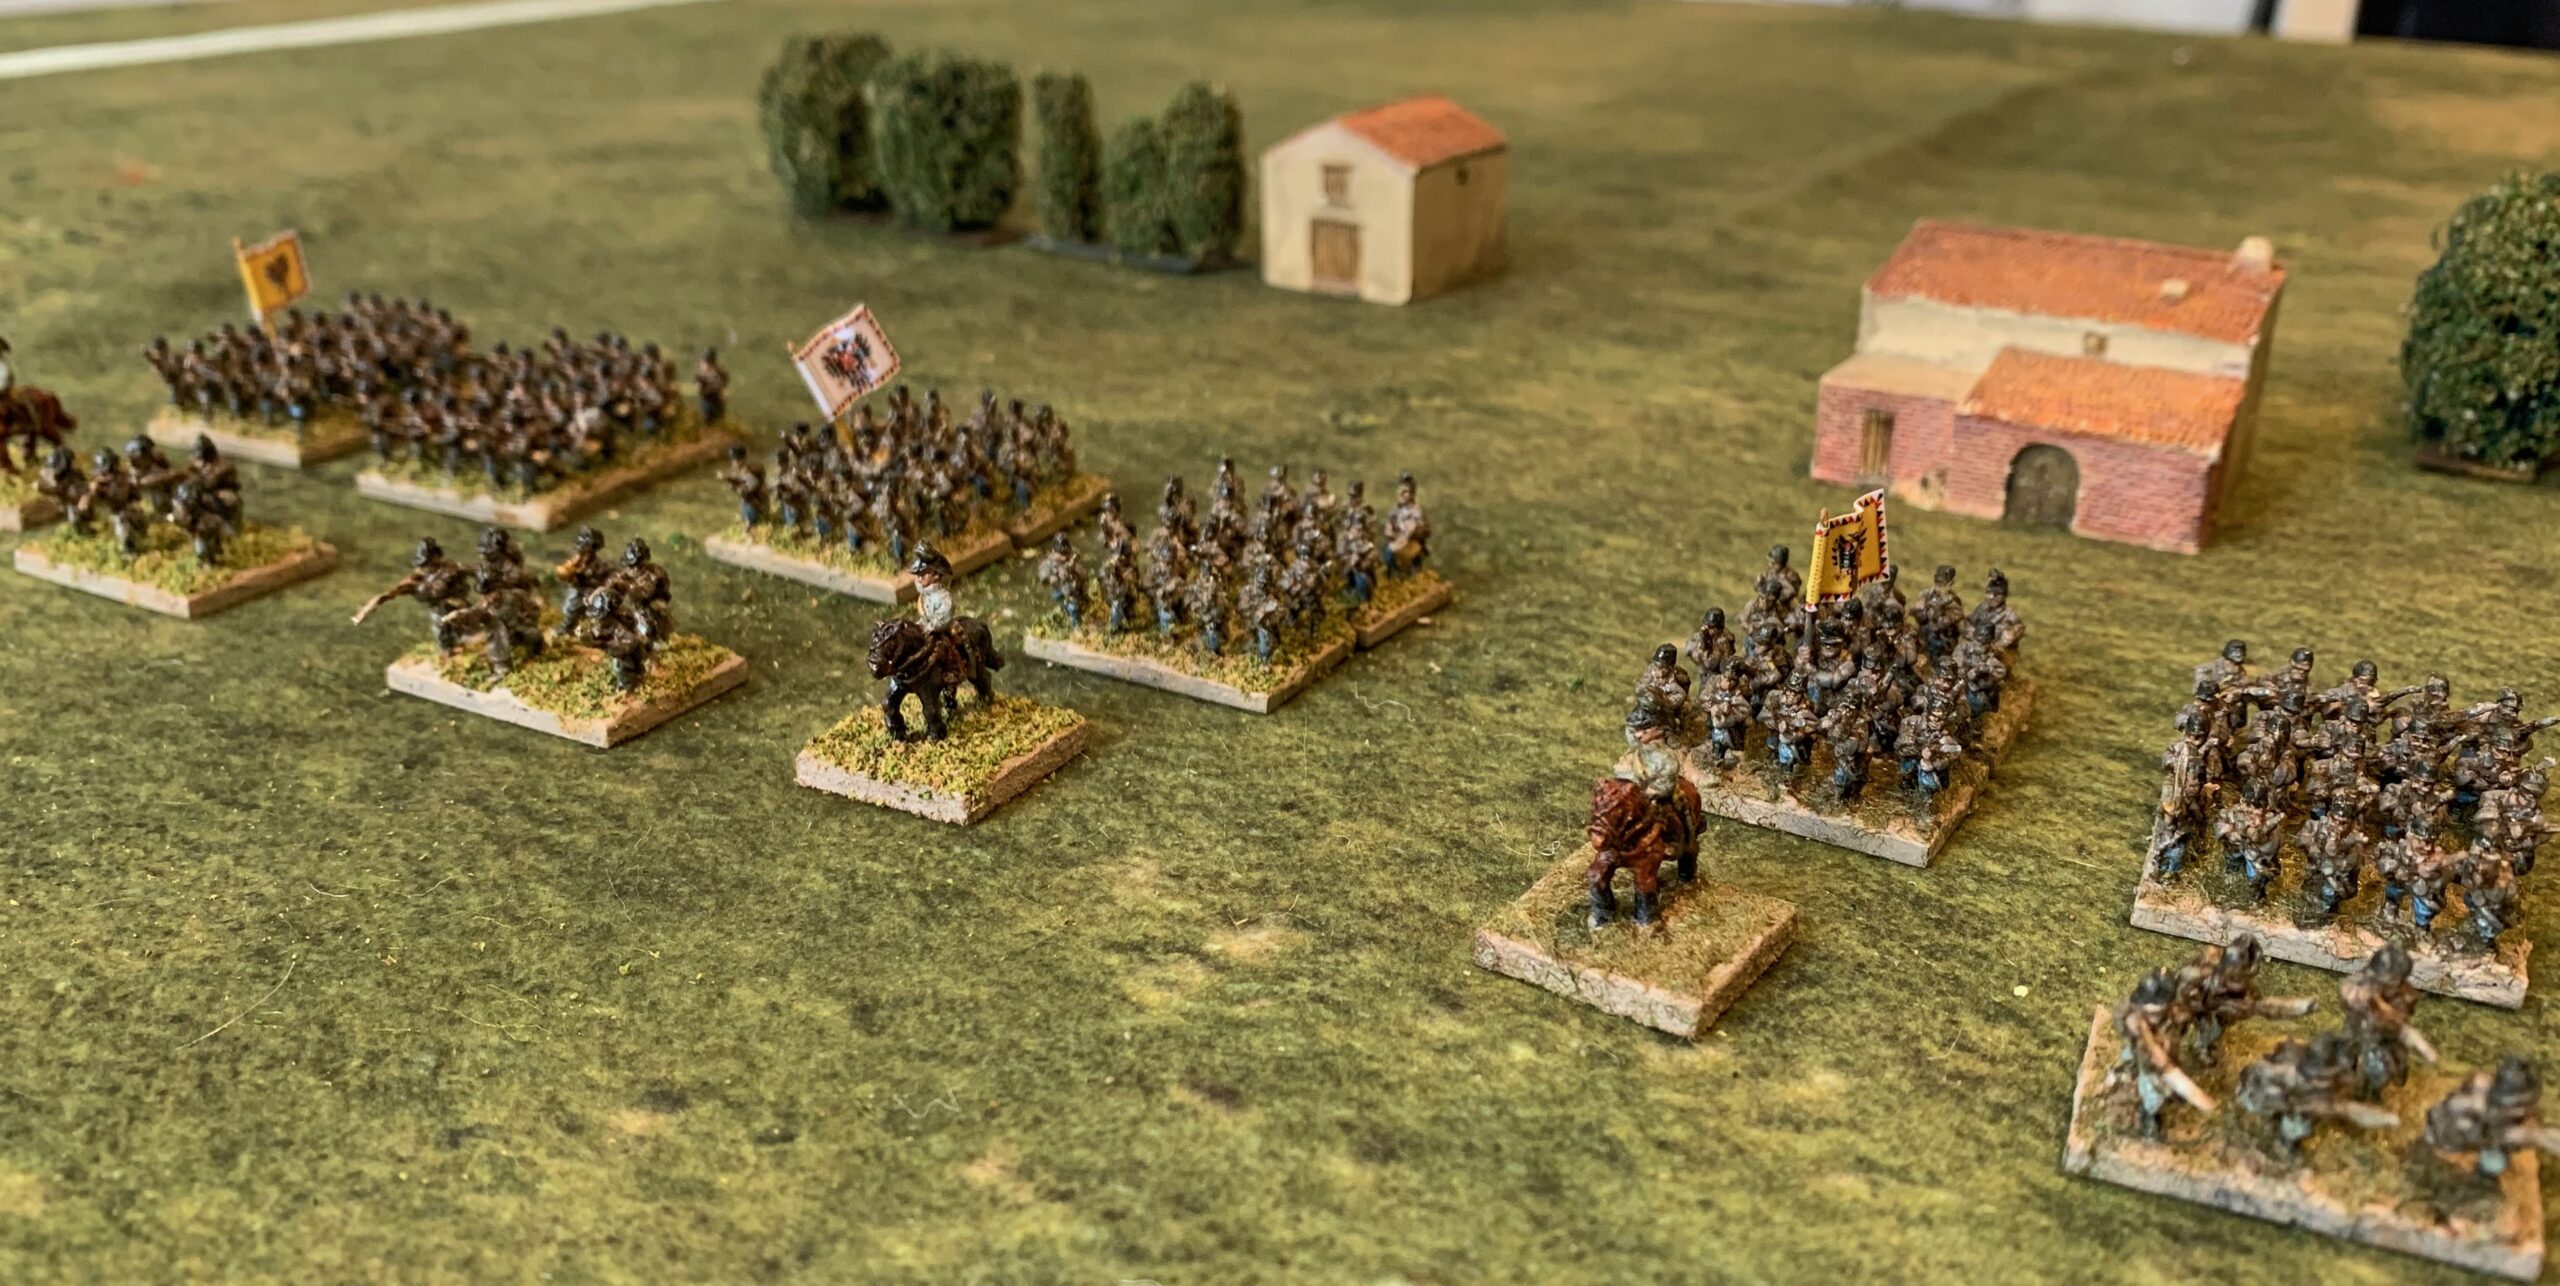
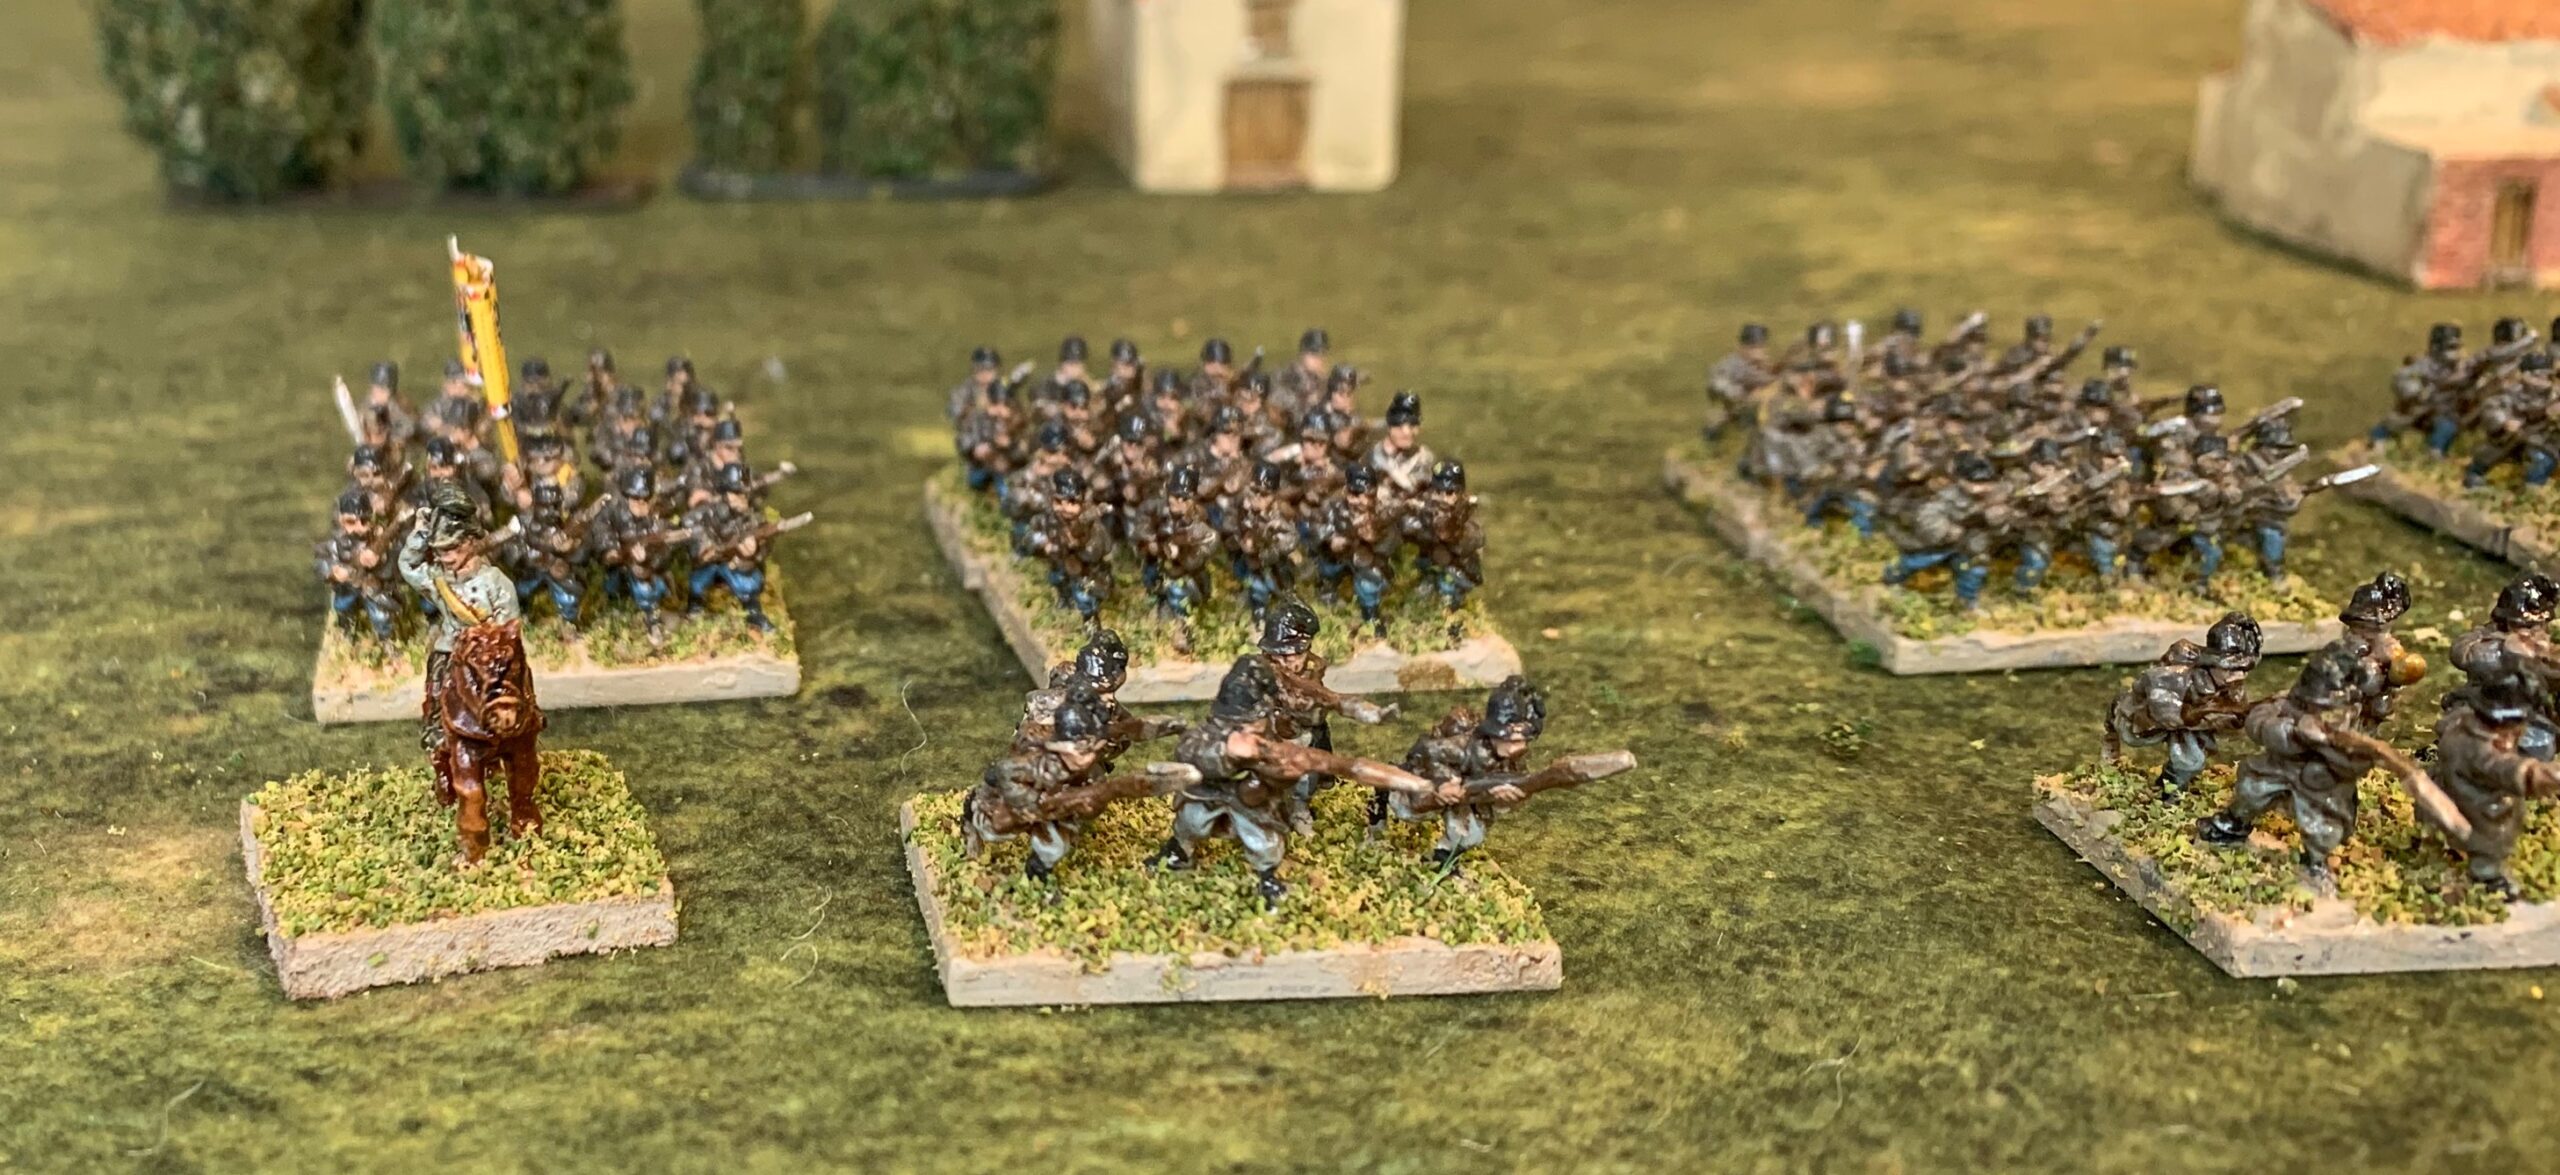
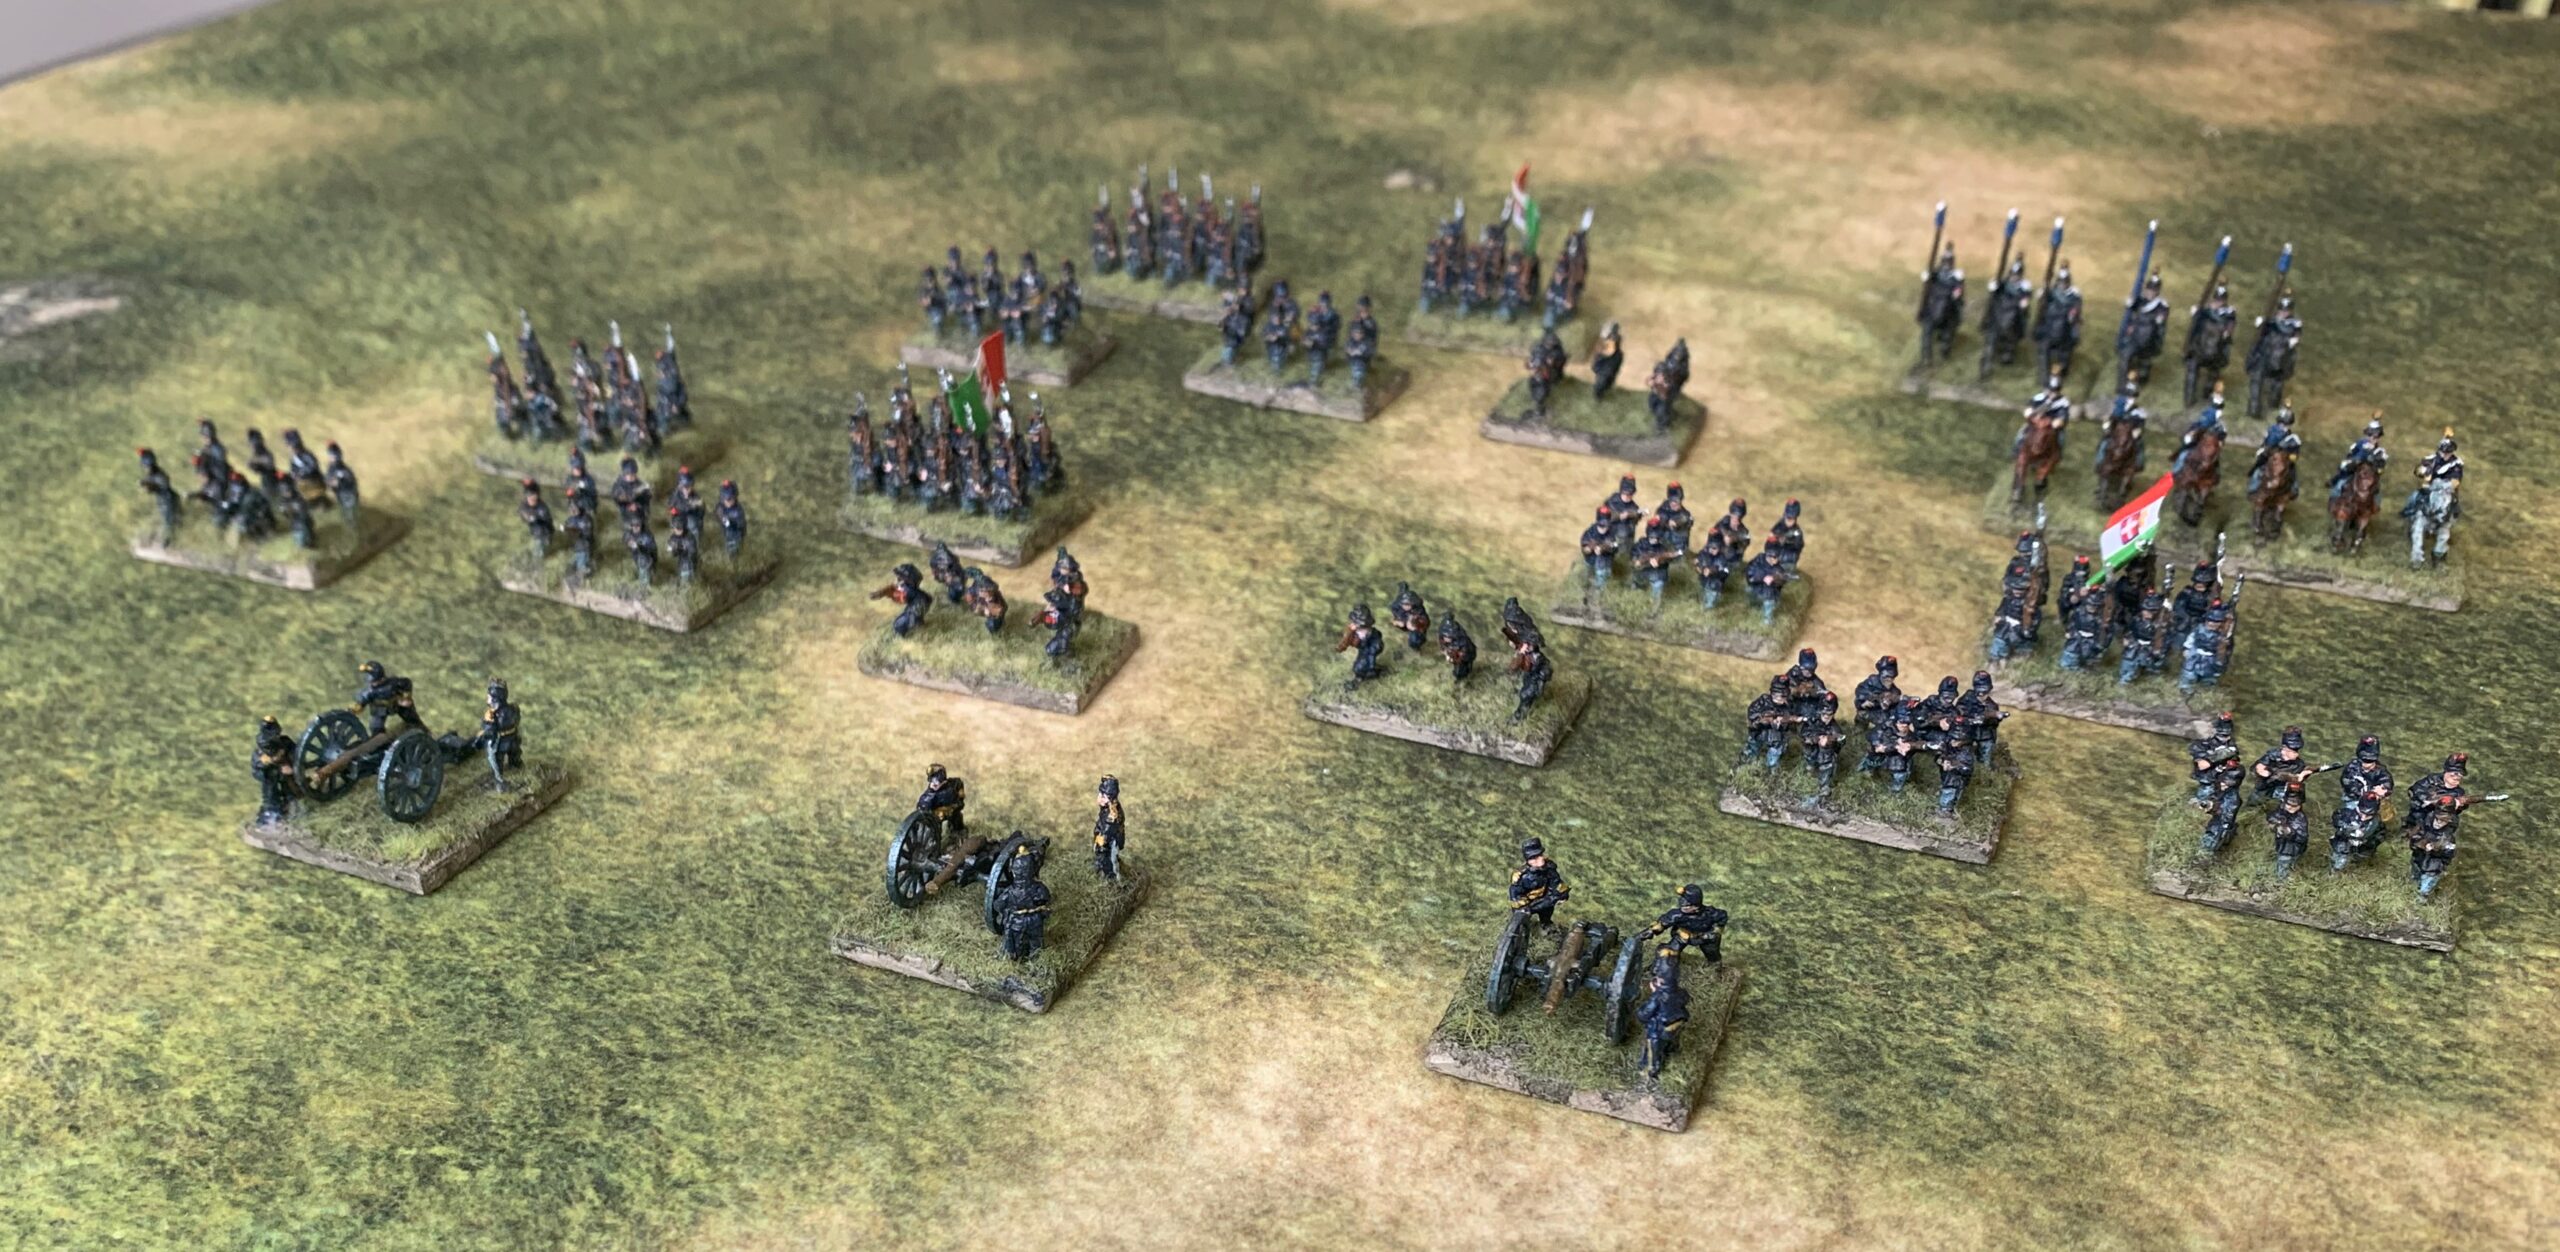
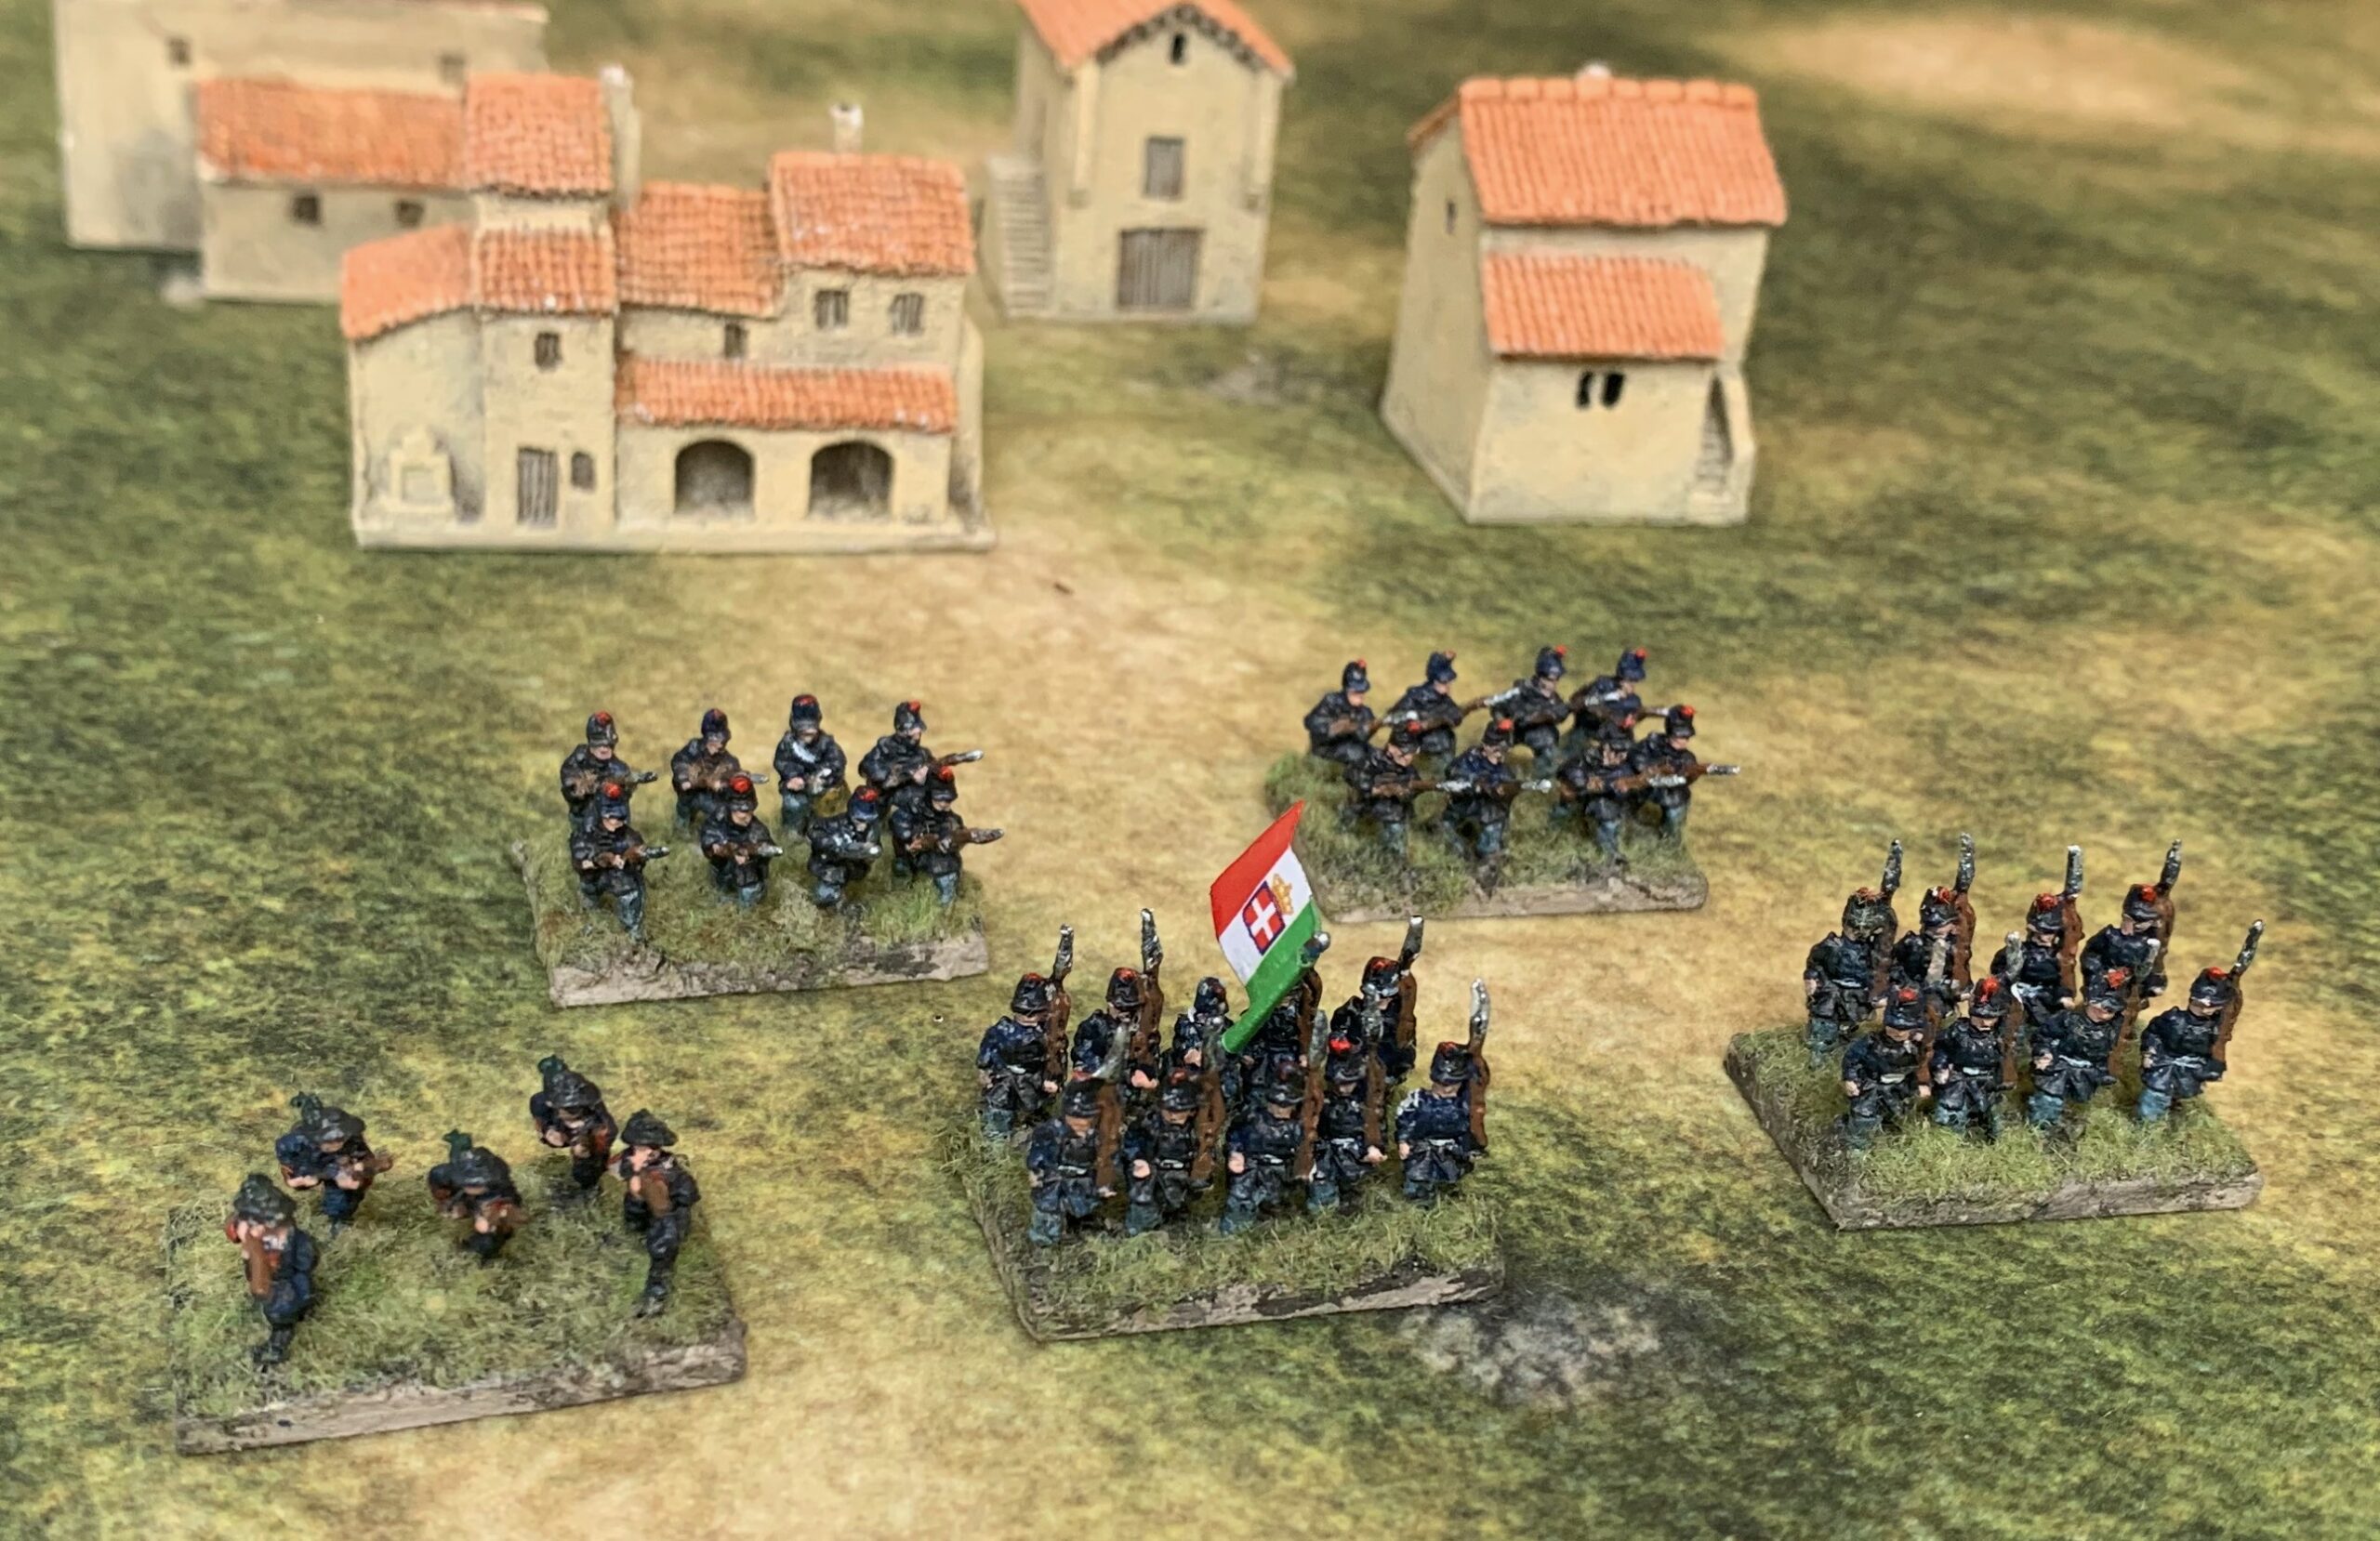
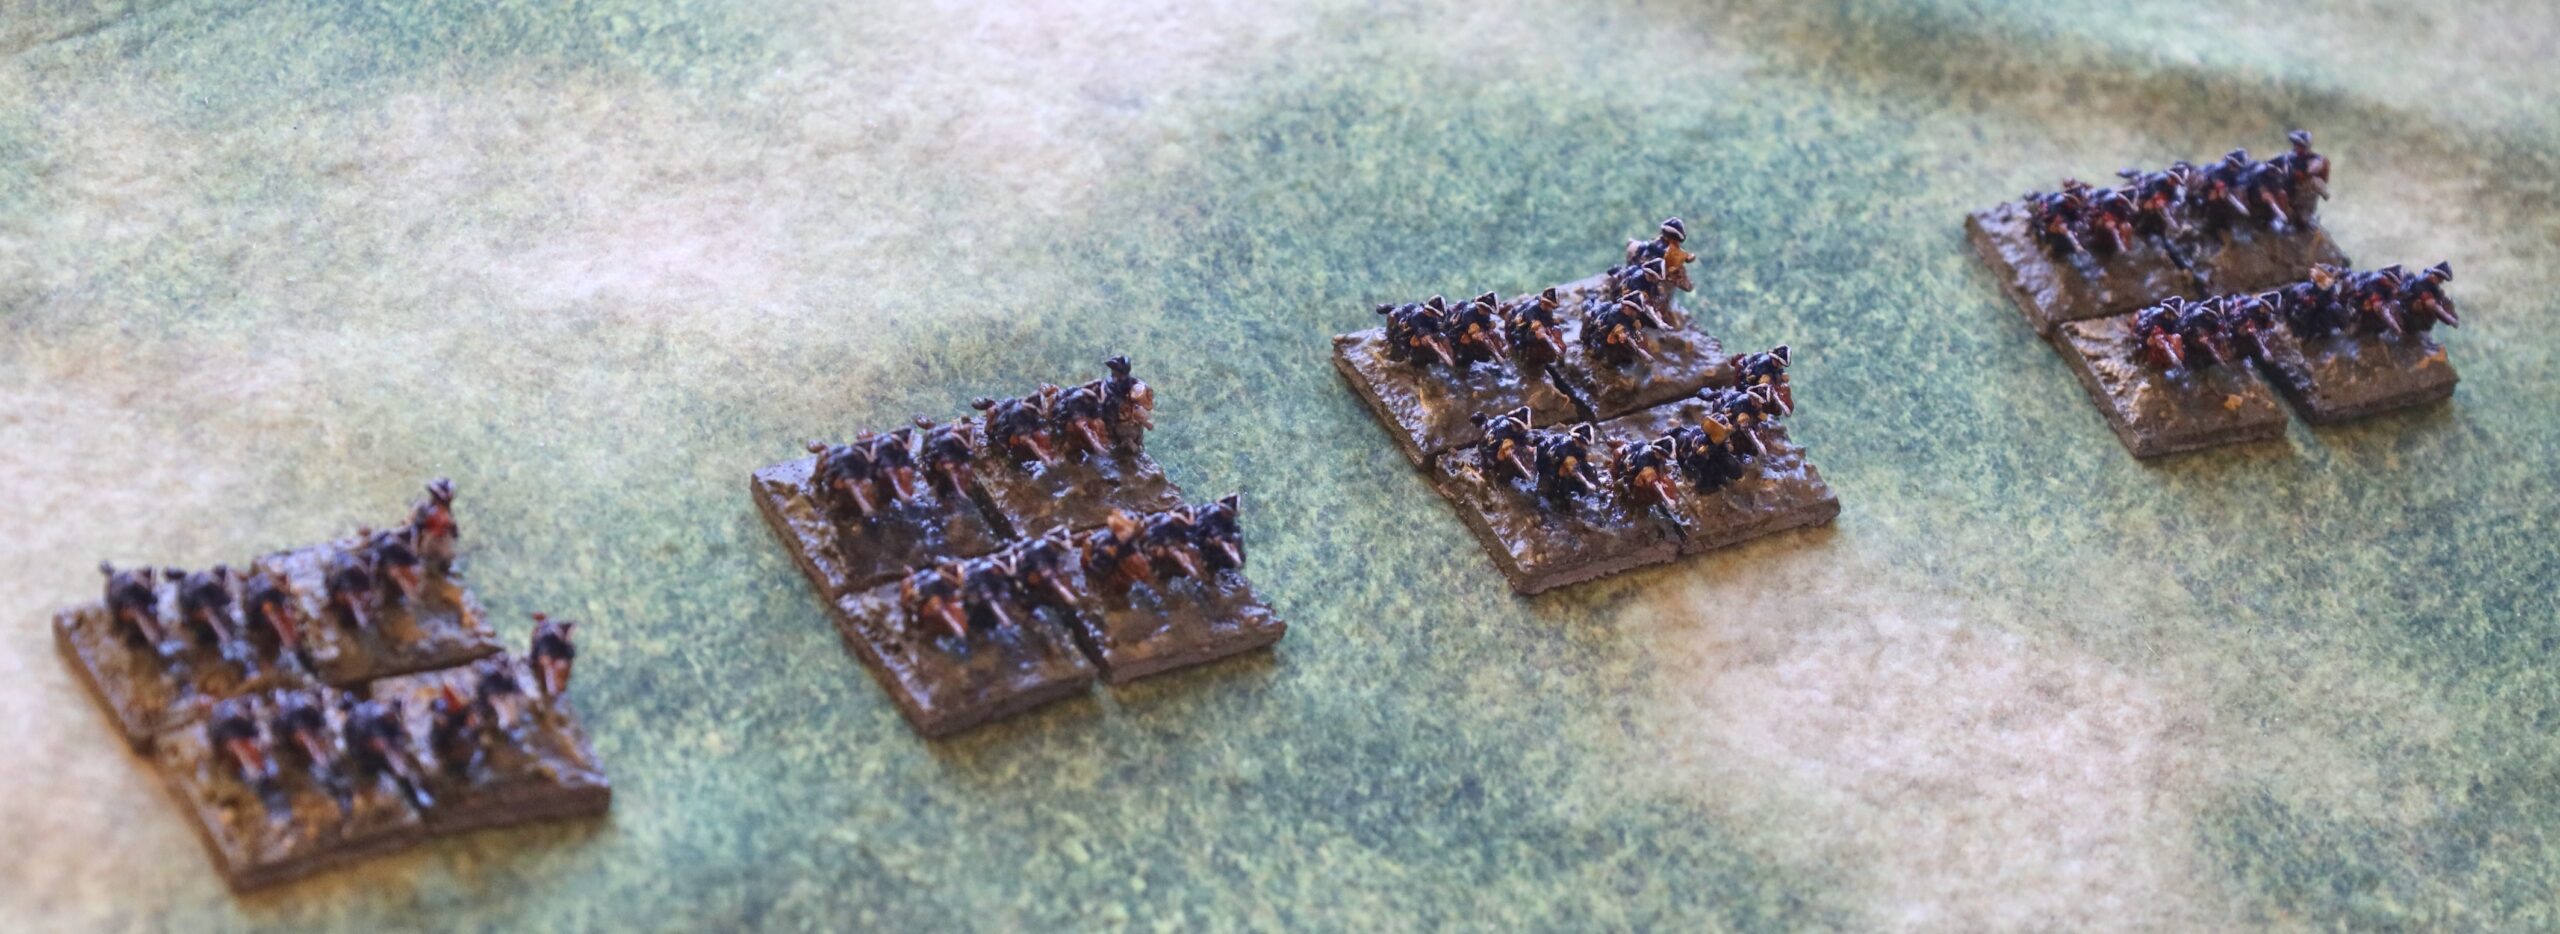
The next question was how many figures to put on a base? My first thought was 10 infantry or four cavalry. There is room. But then I thought I could get away with 8 and three respectively – since looser formations were starting to be used in this era. I mounted all the line infantry at 8 to base, except one flag base with 10, to see how it compared. For the Bersaglieri I put then five to a base. This is the result (with the 10-figure flag base):
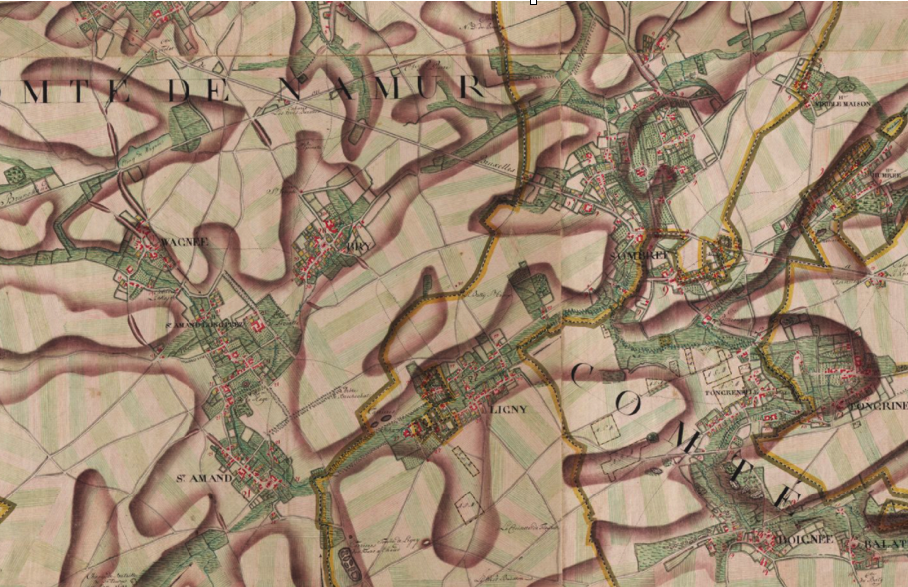
I made up three groups of four line infantry bases and one Bersaglieri, 15 infantry bases in all. Unfortunately I think the denser basing looks better – and illustrations from the era often show dense deployments. My plan is to mount my next batch, which will be Austrians, at 10 to base (or 5 or 6 jagers),and see how they look en masse. The Austrians particularly favoured dense formations anyway. The flags, incidentally, are from Pendraken. Given the general dullness of the troops (many wore greatcoats in the filed), the flags are an important feature. The Pendraken flags are quite basic, but do the job. They don’t do cavalry flags though, which might be a problem. Talking of cavalry, here they are:
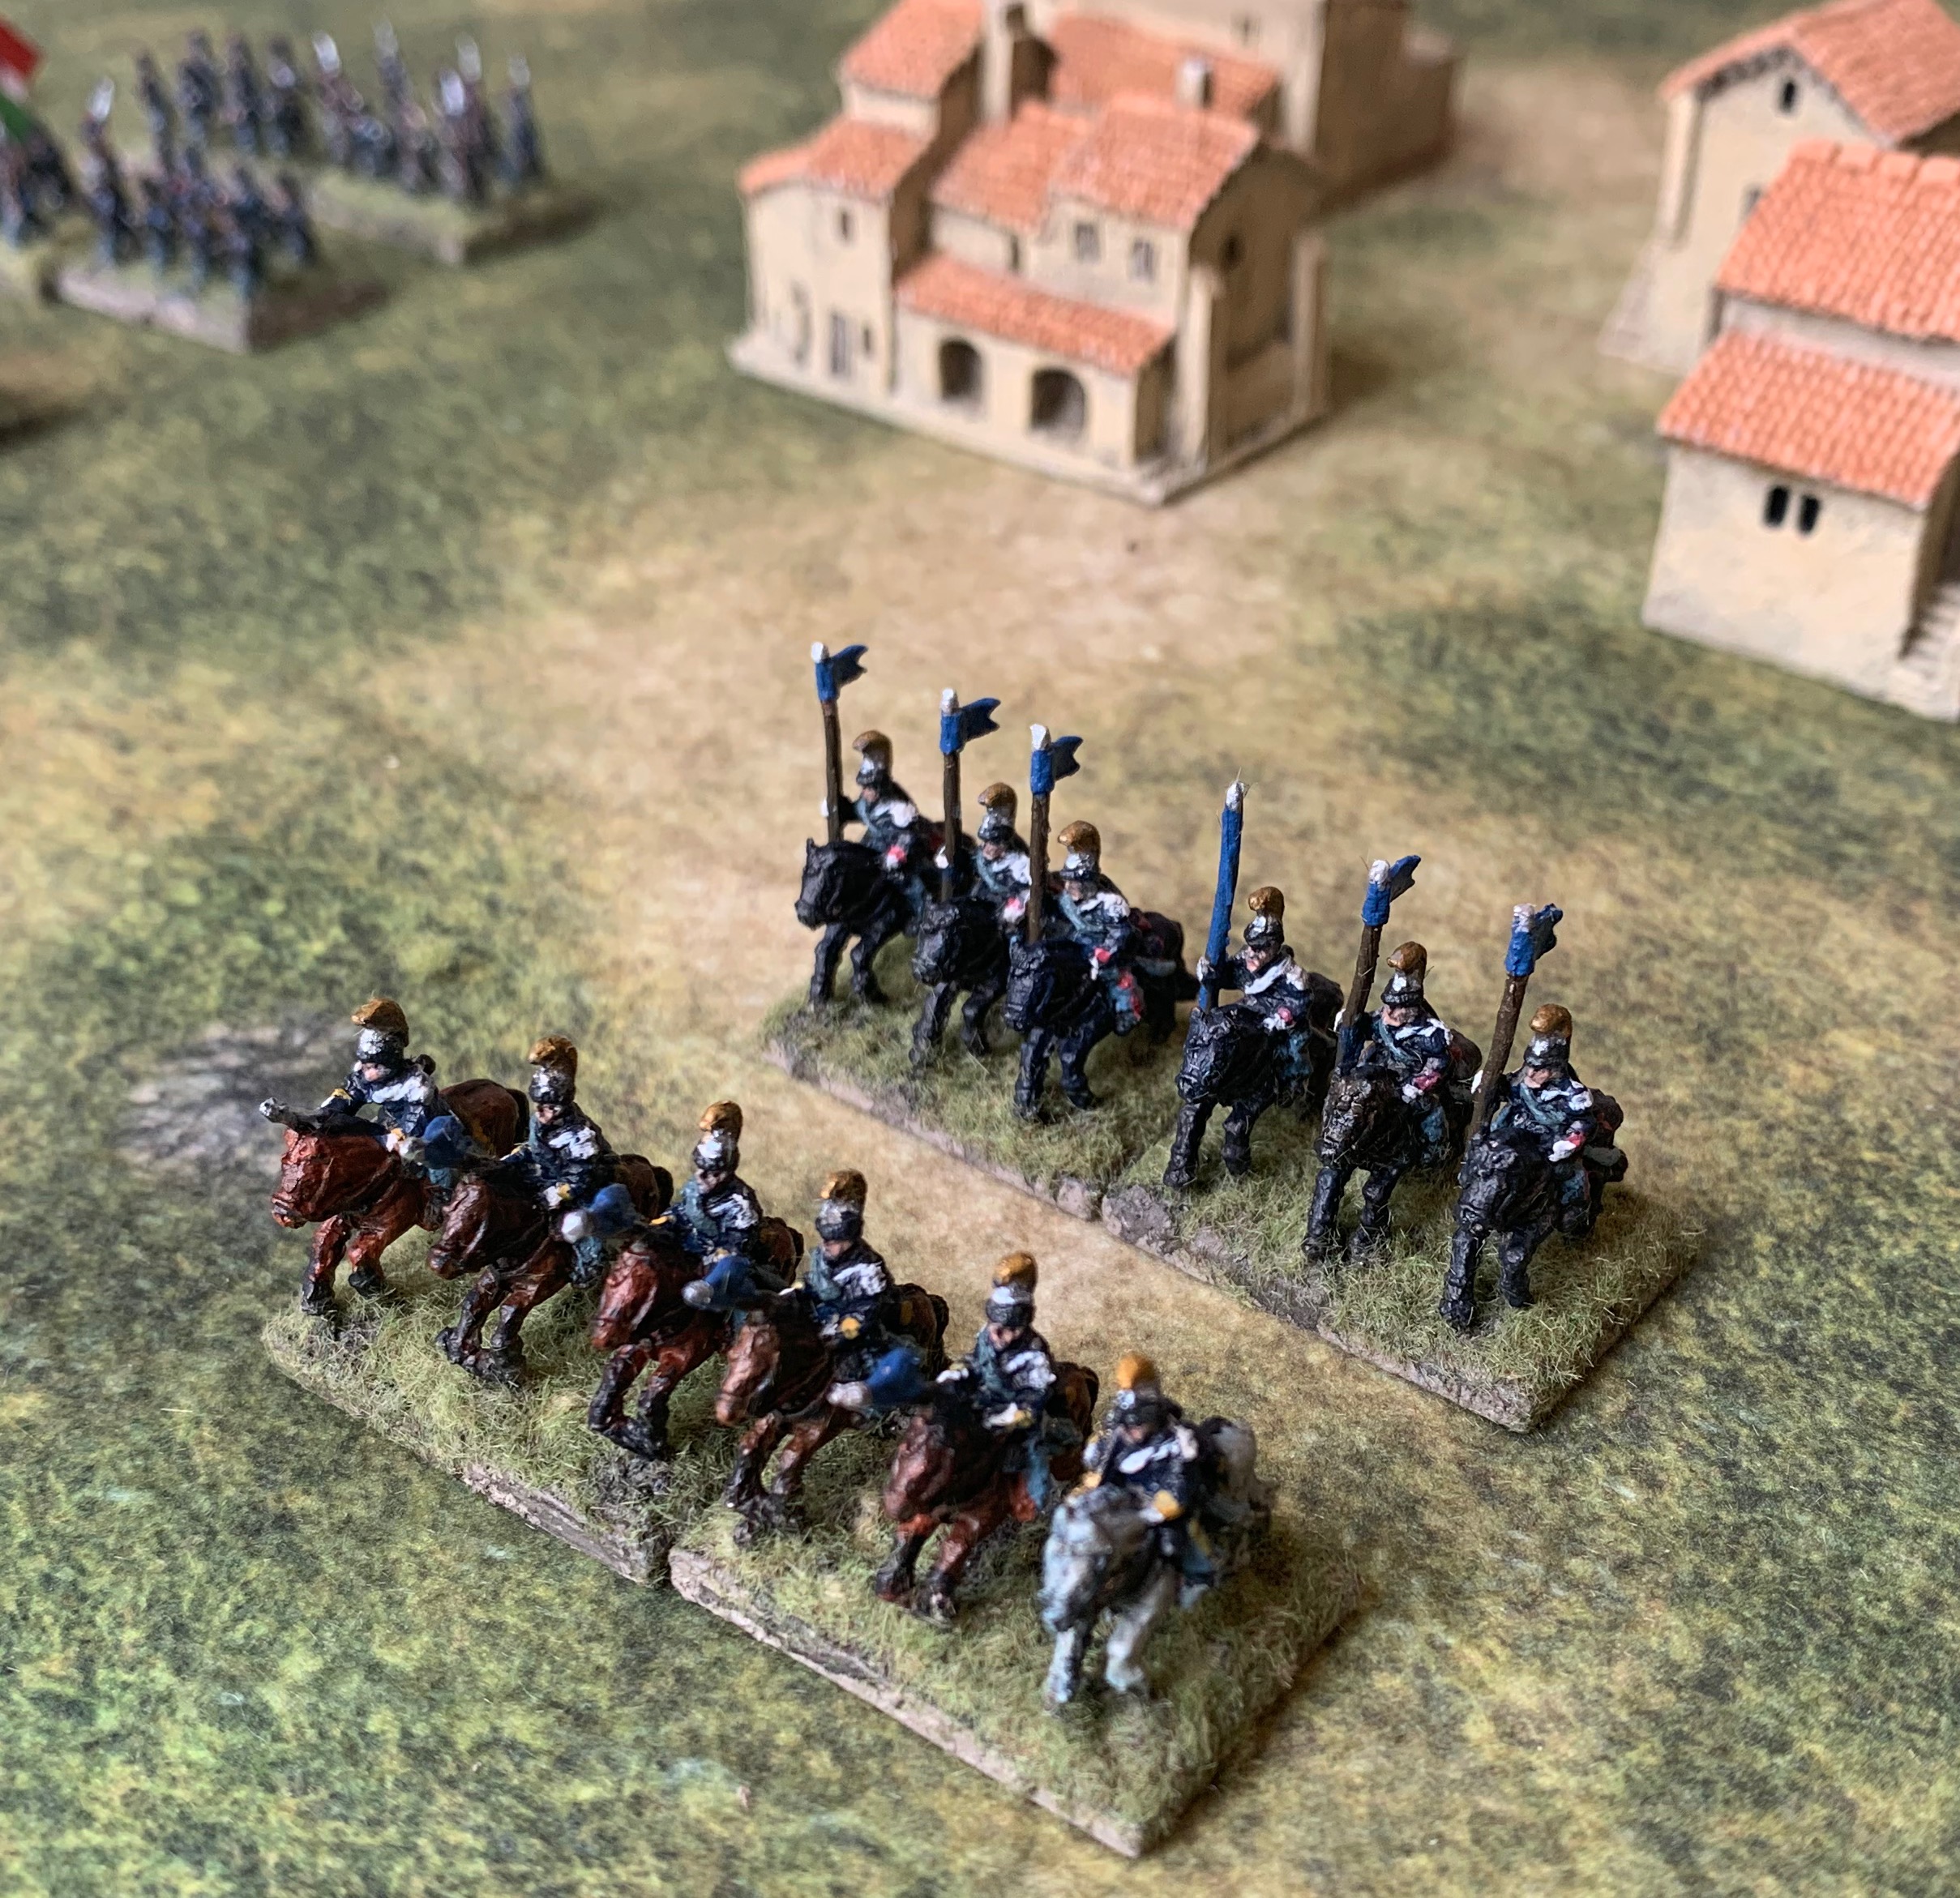
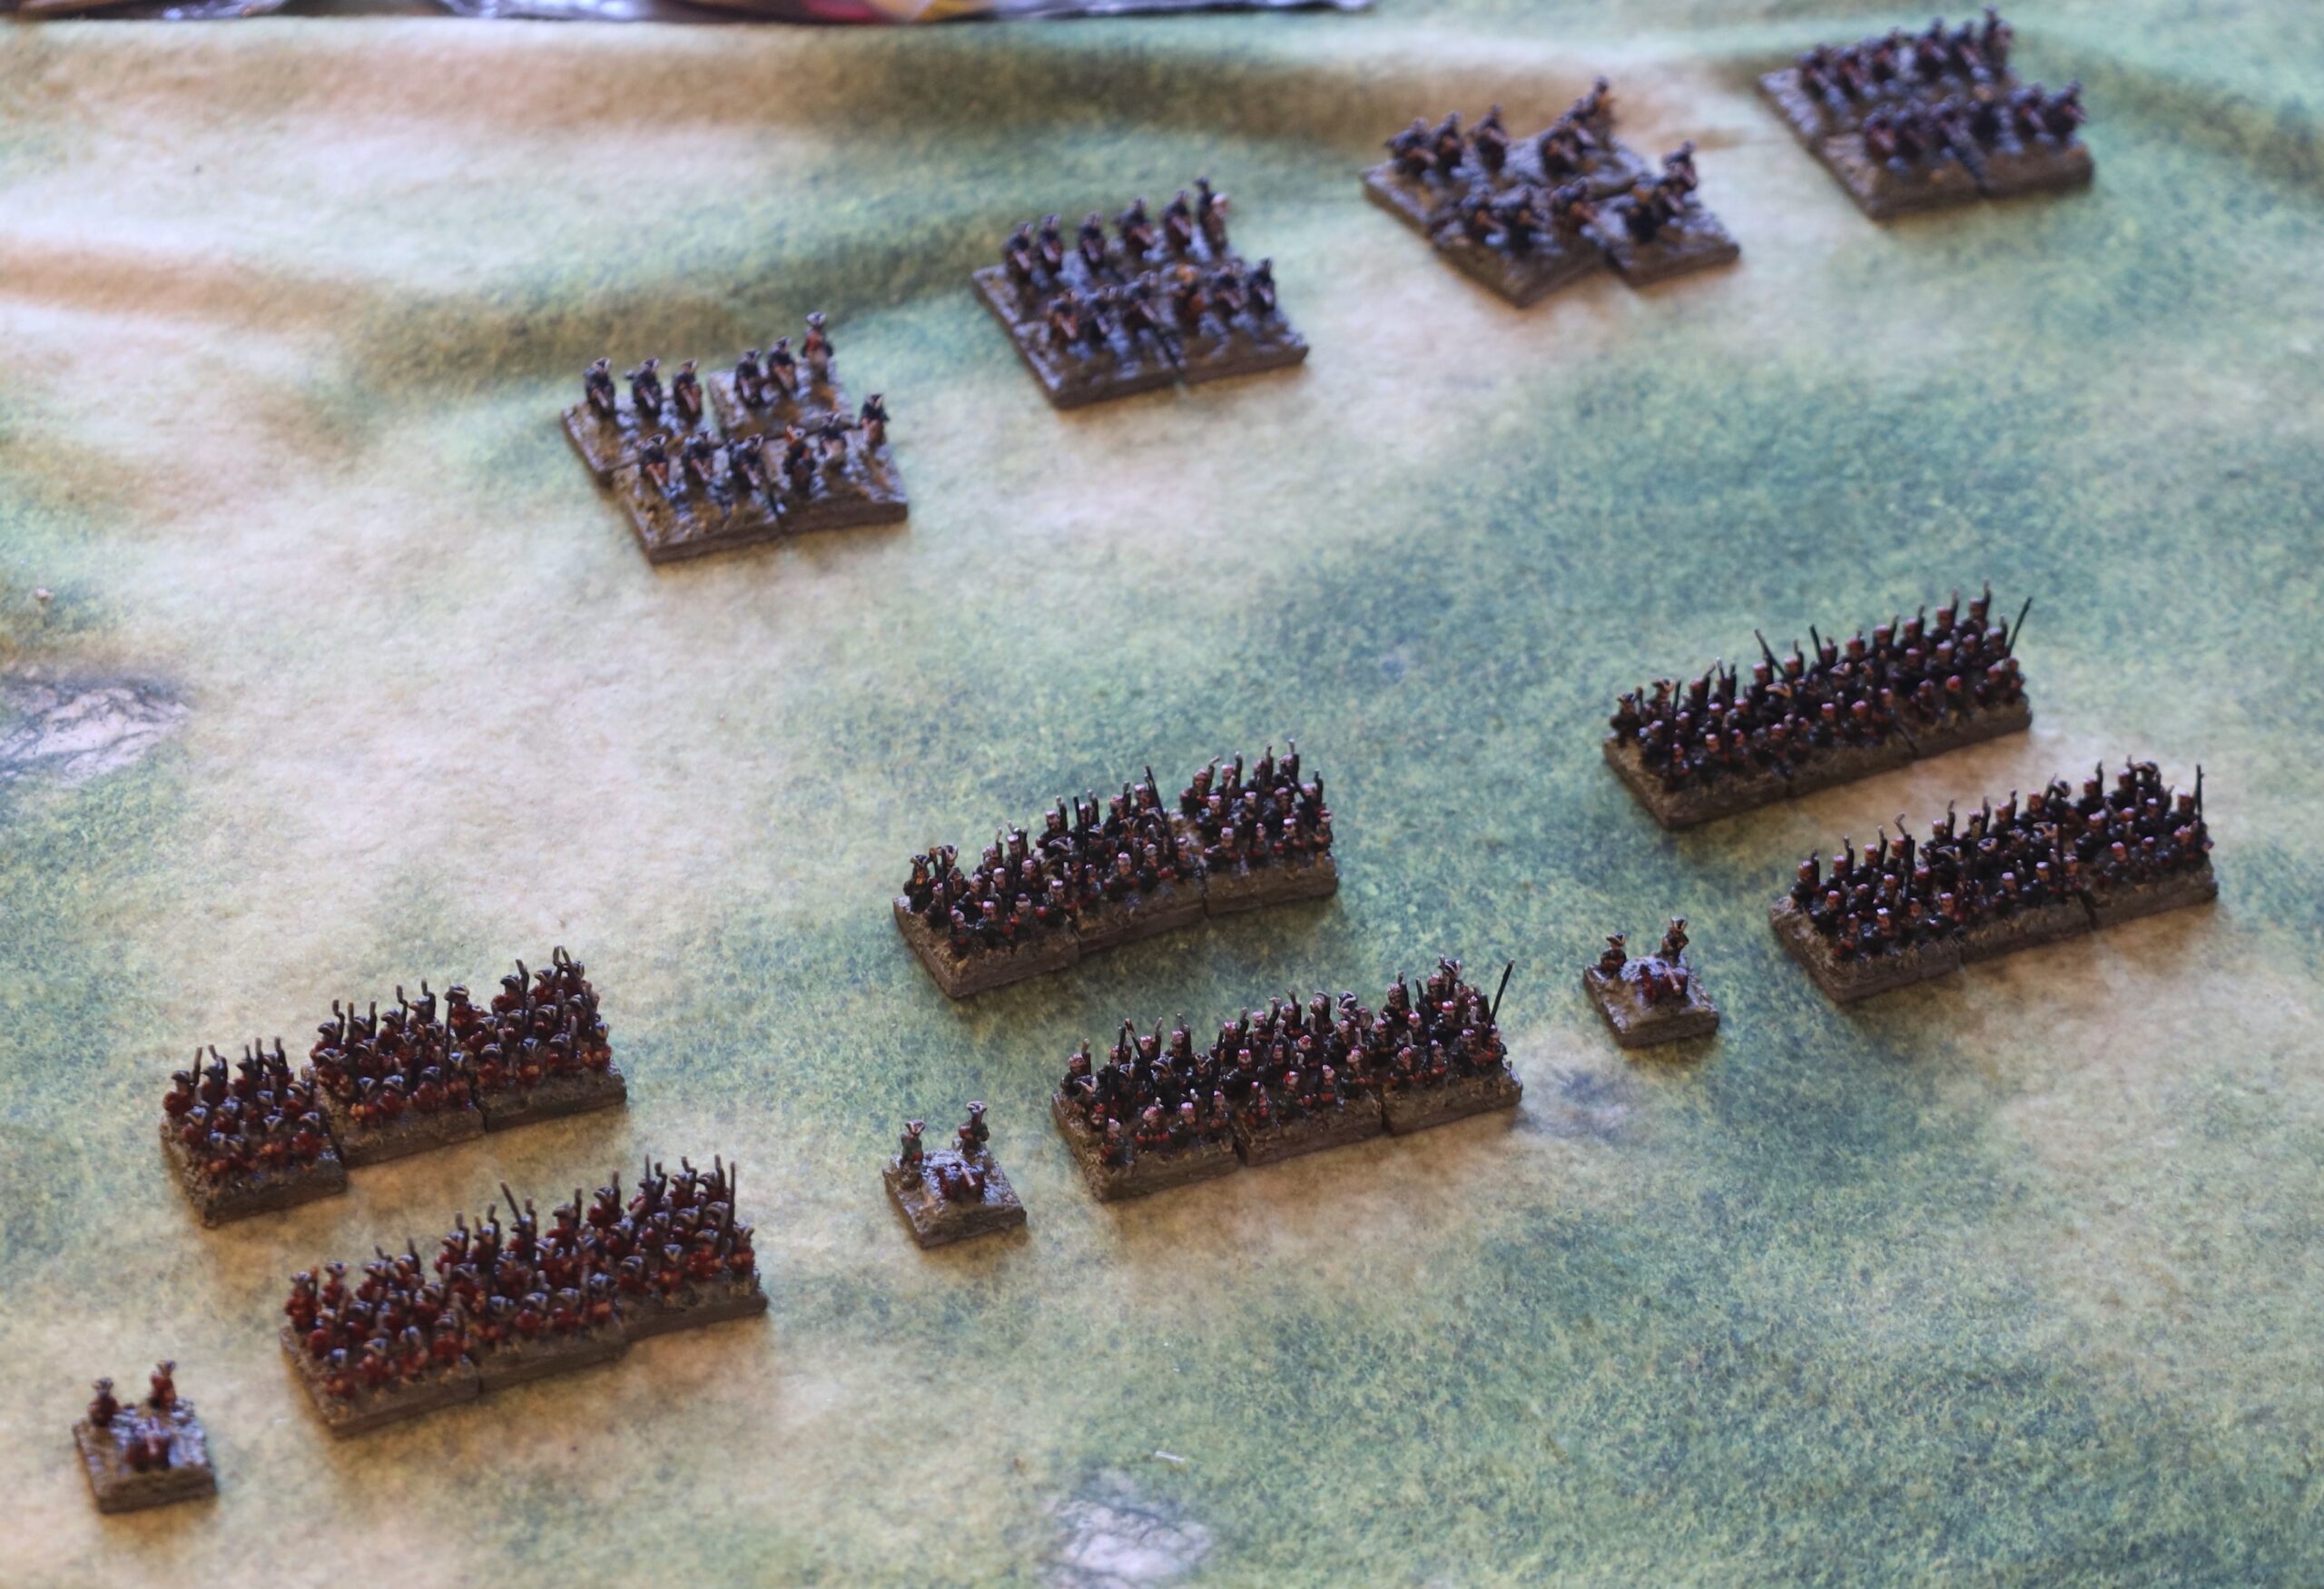
These represent “line cavalry” or dragoons – the nearest the Italians had to elite heavy cavalry, of which they had four regiments. I have representatives from two regiments. A denser basing would be justified here too – but the pack size is 15, one short of what I need for four bases. Since I will (probably) be operating the cavalry in brigades of two or four bases, life is going to be harder if I can’t get four bases out a pack. With three to a base I might even get and extra base. With the cavalry present only in small quantities, that proved decisive, and I will stick to three figures a base – the look is perfectly satisfactory. Here’s the artillery:
These are 8-pounders, the typical Italian artillery piece, which were rifled in 1866 (but not in 1859). They look distinctly like Napoleonic smoothbores to me, but Leon from Pendraken assured me that he did research them, and I know no better. Reliable information on the Italian army of the era is hard to come by, and I’m very thankful that Leon took the job of producing this range on. I have found little consistent information on the line infantry. The Osprey, which covers the topic only briefly, has no pictures of standard line infantry of 1866 – or the Piedmontese army from before. Pendraken supply four crew figures for each piece but I didn’t like one of them. I thought I might reserve four crew figures for heavier weapons.
I will leave description of how I have prepared these figures to another post, when my Austrians are done. My hope is that I can get these troops table-ready quickly. Much more quickly than my 18mm troops, and even the GNW 6mm ones. The jury is out on that. The uniforms are quite simple, and the figures small enough not to need much detailing. Piping and braid need not be attempted! Even the black facings on the Italian infantry present so little contrast to the dark blue coats that I didn’t attempt it. The Austrians wore their greatcoats in the field (removing the tunics underneath in warmer weather), which will be just as simple. This batch of 15 infantry bases, four cavalry and three artillery took a bit longer than I hoped though. I will need over 70 bases of Italians alone if I follow the BBB scenario. I think I will try bigger batches, but of one troop type. This will be pretty boring, but hopefully faster. For the first Austrians though I will do a similar mixed batch, though.
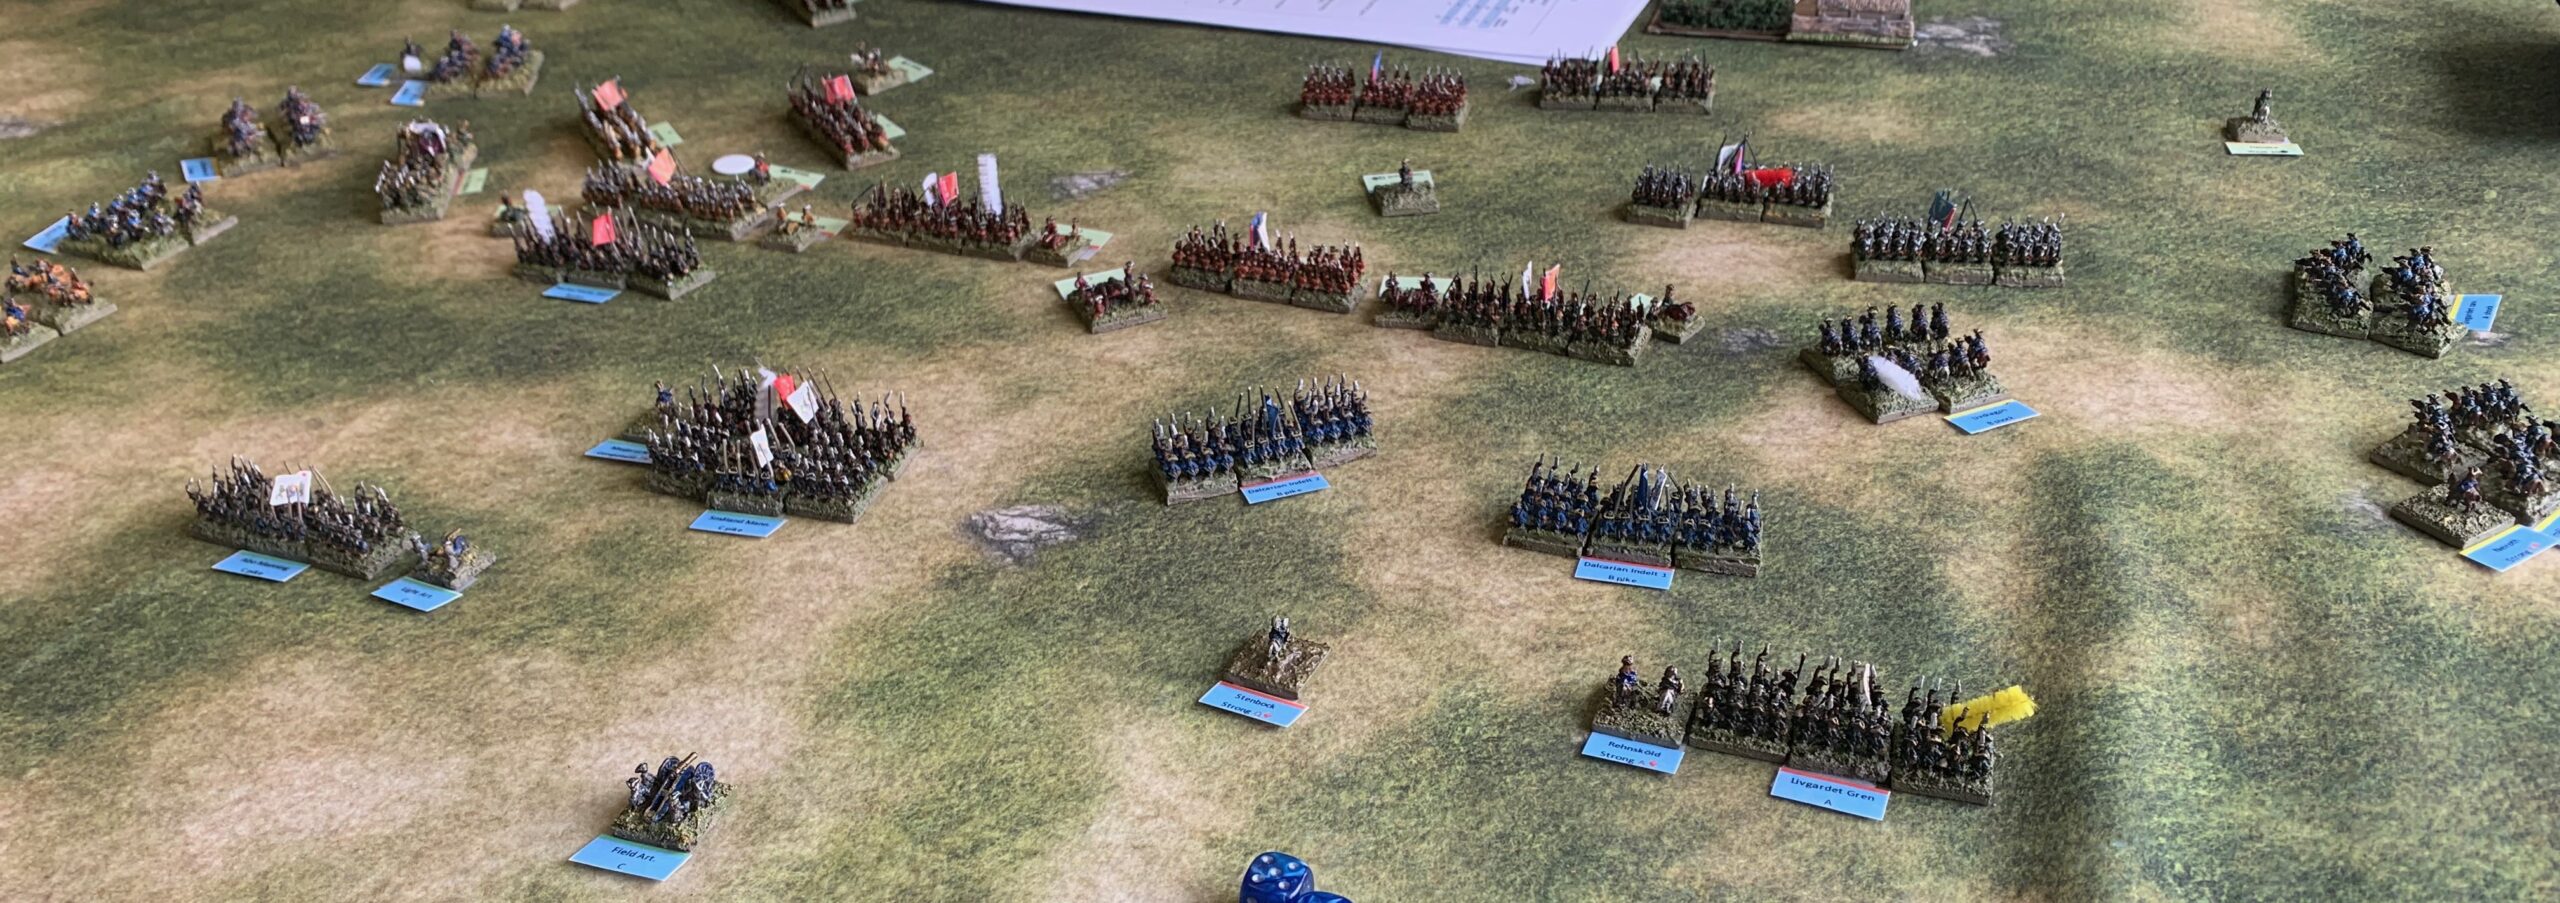
My recent game, which the Swedes taking on the Russians
How time flies! It’s been quite a while since I last posted. My hobby focus has been mainly on my Great Northern War project – though as usual the rest of life intervened to limit the time spent on it. I developed my Carolus Rex rules ready for a proper live game in April. Since then I have modified them, and they are now published on here the Rules Page. I have also painted up six more infantry units (mostly Swedish) and a few other bits and pieces. That draws a line under GNW for the time being. It’s on to the next thing now.
The game was with the monthly group from my old club, which I’d had to miss for a couple of months. There were six of us. It was a sprawling affair using the bulk of my Swedish and Russian armies (I left some Russian infantry, a lot of the Swedish artillery, and the Swedish irregular cavalry out), shown in the picture from the Swedish side. There was no serious terrain. Although the Swedes had much the smaller army, the Russians were mainly D class, and the Swedish troop and command quality showed through, especially with their cavalry. The Swedes had one hairy moment, when the Russians managed to rout both Swedish guard infantry units. If the Swedes (played by me in this case) hadn’t done well on a divisional morale check, and then managed to rally one of the units, it would have been a big struggle for them to win. But the game flowed well, and we concluded within the time allotted. The feedback from the players on the rules was very positive – no big holes were revealed, though some tweaking was needed. Cavalry was too powerful against infantry, and flank attacks needed to be a little more effective. The one issue I won’t fix is the card driven activation system, which means that the six players need to go sequentially, reducing the possibility of parallel processing. I think this dynamic adds a lot to game play.
I have made those tweaks to the rules, as well as correcting a few other details. Increasing the effectiveness of flank attacks meant I felt the need to introduce an option to form square for infantry. This is perfectly historical, in fact, but there is a risk of the unit becoming disordered as it forms up. Interestingly I also changed the rules in a couple of places to reflect what we actually played, rather than what I had written. What we did was more intuitive and made better sense. I am pretty pleased with the rules overall. s discussed before, I feel I may have tilted a bi towards playability rather than historicity, especially in command and manoeuvre, but I do think I have caught important aspects of combat in this era. It should be possible to use them for other conflicts than Swedish/Russians in 1708/09, except that I haven’t developed them to cater for the new Dutch fire discipline methods and three-deep lines, used by Britain and the Netherlands, and neither some of the looser infantry and cavalry types used by the Ottomans and others. I might also want to distinguish between “galloping’ and “trotting” cavalry charge tactics. But life is short and I don’t plan to build armies for these other conflicts. Next time, though, I will design a more interesting scenario – the one inspired by Holowcyzn that I used in early play testing is a suitable starting point.
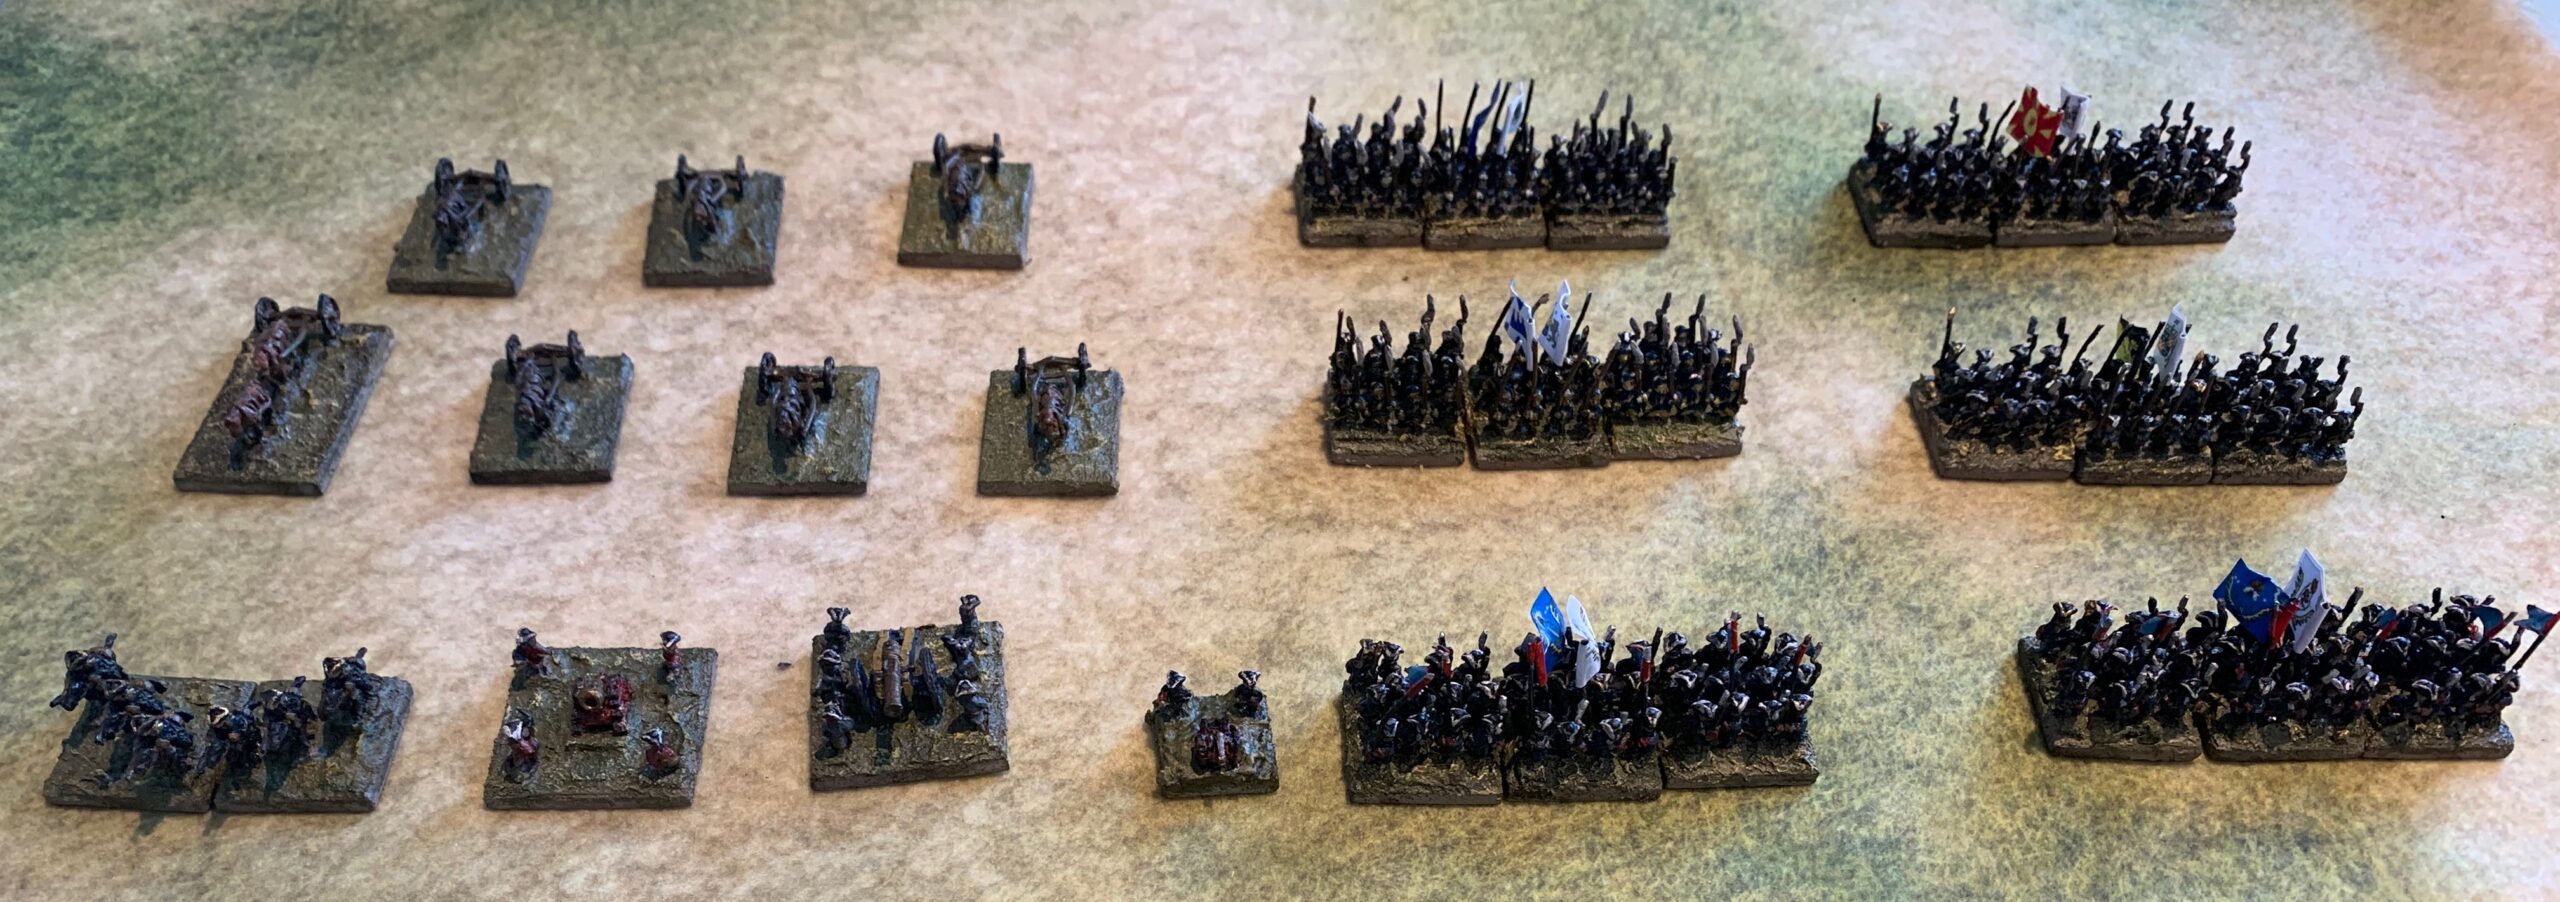
After that I painted one more batch of figures to give me more options for armies on both sides. These were four Swedish line infantry battalions, two Russian guard battalions, a Swedish heavy gun, a small unit of Swedish Drabant cavalry, and seven artillery limbers. While I still have more metal to paint, I plan to draw a line under things for these armies now. I will only paint up more if a particular scenario demands it. If I have enough units to keep a six player game going for four hours plus, I don’t need more.
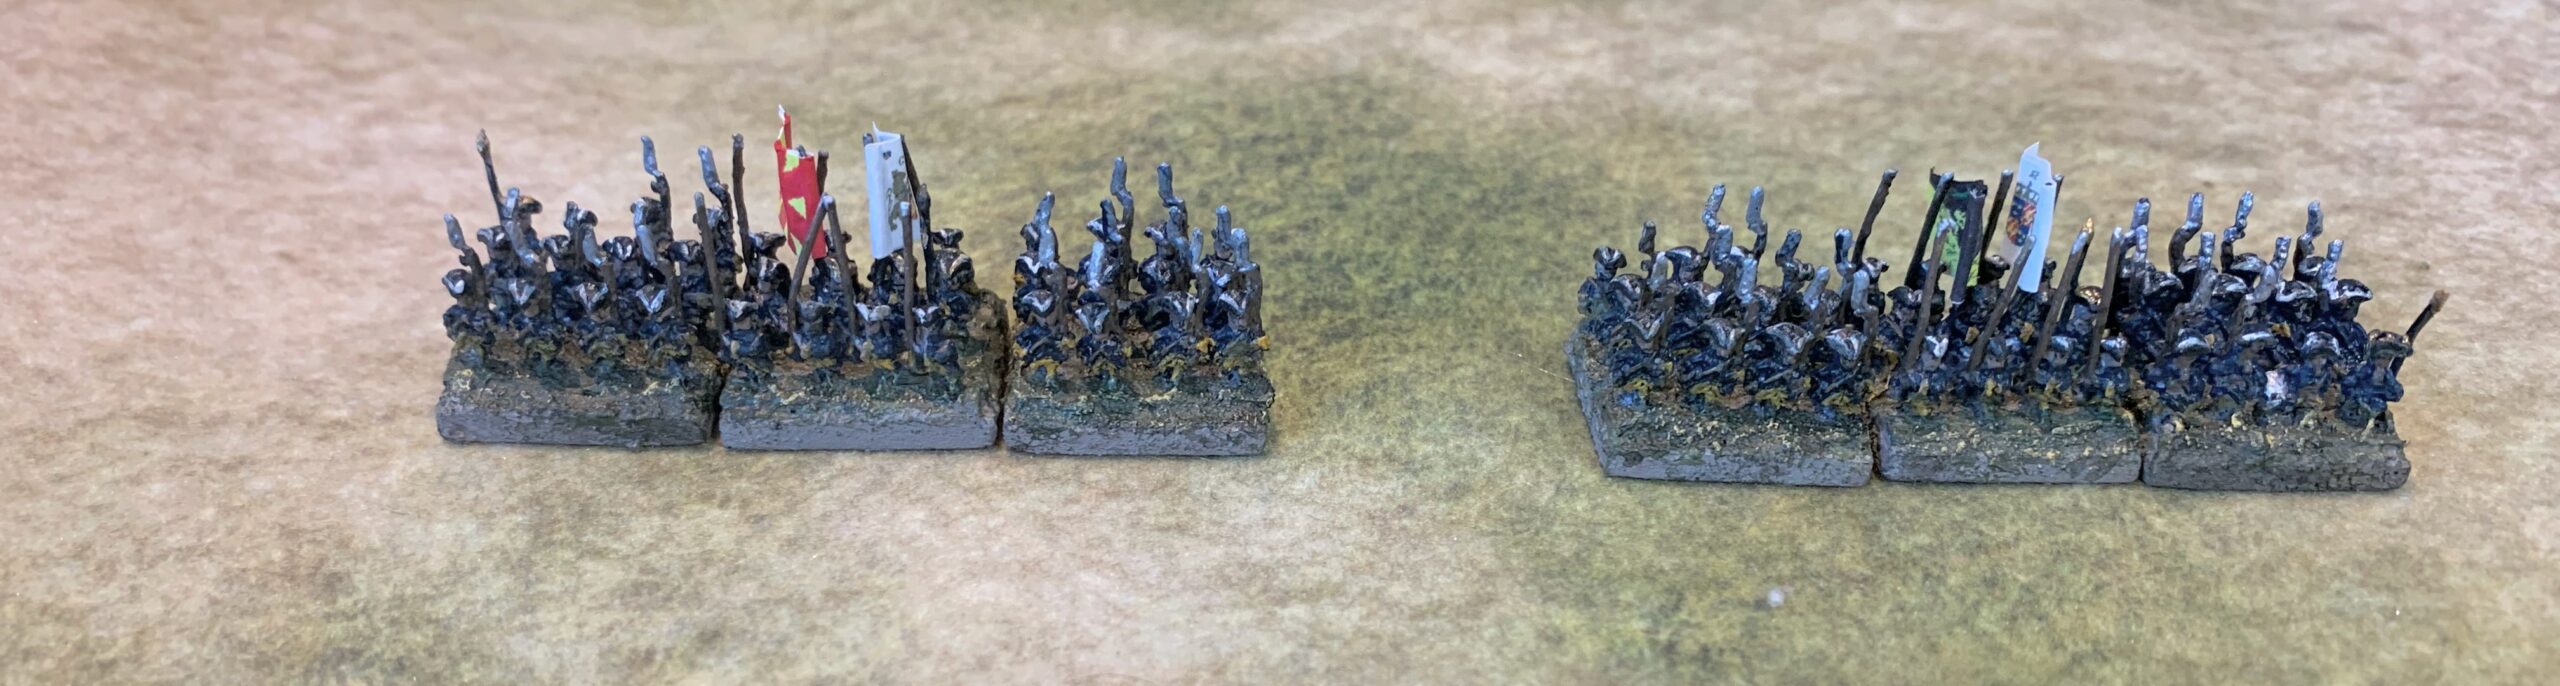
For the Swedes I painted four units from different regiments: Kalmar, Skaraborg, Västerbotten and Västmanland. Until now I have prepared two battalions from the same regiment, except for two Manning (additional draft) units. But I have the flags and in any case there is usually a bit of bathtubbing going on in my scenarios. The first two of these units are in hats, and the second two in caps (karpus). I don’t think that the karpus was as widely used as I have them in my armies, but I had bought a lot of the figures from Baccus, and they were a bit nicer than the ones in hats anyway (since then Baccus has brought out some better ones in hats).
The Kalmar and Skaraborg infantry unitsThe Västmanland and Västerbotten units
I have plenty of Russian infantry, but there was something to be said for having a couple more guard units to beef the army up. I painted these from the Semonovsky regiment, with its blue coats. Like my two units for the Preobrazhensky regiment, I attached foil pennons to the pikes. the evidence for this is pretty thin (one of my early source book suggested it), and even thinner for their use in battle (unlike cavalry lances, where the pennons were considered to add to the psychological effect). Still it helps make the guard units special. I painted them mid-blue with a red lining, like the company standards.
The Semonovsky Russian Guard units
The Swedish Drabants were Karl’s personal bodyguard, and like him were often in the thick of the fighting. I didn’t really need this unit, but Swedish armies were heavy in cavalry, and this unit gives me more options. They weren’t up to full regimental strength, so I’ve had to create rules for smaller, two-base units.
For artillery, I wanted a Swedish heavy gun. The Swedes weren’t usually big on artillery, which hindered mobility, but they did use 12 pdrs at Holowcyzn, and I had the metal. Why I bought a mortar I don’t know, as these were generally siege weapons, but having bought them I thought I’d better paint one up in Russian livery. The other piece in the picture is the regimental artillery for the Semonovsky regiment – which was a matter of covering a piece that I had already painted.
The Drabants, the Swedish heavy artillery, the Russian mortar and a light gun
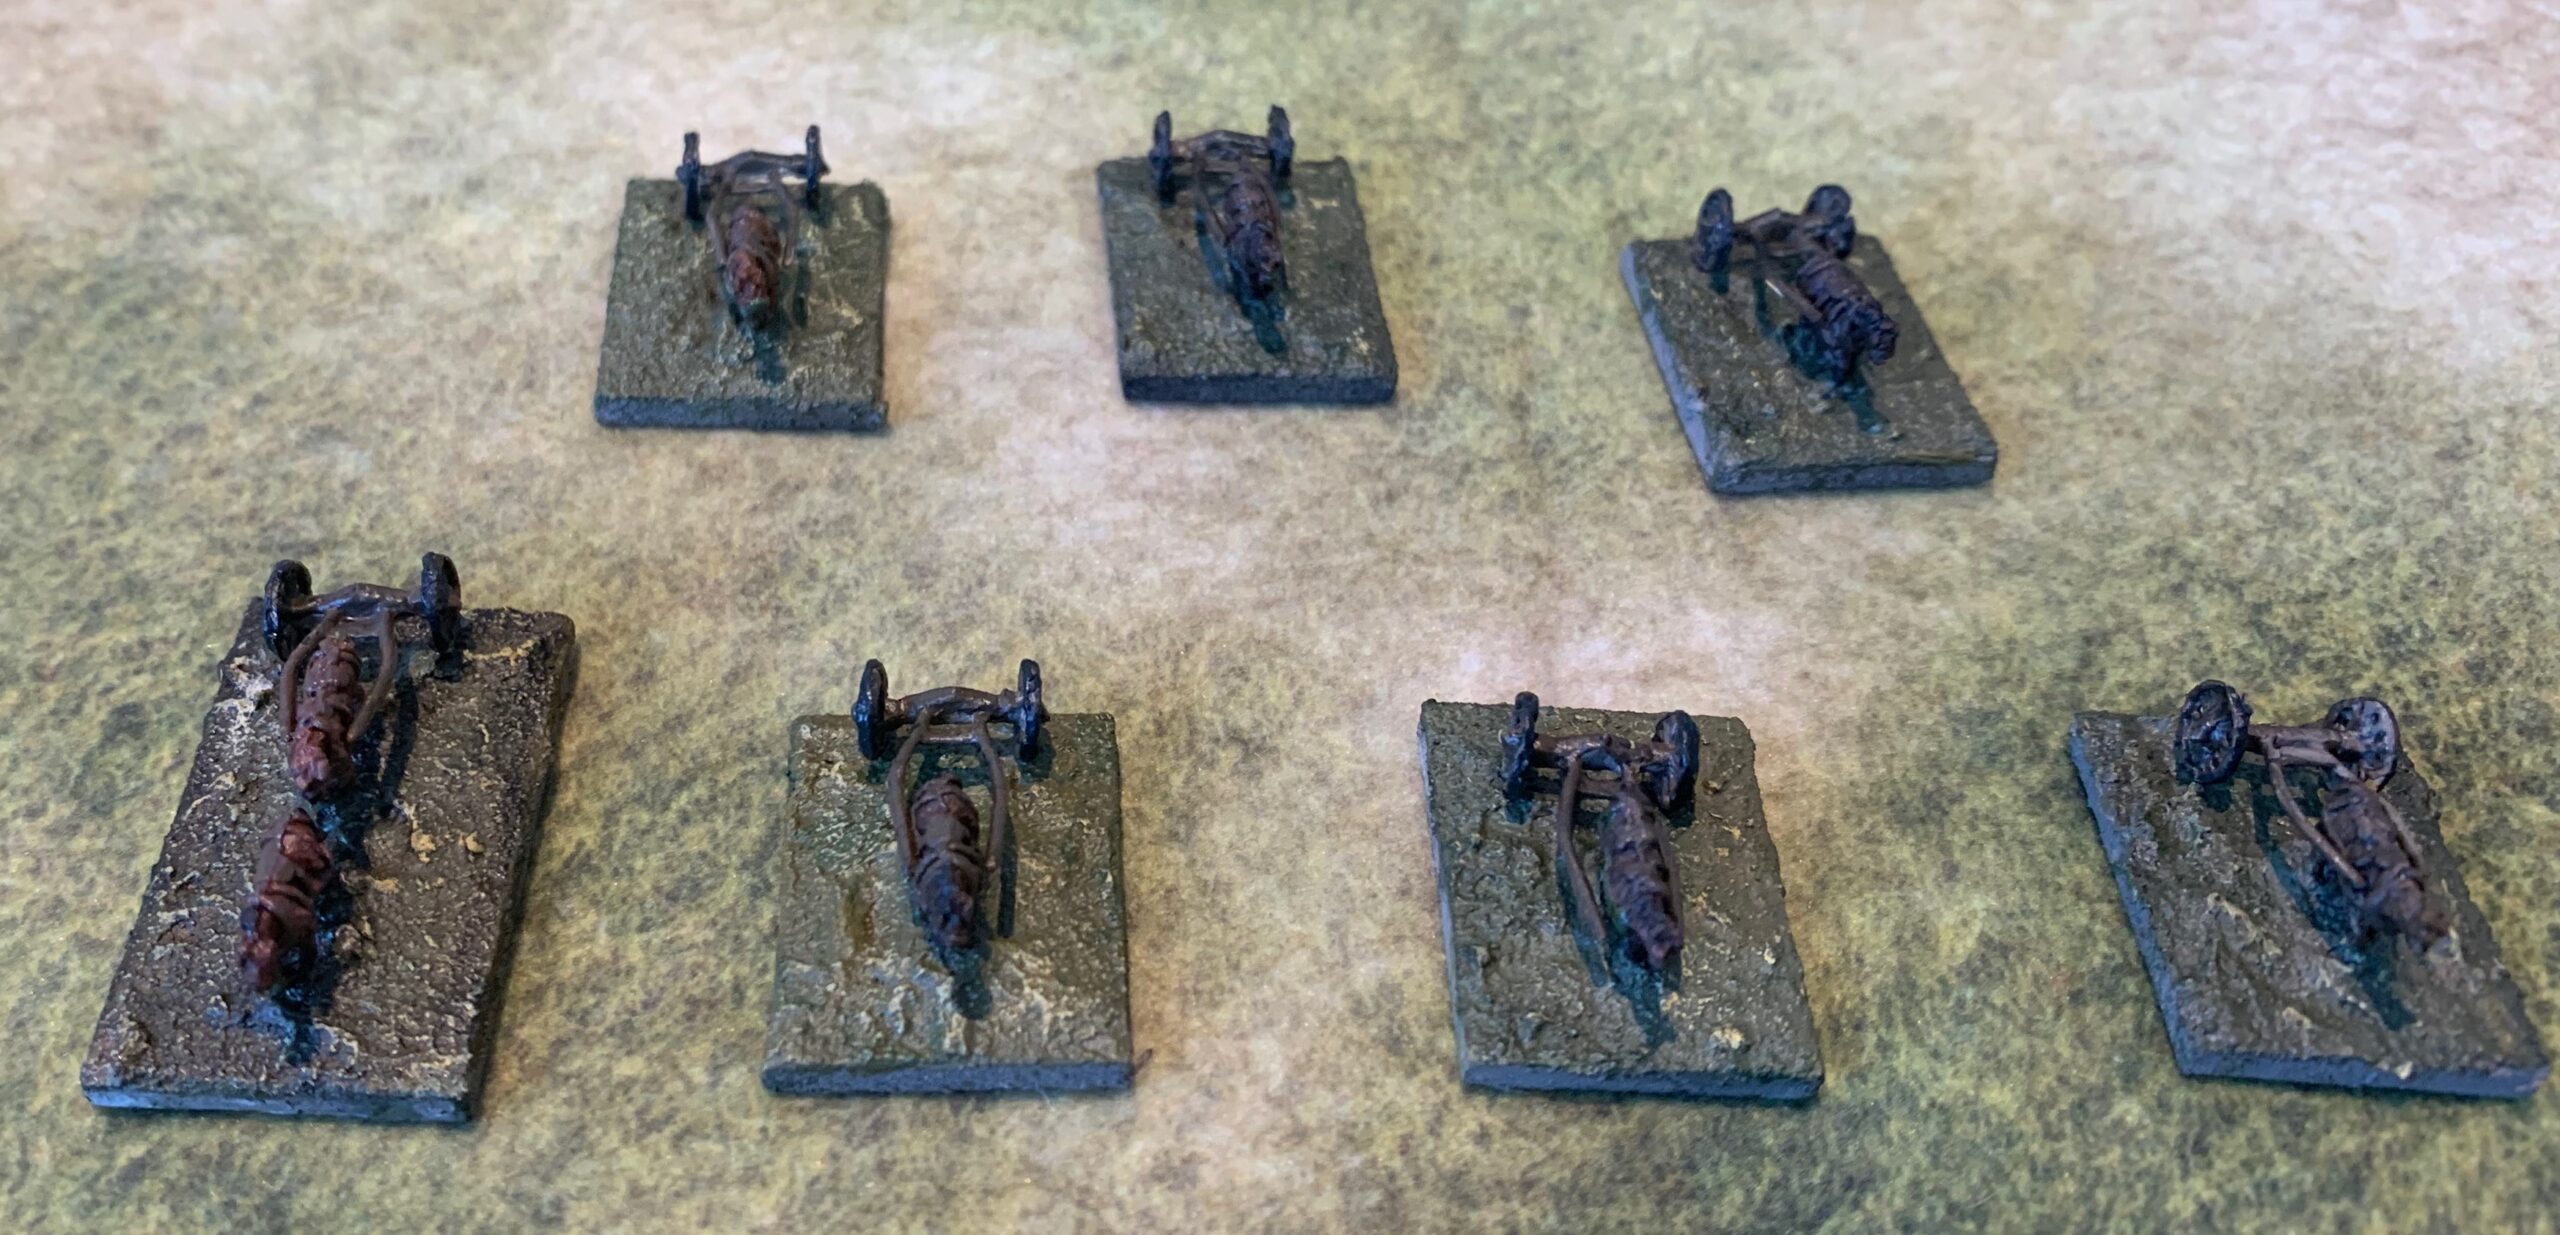
And finally limbers! I’ve made light (regimental) artillery and even field guns relatively mobile, without the need for limbering – so in our game players didn’t bother with limbers, as it takes a whole turn to limber up (limbers were not under military discipline). But in my next scenario there could be a lot more movement, and I had the metal away. So I painted up seven models to join the two I already had. One of these (like both the earlier ones) had two horses; the other single horse ones are there for my plentiful regimental artillery.
For painting technique I followed the same method as my last batch, described earlier this year. The main point of interest came at the end, when I used a rather dark wash. I started to use my Windsor & Newton peat brown ink, but this has turned thick and very red in hue with age. I tried diluted Antelope Brown (Liquitex I think), but this was very yellow – so I added some black, which is strong stuff and overwhelmed the brown. As I merrily applied it (including to the bases), I thought it enhanced the look. As it dried I the result was a bit dark – it’s not just poor photography in the pictures. I felt the need to highlight some of the yellow facings on the Swedes, and some light yellow highlighting on the bases. this proved to be quite a quick and easy process, leaving me to think that perhaps the lighter colours (facings, flesh and weapons) could be done after a dark wash (with paler base colours), using a quick dab of paint. This going down the rout of the black outline style that I have dismissed as being cartoonish. But it may be more appropriate for the tinies.
My next project is 10mm figures for Italian/Bismarck wars of 1859-71. More of that anon.
One of my current projects is the battle of Ligny on 16 June 1815, one of the precursors to Waterloo, which was two days later. The usual script is that in this battle Napoleon comprehensively beat the Prussians under Blücher, and with a bit of better luck would have destroyed them, so winning the whole campaign. But, as I said my earlier article, a number of mysteries surround the battle, of which the most important was how the Prussians lost when they had such a strong numerical advantage.
But researching the battle faces some tough challenges. The biggest is the lack of French sources. It is far from clear when particular formations were committed and exactly where. Prussian sources are plentiful – I think they had a system of after-action reports – but they are subject to the usual systemic biases that will under-report poor performance. One particular frustration is that I can’t find any detailed casualty figures below corps level (and not even that for the Prussians), even though some authors make reference to these. Casualty figures are an important source of evidence, as noted by the French 19th Century writer Andant du Picq, as they are less subject to fakery (if you ignore after battle bulletins). If any reader knows where this data can be found, please get in touch.
My initial focus is on what I am calling “small Ligny” – the battle for the village of Ligny itself, and the chain of villages and hamlets from St Armand to Wagnelée to the west, involving the Prussian I and II Korps, and French III and IV Corps (minus Hulot’s division) plus Girard’s division from II Corps, from about 3pm to 7pm, when French Guard formations started to get involved. This will lead on to some wargames with my army-level rules. I am also intrigued by the possibility of some divisional level games.
For my first stage of research, I have used work by Dutch historian Pierre de Wit, which unfortunately does not seem to be available as pdf downloads online any more. This is dense stuff but closer to the primary sources than anything else I have seen in English (or French come to that – I can just about access text in that language). The main information I have sought from this is which units were committed and when, in terms of each hour of the battle, corresponding to game moves. My objective is both to understand the battle and to calibrate my rules.
Ligny village
“Small Ligny” organises itself into two main zones – Ligny itself to the south and St Armand to Wagnelée to the west. Let’s take Ligny first. This is quite a compact village, either side of the Ligne brook. On the south bank to the west is Ligny chateau, which was capable of being defended all-round by a garrison of a battalion in strength. There are a number of other substantial farms and a church with yard which became focal points of the battle. The brook was a significant obstacle, with one stone bridge at the eastern end of the village, and a couple of other less substantial crossing points. To the west of the village was relatively clear terrain, on a hillside, which is where the Prussians located a grand battery. To the east was a sunken road, orchards and so on, on the way to Sombreffe, which was clearly difficult terrain, and which does not seem to have been seriously contested.
The village was initially garrisoned by one small Prussian brigade (but remember that Prussian brigades equal other countries’ divisions) of six (large) battalions, of which two were initially held in reserve. One of these occupied the chateau, and held it until after 6pm, when exhaustion and ammunition loss forced a retreat. Over the course of the battle the Prussians fed in 14 more battalions, meaning that some 16,000 men were committed. The French committed just two divisions, in 18 smaller battalions, amounting to about 9,000 men. The outcome can be called a draw: the Prussians still held the village, or most of it, but were exhausted. When Napoleon committed the Guard and heavy cavalry they did not resist – the occupants pulled back to the next line of defence.
This is a very striking achievement, and goes some way to explaining the Prussian defeat. Just what happened here? This is important not just to understanding the battle, but also how to simulate battles on the tabletop. The direct sources tell us little. We are left to speculate, or hypothesise, using circumstantial evidence.
The first point of interest is that while the Prussians committed many more men, the number of battalions on each side was roughly similar. I have seen arguments among wargamers who suggest that when doing tabletop simulations the number of battalions is more important than the number of men – and that using standard units to represent each battalion, regardless of size, gives a fair representation. This view, which I have aways found suspect, is given support by this episode. But interestingly, this battle was not fought by coherent battalion formations, as battalions broke up into smaller tactical units. Still the battalion statistic does point to another factor – the French ratio of cadres (officers and NCOs) was probably higher, though I don’t have statistics on officer numbers for the Prussians. Battalions vary more in size of rank and file than they do in cadres – which tend to be dictated by the internal structure (number of companies, etc). And its clear that the Prussian officer corps was stretched by the fact that they tended to use more junior ranks to handle similar sized formations to the French in 1815 (while the British tended to field more senior ones). The ratio of cadres in regular formations (it’s a different matter in elite units) might make a significant difference to battlefield performance, and in particular to stamina – how long they could keep going when sustaining casualties.
And stamina is the critical issue here. The Prussians kept on having to feed in fresh troops to keep the battle going, while the French could recycle theirs. My guess is that the French the French used one division at the start (3pm), and withdrew it after about an hour, replacing it with the second. Which was in turn replaced by the rallied first division an hour or so after that. So the French are getting two bites of the cherry for each of their units, to the Prussians’ one. So far as I can tell casualties, in dead and injured, were roughly similar on both sides (about 3,000 for this part of the battle). The tactical situation may also have made it easier for the French to pull back and refresh units (replenishing ammunition in particular). To pull back the Prussians either had to go up the hill behind the village, exposed to French artillery fire, or along the road to Sombreffe, and into III Korps’s zone. They do not appear to have done it until the original brigade (Henckel’s) was withdrawn after 6pm.
There is another factor when considering quality of troops and stamina. Nine of the 20 Prussian battalions were landwehr (7,000-8,000 men), and all them from the Elbe and Westfalia provinces. These had only been incorporated into Prussia in 1814, and these units hadn’t been forged in battle – and nor were they so inured into Prussian military tradition. By contrast the landwehr units in the Prussian III and IV Korps were from the established territories of Kürmark, Silesia and Pomerania, which had been part of the great battles of 1813. It is estimated that the Prussians lost 8-10,000 men as deserters at and after the battle. It is thought that the bulk of these were from these landwehr units – though some did come from the more recently raised regular units, like the 25th Infantry regiment. There were 24 landwehr battalions in the two corps; 9 were engaged in Ligny, and 11 (3 after 7pm) in the west. So a very large chunk of the deserters must have come from the landwehr units in the Ligny battle. And that means that half or more of these troops must have fled. I have not found direct corroboration of this. There is a mention in de Wit of the landwehr troops wobbling a bit early in the battle and having to be rallied. But there were no mass routs. But Henckel’s brigade, with three landwehr battalions out of six, lost half its men in the battle according to one historian; it started with 5,000 men; if we say they took 1,000 dead and injured (being the battle the longest, casualties would have been higher than average), it means that 1,500 of the 2,500 landwehr deserted.
What happened? My guess is that at first the landwehr units would have engaged with reasonable effectiveness, but as the battle wore on the feeling among the men that they had done their part, and the imperative to survive and return to their homes, started to dominate, and they found ways of lying low. Substantial numbers may have been able to drift the rear areas. Once the Prussian army started to pull out in the fading light, these men flooded out along the road from Sombreffe to Namur. What this boils down to a very low stamina level in these units. If we try some sort of quantitative evaluation in wargames terms, we might class the French troops as “veterans”, the Prussian regulars, with their weaker cadres, as “trained” and the newly-raised landwehr as “raw”. If we weight veterans as one third more than trained, and raw one third less, we get a weighting for the French of 12,000, and the Prussians of 13,600. This is clearly much closer, and allows other factors, like stronger French artillery, to be brought into account.
Interestingly, not this analysis shows that the Prussians did not derive a great deal of benefit from being on the defensive, in a garrisoned village. According to French accounts, the first French assaults were beaten off with heavy losses, but they then managed to gain and exploit a foothold. This goes against most wargames rules. I have set up two or three games of the Blücher system based on Ligny, and it was hopeless for the French. Attacking the village was battering their heads against against a brick wall, and they soon ran out of infantry. Another interesting wargames point from this part of the battle is that the French artillery were able to rake the slopes behind the village. This almost certainly this involved a degree of overhead firing – and this was tactically important. Most rules systems allow this, but some (like Blücher) don’t.
St Armand to Wagnelée
This was a bigger and more complicated battle. The contested area was three villages along the line of the Ligne brook. To the south was St. Armand, apparently quite an open village, though with a substantial church and yard. Next to the north, with very little gap, came Longpré, where most of the fighting took place. This included two substantial chateaux – La Haye, heavily contested, and l’Escaille to the east, which the French never reached. Most historians of the battle call this village “St Armand la Haye”, but both current maps and the Ferraris map from before the battle call it Longpré. I think using this name is better for clarity. Next north after a small gap is Wagnelée. There was no serious attack on this village that I can see, but it was an important access point to the battle for the Prussian troops. Between Longpré and Wagnelée, at a crossroads, there was a hamlet of just few houses and an inn, which historians usually call “St Armand le Hameau”, but which is more correctly called Beurre-sans-Croûte. Historians generally refer to the whole area as St Armand, but this can lead to confusion.
St Armand, which wasn’t substantially garrisoned, was the subject of the first French attack, which was initially beaten back by Prussian forces waiting outside, but after the first hour it was occupied by the French and not seriously contested – but possibly after a second French division ws committed. Both sides concentrated their efforts after this in and around Longpré. The Prussians mounted attacks from Wagnelée into the open ground behind Longpré, leading to some open battles including cavalry support. The initial Prussian garrison (in Longpré) was just three battalions, plus some jager companies. But as the fight developed they committed some 29 more in the period I am looking at (and 6 more after that), giving 32 battalions or about 27,000 men. The French committed four divisions, and about 20,000 men in 39 battalions. At the end of this the Prussians had clearly won, and the French forces were close to collapse, forcing Napoleon to commit the Young Guard and most of the Chasseurs of the Old/Middle Guard to this sector. However the Prussians did not achieve what they had clearly hoped for: a breakthrough that would threaten Napoleon’s left flank.
We don’t have quite the same puzzle here Ligny village. The Prussians used fewer landwehr units (just 6 battalions); they also cycled their troops to refresh ammunition. They were in fact on the offensive for most of the time, unlike Ligny. Using the same weighting formula as for the Ligny analysis gives the French 26,700 men to the Prussians 25,300. Given that the Prussians ended up on top, it shows a better relative performance by them. That doesn’t seem to be because of better leadership than at Ligny, though. There are two cases of substantial Prussian attacks mis-firing and being defeated through poor coordination. There seems to have been no leadership at corps level, with brigade leadership undermined by the ad-hoc partial commitment of formations. Instead, the French leadership seems to have not to have been of the same standard as that for Gérard’s IV Corps. The III Corps commander, Vandamme, was very experienced but never made it to Marshal; there are numerous cases of questionable judgement across his long career. And one division, Girard’s, which led the attack on Longpré, was not under his direct command. This formation was over-committed and effectively destroyed, with one regiment fleeing in rout. Meanwhile Habert’s division was (arguably) under-committed, though their participation is not clear (it is known that the Swiss battalion that was in this division was not used) – but Vandamme’s orders may well have been unclear. Also the second division from III Corps (Berthézène’s) sees to have been very early to the fight, in contrast to Ligny. All this suggests a less measured management of resources by Vandamme.
Conclusion
It will be interesting to see how my rules work when I try this scenario out. This exercise will doubtless pose further questions. I have not paid so much attention to the artillery for example – but this is best done once the lie of the land is clearer, and that means modelling this on the tabletop. It is amazing how often historians fail to understand how terrain limited the use of artillery in particular battles (for example how hard it would have been to use artillery to reduce the British strongholds of la Haye-Sainte and Hougoumont at Waterloo). This phase of analysis does point to some places where the rules need a review. For example rallying can’t be done close to the enemy – which create problems for units defending terrain, like the Prussians at Ligny and (perhaps) Girard’s division at Longpré. Also how to feed in fresh units into an undity battle for a built-up area, and the role of strong-points – when to represent and when to abstract away.
A further thought concerns lower-level rules, which use battalions as their principal unit. This battle should be a fertile source of scenarios at this level. But it isn’t because rules tend to deal with built-up areas in far too abstract a fashion, usually giving too much benefit to the occupier. Lasalle 2, my go-to rules, would be hopeless. To get the proper feel of the battle you need to represent the structure of the villages – the streets, farms and churchyards and so on – rather than using undifferentiated terrain areas. It also probably means giving a role for company-sized formations. This is a problem that I might try giving some thought to. One episode, though, the attack by Tippelskirch’s brigade on the French flank, which included cavalry support, has the makings of a good game at this level though. What adds to the attraction is that I have actually made a representation of this formation, with four-base battalions, the core of my Prussian army collection.
Six Russian infantry units and regimental artillery. The new Swedish cavalry is in the background
After getting back into the Great Northern War, it was time to bolster my rather limited armies, and run down my lead mountain. My biggest deficiencies were Russian line infantry and Swedish cavalry. So I have painted up six units of Russian infantry, and two units each of Swedish line cavalry and dragoons. I added in some regimental artillery, and a Swedish general. It is some years since I last worked on 6mm figures, so this is quite a break from normal.
The miniatures are from Bacchus, and were all bought back in 2012. I bought a job lot from a friend who had decided to take a different route on his GNW forces. I then developed an absurdly ambitious plan to build up my armies, and bought loads more from Baccus. Then I got distracted when about half had been painted up, and the painted and unpainted figures lived in a plastic box for a decade or so, rarely seeing daylight. I had enough painted up enough for an interesting game, but choices for force composition were very limited. My plan was to paint up two more batches (this is the first), amounting to half or so of the unpainted ones, and then stop – unless a particular need arises.
My original figures were painted in a manner quite similar to my larger 18mm ones. I painted them up before mounting on bases, and put quite a bit of detail on them. Even the barrels on the muskets. But I noticed that this was taking quite a long time, for a scale which was supposed to be quick! This time I wanted to take a different approach – more inspired by Impressionist painting. Impressionist paintings are beautiful from a distance, but make a lot less sense closer up. This is harder than it sounds!
The first step was to mount them on the bases. Apart from the artillery, these are mounted on 20mm squares of MDF, which I had bought along with the original figures, and of which I have more than I will ever need. The regimental artillery is on 15mm squares. I find this system of basing very attractive – though it is what caused my friend to abandon his miniatures, and buy in others mounted on larger bases, with one base to a unit. Baccus produces its infantry figures in 20mm strips of 4 side-by-side. Three of these fit comfortably on a base one behind the other. Historically formations were four deep, with about 150 files (i.e up to 50 per base). So these bases are both too shallow and too deep! Nevertheless this basing recalls contemporary representations in pictures. This would be easy if I could simply plonk the strips on the bases. But there are two problems. Firstly the command strips (supplied at a ratio of one in five in the packs) only have one standard bearer, along with an officer, flanked by two drummers. I like a good proportion of my units (typically the first battalion of a two battalion regiment) to have two flags. That means cutting up the command strip, and then the line strips to make room for the spares. The second problem applies to the Russians only. Russian infantry at this time was armed with a small proportion of pikes (one in eight); I read now (this wasn’t in the literature in 2012) that these were deployed in every other file in the front rank. I decided to represent this, rather than just plonking a strip of pikes in the back row of the centre stand, as I did before. I decided to distribute them PMPM; PMMP; MPMP – so that the pikes would be on the corners. That means cutting up the pike strips, and also the musketeer strips for the front row. Each pair units uses three command strips, three pike strips and 12 musketeer strips. You can just about see how this works on this close-up:
My representation of the Butyrski infantry regiment
The cavalry is more straightforward. These are come in strips of three, fore-and-aft, so they have to be cut up anyway. I mounted the Swedes three to a base, the cavalry staggered to represent the arrowhead formation, the dragoons side-by-side. Actually the Swedish dragoons fought in the same manner as the cavalry; they were equipped to fight dismounted, but I don’t know of them doing this ever in a significant battle (though I know almost nothing of the later war years), unlike their Russian counterparts. Still this mounting serves to distinguish them on the tabletop. Here are the four Swedish units:
The Swedish cavalry, with the dragoon units alternating
I mount the figures in a matrix of acrylic medium mixed with model railway fine track ballast and raw umber acrylic paint. This is the same method as before. The ballast is something I have had for decades: it is finer, lighter (in weight) and more uniform than the sand I use in bigger scales. It gives the surface some texture. After the assembly is fully set, I primed them with gesso mixed with paint. I went for an overall pale grey-green shade (it has to be pale because of the gesso). This is equivalent to the ground in a canvass painting (thinking back to the Impressionists) – the idea is that the colour doesn’t jar if it shows through (modern painters sometimes use a bright ground, thinking that it adds to the effect when it shows through – not appropriate for the wargames table!). Since it was going to be difficult to paint the bases between the strips, I wanted something that would merge with the base colour comfortably – hence the green element. I was overthinking that – in future just mixing in some raw umber (of which I have industrial quantities, thanks to a mistake by my supplier) with the white gesso will be fine. I used an old paintbrush to do the priming, covering both figures and base. I gave some thought to using an airbrush, but actually it can be a little hard to get airbrush paint into nooks and crannies, and getting between the figures and rows wold be tricky. It didn’t take too long with the brush, but it looked awful afterwards, though a lot better after cleaning with brush soap.
Next was the mass painting stage. At his point I treated all ten units and extras as a single batch, though no colour applied to all of them. I started with the horses, using various shades of brown, with some Payne’s Grey, so get a variety of bays, chestnuts and blacks – with a few greys, mainly for the musicians. Also I applied the main coat colour (blue, red or green), and then dark grey for the tricorn hats. For all this, I used my now standard technique of mixing artists acrylic (mainly Liquitex – as their tube design is easily the best, prolonging their life, as well as being excellent quality). No faffing with oil paints as I do with my 18mm horses. All mixes have a bit of white in them. The red was dramatically dulled down (from Cadmium Red Hue) to reflect cheap dyes and campaign weathering; the green (Sap Green as a basis) and blue (Prussian Blue Hue) were dulled down somewhat less. The horse colours (Raw Umber, Burnt Umber, Raw Sienna and Burnt Sienna) didn’t need much mixing beyond a touch of white – though the Siennas are a bit bright and I mixed a bit of the Umbers in.
After this I concentrated on finishing each unit in turn. The Russian units were in pairs of battalions from the same regiment, and each pair was treated as a batch. My worry was that if I did each colour for the whole assembly, I would start to lose the will to live, as the results would take so long to show – as well as the greater likelihood of mistakes. What did I paint? Flesh on the faces and hands; red or yellow facings on the cuffs only; brown for the muskets (where easy to reach) and the hair at the back of the head for the back row; dark grey for the pikes, cavalry boots and the scabbards for the rear ranks only of the infantry; I used a paler brown for the pistol pouches on the front of cavalry saddles . Accuracy was not a priority: blobs here and there where I could reach the spot with a brush. I ignored the legs of the infantry and the neckerchiefs; these aren’t visible enough. Finally some detailing. The hats got trim of white, yellow or gold. This detail really stands out when viewing the figures from above; similarly the karpuses had a contrasting lining colour (white or yellow – against he red main colour); silver for the bayonets, sabres and the pike trips; visible straps on the backs got quick attention too. The drummers and officers got a little more work (including the flags for the cavalry – a base colour, edging and a blob in the middle). And that was it. The final step was to wash the figures with diluted ink (peat brown or black).
Then, of course, there are the bases. I don’t go for the fashion of elaborate works of art; I don’t want the bases to draw attention away from the figures, and ideally I want them to blend with the table. At this scale my normal techniques of using flock, sand and/or static grass wouldn’t work – the strands and grains are too big – I just used paint and the texture arising from the basing material (i.e. the model railway ballast). It took me a long time (i.e. trial and error) before I settled on a shade of green that wasn’t too verdant or too grey – a combination of black, white, Yellow Oxide and just a little Sap Green. I then gave them a heavy highlight of a white and yellow mix. I also used a white and Raw Umber mix on some of them. I was left with the issue of the base sides. The MDF I am using for the bases is very chunky – typically I use much thinner material for bases, so as to blend better with the table. But I like the feel of the chunky bases, and it certainly makes handling easier – you can grasp the bases rather than the figures. But what to paint them? At first I tried a green to match with the table surface – but then I noticed that these edges were often shaded. I thought a bit of countershading might work, so I used a white and Raw Umber mix. Whether or not the countershading works (not really light enough from the pictures above), I did like the overall result.
The infantry represent three Russian regiments – Astrakhanski, Butyrski and Schlisselbergski, with two battalions each. Uniforms were subject to the colonel’s whim at this stage, and there was a lot of variation. Evidence for particular regiments is patchy, and my sources back in 2012 disagree with the most recent ones (a book from Helion), so there’s a lot of guesswork. I gave the Astrakhanski and Schlisselbergski green coats with red facings – the most common scheme, which later became the standard. I gave both of them a carpus for headgear in place of the usual tricorn – because I had a lot miniatures with these hats which needed using up (Bacchus don’t appear to sell them any more for the Russians) – these I coloured red and yellow and red and white (one of my existing regiments has a green and white karpus – allowing a ready distinction between the three units). The Butyrski regiment I gave red coats faced yellow, with tricorns with yellow trim. I haven’t given them their flags yet – I’m waiting for colonel’s flags with eagles, though I have coloured company flags from Baccus. I painted the regimental artillery crew in the uniform of the parent regiment (though with tricorn hats in all cases), but the gun itself in red, as used on the bigger guns.
The Schlisselbergski infantry.
The Swedish cavalry represent the Småland and Nyland Indelt regiments, along with the Gyllensterna and Taube dragoon regiments. These all had the standard Swedish blue uniforms; I decided not to try and represent the yellow breeches or coat turnbacks, with facing colours (yellow, red or blue coat colour) on the cuffs only. On the Swedish infantry it will be worth a dab of yellow on the front for the breeches and turnbacks for the front rank at least.
The Nyland Indelt cavalry
And that was it. Alas my photography at this scale is a bit weak, so I’m not giving much of an impression of the result. They are a bit dark maybe (but they need to fit in with my earlier figures) – perhaps an example of the rule that you should use paler colours for smaller scales. But the results work on the tabletop – the Impressionist approach works, and is certainly quicker than attempting too much detail (and correcting minor mistakes). I did need to repaint the bases on my earlier figures to make the assembly more coherent – but I didn’t like these earlier bases anyway – they were too bright and too dark. I will move straight on to next batch, which will add four Swedish infantry units, along with two more units for the Russian Guard, a Swedish heavy gun, a Russian mortar and more limbers.