What a year 2020 was! From early March meeting up for wargames became impossible. Trapped at home with social activities drastically curtailed, most hobbyists had a ready outlet – preparing more figures for the tabletop (plus terrain items). Almost all of us have a “lead mountain” (though these days with a large plastic component in most cases) of miniatures waiting to be painted up, so this was a good opportunity. Alas many of us also browsed hobby suppliers online and added to the mountain as well. Hobby manufacturers were doing a roaring trade.
But for me it was different. I had (and have) a substantial lead mountain, but 2020 was the year we chose to move house. In January we readied the house for a sale; in February we were frantically sorting and packing our accumulated 24 years of possessions, and the lead mountain disappeared into boxes. In March we moved out. We had chosen but not legally acquired our new house in rural East Sussex, and lockdown slowed the acquisition process right down; we did not complete until the end of July. In the four month interval we stayed at a friend’s holiday home on the coast, with a small fraction of our possessions, and almost all hobby material in storage. Once we moved into the house the early priority was settling in, and getting on with the myriad of tasks associated with a new home, and then their was a health crisis with my father’s health deteriorated and he passed away (at 96 after a period of deteriorating health). It wasn’t until later in November that I was able to get back to painting miniatures. I have just finished my first lockdown project: upgrading my French light cavalry. This is a report on how the went. Warning: it is quite a long one, as I find it useful to keep a record of the main points – you’d have to be quite deep into the hobby’s obsessions to find most of it interesting!
This project has been a couple of decades in the making. My original Napoleonic armies, back in the 1970s, built up with my brother, were Airfix plastics for Waterloo. In the 1980s I decided to move to 15mm metal figures, with French and Austrian armies, using Minifigs. But I became tired of these fairly quickly – the figures were quite crude – so I decided to upgrade. This was mainly a mix of Old Glory 15s, Battle Honours and AB figures. This upgrade still hasn’t been finished for my Austrians, where my line infantry is still the old Minifigs, and the whole army is in a sorry state. But in a major push I have managed to upgrade the French, mainly with the OGs. While doing this I bought the figures I needed for the light cavalry. In those days OG sold their cavalry in packs of 30, with two sets of command figures. I bought one each of chasseurs and hussars. 12 of the hussars got painted up relatively early, but the rest languished as I was distracted by other projects. My Minifigs chasseurs soldiered on for quite a while but , but eventually I retired them as they were generally the only old Minifigs on the table for the French.
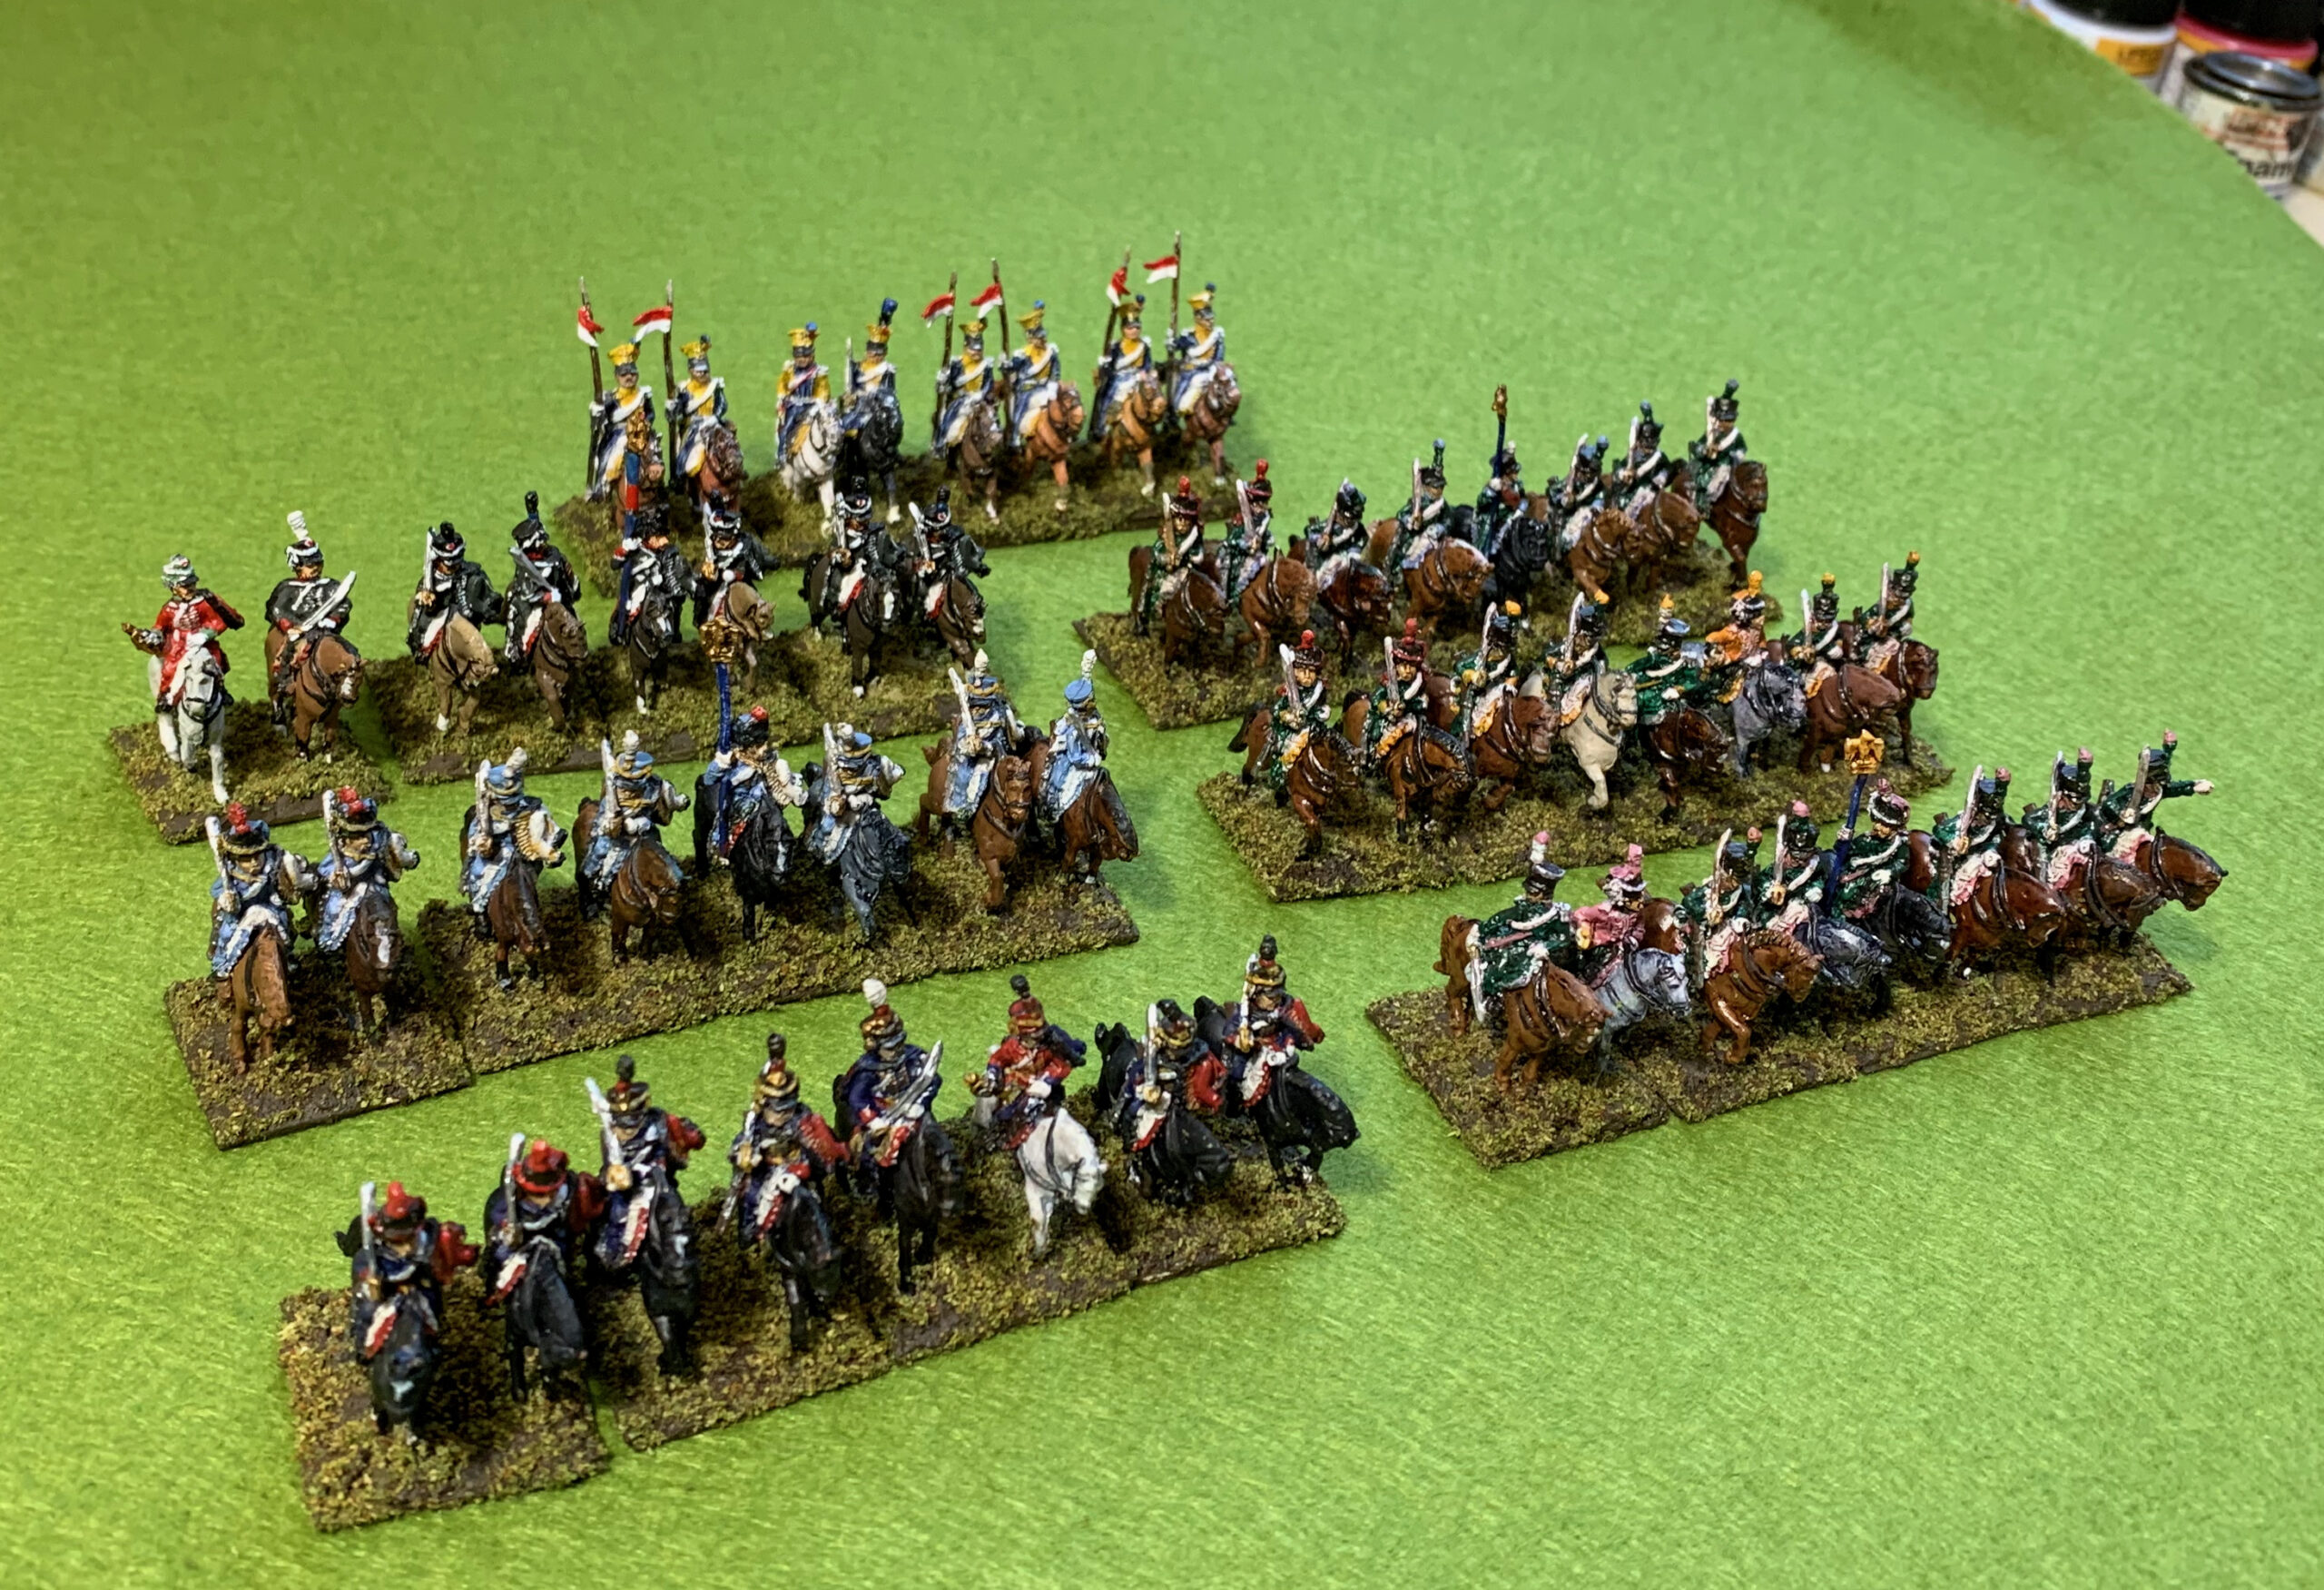
I have been short of French light cavalry ever since. My hussars (painted up as the 8th regiment) did sterling service, joined by a unit of AB Polish lancers and occasionally dragoons making up the difference. The 8th Hussars have green uniforms, so they resembled chasseurs from a distance, and it sort of worked. My main efforts went into upgrading the French infantry. After that the big push was to create an army of 1815 Prussians. while doing so my French cavalry was looking tired. So at the end of 2019 I decided that I really had to find those OG chasseurs and bring them into service. While doing this I found the other 18 hussars (or most of them), and started to think I could paint these up too, and bring in some more visually striking units than my faithful 8th. At this point I was thinking that the way to paint horses was to use large batches without riders (then glue primed riders to their backs and paint these mounted). So I decided to do all the horses in one batch; this morphed into doing all the riders in a single batch too. Normally I do two 8 figure cavalry units in a batch (though for infantry it is usually three 12 figure units). This time I wanted to do three chasseur units (of 8) and one hussar unit. The single hussar unit became two, as I decided to repaint four of my 8th Hussars, bringing it down to my new standard size and giving me an extra unit.
The horses
Many hobbyists struggle with painting horses. Look at the lovingly painted figures in wargames magazines (usually 28mm), and you will often see splendid riders sitting on very flatly painted horses, conforming to no common natural colour pattern. I have had my own struggles, and I still haven’t hit on a technique that I’m really happy with. This time I decided to paint a large batch without riders, with a white primer, and building up layers of relatively thin artists’ acrylic. I divided the group of 36 horses into subgroups: the biggest being bays, then a smaller group of chestnuts and smaller still groups of blacks and greys, with a single dun. I upped the number of blacks when I decided to mount the 4th Hussars on black horses, though four of these were to come from repainting the mounts from the 8th, and not the 36 new ones.
The priming and very first coats were actually done in early January before I realised how incompatible this project was with getting the house ready for sale. With some of the horses I tried a bright orange undercoat. I have long wondered how to paint a horse to get that wonderful glow that some chestnut and bay horses have, so I though that a bright undercoat with layers of. duller paint on top was a possible way to go. It didn’t really work as the coverage of each layer was generally not quite 100%, so there would be tiny patches of bright colour coming through! The process of layering took a long time before I started to get anything that looked satisfactory. what I did learn was that it was easier to put on thin layers of pure pigment, rather than try to mix them in advance, except with a little white maybe. I use artists paints, and the main ones I used were Raw Umber, Raw Sienna and Burnt Umber, with Payne’s Grey for the black and grey, with some Titanium White as required. I also needed to introduce some red, but my Burnt Sienna (the most suitable pigment for this) had given out, so I used some old Venetian Red, which was a bit too bright and had to be used in sparing quantities.
The greys were he hardest. I started all but one with a thin coat of Payne’s Grey (which is actually a decent match for horses’ skin), and then built up lighter grey colours, with a bit of speckling. Grey horses a generally pretty textured, and moving from dark to light (rather than the more usual light to dark) is one way of achieving this. However my white came from a free sample tube, and I don’t think the quality was quite up to scratch. I had to rescue some of the models with a thin layer of Liquitex white. In the end I was more or less happy with the bays and chestnuts, though I did not achieve the glow I wanted, and the blacks were pretty easy (one I painted as a very dark bay, which turned out to be nearly indistinguishable from the others – as in life, as I remember noting from the Horse Guards in Whitehall). The greys, and the dun I was much less happy with, but they were OK to put on the table. I didn’t manage to achieve a proper white horse among the greys – I find these very hard to do; they look quite simple at first, but look closer and you see sort of textures an slight colour variations..
I have another batch of OG horses which I have started to paint in acrylic (bays and chestnuts); I will use these for a batch of Prussian cavalry using acrylic, but my next big experiment on horses is to use oil paint. I did think that doing large batches of horses worked though, especially when being a bit experimental. It’s easier to try different ideas out, though also have to do a lot of repainting. But many layers of paint is supposed to give depth, so I’m not stressed about this.
The chasseurs
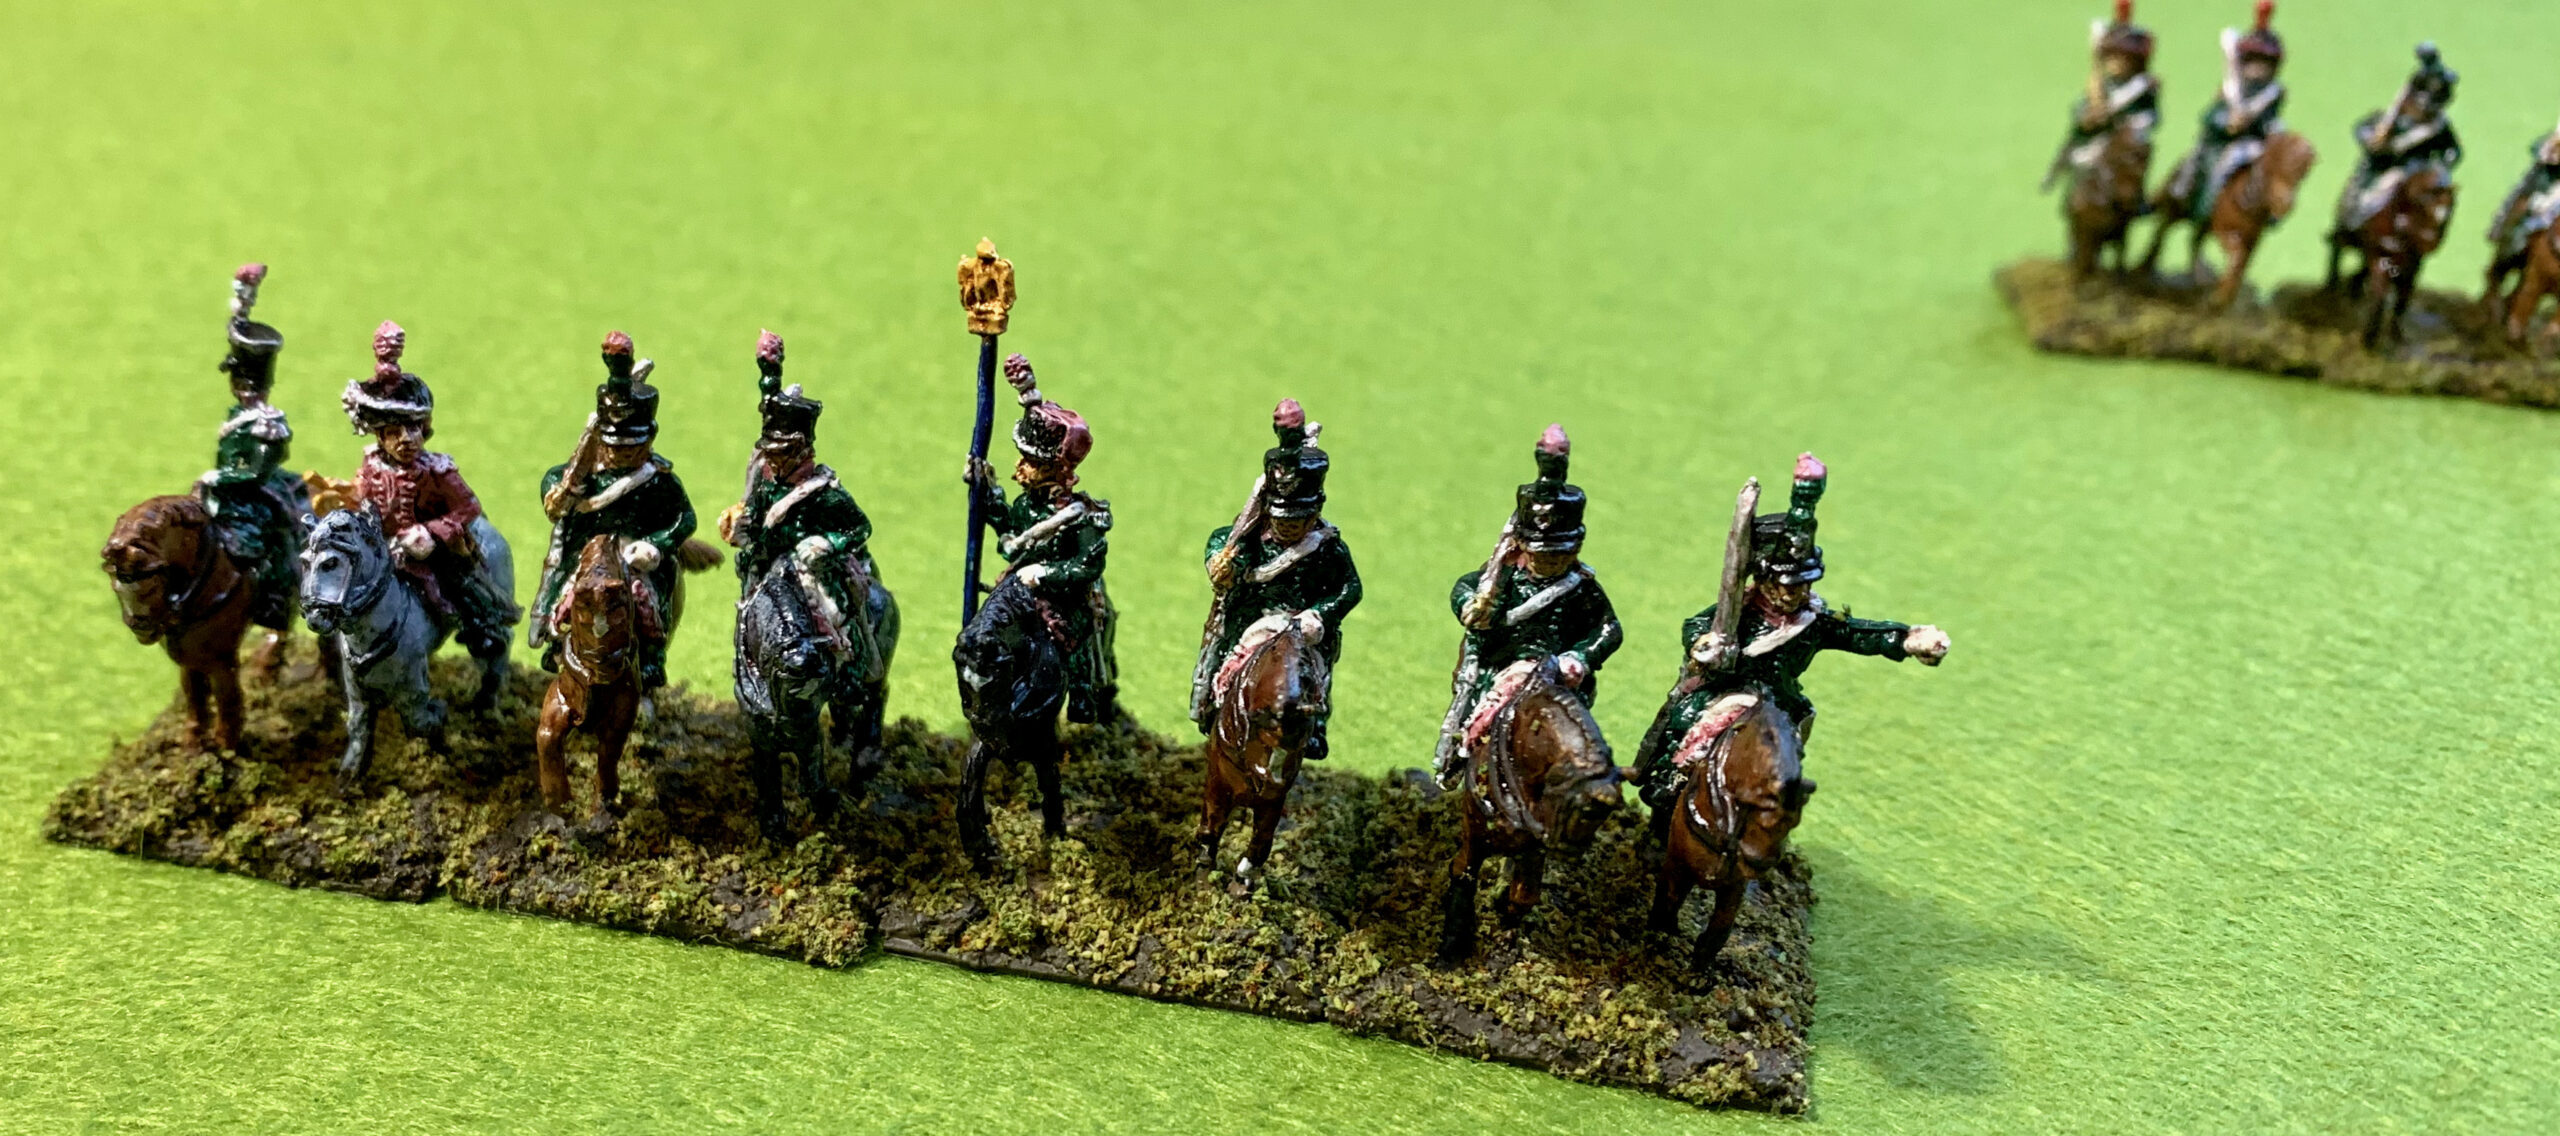
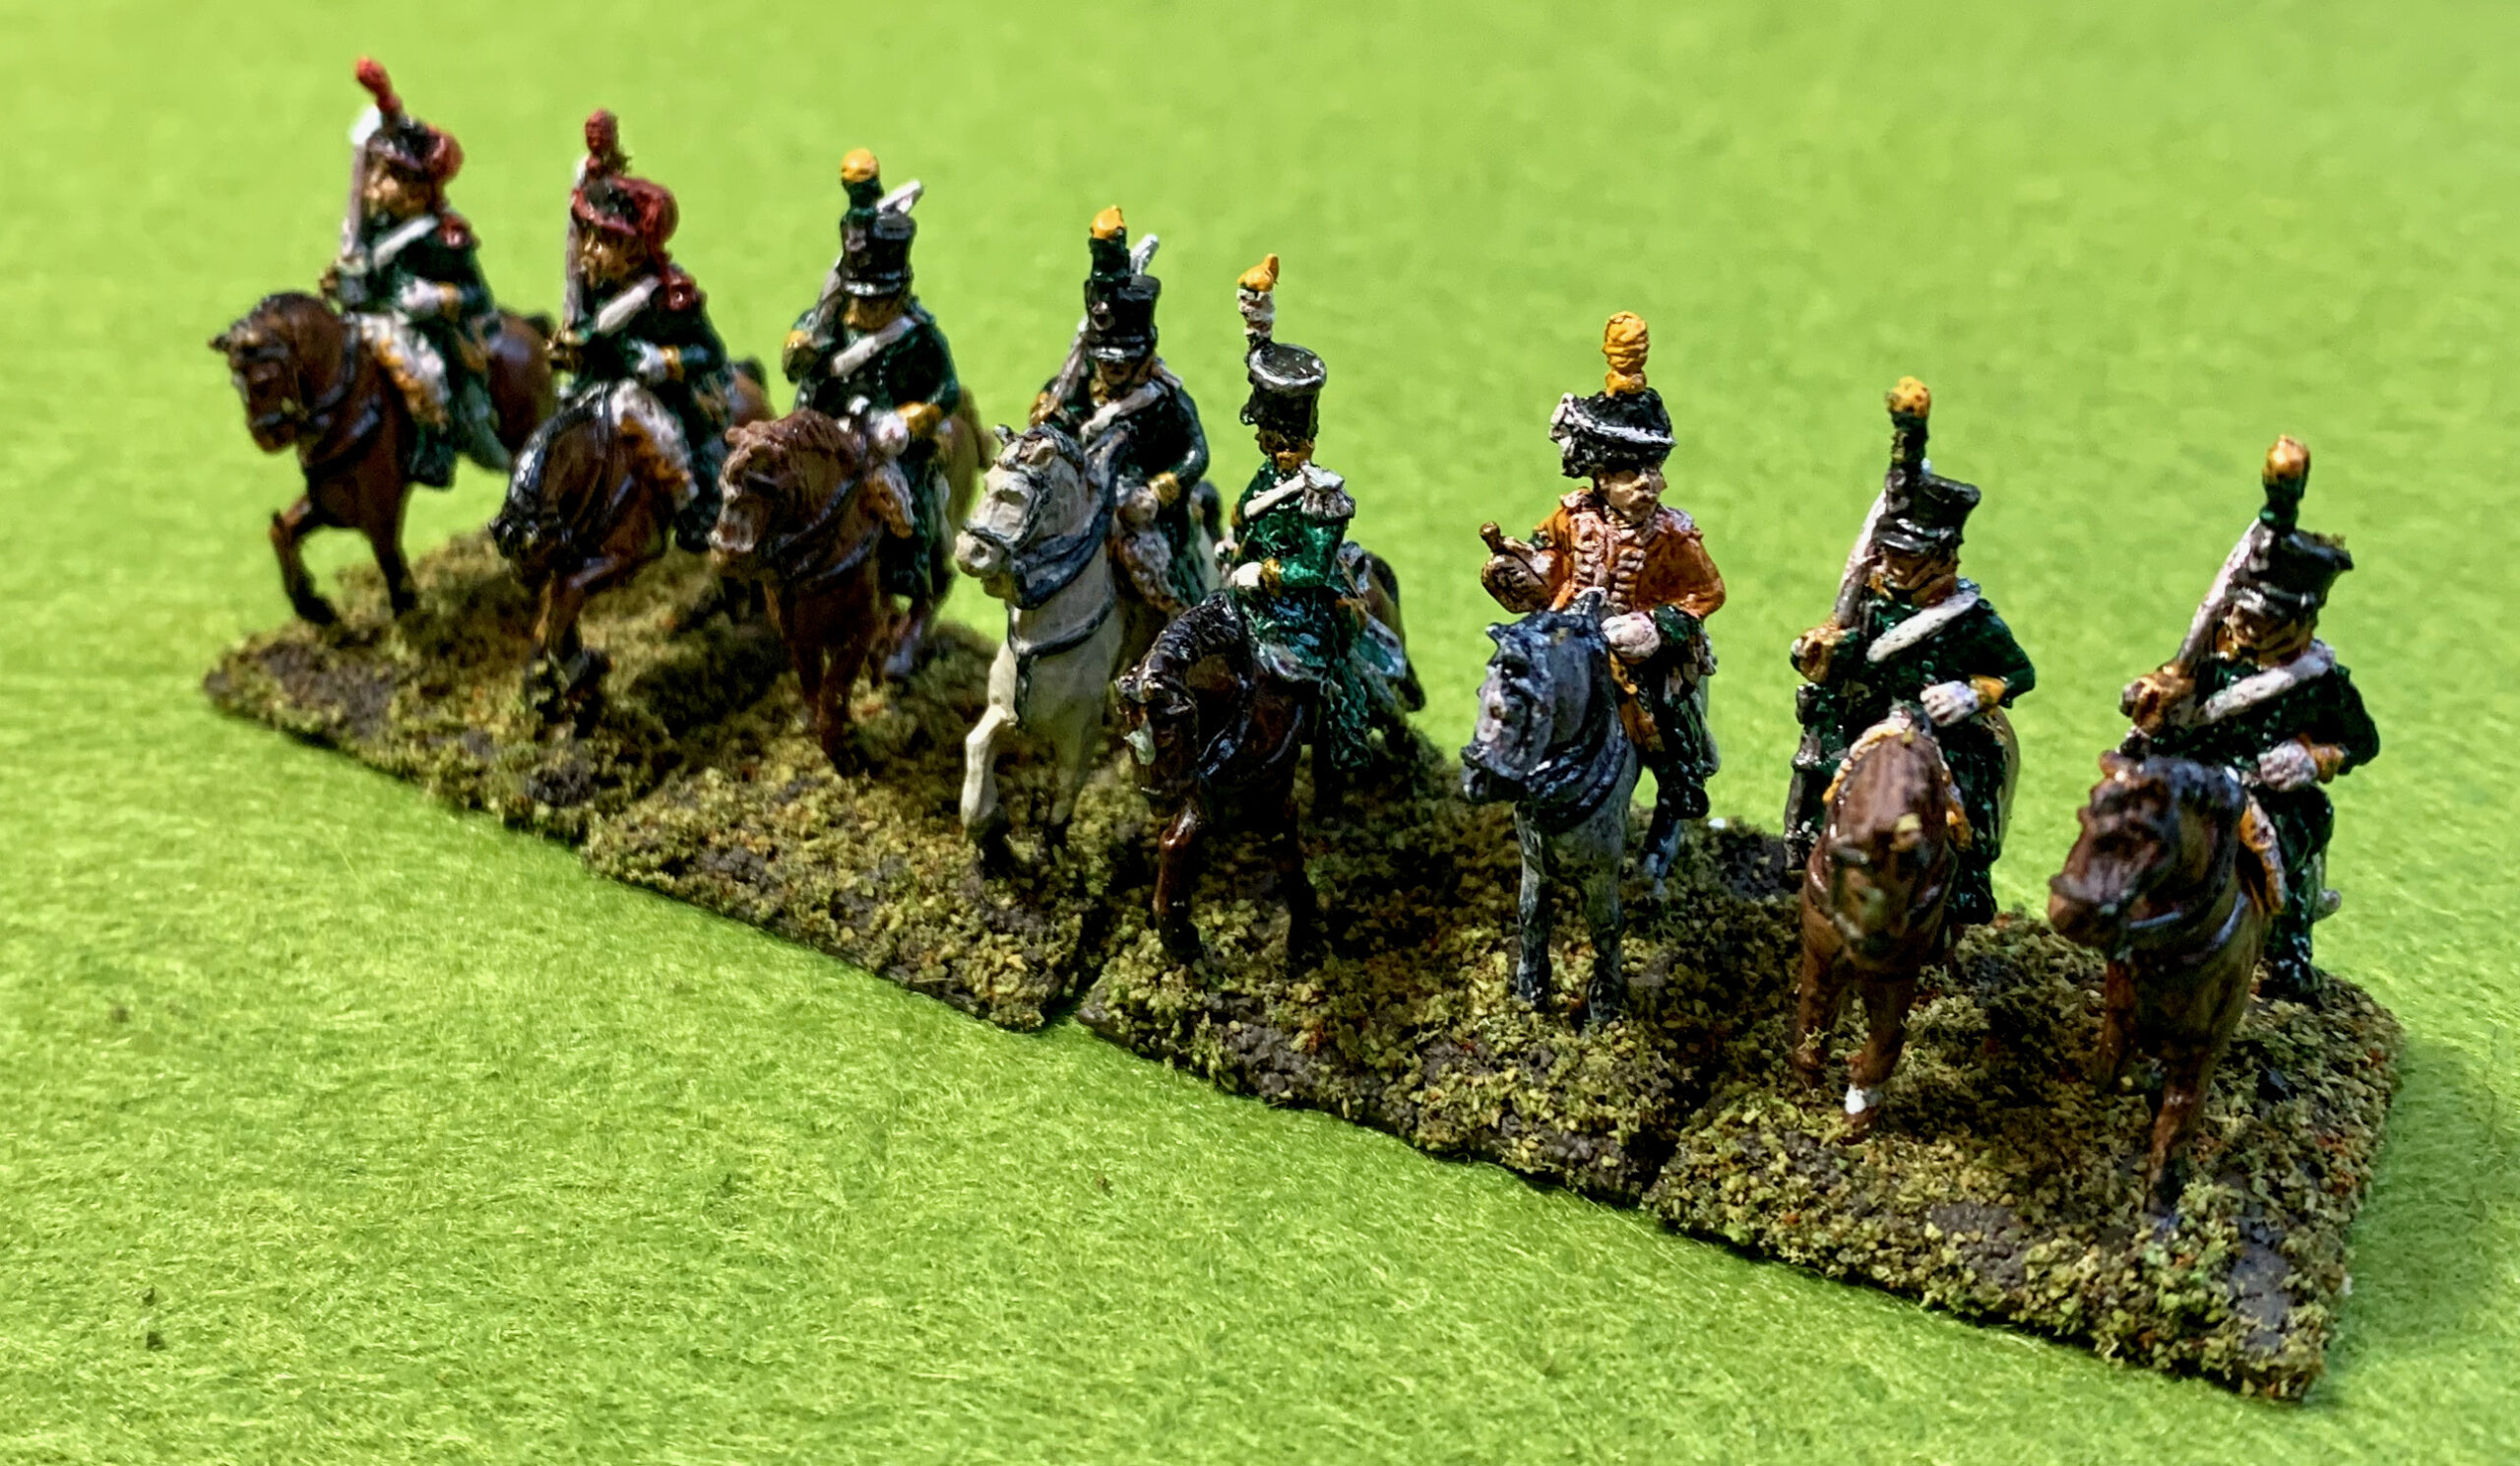
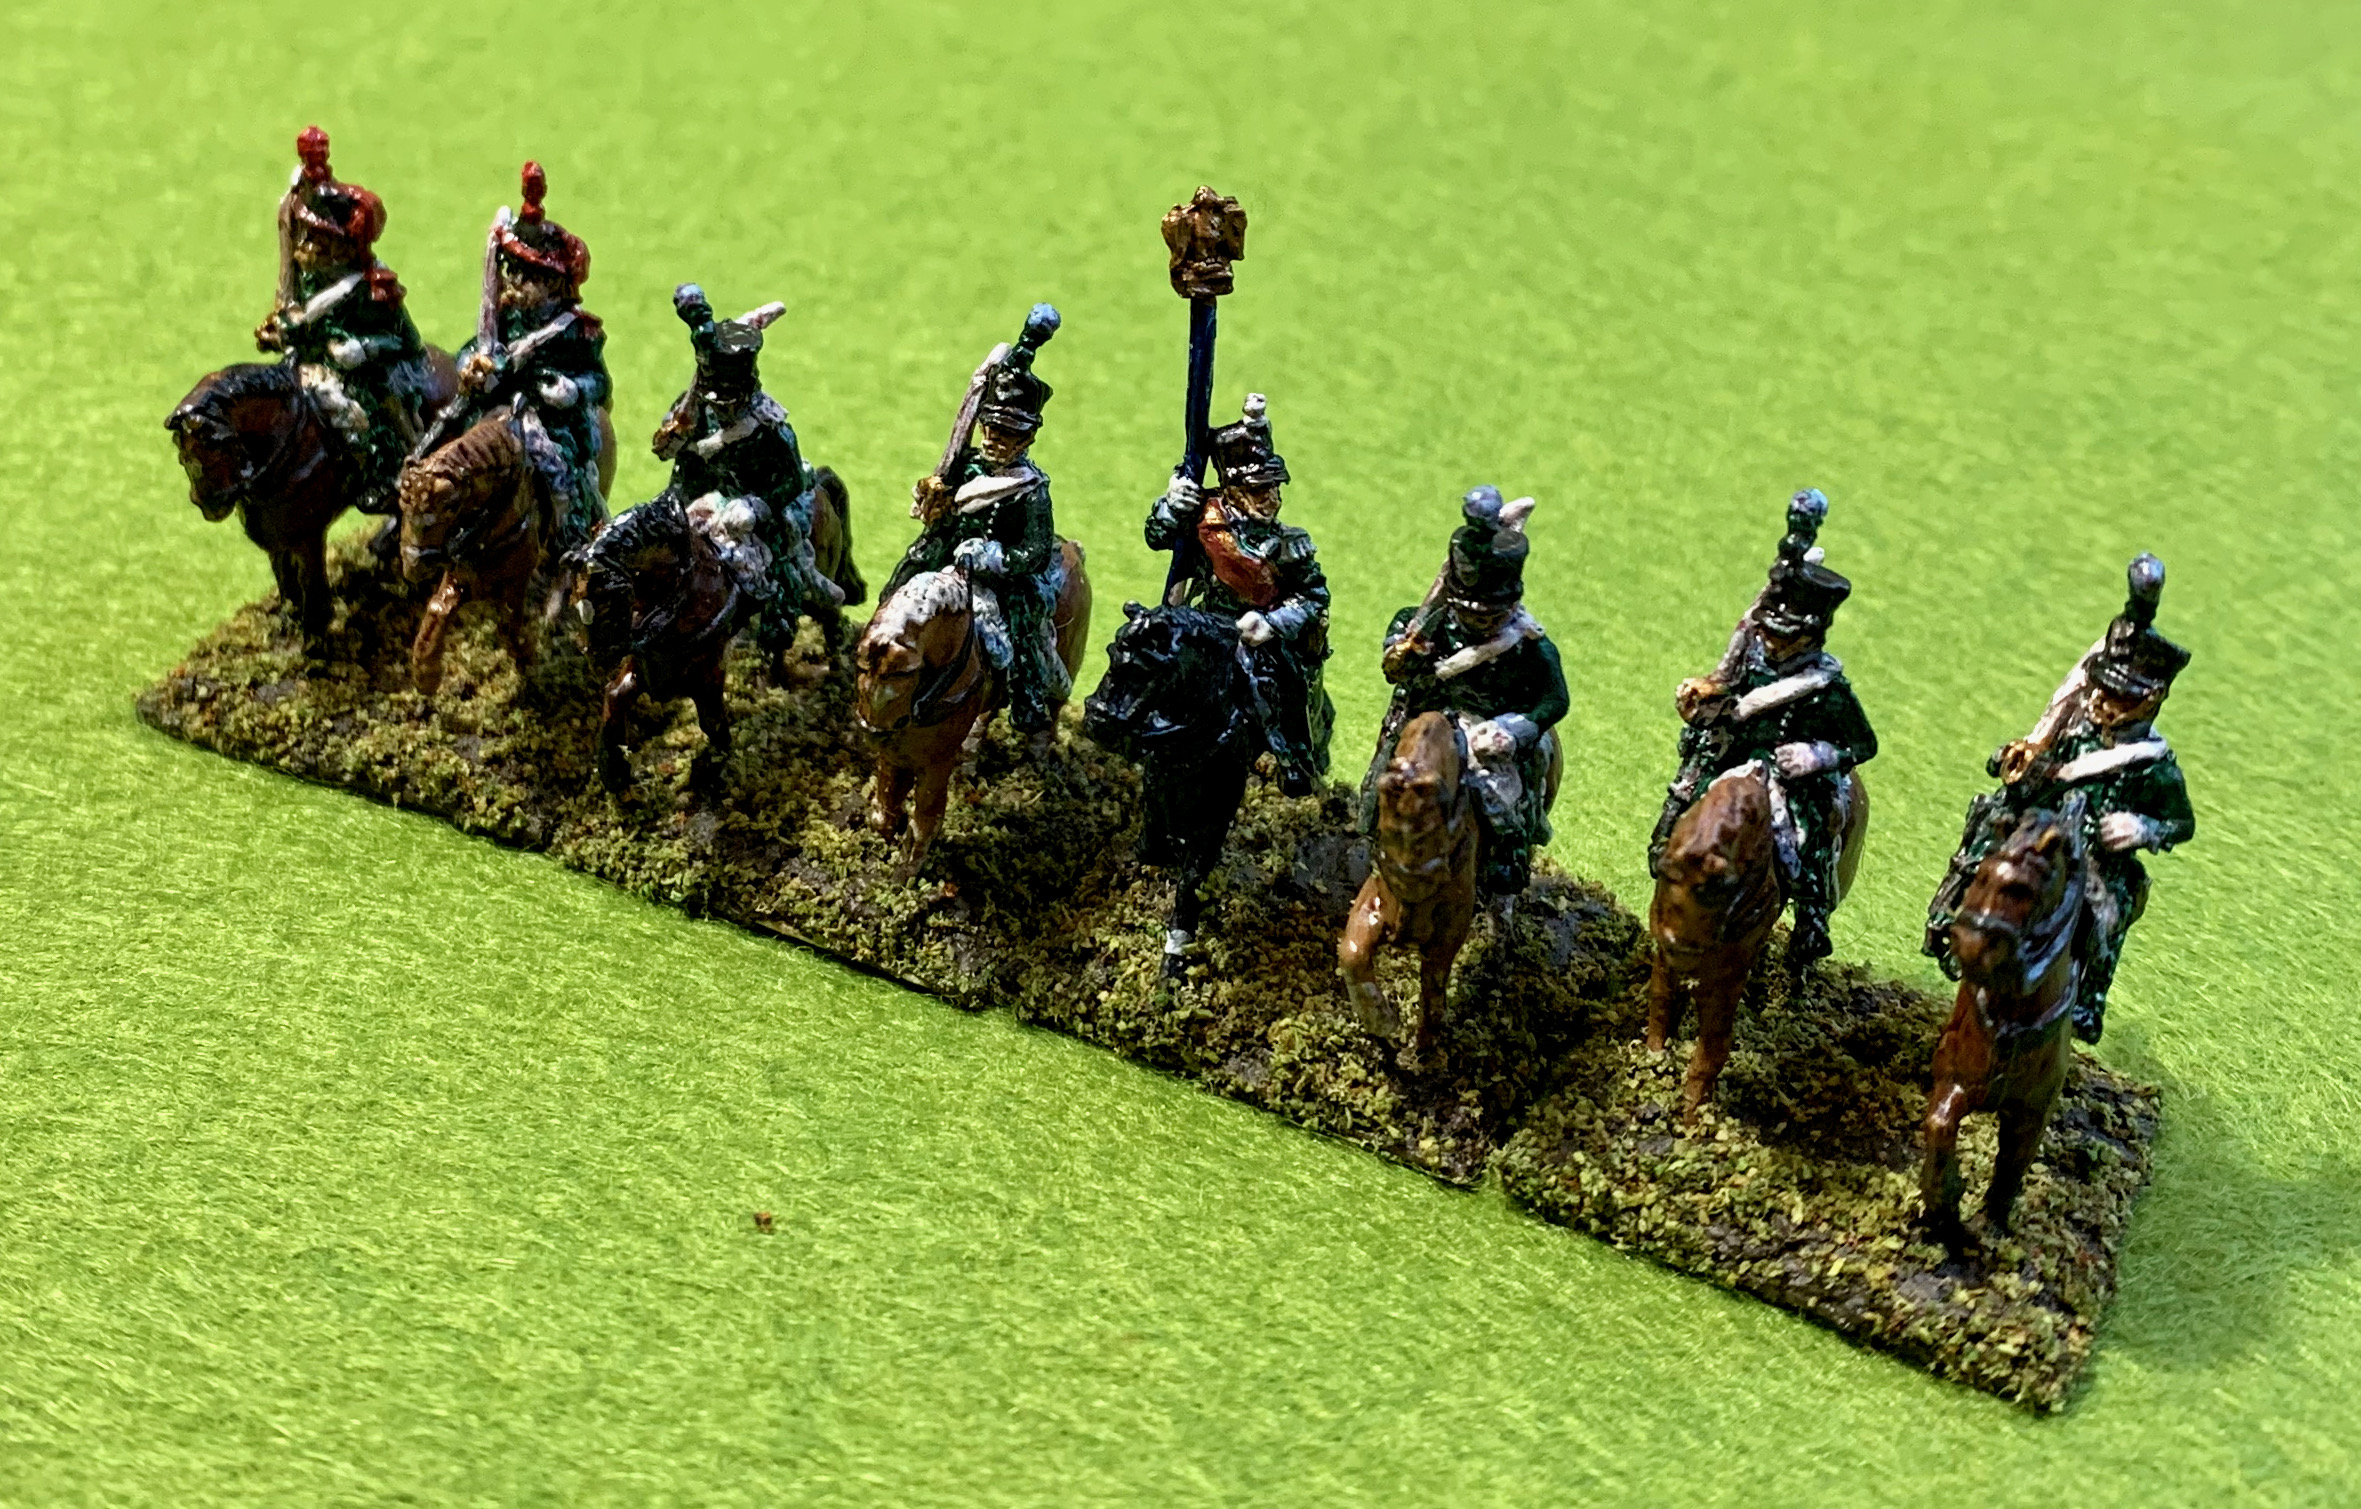
I was always going to do three regiments in my new standard unit size of eight. Initially I chose 13th, 16th and 23rd, all serving in Lasalle’s division at Wagram, alongside the 8th Hussars. But the 23rd had capucine facings – a sort of orange-brown. With the 13th having proper orange facings, I thought the contrast wasn’t enough on 15/18mm miniatures. So I picked an alternative colour, I’ve always liked pink, and chose the 9th regiment, which served in Army of Italy in 1809 (including at Wagram) alongside the dragoon regiments in my army. All the cavalry figures were to be painted as at 1809, approximately, since that was how the castings were made. In fact most of my future campaigns are likely to be 1813-1815, but that is a detail! The chasseur uniforms of 1809 were more interesting anyway, especially the trumpeters. I didn’t research the uniforms too heavily, as I wasn’t prepared to go in for head-swaps and other conversions that would doubtless have resulted (though I did exactly this for my French line infantry). So the uniforms are quite generic, based on the regulation facing colours, reversed for the trumpeters. My main priority was to get theses figures table-ready, and to finish in 2020 if possible. I didn’t try much detailing especially in the lower body, which is not so visible on the table.
As usual I used artists’ acrylics (mainly Liquitex). Each colour was mixed for the occasion. The most important colour was the green for the basic uniform. Since taking up artists’ pigments I have struggled with greens more than any other colour. I wanted a slightly blue hue for the chasseurs. The best place to start would have been Hooker’s Green, but my tube from Daler-Rowney had dried up. This is not the first time this has happened recently with Daley-Rowney paint, which I initially put down to poor cap design, but I think may be deeper. I am still using Liquitex and Winsor & Newton paints bought in the 1980s. That left a choice between Sap Green, a well-behaved pigment which is a bit warmer than I was looking for, and Viridian, a bluer green which I had bought following a recommendation form an artists’ book. I chose the latter because it was closer to the bluish hue I was looking for. I immediately regretted it, as it is a thin an nasty paint that needs multiple coats on miniatures. I mixed it with a bit of Venetian red to tone it down, and a little white – which these days I do for all paints I mix.
To finish the figures I used a wash of Winsor & Newton Peat Brown ink. This went on undiluted from the bottle – a little risky but it worked. This has a sightly reddish hue, which worked fine against the green of the uniform, as well as the brown and flesh, but stained the white belts in an unhelpful way; these needed to be restored with some white highlight paint. It was a disaster on the pale grey and roan horses, which I had rescue with some white paint. Apart from these snags the wash lifted the figures beautifully, and brought out the details very nicely. I decided not to try a dry-brush highlighting. I’m not sure this makes enough difference on figures of this scale; I’m often too impatient and start with too much paint on the brush; and it is expensive on brushes. The ink wash left a slight sheen, which I don’t mind on Napoleonic miniatures, and helps bring out the detail (for example the breast buttons on the pictures above, which I had not attempted to pick out in paint). I decided not to try applying varnish either, as I was OK about the sheen from the ink.
The hussars
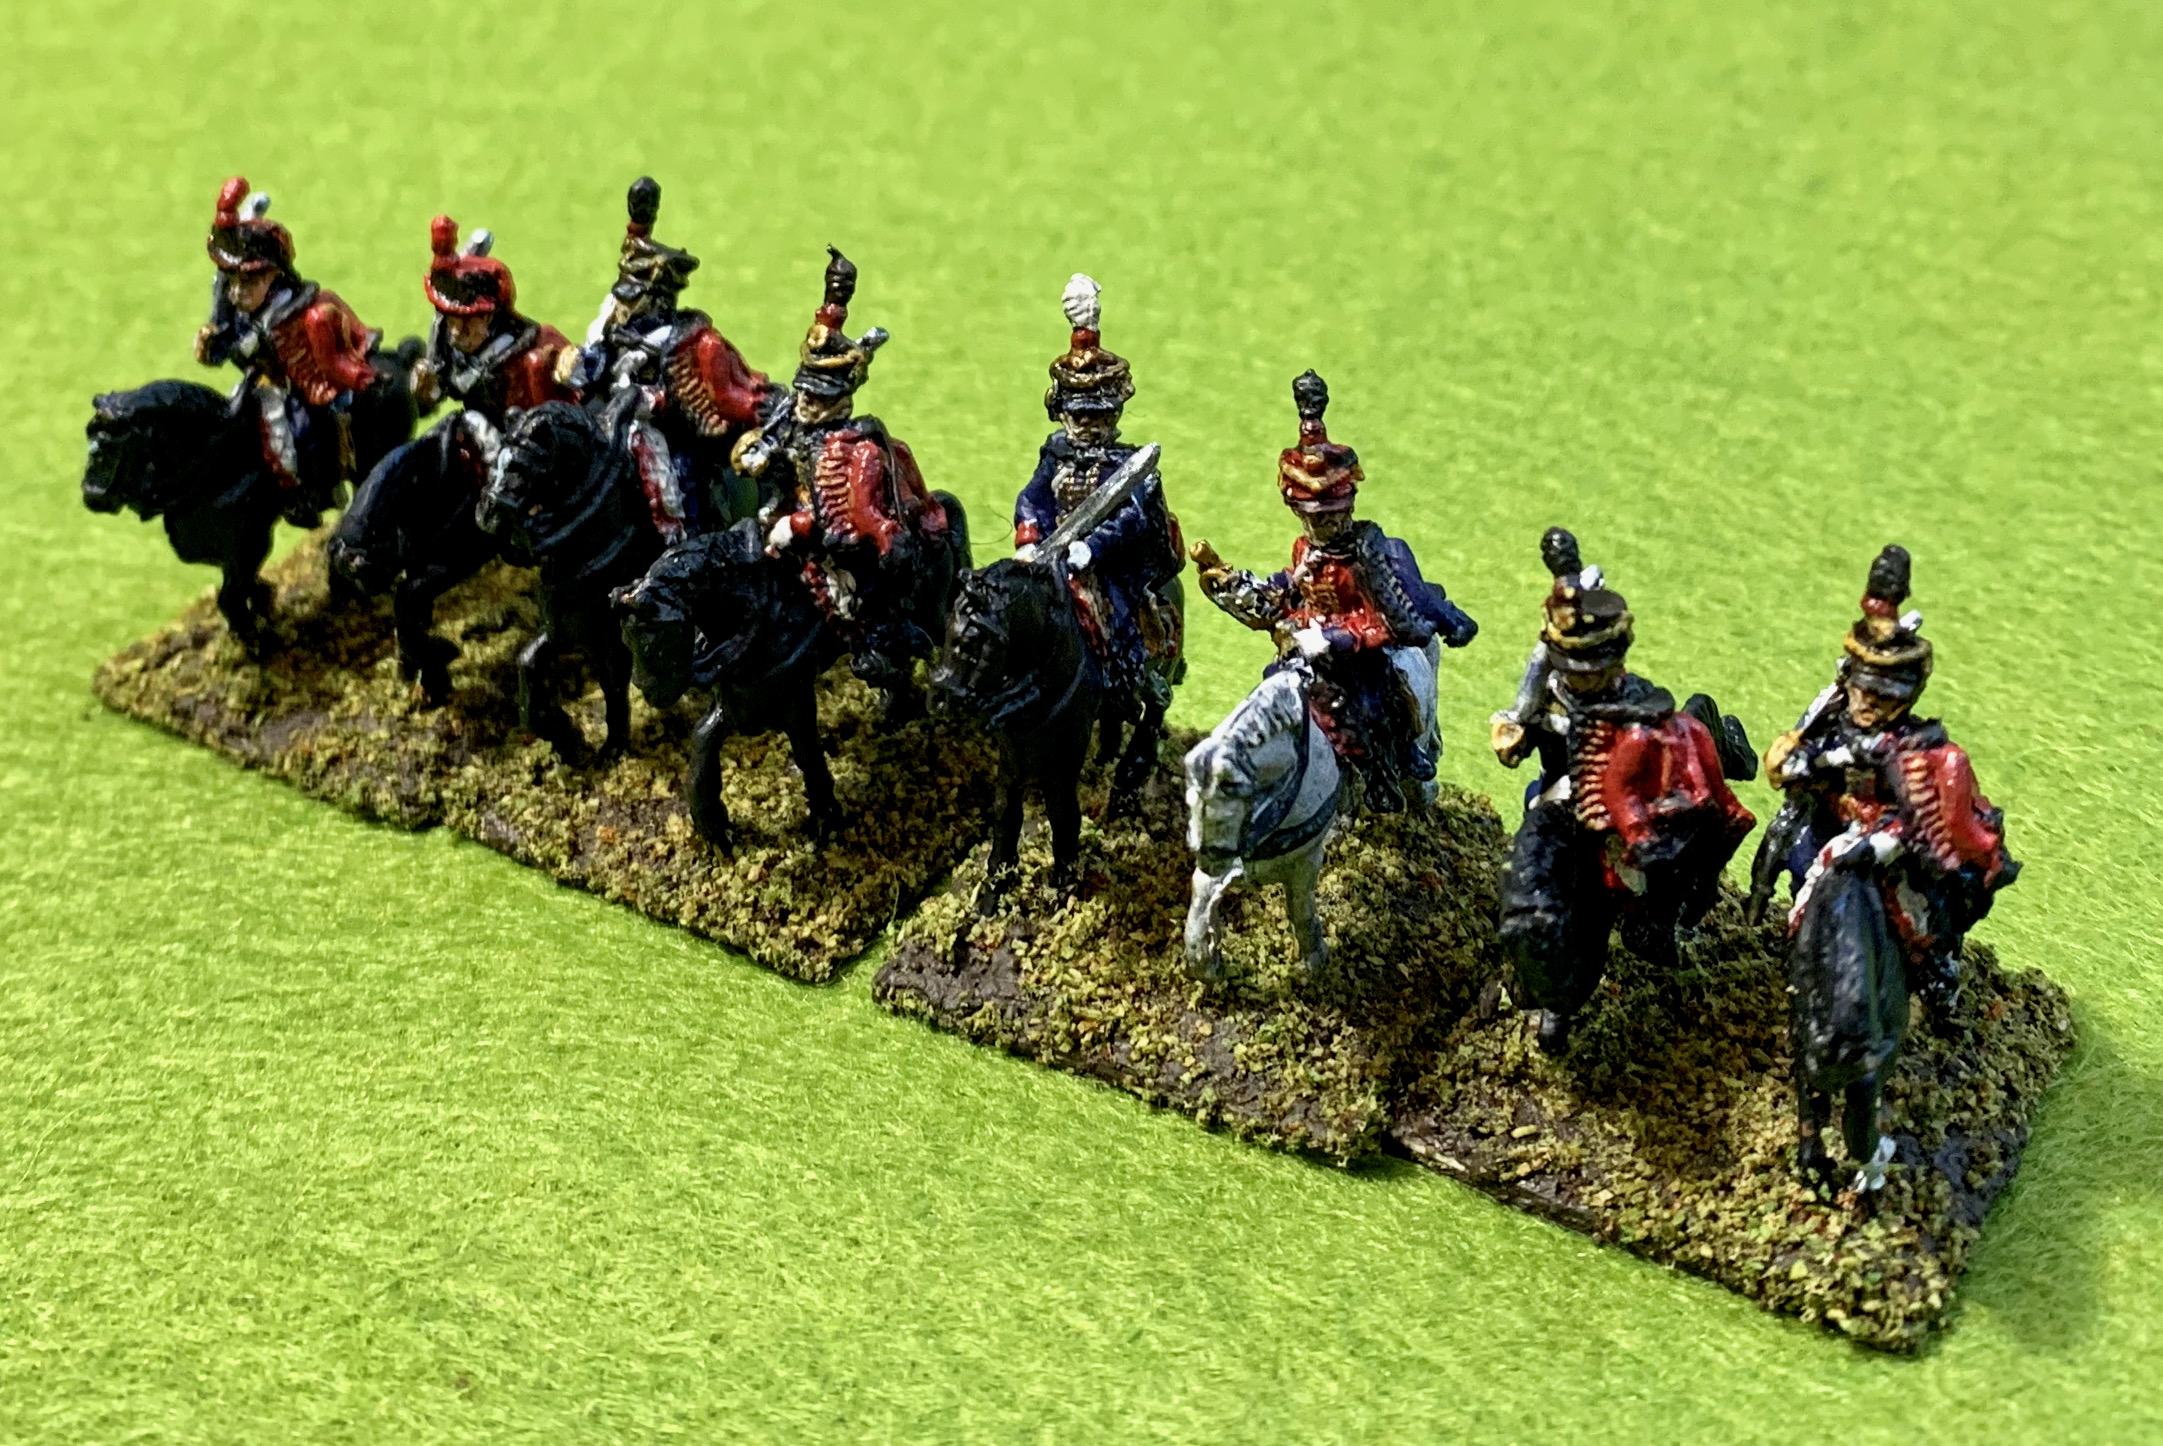

Hussars are irresistible for collectors of Napoleonic miniatures, with their flamboyant uniforms, and I chose to paint up more units than I will ever be likely to need on the table at one time – simply because I had the castings. I had originally picked the 8th Hussars as this was the hussar unit most engaged in the 1809 campaign against Austria, the main focus of my collection at the time. It turned out to have the dullest uniform of all the French hussar regiments. This was made worse by the fact that I decided to paint the legs in overalls, rather than boots and breeches – the breeches were red. The detailing of the OG casting on the legs is a bit vague, and it wasn’t clear which it was. There was a uniform from this regiment on display in the National Army Museum in Paris, which showed the overalls, so I decided to follow this. As noted above, this unit served as generic light cavalry, frequently standing in for chasseurs, so predominantly green uniform was appropriate.
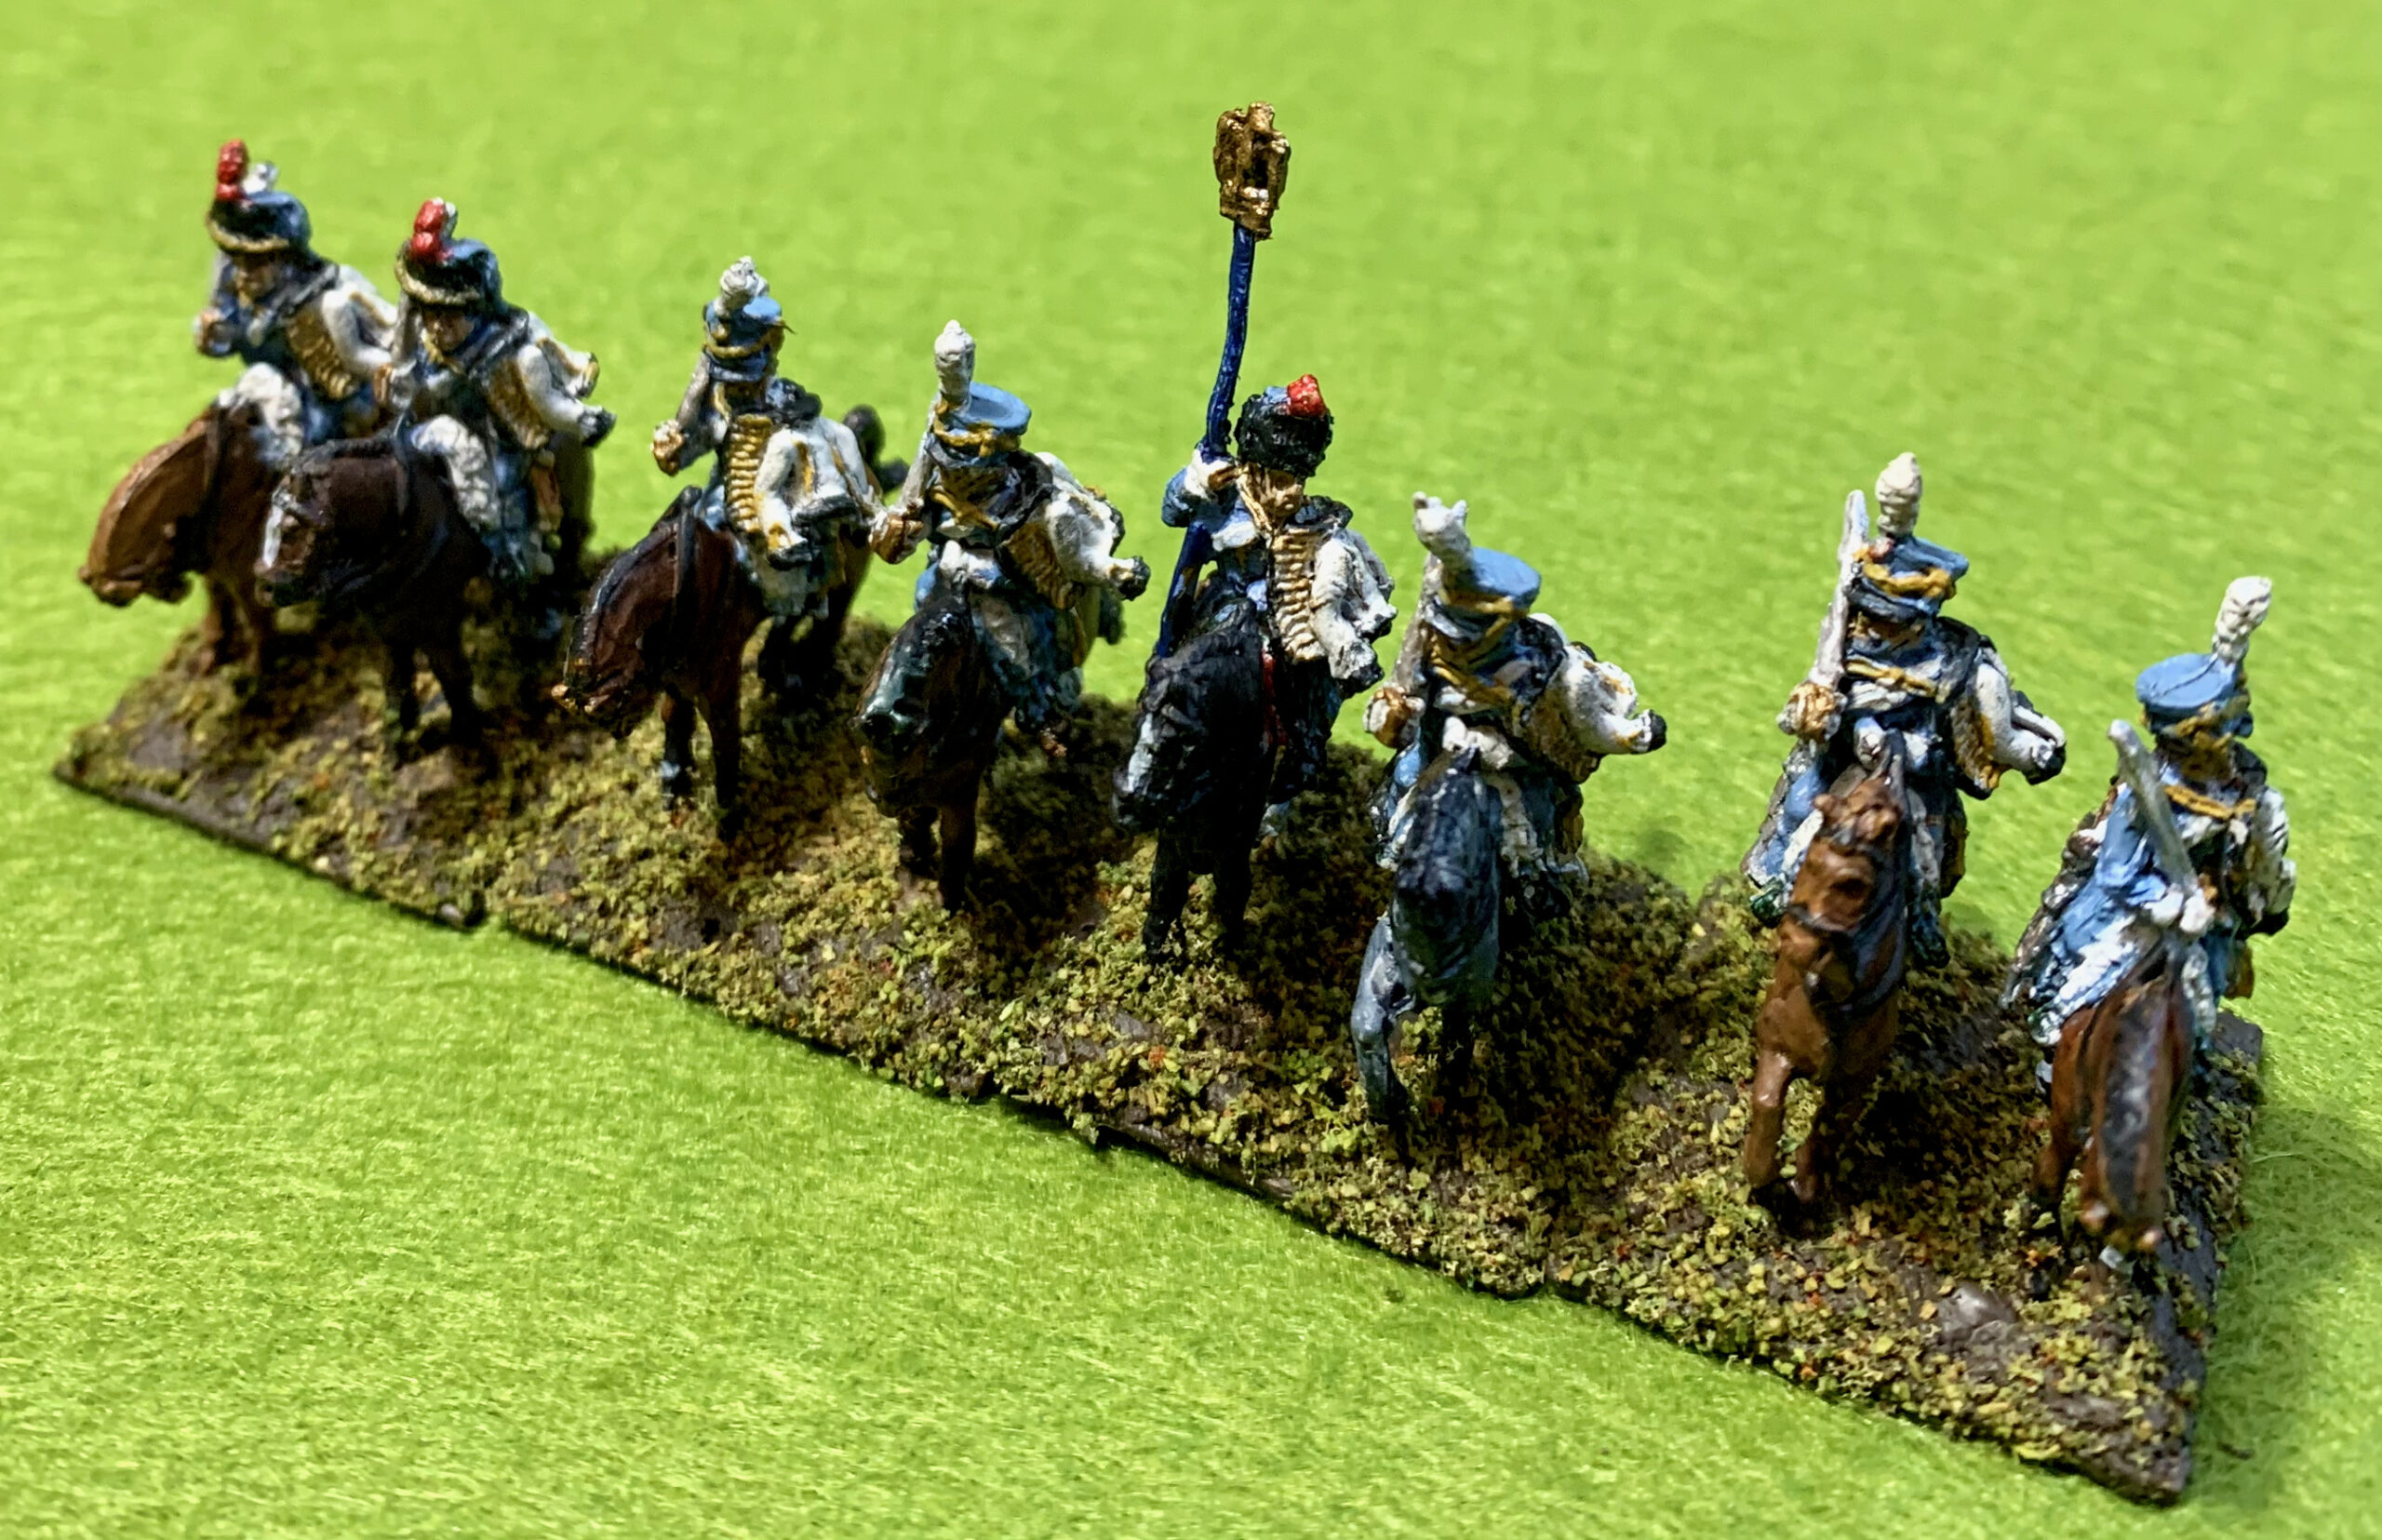
The first of the new regiments I chose to depict was easy: the 5th. This regiment with its white pelisses, has always been my favourite. My brother and I painted up a unit of this in our original collection, converted from Airfix figures. I now want to replicate all the identifiable regiments from this original collection in my current one, though in this case an earlier uniform will be depicted, as the shakos are in an earlier style (a shame, as I like the later cylindrical shakos for the hussars, and the 5th had them in red). But which other unit? The main candidates were the 4th, which served alongside the 5th in the Waterloo campaign in Pajol’s division, and the 3rd, whose grey and red uniform I have long been attracted to, ever since it was depicted in a film about two feuding French light cavalrymen, whose title I can’t remember [It was The Duellists, directed by Ridley Scott]. But the 3rd wasn’t part of the French army of the Waterloo campaign, and it was in Spain in 1809. What tipped it was when I read that the 4th was mounted on black horses. It is doubtful that the regiment would have been able to sustain such pickiness in wartime (though at least it wasn’t in competition with the heavy cavalry regiments, which loved dark horses, as it would have used smaller mounts), but it was an appealing idea for the table. It also solved a problem about repainting the four the horses from my old 8th Hussars unit – a repaint to black is much easier than trying to replicate my layering technique for bays and chestnuts.
For uniform details I consulted a number of sources, plus googled images. This gave a bewildering number of alternatives and variations for both regiments. In the end I went for a version that was close to Martinet’s depiction in his series of contemporary prints, though not the elaborate officer’s dress uniform shown for the 5th.
The main colours for the 4th were blue and red. The blue is usually depicted as being brighter and richer (a Royal Blue) than the standard infantry uniform blue (or that used by the various French heavy cavalry units, come to that), so I based my colour on Ultramarine, a very bright pigment, compared to my normal Prussian Blue hue (and a bit redder). It needed toning down, though, which I did with raw umber, plus a little bit of white. I also toned down the red (with green from the chasseur uniform, and white). The four newly-painted figures were undercoated in Payne’s Grey, to help them match with the 8th Hussar conversions, which also had a dark undercoat. All of this meant that the figures ended up quite dark (though the blue is nice and rich), so I didn’t think the Peat Brown wash would be strong enough. I decided to use Daler-Rowney black ink instead – but this needed a lot of diluting with water. This worked very well in picking out the lacing on the pelisses (which were done in Yellow Oxide, a close match to Yellow Ochre).
For the 5th I needed a sky blue for the base of the uniform, which was also needed for the facings of the 16th Chasseurs. I tried mixing a bit of white in the deep blue used for the 4th – but this came out a bit on the red side – a distinct hint of an unmilitary violet. It looked OK after mixing in some green; generally the best way of getting sky blues for uniforms is to mix white with Prussian Blue. The white for the pelisse (and in fact all the white elements on all the uniforms) was in fact an off-white made by adding a little Raw Umber in with the white. The yellow lace work was Yellow Oxide again. For the wash I decided to use the diluted black ink I used for the 4th – notwithstanding that these are much lighter figures (including the horses). I had learned that peat brown and white don’t go, and opted for the neutral black. I had to be careful to brush it off the white pelisses as far as I could, but overall it helped to lift the figures a lot.
You may notice that I am trying not to make the colours too bright and contrasty, in order to get a more authentic look. There is no black anywhere (except the ink washes), instead I used Payne’s Grey ( a dark blue-grey) and a more neutral mix of blue and raw umber – in ,most cases with a touch of white in there. Yellow Oxide is not a bright yellow (though better behaved than most yellow pigments, which tend to be thin and runny, like the Viridian). The red is only a bit brighter than a classic brick red. I am still developing these ideas about colour palette. In general I still have a tendency to make them a bit too dark – though in this case that only really applies to the 4th Hussars. This is all part of the adventure of mixing my own colours, rather than going for Vallejo paint-by-numbers, as most hobbyists do.
I have included the remaining eight figures from the 8th Hussars in the photos. These present an interesting contrast to my more recent work. I had only started my journey with artists paints at this point, but I think these were mainly done in Humbrol enamels. There was only one green artist pigment that I was confident with at that stage, which was a bit lighter than the one used here (I used it for my dragoons, painted at about the same time). The horses have a distinct Dark Earth hue – though I was mixing horse colours at this stage, and attempting to distinguish between bay and chestnut. The grey is very flat. My detail work is sharper than it is now, though I did not attempt the waist sashes either then or now (except one or two of the 4th). That clear detailing holds the whole composition up, though, allowing them to hold their heads high compared to my more recent work, in spite of the flatter and denser paintwork. Starting again, the main thing I would do differently (apart from the horses) would be to make the green a bit lighter and brighter. Having said that, the uniform in on display in Paris was very dark.
The Polish lancers
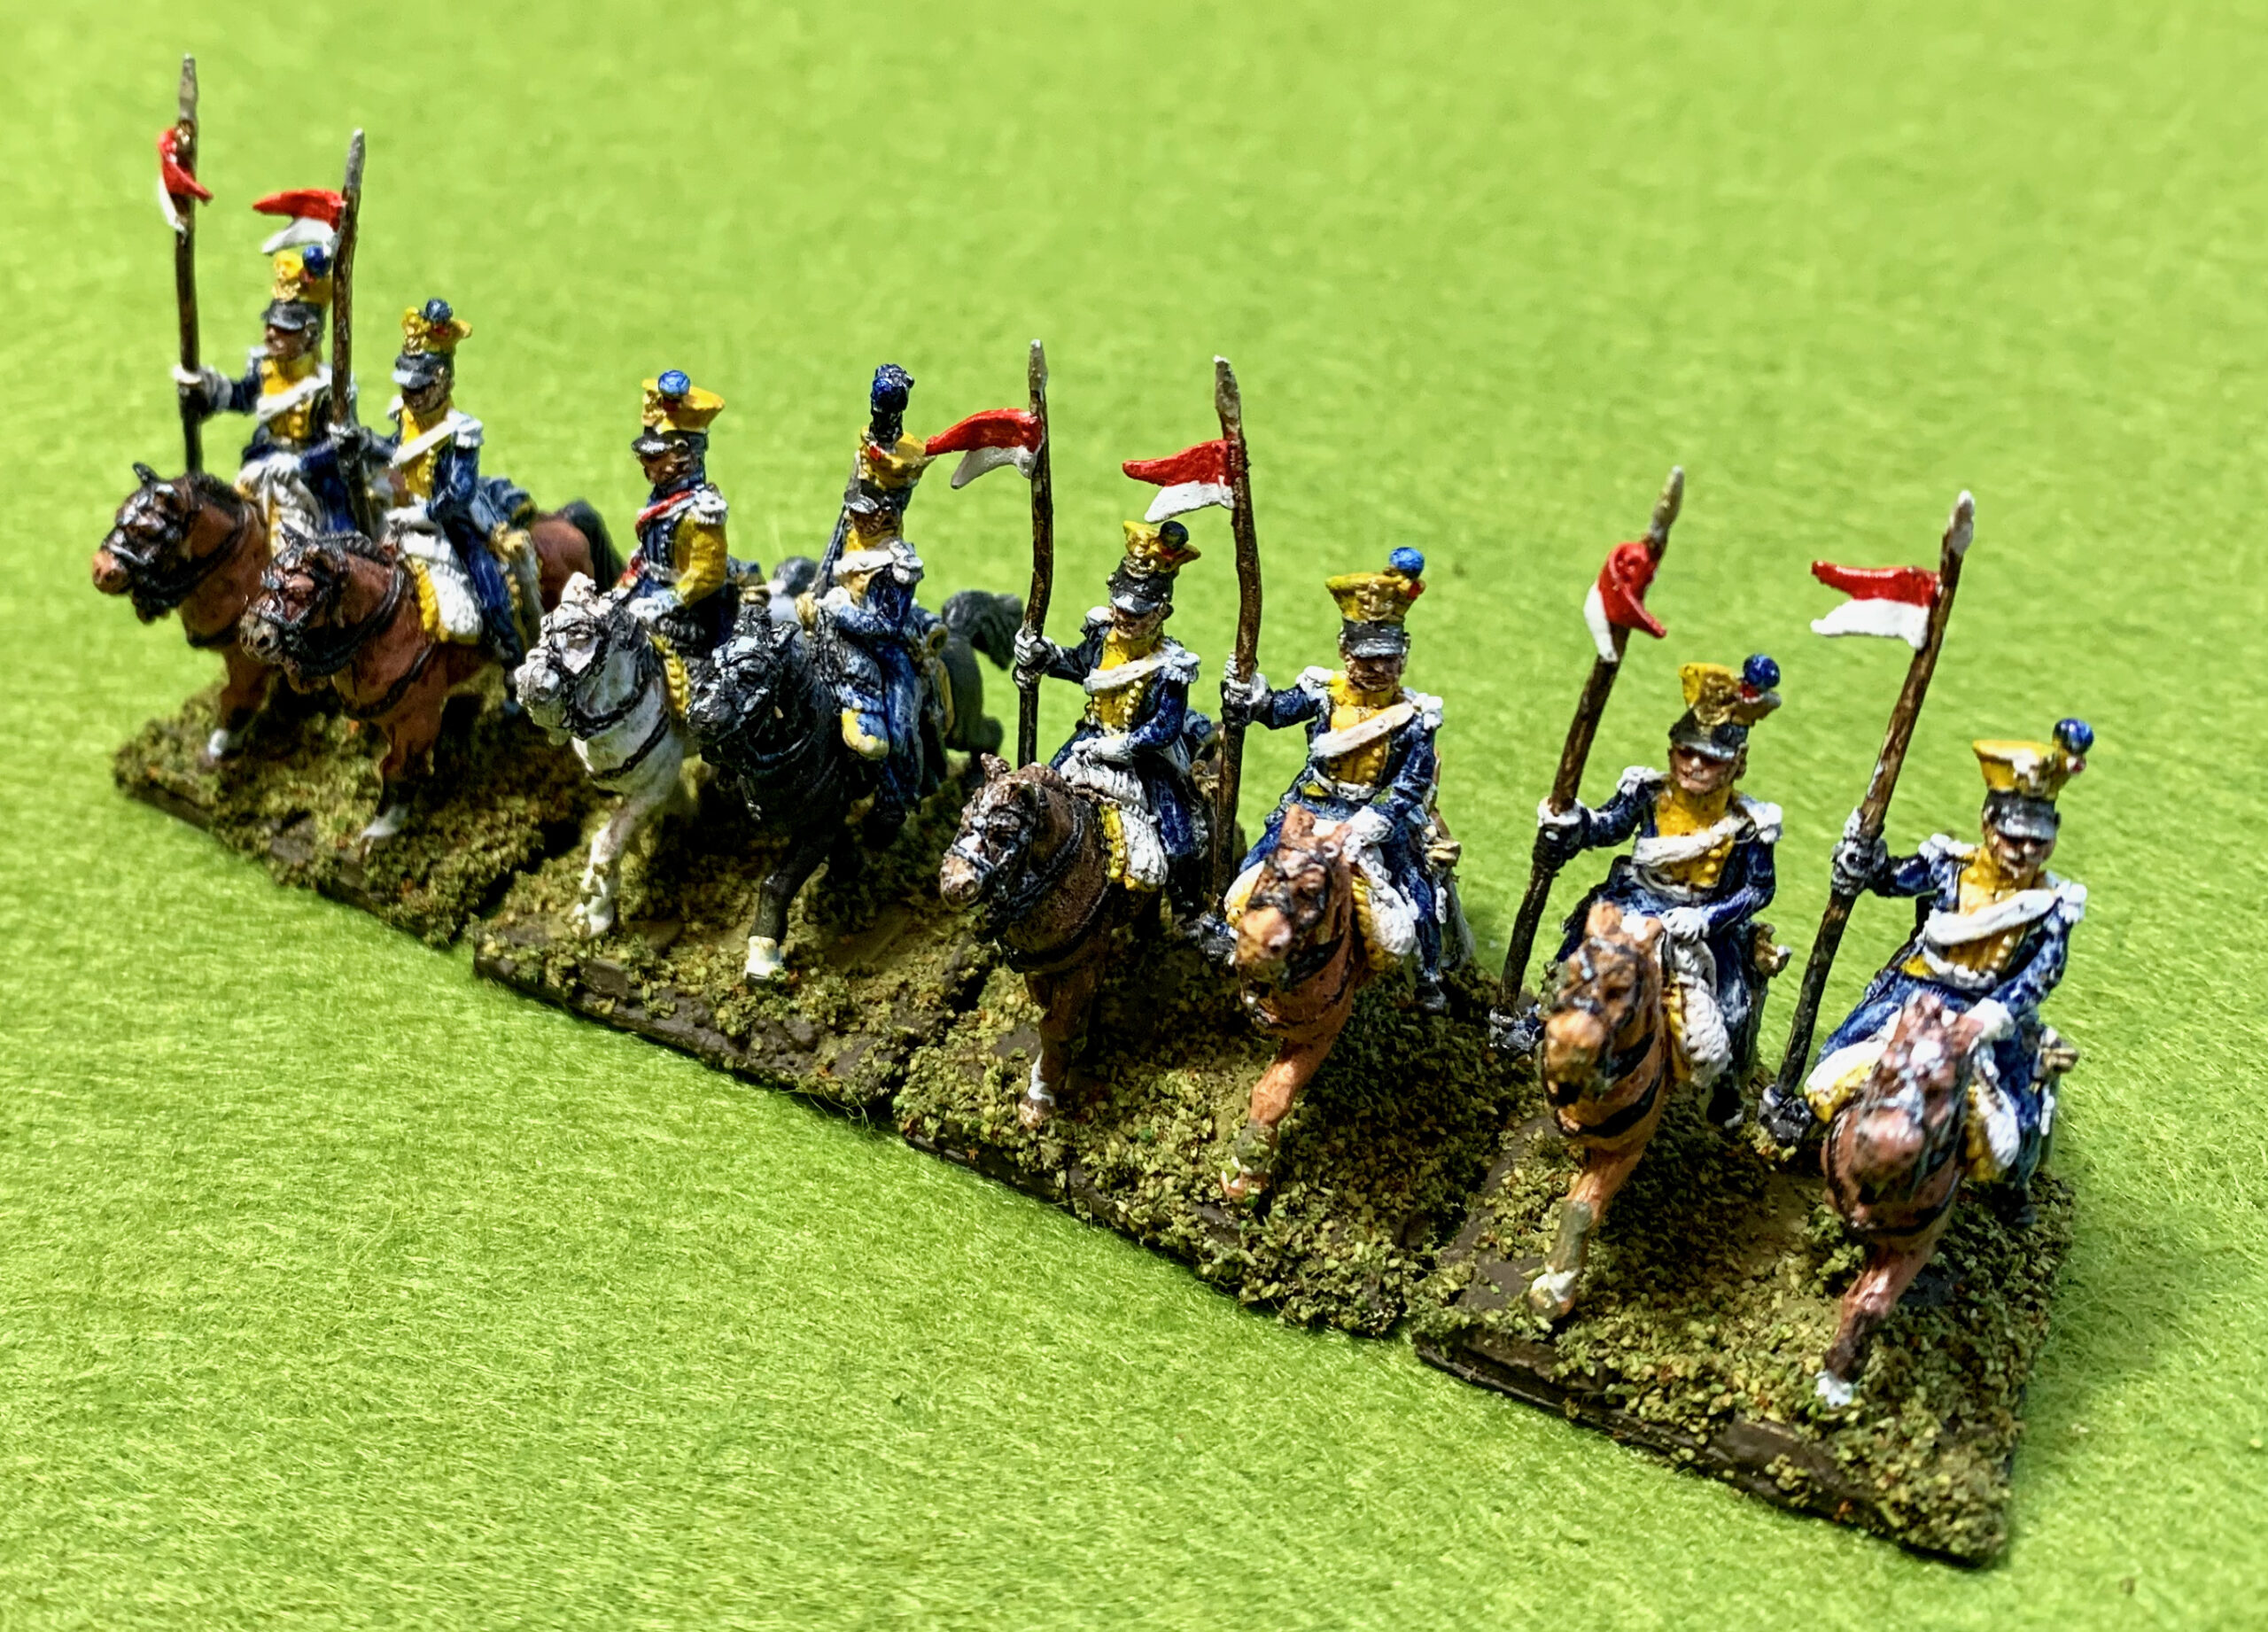
Finally I have pictured the faithful Polish lancer unit. These are later work than my 8th Hussars. They are AB castings, which are much sharper than my OG figures. The men are probably a bit bigger (true 18mm rather than the OGs which are from the period when the 15mm was inflating to 18mm), though the horse aren’t bigger – as befits light cavalry. I much prefer the AB range to OG, though their early French figures aren’t their best (these lancers are later). All ranges tend to improve with time; they usually start wit the standard French types and as a result these tend to be their weakest. That is true of OG too; these French castings (the infantry as well as this light cavalry) are not as good as their later Prussians, which I happily mix in with the ABs. This unit was not my most successful paint job, and one day I might repaint it. The horses are a bit flat and matt; on the men I was too heavy-handed with a white dry brush. I was using a technique recommended in one of the rule books I used, but it didn’t really come off. Still they have a dusty on-campaign look, which is appropriate for the Peninsula theatre where they did their main service. The unit’s greatest triumph was at Albuera in 1811, which has been one of my favourite tabletop battles.
I have 15 OG French lancers, which I intend to bring to the table, though I want to find a way of topping them up to 16 to get two complete units. Another thought is to do a unit of Polish Guard lancers… but that would involve buying more miniatures. For now the priority is to paint what I have.
Basing
Finally came the bases. I wanted to get the bases of all seven units looking consistent. The two old units were mounted on un-flocked plaster painted in a washed-out olive green colour (Humbrol Hemp, I think). All bases are 25mm squares, and have magnetic material underneath. I cut the new bases from thick artists’ paper. This is thinner than the customary mount board or MDF, but with the magnetic material already increasing the height my recent practice is to use thinner mounting material. This means you have to be careful about warping. The gunk I use to set the miniatures in uses no water: acrylic medium mixed with some paint and some old railway ballast material (in place of the sand I usually use, which I hadn’t brought in the move). I let this mix cure with the bases placed on a metal surface, so that the magnetic material ensures they say flat.
The paint was Raw Umber mixed with a bit of white. I used the same paint mix to touch up the base edges, and also the outer parts of the bases on two old units. I then applied flock, which I mixed from a couple of sources. I decided not to try static grass at the edges, as I wanted to develop my application techniques later, and I was in a hurry (it was nearly New Year’s Eve by now). However I did feel the need to apply a further layer of diluted PVA glue to fix the flock, which otherwise leaves a trail wherever the figures go. This was very necessary, as the initial bond was weak, but it did mean that there was a lot of lumping of the flock, which became very uneven. That meant that a lot of the basing material was exposed, as you can see from the pictures. That shouldn’t matter that much as this should resemble bare earth. But the paint mix should have had more white in it, and it all looks a bit dark. The flock is also on the dark side. Overall the bases are acceptable but not great.
Conclusion
This project isn’t properly finished. The standards need flags (which I have bought) and I think the bases could do with more work. I also need to revisit my decision not to highlight and/or varnish. But this project had taken a long time and I wanted to declare victory by 31 December. I will revisit when I do my next batch of 18mm miniatures. This is likely to French Guard infantry.
As usual I wasn’t that happy when I put down the paintbrushes. By this stage in a project you are very familiar with the flaws, and have to draw a line. But, again as usual, I became progressively happier with the outcome afterwards, apart from the bases. The 4th Hussars are just a little too dark I think. But all the units will do fine on the tabletop when this resumes, and are likely to get into action quite quickly.
My main learnings:
- This project took a long time. Partly because I was rusty and had to unpack various materials, but only partly. The horses might be a bit quicker with improved technique, but the really time-consuming bit was the detailing. I have tried to reduce this as far as possible, but the detailing left is just the sort that has a big impact on the end result. It is these high-contrast features (facings, belts and straps, and so on) that are the making of horse and musket miniatures.
- Technique on horses needs more work. I need to rethink the approach for greys, especially the paler ones. In due course I want to do a unit of Royal Scots Greys, so this will need to come right. For the bays and chestnuts I need to work more with layers of pure pigment, including the Burnt Sienna that I lacked this time. This will be interesting in oils!
- Don’t use Viridian again if you can help it. Perhaps tweak Sap Green with some blue, or use Pthalo Green (though this is very bright and will need quite a bit of toning down). Buying a new tube of Hooker’s Green looks a bit wasteful when I have all these other tubes of green on the go.
- Peat Brown ink is great to use as a wash because it can be used straight from the bottle, though application needs some care to prevent pooling, but not on expanses of white or grey. Otherwise I can use diluted Daler-Rowney Black or Antelope Brown (a yellower hue) ink, which doesn’t seem to mind heavy dilution in water.
- Basing is a bit of a headache. I need to lighten up the earth colour, but also rethink the flock mix. Static grass isn’t necessary but it may enhance the edges of the base once I’ve improved my application technique.
Leave a Reply to admin Cancel reply