At last I have had more time to spend in the studio to work on painting my little men. In the remaining days of December since my last update, the 10mm 1866 Italians were finished. In the new year I started my next project: 6 battalions of 1815 French infantry. I’m on course to finish these by month end! Alas the early January club game had to be cancelled because my wife wasn’t well.
10mm 1866 Italians
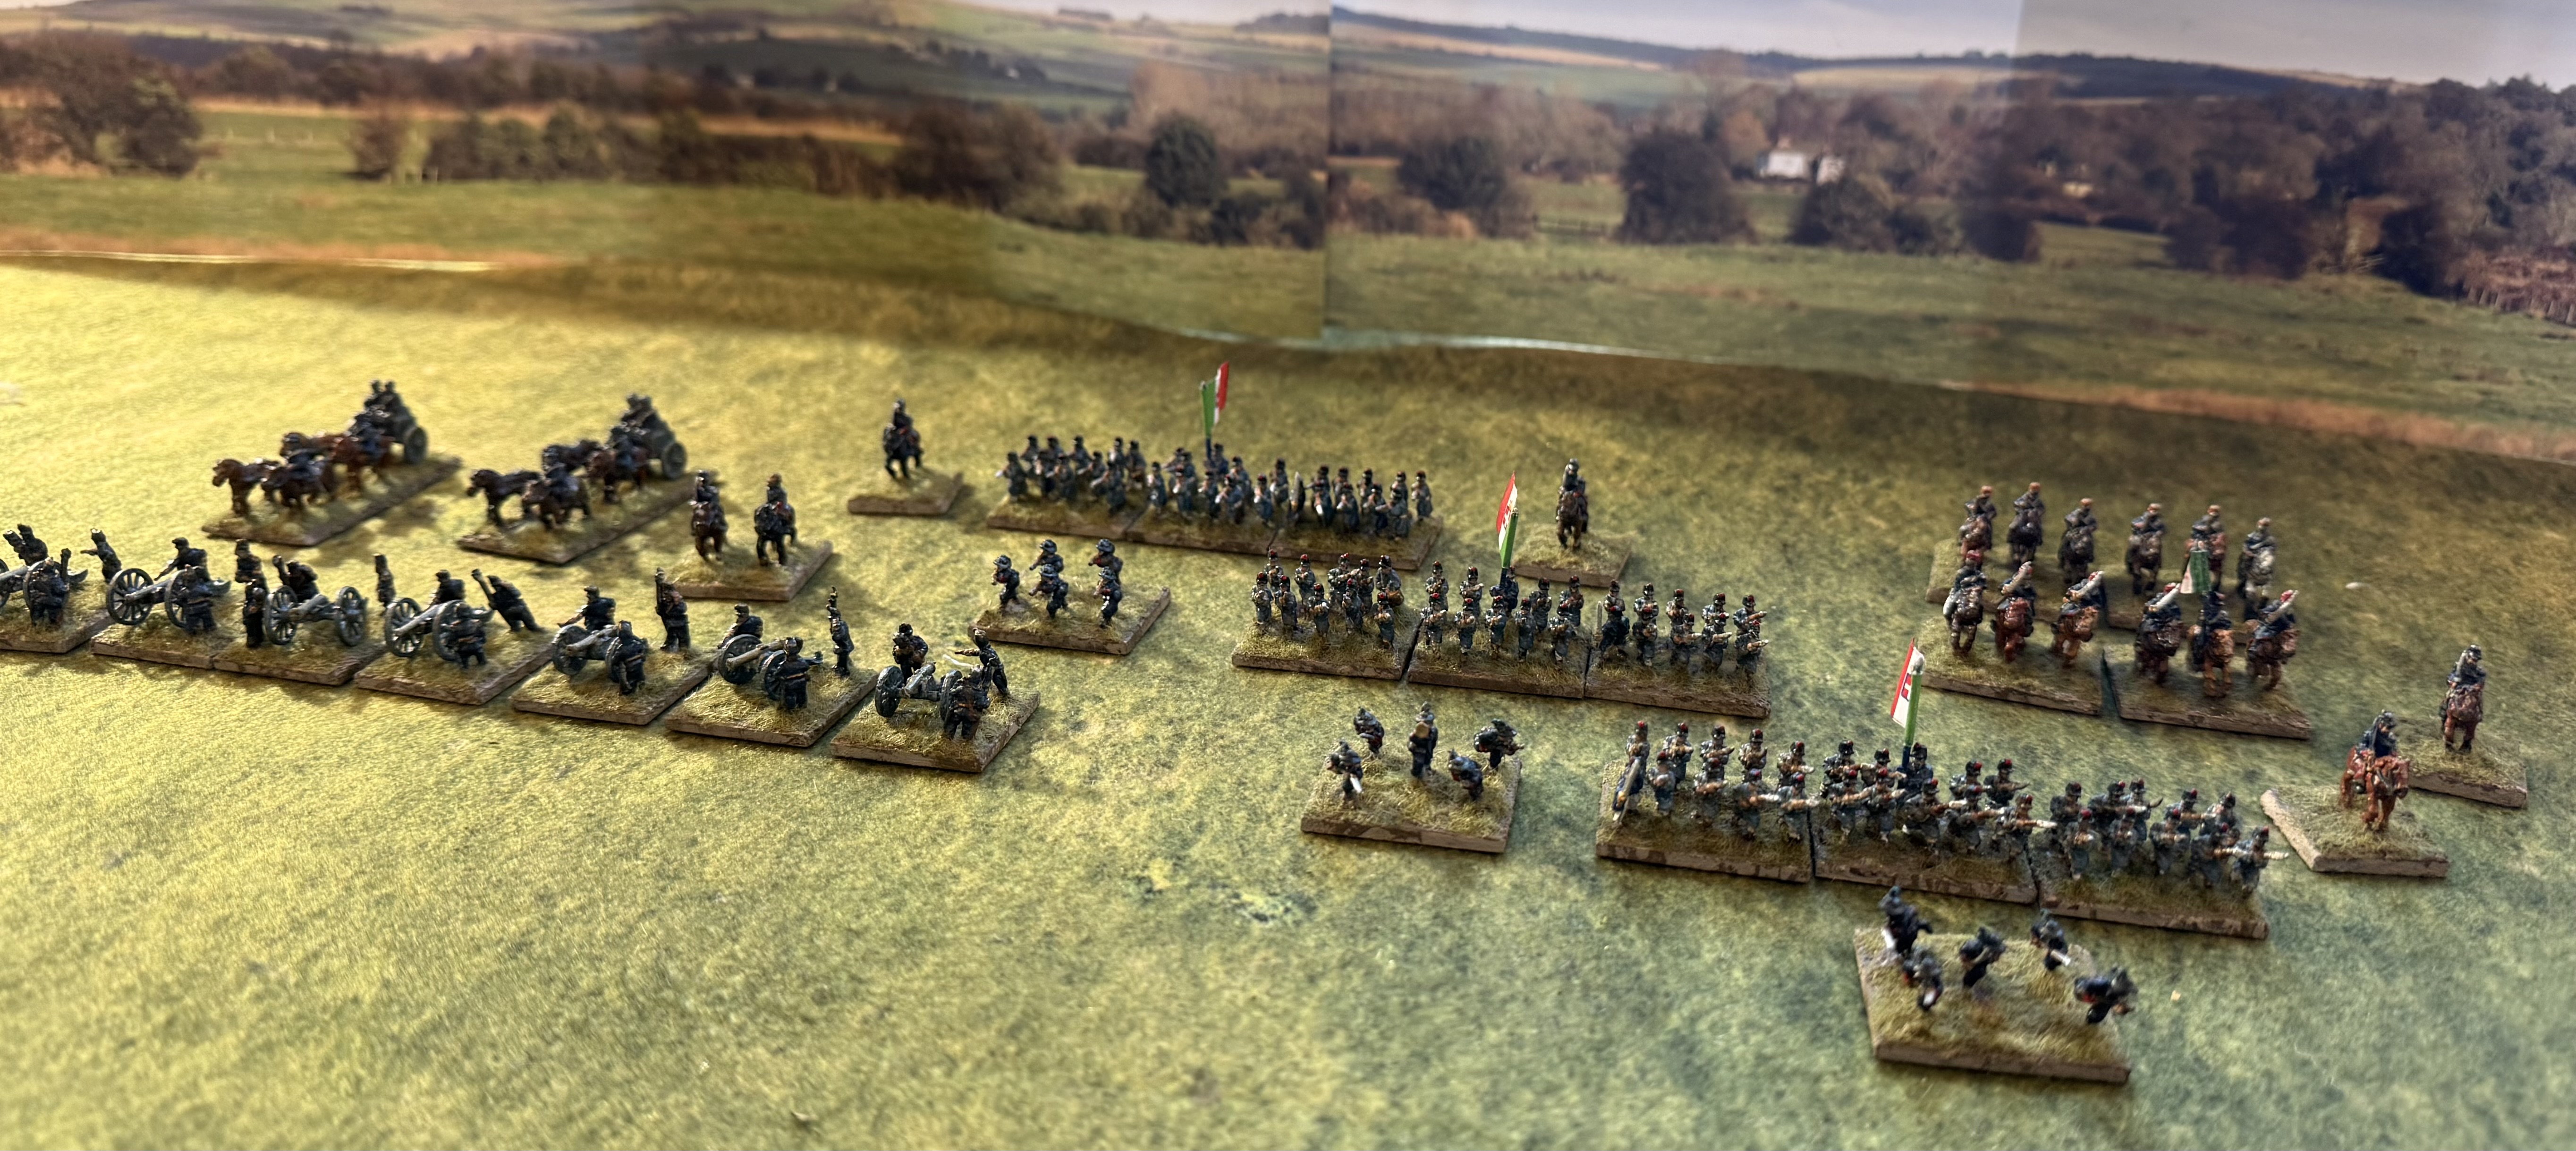
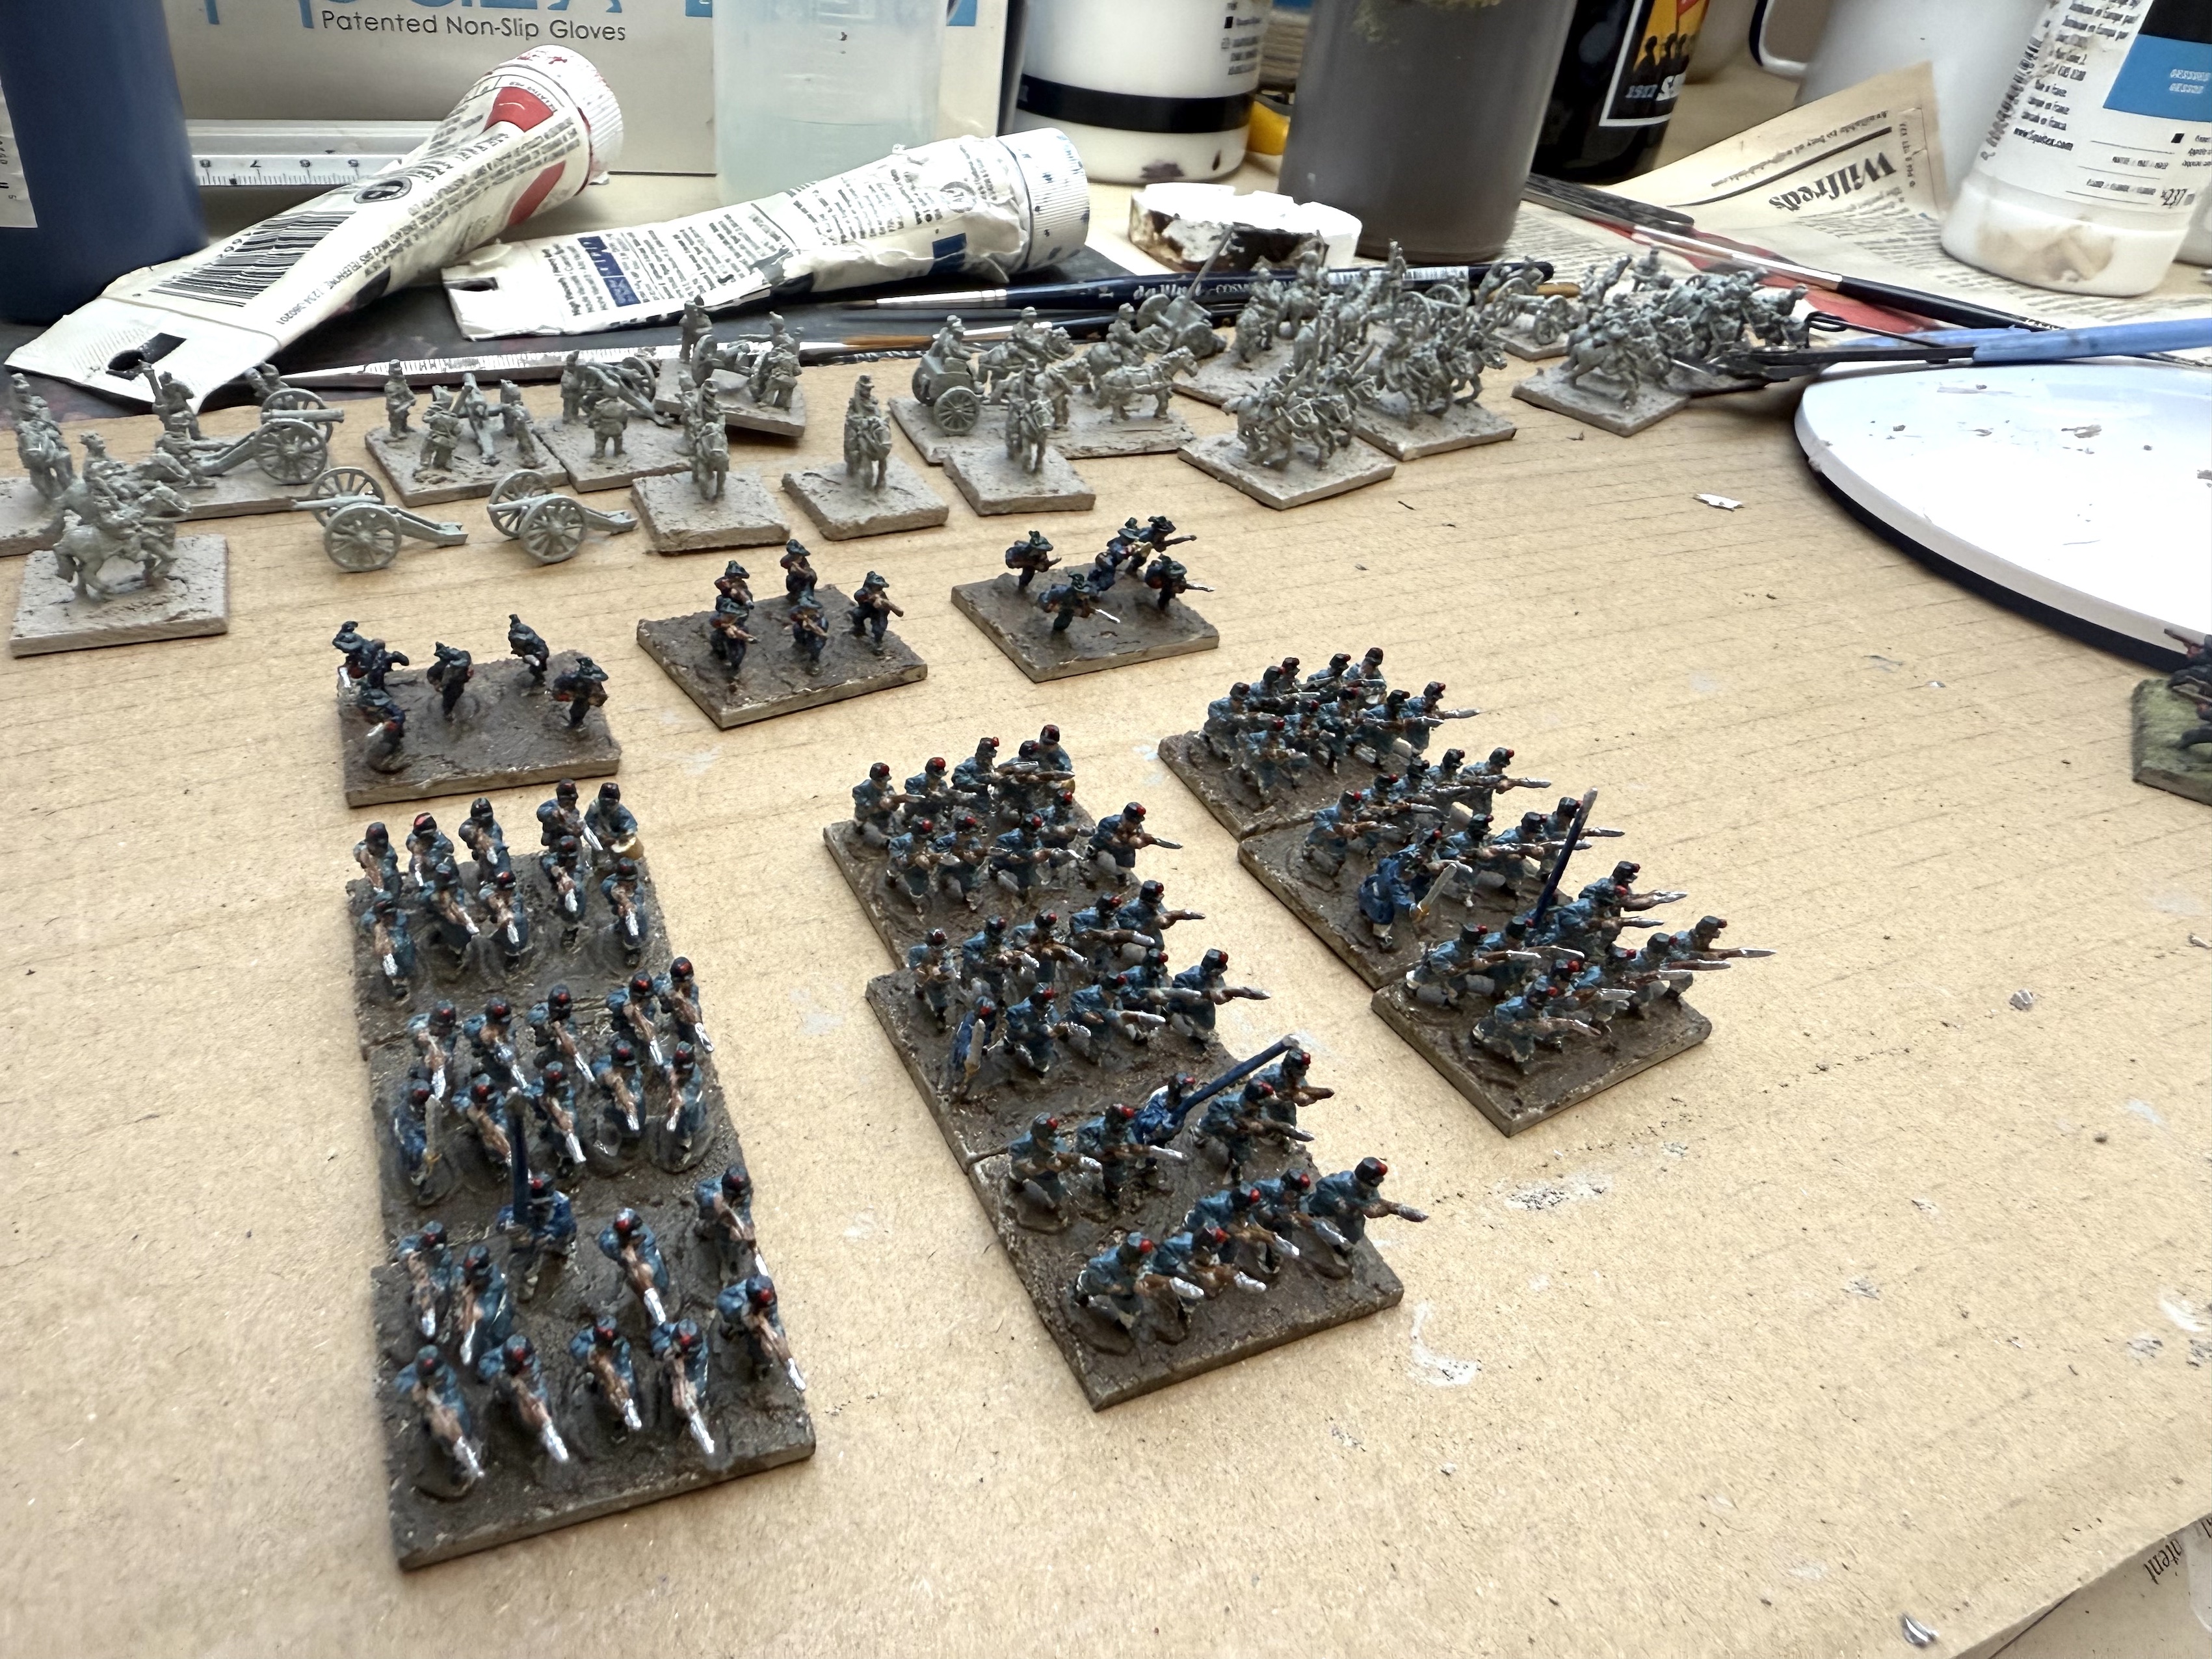
This relatively modest batch has taken me months of elapsed time as I have not been able to spend much time in the studio across October to Christmas. There are nine bases of line infantry, three of Bersaglieri , four of cavalry, a more impressive seven of artillery, plus two limbers and five generals.
A closer look at the infantry
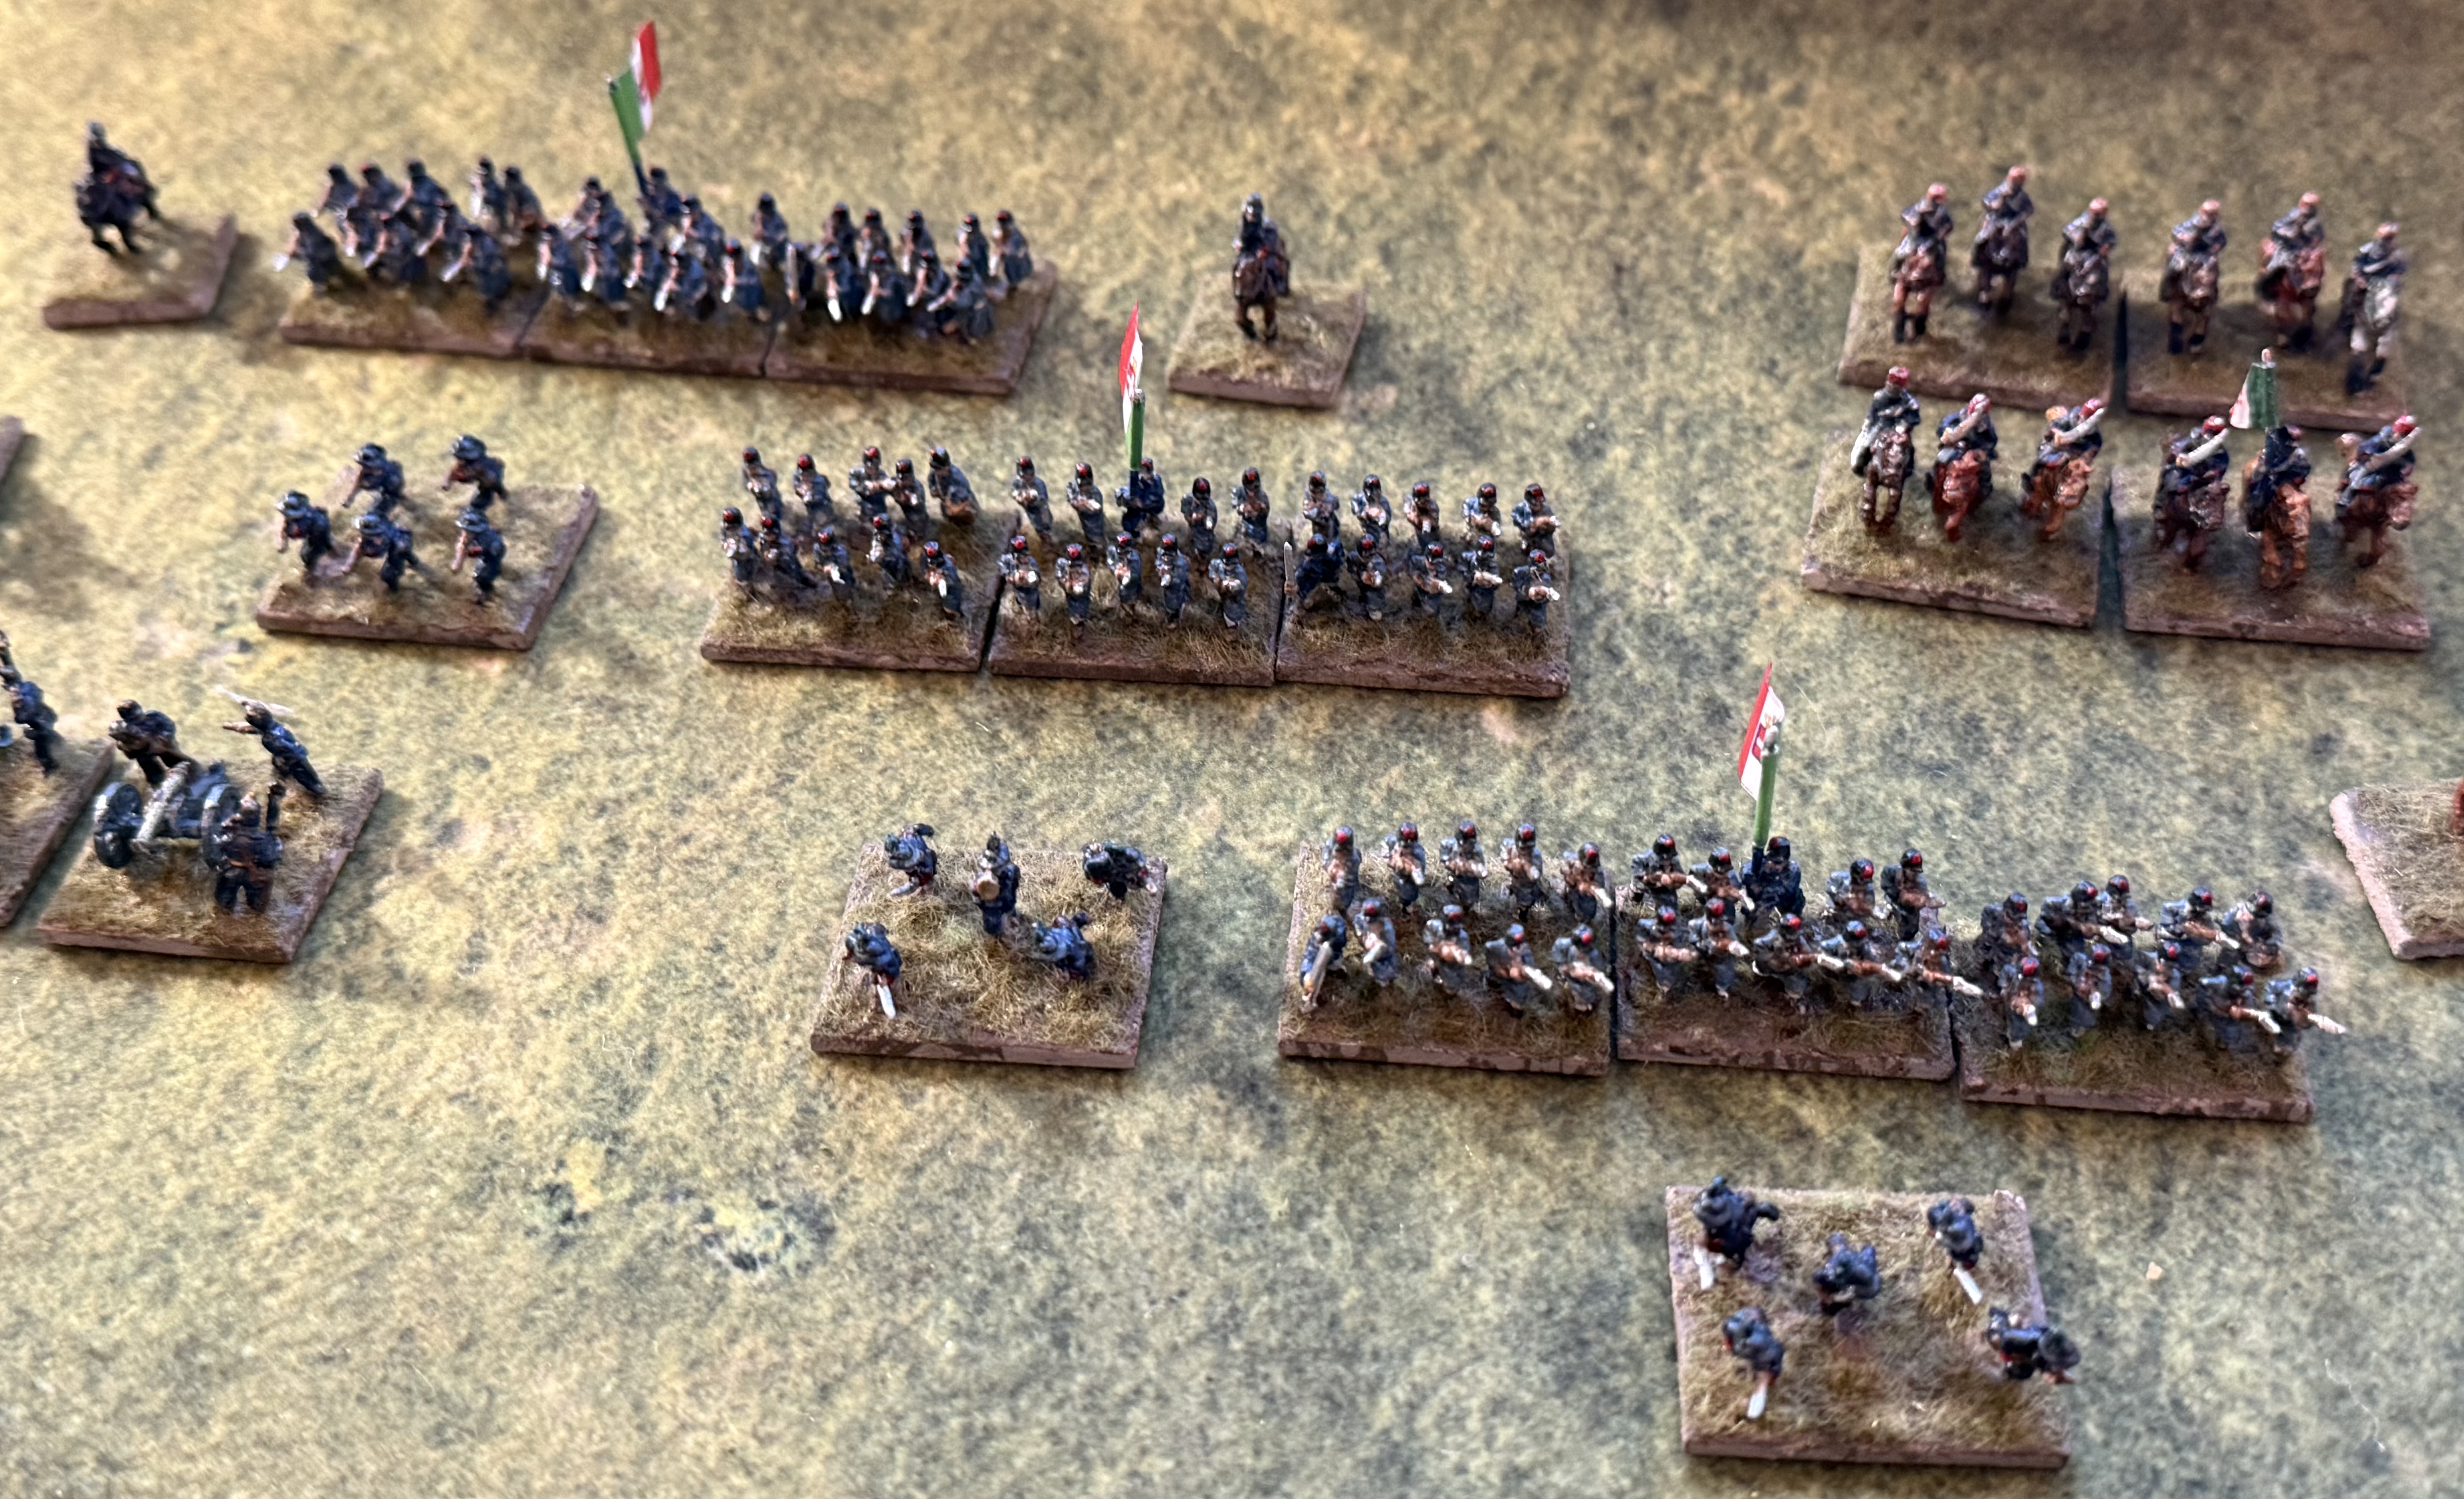
10mm is a new scale for me, and I’m starting to understand that they are small. And as my efforts show, difficult o photograph! You can’t see much in these pictures. There isn’t actually a huge amount to see. The 1866 uniform meant that the men were in grey greatcoats (as were the Austrians), notwithstanding the heat. No regimental distinctions are visible. The red pompon on the shako is about the only feature to lighten the dull appearance. The greatcoats are described as blue-grey, and illustrations show variations from almost French-style dark blue, to neutral mid-grey. A went for a paler blue-grey (reminiscent of French WWI troops) – as I want to there be a clear difference with the mid-grey Austrians. The Bersaglieri are only slightly more interesting in their dark blue uniforms. My original plan was to put them on 30mm by 20mm bases, but when basing I started using the pile of 30mm by 25mm bases (my new standard for 18mm troops), and all but two are on this deeper bases. They look fine, but I prefer things to be a bit more compact.
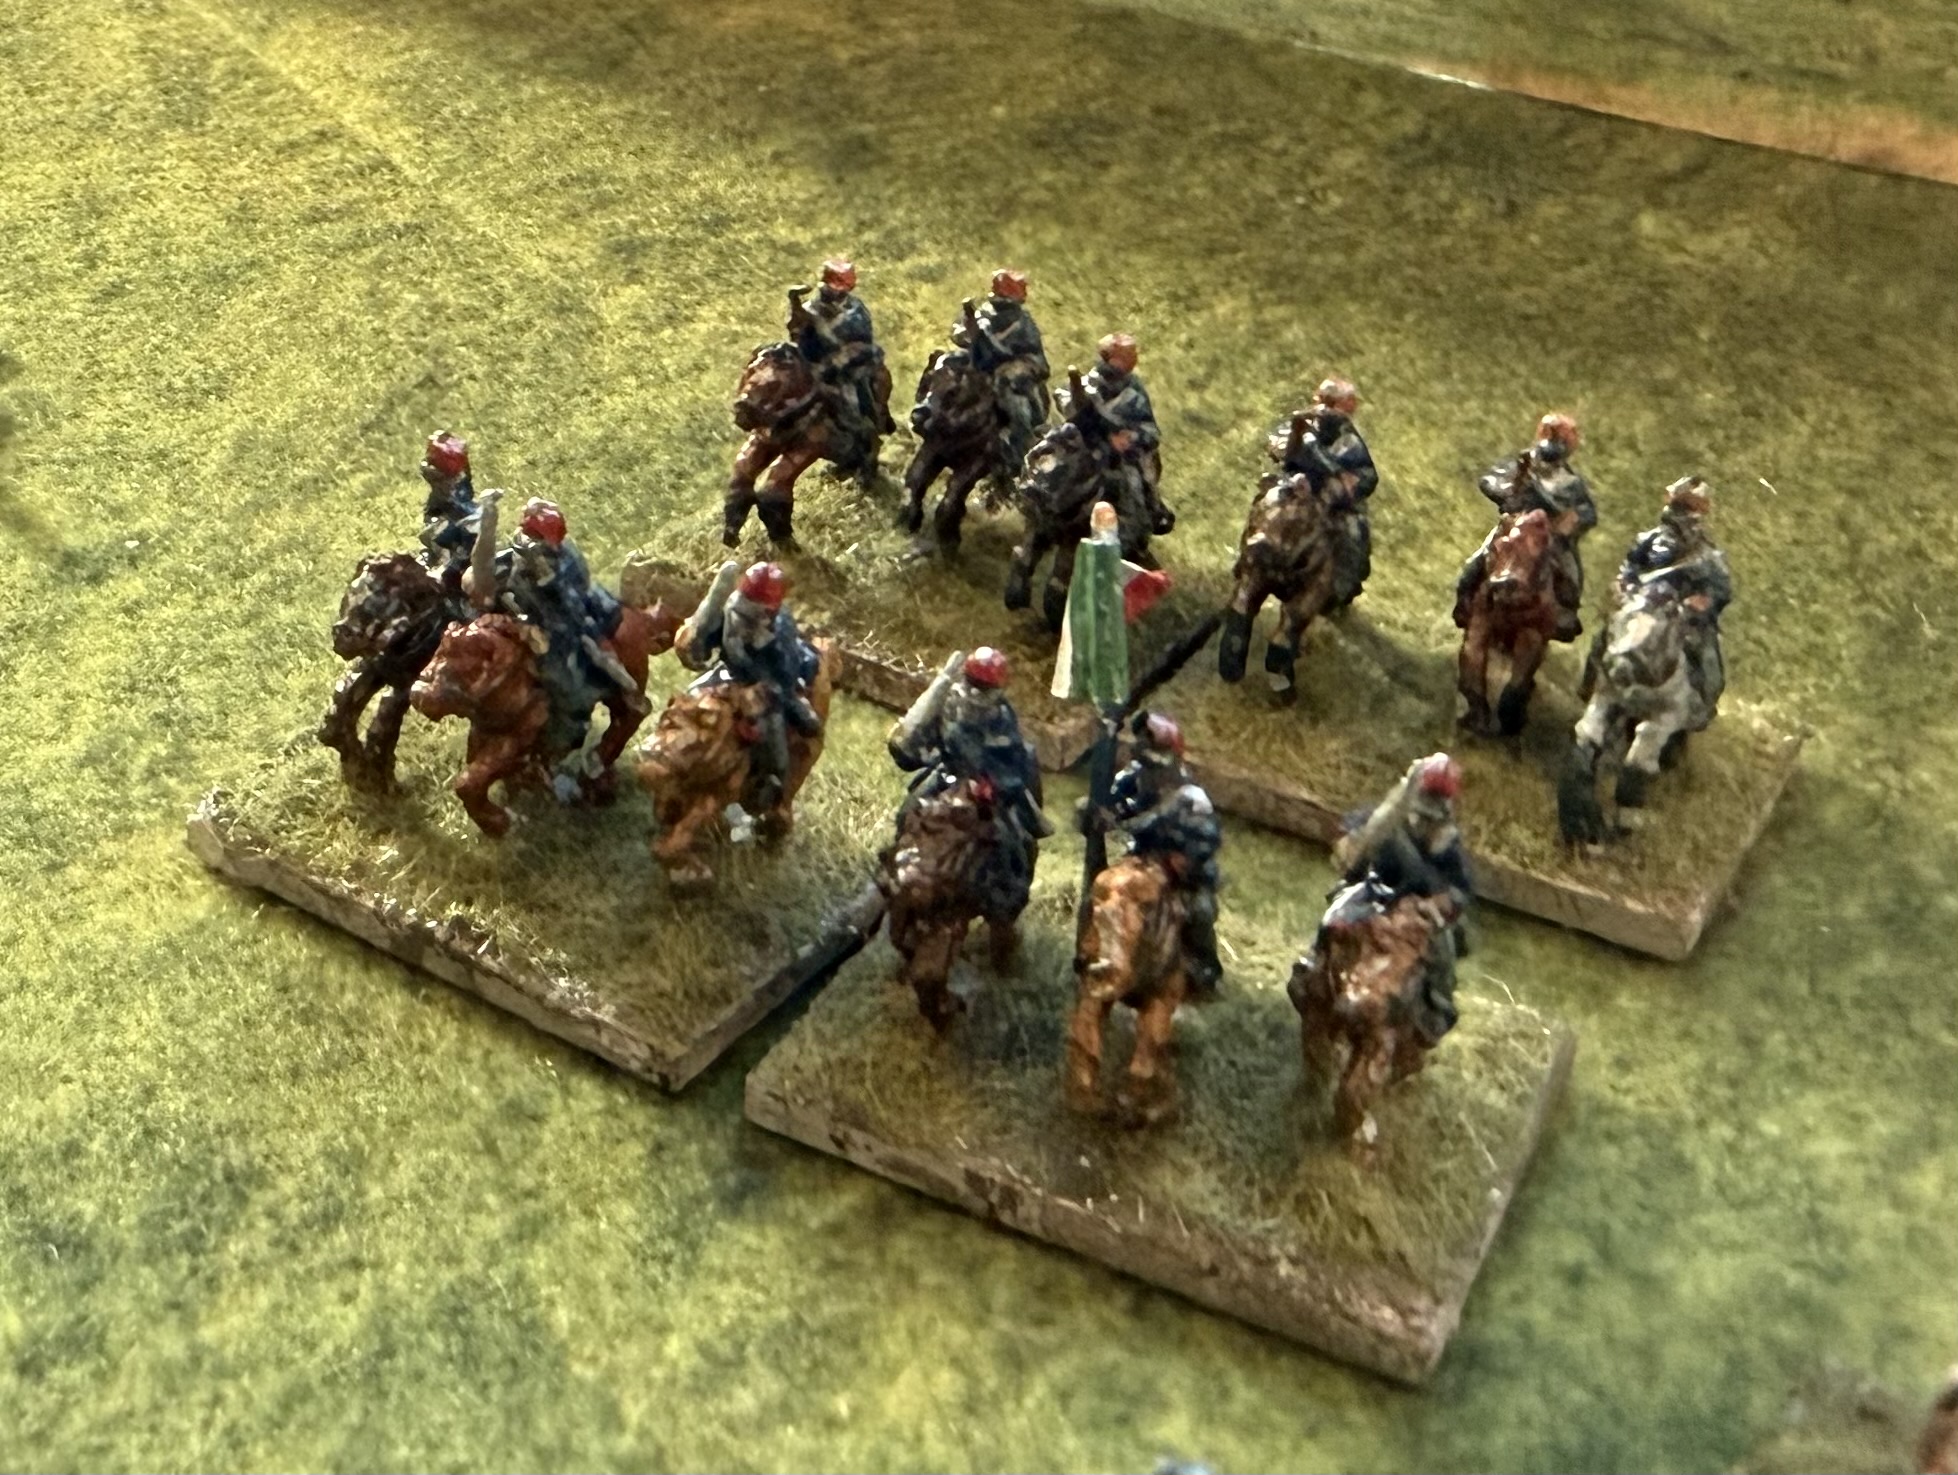
A closer look at the cavalry – not that there is much to see!
Th cavalry are a bit more interesting – each regiment has a distinguishing colour for facings and kepi. I painted up four bases from two regiments. I had to make and paint my own flag using foil – not too hard to do fortunately. Foil is nicer than the printed paper I use mainly, though I struggled a bit with paint adhesion, as my usual gesso primer didn’t fully stick at first pass.
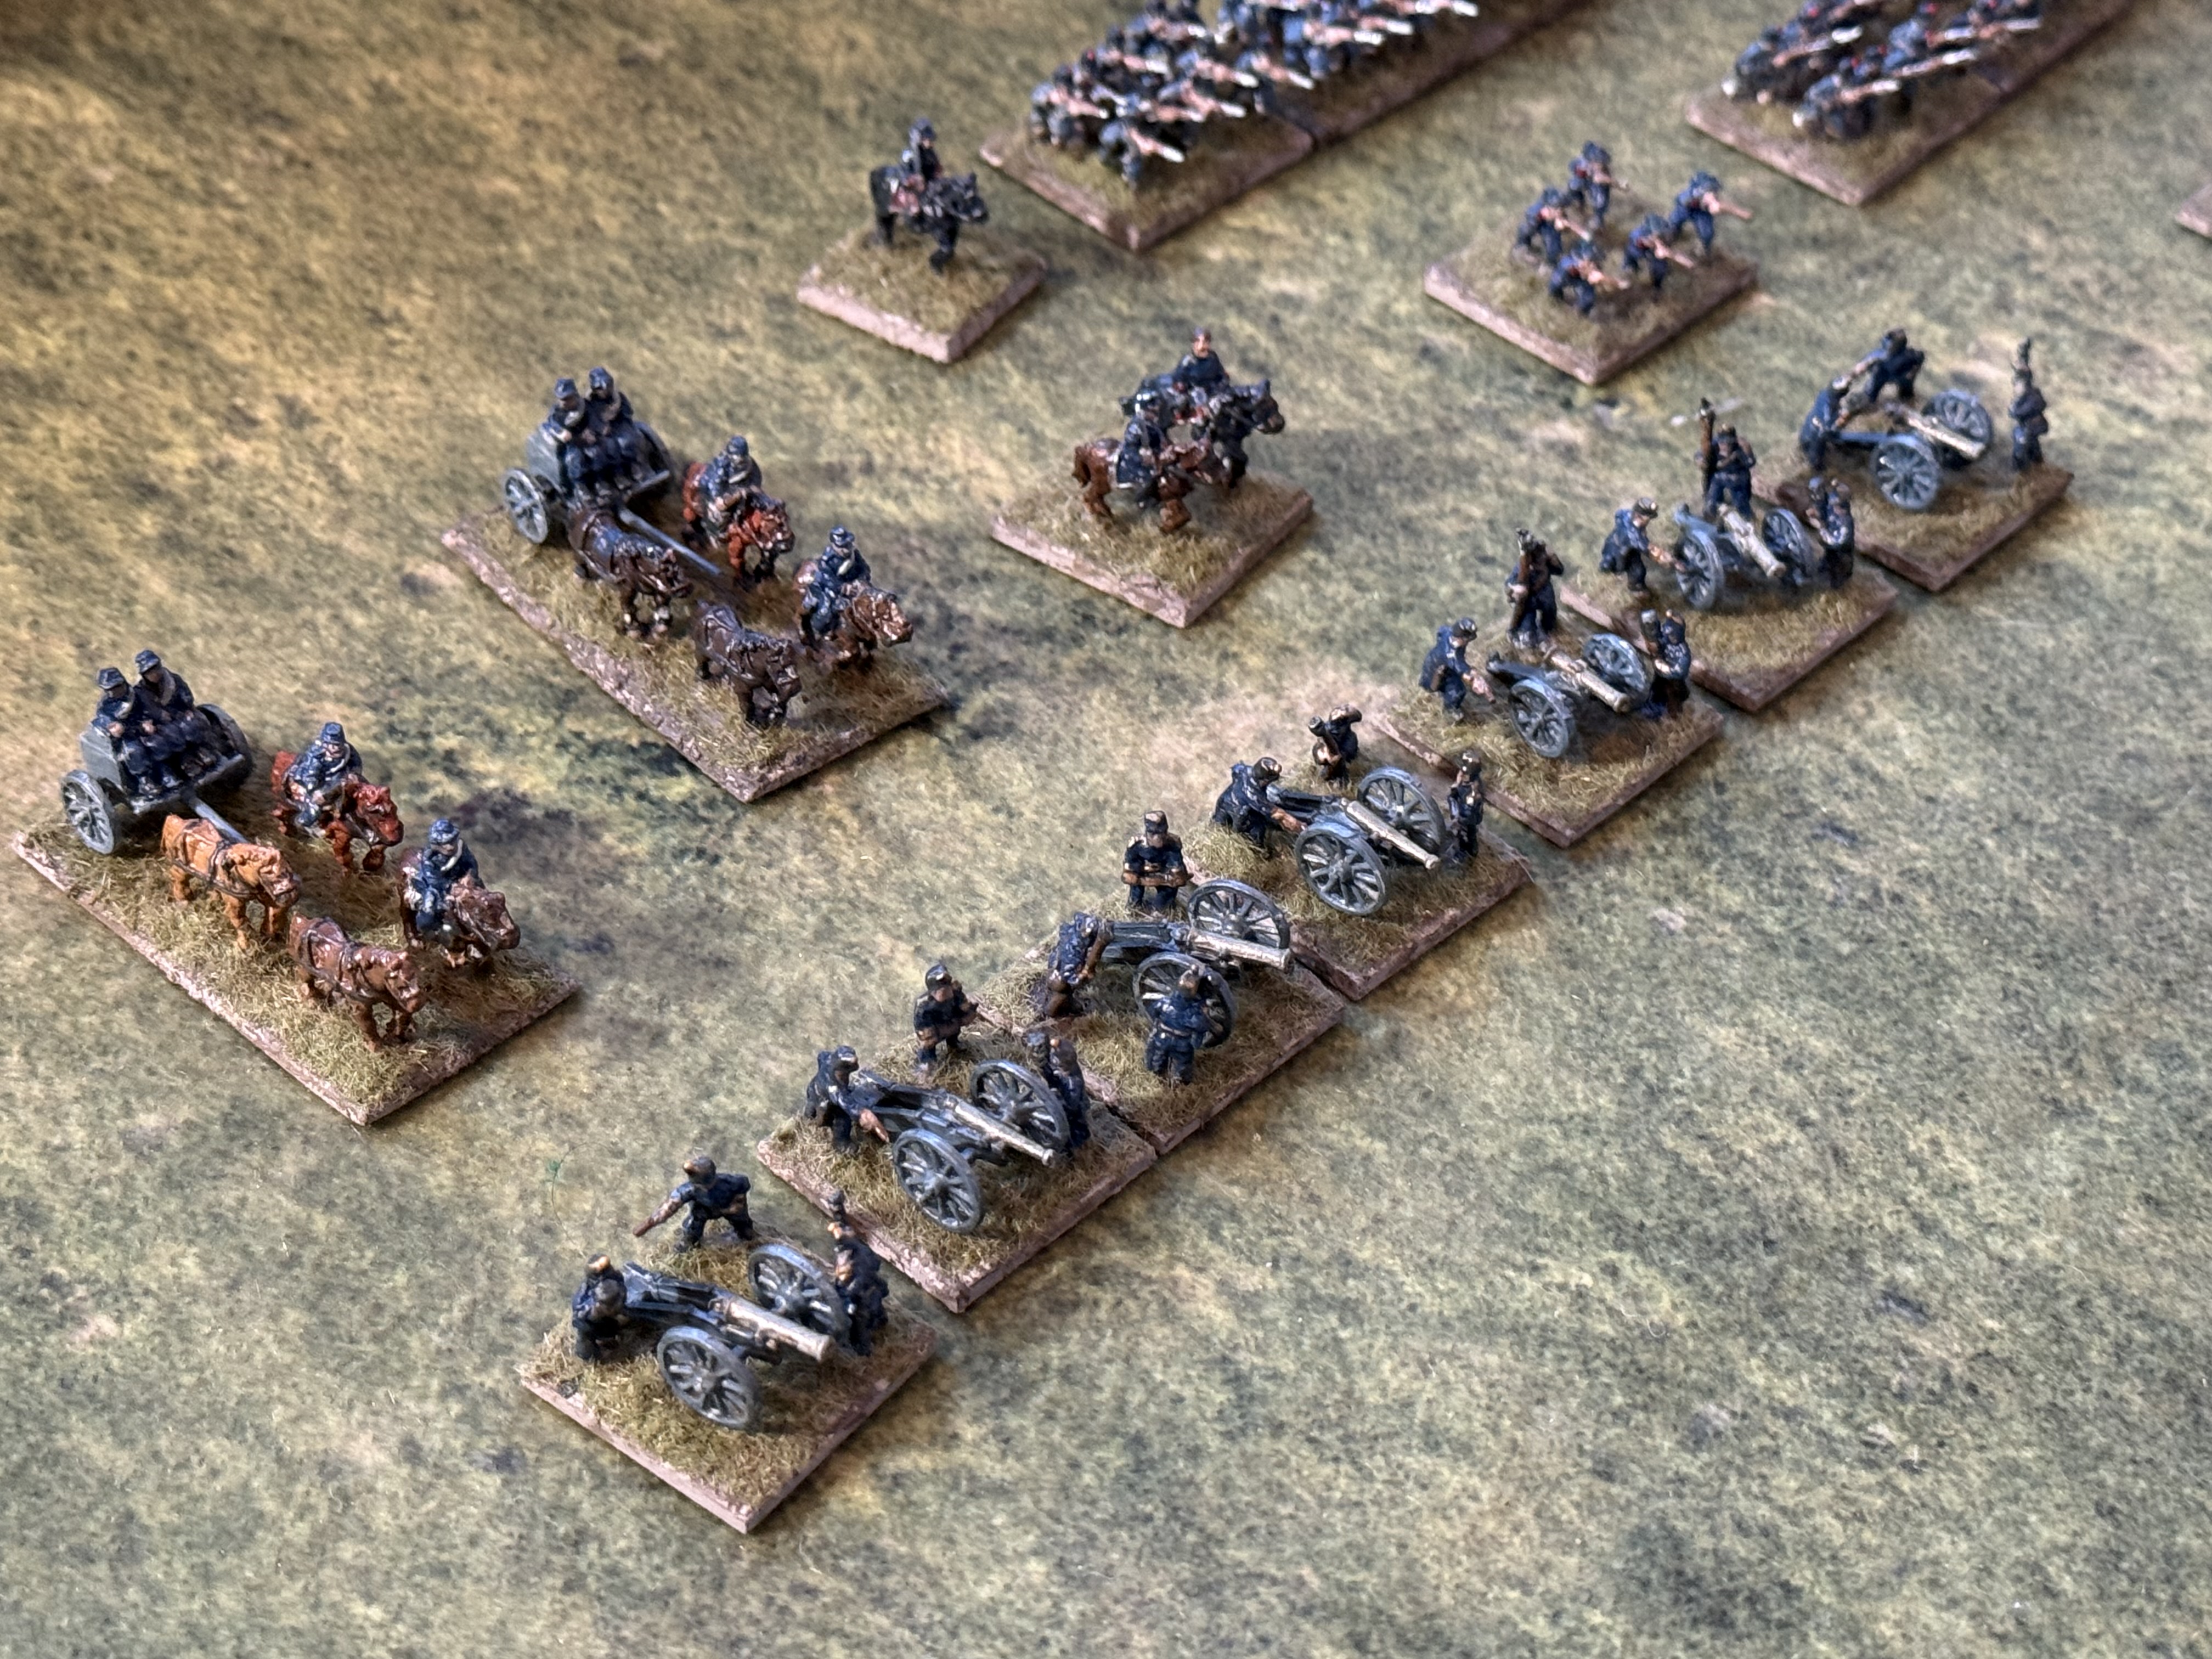
Artillery -four smoothbore 8-pdrs on the left, and French rifled 4-pdrs on the right.
Artillery is proving a bit of a headache for this project. The main Italian piece was the 8-pdr. In this era the use of pounds to denote calibre had lost all comparability between nations. But this ordnance was heavier than the main Austrian piece, the 4-pdr. The models in the Pendraken 8-pdr pack look like smoothbores, though, which would be suitable for 1869, but not 1866, when the Italians had rearmed with rifled weapons. Apparently these were based on the French 4-pdr RML guns – so I bought a pack of these (complete with French crew). I painted these up to use with my Italian crews, but they look a bit small! If I get to 1859, I will have a use for the French crews anyway. The limbers are French – the uniforms are slightly different, but I don’t think that matters too much.
I will write more about this army when I finish it. This will require as many as 40 more bases of infantry, which is quite a daunting prospect. I am going to finish the Austrians first.
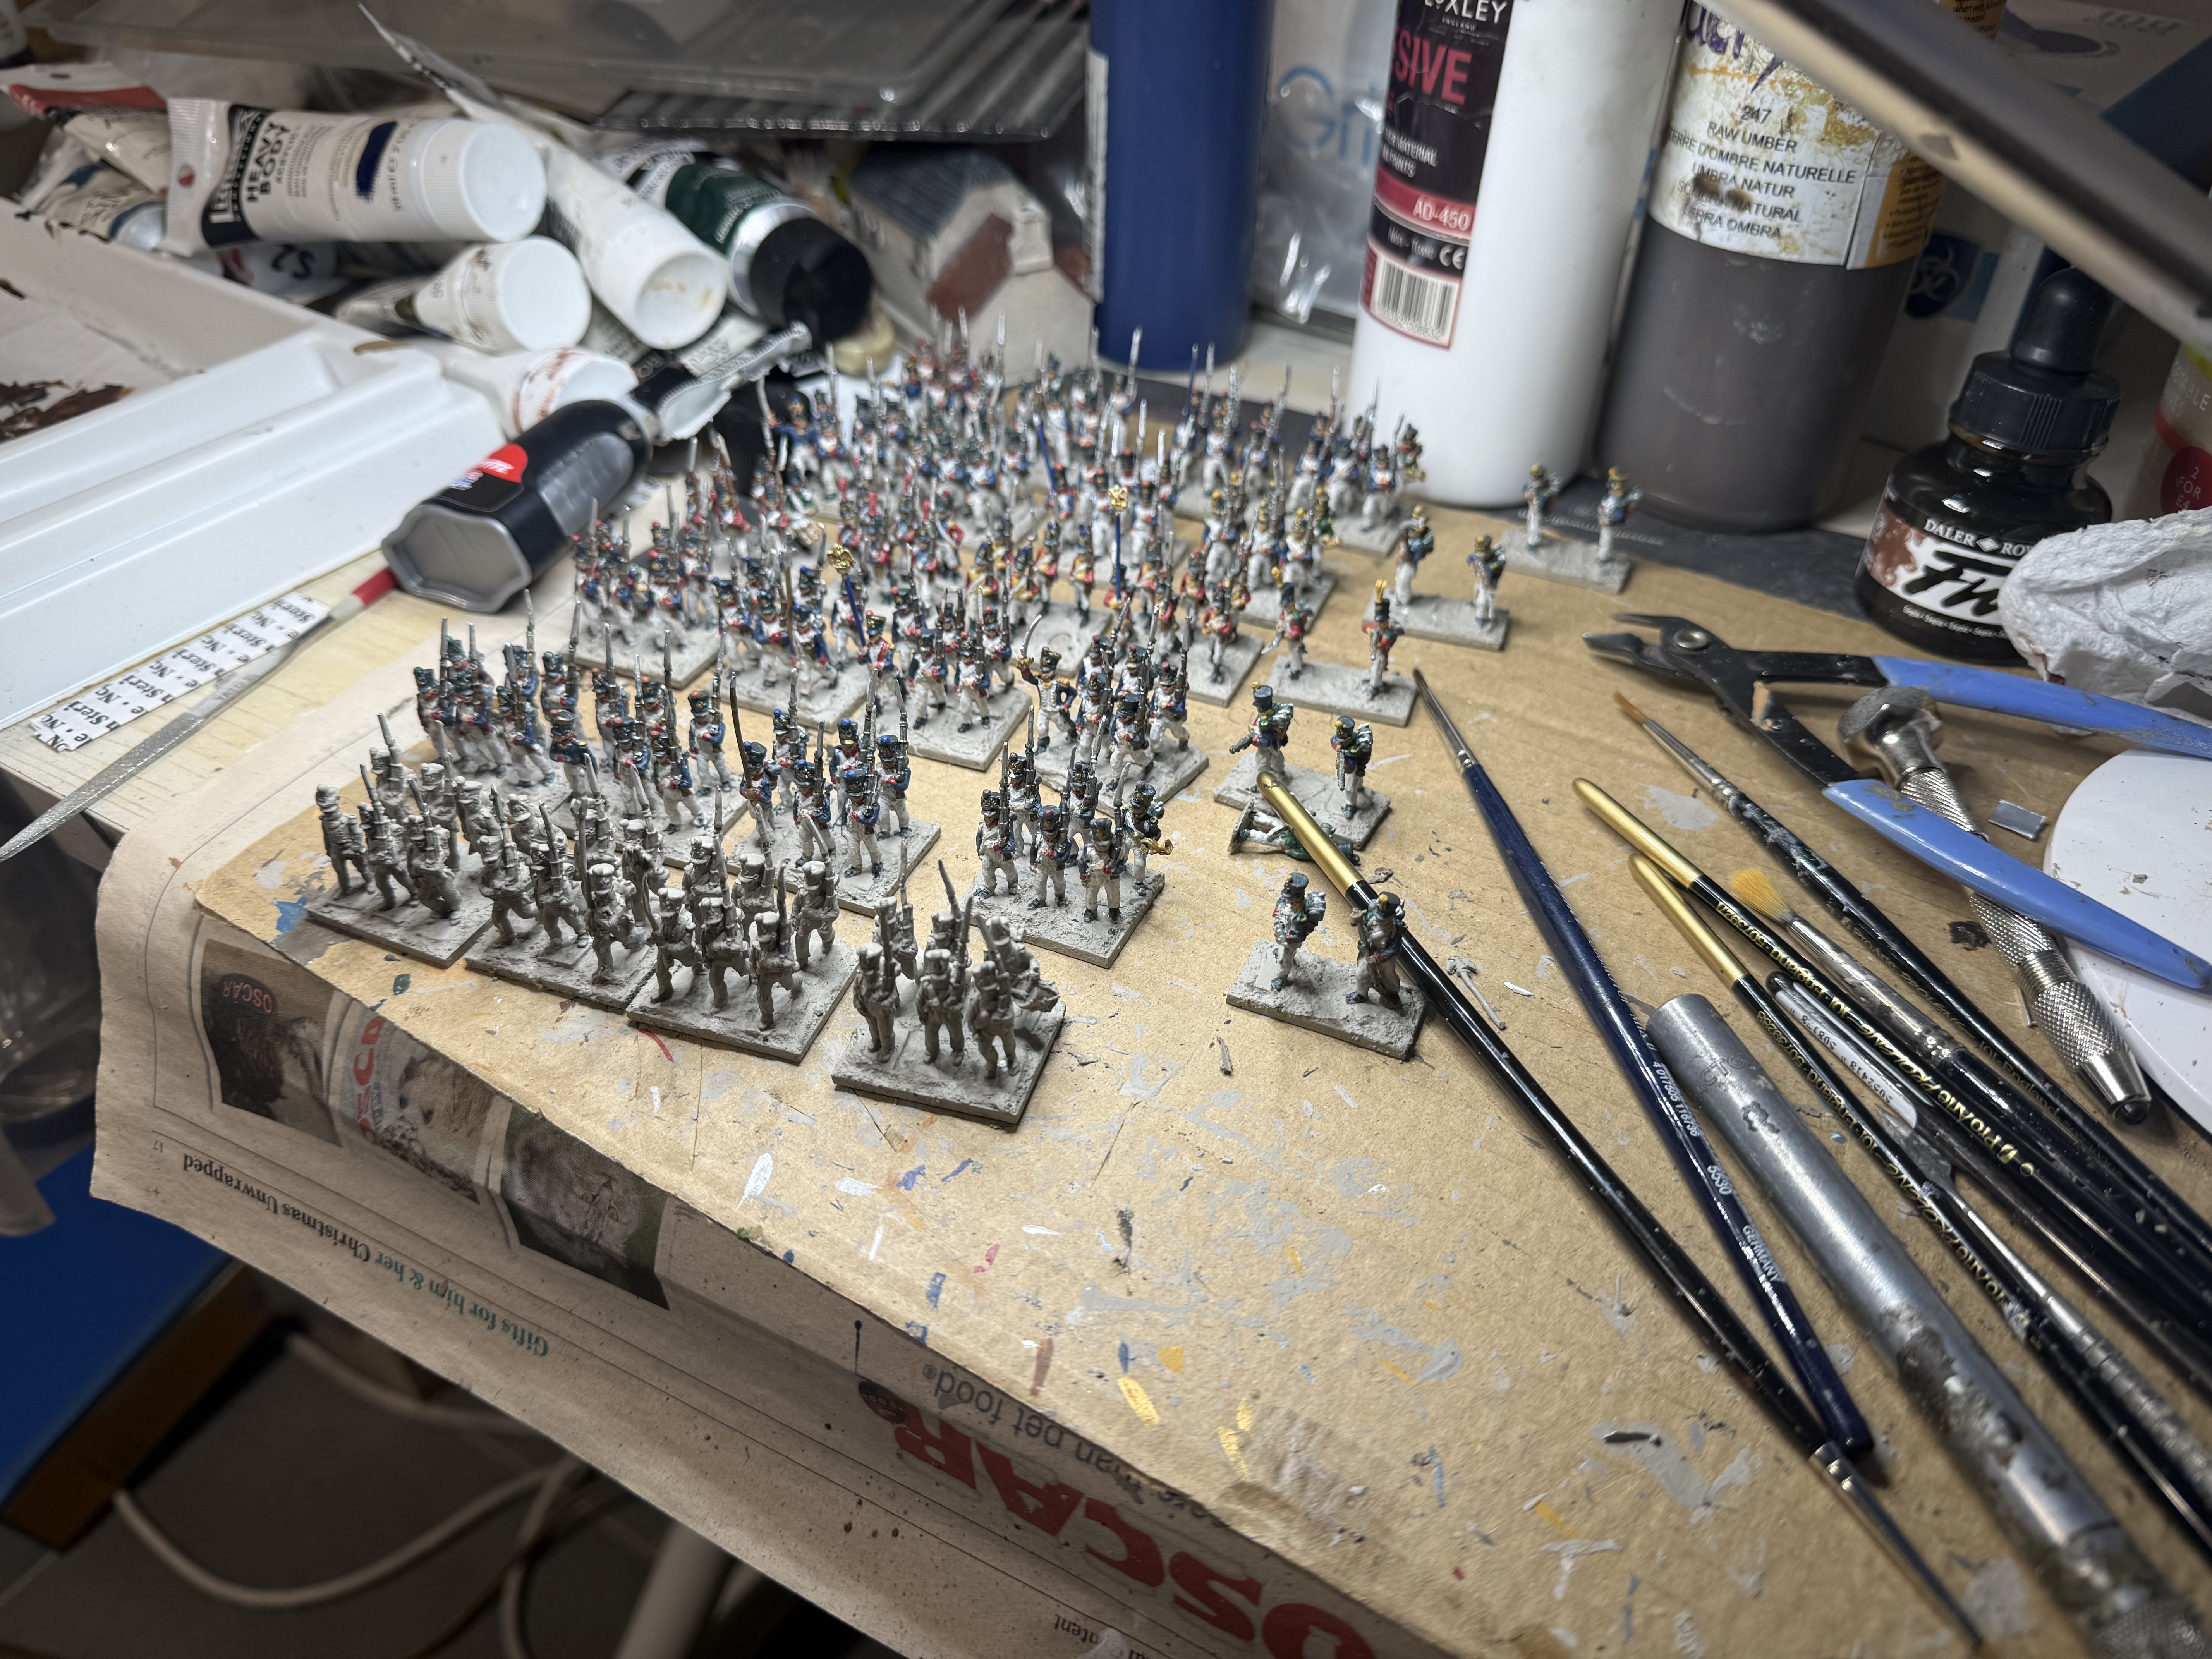
1815 French
My Napoleonic French infantry are mid-war (1807-1812) and have been working very hard. GDA2 uses a lot of miniatures, and it’s been clear that the troops need reinforcements. Since their main opponents these days are my late war (1812-1815) Prussians, clearly these should also be from the late war period. AB have a relatively new range of late-war French, and I wanted to use these. My New Year’s resolution for 2025 was to get 6 battalions into action. But I decided to prioritise six battalions of Prussians, and then got distracted by WW2 and 1866. As my painting schedule became dislocated in the late part of 2025, the resolution went unfulfilled. But I had bought the miniatures and I have been at it with a will this month. They should be ready in time my club game on 1 February, just a month behind schedule.
The picture shows where I’ve got to: five of the six battalions are ready for finishing (bases and a wash). The remaining battalion will take another couple of sessions to do – so I’m on track!
I will post more about these when I’m finished. The AB castings are a joy! These are much more fun to paint than the small 10mm figures I’m doing for 1866. I might need to rethink things in future. I am now hatching a scheme to do another six French late-war battalions.
January isn’t over – but I will report on the last week in my next monthly update. I hope to do a post specifically on my new French battalions too.
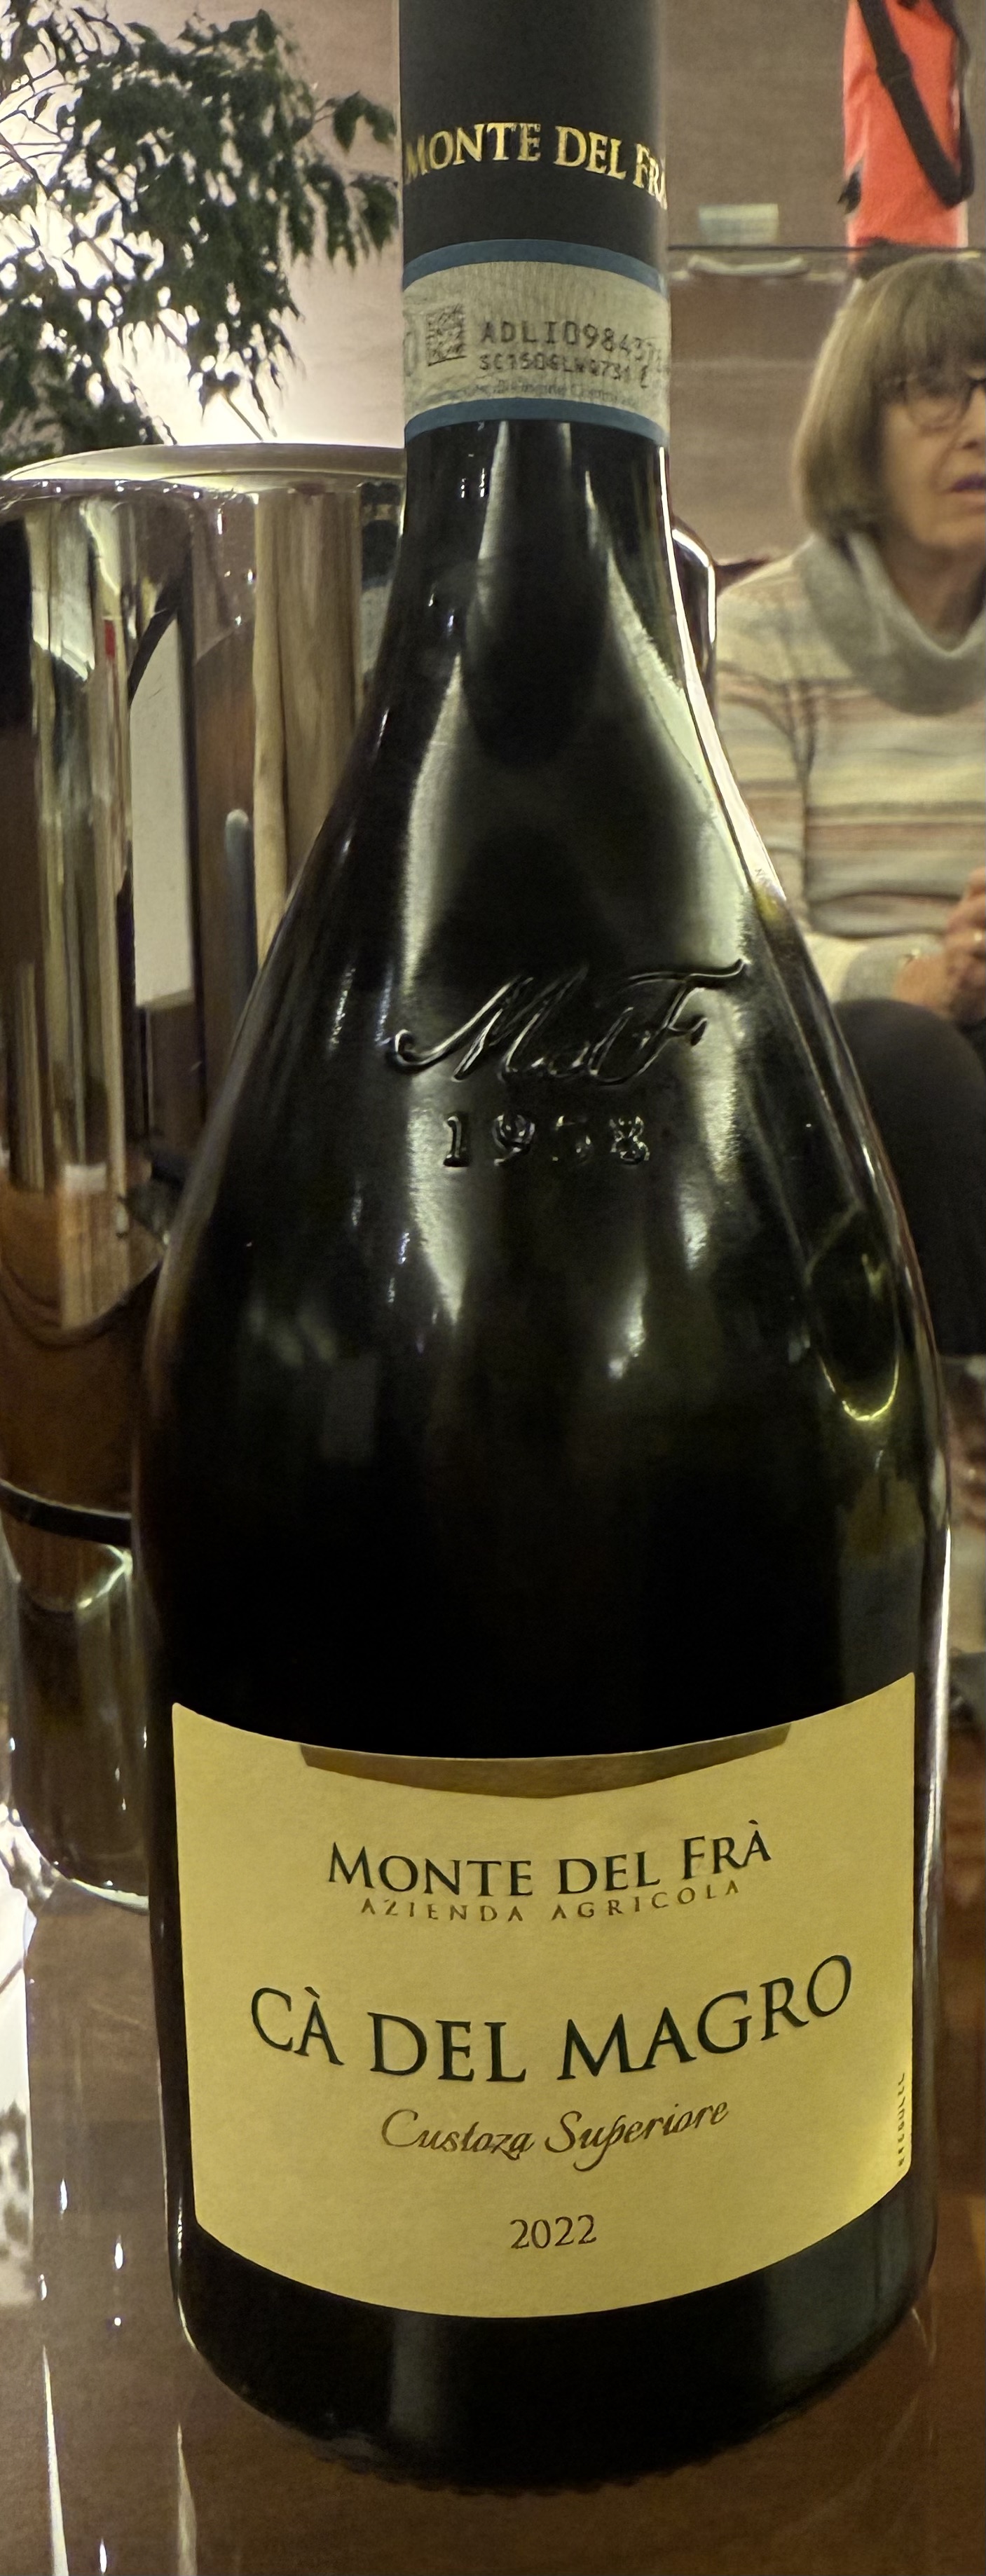
This bottle of Custoza wine was as close as I got to the battlefield during my recent holiday on Lake Garda.
I’ve decided to do things a bit differently on this blog. I’m not posting stuff often enough. This isn’t helping me to get engagement with other hobbyists. The problem is that I haven’t been posting until I feel I have something to say – which usually means finishing a project – or perhaps exploring an issue in (like mixing paints), which takes quite a long time to write about. But my life, even though I’m retired, has quite a few other things in it other than the hobby. We go on holidays; we have people to stay; I’m chair of governors at the local primary school; I’m on a number of online committees; sometimes I just like to go for a walk or see something with my wife; and there’s the garden. The hobby has to squeeze into this agenda, and often involves a number of parallel activities which take time to resolve. There a quite long stretches when I don’t finish something, or don’t feel I have time to write a long blog piece.
But often people just like to know what you are up to. My plan is to do regular hobby updates – at least one a month. These may not take long to write (though this one is quite long) – but should be enough for any followers to have an idea about what I’m doing. This is the first and I’ll cover what I have up to since the last post, in July, following my rather unsuccessful game for the Battle of Medenine (1943) in June, featuring innovative game mechanisms.
Games
I have played just one miniatures game in the period – an Arab-Israeli scenario from the 1967 war, using Cold War Commander. This was with my regular London group of players (mainly from my ex-club of South London Warlords). This was entertaining but a bit one-sided (to the Israelis) – though John, who put the game on, didn’t think it was unrealistic. We used John’s 6mm miniatures – I particularly liked the way he used colour flashes on the back of the base to denote unit ID, without the use of labels. The rules I was a bit less impressed with. I had used the very similar Blitzkrieg Commander before, with a similar reaction.
After this the London group has met a couple of times, but playing a board game – Here I Stand – representing the Reformation in Europe. We played it quite a bit a few years ago – it’s an excellent game but no miniatures! We have one more round to go, in November.
Meanwhile my commitments conspired against my regular club’s days. I haven’t been able to play there since March. Thankfully I’ll be back on 2 November. We haven’t decided on a game yet.
Projects
The Medinine game was a bit of a downer for me. I am a long way from having a decent system for brigade level games in 1943, after having devoted to quite a bit time to trying, and getting things ready. And as for my attempt to create sangars from modelling clay and bits of model railway ballast – I really don’t want to relive that. I decided to give 1943 a long rest. I have plenty else I want to do.
So I have returned to the battle of Custoza in June 1866 in the Third War of Italian Unification (there was also a battle there in the First War in 1848), using home-produced rules. This has been interesting on a number of levels.
Custoza was the main land battle in that war. Taking advantage of Prussia’s attack on Austria, the Italian army attacked the Austrian-occupied province of Venezia. It ran into the Austrian army near Custoza, just southeast of Lake Garda and southwest of Verona. The Austrians were outnumbered but won, forcing the Italians to retreat across the Mincio. However the outcome of the war was soon decided by the Prussians at Koniggratz a few days later, and the Austrians gave up Venezia. The Italians also suffered a naval catastrophe at Lissa.
The battle looks as if it would make a great close-fought and evenly balanced war-game. It is especially interesting because the Austrians used their system of stosstaktik, which proved so disastrous against the Prussians, and is usually written off as being utterly stupid. The Austrian infantry formed into close columns (in divisions of two companies, in contrast with the more typical Napoleonic battalion columns), and went as quickly as possible for the enemy in a bayonet charge. It was no disaster at Custoza, but the Austrians suffered heavily casualties (more than the Italians), so the evidence isn’t conclusive. But it should create an interesting dynamic on the tabletop.
I started this project in 2023 (here and here), and painted up my first batches of figures then, using Pendraken’s 10mm figures. I did one batch each of Italians and Austrians. I also started work on some rules – named Forge of Nations.
Miniatures
I cleared up the considerable mess from the Medenine game from the Studio – the hobby room I have above the garage, nominally shared with my wife, though she has almost never used it. And I then did practically nothing until last week. I picked up the Italians from my last order from Pendraken, featuring all arms and generals. After basing and priming the complete batch, I decided to focus on the infantry – 9 bases of 10 line infantry, and three of 5 bersigelieri. After three sessions these are now ready for finishing (wash/glaze with a dark shade; flocking the bases).
The Italian infantry are ready for finishing. The cavalry, artillery and generals are primed in the background
Research
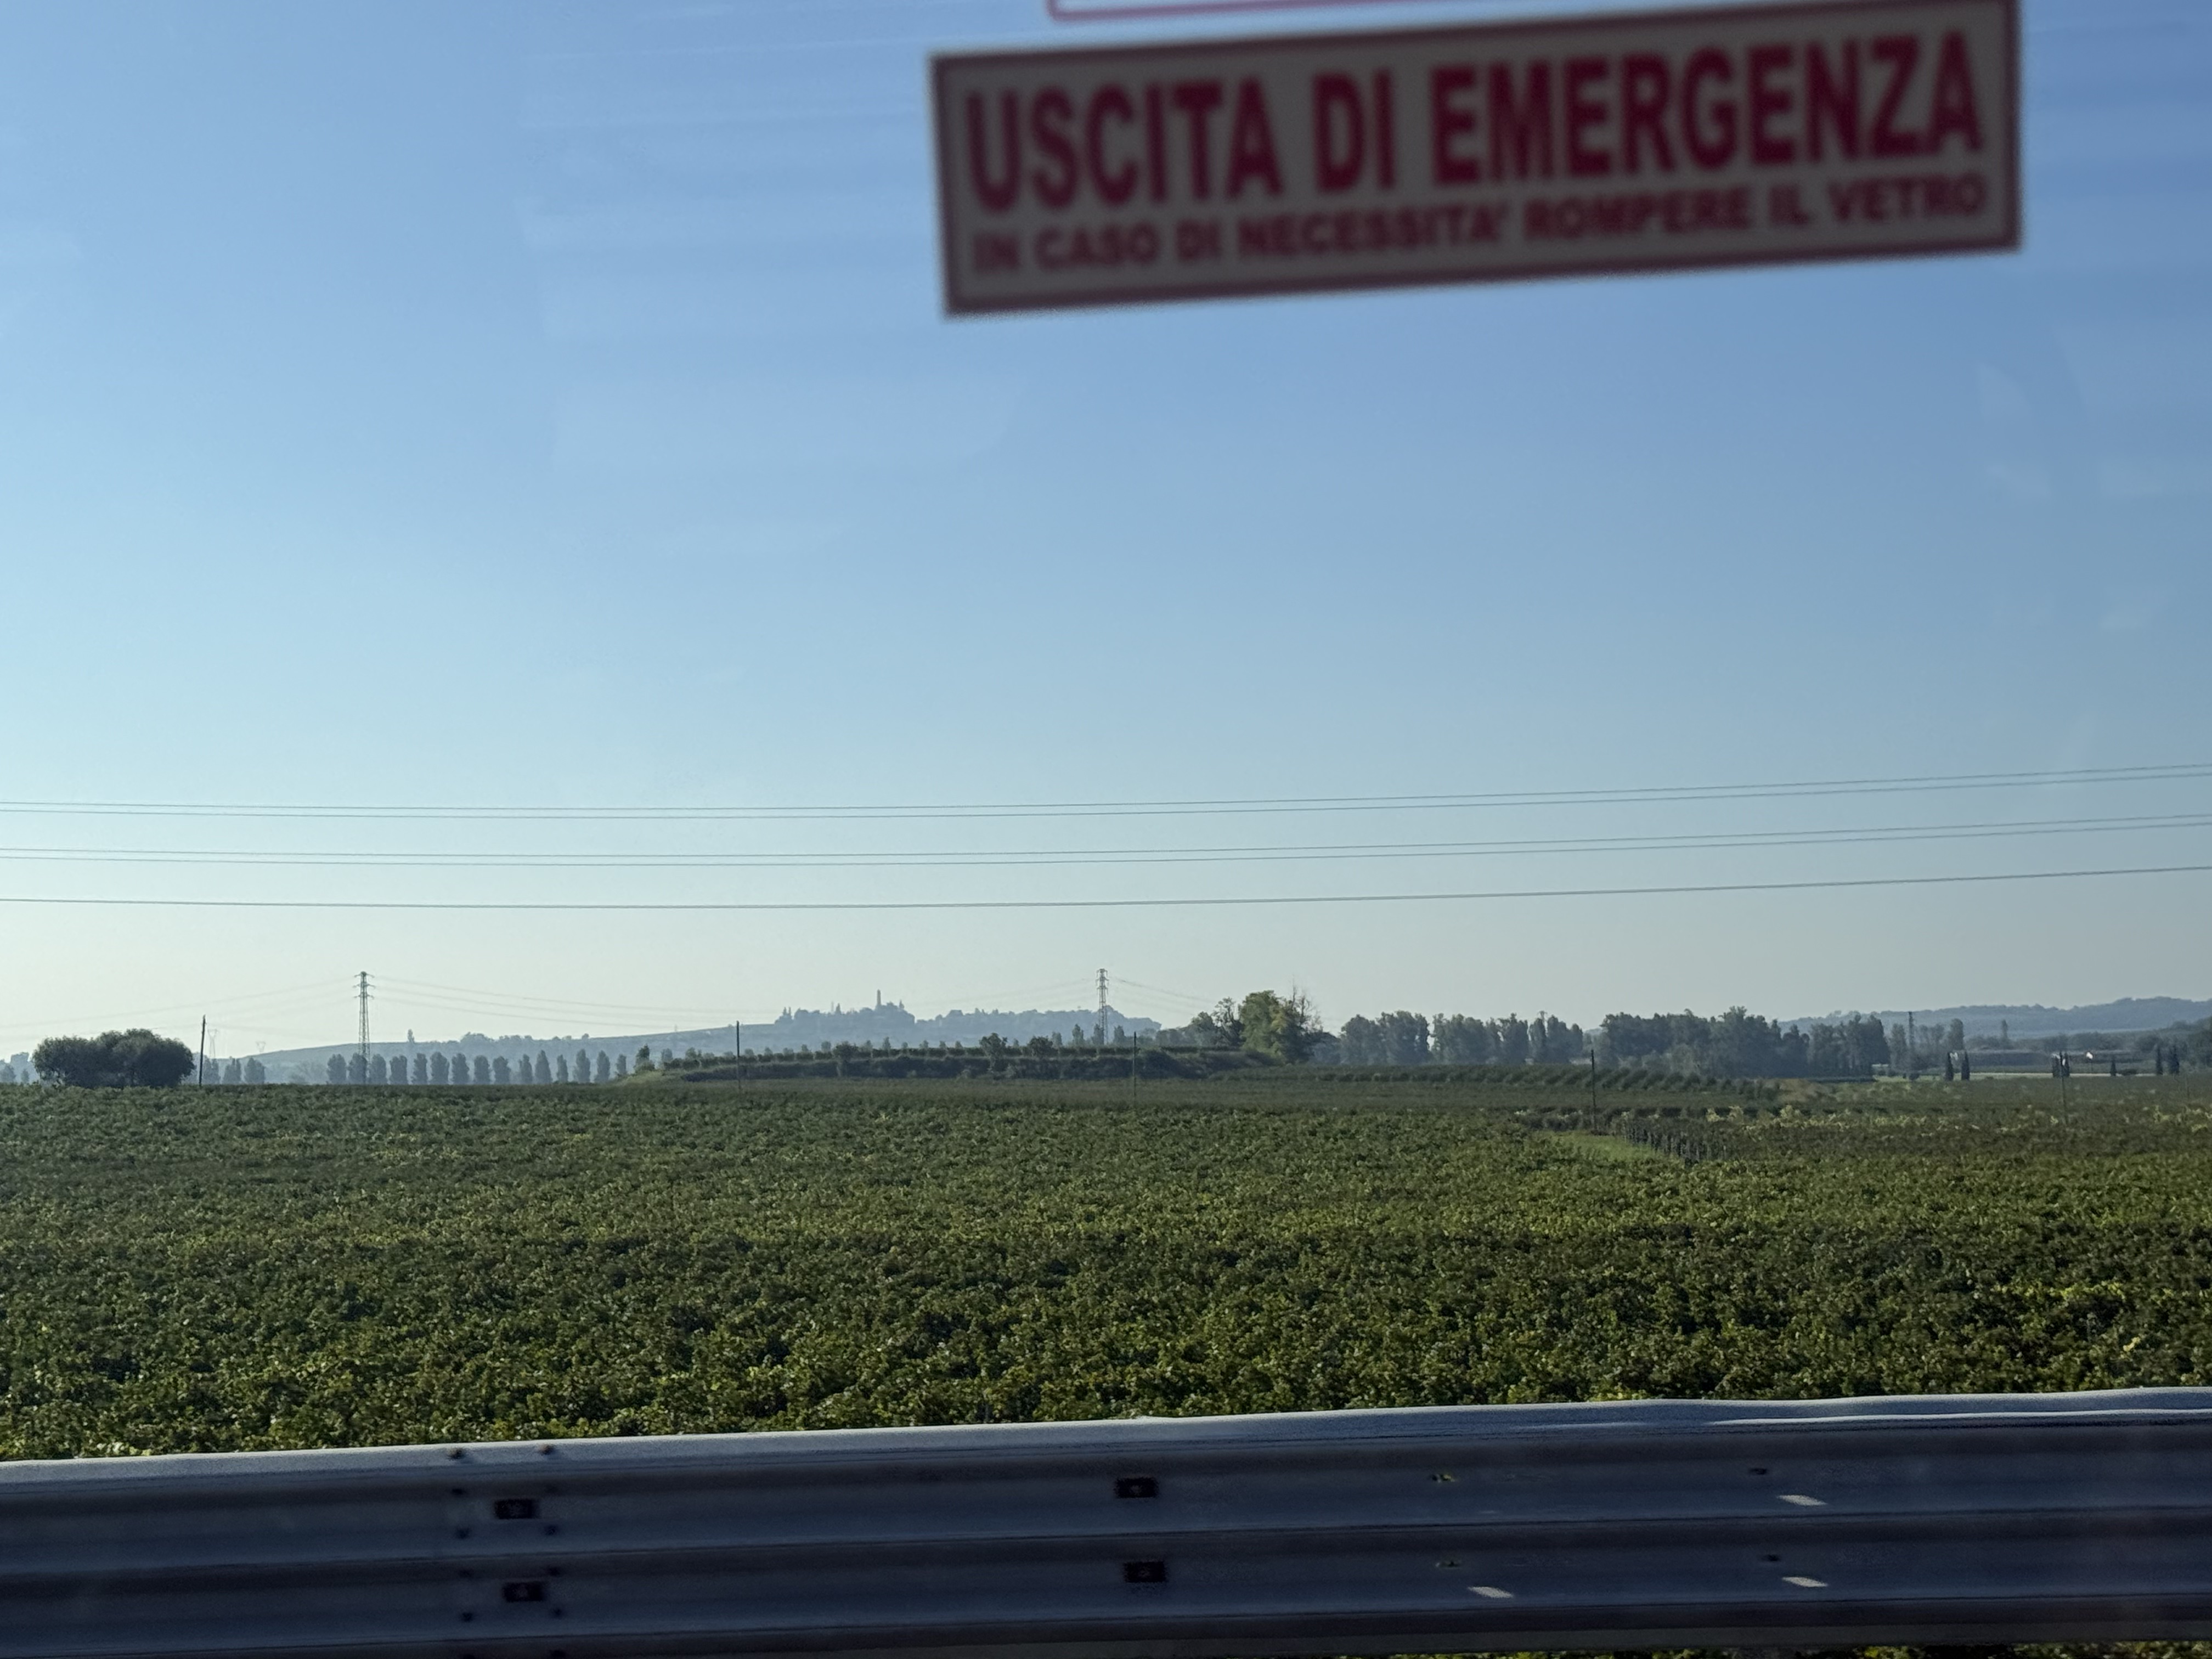
As it happened we went on holiday to Lake Garda a couple of weeks ago. We stayed at Salo on the western shore, but were taken bus to Verona on two occasions. The route crossed the northern edge of the Custoza battle site (from which the Austrians advanced), but it was difficult to see much. The modern motorway was a corridor of ugly modern engineering and the view across country was often obscured. This is the best I could do:
View from our coach. I think this is looking towards the village of Custoza itself. The vineyards in the foreground are doubtless modern, but this provides some indication of elevation and tree cover.
It was interesting to get a general feel for the terrain. The hills dominate the battlefield, but were surprising gentle. This is an area of morainal hills sitting between the mountainous pre-Alps and the flat plain of the Po River. The land is agricultural, and there are a lot of vineyards (the produce of which we sampled, see above), and trees, especially on field boundaries. This limits line of sight, though artillery still played an important role in this battle – doubtless because there were elevated spots with better visibility. It will also be interesting to consider how to present the table visually. The miniatures are relatively boring in appearance (both sides fought in greatcoats, notwithstanding the heat) – so good looking terrain will help. It would be quite nice to take the game to a show but that’s a long shot.
Interestingly, the coach also passed San Martino, at the northern end of the battlefield of Solferino (1859), from the Second War of Unification). I played the Piedmontese (Italians) in a beautiful recreation of this battle hosted by Bruce Weigle at Newbury. The road went right through where my troops were operating. There’s a monument to the battle, which is seen as a glorious Italian victory.
Rules
I have probably spent more time on this activity than anything else. I can do this from the study in the main house, meaning that it’s easier to do short sessions between other activities.
Forge of Nations is designed to cover 1866, including the Austro-Prussian war and 1859. This is but the hors d’oeuvres to the Franco-Prussian war in 1870-71, of course – but that is still a distant prospect.
I had produced a first draft in my first pass at the rules in 2023. This copied quite a bit from my Carolus Rex Great Northern War rules. However, I moved away from the randomised activation of different commands to a more conventional I go/you go system, which is easier to run in multiplayer games. But I wanted to use the card system described in my previous post – with a Move deck to regulate movement, and a Cohesion deck to evaluate combat and rallying.
I think the Move deck is a sound idea, and I want to persist with it. But I have been reflecting on the feedback I received on the Cohesion deck. It replaces dice throws, but comes over as a bit of a black box. Gamers have an intuitive idea about dice odds – and seeing how they land is part of the entertainment. Game design is a careful blend of innovation and conservatism, so I thought I would create a dice system that largely replicates what the cards were meant to do.
My idea is to have one distinctive die to reflect unit quality (D6 for D class, D8 for C, and so on, and then one D6 in place of each card in the old system, which reflect the attacker’s circumstances, such as weapon and range. You add each D6 result to the unit quality die – and see whether it meets a target number – which is adjusted to the unit circumstances. Each fail is a hit. A high score might an Elan result. We’ll see if it works.
Philisophical reflection
It is quite common to design a rules system based on one campaign or period, and then extend it into others. It is interesting to understand how this starting point influences the system. I am hoping to extend my 1866 rules into not just the 1870 war, but back into the Napoleonic and Revolutionary wars, and even into the next version of Carolus Rex, my Great Northern War system.
This is evident from the two different rule systems that I have used that have this battle in scope. One is Bruce Weigle’s 1866 – which is a development of his 1870 system. An interesting feature of this is that it makes extensive use of a “suppression” result for firing. 1870 was probably the first major war where troops often went to ground when fired on – as breech-loading weapons could be fired from the prone position. It is one reason why, in spite of a huge advance in the lethality of firearms, casualties did not escalate (or so I read – casualities in the FPW were still high). This doesn’t seem to have been a feature of the 1866 wars – perhaps the last in history where this applies. The Prussians had breech-loaders, but since their opponents didn’t, they don’t seem to have gone to ground. Still “suppression” could still reflect a hesitancy to move when under fire, and doubtless that is why bruce retained it.
The second system is Chris Pringle’s Bloody Big Battles (BBB). Chris also developed this originally for the FPW, so far as I can tell. But it is based on the Fire & Fury system used for the American Civil War. Going to ground wasn’t a feature of that war either. This is a more abstract system than the 1870 series, with a higher level of scaling (typically a base represents double the number of troops) – so doubtless Chris felt that representing suppression specifically was a needless complication: he has been ruthless in keeping the mechanisms as simple as possible, which is one of the great strengths of the system. However, the European wars of 1859-1871 were not the ACW, even though they are contemporary with it. The weapon systems (for the Prussians in 1866 and both sides in 1870-71) were different and this played a critical role in tactics – but BBB does a careful job of representing this. The use of cavalry was different too – the Europeans clung to the romance of the Napoleonic era, insisting that the charge into close combat was the most important cavalry tactic, and retaining pretty uniforms in many cases, while largely neglecting firearms. The Americans were much more flexible, often deploying cavalry on foot, using firearms – which proved to be the way of the future. BBB retains this approach, with cavalry being very similar to infantry in the way it is represented. Cavalry didn’t play a big role in the European wars, so this doesn’t matter that much. But if you start on the European side of the Atlantic with your system, you would try a bit harder to reflect the possibilities of the grand charge – as the Weigle rules do.
My rules use much the same scaling as BBB, but the base articulation of 1866. Bases move individually, and are not organised into rigid units. Cavalry have a more Napoleonic feel. If I take them into 1870, I will need to reflect suppression in some way, but for now I’m ignoring it.
What BBB and 1866 share, with very different mechanisms, is strong command friction. Command and control is heavily devolved – the direct influence of corps and army commanders is limited – and subject to heavy activation tests. This clearly reflects how things worked in this period – and it is one of the reasons that I find that BBB does not translate so easily into the Napoleonic era – when the action was much more centrally directed, but subject to less friction. This will be interesting to reflect in my rules.
GDA2 uses a lot infantry miniatures. Fifteen or more battalions on the table is commonplace, and often more in their scenarios, and there are 24 figures in each one on my basing system (not counting large battalions). I didn’t have enough Prussians for some of the 1813 or 1815 published scenarios – except perhaps using some Landwehr as line infantry. I have similar problems for the French, where I have had to use Guard units in the line. So I needed reinforcements!
My immediate focus was on the GDA Lützen scenario. For this I needed lots of bog-standard Prussian line. Four regiments were involved (two Silesian and two West Prussians), with up to four battalions each and 13 altogether – plus two battalions of grenadiers and one of Silesian Shützen. And that’s not the full game size – though I doubt we will ever play the extended variant with another 3 battalions of late reinforcements. I have but three battalions of standard line infantry (from the 2nd, Pomeranian, regiment). In addition I can rustle up seven odd-looking battalions from the 1815 new regiments – previously reserve units (plus 8 Landwehr) – and I had a couple of bases of Silesian Shützen.
My plan was to put together another six and a half battalions. Four of line infantry – painted as the 2nd West Prussian regiment – and two of grenadiers (West Prussian and Pomeranian) and an extra couple of bases of Shützen. The line infantry and shützen I could cobble together from Old Glory figures in my lead mountain, with a few AB officers which I also had in stock – which would leave me with only a handful of unpainted Old Glory figures. I bought the grenadiers and some extra skirmishers from AB. AB do them in campaign uniform, without the fancy shako plumes – but with a couple of details different from line infantry, like badges on the cartridge box.
This project is especially significant because I bit the bullet and decided to change the basing. Until now my infantry (and cavalry) have been based on 25mm squares (and skirmishers on 25mm by 15mm bases). I decided to move them to 30mm wide, with the same depth. The tipping point was the decision that in my future grand-tactical rules I would articulate the bases individually, rather than forming them into lines and columns like individual battalions. When a base is on its own it looks a lot better as an oblong, so you can see readily which way it is facing. The difference is not so great that I can’t use them alongside my smaller bases: indeed a I have some British units, bought from a friend, on 30mm squares, which I have used successfully co-mingled. A second decision was to use pre-cut MDF bases (bought from Pendraken) rather than cutting them myself from thin cardboard. I use these bases on my smaller scale figures (6mm and 10mm) for ease of handling, and I have decided that the thicker bases aren’t so bad visually. The handling issue still applies, and the cardboard can warp.
This first picture shows the 1st and 2nd battalions of the 2 West Prussians. Each line battalion comes with a skirmisher base, and to these I have added a couple of bases of volunteer jagers. The 2nd West Prussian regiment actually contributed little (one or two battalions out of a possible four) to the Lützen order of battle for the GDA scenario – but I already had the flags in stock.
Next come the Fusiliers and the 3rd battalion. The Fusiliers count as a light unit for GDA purposes, so I did five skirmish bases. When fully deploying the unit my plan is to take off two bases from the main unit and put on four skirmish bases; this is not in the rules but has an almost identical effect. The 3rd battalions of Prussian infantry were only used at the start of the 1813 campaign. After Lützen they were folded into the other battalions. However, since all my 1st and 2nd battalions are standard sized, I can use bases from this unit to make them into large units (and the Fusiliers too if I just add a single base), typical of 1815, and even later in 1813.
And finally the grenadiers and shützen. The Pomeranian grenadiers are in the front rank. I chose this regiment rather than the Silesians (who were actually in the order of battle) to match with the Pomeranians I already have. Also there was Frederick the Great’s quote about Pomeranian grenadiers. The AB figures are lovely, and a cut above the Old Glory ones (though these are not bad – and quite characterful). The shützen are a combination of my old two bases, rebased and touched up, and two new ones. Likewise with the skirmish bases (where as a light unit, they get five – plus I did three bases of jagers for the other regiments). They integrate pretty smoothly, though getting them off the old bases, covered in static grass was less straightforward.
Doing seven units of infantry as a single project was easily my biggest at 18mm – but I it felt necessary to get the troops table-ready in reasonable time. I based and primed the units all together. I then did the basic painting by individual unit, so as to be able to see progress more easily. After the first four units, I finished the bases and gave them the final coat of varnish/wash for the ones completed so far. I then moved on to the final three units. Because I thought the wash dulled down the white webbing and the white/red facings a bit too much, I did this earlier in the process for the second batch, and did the final paintwork (the webbing, facings and metallics) in one big batch afterwards. I also did a little highlighting on the first batch to lift them a bit – including on the flesh parts, which looked a bit dull. I’m no expert at highlighting (getting the right weight of paint on the brush is a real skill) so I don’t think this added that much.
Incidentally the wash is one aspect that I have been experimenting with. This time I mixed a bit of sepia acrylic ink with acrylic airbrush matt varnish (from Liquitex). I have used black ink before, and found it a bit too strong. The sepia is better, and the finish of the varnish (if properly shaken before use) is exactly what I want. As I said, I still think the figures needed final highlighting – but this is not a big job.
How about the new bases? I’m not a total convert. The figures still look a little loose for close order infantry to my eye, especially in the “march attack” pose. When posed advancing with lowered weapons (only the shützen this time), and the ranks slightly offset, then the extra space works. For the light infantry I did try to offset the ranks, though this is barely visible. However, by modern wargames standards these units still count as densely packed, and the wider bases do look better on their own.
The first batch of units were finished in time to take part in one of my club games, mixed with my older units. You can see from this excerpt:
The shützen are on the front left; 3/2 West Prussian is the right of the limber (which is from the artillery batch described in the last post). There’s no problem mixing the two. But the big question lurks: do I rebase my old units? Not for now.
My Prussian lead mountain is now substantially reduced. I have some packs of AB Landwehr that I will paint up as Silesians. I have a couple of AB cavalry units that I don’t really need but would look good. My next Napoleonic project is French infantry reinforcements: six battalions in late uniform, including two of Young Guard.
My new 1815 Prussian artillery and limbers – on my new Geek Villain Fields of Glory mat.
Apologies for the long silence on these pages. I’ve been quite busy. In 2025 I’ve had two games of Général d’Armée at the club, one with my figures, and one based in 1800 with a fellow club member. I’ve been working on some new ideas for my WW2 rules, some of which I will apply to other periods. And I’ve been busy painting reinforcements for my 18mm Prussian army for 1813 to 1815. I’ve also revamped this website, though not so sure about how much better it is. Today I am going to describe my new Prussian artillery an d limbers; next time it will be the turn of seven battalions of infantry.
I started with the artillery, not because I had any special need for my GDA2 games, which are not intensive of artillery, but because I had been planning this as part of my Ligny project – for which I will use my own grand-tactical rules – which use a lot more artillery models by comparison. I had gone as far assembling all the figures and models ready to complete this aspect of the project a year ago – but then got distracted. I actually finished this in January, but not got round to photographing the results – I am actually a bit vague about what I did! There are ten bases of deployed artillery – three horse artillery, two heavy artillery, four field artillery and one howitzer. In my system I denote horse artillery with two-figure bases (and the howitzers too), field artillery with three crew figures, and heavy with four. The historical batteries were all the same size – 8 guns. In addition I painted eight limbers – three with two pairs of horses, and the rest with one.
The first image shows the heavies on the left and one of the field batteries on the right. The figures are all AB – much nicer than the Old Glory ones I have been using before. The 12 pdr pieces are also AB; the one on the right (in paler blue) was not painted in this batch, but left over from before. The 6 pdrs are Blue Moon – these are chunkier than the AB ones, and I’m using them for foot artillery. Apparently there was a bit of variation in Prussian artillery in use.
The next picture shows three horse artillery bases (far left, and both on the right) and the howitzer. The base on the left is meant to represent a battery from the Lützow Freikorps , which was still wearing the old uniforms in 1815. These are old Battle Honours Austrians with head swaps from Old Glory Prussians. Nothing very impressive, I have to admit. All the artillery pieces are from AB, with the howitzer in the lighter colours of my earlier batch. Incidentally I replaced the howitzer barrel with one from a Battle Honours Austrian 7pdr howitzer, and the AB one appears to represent the heavy 10-pdr howitzer.
What to say about the techniques used? The bases were cut from some packing plastic that I had lying around, after trouble with cardboard (even mount board) warping on bigger bases. They worked out in the end, but the material is too flexible and not very easy to glue. I needed to fix the magnetic material on the bottom early, and cure on a steel surface to make sure they were flat. In future I will use polystyrene plasticard – more expensive but more reliable. The figures were finished in the fast-drying oil medium I have been using before, with some raw umber mixed in – but the result is a little too glossy for my liking. Next come the limbers:
I have used Blue Moon Prussian heavy limbers and limber horses (with riders) for the foot artillery. The two horse artillery limbers – at the left end, are Minifigs – whose more dynamic pose works better for that arm (though I’m not a fan). AB limbers are works of art but fearfully expensive. For bulk buying wargames use Blue Moon are a much better source. If I didn’t have substantial numbers of Minifigs horses and riders already in stock (from more than a decade ago when the choices were more limited) I probably wouldn’t have used them. To date almost all my limbers have been with a single pair of horses (which would only have been used for manoeuvring – two or three pairs was the norm for normal use) – this because I was worried about the table space they would take up. This is not an issue for GDA2 games, so I have introduced a few larger models with two pairs (though without any attempt to represent the tackle).
I tried a new technique for the horses. I built up the colour in thin glazes of acrylic on a white base, using acrylic airbrush matt varnish as the medium. I thought this might give the horses the more luminous quality I have been searching for. It was a lot of faff for not especially striking results. I will be back to oils next time – have picked up one or two ideas from Yarkshire Gamers’ You-Tube tutorial. The horses will need a bit of touching up – in the hurry to finish I forgot the white markings. Looking at the photo I also notice than one horse doesn’t have the tackle painted.
The bases were covered in my usual sand and acrylic medium mix, coloured with white and raw umber for a pale dried mud colour. This is then covered with a mix of flock and sand to give a rather paler green-beige ground that in my earlier efforts: dark bases don’t show the miniatures to best advantage. Though the strong PVA adhesive I use to fix the flock mix is pretty good, I still felt that it could do with fixing with a mix of PVA and water. I thought mixing a bit of raw umber paint in would help bring out the texture. Disaster – the paint made the bases too dark. I tried rescuing with a bit of light brushing with beiges and lighter green. The result is OK but not great.
That may finish my Napoleonic Prussian artillery for all time. I have lots of it.
After the German vehicles, I will describe the accompanying infantry. I need two battalions for the Rapid Fire style game I am planning for the battle of Medenine. Exactly how many figures this is I haven’t finally determined – but the starting point is 24 (three groups of 8) plus supporting weapons. I had enough already to cover one battalion-plus, but needed more.
Until now I have been using AB Figures’ standard Germans for further north, and simply painted the uniforms in tropical colours. It’s not too far off. But Medenine is one of the last desert battles, and features the Afrika Korps (DAK). I noticed that the AB range for the DAK did not feature troops in shorts – really not appropriate for the winter battles in Tunisia – so I thought I would give them a try. I bought three packs of infantry (ten in each), one of tripod-mounted machine-guns (two models) and one of officers (6 figures). All of the infantry are in helmets (good from my point of view), though there are caps for some of the others. Some of the infantry have sand goggles (which you don’t see in Sicily or Italy) and some are wearing gaiters, a feature of the German tropical uniform that you tend to see in pictures of earlier in the campaign – but also in the occasional one from Tunisia. These are fine for Medenine, and acceptable for the later 1943 campaigns.
I painted up all of the infantry (two groups of “advancing” and one of “prone”) and the machine-guns, along with most of the command group, along with figures I already had in stock, especially to provide the radios. I painted four command groups of two figures, three with radios. This will serve either as command groups at battalion or more senior level, or as artillery observers.
A closer look at one of the advancing infantry groups:
And the other one:
And the prone section (I entered this in my club’s monthly painting competition – it was voted 3rd out of 3 in its category…):
The main uniform is olive, made from mixing black with Oxide Yellow and white, I attempted a little variation in the amount of white, but this is hardly visible. The helmets for two of the sections are in the Braun used for the vehicles, and the other one was the Grau. Vehicle paint was often used to paint the helmets, and there are surviving examples with both of these colours. I darkened down the skin tones to reflect sun tans – but the result is still a bit on the red side, suggesting a bit of sunburn.
Here are the two machine-guns:
My photography doesn’t bring out the weapons themselves. Normally for medium machine-guns (i.e. medium calibre mounted on sustained fire mounts) I put just two crew on the main base, with a third crew member available on a separate one (rule systems can require individual crew members to be accounted for) – but these AB figures were obviously designed to go on the same base, and separate bases would have made little sense. They are a bit strange, in that they aren’t actually engaged in combat, but rather waiting for the action to happen. They are rather nice, though.
Finally the officer groups:
After the initial paint job, I applied my wash/glaze (a bit thick for wash, but thin for a glaze…) of Liquitex airbrush matt varnish with a little acrylic black ink. I thought the black would work better with the olive colouring than brown, and the brown ink I had was a bit bright. I tried to use less ink than on the previous occasion (with my British) but the ink is so powerful that it didn’t really work. It made the figures too dark. I touched up the uniform high and middle lights with fresh paint, and also the faces, which I think is good enough. The ink brings out the AB mouldings beautifully, almost to the level of the cartoon-style appearance which used to be very fashionable (though often achieved with a black undercoat). But I’ll have to try something less dark next time.
The bases are steel washers or mount board. The latter isn’t ideal as it can warp, and sometimes fray if over-handled. Pendraken do excellent pre-cut MDF bases and I may move towards these in future. Initially (and before any painting) I cover with a mix of acrylic medium, sand and a white-raw umber mix, with the edges painted in the same paint mix – quite pale with the idea that this would act as countershading (but not with the lighting in the pictures…). After painting they are covered with a mix Woodland Scenic flocks and sand. This gives a sort of generic arid finish. I have learnt the hard way how easy it is to make bases too dark.
I’m nearly ready for Medenine so far as miniatures are concerned. I need a couple of 2-pdr antitank guns for the British, and I need to find a way of making my die-cast Dorchester command vehicle table ready. The bigger obstacle is that I’m still working on my hex-based rules. While I’m loosely basing my order of battle on Rapid Fire, I don’t find those rules very satisfactory. I love the tabletop look of Rapid Fire, but not the extreme bath-tubbing of the rules.
So far as painting projects go, I’m being pulled in two directions. Do I continue to build up my Napoleonics for club games – now that I am converted to the Général d’Armée 2 rules. Or do I resume my 10mm 1866 project? Some time ago I prepared a large batch of Prussian Napoleonic artillery. I don’t strictly need these (GDA2 scenarios are quite light on artillery), but I think I’ll do these next anyway. If nothing else I want to try out new techniques on the horses.
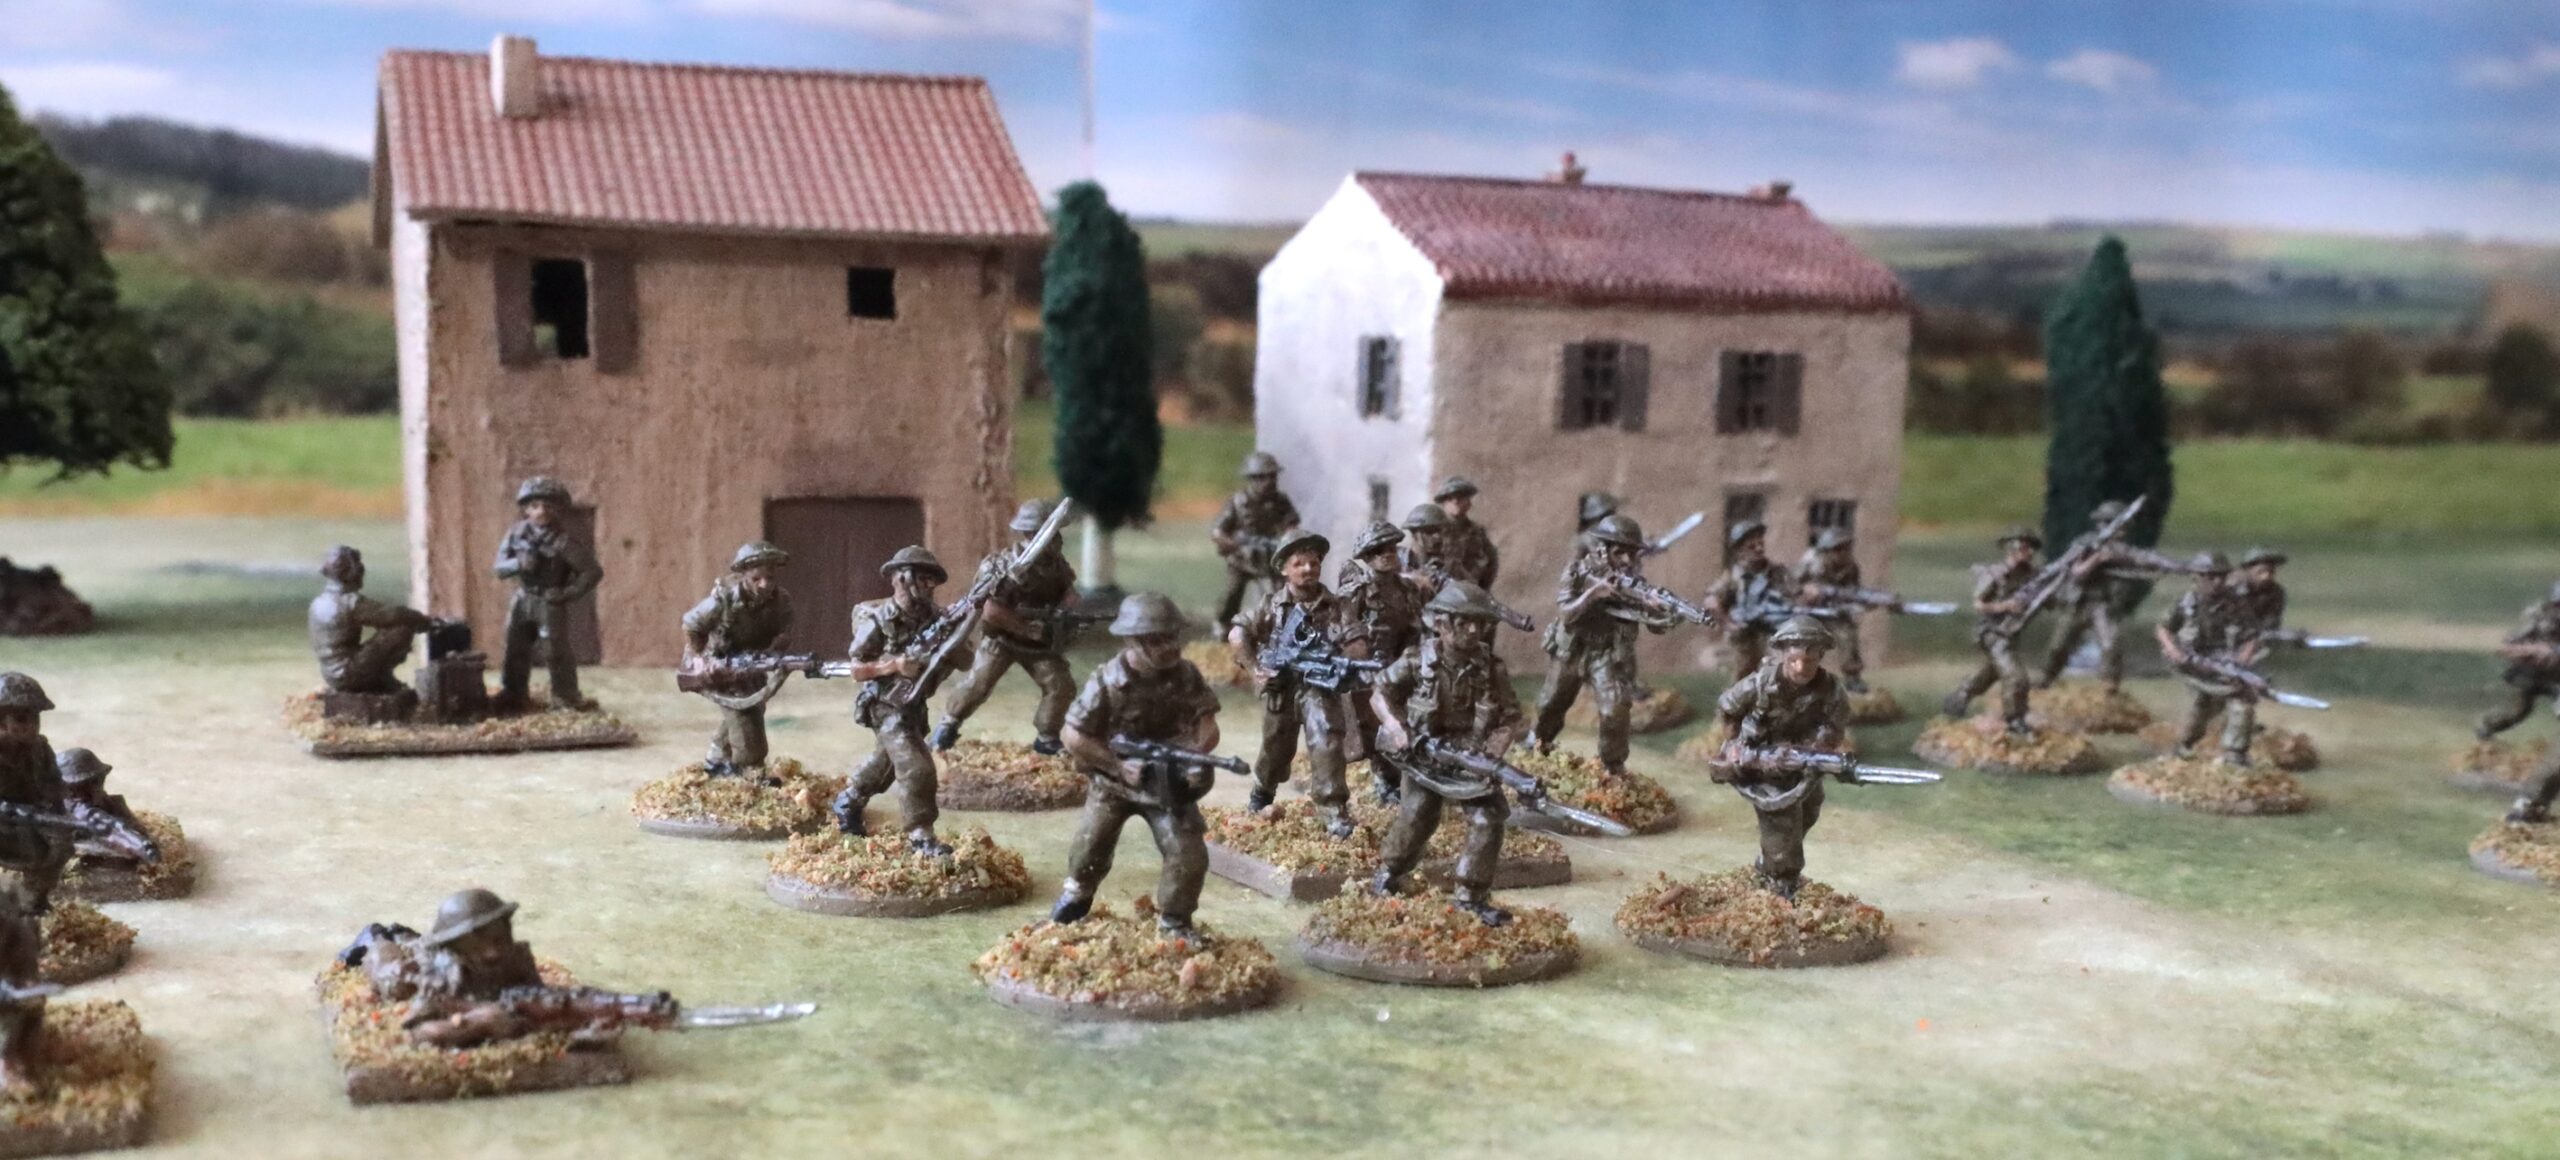
I’ve been working on. my most recent project for quite a few months, interrupted by the usual series of things – including a focus on completing my Journey Through Colour series. Now they are battle-ready I can introduce them. These are the Germans I will need to enable me to play the Medenine scenario I have been planning. It includes 30 infantry, plus extra tripod-mounted machine-guns, and four bases that can used as leaders or artillery observers; topping up the motor transport with three medium trucks and three heavy cars; three Panzer IV tanks (though I will only need one this time); three self-propelled guns; and a command tank Panzer III, a light tank and an armoured car HQ vehicle. A lot of stuff, so not surprising it took a long time to complete.
Today I will look at the vehicles. First the Panzer IVs
:
I need eight tanks to form the main assault force for Medenine, the last major German attack of the desert war, representing a whole regiment. Following the Rapid Fire scenario, I’m splitting them 50/50 between Panzer IIIs and Panzer IVs. I already have three Plastic Soldier company (PSC) Panzer IIIMs with the long 50mm gun (with schurzen on the turret only, as characteristic of tanks in Sicily and Italy), which are close enough to the IIILs actually in use (no schurzen), and a Pz IIIN, with the short 75mm gun, converted from one of my ancient 1970s models. The IIIN was certainly in use in Tunisia in 1943 (often associated with the Tiger units, apparently), and the Rapid Fire OB has two. For the Panzer IVs I have three of my old Airfix F2s, which are the right model (though not quite the right paint finish), leaving me one short. I wanted to have some later model Panzer IVs for Salerno, so I decided to assemble and paint up three of these from PSC, with the turret schurzen, and to use one of them for this scenario.
To be honest, these PSC models were a bit of a disappointment. They are early releases from that company’s range, and modelled on early versions of the Panzer IV, with gestures to the later ones(mainly the schurzen parts, included track ones that I didn’t use). The minor details, such as the vision slits (largely removed in later models as blocked by schurzen), aerial (moved to the back and changed to whip format) and hatch lid (becoming one-piece) are all for the earlier models, and there is no attempt to reflect the slightly longer gun barrel of the later version. These later versions were the G and H, but that is an altogether too tidy a representation of what happened. The changes were brought in piecemeal, and older models converted, and this transition is visible in 1943, with only early versions of the IVH making an appearance. For mine I cut off the surplus vision slits, and the old (retracted) aerial. On one of them I even created a one-piece hatch lid. The result is good enough for wargames, but if I want more I will try something different. In fact these traditional plastic kits are being phased out by PSC, replaced by 3D printed models. These may be more accurate – but they aren’t visible on the PSC website – which may be because of the great website disaster that has affected so many wargames suppliers. I fitted some stowage from stock, and tank commanders from AB Figures – so much nicer than the PSC ones.
Next the command and recce vehicles:
These consist of a Panzer III command tank and a Panzer IIF from Early War Miniatures (EWM), and a SdKfz 263 radio vehicle, an option on the PSC SdKfz 231 kit. The command tank, and the Panzer II (equipping the reconnaissance platoon) were lifted straight from the Rapid Fire OB; I also wanted a radio vehicle to add to the HQ, and opted for this armoured car. In fact the vehicle was used to act as the HQ for a reconnaissance unit – but it is an interesting vehicle and I thought it would work well enough here – improvisation was so often the name of the game in Africa.
The Panzer II was an incredibly disappointing model. It is a metal one from PSC, and the turret looks just wrong – it is too flat. Not only that it is moulded with a closed hatch, so I can’t put a commander in – it really should be open-hatch for a recce vehicle. I didn’t really need this tank – whose role in the scenario is surely peripheral – I could have used an armoured car. But I like the look of a Panzer II, and it was the only way I was going get one in my 1943 project. I’m so disappointed that I am on the lookout for a better model, though I probably will never get as far as actually replacing it.
The Panzer III is another model from EWM – a special Afrika Korps model with lots of stowage moulded in. The turret is also a little flat, but I can have the hatch open, and somebody in it – and the overall effect is tolerable. While I’m not bowled over with the model – and it is probably is more appropriate to 1941/42 – this will do. The most serious problem is that the moulded in stowage makes it impossible to put in the vertical struts of the aerial at the back, even though these are provided. Like the Panzer II it is a small model ( a small 1/76 compared to the large 1/72 from PSC – more on that later), but I’m going to have to tolerate these scale variations.
As for the armoured car, it’s a classic PSC job – a big brute and a bit clumsy in places, but a good wargames model. Unfortunately all the hatches are moulded closed. I have two more models in the box – one of which I think I will make up as a 75mm SP gun, and the other the conventional armoured car.
All these vehicles are finished in the Braun/Grau camouflage scheme in use in Africa at the time. Usually German vehicles are portrayed as being in a single colour (the Braun or the earlier Gelbbraun) – but the German policy up to this point was for the camouflage stripes/blotches to contrast in hue but not shade – so the patterns don’t pop out on black and white photos. My Grau is probably slightly dark but even so you can see what I mean from this:
And so to the self-propelled guns:
From left to right we have a Grille, an early Marder III and a captured M3 75mm GMC. The Rapid Fire OB only has one SP gun in it: a sIG33 150mm infantry gun. The Grille stands in for this; I don’t know if any Grilles were deployed in Tunisia, but they certainly featured at Salerno, and its characteristics will be the same as the more ad-hoc vehicles they did have (mounted on ex-French tank chassis, or perhaps Panzer II). But a German account of the battle I bumped into over the internet talked of a motley collection of self-propelled artillery being taken along for this attack, so instead of the towed weapons in the OB I decided to include some extras (though actually more powerful). This early variant of the Marder III was certainly in Tunisia, even if it wasn’t at this battle. And this battle was shortly after Kasserine, when the Germans acquired a lot of American equipment, so taking the 75mm M3 GMC was certainly plausible.
The Grille model came from EWM: though small it is a delightful. I didn’t think the crew provided really came up to scratch (though I did use them on the M3), but I found alternatives from my various PSC kits (even though these are made to a bigger scale…). It was painted in the later war Dunkelgelb, befitting the Italian campaign.
The Marder III was from PSC. As usual it was a bit of a monster (it has the same Pz 38t chassis as the Grille, so you can get an idea of the scale difference from the picture. But it’s nice enough model, which I painted in the Braun/Grau scheme.
The M3 GMC was an Italeri kit, at the smaller end of the scale range (it’s about the same size as my old Airfix halftracks). For some reason I always wanted a couple of these in my collection – I think they occupy a tactically interesting niche. They were used by the British in Italy – though I not sure that was before 1944. There were two models in the box, and I thought a captured German one would add a bit of variety. One did make an appearance at the battle of Hunt’s Gap, which I have in mind to do a scenario of. And the paint scheme I used was from that vehicle. The Olive Drab base colour was overpainted with Braun, to cover over the US markings, and create some rather crude crosses, along with a general mottling. The model is OK, except that the floor of the driving compartment is too high, which makes it impossible to put anybody in the driving seat (or passenger seat, come to that.
And so to the transport. The German infantry arrived on the battlefield in lorries, which came under artillery fire, forcing them to disembark rather further from the action than they had hoped. For two battalions of infantry I needed six medium trucks – and I only had three painted up. I did have three more PSC models in stock, though I had a vague plan to turn one of these into a mounted AA gun. The simplest thing was to commandeer them for this. In hindsight it would have been more interesting, and perfectly realistic, to do some captured US trucks, which would have given a very Tunisian flavour to proceedings. I made them up as standard tucks, two Mercedes and one Opel. Two were painted in Braun and one in Dunkelgelb.
And finally some lighter transport:
These are three Styr heavy cars (or light trucks if you prefer), from another PSC box. This is one of the more recent PSC offerings, before they went the 3D printing route. I needed them as transport for mortars, antitank guns and so on. And there’s a problem. They are massive, even by previous PSC experience. PSC’s scale creep has gone mad; there is no way they are 1/72 – though the crew figures are consistent with earlier models. To see what I mean look at the comparison here:
On the left is a Milicast Horch heavy car, which should be of comparable size, although admittedly in 1/76 scale. On the right is one of the Mercedes medium trucks, which should be heftier. The Styr overshadows the Horch and is getting towards the medium truck in size. The Styrs look OK in isolation, but start to be problem when mixing them with my other models. I will have to think about replacements. I could press into service one of my Airfix US halftracks, but I would still need a couple more. I don’t want to go down the Milicast route again: their models are expensive and very fiddly to assemble.
I have already said quite a bit about my painting and finishing technique in the Journey Through Colour series. After the paint and decals, I was quite sparing with my matt varnish black glaze/wash, given the rather over-heavy result on my infantry figures. I still needed to do a bit of light overpainting with my original paint mixes, which fortunately were still alive. Finally they got a heavy dusting in ground pastels. The result isn’t refined, but I have achieved a weathered campaign look that works on the wargames table.
Next time the infantry!
Postscript: I entered the Marder III for my club’s monthly painting competition and it won its category… out of three entrants.
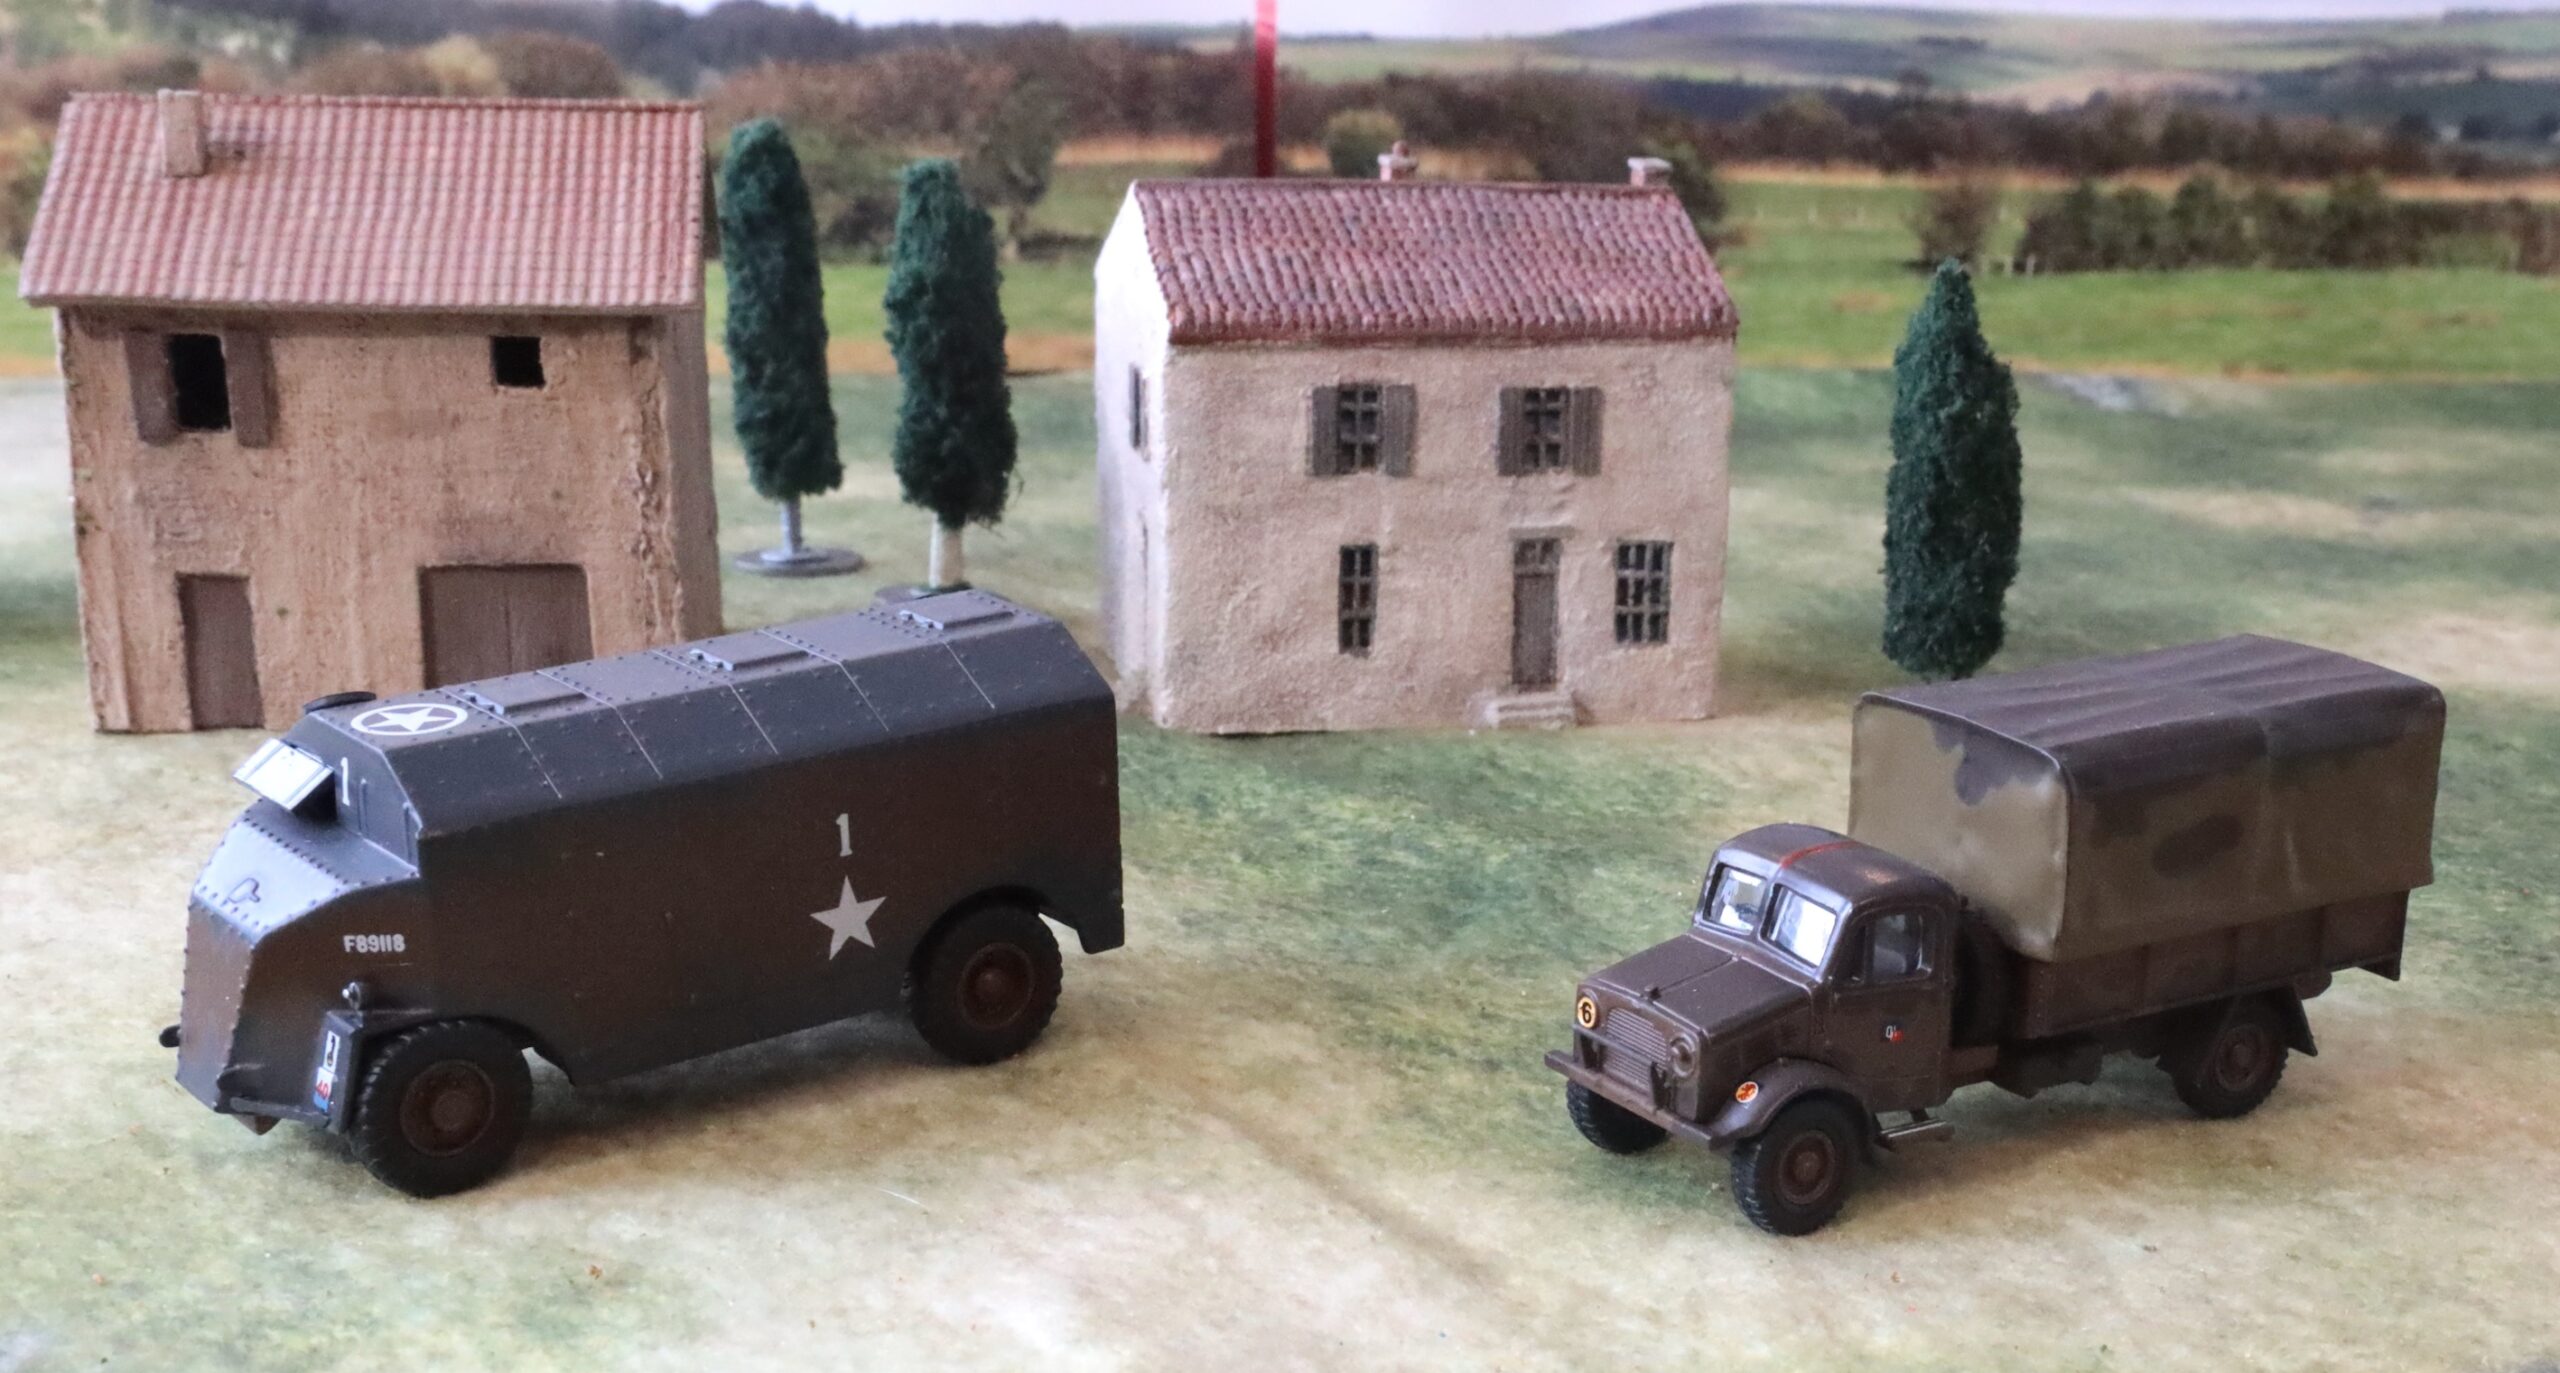
Making up and painting models from kits and castings is a faff. What about buying die cast models ready assembled and painted? A bit more expensive, but not that much, and less trouble. For my most recent project I decided to try a couple of models from Oxford Diecast. These were a Bedford OYD 3-ton truck, and a Dorchester Armoured Command Vehicle (ACV). The former was to provide a bit more variety to my transport (dominated by Bedford QL trucks), the latter to act as brigade command vehicle for my British at Medinine and doubtless subsequent scenarios. Here’s what I found.
Firstly these are marketed as collectors’ items and not as wargames models. They come in nice plastic display boxes, screwed to the base. For tabletop use you have to unscrew them – and you then have the display boxes to throw away or repurpose (or leave hanging around while you try and think of how you might repurpose them). Once out, the models are nicely detailed and beautifully finished. They also handle nicely. The Bedford even rolls one its wheels. Unfortunately the Dorchester’s front wheels don’t fit properly and are jammed against the wheel arch. They are quite small – true 1/76 scale I would guess without measuring them. Alas I’m finding that “20mm” models come in a range of scales. If the 20mm is meant to come up to eye level – itself a bit of a scale creep definition (it should really take you to the top of the head) – then the scale should be about 1/80. All 20mm products are bigger than this that I have seen. Plastic Soldier has 20mm in the range description, and 23mm in the instruction leaflet (about 1/70 in my book) – and maybe a bit bigger even than. So these models are at the smaller end of the range, but consistent with Airfix vehicle kits, old and new, for example, and models from the likes of Milicast and SHQ.
Here’s the OYD next to my Airfix QLD to give an idea of size:
One obvious difference is that the die cast models come with windows – though in fact I could have put these into the QLD in this case. Most wargames models either have the windows completely open, or, now more common in the age of 3-D printing, moulded solid. There is no driver model, and adding one would mean disassembly and potential damage. You would also struggle to find space.
The next issue is finish. These models are painted in authentic colours (they match precisely to the colours in my reference book on WW2 colours). That means there is no attempt to lighten them up to replicate the scale effect, which is something I like to do. This is a complicated topic with “that depends” type answers – it basically means that they look best representing originals in in strong light, and this is clearly the standard for display models. On the wargames table they will be a bit dark. There is also a slight off-matt finish – appropriate for a parade ground rather than the battlefield. The tilt on the Bedford is plastic, and the finish a bit plasticky. The decals are lovely and intricate, going down to serial numbers, etc, which I don’t bother with.
So how about incorporating these vehicles into my 1943 tabletop army? Take the truck first. This is modelled on a vehicle in the 15th (Scottish) Division in the UK in 1943 in the artillery. The paint scheme is fine for 1943 First Army in Tunisia. And second-line vehicles might well not be repainted for later campaigns. The divisional marking is not correct – but this can be removed rather than replaced, as these aren’t very 1943 in theatre. Perhaps it should have a roundel on the roof for air identification (the white stars were not used by the British in this theatre, even later in the war). Removing the divisional decal would be quite delicate work, though – but I do have some very fine sandpaper. To integrate with my army at large the model will need to be weathered – though this feels a bit sacrilegious on such a nicely finished model. I think this would take the form of a little white oil paint, brushed very thin, which would help lighten it up, as well as representing slightly uneven discolouration. And then dusting with powdered pastel. I don’t think there is the need for a wash.
The Dorchester is another matter. This represents a vehicle in use by the Polish Armoured Division in Northwest Europe in 1945. In fact the camouflage scheme is similar to the Bedford (brown and blue-black) and OK for 1943. But unlike the trucks, these vehicles were nearer the front line and surely would have adopted one of the standard or ad-hoc camouflage schemes. This might be the Desert Pink (appropriate for Medinine), Light Mud (Sicily and Italy) or plastered with lighter coloured paint ad-hoc (First Army Tunisia). But it does look as if I should repaint this, using the airbrush. That gets round the issue of the decals, which would be overpainted rather than sanded off. At least I don’t have to worry about the windscreen and windows.
So the models will need some work to be table-ready, and I should reserve my final judgement. I don’t see myself buying many more, though.
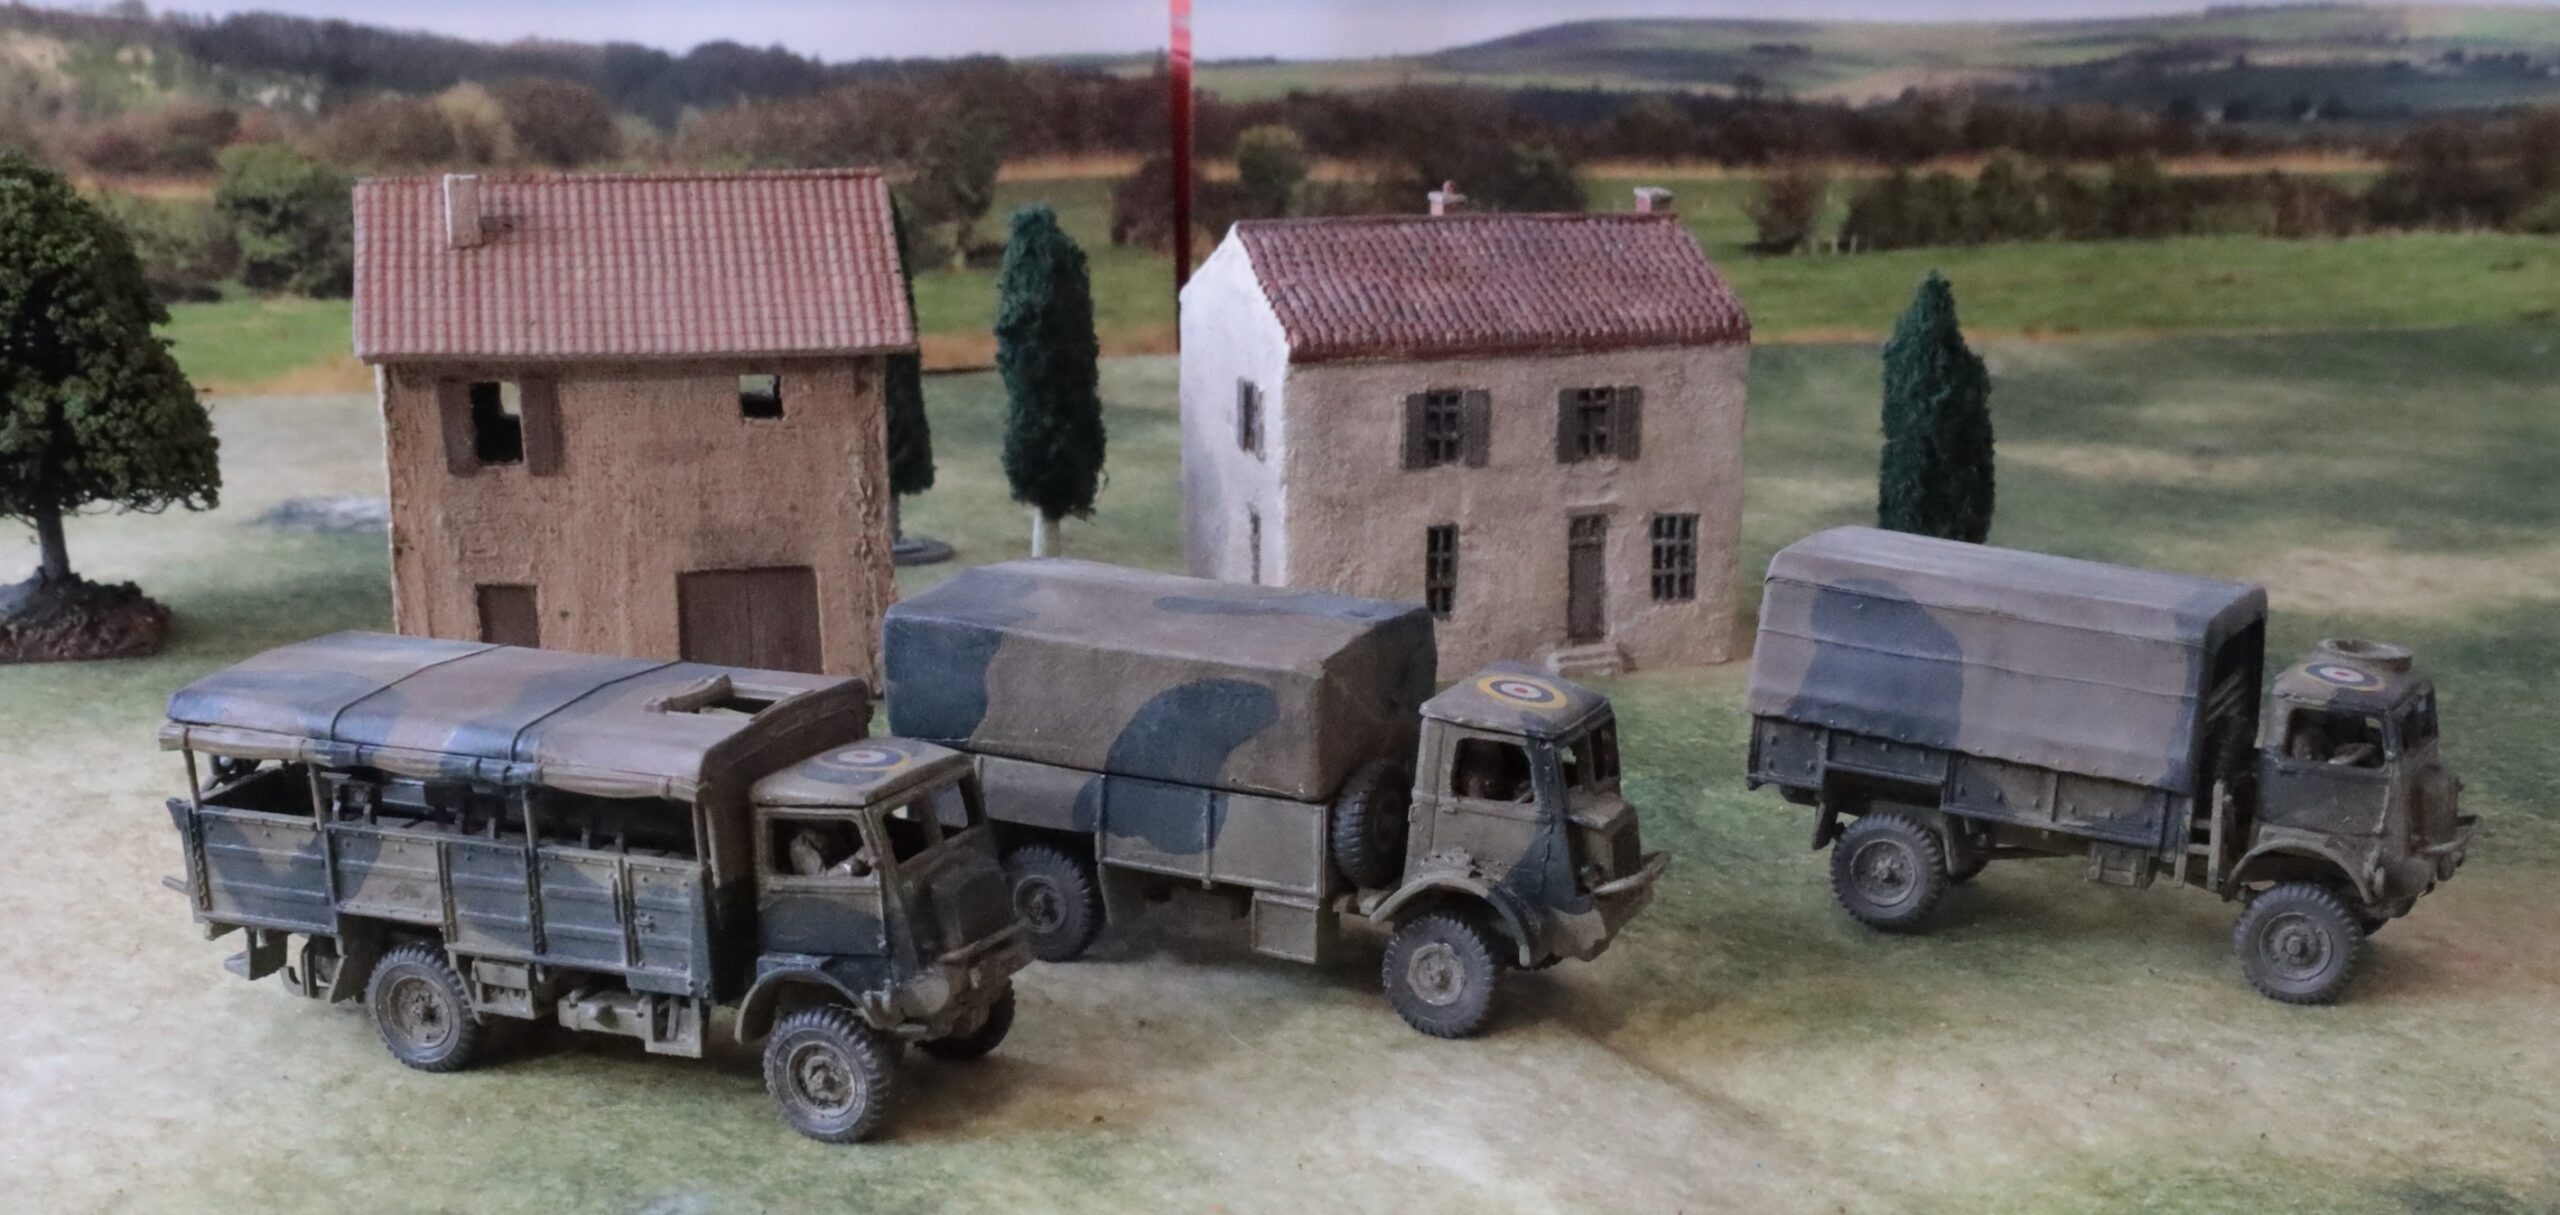
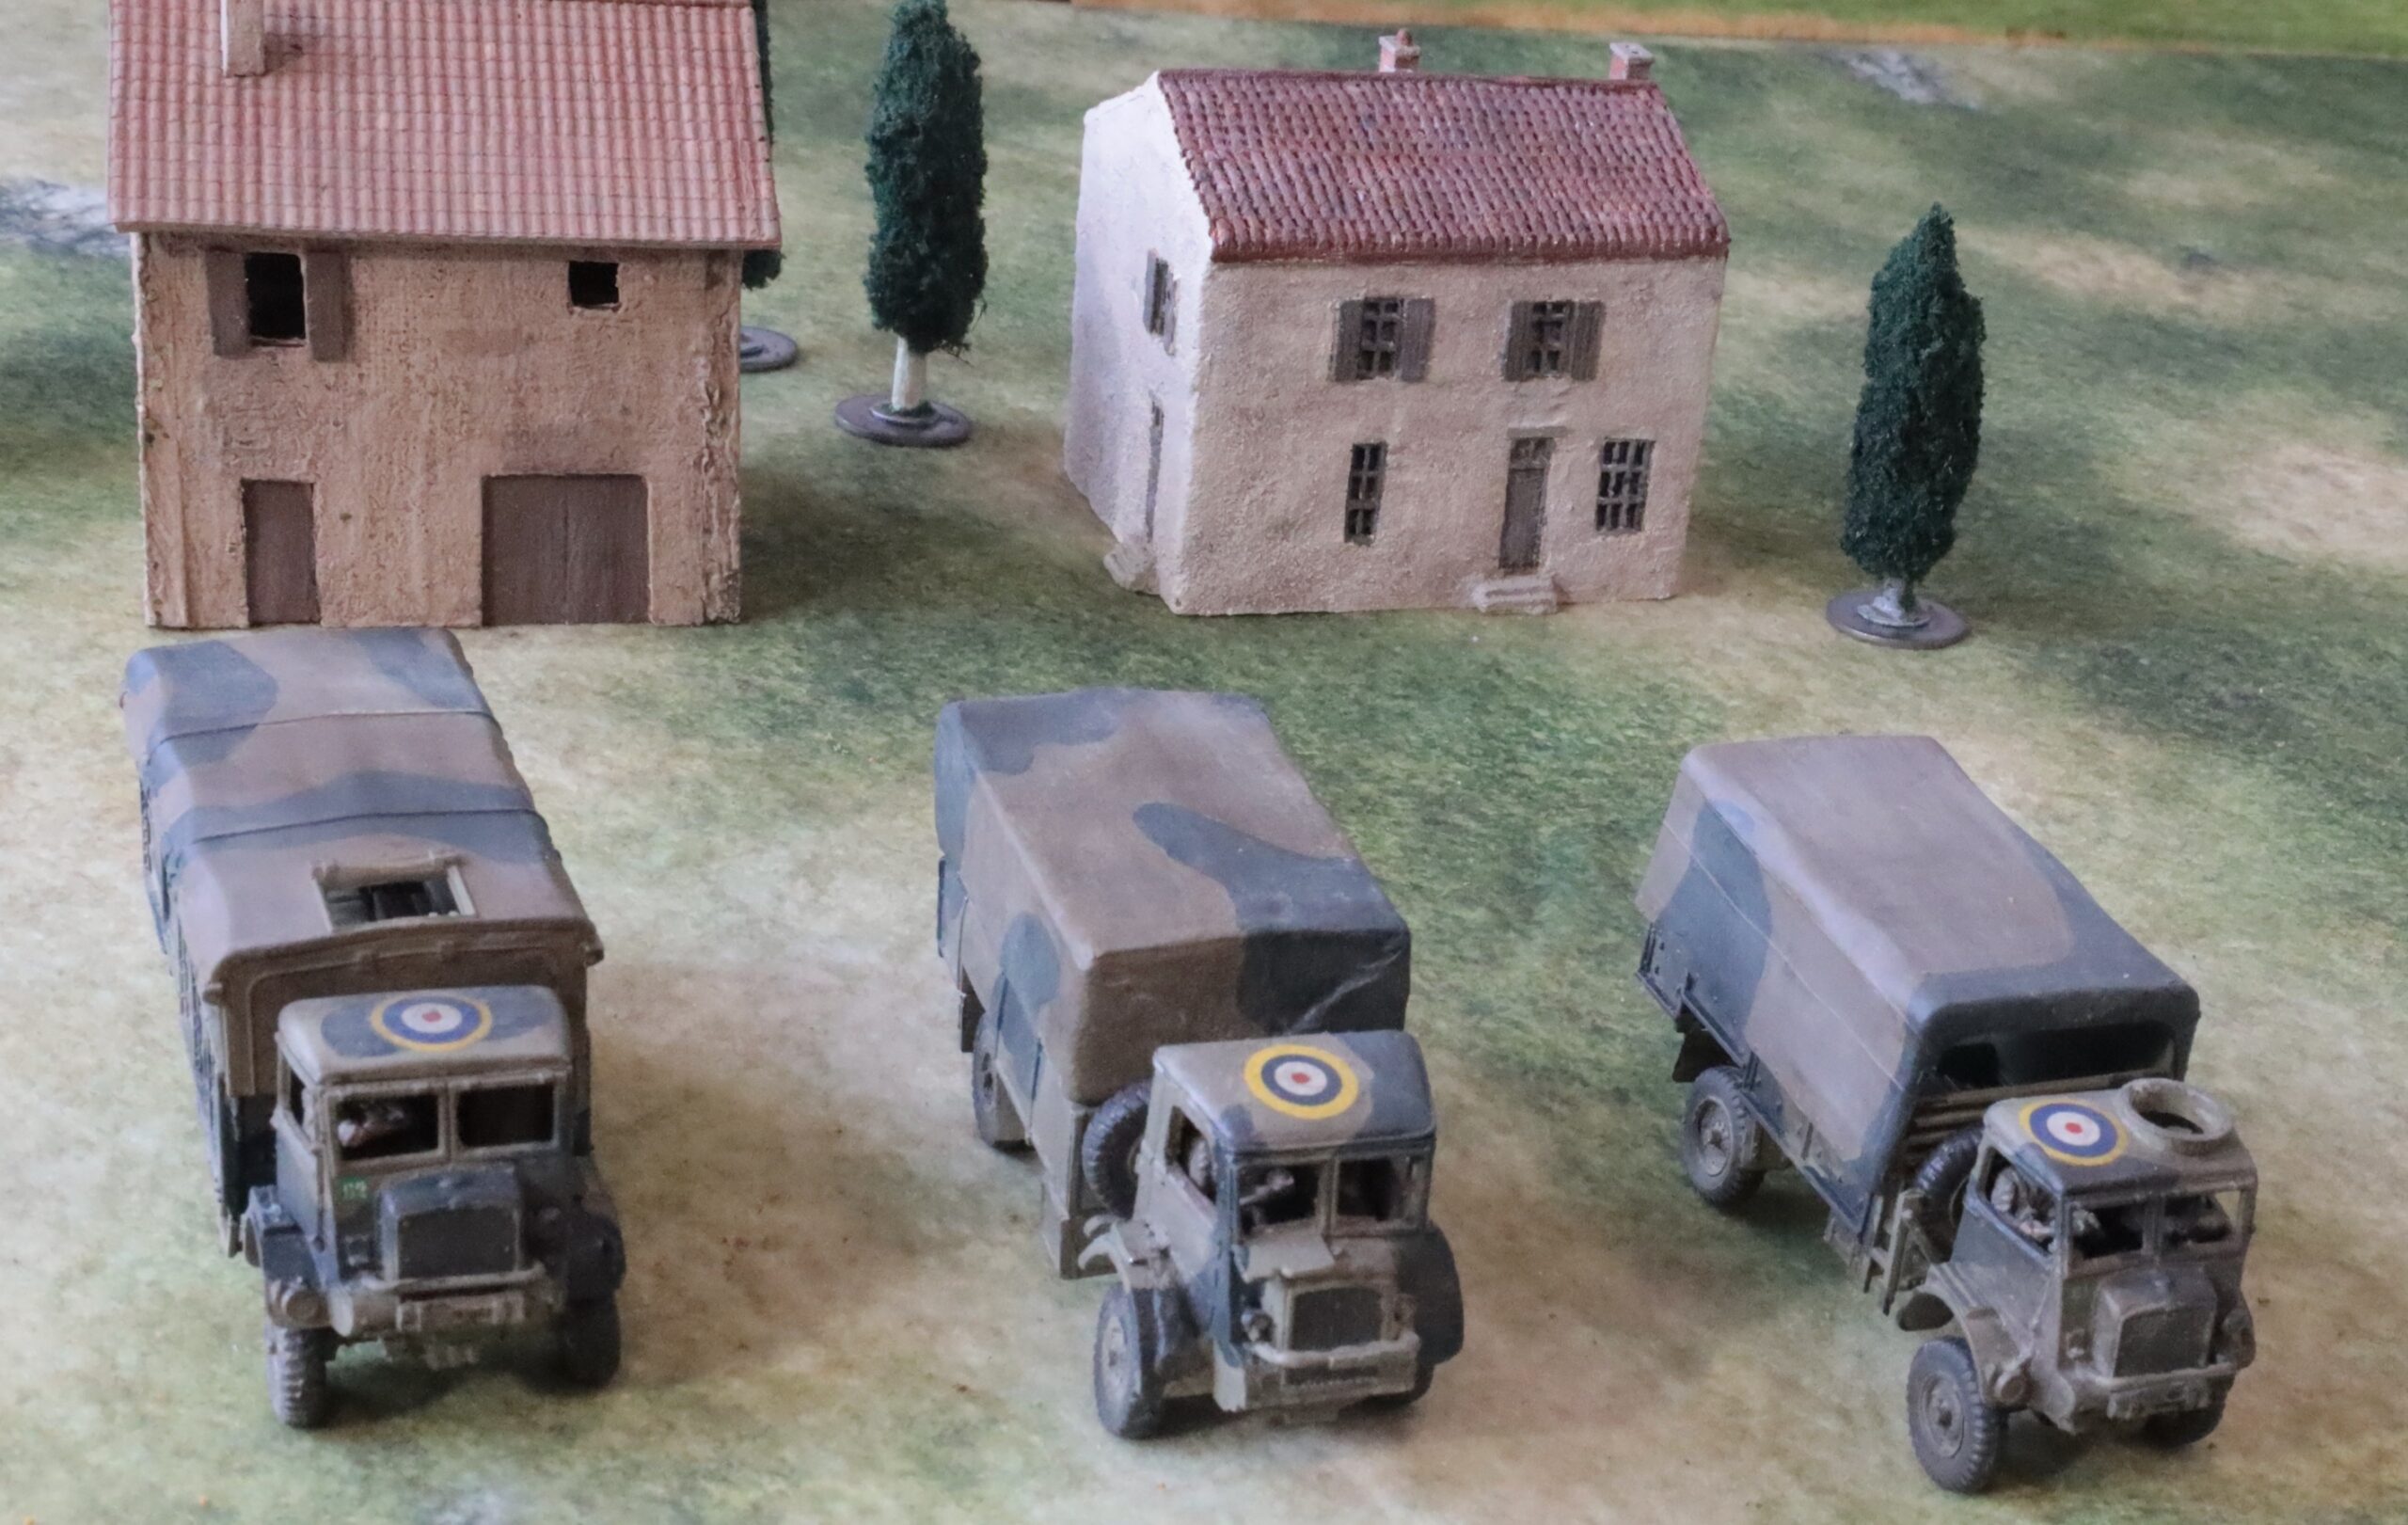
The three Bedfords. The QLT on the left; the QLD on the right is the metal SHQ model; the others are Airfix
My third article on my latest batch of 1943 British covers the vehicles: three Bedford medium trucks, three carriers, two Quads with limbers, and a CMP 15cwt light truck. I’m not showing the Quads or the OP carrier in this post – but you can see them in my previous one, along with the artillery.
First the big trucks. These Bedfords were one of the mainstays of the British war effort, and the easiest medium trucks to acquire as models in this scale (20mm, 1/76 or 1/72). I had an Airfix kit of the QLD (general purpose) and QLT (troop transport) trucks, and a metal SHQ model. The Airfix models are proper, detailed kits with lots of parts, that require intricate assembly. The SHQ model is much cruder, though also requiring assembly, but with many fewer parts. Neither came with crew. For the Airfix models I used AB figures, though they weren’t an easy fit. For the SHQ model I took a very crude figure from a vintage Airfix Matador I had in stock. That was actually fine – it’s waste of good quality models to put them in an enclosed cab. The Airfix models are nice – they are modern ones, rather than reissued Vintage classics, which I’m going off a bit. The SHQ model, though, was simpler to put together (though vague assembly instructions didn’t help) and looks very similar at distance. Incidentally, the Airfix models came with clear plastic for the windscreens, etc., but I couldn’t lay my hands on them at the critical moment – and would have made it even harder to fit in the crew. None of my other models have clear plastic windows so I wasn’t going to stress about it – though they did turn up later.
After my initially negative impressions of SHQ, I find they are growing on me – they look much better than you would think when they arrive unassembled, and have a nice weight when handling. Their figures are growing on me too – though I prefer the beefier AB ones. Unfortunately SHQ have ceased business. They have been bought by Grubby Tanks/Britannia. As it happens, a few weeks ago I was helping the owner of Grubby Tanks to unload his stuff at the Cavalier wargames show in Tonbridge (put on by my new club); he says that he’s going to put the SHQ items back on the market later this year. I took the opportunity to buy some items of light artillery from his Britannia range – which look quite similar but are significantly cheaper. None are assembled/painted up yet, but include one of the 2pdrs I will need for Medinine (I also bought a German 20mm flak gun and a 75mm infantry gun).
Here’s another view:
The SHQ model is in the middle
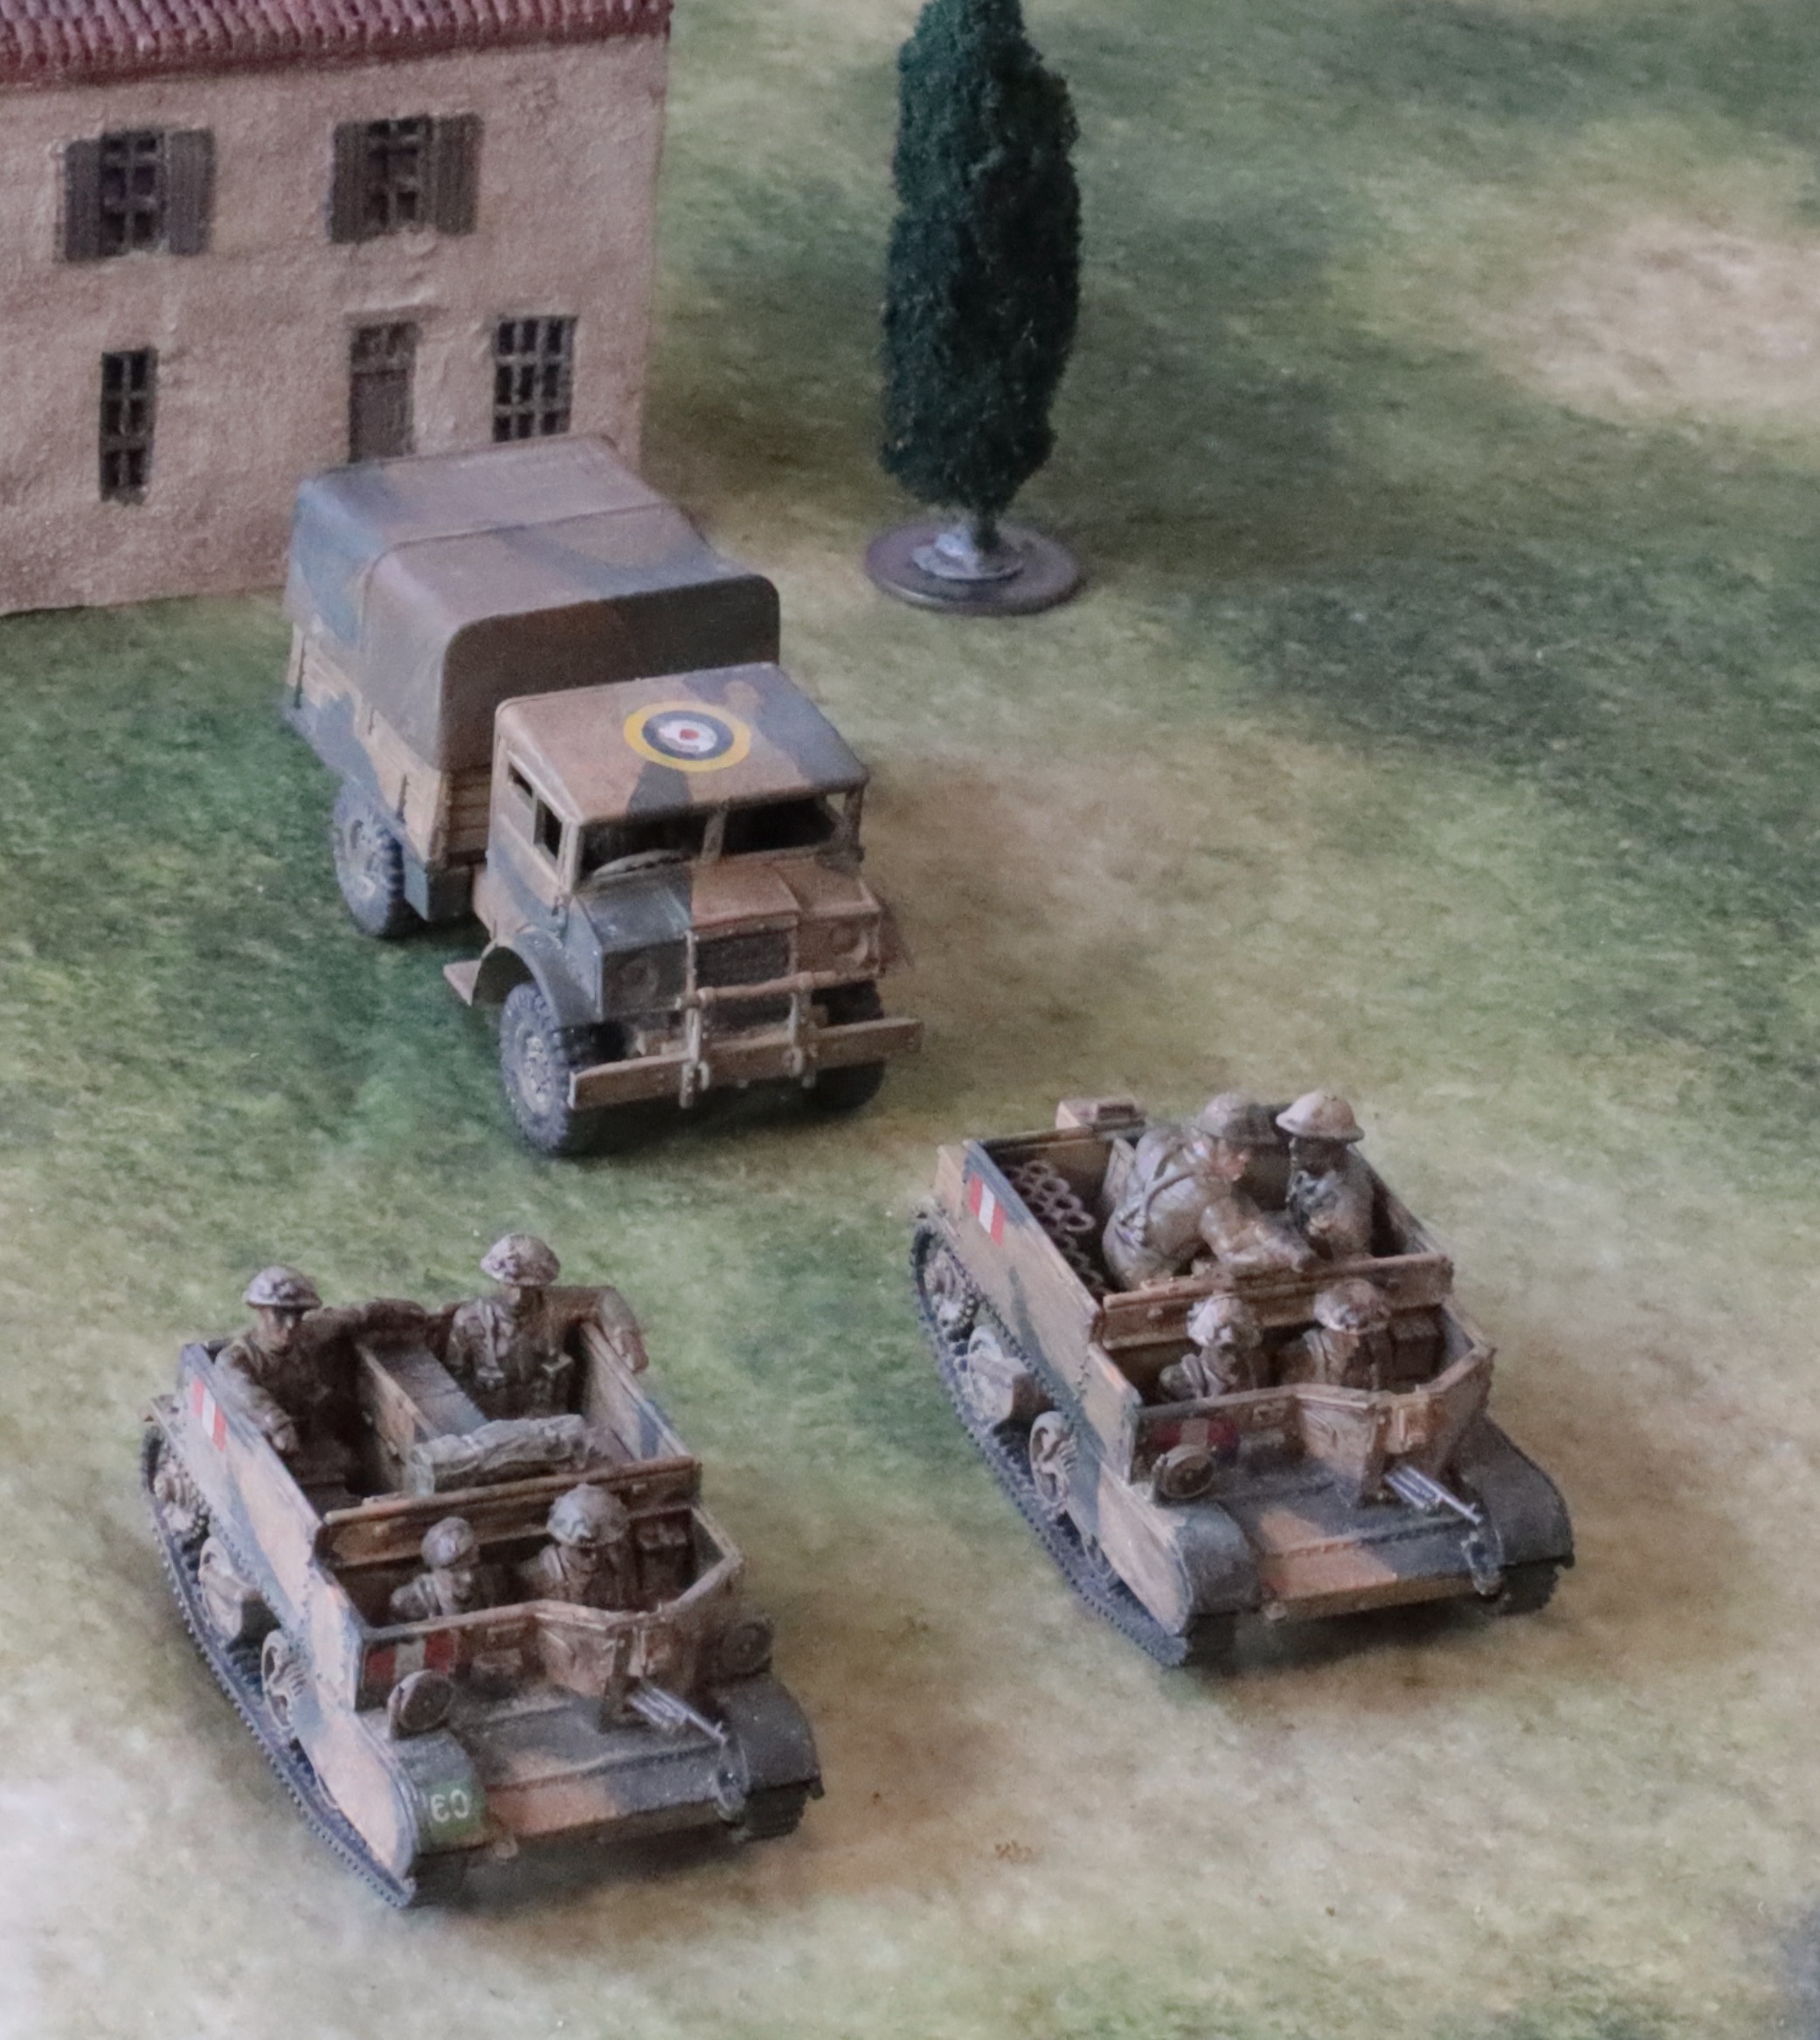
And now for my models in desert colours, the CMP light truck and two carriers:
These are all from Plastic Soldier. The CMP truck was easy enough to put together, but it is hard to get excited about it. It’s a very basic model with no options. I left the tilt loose so that I could play it without should the urge take me. This vehicle has no clear role in my set up, but it is available to shift 2-pdrs or Vickers guns if needed. The carriers are a bit more interesting. The are from the PSC Carrier Variants set. The one on the left is the 3in mortar transport. The mortar couldn’t be fired from the vehicle (unlike the German equivalent with the SdKfz 250), but is stowed away at the back. The crew are the standard crew for the PSC “generic” carrier. The one on the right has a 2in mortar in firing position – this weapon could be fired from the vehicle. Since the light mortar was part of the standard equipment of a carrier platoon, this vehicle will stand in as transport for a carrier platoon in my setup.
Another view
The Carrier crew are those supplied by PSC. I’m not a fan of these – a lot of PSC figures seem to be sculpted in 15mm and scaled up, looking a bit clumsy. AB make carrier crews, which would be easier to fit into these models than the slightly smaller Airfix ones – but they are rather pricey and don’t have the 2in mortar in action. From a distance the PSC crew work OK. The generic crew are appropriate for NW Europe with scrim on the helmets; the driver comes with a beret, though the head is separate and easy to swap. I hadn’t woken up to the idea of sawing off heads from the desert uniform to use on the NW Europe bodies yet, though the desert heads would have to come from other PSC models – so I left the scrim helmets on, which isn’t realistic either for 1943 or this theatre. The supplementary figures on the Variants sprue are OK in this regard, though not especially nice mouldings. I added a few boxes and bits to make the carriers look a bit more used. The models worked well, with one exception – it’s hard to fit the Bren gun in the front slot when there is crew in the front seat. You have to skew it a rather awkward angle fairly early in the assembly process.
On the subject of the Carriers, I made up a third one from the Variants set, as an OP (visible in my previous post). This is extremely useful on the tabletop, and it is modelled with a heavy-duty radio set and lots of cable for the field telephone – and a ladder, presumably for accessing vantage points. I only have two niggles; one is that the officer with binoculars is rather crude; the second is that there is no range finder amongst the equipment stowed in the vehicle – even though this does seem be there in the picture in the assembly instructions. These instructions, incidentally, tell you which parts belong to which variants on the additional sprue (the set consists of seven generic sprues and one variants – it would have been more useful for the balance to be 6-2 or 5-3…), but you have to work out for yourself where they go based on a rather basic pictures of the assembled models; in my case even this instruction sheet was missing, and I had to find it and print it off from the website. There are complete instructions for the standard generic carrier though, which is just as well as this is much more complicated. There are alternative parts for Mark 1 and Mark 2 versions; I used the former, based on pictures of the vehicles in theatre.
Now for some notes on my painting of these vehicles and the artillery discussed in the last post, including the Quads and limbers for the 25-pdrs (good basic models from PSC, about which there is not much more to be said – no whinges here). There are two schemes: the Light Mud scheme used in Italy, from Sicily onwards, with Blue-Black as a contrast colour; and the desert scheme of Desert Pink, with Olive Green contrast, used by the Eighth Army in Tunisia (but not the First Army in Tunisia, which had darker UK colour schemes, overpainted ad hoc in many cases). The first of these is well explored territory here. I mixed Light Mud from Raw Sienna and Titanium White, with some Prussian Blue. These are the same pigments I use for Khaki, but with a bit more white and a bit less blue. The Blue Black can be made from the same pigments, with only a touch of white and a lot more blue. In fact I think I just dived into another mix I was using that was lurking on my palette, adjusted slightly. Incidentally, I use a wet palette, as I have for many years. Not the expensive one marketed by one of the usual suspects in the hobby world, but a Daler Rowney one that has been going for many years. Mixing paints from artists’ acrylics, this is a bit of a no-brainer, as you want to keep your pigments going across a multi-day project. In fact in the winter (my studio is only heated when I’m using it), the paint kept going for weeks. Which was just as well given all the interruptions. For the tilts on the trucks I used the Khaki mix I had been using for the infantry for both schemes.
The desert scheme was new for me – this being the last of the three main scenes used by the British in the desert (Coulter and Light Stone being the earlier ones). For the Desert Pink I simply mixed white into Raw Sienna. This is a touch less red than the usual portrayals of this colour, though I suspect (for no particularly good reason) that the pinkness softened with weathering. The Olive Green was a mix based on Sap Green, into which I threw various mixes used for the uniforms to dull down and lighten up a bit. The result may be a little dark. Greens are the hardest colours to mix. The schemes themselves were based on a variety of sources, including the official guidelines (which generally didn’t cover the vehicles I was painting and which were usually simplified in practice), photos (giving only one angle) and otherwise guesswork.
Apart from the basic scheme I painted the tyres and radiators (a variation on the dark grey-black mix) and tracks (ditto with some added silver). And that was pretty much it (apart from the crews, painted as infantry). I took the view that other detail (the lights for example) weren’t important enough to pick out. After this came the decals. I put roundels on the truck and Quad roofs, filched from old aircraft decals, and a couple from some an Italeri halftrack kit that I had recently acquired. I also put some arm of service markings on where I could use appropriate ones. I used the ones in the Airfix kit for two of the Bedford lorries. The others were from some I had printed myself a few years ago – but these were tricky and I lost a number of them in the process. Some models, like one of the carriers in the picture, had to do without. I did not bother with divisional markings (these often weren’t used in 1943 in this theatre).
After this came the weathering and high/low-lighting. I wanted to simplify this from the multiple stages of earlier versions. First I used small amounts of white oil paint brushed into a very thin and slightly uneven layer. Then, as an experiment, I mixed some ink into some new acrylic matt varnish that I recently acquired to make a wash. Previously I have used dark oil paint mixed with a slightly glossy medium, to get into the crevices as a glaze (which, in my parlance, is thicker and stickier than a wash) – followed by spray-on matt varnish. But the matt varnish is a very harsh matt, and the effect is too uniform to my taste. So I was trying to combine the two steps with the new, very liquid varnish, which dries off-matt. The basic concept was sound enough, but unfortunately I used some very powerful black ink. This enhanced the crevices beautifully, but made the models too dark. I had to light brush over the lighter colours on the original paint work again (which the wet palette has preserved); even then they still look a little on the dark side, especially the desert scheme. Finally I applied some powdered pastel in a sort of light dusty mix, with a brush. This served to matt-ify the off-matt varnish, without the harsh uniformity of the spray, and create a dusty texture. Apart from the matt varnish wash being a bit too dark, I’m pleased with the results. I have nice weathered finish, and the decals look well and truly integrated – and the method is quite simple.
My next project is the Medinine Germans – which I have now started. But before then I will do a quick post on some Oxford Diecast models I have acquired.
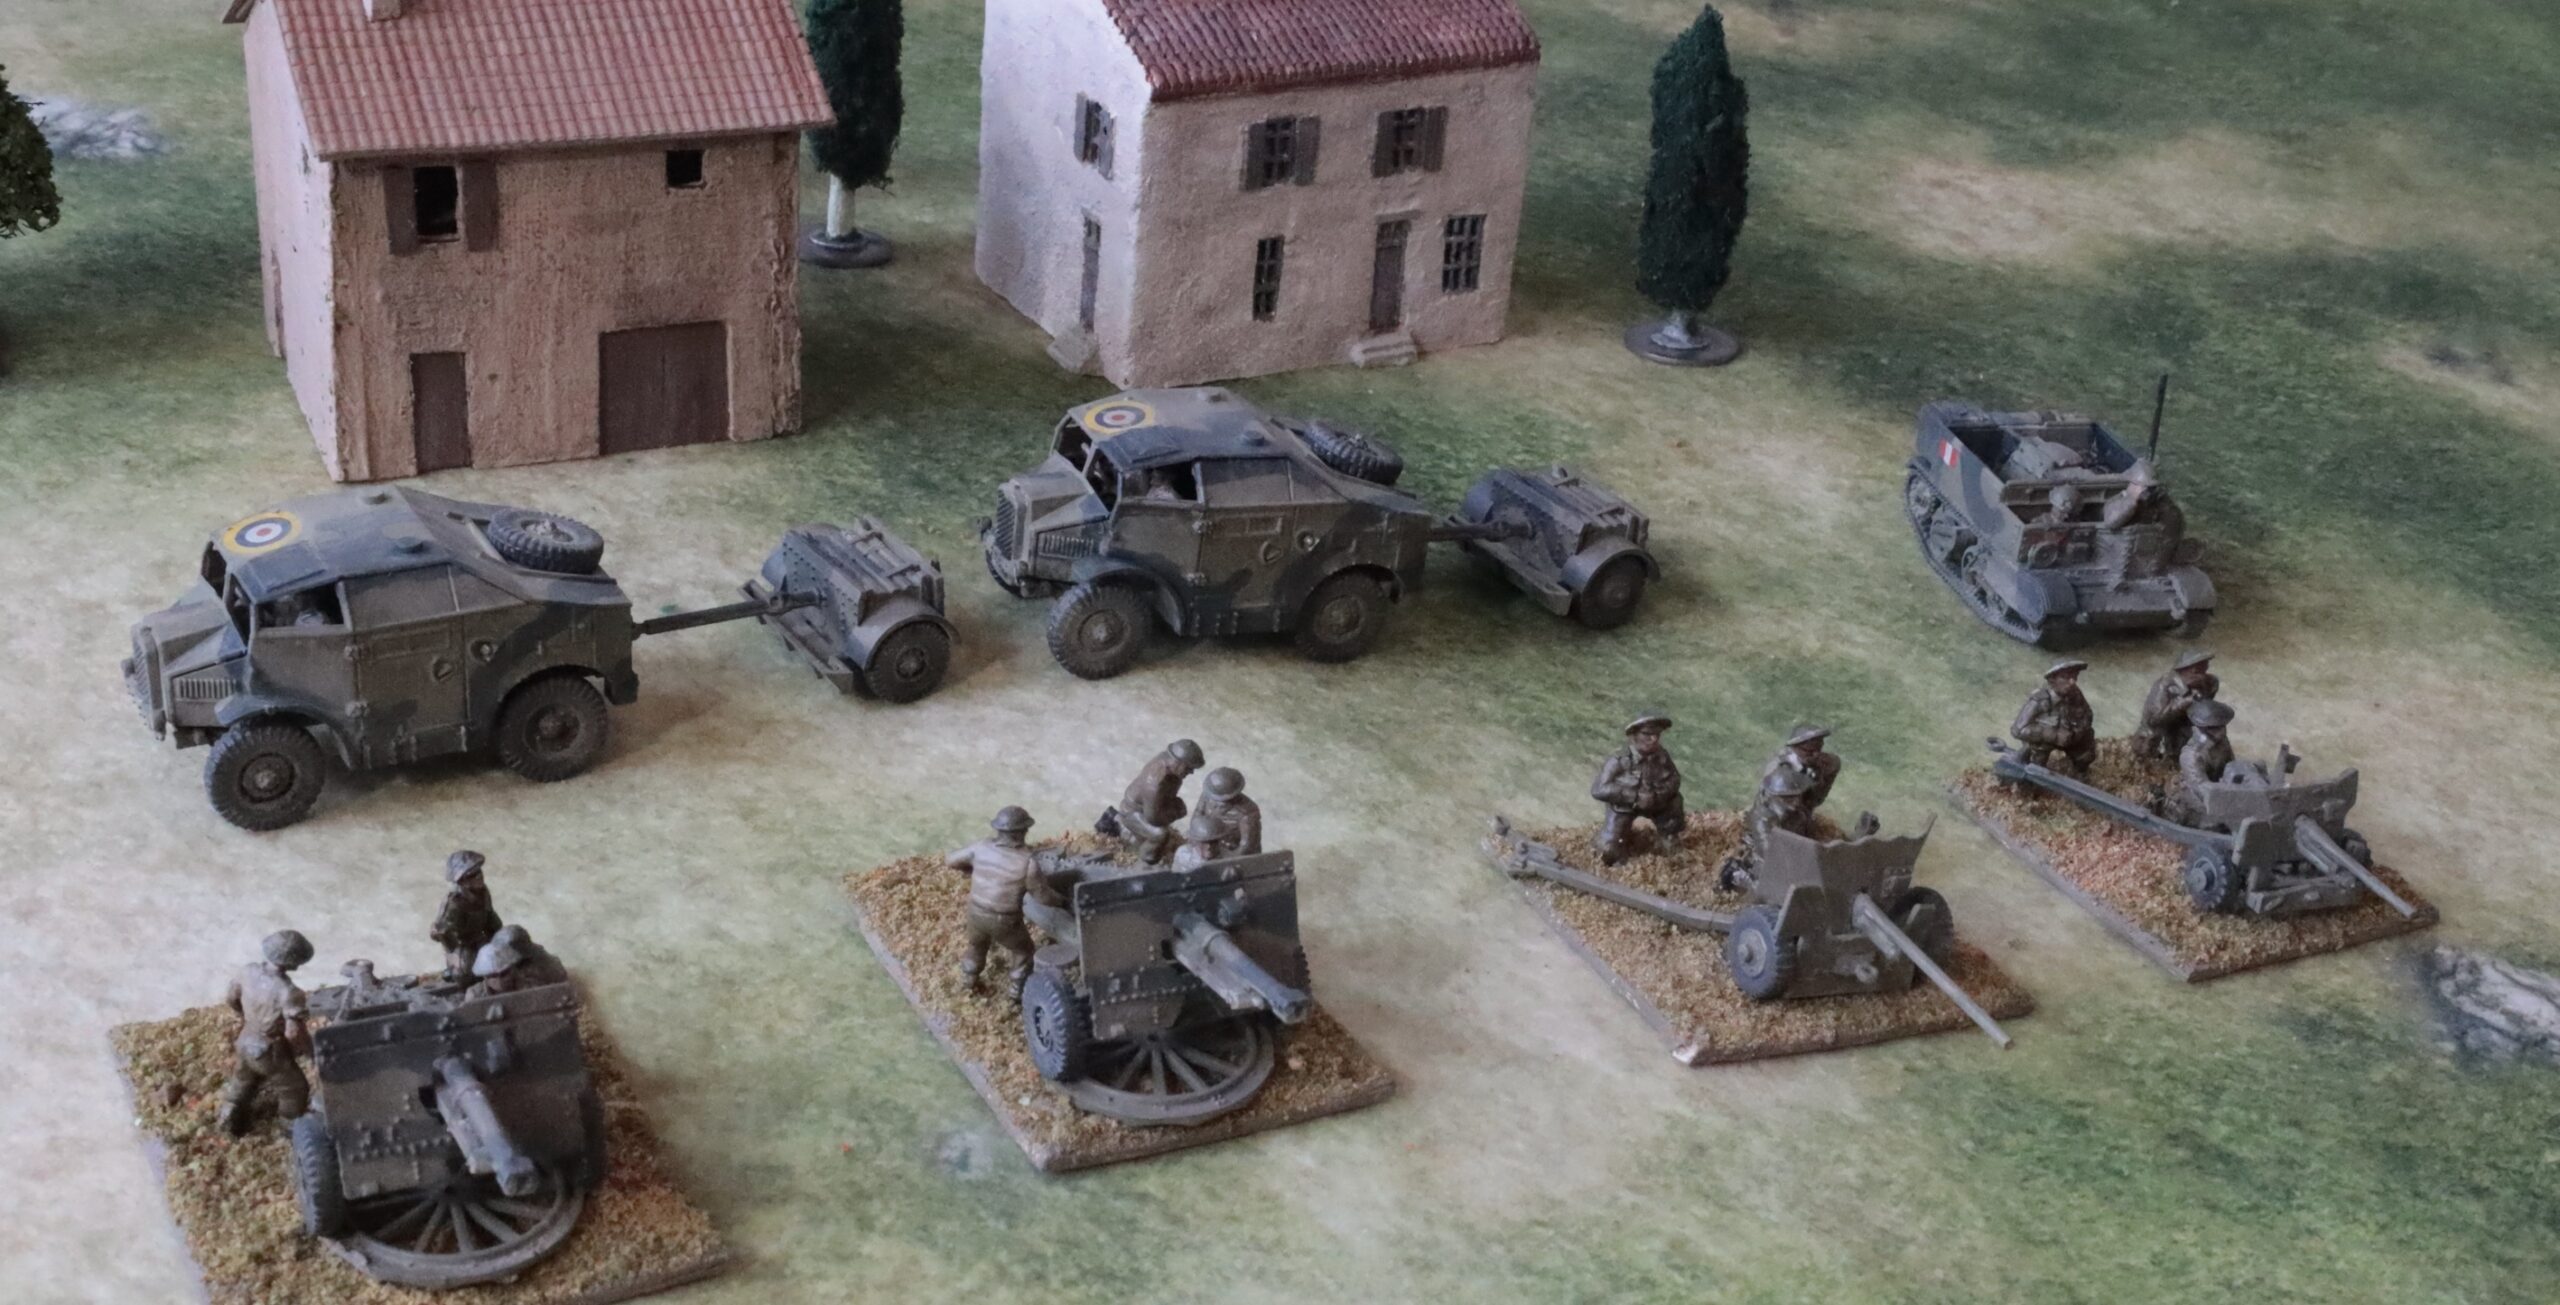
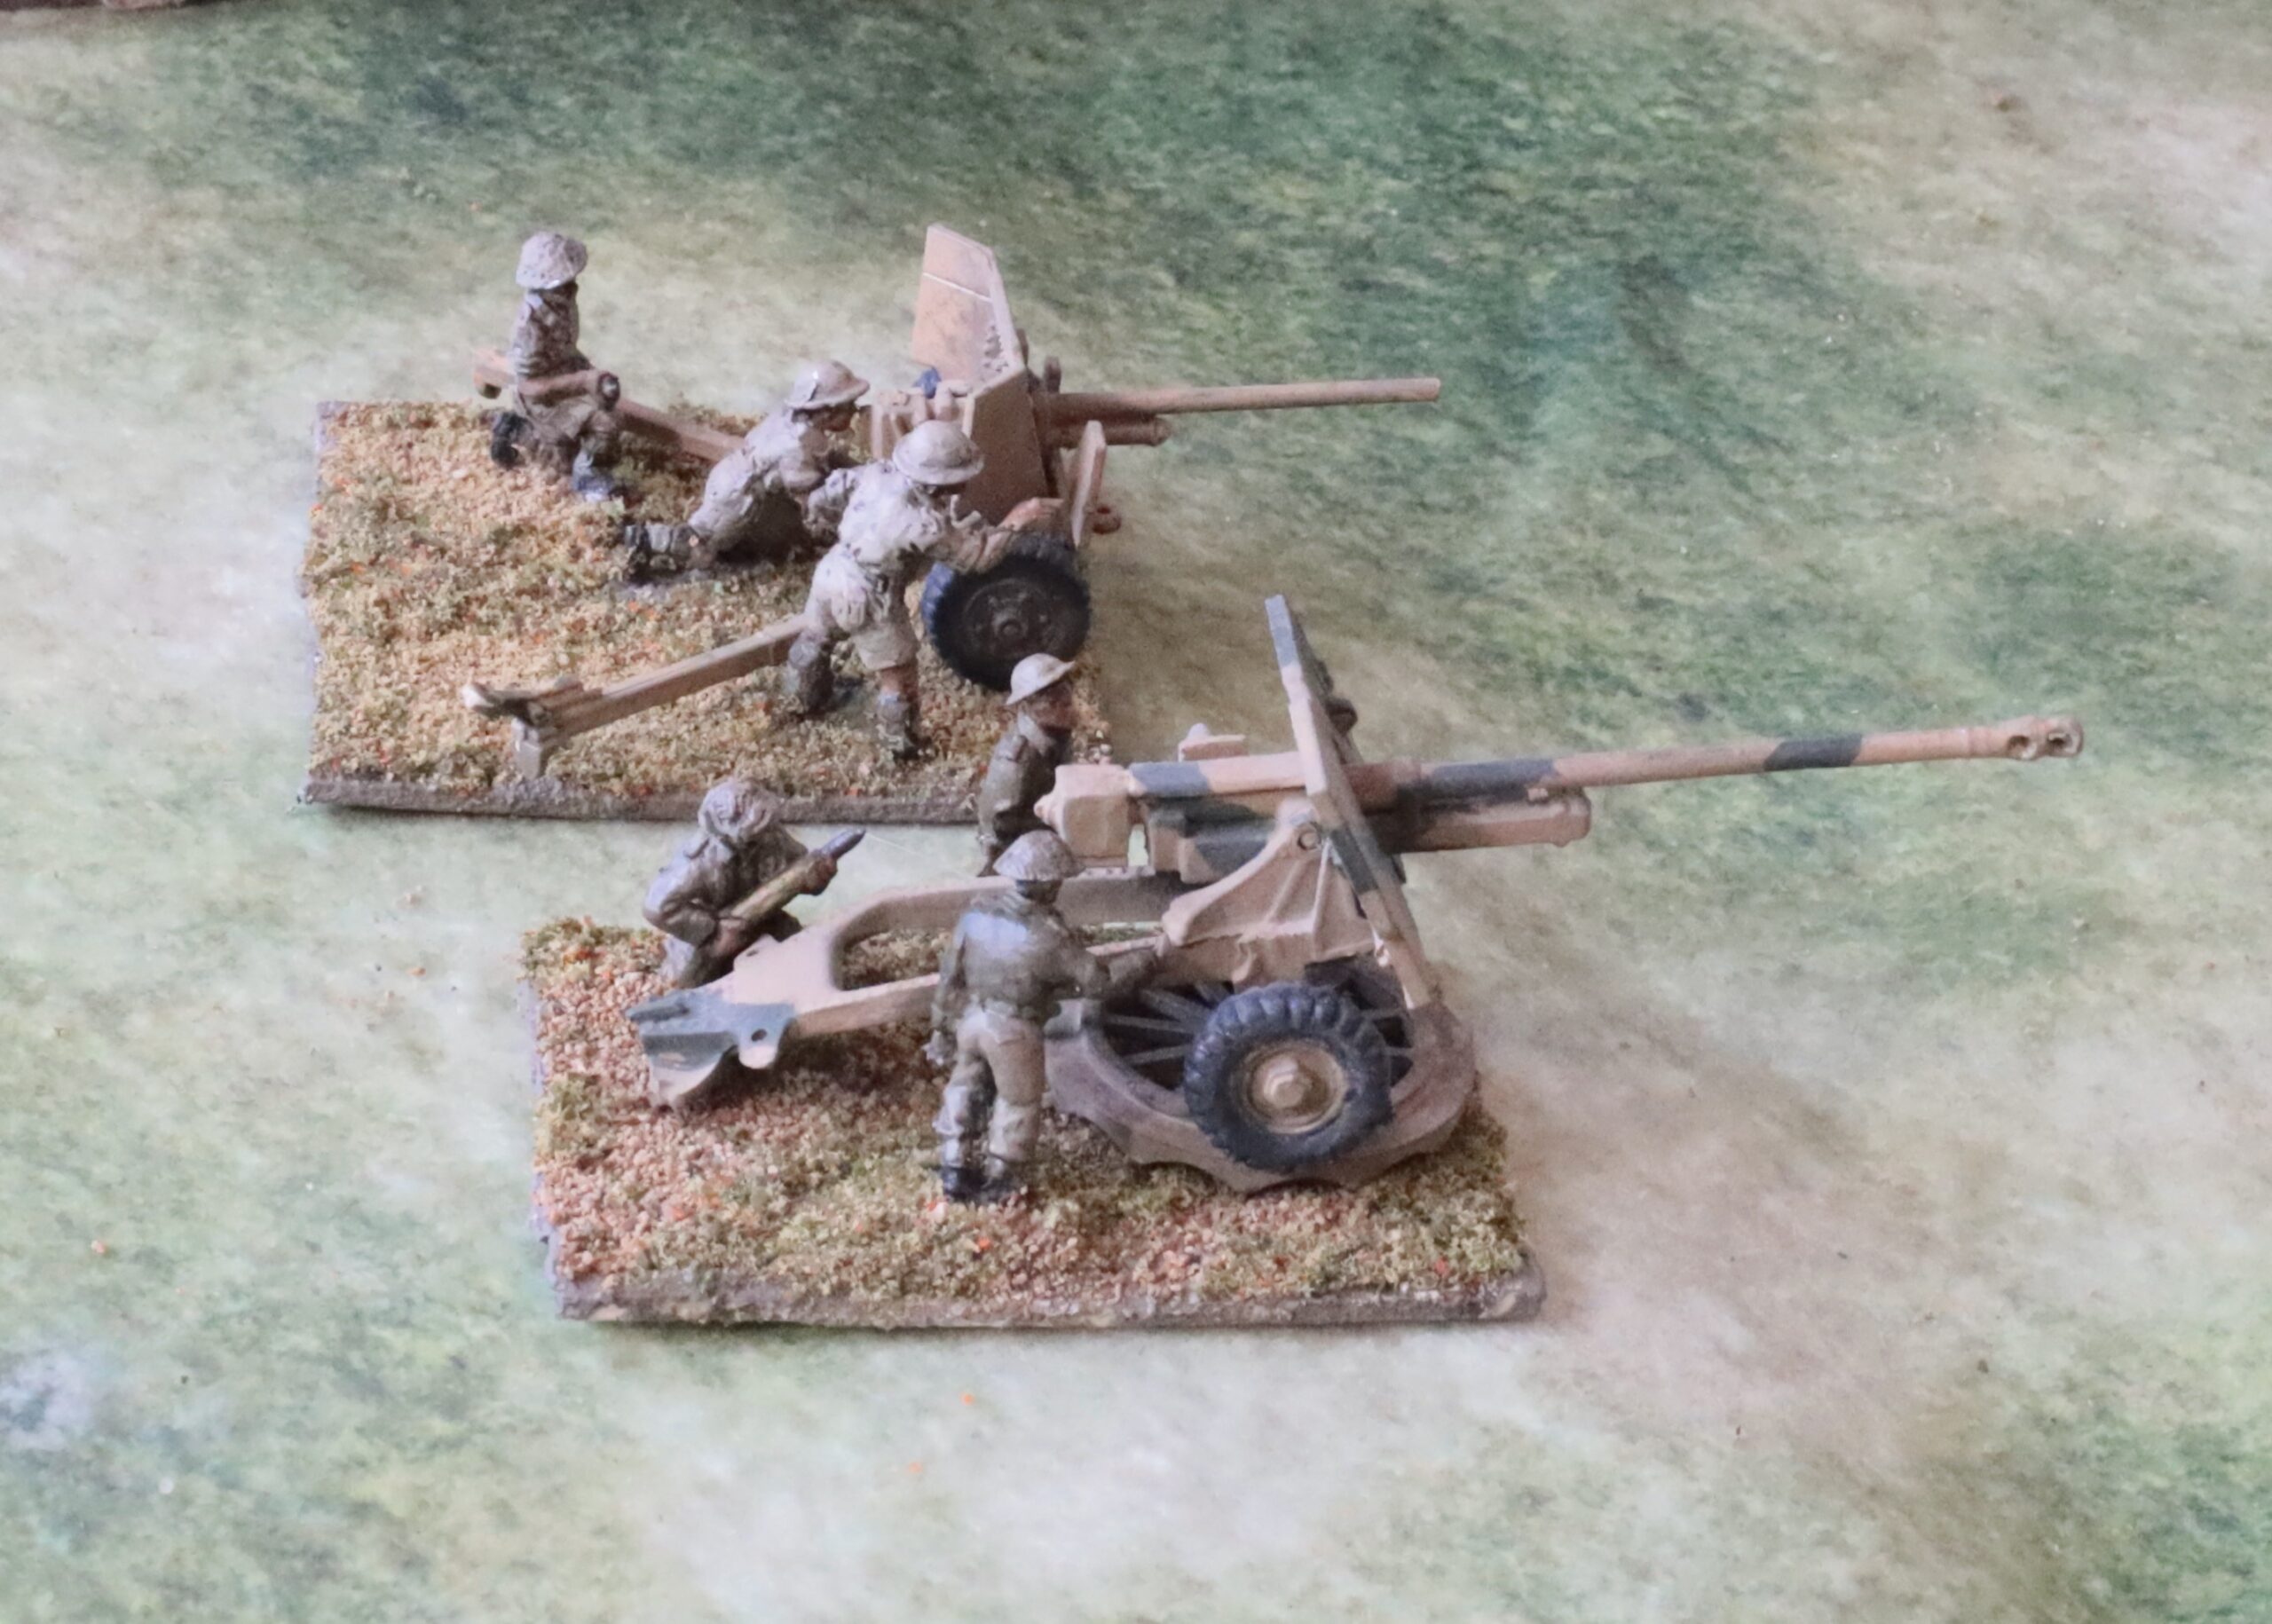
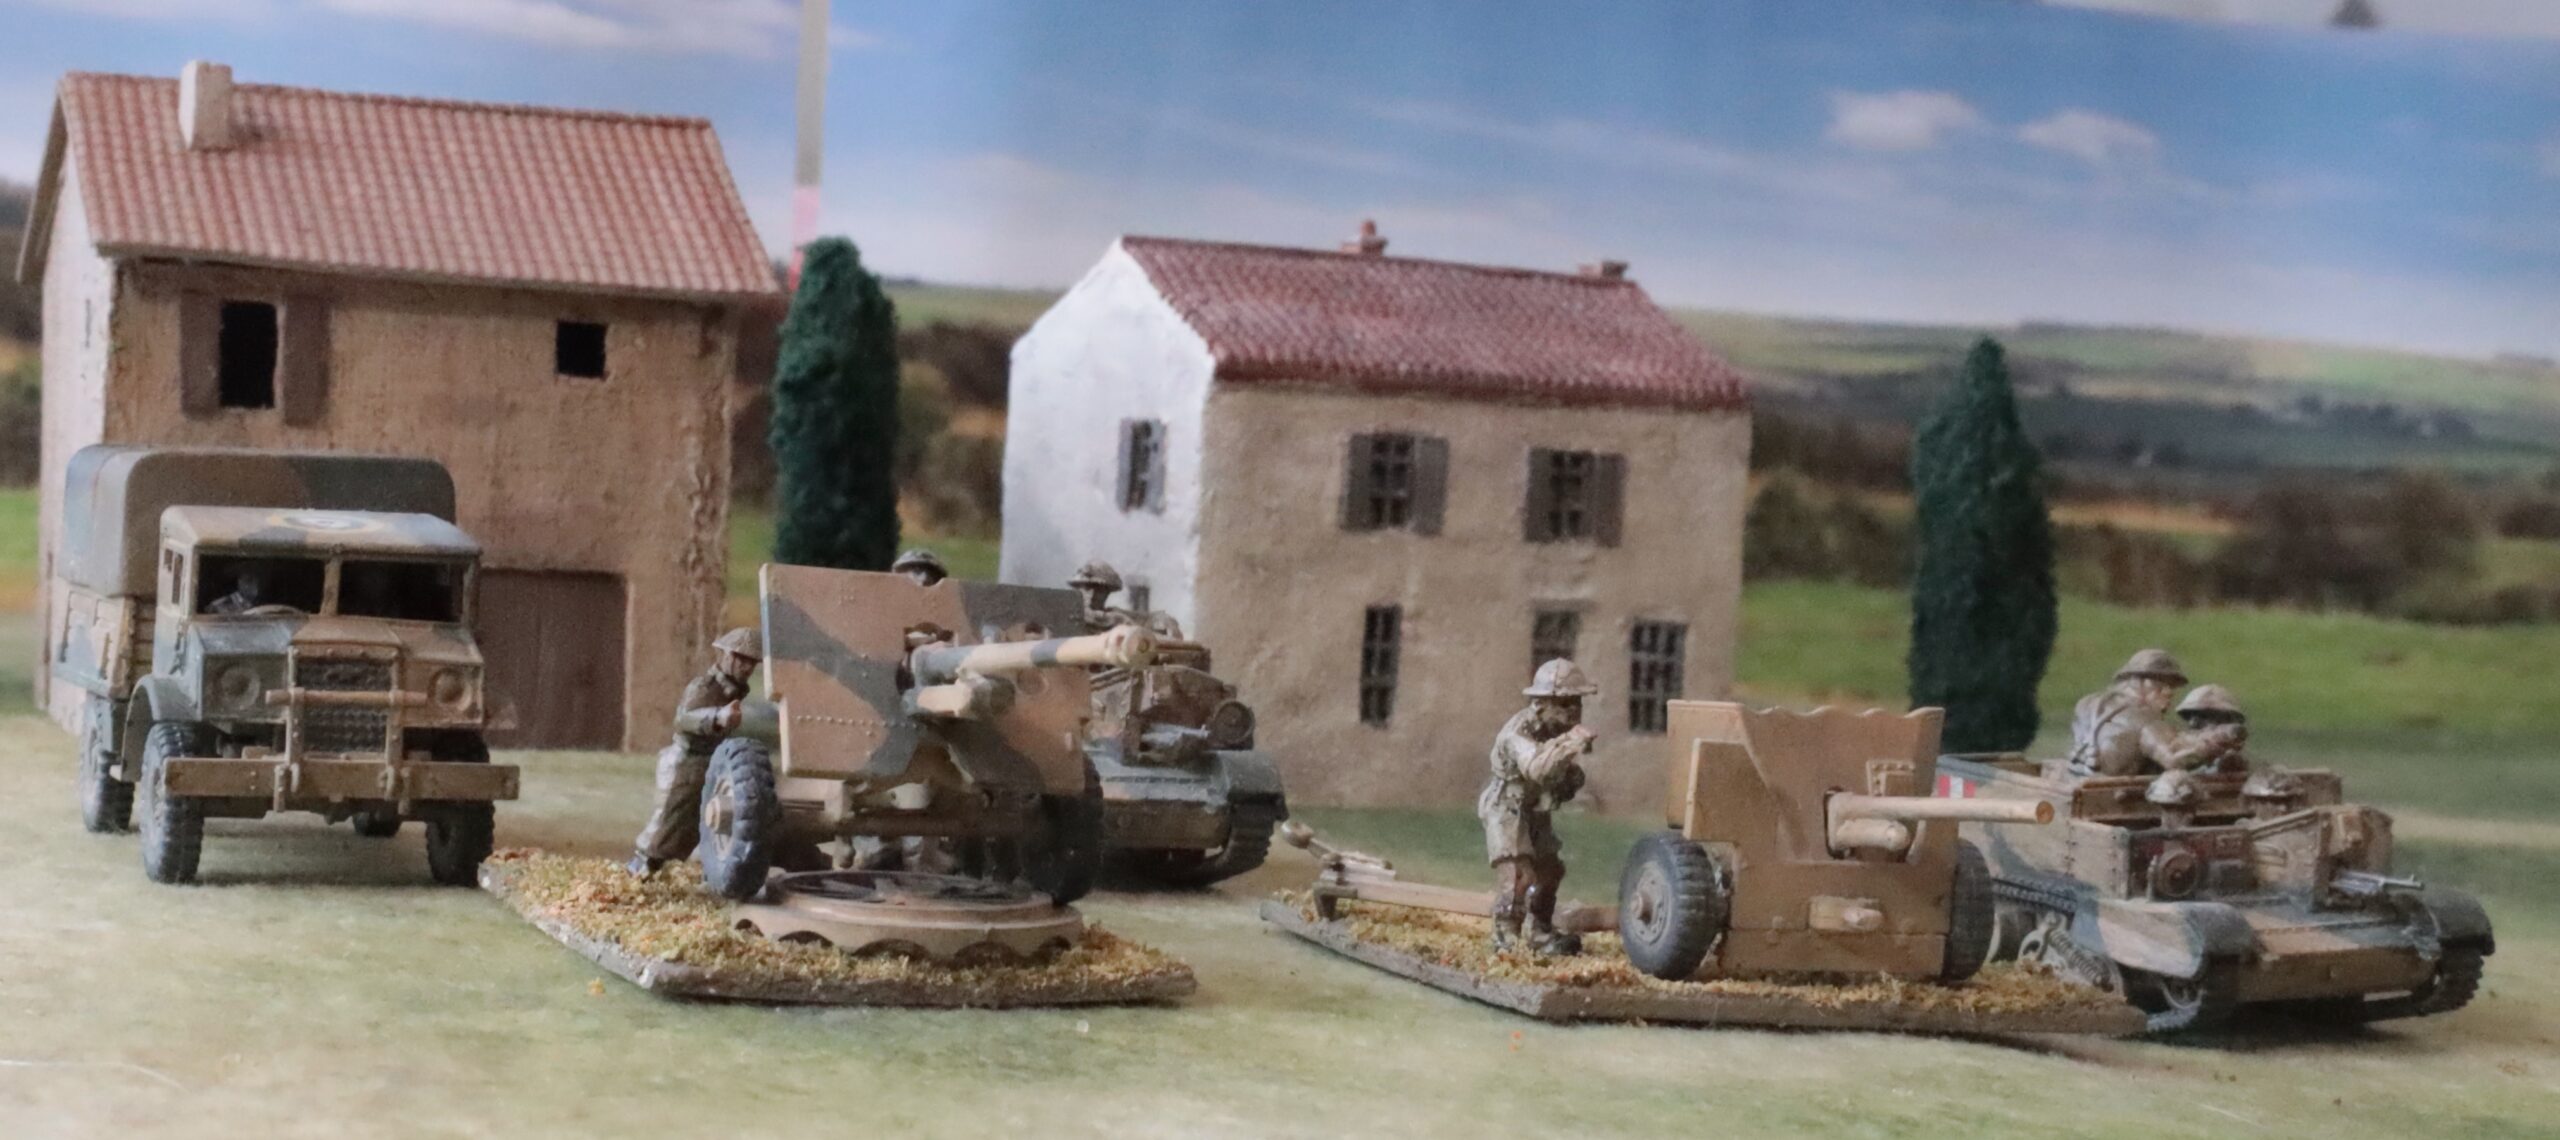
This time I continue with my description most recent batch of figures and models for my 1943 project, as I build up enough forces to run a scenario for Medinine, by talking about the artillery. These comprised two 25-pdrs, three 6-pdrs and a 17-pdr Pheasant. The above picture is of four of the six weapons, together with two Morris Quads and limbers and the carrier OP. These are items I painted in the Light Mud and Blue-Black scheme introduced after Tunisia, ready to be used in Italy. Missing are the two 2-pdrs that I will need, because I didn’t have the models when I started the batch, and found that I needed a second crew assemblage anyway.
Let’s start with the 25-pdrs. These were the workhorses of British artillery in WW2. In the desert, and on at least one occasion in the Tunisian hills, they served as direct fire support, taking on a role as antitank gun. I’m not sure how much of my artillery I will actually use on the tabletop – because even at Rapid Fire scale they would mostly be off the table – though I think Rapid Fire players like to stretch things and put them on. Still I’ve been buying the models: I have two more 25-pdrs and two 5.5in guns in stock, and a number of German guns too. In the Medenine scenario the antitank guns looks a little thin (though more than adequate historically), so I thought it appropriate to have at least a pair of 25-pdrs ready to act as a last line of defence.
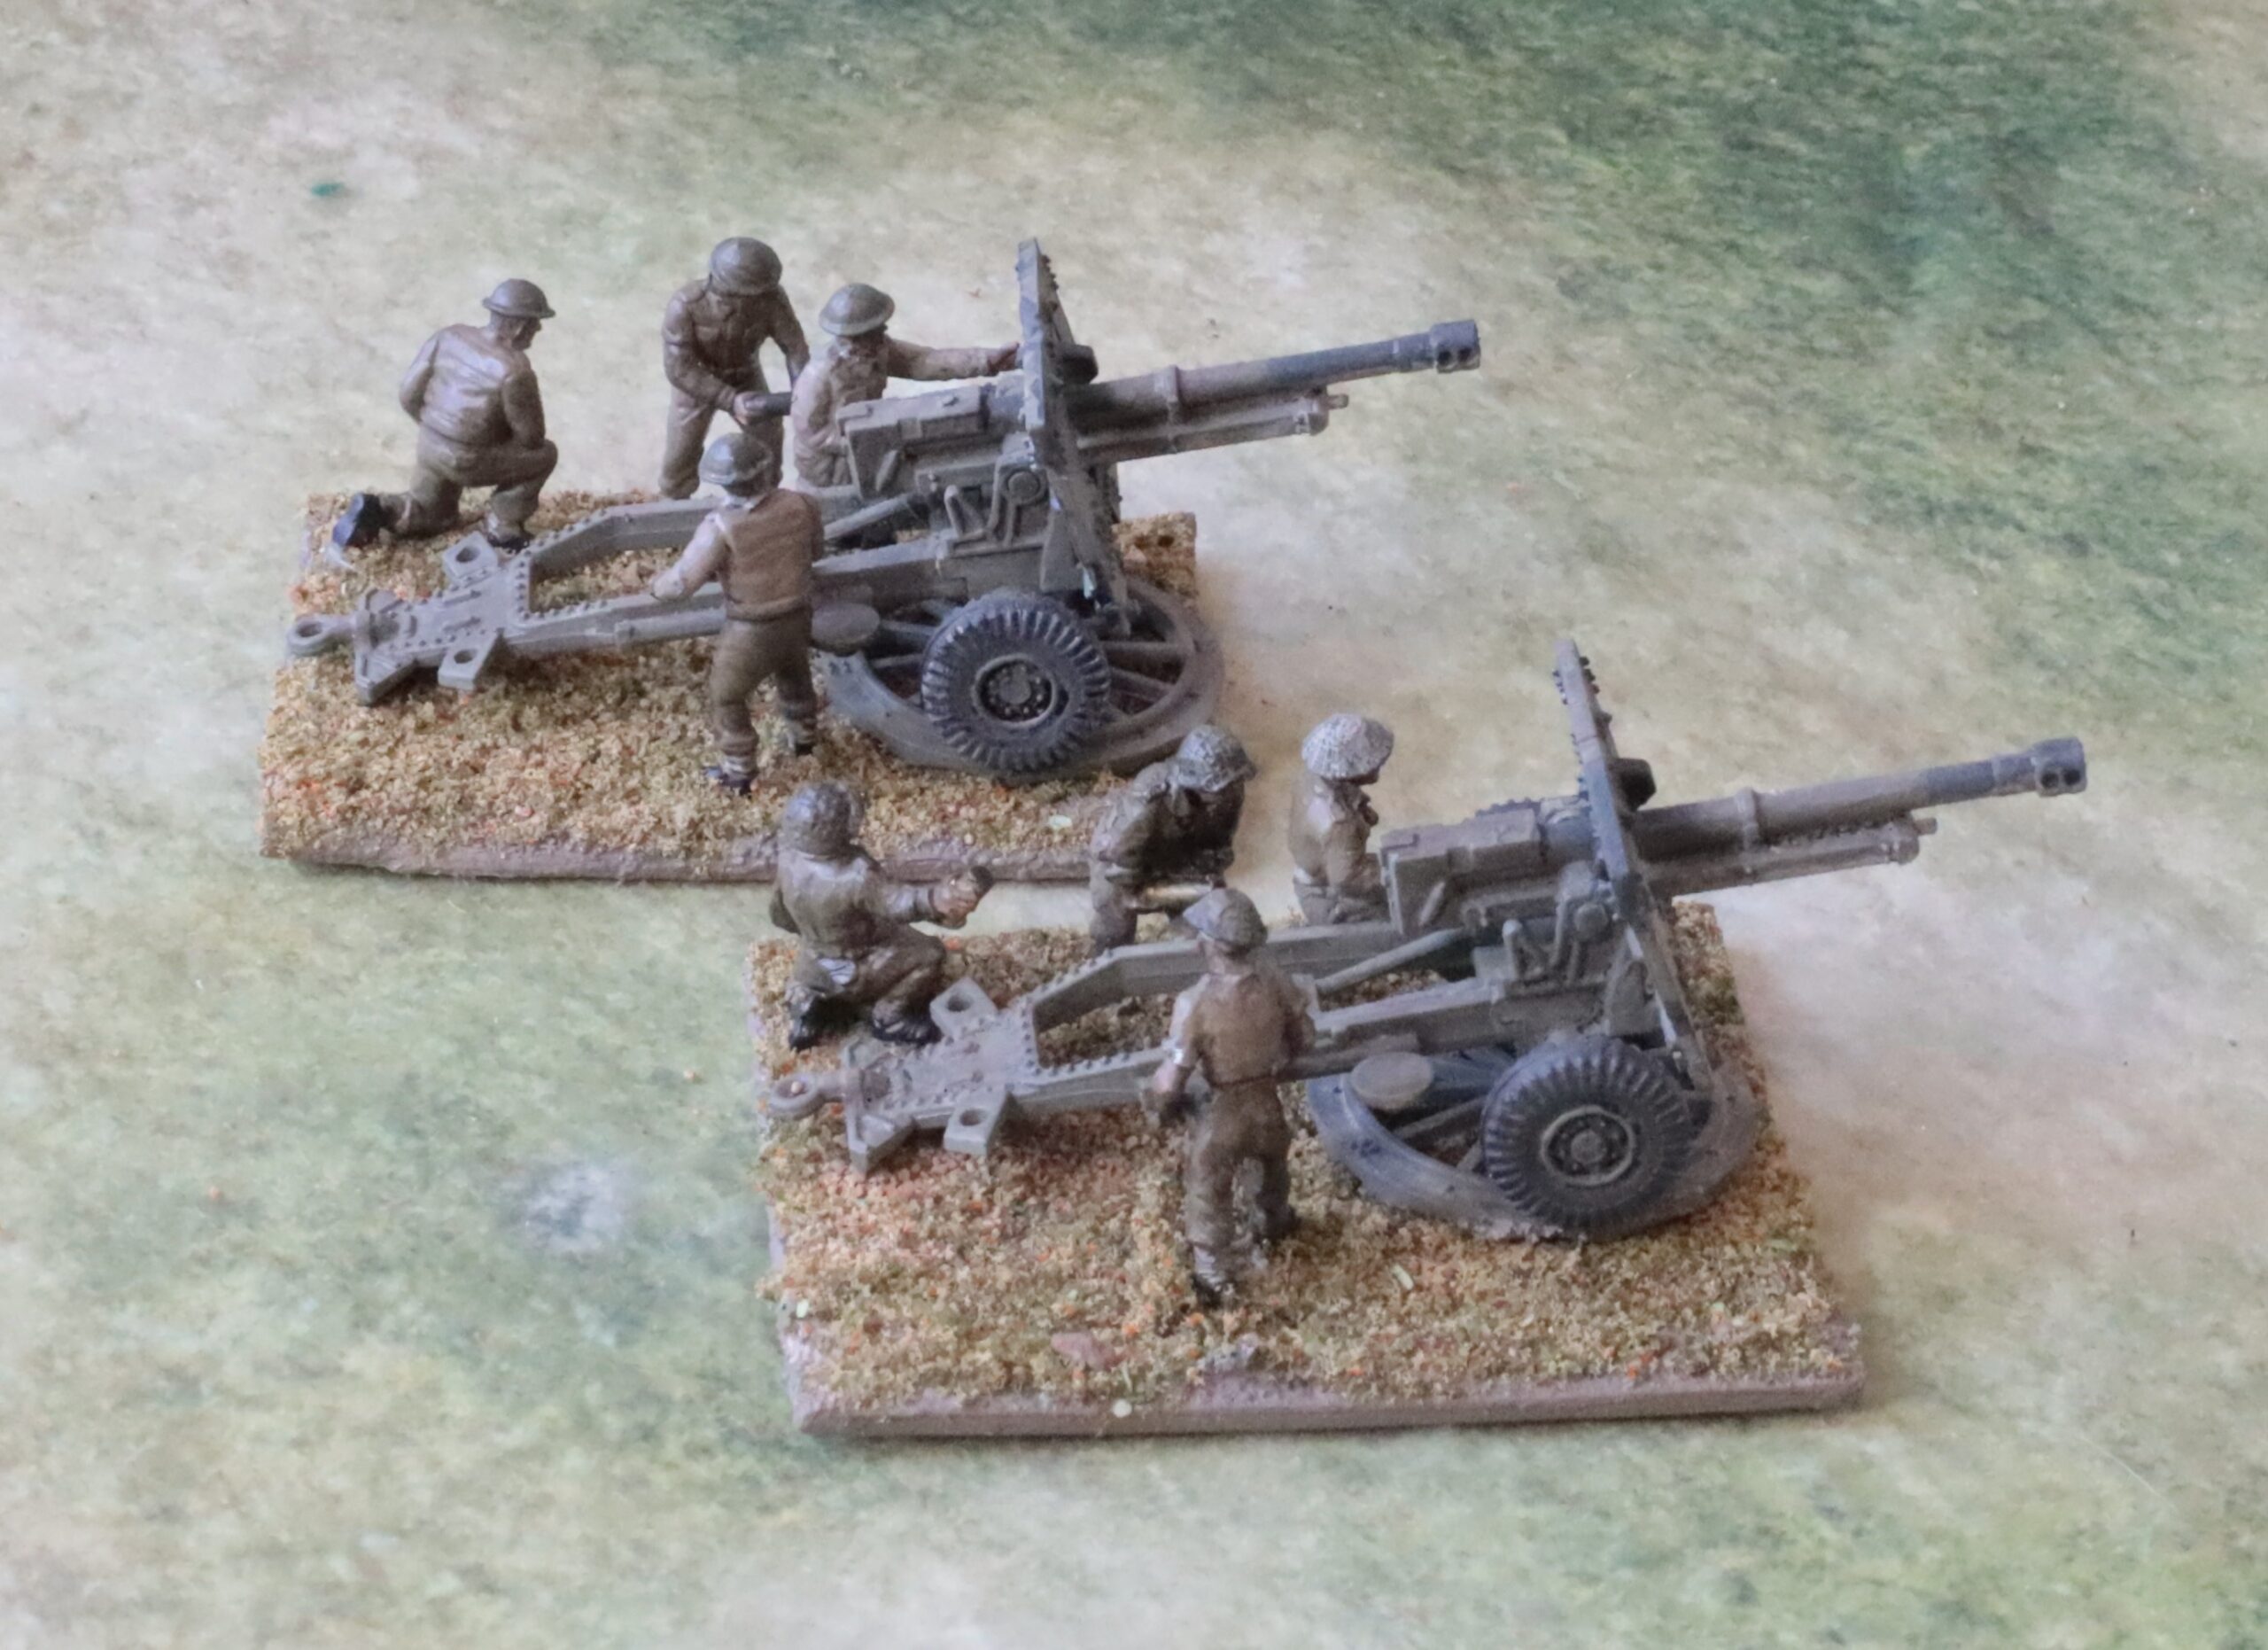
My 25-pdrs. The one in the foreground has an AB crew; the other has a PSC crew with a head-swap.
I had a box of two 25-pdrs with a Morris Quad in hand (together with another with the CMP Quad, as PSC had run out of the Morris sets). I used this. The first decision was whether to use the parts for the later version, with muzzle-brake. I didn’t have definitive information for when this was introduced. A lot of pictures show the earlier version in North Africa – but there are pictures of the later version in Italy in 1943 (or so the picture captions say) – so I decided to go for this, painted up in the Light Mud and Blue Black scheme. Next was the question of crews. I bought one set of eight figures from AB; I only wanted four on the base, so I hoped to get both crews. But they only had one seated figure, and I thought this was critical – otherwise it would be just a group of people staring at the gun. I decided to use the PSC figures for the second gun. These aren’t nearly as good, but good enough, I think. They supply two versions: Western Desert with men in shorts, and North West Europe with late helmets and scrim. I wanted neither, so I decided to head-swap the African heads onto the later bodies. This wasn’t actually that hard. The AB crew have the later helmets too, but I decided to overlook that (as I have on half of my infantry) – and it wasn’t as blatant as on the PSC figures.
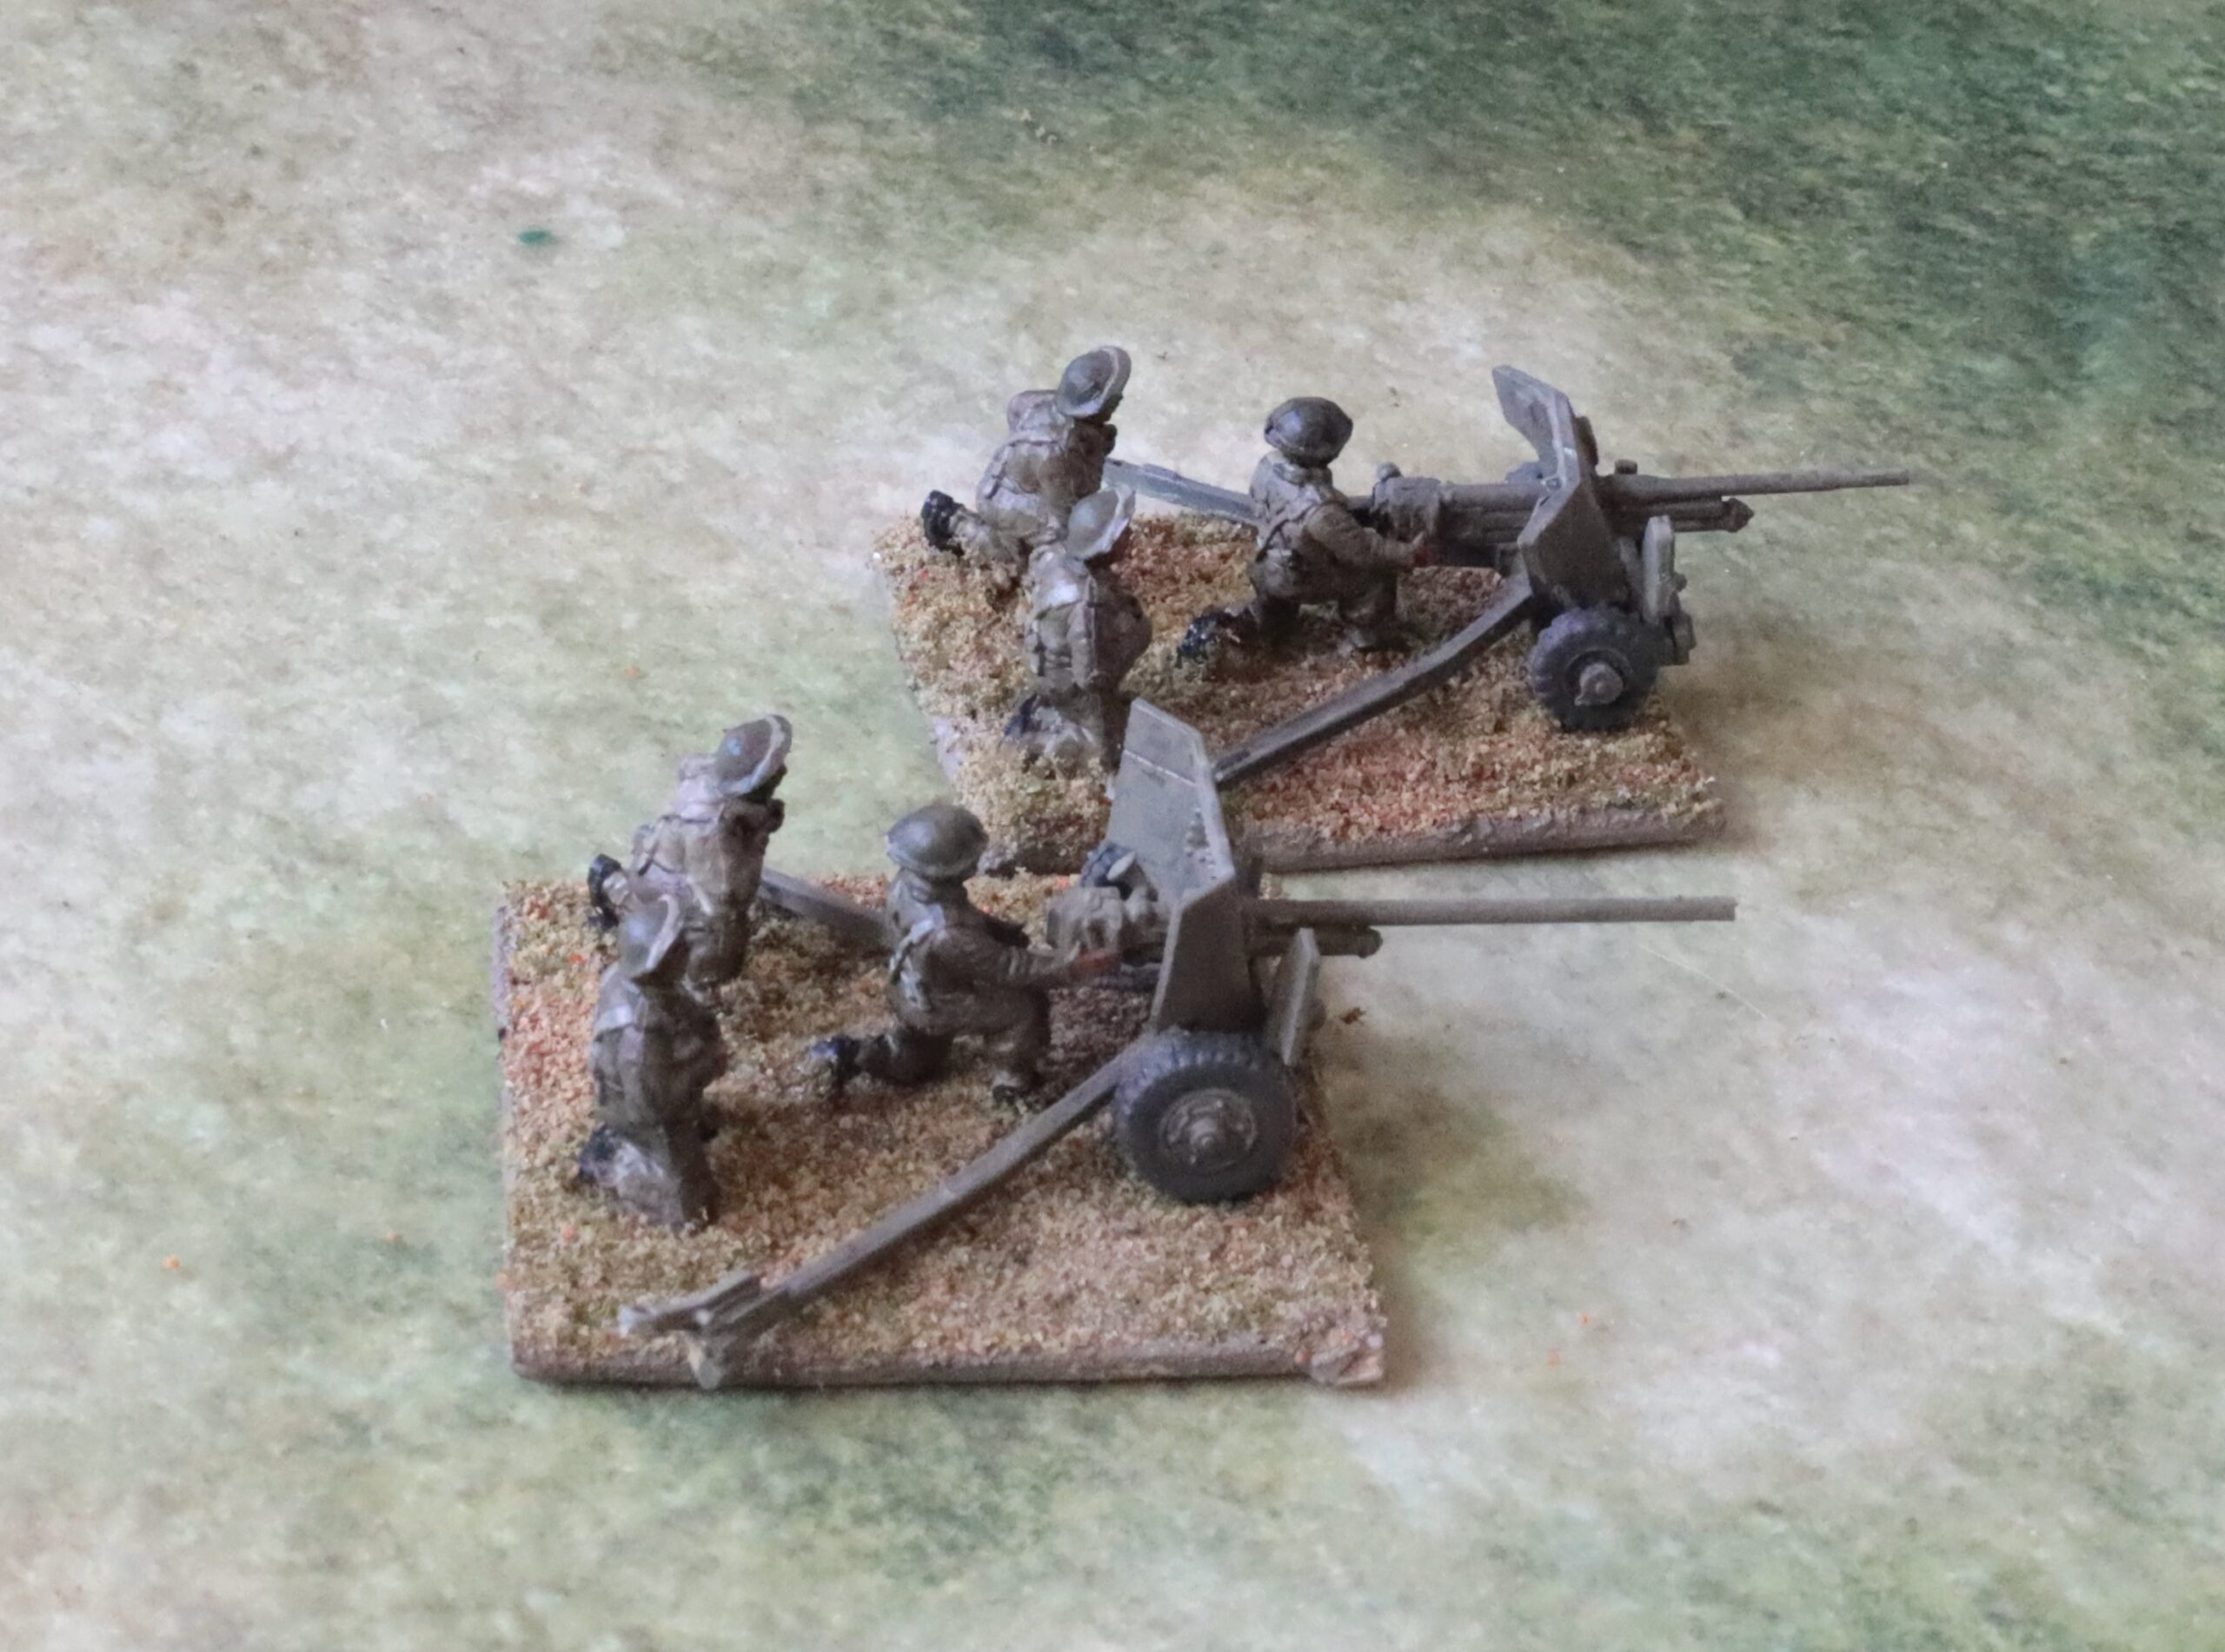
Next come the 6-pdrs:
The two 6-pdrs in Light Mud. The one in the foreground is Valiant; the other is an old Airfix one. Both crews are Valiant.
I needed three more of these to go with my one existing model, one of my old Airfix ones. I had another old Airfix one that just needed a paint job. The cheapest way to source a couple more (with crews) looked to be to get the Valiant models, for which I found a decent review. Alas I think they look wrong, when compared to the photographs in theatre. The Airfix ones look better, though I have no reason to think they are particularly accurate – that wasn’t an Airfix strong point at the time. But it looks low and mean, just like the pictures. A second issue is that I wanted the earlier version of the weapon, with a shorter barrel and no muzzle brake. I followed the advice on the Valiant box, but it just didn’t look right either! I am so dissatisfied that I have bought the PSC box of two 6-pdrs with Loyd carriers, hoping these will look better. The Valiant crew figures were OK, though, and in the right uniform for 1943 – though they are too big. Four were provided, though I only used three. For the third crew I used bought AB desert castings with a crew in shorts, just for variety.
Finally there was the 17-pdr Pheasant. Here it is with the third 6-pdr:
Old 17-pdr Pheasant conversion with SHQ crew, with the second Valiant 6-pdr in the background, with AB crew
As I said in my previous post, the Pheasant was something of an afterthought. I don’t think that this weapon was used in Medinine, but the 7th Armoured did have them at the time, and they would have been an option for the British. Actually they probably weren’t that suitable. Their big virtue was their range – but if they had opened up at long range (and the 17-pdr went off with a very spectacular flash and bang) they would then have been picked off by the German artillery and mortars. Plus they were bigger weapons, harder to conceal in the desert. This model is one I made back in the 1970s from and Airfix 25-pdr and a Panther gun barrel. Very basic, but I adjudged it good enough. I had plenty of SHQ crew, which I brought into play. These are slightly smaller than AB figures, and so more appropriate for this slightly smaller-scaled model. Here’s a different angle, including the three vehicles I painted in desert camouflage:
I will describe how I painted the models in my next post covering the vehicles. The process for figures I have already described – they were painted alongside the infantry.
It’s been a long absence since my last post. I don’t tend to post until a project is complete, and my most recent project has been a big one. As usual lots of life has intervened to slow things down. But I also have a lot of half-finished projects lying around, especially on the rules-writing side, which is not conducive to regular posting. Still, I now have something definite to report.
Following my last post for Rapid Fire! for hexes in December, my focus has stayed on WW2. We played two games, loosely based on episodes at Salerno. They weren’t particularly interesting. Much depended on encounters between tanks and antitank guns, turning on a small number of D6 throws. Infantry proved pretty useless. The first game at least had a close finish, but the second was an overwhelming British victory as the Germans failed to make any impression on the British Shermans, while the British scored hits pretty much every time. Scenario design was partly at fault, I’m sure – but the whole thing reinforced my dislike of the bathtubbing aspect of the rules. Too much hinged on too few dice throws. But I like scaling of RF, allowing bigger battles using 20mm figures. So I have embarked on writing my own rules – which will be part of a rules family stretching from Great Northern War to Napoloenics to the 1859-71 wars and on to WW2. It is surprising how much the game structure and mechanisms can overlap. That’s the idea anyway.
But I needed a scenario to focus on. Salerno is tricky at this level, especially if you leave the Americans out (they had more tanks, which makes it easier to design good games), and I think I need more experience with the system to work out how to design decent scenarios. Similar things can be said for Sicily. But Tunisia is another matter – there are more tanks!. As it happens the Rapid Fire crew have two Tunisia scenarios (or scenario groups): Medenine and Tebaga Gap. These are among the last desert battles, as the 8th Army fought their way into Tunisia – and so fit into the desert battle series that has been designed for Rapid Fire. I picked Medenine – the last major German tank attack in Africa- though allied tanks were only marginally involved. The scenario is based on the central of the three principal thrusts, with the 15th Panzer Division’s attack on 131 (Queen’s) Infantry Brigade of the 7th Armoured. I decided to set out on two large batches of model-making and painting, first for the British and secondly for the Germans. I started with the British.
For the British I needed two four-company battalions (actually this was more than I needed for this scenario – but I’d need more troops for Tebaga Gap), each with a 3in mortar (with carrier), a 6-pdr and a 2-pdr AT gun, and a carrier platoon. In addition I needed Royal Artillery support with a further two 6-pdrs and a battery of two 25-pdrs – and brigade command, for which I wanted a Dorchester ACV. Mostly field artillery at this scale is off the table, but I wanted the 25-pdrs on the table as a last line of defence should the panzers (eight panzer IIIs and Panzer IVs) push their way through the four 6-pdrs and two 2-pdrs – although historically they didn’t. I already had all I needed for one battalion except the 2-pdr. For the second battalion I bought in AB Tropical infantry (four packs of 10 plus support weapons). These are a recent release, and work pretty well 1943 British infantry in this theatre (unlike my earlier British infantry, which are more appropriate to Normandy 1944). In addition I had PSC 25-pdrs with Morris Quads in stock. I bought in two extra 6-pdrs from Valiant, to use with an old Airfix one I had in stock, and an AB desert crew. On top of this I decided to bring into service an old Pheasant 17-pdr I had made up in the late 1970s from an Airfix 25-pdr and a Panther gun barrel; I compared it to the parts in the PSC 25-pdr kit (which can be made up into a Pheasant), and it didn’t look too far off. I had some crew available bought a number of years ago from SHQ. I needed more carriers – I still have three of my old Airfix ones (three are already in service with AB crews and look jolly nice too) – but I decided these didn’t come up to snuff. I needed crews. The AB ones look fantastic, lifting my rather ropey old Airfix models to the heights, but they took a lot of work to fit, as well as being pricey. Also I needed one as a 3in mortar transport and, more complicated, as the all-important OP for the 25-pdrs. I decided to go for the PSC variants set, which has seven models which include an OP and 3in mortar transport – as well as one with a 2in mortar in firing position, which I can use for a carrier platoon. Finally there was the question of transport. Strictly this wasn’t needed. The British positions were essentially prepared and static – the lorries would have been well to the rear. The antitank guns were carried on portees, but they were lifted off these into dug-in positions – keeping these weapons concealed was tactically critical. Still, I had three Bedford QL lorries in stock, and I thought it was time to bring these into the picture, together with one of my PSC 15cwt CMP light trucks.
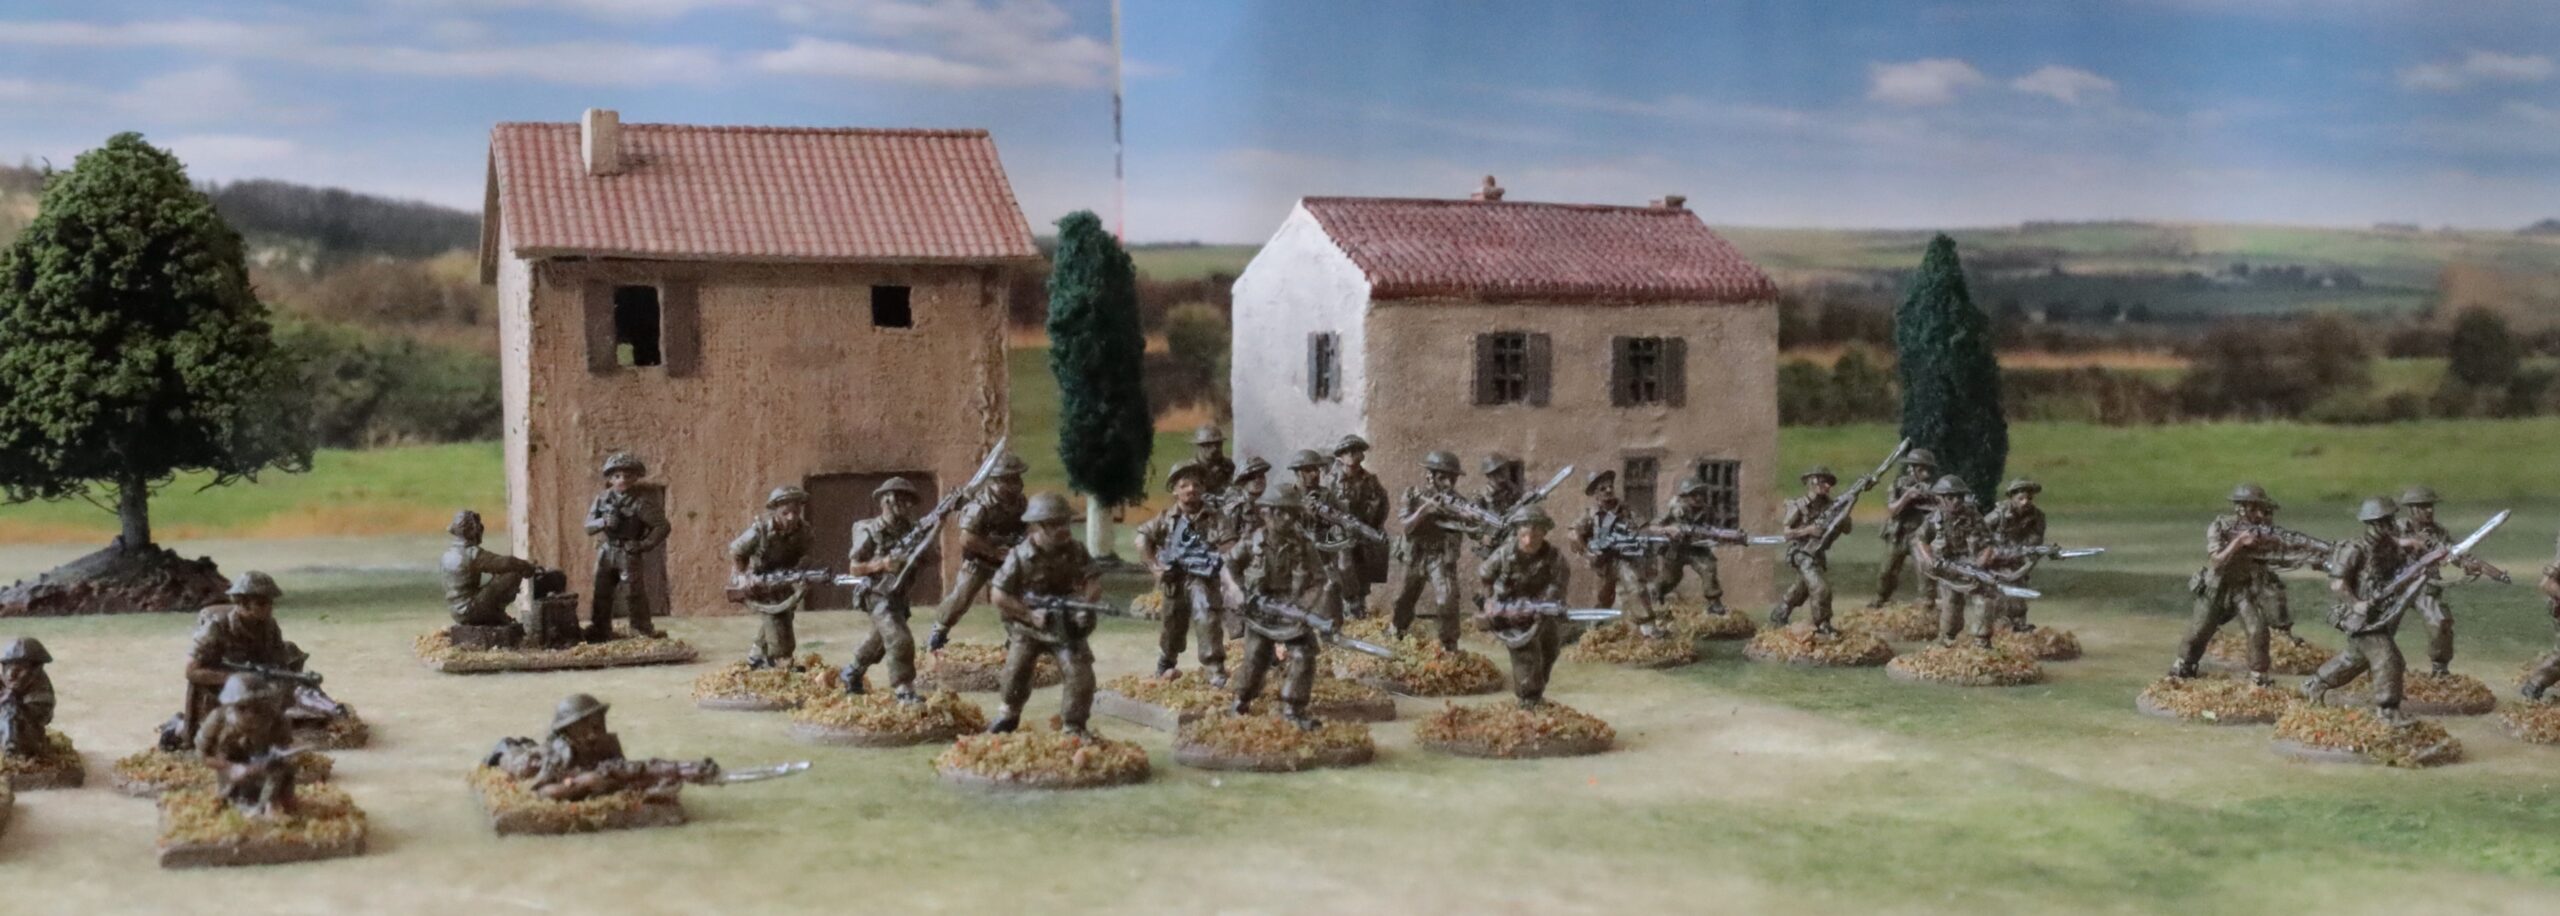
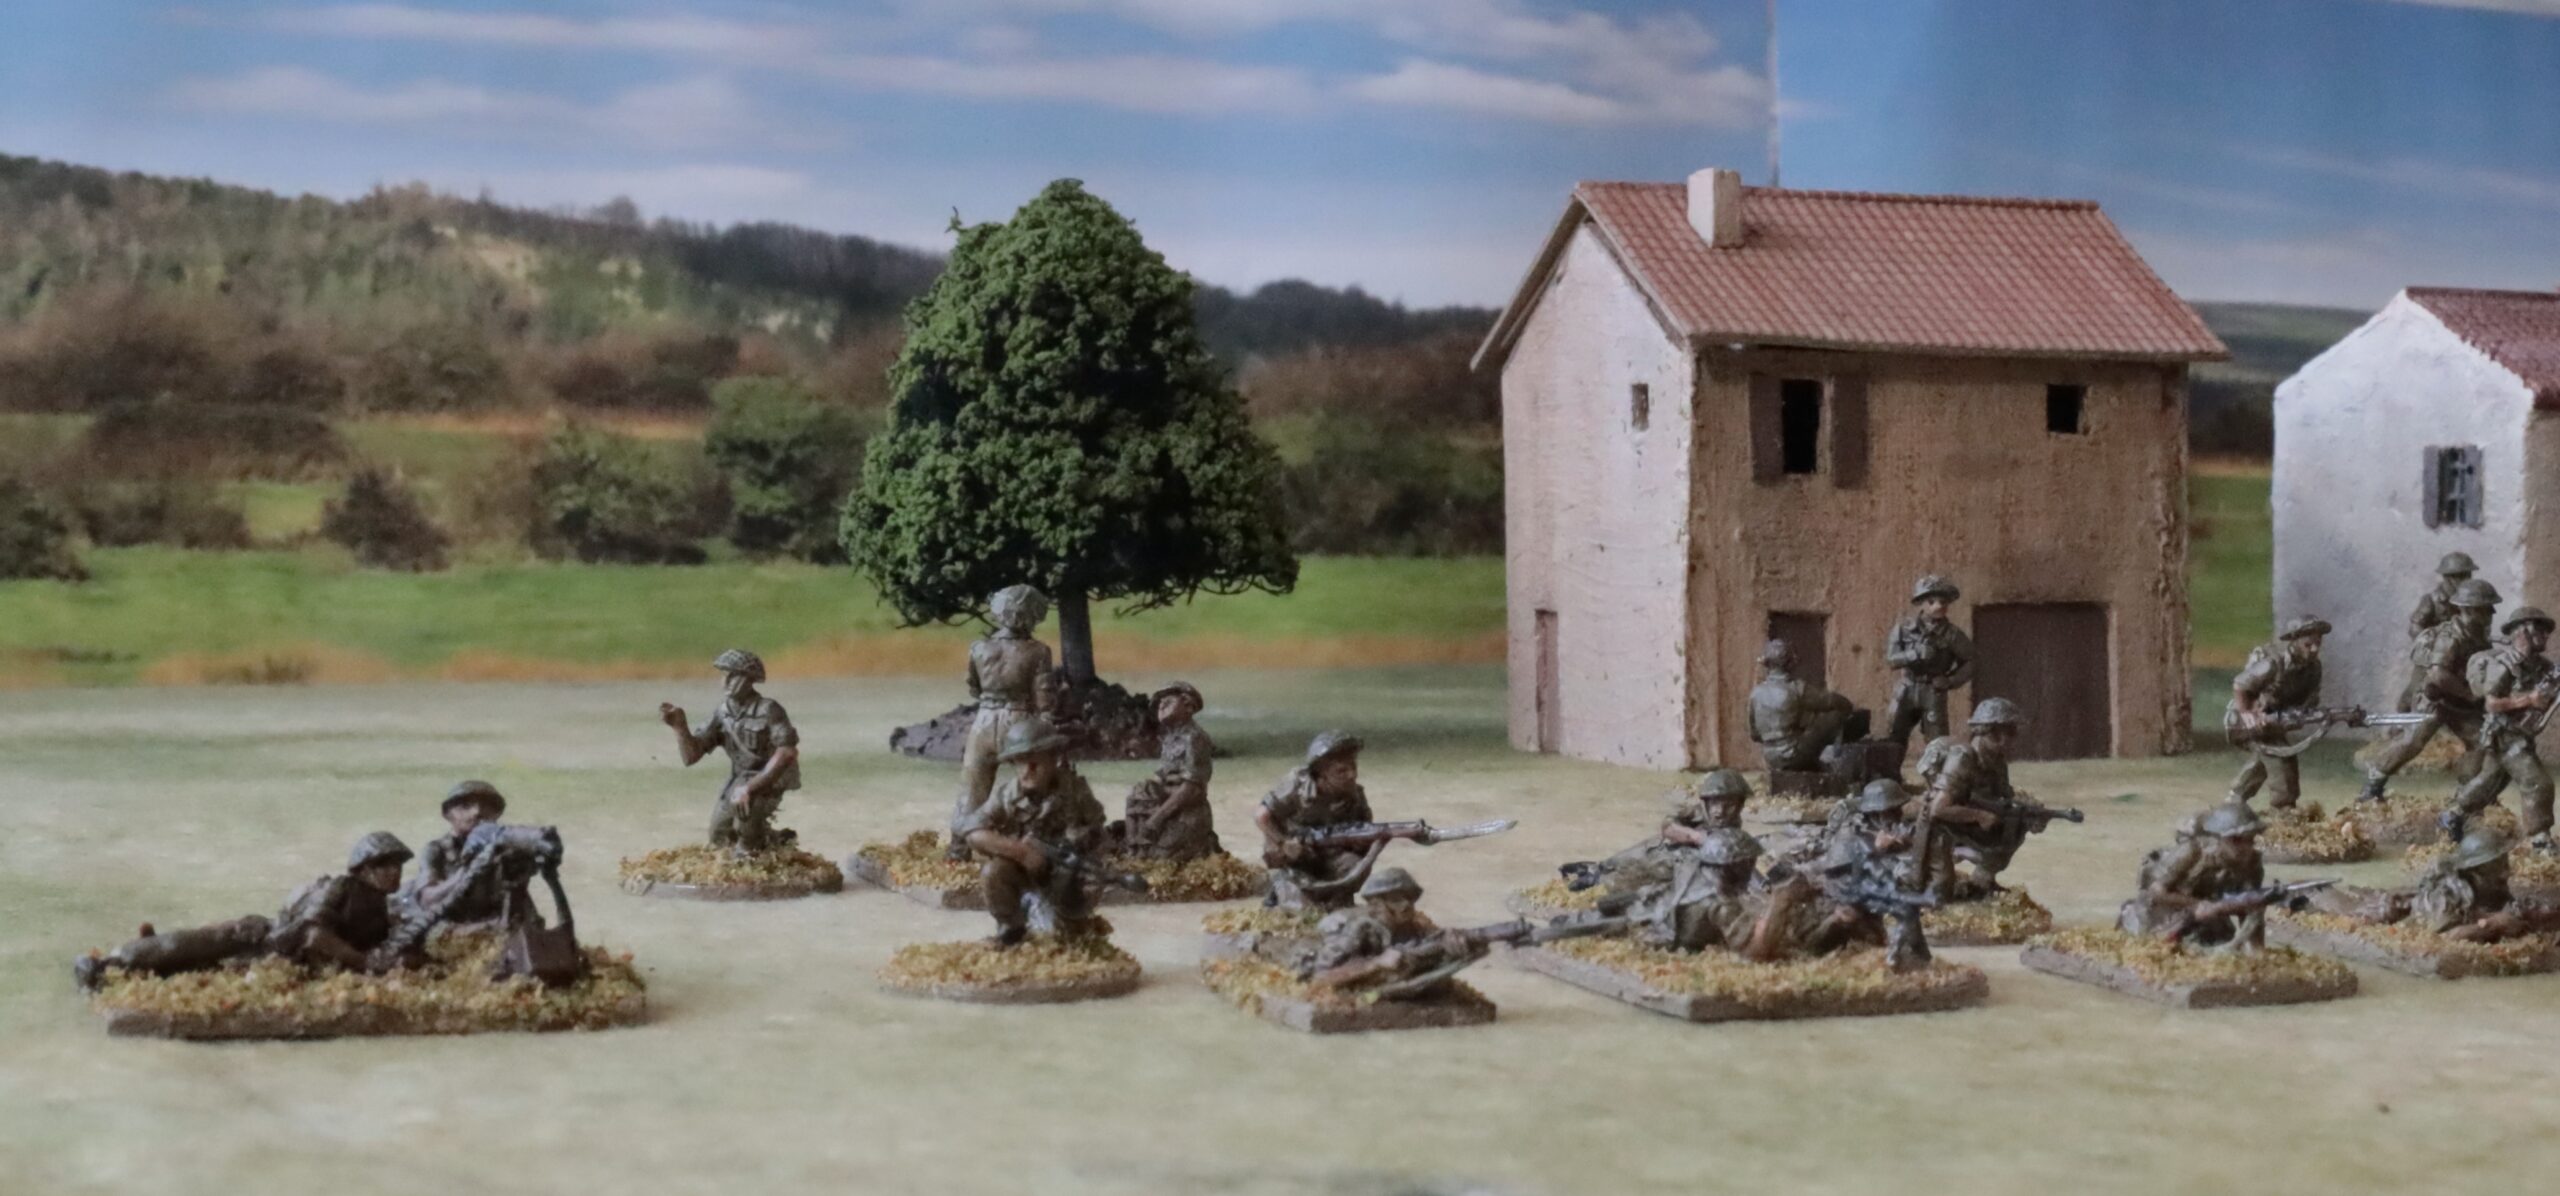
So for this project I assembled some 50+ infantry and artillery crew figures, three 6-pdrs, three carriers, three Bedford lorries, two 25-pdrs plus quads, a CMP light truck, and 17-pdr Pheasant. For this post I will stick to the infantry. Here’s a different perspective on my group photo:
And another, closer up…In the background you can also see a battery command element for the 25-pdrs, which got swept into this photo:
And this one catches the Vickers gun on the end. Loyal readers may notice I have been trying to improve my photography. This now includes a backdrop photo bought from a model railway shop (online). This depicts a a very English looking winter or early spring scene – and I need to pay attention to the join! But it does make the picture look a lot better.
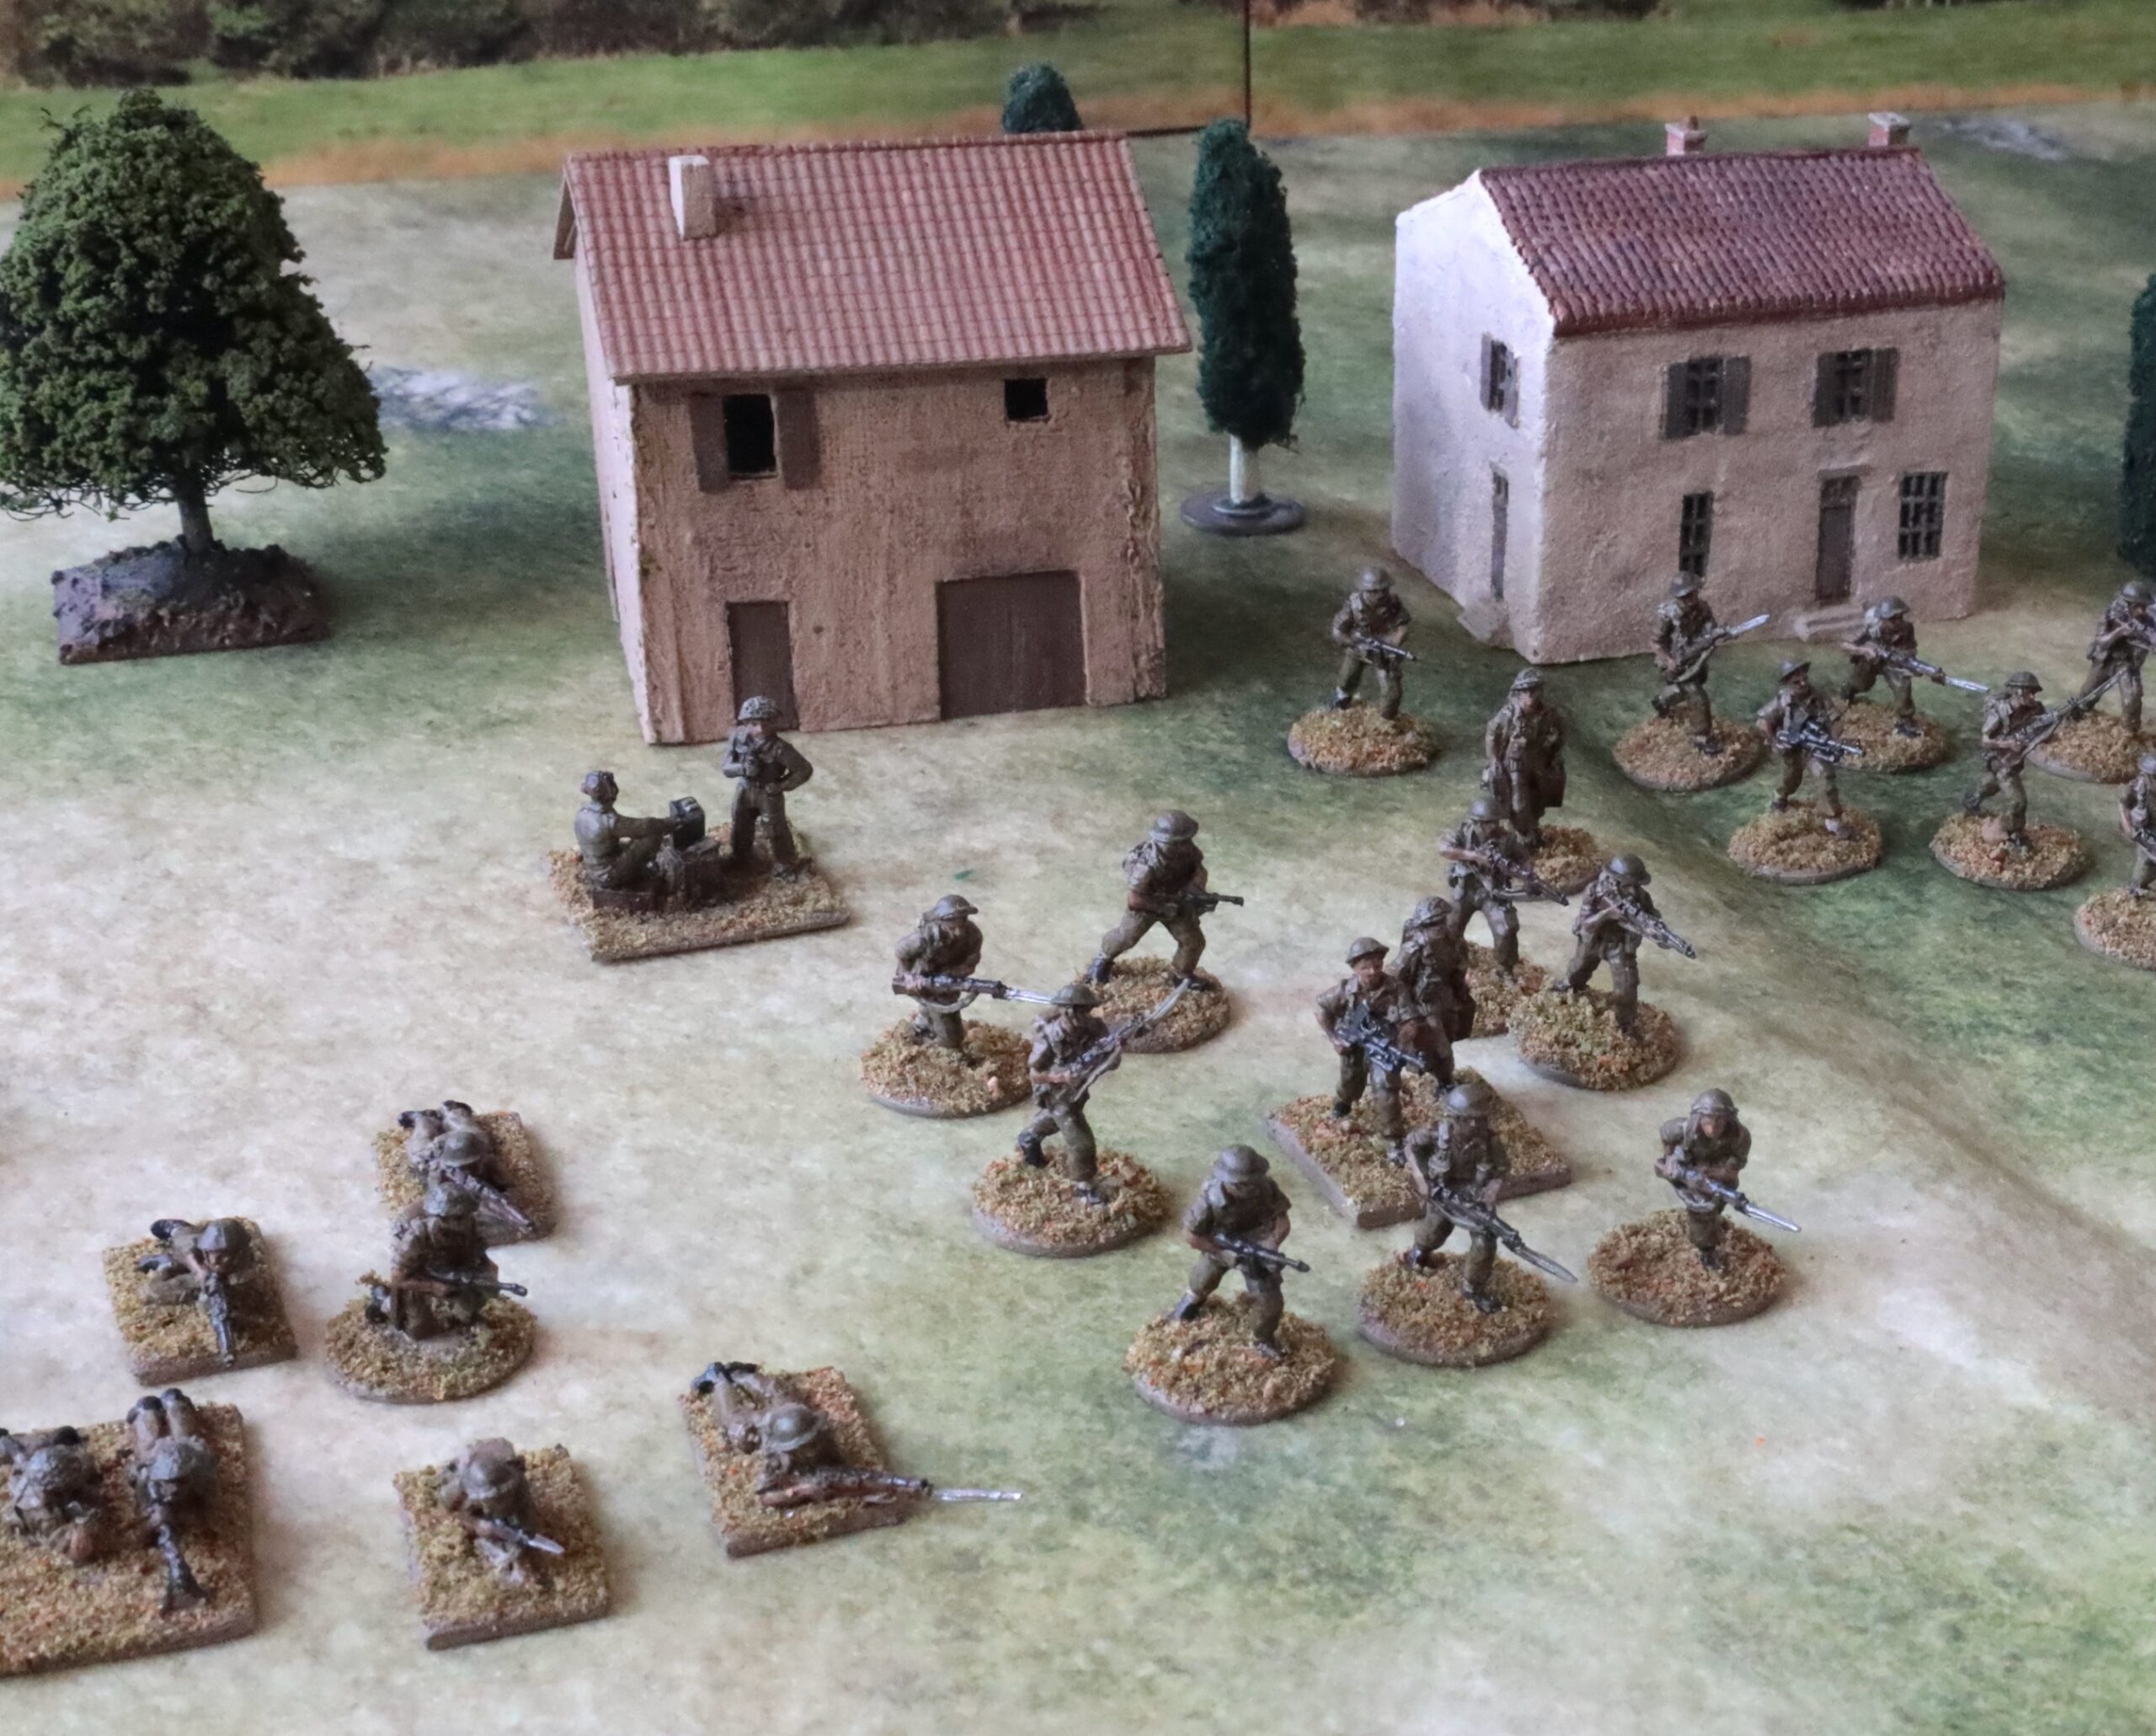
As I already said, these are from the recently introduced AB 20mm British “tropical infantry” range, designed to cover the Med and Far East theatres, when troops weren’t wearing shorts (North Africa) or Burma hats. This works pretty well for my 1943 project – they are wearing the earlier version of the helmet, without scrim, and they are using Tommy guns rather than Stens. In Tunisia it was pretty cold, so even the Eighth Army had abandoned their shorts (though they don’t seem to have bothered with the gaiters, and their helmets were still painted sand) – but their sleeves weren’t rolled up. In Sicily it was pretty hot, and many troops adopted shorts, though not as consistently as in the Western Desert. For Salerno, these figures are just right; later in Italy it tuned cold and wet. I’m making no attempt to get the figures, vehicles and guns to look exactly right for each scenario – and if there is one episode that I’m focusing on, it is indeed Salerno, in spite of my struggles with scenarios. So this range was perfect. I had three packs of advancing infantry, one prone infantry, and a Support 2 pack, with a 3in mortar and Vickers gun. The Support 1 pack has a flamethrower, 2in mortar, AT rifle and a PIAT – and I will doubtless get these later – but I have plenty of 2in mortars and PIATs in the later uniform. (PIATs were not in use in Tunisia – so I could probably have use the AT rifle).
The bases are mainly metal washers, but the prone figures and support weapons required bases cut out from mount board. I decided to have only two crew for the mortar and Vickers (three were provided in the pack) to keep the bees size down. These were plastered with the usual mix of acrylic medium, sand and paint (a mix of white and raw umber) to integrate the figure bases. Once mounted the figures were given an undercoat of artists’ gesso (which is white) mixed with some raw umber. The raw umber and white mix gives a nice neutral grey-brown colour, which is now my go-to base colour for figure paining across all eras. It means that any gaps in painting don’t show up. Then came the usual paint job in various mixes of Liquitex artists’ acrylics. For the uniforms this comprised Raw Sienna (orange-brown), Titanium White and Prussian Blue (not much of the last of these, but it’s needed to get khaki), plus a little green for the helmets. The flesh was based on white and Burnt Sienna (red-brown), but once I get the palette going I keep throwing in bits of this and that. This came out a bit on the dark side, but I did want to get tanned flesh, but with a slight pinkish hue. I’m not entirely convinced, but it probably roughly simulates how my own fair flesh would look in those conditions. I’m painting less detail on the figures these days, so the water bottles and bayonet sheathes did not get more than cursory attention, for example. One innovation for this batch was the use of a light/magnifier. My short-range eyesight is pretty decent, but this in fact proved a big help.
Once the basic paint was laid down I was left with the vexed question of how to finish. With my previous WW2 figures I have used ink washes or oil medium glazes, followed by matt varnish spray. This leaves a very harsh matt finish which I don’t really like – though it’s quite fashionable these days. I have recently tried to moderate this by applying a little not-so-matt varnish with a brush – on flesh, weapons and helmets, but I have been rather underwhelmed by the result. As an experiment this time I mixed some black and brown ink into some Liquitex matt varnish (which is very fluid and dries off-matt). Alas I overdid the black ink and the effect was too dark. I had to go back to the figures highlighting the paler bits, including the flesh. This took me to the margins of the level of shine I can tolerate on WW2 figures (I have a much higher tolerance for earlier eras), but brought out the wonderful AB castings very nicely. I need to go a bit easier on the black ink (the stuff I have is extremely powerful), but otherwise I think I’ve found a good technique.
For my rules system I will need to mount these men in pairs on temporary bases – as I have already done with my other infantry using lower-adhesion Copydex. I still want to be able to use as singles if I want to try platoon level games. Next time: the artillery.