Category: News

  • French artillery in 1/100 Part 3: the 8pdr

    Now on the the most well-known of Gribeauval’s designs: the 8pdr. According to the old wargamers’ beliefs, which are remarkably persistent, this was the main piece in use by the French throughout the wars. Every 15mm figure manufacturer has a go at this one.

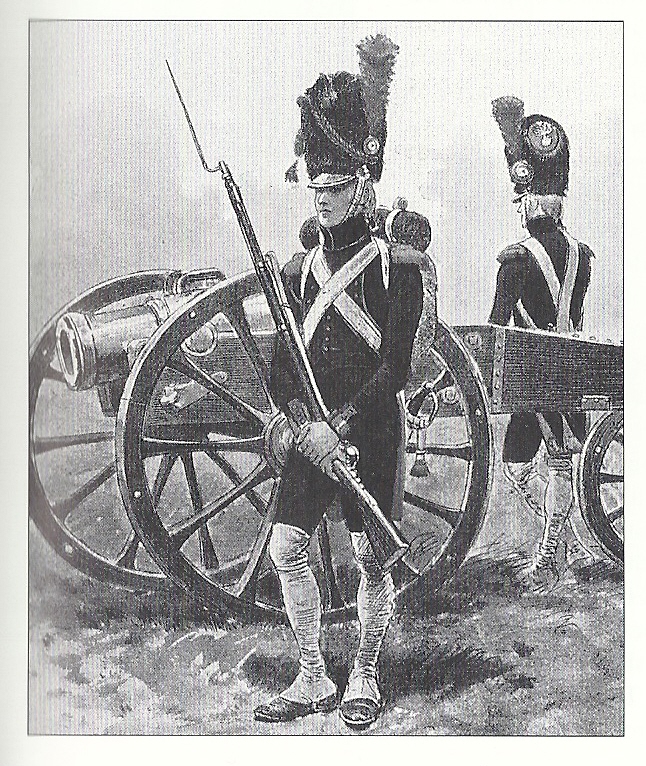
    The 8pdr seems to have been well liked by the artillery men that served it, who forgave its weight. One aspect of the weight was that a second set of trunnion recesseses was required, and the barrel (580kg) had to be moved between them each time the weapon was limbered or unlimbered. No doubt this was easy enough for a practised crew. The weapon had more hitting power than almost all its field opponents (usually 6pdrs – the British 9pdr was the exception, and this could match it). Perhaps that gave the crews a better sense of security in the counterbattery exchanges which were so much a feature of the wars.

    But the weapon was less popular with the war ministry. The extra weight meant more expensive metal. A typical 6 pdr weighed just 400kg. And no doubt this discrepency applied all the way down the line: the cost of ammunition, and the number of horses and caissons need to shift things around. So in the An XI reforms of 1803 it was decided to phase the 8pdr out.

    This meant that probably not all that many of them were manufactured. In the pre-Empire era the French were notoriously short of artillery. This persisted into the early Empire when several corps were kitted out with captured artillery, such as Austrian 6pdrs. And after that they were officially obsolete. So they would have missed out on the big manufacturing push in the early Empire period.

    Still, they continued in use after 1803. No doubt the field units were reluctant to give them up, and the first priority was to replace the captured guns with the new 6pdrs. According to the orders of battle for the 1809 Austrian campaign, quite a few units were still equipped with 8pdrs. This included the horse artillery supporting the cuirassier divisions – showing that the piece’s weight was not too much of an obstacle even for use by the horse arm. By 1812, though, they were gone, except in Spain. There were none at Waterloo.

    As with the 4pdr, though, they experienced a bit of an afterlife in the Pensinsula. This was partly because the Spanish had them, and it was convenient for the French to take these over. Some divisional batteries used them, but they were also used in a reserve artillery role, in place of the  12pdr. Nearly as many of them were at Vitoria as 4pdrs – though how many of them were actually in use, rather than left on the Park, is an open question. (As it happens I suspect that all, or almost all, of them were brought into action in that battle, mostly as reserve artillery, and the 12 pdrs were left in the Park).

    That wasn’t the end of the story though. The post-Napoleonic regime brought them back for use in the horse artillery, and their use continued beyond 1827.

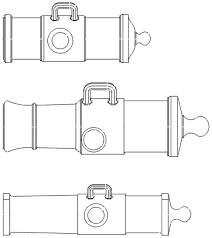
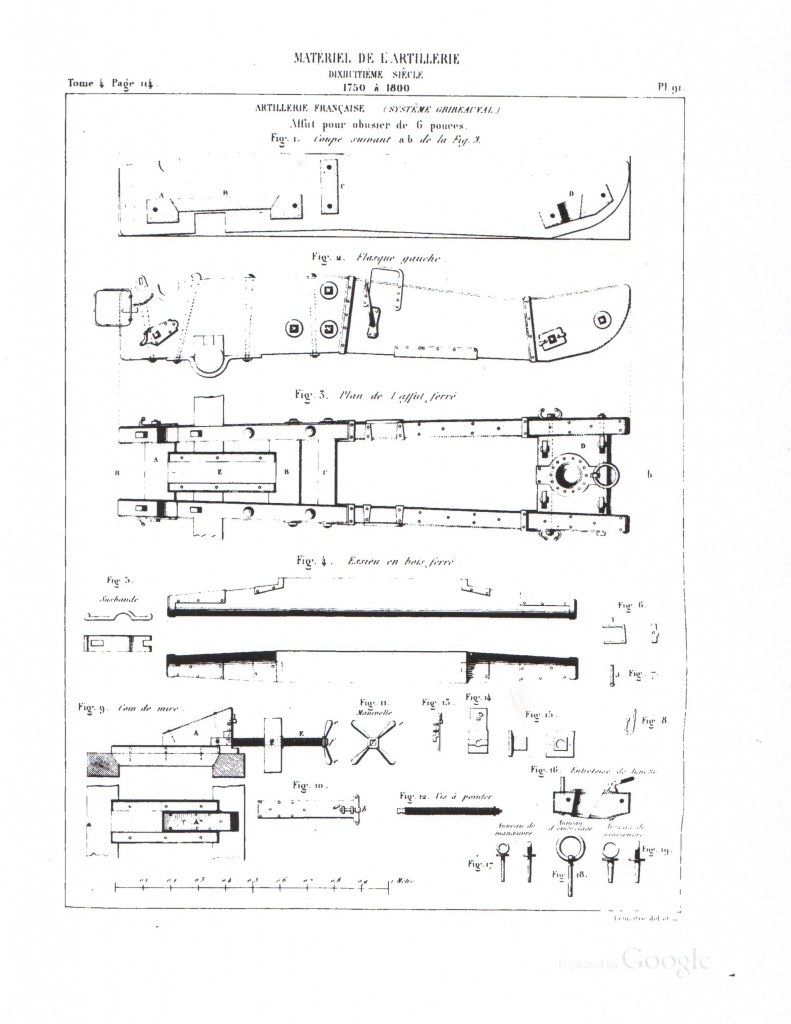
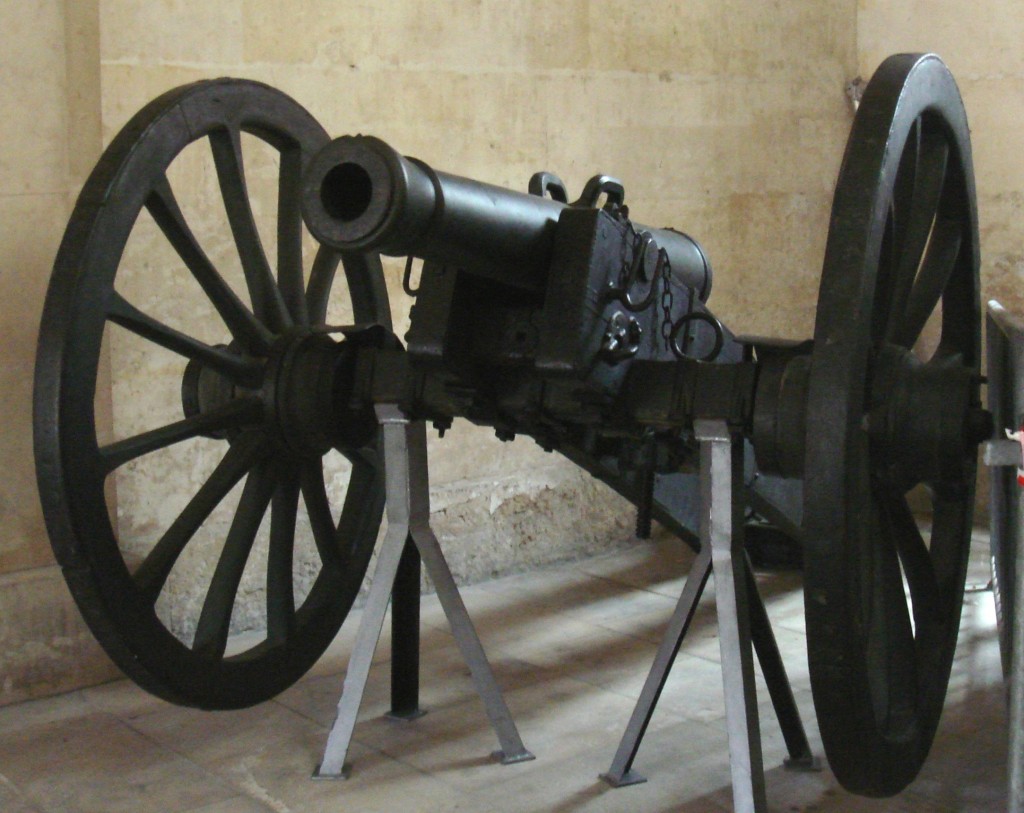
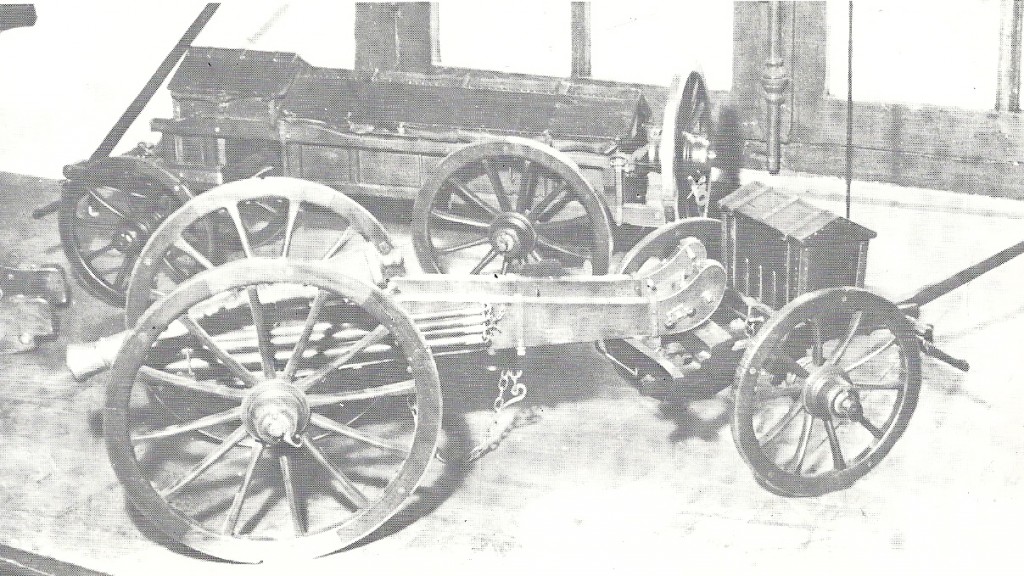
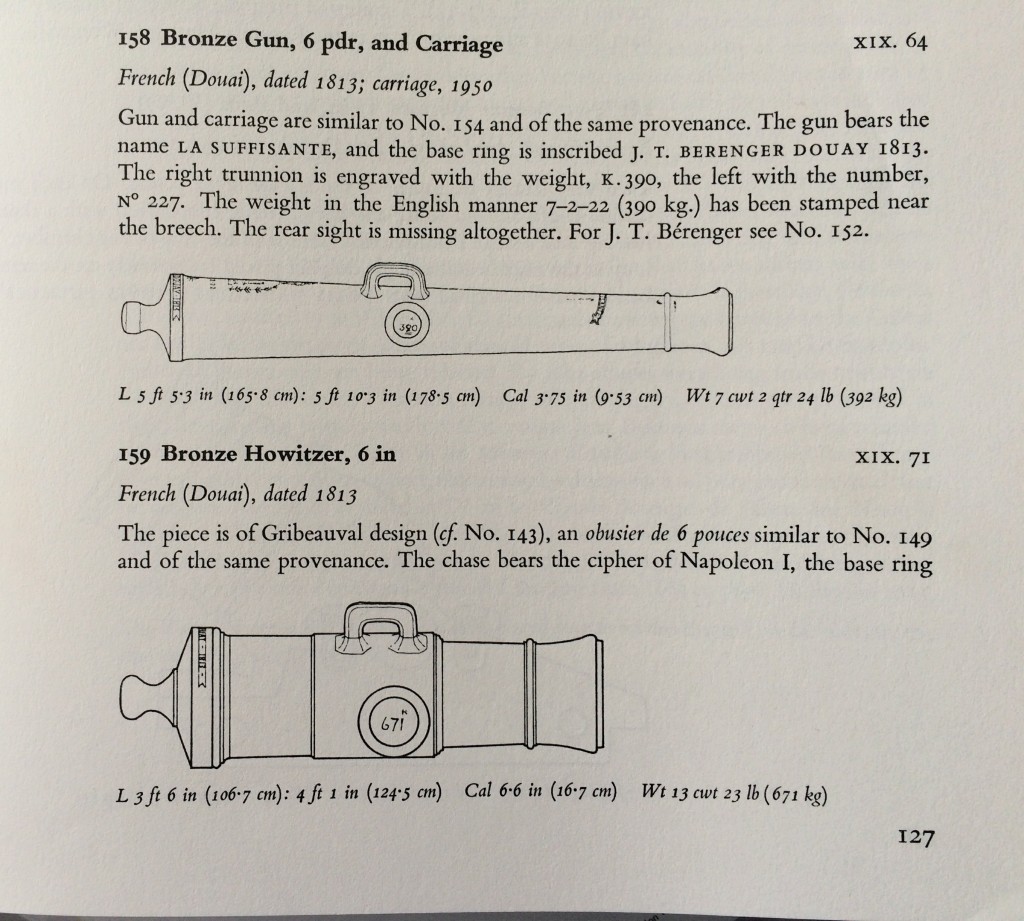
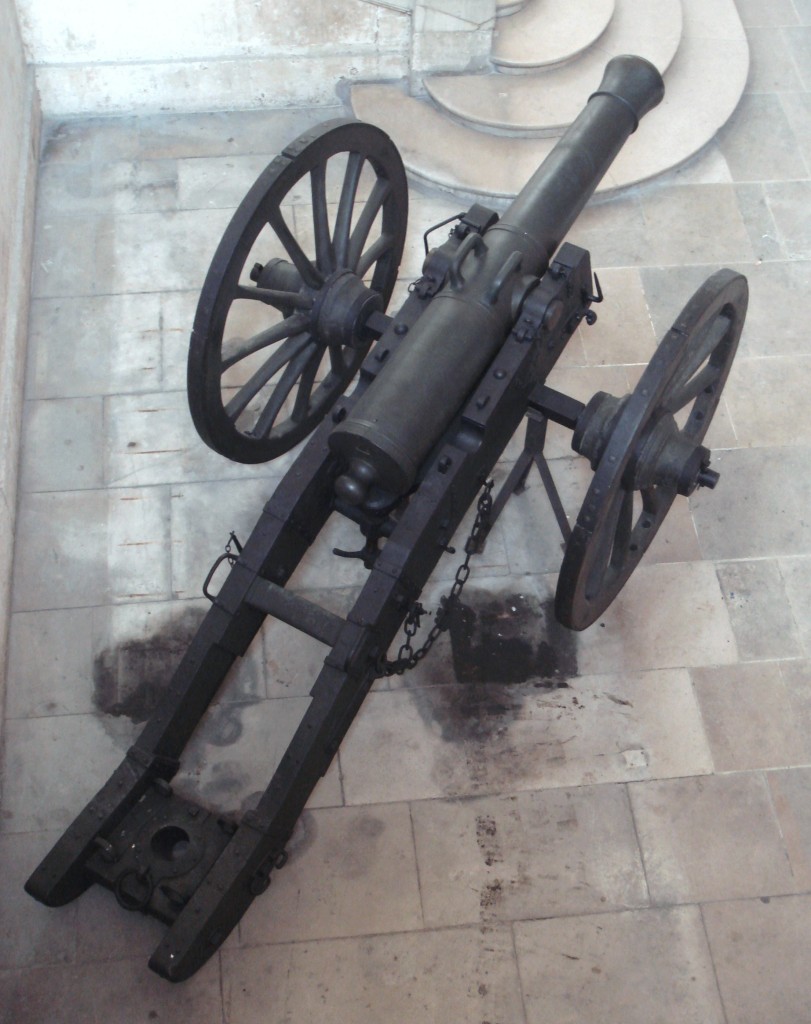
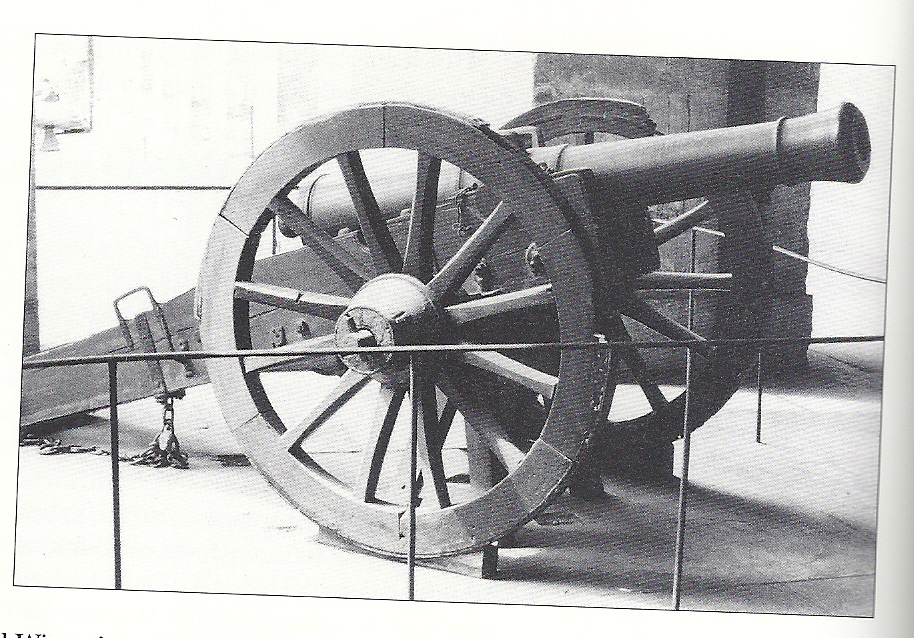
    There are no photographs of surviving 8pdrs with original carriages – which means that probably none have survived. Oddly enough I haven’t even seen any detailed drawings either. There is a rather fine model in the French Army Museum, which gets a lot of pictures in the publications, though, so I suspect that detailed drawings do exist. A few barrels survive, including one in Britain’s National Armouries.

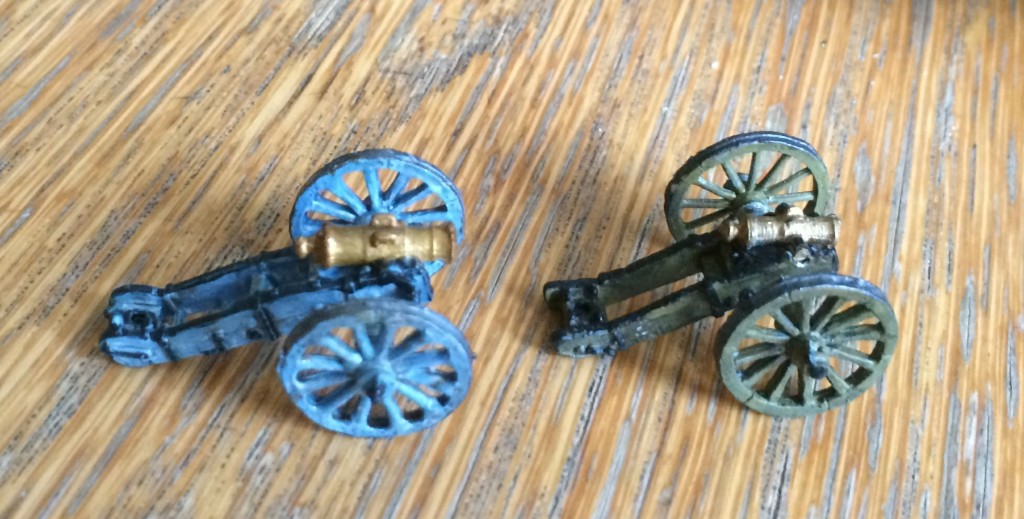
    For my models I wanted just three of these, enough for the artillery-light Peninsula and revolutionary wars battles, and to play a role in any 1809 scenarios. I decided to assemble them from bits and pieces I had to hand, rather than buying them new. I took the carriage from my Old Glory pack. These are quite nice, at about the right scale. It is nicely detailed, and I find the proportions are pleasing to the eye. There’s a slight splay on the trail, which not all models attempt. A trail spike is moulded stowed on one side, which won’t be to everybody’s taste (the same is true for my Battle Honours 4pdrs). The main problem is that the elevating plate is too low for the firing position – though works perfectly well for the travelling position on the rear trunnion recesses.

    The trouble with the OG models is that the wheels are too small (though at least they can be reused for the 4pdrs!), and the barrel doesn’t work. The wheels look quite nice – but I want to acheive the big-wheeled look in my models. Truth be told I’m not entirely sure which barrels came from which models with my old bits and pieces, but I’m not that impressed with the ones I think are from OG (nor the ones I know came with the OG Prussian pack). The three OG carriages I was using (with their original wheels) had barrels borrowed from (I think) BH 8 pdrs (where the carriage is not as nice). I took the wheels from the Blue Moon French howitzers. This pack was a major disappointment, of which more later, so sparing three pairs of wheels was not a difficulty.

    As for the barrels, my BH ones would have done at a pinch, but they were a tad small. The main problem with them was that they did not look much different in size from the Blue Moon 6pdr barrels – and I needed them to look substantially bigger (while being clearly distinguishable from 12pdrs). I found one really nice barrel, though I don’t know where it came from (it might be a very underscale BH 12 pdr). The other two were, remarkably enough, taken from my series 2 Minifigs Austrian 6pdrs, which says something about the accuracy of those old ranges! I cut the rear portion of the elevating plate from from plastic card and glued it to underneath and the back of the barrel.

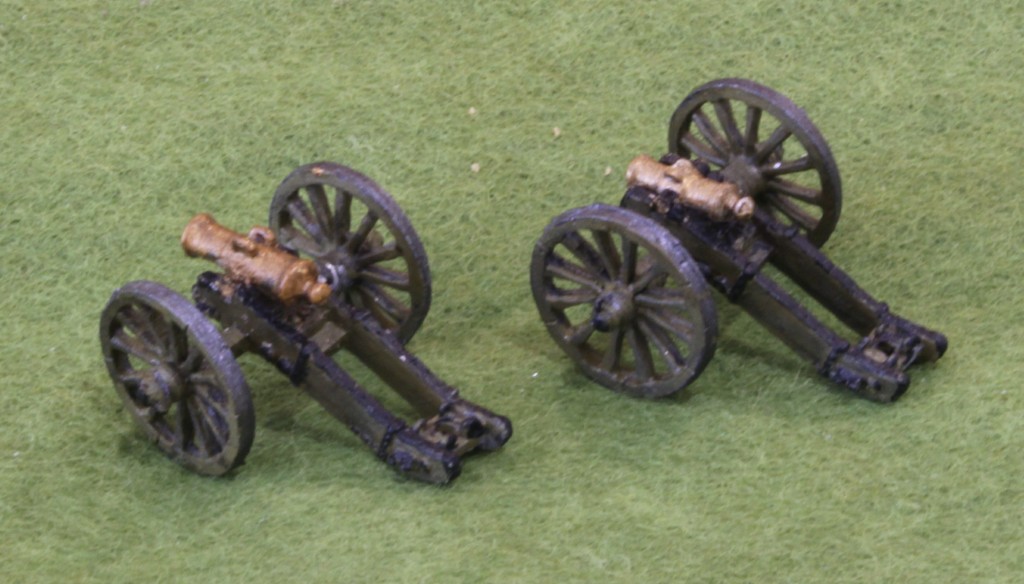
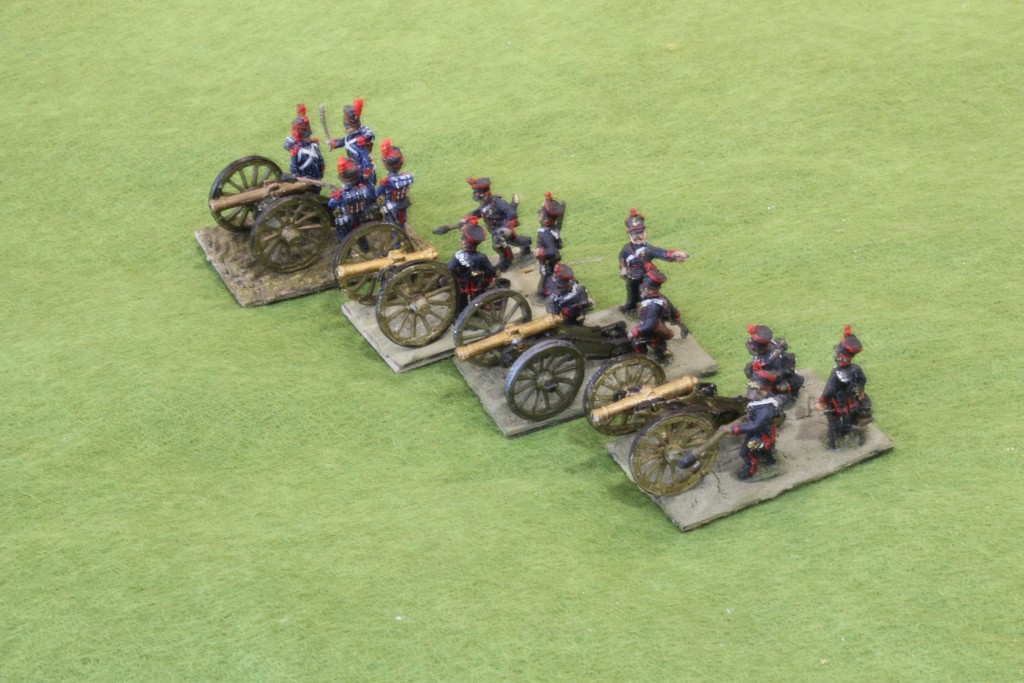
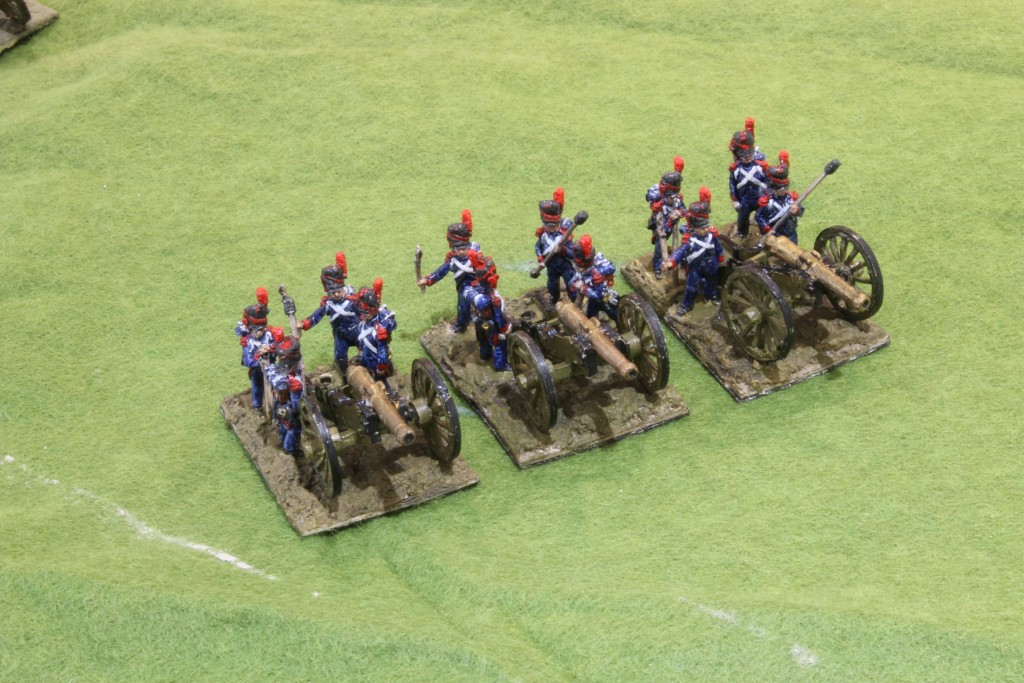
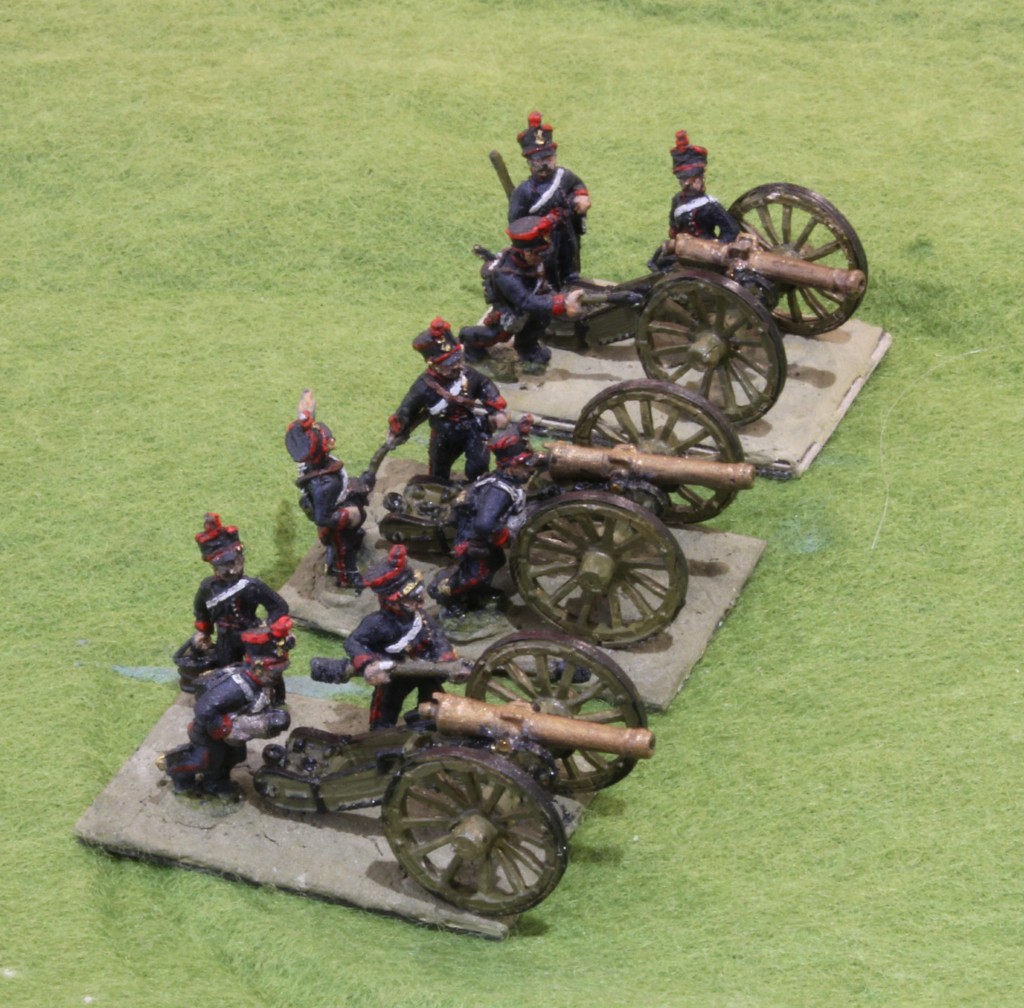
    The overall result was quite pleasing. This picture shows the three with OG horse artillery crew figures on my old basing system. The two Minifigs barrels are closest to the camera:

    8 pdr models 2

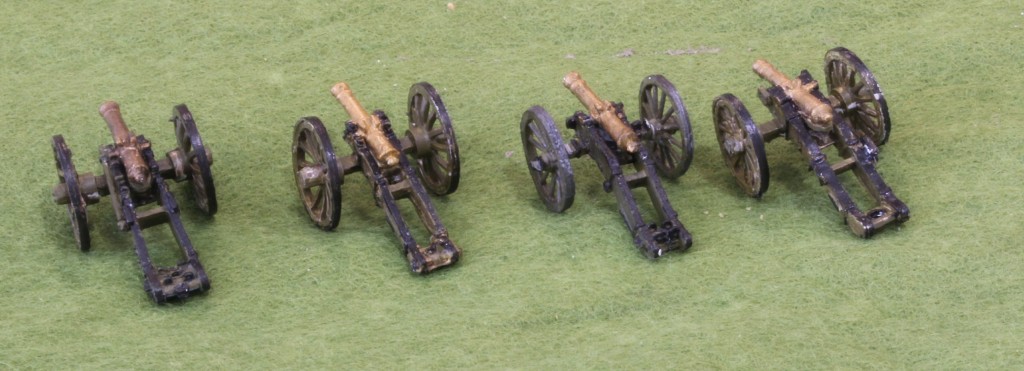
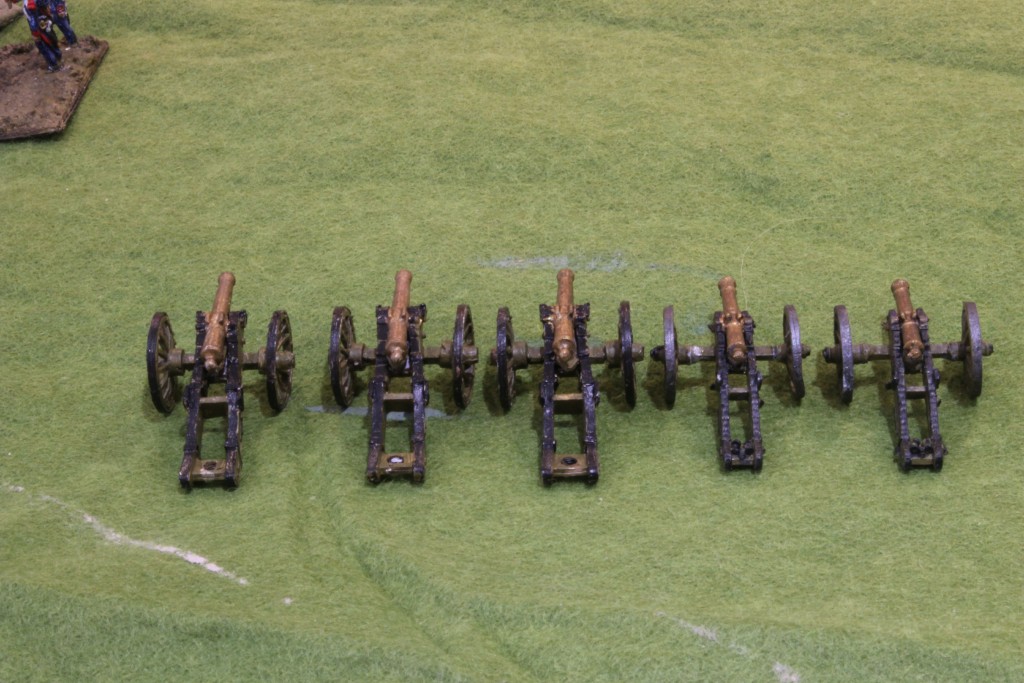
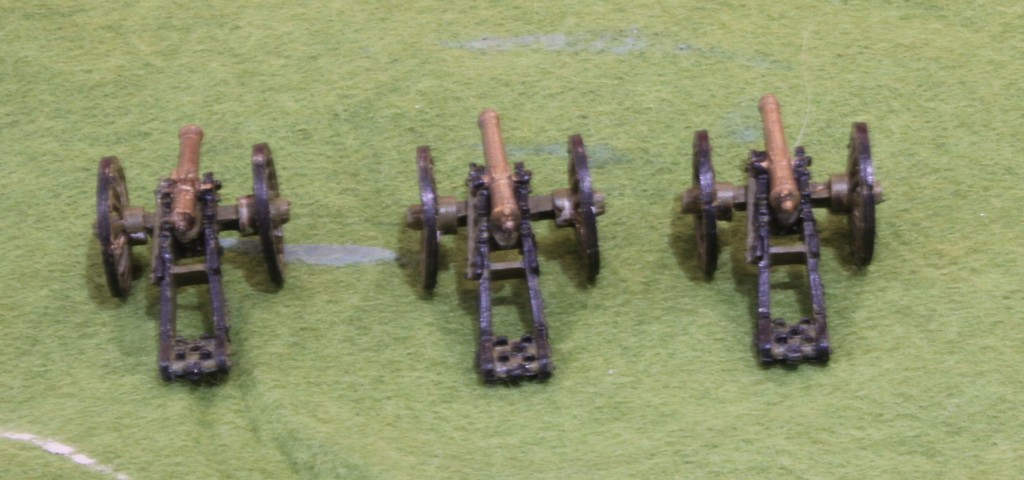
    A rear view without the crews (on an uneven cloth!):

    8 pdr models 3

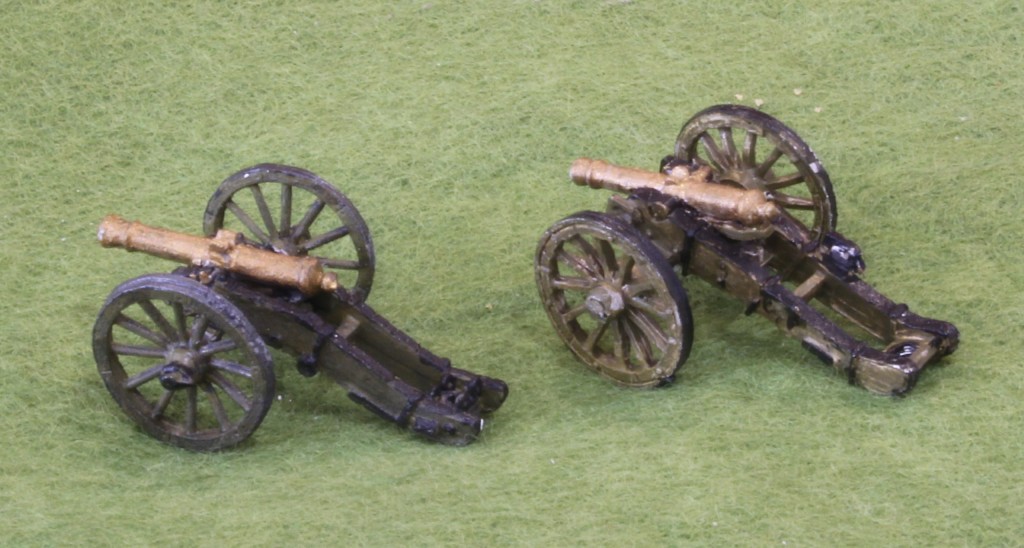
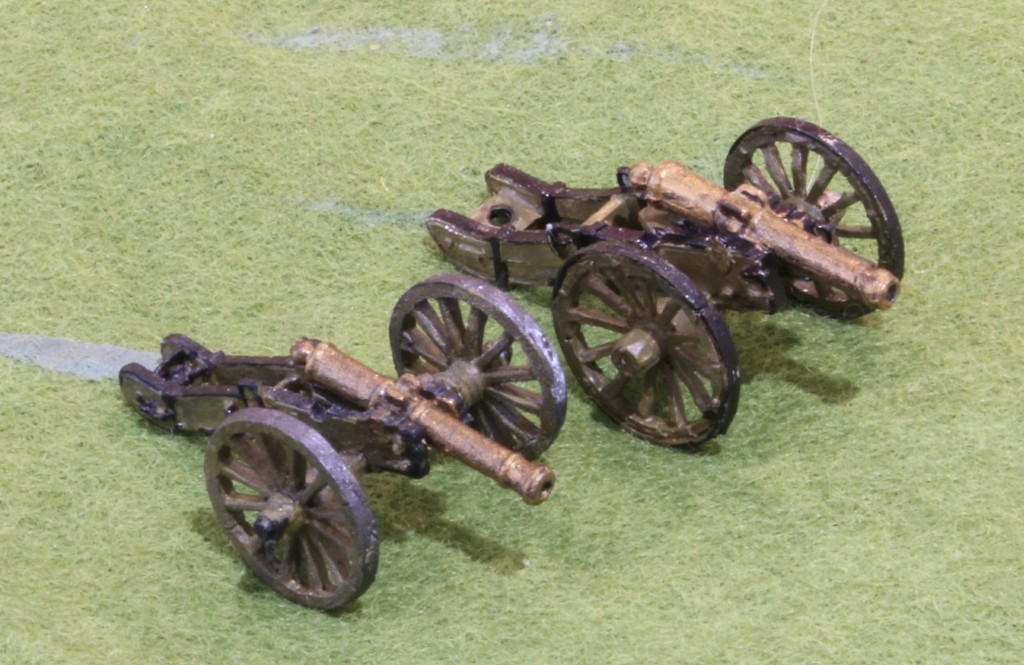
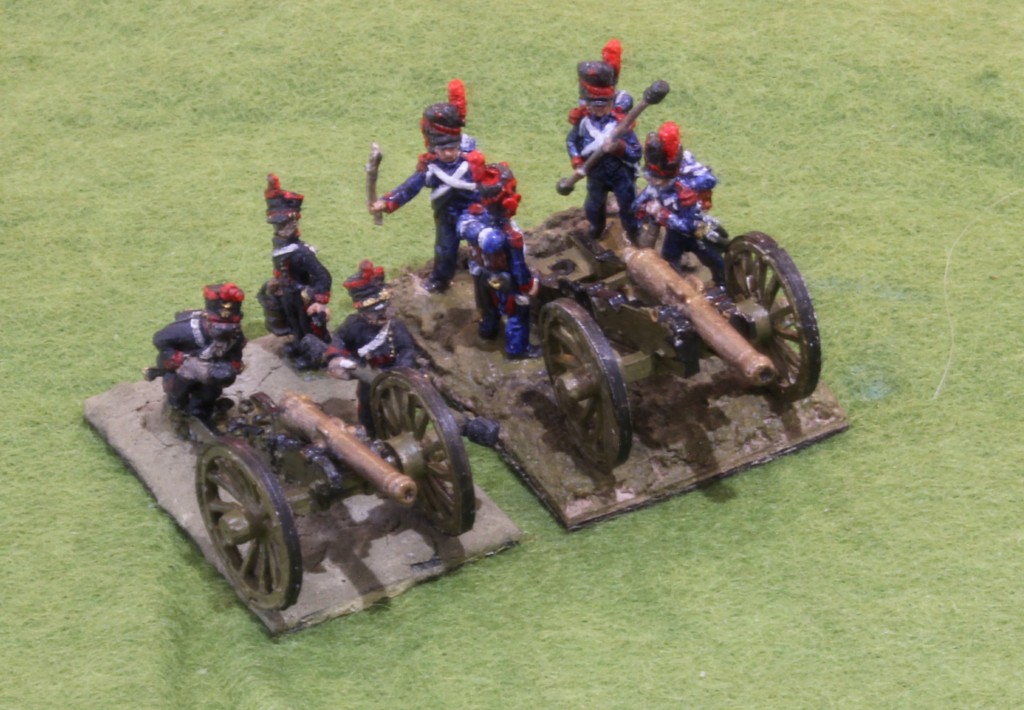
    And here next to my 12pdr, the latter with AB Guard foot crew figures:

    8pdr12pdr models

    How would I recommend readers model the 8pdr from scratch? No need to repeat my palaver. Based on LittleArmies‘ reviews, the Blue Moon 8pdr is probably perfectly good, if your budget can stretch a pack of 6 for £12 in the UK. AB also do an 8pdr, though I haven’t seen it and neither did LittleArmies. But I have seen their 6pdr and 12 pdr and a picture. It is likely to be nicely detailed, with the trails dead straight and a little narrow. But the wheels will be about the right size, and the elevating plate probably in the right place. And you can buy them one at a time (at £2.40 here in the UK). If you are using the 12pdr and 6pdr from AB (which I will post about in due course), then this may be the best choice.

    As I have already said, I don’t like the BH 8pdr, even if it was readily availalble; the OG version has the problems I have mentioned, as well as being sold in packs with crew (though these should be usable, unlike the BH ones). Incidentally, LittleArmies has two different versions of the OG artillery, neither of which match mine, though he wasn’t entirely sure where his originated from. So there’s also a risk that what you get now does not match ones I had in my 1809 Horse artillery pack, bought before Timecast days. The Warmodelling/Fantassin models are really quite horrid, and I would avoid them. LittleArmies says the XAN version works well, though I would find the wide carriage a bit off-putting. I haven’t seen the Minifigs version, but they tend to be a bit small. There will be many others out there which I haven’t seen, of course.

    Next article: the 12pdr

  • French artillery in 1/100. Part 1 – setting the scene

    Over the last months I have been overhauling and re-basing my French army. Apart from looking a bit tired I had two problems. First the infantry (all in 15/18mm scale, or 1/100) were based in one rank on a single base, one inch (25mm) wide and half an inch deep. I am moving to one inch squares, with the figures in two ranks of three. These look much better and are easier to handle. The deeper bases create a host of problems for game mechanics, especially in the grand tactical games that are my main focus, but I have decided to take those challenges on. The second change was artillery, where the bases are too deep (40mm for the most part – a shade over 1.5 inches). This was messing up limited tabletop space. So I am cramming them onto shallower bases (a bit wider if need be) with fewer crew figures.

    The first task was rebasing my mainly 1809 Old Glory infantry, which are the backbone of the army. This involved some conversions (mainly head changes) to get the elite company poses looking consistent, and painting up skirmishers (which came from Blue Moon rather than OG). This is now done, bar finishing touches to the bases. That still leaves the Imperial Guard, which I will leave for later. The next task is the artillery, where I don’t just want to rebase, but I want to completely overhaul my rather inadequate models, to align them better with what is currently known about them, and allow later campaigns (especially Waterloo) to be depicted more faithfully.

    I have been researching this for months. My aim is to have a complete range of models representing all the main field artillery types in use by the French, and substantial numbers of 6pdrs, which I currently lack.

    You would think that for something  as basically factual as this, it would be not too hard to work out what these various pieces looked like. But in fact the information out there is mired in muddle and misinformation. When I started the hobby in the 1970s, all the English language literature suggested that the French operated the Gribeauval system with the use of 4pdr, 8pdr and 12pdr guns an 6in howitzers throughout the wars. In fact it turns out that from 1803 these weapons were being replaced by a new system, the An XI, instituted by Napoleon. By Waterloo most of the artillery were 6pdr guns and 24pdr howitzers (actually a bit lighter than the old “6in” ones). Unfortunately most 15mm figures ranges were cast when the old story was still current, and when good data on the newer pieces were scarce.

    Two more recent publications have helped somewhat. The first, in 2003, was the Osprey booklet Napoleon’s Guns 1792-1815 (volume 1 is the relevant one) by René Chartrand (which I’ll call RC). Then came Napoleonic Artillery in 2007, Anthony and Paul Dawson and Stephen Summerfield (DDS). These are big advance, but I have found inaccuracies in each.

    The truth is that there isn’t all that much good data out there. Few examples of the pieces survive with their original carriages – though more of the tubes do. There are some technical drawings – which exert a disproportionate influence over how the weapons are represented. There are also some official papers and some contemporary tables giving some measurements. This was before the age of precision manufacturing and machine based mass production.  Standardisation was the theory, but less so the practice. Carriages might be made without detailed drawings to work from, or the drawings might be lost. Changes might be improvised in the field without any clear records. That leaves plenty of gaps into which people must speculate.

    I am not attempting accurate representations of the pieces – that is too much. My objective is similar to that of artists – to get something which is recognisable – and also I want the models to look more or less right next to each other.

    And before I move on to the detail, I want to say a bit about my collection to date. I started building my 15mm armies in the 1980s, using early (series 2 I think) Minifigs. I didn’t take to their artillery, and I quickly replaced them with Battle Honours in the 1990s. But I didn’t particularly like these either (or the heavier pieces and howitzers anyway), so I brought in a few Old Glory and AB models. That leaves me with a lot of old bits from which to make my models – especially including a few Austrian and Prussian models that I have acquired along the way. In order to help readers without these resources, though, I will offer guidance on how to reproduce these from stuff that is currently available.

    What I haven’t done, though, is gone on a spree of buying all the models that are available from the different manufacturers. I have made a few speculative buys of French and Prussian pieces (I am assembling a late Prussian army too – and their later pieces were quite similar to the French ones). I must particularly acknowledge a debt to fellow London blogger LittleArmies, whose review of 15mm models, including exchanges on TMP, has been of enormous value.

    I must also acknowledge help from author Kevin Kiley, who helped me find a number of very useful drawings, supplying me with scans of a number of them. Plus a number of contributors to TMP – including Stephen Summerfield (of DDS) – who have taken the trouble to illuminate a number of details.

    Next article: Gribeauval and the 4pdrs

  • Bloody Big Battles goes to Waterloo

    BBB Waterloo startAlas the rest of my life intrudes and my wargaming projects proceed at the pace of a snail. When my friend Rob suggested that we celebrate the bicentennial of Waterloo in the only way you really can, I was unready. My rules are still in pieces, untested, and probably unfit. Even my French army was off its bases as part of an overhaul and rebasing exercise (Rob provides the Allies). The house was entering chaos as a major kitchen rebuild was just starting.

    But these challenges help to focus the mind. I could get a reasonable number of French infantry ready. In spite of the domestic chaos I could get a temporary 3ft by 4ft table up for a day. But with limited numbers of figures available, and an even smaller table than usual, what rules to use? I thought of doing a tactical game, representing part of the bigger battle, another encounter or some wholly made-up scenario. And then I remembered Bloody Big Battles. This set of rules, written by Chris Pringe, is meant for a later era – the European conflicts from the Crimean War to the Franco-Prussian war. I had bought them because we considered their use for an 1866 game (Austro-Prussian War), but rejected them as we preferred the less abstracted feel of Bruce Weigle’s 1866. I had read on TMP that they could be used for the Napoleonic wars, which were not at such a technological distance from Crimea after all. These should fit the bill nicely – designed as they are for such large scales. I could even bring in my newly painted Prussians. We were on!

    Apart from the scramble to get enough of my French ready, the two big challenges were to get the rules and table ready. On re-reading BBB there seemed a serious deficiency in its treatment of cavalry. They used the same figure scale (1,500 per base), but were treated in much the same way as infantry, except with more mobility and limited firepower. This might be appropriate for the later era, when cavalry’s role was somewhat peripheral, and where they were dominated by firepower. But the Napoleonic era was different – the rules would not produce anything like the seminal Waterloo events of the charge of the Union Brigade, or the French cavalry charges. A major aspect of Napoleonic warfare was lacking. A second deficiency was the lack of any rules that would cater for the fortified outposts of Hougoumont and La Haye Sainte, so important to the actual battle. To rectify these gaps, and fix one or two other things, I put together some house rules. These weren’t my finest hour, as things proved, but more of that later.

    So far as the table was concerned, the challenge was harder. I have struggled to produce adequate representations of relief for my games. The more games I play, the more important I think this part of a simulation is. Terrain is a wonderful, complex thing that does not follow standard shapes. Dropping standard hills and other items onto a flat tabletop does not work. The gentle, rolling terrain of the Waterloo campaign are a big challenge. This folds in the terrain may not be big, but they are vital to an appreciation of the battles. How to create terrain quickly?

    The solution I opted for this time was to buy 60cm by 40cm by 10mm cheap sheets of styrofoam, sold for packaging (not the denser insulation material) and a hot knife. I then built the table up in contours, representing about 10m relief (ignoring the edges), fixing everything in place with masking tape. This took a few hours the day before – longer than I had hoped. Over the styrofoam went the standard felt blanket, with the help of some pins and water spray to help it conform more closely. The rivers, roads, woods, etc were hastily added using masking tape, green flt and a few stock items of 10mm and 6mm scenery (in spite of 15mm figures!). You can see the result in the picture above of the start of the game. The non-relief bits (especially the rivers) looked awful, but they are a work in progress. The relief looked fine though, and was the best I have produced for any of the games I have hosted. My main learning is that it would have been better to build up modules, of say 30cm by 60cm, rather than build the whole table up with interlocking bits of foam. This makes dismantling, storage and reassembly much easier – and may even be quicker to put together – as working on such a large canvass can do your head in a bit.

    And so the 18th June arrived and we were set.

    The course of the battle

    The game started at 11am in game terms, and about the same in real time, with the historical start positions and using Napoleon’s battle plan. My memory of the exact sequence of events is a bit vague, but this is my general recollection.

    On the French left things got off to a bad start when Jérôme refused to move. Foy attacked Hougoumont in his place, and suffered a -5 dice difference on the assault, which left him retreating with a base loss. Subsequently Jérôme did move in and capture Hougoumont, which proved much easier under my rules than I intended. There was a counterattack by the Guards, but Jerome held on. But he made no headway. He lacked support on the ground to his right, which was dominated by the British artillery. French artillery reinforcements did help reduce the British artillery, and an attack by the cuirassiers on the Guards as they counterattacked was beaten off. The French dithered a bit, though managed to take La Haye Sainte after d’Erlon’s failure there.  But as the British threw all their horse artillery in to create a 3 unit grand battery (supposedly over 100 guns), Bachelu and Foy were thrown into the centre in an attack right along the line. The cuirassiers took on the newly arrived artillery. But this attack failed, apart from disrupting the British artillery. Foy and Bachelu were wiped out, leaving Jérôme isolated.

    On the French right things went worse still. Although the initial French bombardment made some headway, the leading French division in the centre was disrupted by long range artillery, meaning that the attack was severely weakened, and failed across the line. At one point the British conducted a vigorous counterattack with Picton and Bijlandt, which attracted a cavalry charge, which bounced off. As the battle progressed three of d’Erlon’s divisions were destroyed. One by cavalry, another by a good throw on combined artillery and infantry fire, and the third from a double draw in an assault which took out 2 bases.  Durutte managed to take the Papelotte complex and hold it for a while, but was eventually ejected with loss. Eventually the French threw in the cavalry and the Middle Guard in a general attack across the front (as already referred to). The Middle Guard made some headway, but in the end the attack failed, and the Middle Guard was destroyed. The British lost Picton and Best and a light cavalry unit. They brought in their heavy cavalry and the Brunswick division to shore things up.

    The French did quite successfully keep the Prussians at bay though. The Prussians were as aggressive as they could be, and drove the French back some distance, causing some losses on Lobau. But by 7pm they had not got beyond the Papelotte complex. The Prussians had overwhelming numbers, but found it difficult to advance quickly enough.

    It was about this point that I threw in the towel as the French player. I had very little infantry left. Reille was reduced to an isolated Jérôme. D’Erlon had a weakened Durutte, drawn into holding the Prussians back. That left two Guard units. The British infantry was a bit battered but still looked very robust. The French cavalry was faring much better though – but there was little it could do against all that infantry!

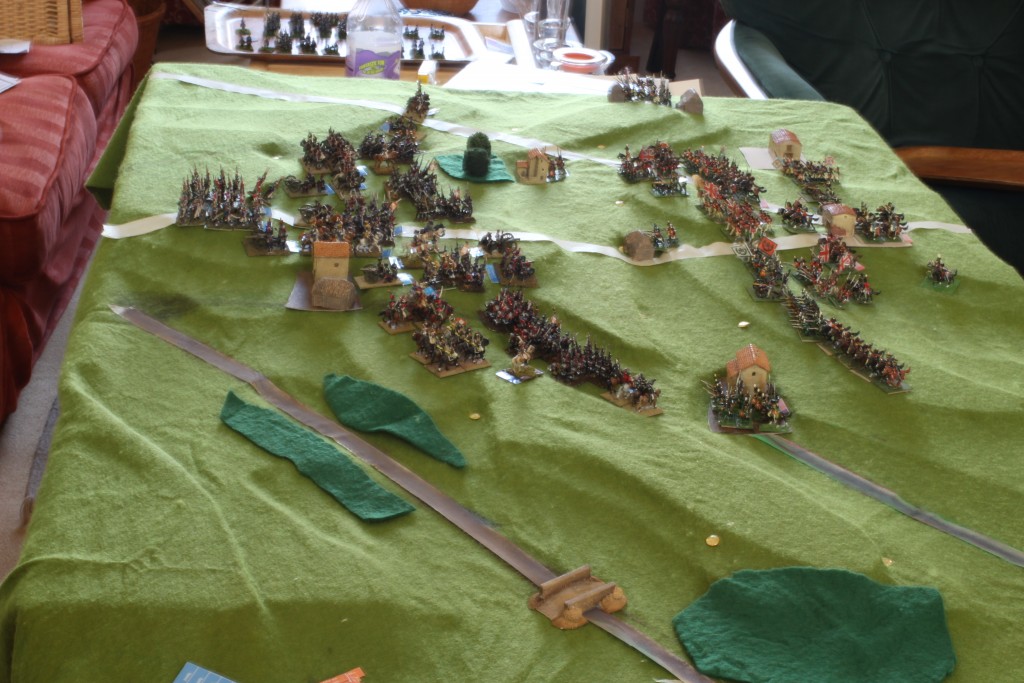
    This was how things looked at the end:

    Waterloo BBB the endOverall verdict on the battle

    The game followed the overall historical path – except that the British did not suffer as heavily, the French cavalry fared better, and the Prussians did not advance as quickly. My performance as Napoleon was a bit tired – I needed to fight a tighter, more vigorous game in those early moves.

    The game was affected by the rules. My rule modifications on outposts and cavalry both worked badly. The former were much too easy to take, but cavalry had very little ability to make much headway against infantry – though did not suffer heavy losses.

    Also I was a bit generous with the British. On the right they had two big, six base units, rated as veterans. The French mainly had three base units, rated as Trained. The big units had a lot of stamina, while the smaller units disappeared after their second base loss.

    We were unfamiliar with the rules – and the tactics that were needed to succeed. We didn’t play them accurately either. We weren’t recovering losses until very late in the game, or reducing fire from disrupted units.

    For the attacker the best tactics seem to be to create disruption and then take advantage using fresh troops before the other side had the opportunity to recover. By and large that disruption comes from Defensive fire and assaults resolved in the enemy’s previous phase – or a failure to recover from disruption inflicted in your previous move.

    Reflections

    Scales

    With 1,500 men per base (750 cavalry in my adaptation), against the recommended 1,000 for the ground scale, I was expecting it to relatively uncluttered. It wasn’t. True, Reille looked a bit spread out at the start, and there was room enough to deploy the British – but the French reserve areas were very congested. And as the forces closed it got very crowded. Similarly with the Prussian attack – though Lobau did look a bit challenged to defend his front, that worked out OK in practice.

    I think 1,000 per base might just have worked. It would certainly have reduced the number of three base units – which lacked stamina. But with my DTN rules have 750 infantry or 250 cavalry per base – and that adds up to a major design problem. A shame because the distance scale worked fine for Dining Table brief – in what was a historically compact battlefield. I want to leave four foot tables for bigger battles so changing the distance scale isn’t really on.

    Core rules

    Unfamiliarity didn’t help us – but I was struck by the strength of the core design, reducing complications to the minimum. The temptation is often to add details, but further thought often suggests that the concern is met within the rules. Overall they fitted the dining table brief rather well. They gave a decent two player game in a relatively confined space. The core mechanism, adapted from the ACW Fire & Fury rules, is quite an elegant one, if a little abstract.

    Still there are frustrations:

    • Firing was very hit and miss – by and large needing high scores to inflict disruption and very high ones to inflict base losses. Mostly it was a lot of dice throws to no effect. The heavy lifting in the combat rules was done by the Assault. This was the main reason, I think, that cavalry got away with so few losses. This is partly a common problem with representing small but cumulative losses on such granular units – a bane of many rules that are designed to play fast. It may be that the original rules are too harsh on smoothbore muskets – it is less easy to criticise the artillery rules.
    • The Assault was rather unsatisfactory process. I remember my friend George complaining about it when we rejected it for an 1866 scenario. Looking back at his emails I think the rules as written are not as bad as we feared – apart from the cavalry v infantry problem. I didn’t think that there was anything inherently unsatisfactory with the way the factors were calculated, apart from the special situations covered by the house rules. Two things jarred. First was that the process of comparing the difference between two dice scores and then modifying is quite hard work, especially if the modifiers work in two directions. Second the “draw” result results in two lost bases, which is a very severe result, especially if it repeats, when dealing with typically quite small units.
    • Command and control works purely through an activation step with a modifier for being within radius of a leader. I prefer something more hierarchical and based on PIPs.
    • There seems quite a serious advantage for larger units. Smaller units are liable to disappear as they hit the minimum unit size. The two 6-base veteran British units (Alten and Clinton) proved very hard to make headway against.
    • “Low on ammo” is a particular irritant to many with this rules system. It is interesting that Chris retained it. You need some kind of mechanism to ensure that artillery especially doesn’t just fire forever – but since an 11 or 12 was required for any decisive result, it immediately posed a penalty. It’s quite hard to reconcile this with historical narrative.
    • Charges against artillery. What happens? The rules are unclear about what happens when they are disordered and compelled to retreat – do they limber? Subsequent close reading gives the result that losing artillery are silenced – which means limber up and disappear. My feeling is that unsupported artillery should be a bit more vulnerable.
    • Silencing artillery. Sound in principle, but making them limber up and retreat doesn’t feel right – though this may just be the easiest play mechanism to get the right overall outcomes.
    • Artillery is dealt with very abstractly, with each unit representing 36 guns. I don’t think this approach worked too badly overall – but the frontage of 150m for a unit would take many fewer pieces. So it is possible to build a very compact grand battery, able to deliver a huge weight of fire on a single unit. When Wellington did just this in the game by bringing forward his horse artillery reserves.

    Overall I think some of this is because of poor calibration for the Napoleonic era, since we used the original fire factors, for example. A bit of recalibration and tweaking could accomplish much. .

    House rules

    A bit of a disaster, which rather spoiled the game. A lesson to be learned there! Always play test.

    I think halving the number of men per base worked OK for cavalry. I’m not sure that reducing their vulnerability to firing was right. The big trouble was that it was much too hard for cavalry to overcome infantry. The new Square mode proved largely irrelevant – but cavalry also needed to suffer more (I had assumed that defensive firing would do the trick – but this did no damage in multiple attacks). This needs recalibrating.

    The outposts proved quite easy to take. The terrain plus points were matched with depth formation and numerical superiority – even as I limited the latter to one point. Attacker occupation was unclear.

    I added an artillery bounce-through rule which worked OK, though I hadn’t defined whether it affects the low on ammo rule. However there was nothing stopping the British engaging in offensive fire – to quite good effect. Wellington didn’t do this in the historical battle because it made his artillery more vulnerable to counterbattery fire. I had deliberately not created a rule to reflect this, as it would be another bit of complexity.

    I also incorporated a horse artillery rule, since both sides were able to deploy it on a grand-tactical scale – this worked quite well.

    Resources

    If you are interested in using BBB yourself for Napoleonic battles, or want to look in closer detail on how I set up the Waterloo battle, then I have posted resources here, under Waterloo. The rules have been revised to take account of many of the issues mentioned above, though I have not had the courage to recalibrate the firing rules. BBB is available from a variety of dealers, like Caliver Books here in the UK

    Unfortunately the one thing that is missing is the table map. This is on a very non-digital piece of squared paper with pencil and crayon markings on it – with features other than contours only vaguely represented. Doing a digital version would not be impossible, but would take more time than I’m prepared to give! On contact I can email a scanned version though.

  • Vitoria article now published

    Better late than never! Miniature Wargames has now published my article on Vitoria 1813. This is a signal for me to  get this blog up and running as proper public proposition. So far I have kept its light under a bushel.

    The resources on this project referred to in the article, are on the Battles section of the site. This is the sum output of many months of research!

    My current project is the production of my 15/18mm Prussian 1815 army, and the upgrade of a multi-period French one to oppose it. Some posts on this shortly.

    Meanwhile the next version of my rules is slow going, as the rewrite is proving very radical, and so slow going. This is liable to be a bit quiet for now!

  • Command & control in one-hour turns

    The Dining Table Napoleon V3 (the changes are going to be more drastic than implied by V2.1 as I originally intended) will have a one-hour turn. I am thinking through the implications for a command control and movement system.

    First each turn will comprise a distinct episode of the battle, rather than a precise time period. They will be named after hours of the day (which helps the simulation feel), but that is only to give a rough idea of when events happen. action will tend not to spill over from one turn to the next.

    An hour is a long time, though. Six turns might encompass quite an important battle like Ligny. That creates some interesting design issues.

    Fist thought: the side with a plan – or clear intent to move – at the start of the period move first and moves farthest. Perhaps through the use of stylised orders commands (up to corps level, perhaps) can have the following status:

    1. Active: movement. Changing location, usually in some kind of march formation.
    2. Active: bombardment. Deploy artillery and fire for a prolonged period.
    3. Active: engaged. Attacking enemy units.
    4. Passive: defensive. Deployed for defensive action, and resisting attack.
    5. Passive: reserve. Awaiting events.

    To be active implies either a plan compiled in the previous period, or direct order from the commander at the start of the turn – or a lower commander on his own initiative. The former means some kind of stylised order carried over. The engaged order implies that the enemy is close at hand – within some kind of threat distance. That means close enough for an attack to be delivered without giving the enemy.

    First issue. When and how are plan orders issued? Normally this would be done at the start of the turn in a Command phase – and then made subject to activation. Beyond using a stock of CPs that might have been accumulated in earlier turns, this does not reflect the time lags. Maybe a new orders phase happens at some point in the turn before? But how to do that without making it much more complicated?

    Second issue. How are pre-issued orders given a shelf-life? Perhaps groups are given a stock of order chits, which they consume?

    Be that as it may the period (as I should call the turn, in DTN speak – turns mean something different) starts with the execution of items one and two. Active movement is carried out, and batteries deployed and (perhaps) targets nominated. These might be done simultaneously. Units in march order get quite a long way in an hour, so some quite big distances could be covered. Couldn’t the enemy intervene? what happens when units from opposite sides bump into each other. An obvious rider is that this type of movement stops as threat distance is reached. If it is stopped early in the movement phase, then further activity should be allowed. Perhaps the concept of single and double moves can be revived from earlier versions of DTN.

    Then come the attacks from category three units. If two opposing units bump into each other then it probably best to ask which come first. This could be done case by case, or one side could be said to have the initiative and move first. On the whole I prefer the latter. For impetus attacks (i.e. not skirmish firefights) we then do one round of combat.

    We then need to move into a sort of reaction phase. This involves shorter moves. it may be that the main command phase happens here. Reaction orders are issued, as well as orders to be executed in the next phase. What happens next is a series of actions that might originate from conventional command and control, or might be initiative reactions. There is another round of impact combat. And maybe some kind of breakthrough or pursuit phase.

    Finally we get into the attrition phase, where more protracted combats are resoled. This includes artillery (if targets haven’t moved), skirmish combats. There is scope for prolonged close combats too, where two high stamina combatants are deadlocked in impact combats, both infantry (think Albuera) and cavalry (I believe Friedland and Borodino featured these).

    Finally there needs to be some kind of morale phase.

    This is building up to a complex period structure with simultaneous and interchangeable initiative elements. This has strayed somewhat from my earlier idea of one side having a clear initiative, and losing it being potentially damaging to morale. That idea might come back, though.

    A further question when using a complex turn structure is whether to stick to strict phases across the table, or follow something more event driven. For example a unit delivers a charge in the first phase, and we get round one of the combat. But across the whole period this might develop into a multiphase affair, including reserves being brought in, counterattacks, breakthroughs and pursuits. There is something to be said for dealing with all this there and then, drawing in other units as required, and (taking them out of any subsequent reaction movement).  I find this approach quite attractive.

    What of command points (CPs). These played a central role to V2. But the idea of carrying them over from one period to the next loses its relevance to the longer period. Still I like the idea that these represent information, which is the basis on which orders can be made (could change them to Information points to make this explicit – though CPs are a widely recognised idea). A high stock of CPs means more orders can be issued. If the commander occupied a vantage point (or has access to one) then he gets more information. As the battle develops there might be both metaphorical and literal fog of war constraining what he can do. Information decays though. More food for thought.

    Next I want to think about what orders might mean at each level of command.

  • Vitoria historical narrative

    Vitoria Map 1

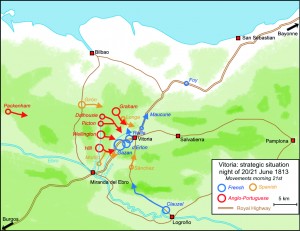
    Finishing the resources I am posting for my Vitoria project, for now, I have posted a historical narrative on the battles page, together with a brochure on the battle published by Vitoria’s tourist office on the battle.

    The historical narrative is based on an article I wrote a year ago, but which wasn’t accepted for publication. It was the first part of a two part series; the second covered wargaming the battle, and evolved into the scenario already posted. The editor wanted more wargame and less history. It is not very detailed, but gives a narrative that is much clearer, and I think more accurate than most versions that get published. That is partly because jean Sarramon provides a more complete narrative from the French side than the usual sources used by English-language authors, which throws a bit more light on things. Also my researches into the orders of battle gives a stronger grasp on the numbers involved than most. And I haven’t followed the British fashion of having large slabs of direct quotes from memoirs to carry large parts of the narrative. This can help provide an atmosphere and provide some interesting angles – but it isn’t really proper history. The historian needs to provide an opinion on how reliable theses accounts are.

    The Vitoria brochure is interesting. It does not provide much in the way of historical narrative, although it has the best published battle map that I’ve seen – for showing the movements of the combatants anyway. it also provides some details and pictures from a more local perspective, which helps fill out the picture.

  • Vitoria scenario and resources

    Turn 8

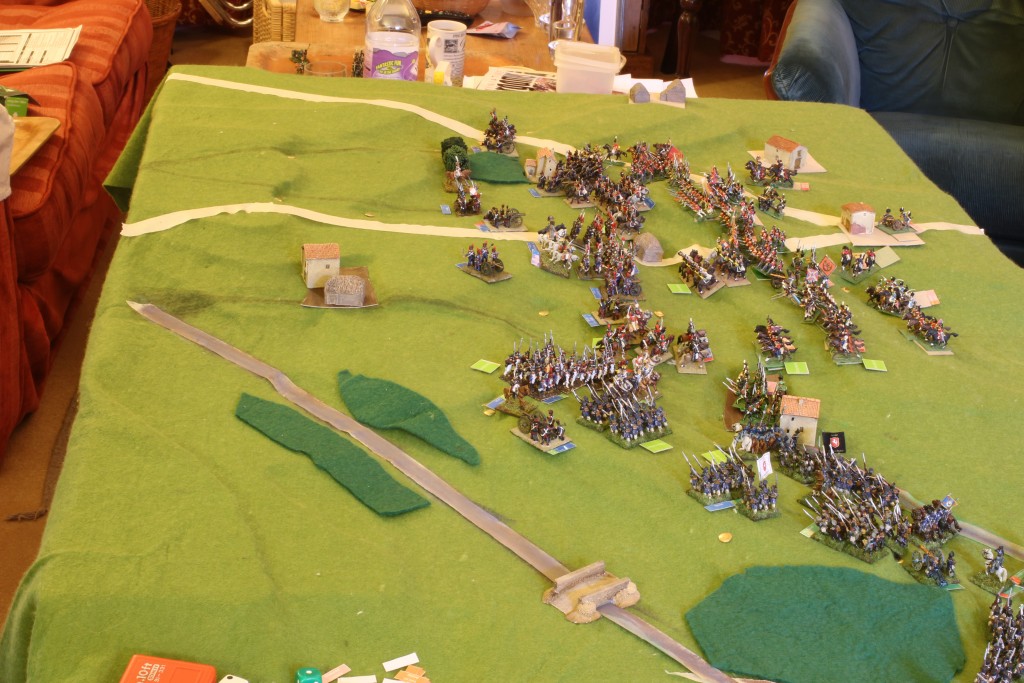
    I have now posted  a scenario and orders of battle for this battle, my first project for the Dining Table Napoleon. This is based on a long process of research. I am particularly pleased with the orders of battle, which are much better that the mediocre stuff that is usually published, especially for the French. Of course, it just a best guess based on triangulating incomplete information – but that is what wargamers need!

    This is one of the most important battles of the Peninsular War, and marked the end of French rule in Spain, though they continued to occupy some parts of the country after that. Strangely, though, it gets very little coverage compared to many other Peninsular battles. There is no book in English dedicated to it beyond an inevitably light-weight Osprey. Many accounts that do appear are a bit garbled. The best in English remains that of Charles Oman in his Peninsular War series – though I have not read Michael Glover’s account. However it clear from works written after Glover and referencing him that he does not come up with much that is new.

    The best work is in fact in French, by Jean Sarramon, published in 1985. This makes better use of French sources, and provides a pretty convincing detailed account – if a little pro-French. I am not a fluent French speaker, but I did manage to translate the key sections of the book.

    As a wargame, Vitoria is a bit one-sided, but nevertheless it is interesting. It is fought down the table rather than across it, with battles on two fronts eventually converging. I have also designed an alternative scenario, injecting more uncertainty into proceedings by allowing both sides to change their battle plans, and for the French to potentially have some more forces available. I haven’t played this – but I hope to get the opportunity someday!

    Also included in orders of battle are forces in the vicinity that did not take part on the day. For the French these include Foy’s division, and a nearby brigade (Birlet’s) that was available to him. A firmer order from the French command would have ensured these forces’ presence – and Wellington probably expected them to be there. In addition I give details of Clauzel’s force, whose presence was never a real possibility – Wellington timed his attack to specifically to pre-empt him. On the Allied side I give rather unsatisfactory information on the Spanish general Giron’s forces, who arrived too late, and Pakenham’s British division,

    It is too much to hope that anybody else will actually play this scenario with my rules – but I hope it is of value to any players wishing to do their own version of this interesting battle.

    Apologies for the poor quality of the picture accompanying this post – which comes the game I played last November. The original looks fine on my screen. It seems to be an issue with the way WordPress displays pictures inserted into posts. 

  • Rules published!

    I have now posted a pdf version of my rules, which can be found on the Rules page of this website.

    This is not a finished article. They are a modified version of the rules we used to play Vitoria last November, and as such are a perfectly decent and playable set of rules. One base is a brigade; one inch (25mm) represents 200 paces (150m), which we stretched to 267 paces/200m for Vitoria. One game period is about 30 minutes. Unit strength points are based on both numbers and quality, a bit like Grande Armée. My recommended base size is 50mm by 30mm, but you can use 50mm squares at a pinch .

    I invite readers to download these rules and give them a go and let me know how they get on int he comments.

    But I’m not happy with these rules, as they don’t fully fulfil the brief. Vitoria was a bit of a slog even with four players. No more of a slog than most rules (e.g. Grande Armée) would have been, but not on the spot. There are a few other things I don’t like as well – the role of artillery did not feel quite as I wanted, though the modifications should help.

    So I’m contemplating a pretty major rewrite. The most radical change would be a move to a one-hour period, like Volley & Bayonet, as well as following those rules on strength points. This has pretty serious design implications, so it won’t be quick. I may produce more updated versions of my 30-minute period rules in the meantime.

    Getting the rules to this stage has been a bit of a triumph, though. It has taken many versions to get to something decently playable, from the original evolution from Fast Play Grande Armée house rules. I owe a large debt to George Street, who helped me through the later iterations.

  • Vitoria article on the way!

    I have submitted the draft of an article to Miniature Wargames which seems destined for publication. The editor has not rejected it yet anyway – which he did to my effort a year ago. If this article does get published it will effectively mark the public launch of the Dining Table Napoleon project.

    The article is an account of the Vitoria game we staged last November, set in parallel with an account of the actual battle, and accompanied by pictures of the game. It will point readers in the direction of resources published on this site.

    My effort a year ago (which followed what the previous editor of MW seemed to want) was a much more serious effort: one article on the historical battle, and one on how to set up a historical scenario. But no actual game – and that is what readers were more interested in. It took a major effort to get that game going – but it does give the project a much better basis to bring to the public. I didn’t have a working set of rules a year ago – and was resorting to the use of Grande Armee.

    Still the original articles were quite good – and I will publish revised versions here.

    Meanwhile I need to finish those resources: the rules, detailed orders of battle and scenario notes.