My third article on my latest batch of 1943 British covers the vehicles: three Bedford medium trucks, three carriers, two Quads with limbers, and a CMP 15cwt light truck. I’m not showing the Quads or the OP carrier in this post – but you can see them in my previous one, along with the artillery.
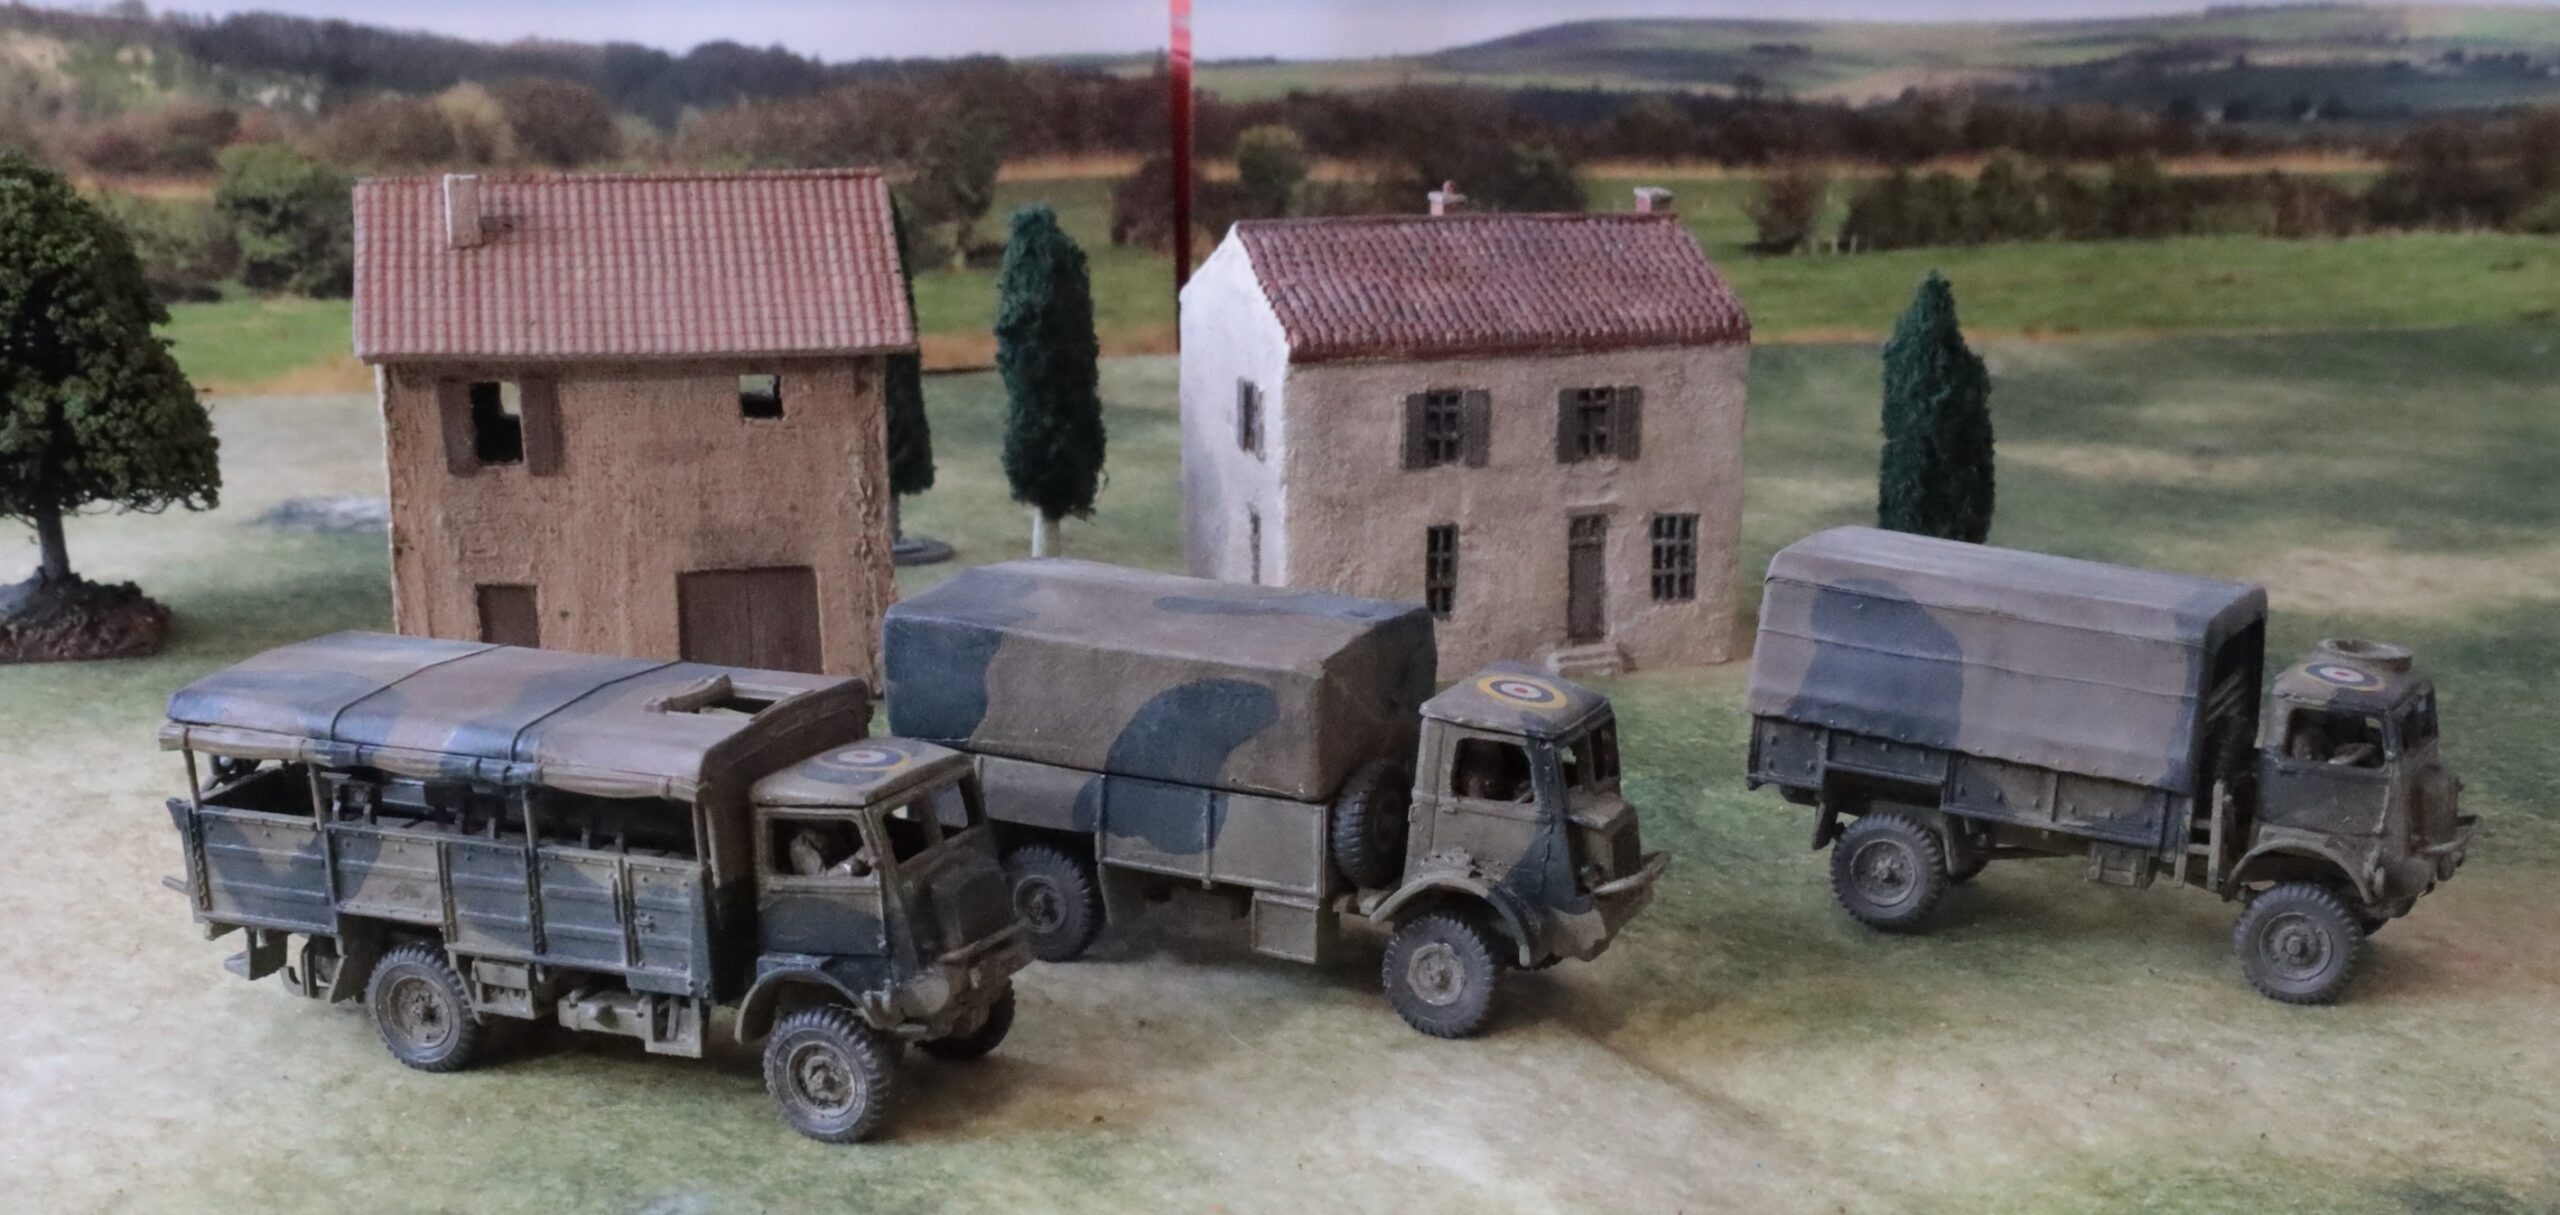
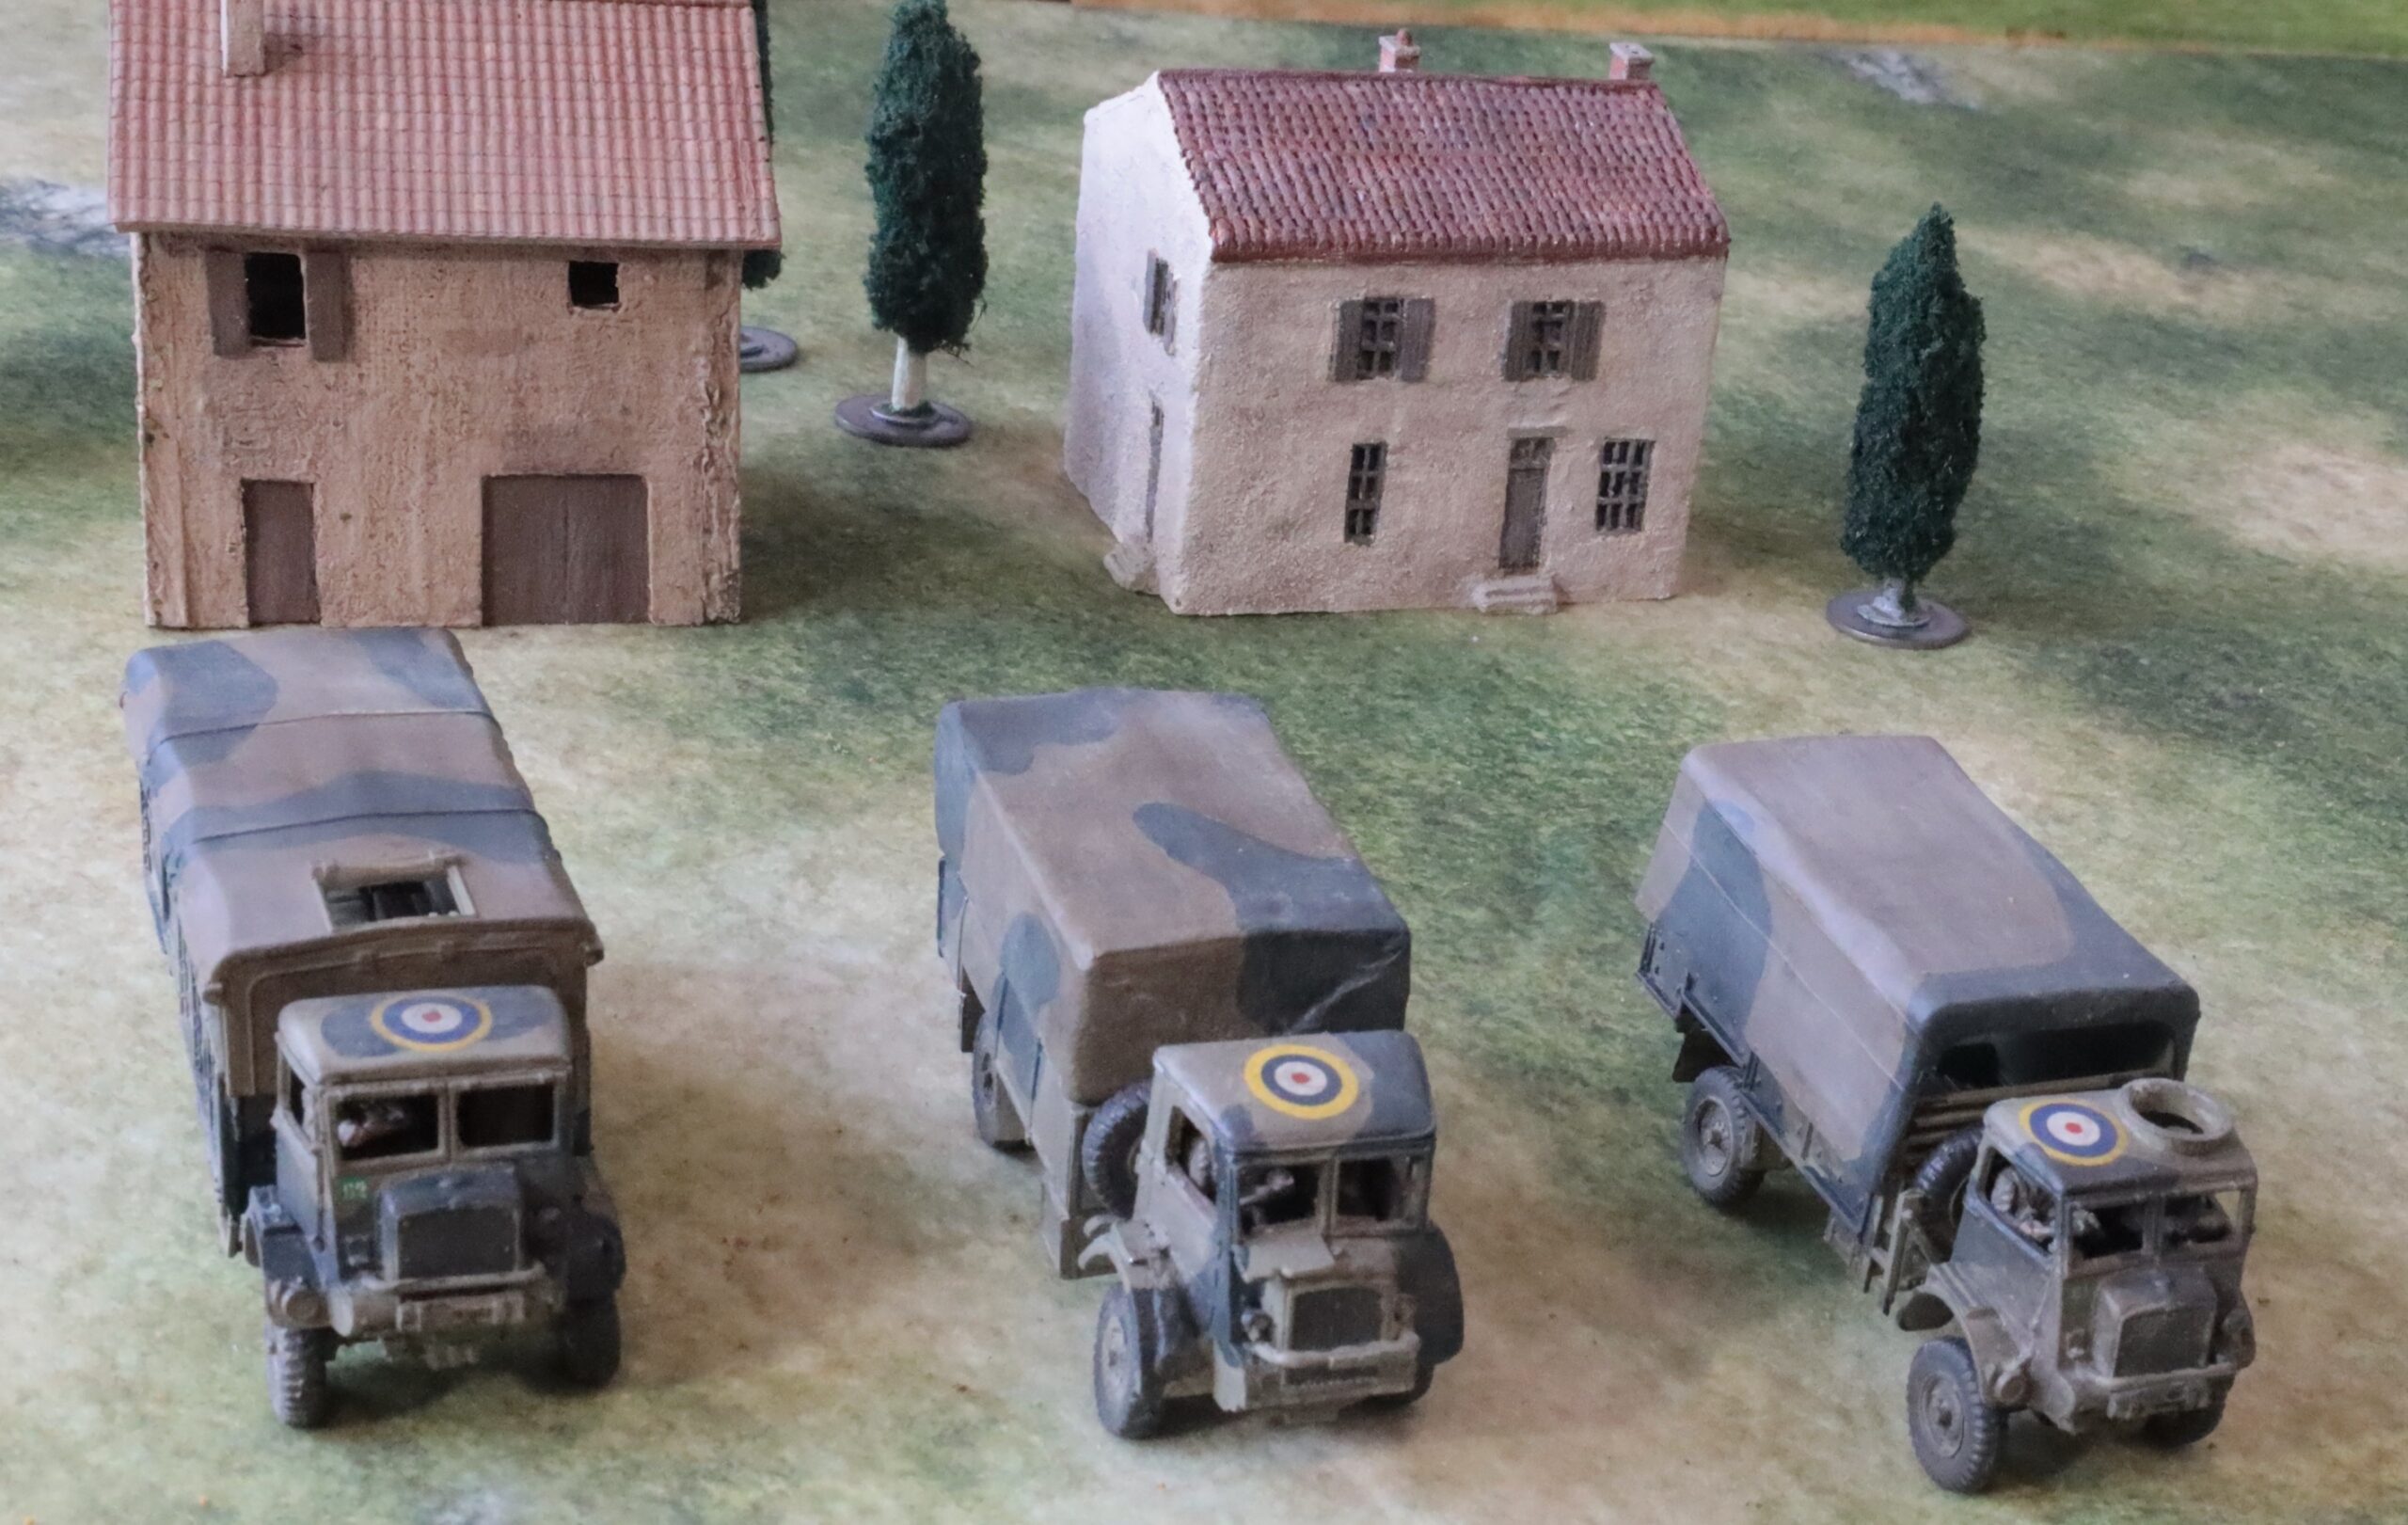
First the big trucks. These Bedfords were one of the mainstays of the British war effort, and the easiest medium trucks to acquire as models in this scale (20mm, 1/76 or 1/72). I had an Airfix kit of the QLD (general purpose) and QLT (troop transport) trucks, and a metal SHQ model. The Airfix models are proper, detailed kits with lots of parts, that require intricate assembly. The SHQ model is much cruder, though also requiring assembly, but with many fewer parts. Neither came with crew. For the Airfix models I used AB figures, though they weren’t an easy fit. For the SHQ model I took a very crude figure from a vintage Airfix Matador I had in stock. That was actually fine – it’s waste of good quality models to put them in an enclosed cab. The Airfix models are nice – they are modern ones, rather than reissued Vintage classics, which I’m going off a bit. The SHQ model, though, was simpler to put together (though vague assembly instructions didn’t help) and looks very similar at distance. Incidentally, the Airfix models came with clear plastic for the windscreens, etc., but I couldn’t lay my hands on them at the critical moment – and would have made it even harder to fit in the crew. None of my other models have clear plastic windows so I wasn’t going to stress about it – though they did turn up later.
After my initially negative impressions of SHQ, I find they are growing on me – they look much better than you would think when they arrive unassembled, and have a nice weight when handling. Their figures are growing on me too – though I prefer the beefier AB ones. Unfortunately SHQ have ceased business. They have been bought by Grubby Tanks/Britannia. As it happens, a few weeks ago I was helping the owner of Grubby Tanks to unload his stuff at the Cavalier wargames show in Tonbridge (put on by my new club); he says that he’s going to put the SHQ items back on the market later this year. I took the opportunity to buy some items of light artillery from his Britannia range – which look quite similar but are significantly cheaper. None are assembled/painted up yet, but include one of the 2pdrs I will need for Medinine (I also bought a German 20mm flak gun and a 75mm infantry gun).
Here’s another view:
And now for my models in desert colours, the CMP light truck and two carriers:
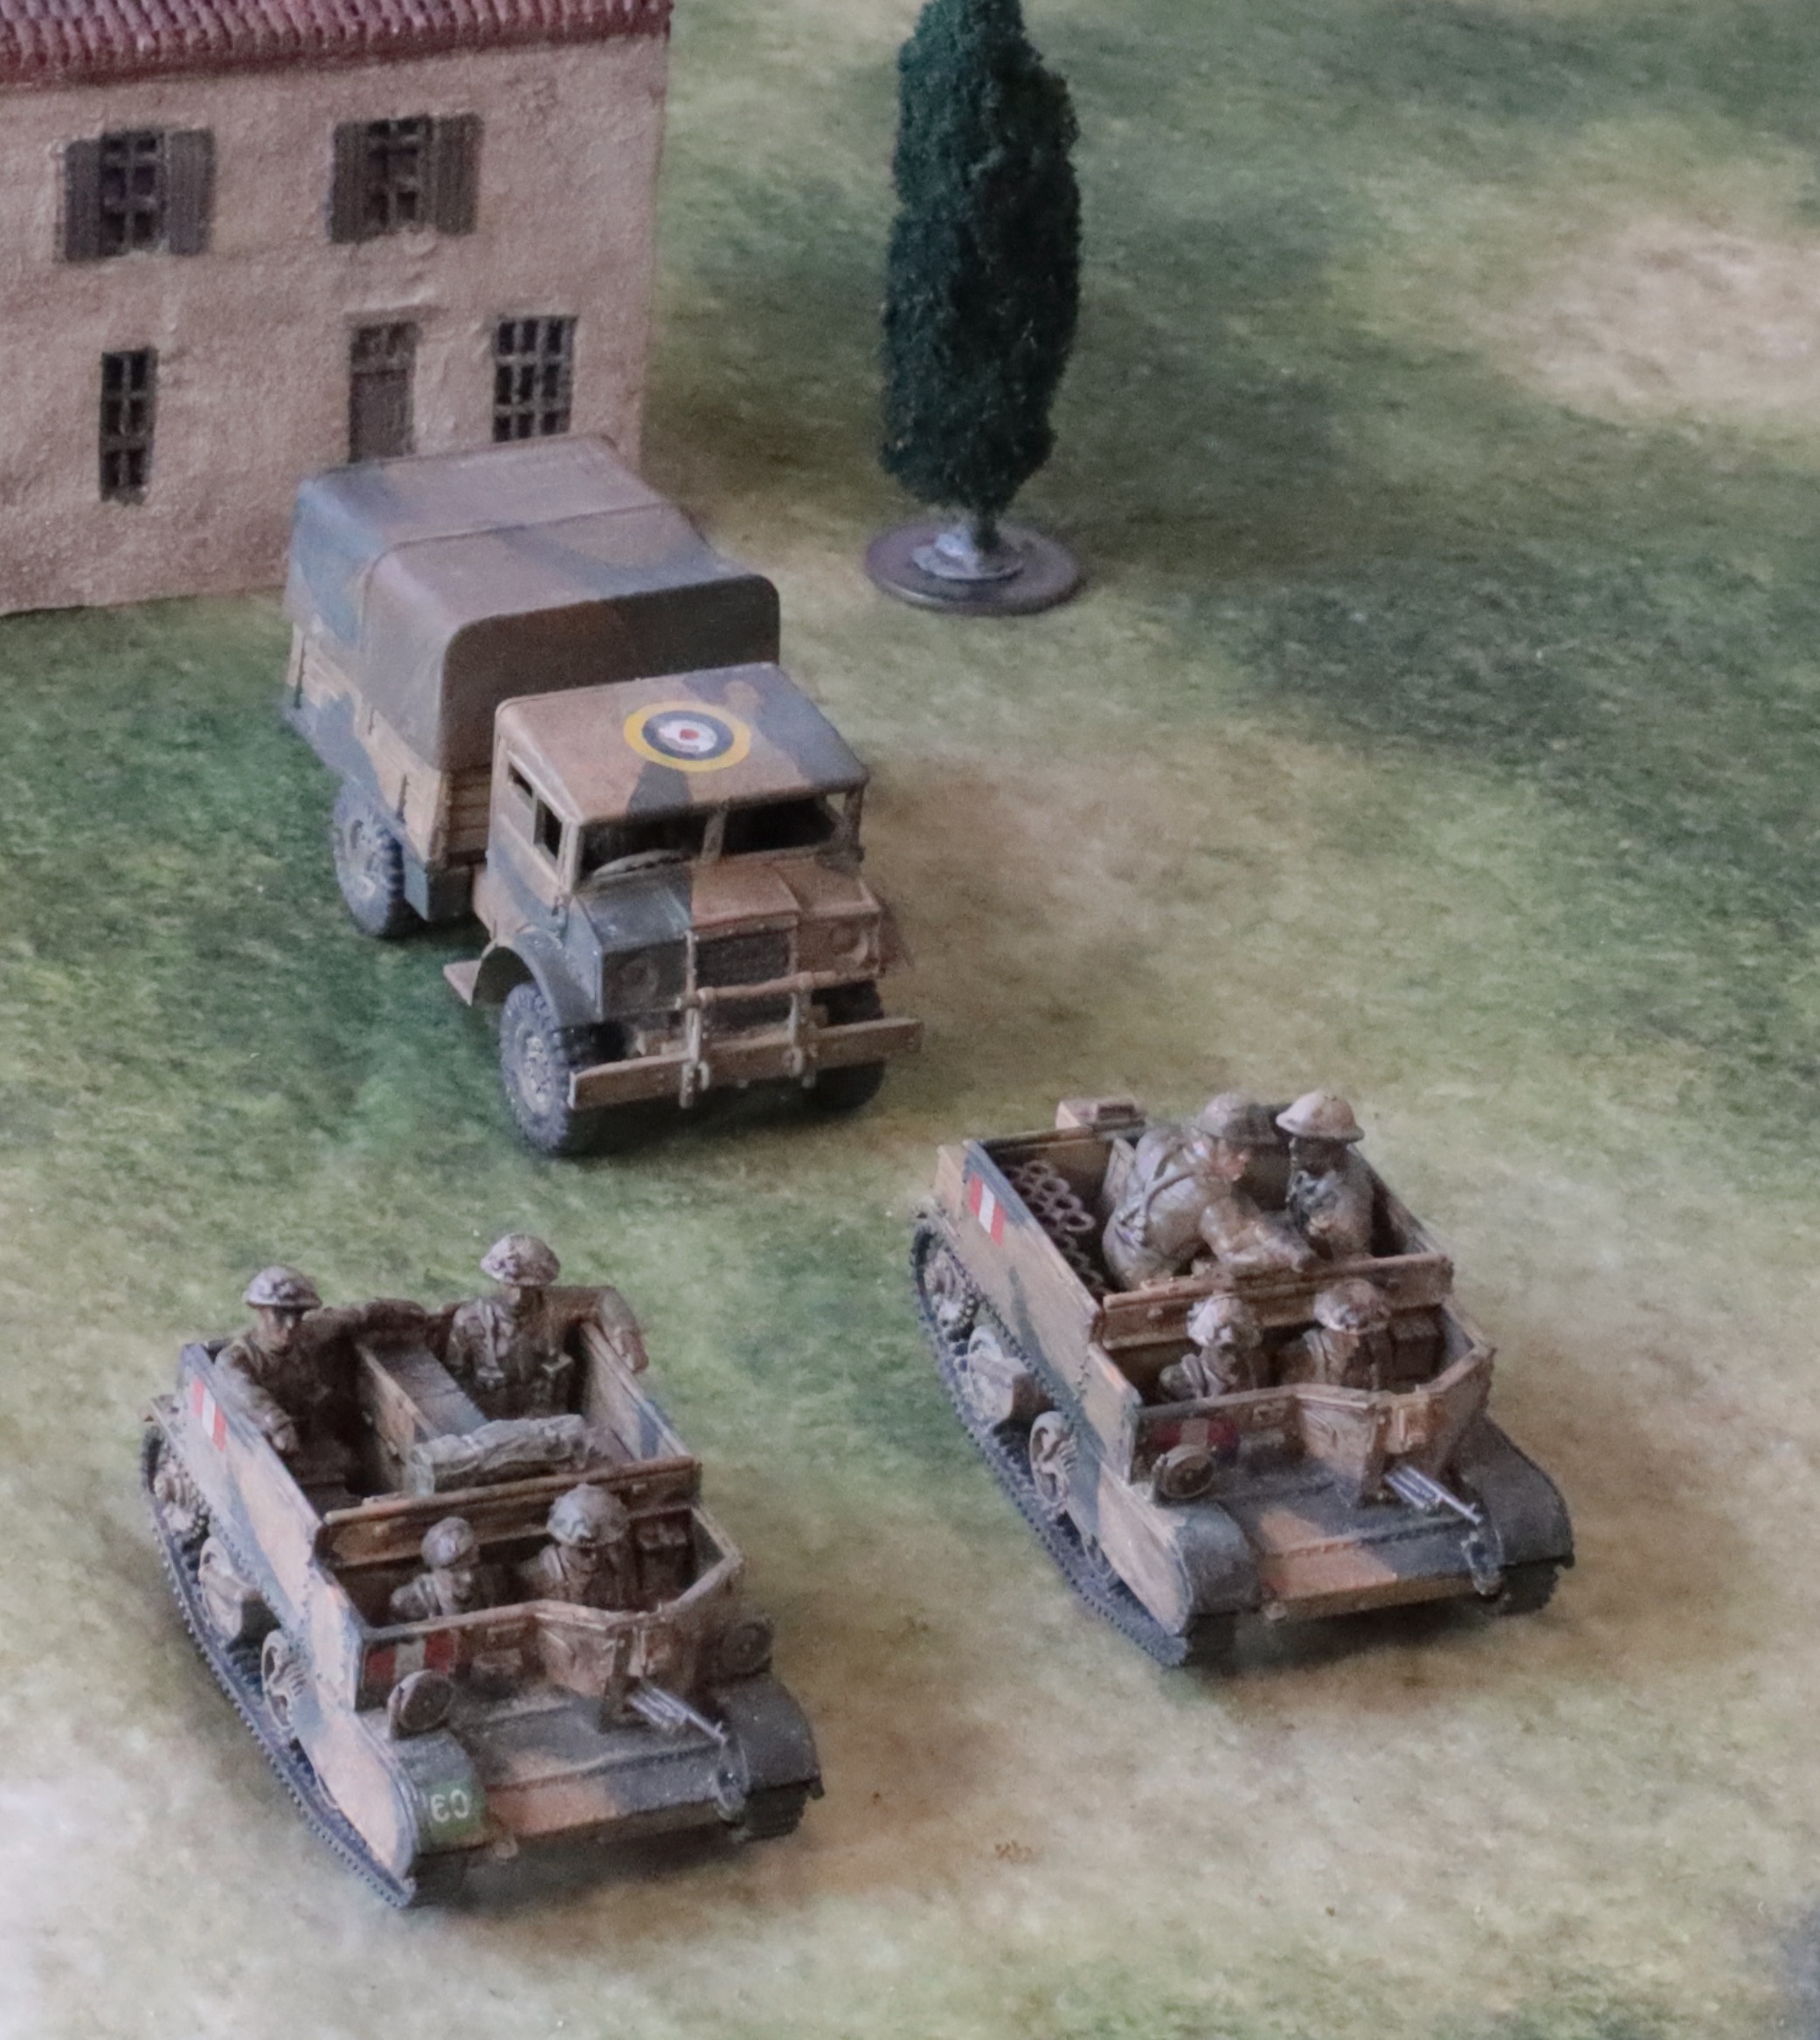
These are all from Plastic Soldier. The CMP truck was easy enough to put together, but it is hard to get excited about it. It’s a very basic model with no options. I left the tilt loose so that I could play it without should the urge take me. This vehicle has no clear role in my set up, but it is available to shift 2-pdrs or Vickers guns if needed. The carriers are a bit more interesting. The are from the PSC Carrier Variants set. The one on the left is the 3in mortar transport. The mortar couldn’t be fired from the vehicle (unlike the German equivalent with the SdKfz 250), but is stowed away at the back. The crew are the standard crew for the PSC “generic” carrier. The one on the right has a 2in mortar in firing position – this weapon could be fired from the vehicle. Since the light mortar was part of the standard equipment of a carrier platoon, this vehicle will stand in as transport for a carrier platoon in my setup.
The Carrier crew are those supplied by PSC. I’m not a fan of these – a lot of PSC figures seem to be sculpted in 15mm and scaled up, looking a bit clumsy. AB make carrier crews, which would be easier to fit into these models than the slightly smaller Airfix ones – but they are rather pricey and don’t have the 2in mortar in action. From a distance the PSC crew work OK. The generic crew are appropriate for NW Europe with scrim on the helmets; the driver comes with a beret, though the head is separate and easy to swap. I hadn’t woken up to the idea of sawing off heads from the desert uniform to use on the NW Europe bodies yet, though the desert heads would have to come from other PSC models – so I left the scrim helmets on, which isn’t realistic either for 1943 or this theatre. The supplementary figures on the Variants sprue are OK in this regard, though not especially nice mouldings. I added a few boxes and bits to make the carriers look a bit more used. The models worked well, with one exception – it’s hard to fit the Bren gun in the front slot when there is crew in the front seat. You have to skew it a rather awkward angle fairly early in the assembly process.
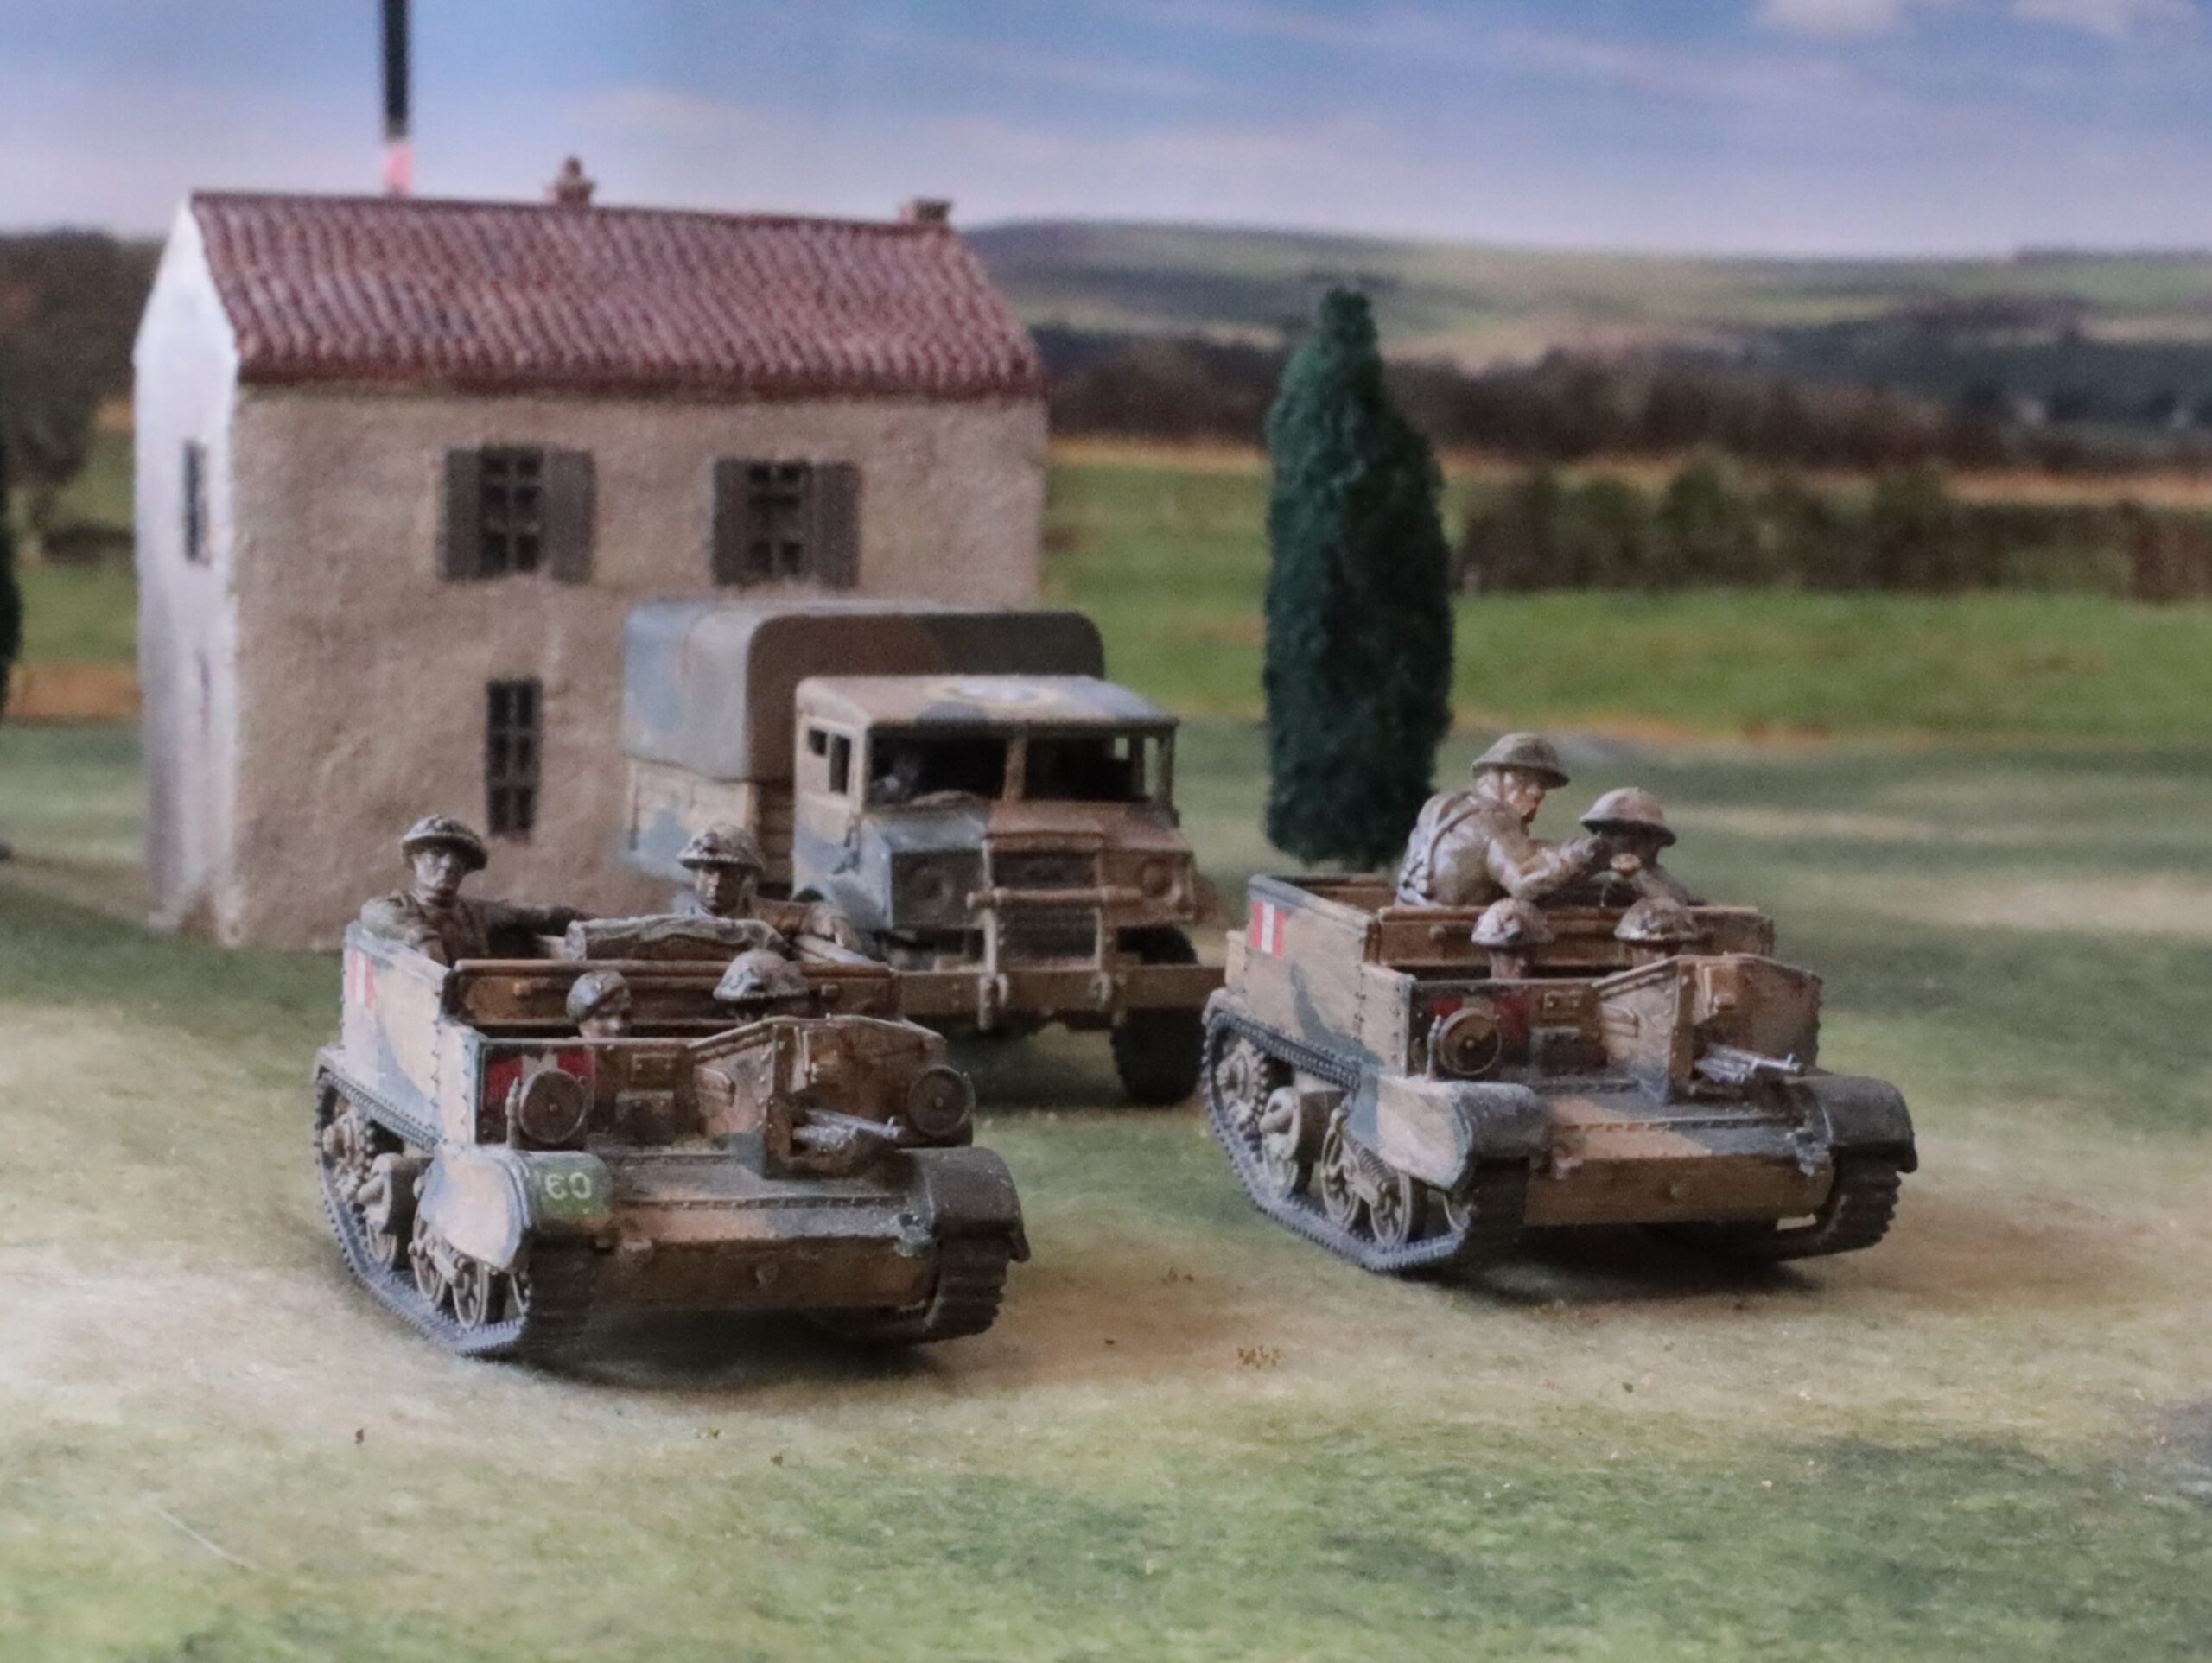
On the subject of the Carriers, I made up a third one from the Variants set, as an OP (visible in my previous post). This is extremely useful on the tabletop, and it is modelled with a heavy-duty radio set and lots of cable for the field telephone – and a ladder, presumably for accessing vantage points. I only have two niggles; one is that the officer with binoculars is rather crude; the second is that there is no range finder amongst the equipment stowed in the vehicle – even though this does seem be there in the picture in the assembly instructions. These instructions, incidentally, tell you which parts belong to which variants on the additional sprue (the set consists of seven generic sprues and one variants – it would have been more useful for the balance to be 6-2 or 5-3…), but you have to work out for yourself where they go based on a rather basic pictures of the assembled models; in my case even this instruction sheet was missing, and I had to find it and print it off from the website. There are complete instructions for the standard generic carrier though, which is just as well as this is much more complicated. There are alternative parts for Mark 1 and Mark 2 versions; I used the former, based on pictures of the vehicles in theatre.
Now for some notes on my painting of these vehicles and the artillery discussed in the last post, including the Quads and limbers for the 25-pdrs (good basic models from PSC, about which there is not much more to be said – no whinges here). There are two schemes: the Light Mud scheme used in Italy, from Sicily onwards, with Blue-Black as a contrast colour; and the desert scheme of Desert Pink, with Olive Green contrast, used by the Eighth Army in Tunisia (but not the First Army in Tunisia, which had darker UK colour schemes, overpainted ad hoc in many cases). The first of these is well explored territory here. I mixed Light Mud from Raw Sienna and Titanium White, with some Prussian Blue. These are the same pigments I use for Khaki, but with a bit more white and a bit less blue. The Blue Black can be made from the same pigments, with only a touch of white and a lot more blue. In fact I think I just dived into another mix I was using that was lurking on my palette, adjusted slightly. Incidentally, I use a wet palette, as I have for many years. Not the expensive one marketed by one of the usual suspects in the hobby world, but a Daler Rowney one that has been going for many years. Mixing paints from artists’ acrylics, this is a bit of a no-brainer, as you want to keep your pigments going across a multi-day project. In fact in the winter (my studio is only heated when I’m using it), the paint kept going for weeks. Which was just as well given all the interruptions. For the tilts on the trucks I used the Khaki mix I had been using for the infantry for both schemes.
The desert scheme was new for me – this being the last of the three main scenes used by the British in the desert (Coulter and Light Stone being the earlier ones). For the Desert Pink I simply mixed white into Raw Sienna. This is a touch less red than the usual portrayals of this colour, though I suspect (for no particularly good reason) that the pinkness softened with weathering. The Olive Green was a mix based on Sap Green, into which I threw various mixes used for the uniforms to dull down and lighten up a bit. The result may be a little dark. Greens are the hardest colours to mix. The schemes themselves were based on a variety of sources, including the official guidelines (which generally didn’t cover the vehicles I was painting and which were usually simplified in practice), photos (giving only one angle) and otherwise guesswork.
Apart from the basic scheme I painted the tyres and radiators (a variation on the dark grey-black mix) and tracks (ditto with some added silver). And that was pretty much it (apart from the crews, painted as infantry). I took the view that other detail (the lights for example) weren’t important enough to pick out. After this came the decals. I put roundels on the truck and Quad roofs, filched from old aircraft decals, and a couple from some an Italeri halftrack kit that I had recently acquired. I also put some arm of service markings on where I could use appropriate ones. I used the ones in the Airfix kit for two of the Bedford lorries. The others were from some I had printed myself a few years ago – but these were tricky and I lost a number of them in the process. Some models, like one of the carriers in the picture, had to do without. I did not bother with divisional markings (these often weren’t used in 1943 in this theatre).
After this came the weathering and high/low-lighting. I wanted to simplify this from the multiple stages of earlier versions. First I used small amounts of white oil paint brushed into a very thin and slightly uneven layer. Then, as an experiment, I mixed some ink into some new acrylic matt varnish that I recently acquired to make a wash. Previously I have used dark oil paint mixed with a slightly glossy medium, to get into the crevices as a glaze (which, in my parlance, is thicker and stickier than a wash) – followed by spray-on matt varnish. But the matt varnish is a very harsh matt, and the effect is too uniform to my taste. So I was trying to combine the two steps with the new, very liquid varnish, which dries off-matt. The basic concept was sound enough, but unfortunately I used some very powerful black ink. This enhanced the crevices beautifully, but made the models too dark. I had to light brush over the lighter colours on the original paint work again (which the wet palette has preserved); even then they still look a little on the dark side, especially the desert scheme. Finally I applied some powdered pastel in a sort of light dusty mix, with a brush. This served to matt-ify the off-matt varnish, without the harsh uniformity of the spray, and create a dusty texture. Apart from the matt varnish wash being a bit too dark, I’m pleased with the results. I have nice weathered finish, and the decals look well and truly integrated – and the method is quite simple.
My next project is the Medinine Germans – which I have now started. But before then I will do a quick post on some Oxford Diecast models I have acquired.
Leave a Reply