And so to the first of my three recent models of German aircraft. The Focke-Wulf Fw-190 A4 is one of the earlier models of this classic fighter aircraft. The 190A is one of my favourite WW2 planes from an aesthetic point of view, up there with the Mosquito and Spitfire Mk VIII/IX.
I wanted to model one of the early variants, which were around in early 1943, in one of the Mediterranean camouflage schemes. These early planes were slightly shorter than the later ones (from the A5 on, and the F series of fighter-bombers), which had the engine pushed slightly forwards to shift the centre of gravity, to ease the carrying of bombs. To meet my aim meant going for one of the pure fighter planes in JG2. Some early fighter-bombers were deployed in Tunisia at this time, but they seem to have used the standard European grey colour scheme. This would have made them look very like the A5 fighter-bomber that I plan to make later on. Given this, the Zvesda kit pretty much chose itself. Most models, like the Airfix one, of the 190A are of the later A8, which belongs to 1944. And I wanted a simpler, cheaper model at this stage in my modelling journey.
The Zvesda kit was an excellent choice. It has an undercarriage-up option, and comes with a pilot. Better than that, the fit of the parts is excellent; it needed very little filler. How unlike the kits of my youth! And also better than the low-cost Hobby Boss models. It sells as a snap fit model, without the need for glue. I did use glue, but it was only actually needed it in one or two places. I have just one significant complaint – the Fw-190’s tail wheel partly retracts in flight – but on the model it is in the fully down position. It was a bit tricky to replicate the retracted version. The decals aren’t great either. The only other point to note is that there are no bomb racks included with this kit to make a fighter-bomber version (which would also require the removal of the outer wing cannon) – though not many of these entered service for the A4. Sometimes kits are supplied with extra parts to make different versions, even ones for which instructions and decals are not supplied – not this one. Based on this kit though, Zvesda are the ideal maker of 1/72 kits for wargames purposes. The shame is that they only have a limited range of models. It looks OK for Russian aircraft (unsurprisingly), but otherwise it’s thin. There is no later, or fighter-bomber, version of the Fw-190 – a bit strange given how big a role this aircraft played on the Russian front. But there are a couple of Bf 109s, and they might be a better source for these than the Airfix or Hobby Boss kits that I have bought.
II Group of JG2 (Staffels 4, 5 and 6) was sent to Tunisia in November 1942 as part of a general rush of German reinforcements to this theatre – the unit had been based on the English Channel (the aircraft in the Imperial War Museum that landed in England in 1942 by accident was from JG2). They stayed until February 1943, and were the only Fw-190 fighters to be deployed in the Mediterranean in the war, as opposed to fighter-bombers. Only 109s took up the fighter role for the rest of the war, in a demonstration of the economic principle of comparative advantage – the Fw-190 was generally thought to be a superior fighter to the 109, but the latter was a much inferior fighter-bomber. What colour scheme? The Luftwaffe Mediterranean schemes were always ad-hoc, and that applies even more to Tunisia; there was no manual. Tunisia itself in winter was quite green for the most part, meaning that many of the aircraft rushed in were not given a new paint job at all, like the Fw-190 fighter-bombers. However there is evidence that at least some of JG2’s were. Unfortunately there are very few photos, and even fewer of them are available on online searches, so I’m relying mainly on secondary interpretations. The kit comes with decals for White 14 from 5 Staffel in Tunisia. This appears to simply have blobs of overpainting on the conventional grey scheme (and with the white on the fuselage Balkenkreuz painted out). This wasn’t very interesting. Two other schemes come up in searches: a group staff plane (with black chevrons) in overall sand upper parts, and Yellow 1 from 6 Staffel, either shown in just sand, or in sand with broad olive green stripes. Yellow 1 (1 denoting staffel leader) was flown by fighter ace Erich Rudorffer. I wanted the sand and green scheme, which would give me practice for the similar British schemes (sand and brown stripes), but I didn’t want a famous ace, but something more generic. I decided to do one from the same staffel but with a different number (seven in the end) – fictional, perhaps, but the sort of generic thing suitable for the tabletop. Details on Yellow 1 vary on the illustrations. Sometimes it is shown with white wing stripes – markings which were apparently used by German planes in Vichy France, but these would not have appeared on planes in Tunisia. Also shown are white underwing tips, yellow under the engine cowling and a yellow rudder (as well as the white fuselage stripe which almost all Axis planes in the theatre had). All of these appear on German fighters in the theatre, but not universally. The yellow markings were also used by JG2 planes in their previous posting on the Channel. My speculation is that the upper parts of the planes were overpainted in sand and olive green, but the underparts were left in the pale blue-grey of the original scheme (rather than azure in the German Mediterranean set). Winter in Tunisia wasn’t particularly sunny (it rained a lot), so there was no good reason to overpaint the underside. Besides a large part of the use of aircraft camouflage schemes in this theatre was to make the planes less conspicuous on the ground, as the airfields were quite basic, and there was little cover. Even the Americans were forced to do this in 1944 when they stopped painting their aircraft at the factories. So, I reasoned, they would have overpainted the yellow rudder but left the yellow under the cowling. I wasn’t sure about the white wingtips, but these aren’t very conspicuous, so I left them out.
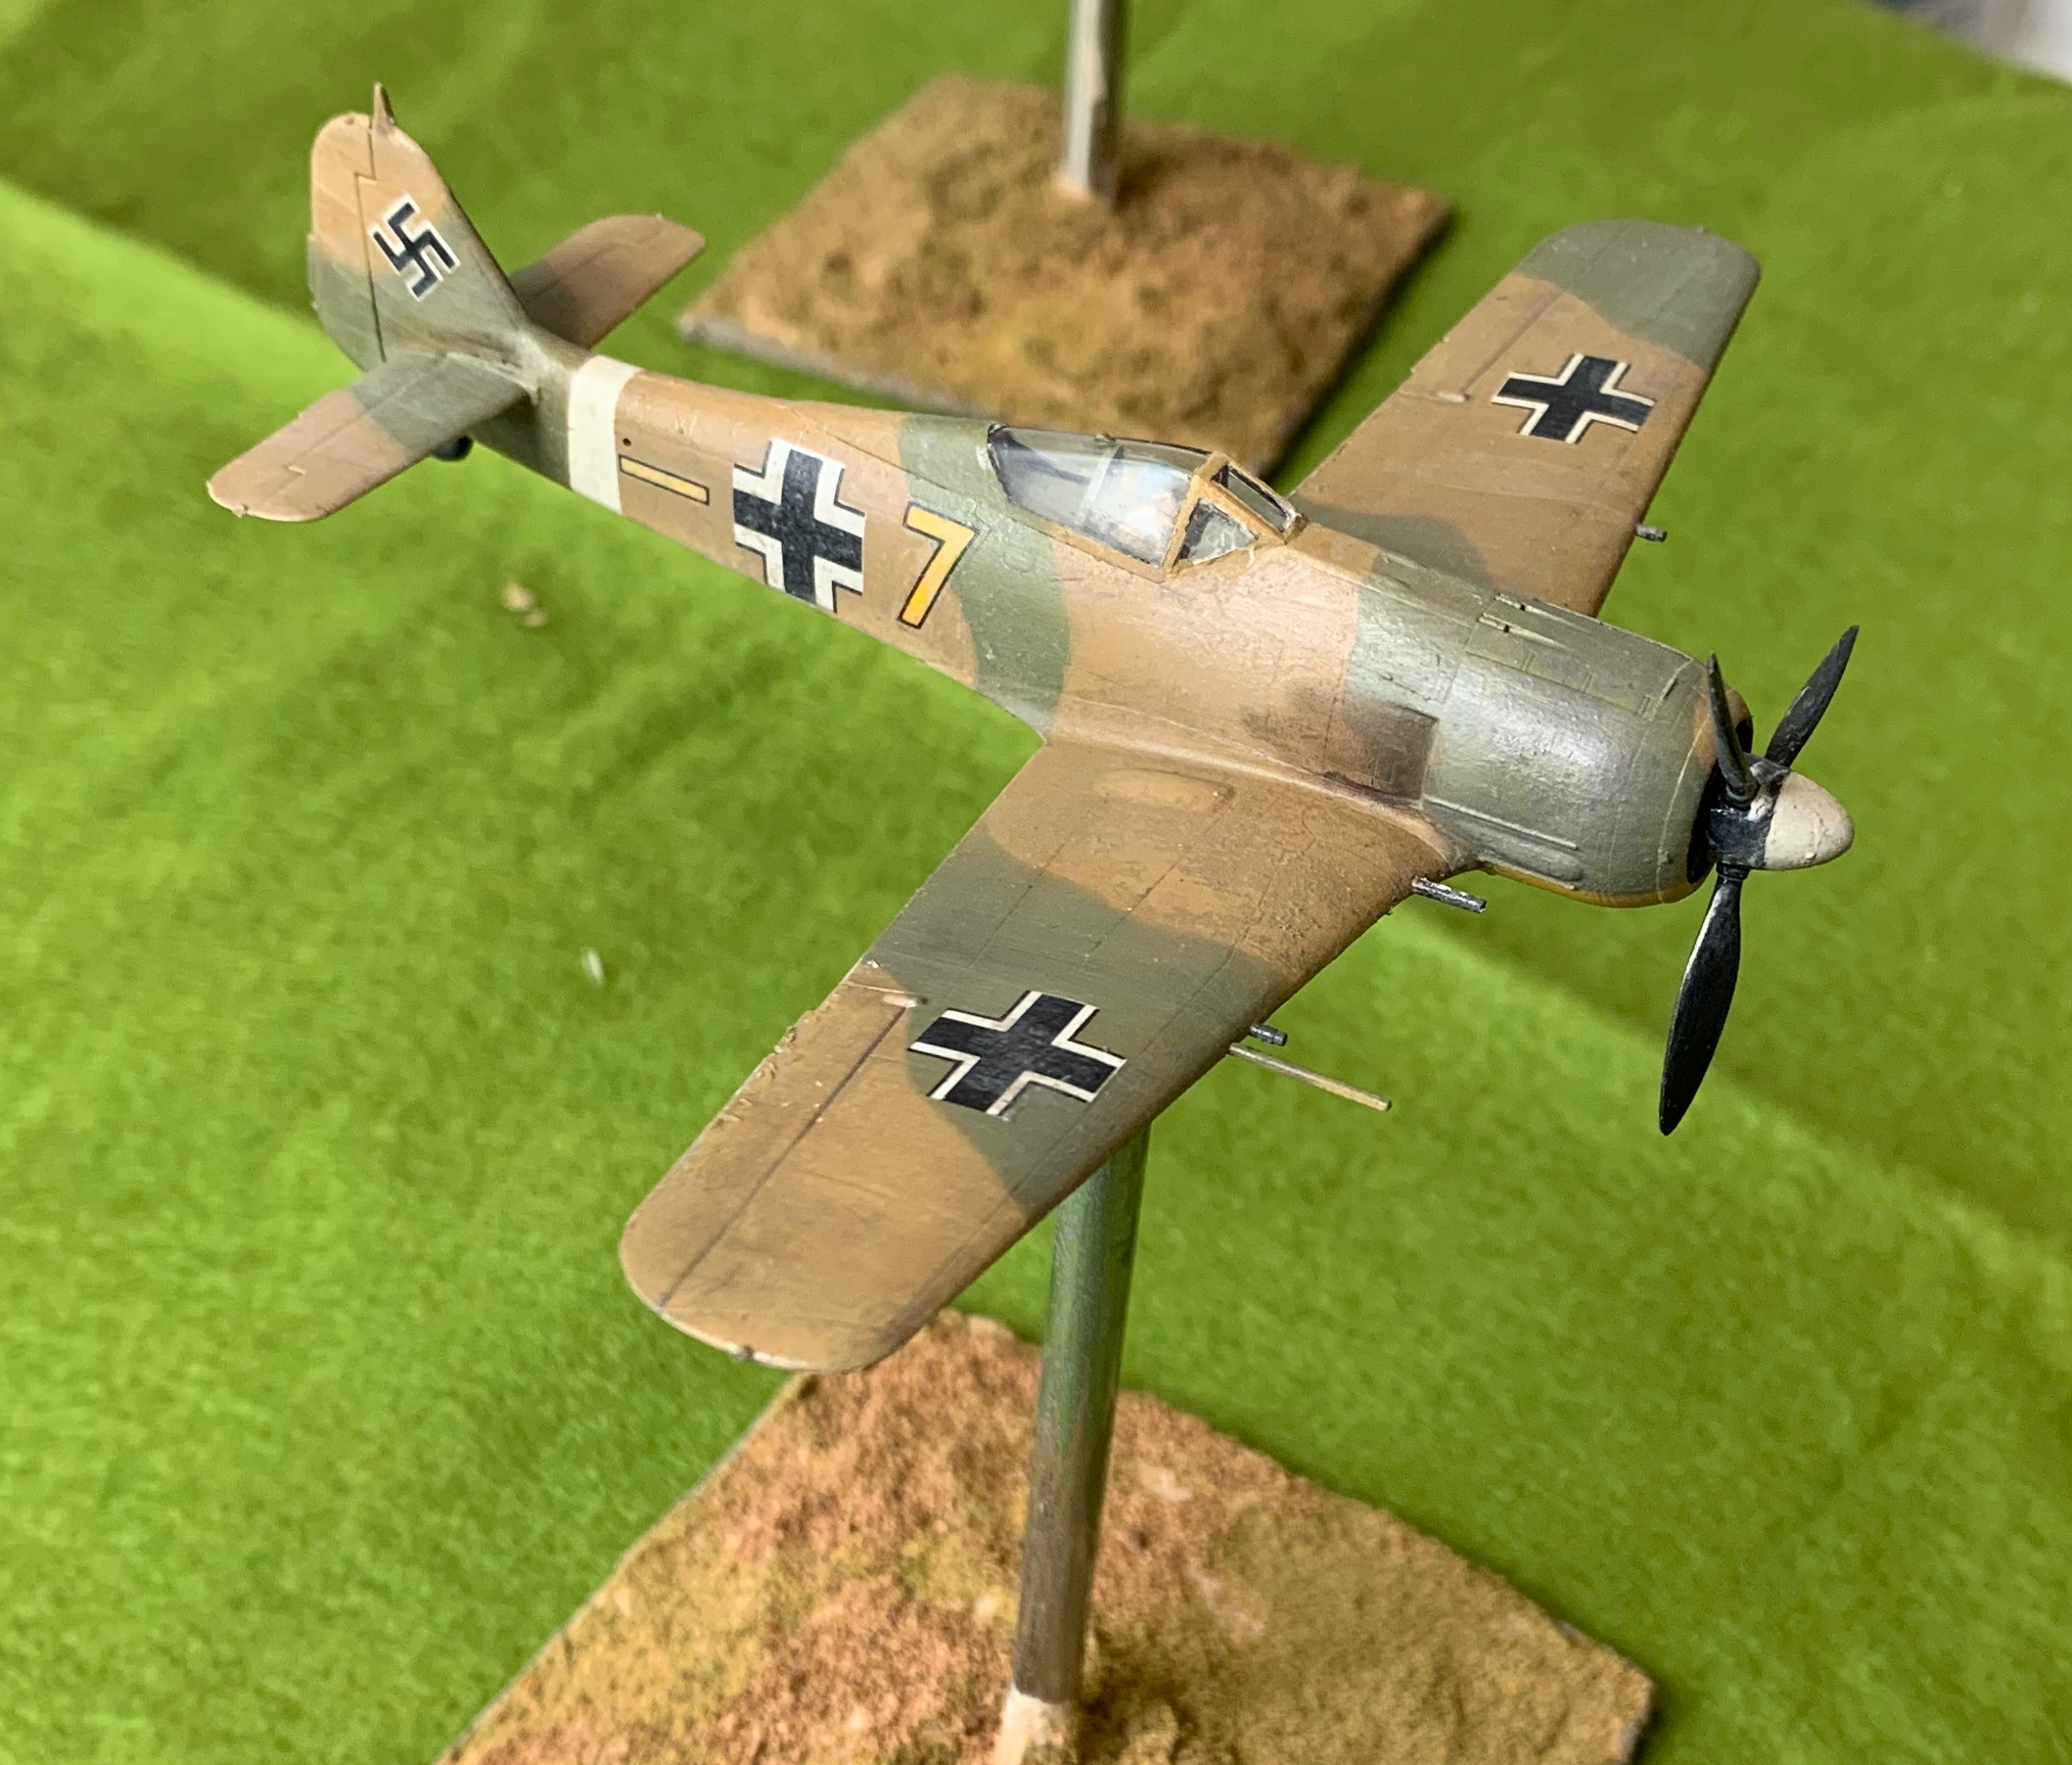
Here’s the finished model:
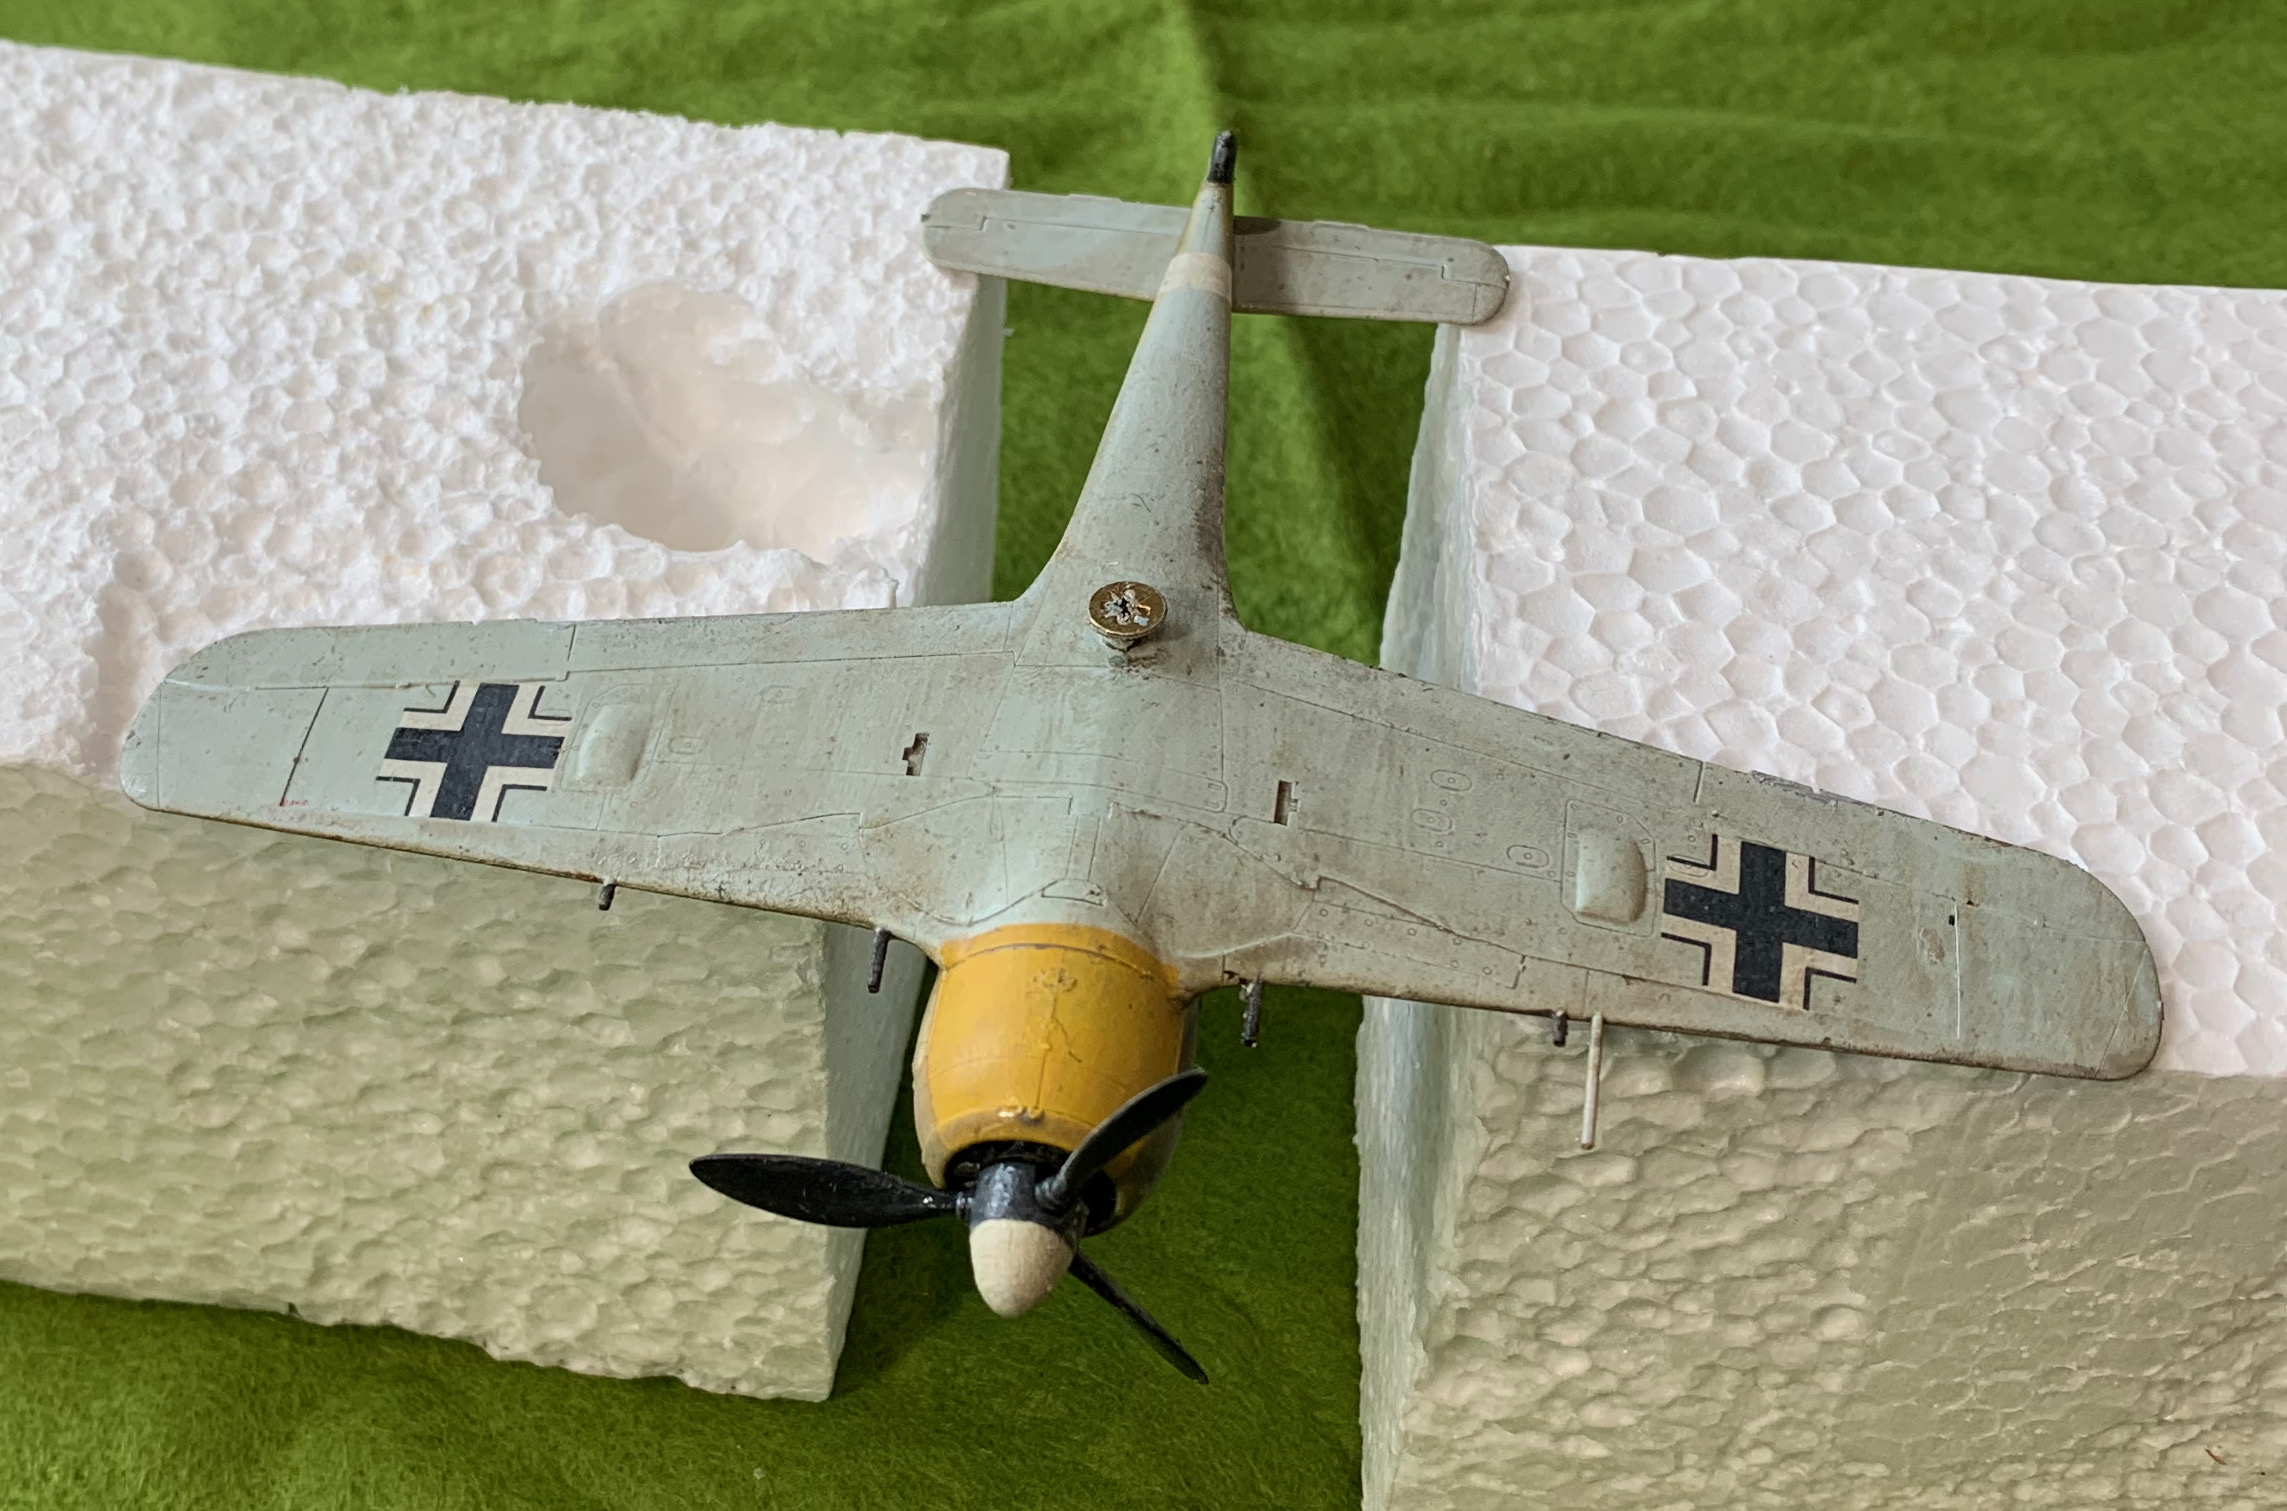
And underneath:
There’s not much to note on the build. It was very straightforward apart from the tail wheel. I used the airbrush to prime, but this time with LifeColor purpose made white primer. This went on more easily than standard paint, but there was still a slight tendency to bubble (even though the parts had been washed). The sand and olive green were mixed for use on this and the other models – the sand on all three models, and the green with the 109. The pale blue grey (“white-blue”) was mixed just for this model. I took the darker light blue I used for the Stuka and mixed some white into it. It should probably have been a bit greyer (on the Stuka too). The sand was Raw Siena with a bit of blue and white – and I am very happy with how that turned out. It’s a bit darker than it is often shown, but close to many representations of this aircraft. The olive green is usually shown as been noticeably darker than the sand (which comes out on may photos) but in this case I thought it would be tonally similar. One the one photo I have of Yellow 1 (showing just the nose) the stripes are nearly invisible. I started with Sap Green, mixed in some Yellow Oxide and white. That works well on this model.
I have already written of my traumas at the painting stage. I painted the whole upper surface in sand, and then over sprayed the green on top, using Science Putty for masking. I used this product as an alternative to the more expensive “Panzer Putty”, and it worked pretty well. However the problem with it is that it moves, so you can’t leave it on the model for long. Blue Tac is probably more appropriate. I had to top up a lot of the airbrushed green with a paintbrush. For the decals I used the Balkankreuz that came with the model for the fuselage and underwing, but they supplied the simplified cross for the overwing, which didn’t seem to be accurate. At this stage, and in this theatre, the Germans seemed to use the standard cross with a thinner white band. This, and ID markings and the swastika were all sourced from my brother’s stock of German markings from the 1970s (or even late 1960s), mainly from Almark. Almark still seem to be going, though Scalemates says they started in 1975, my brother’s main modelling activity in 1/72 was long before this, and I generally only needed the swastikas for my models at this time, so I don’t think I bought these. Zvesda do supply swastikas, but, doubtless for legal reasons, they are cut in pieces and a faff to put on. The old decals took a little while to free themselves from the backing paper, but then were fine to manipulate – actually easier than many of the modern ones. Using decal fluid the flash, a big problem back in the day, disappears – though it didn’t help that we usually applied them to matt enamel painted surfaces. For the ID markings I had to put on the yellow markings first, and then the black outlines over them. I am very pleased with how they turned out.
Overall I am very pleased with the result on the upper surfaces, in spite of the nightmare on the oil paint patination. The LifeColor matt varnish has left a faint sheen (or maybe it’s the oil coming through) which is just what I wanted. While American planes in the Olive drab scheme often appear in a very matt finish, this seems less true of Luftwaffe planes. Doubtless the crews kept the planes clean to extract every ounce of aerodynamic performance. The whole effect is cleaner than the P-47, but consistent with a recently-painted aircraft. The patination nevertheless helps to integrate the whole model, including decals, and give it more of a real-world feel. The underside is much less satisfactory. The main problem is that it is too monotonous. Some of the detail could have done with being brought out. The fit of the undercarriage doors is so good you can hardly see them! The patination effect is also much more visible and makes it look a bit mucky. That’s not unrealistic in itself, remembering that this is the bit that wasn’t overpainted, and the underside would have taken a pounding from dust on take-off and landing, but it still doesn’t look quite right. But after the traumas with the oil, I wanted to draw a line under the project, and had no wish to spend yet more time trying to fix it. The underside is not going to be that visible on the table after all.
Leave a Reply to admin Cancel reply