
And so to the next model in my trio of Luftwaffe Tunisia planes. The 109 was the workhouse German fighter arm throughout the war. They used no other fighter aircraft in the Mediterranean theatre, apart from the brief intervention from the Fw-190s of JG2. I wanted to go for one of the earlier G models. These are very similar to the F, whose introduction give the RAF such problems until the Spitfire V came along. The G had an engine upgrade, giving it superior performance; these early Gustavs appeared in mid-1942. Later ones (like the G-6) had an upgrade to the fuselage machine guns, which necessitated the characteristic blisters each side of the nose in front of the cockpit.
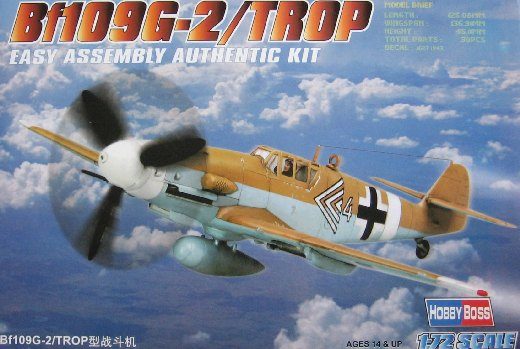
I chose the Hobby Boss kit because it was cheap and simple – just what I wanted when I was still learning how to do model aircraft. I had already bought the Airfix 109G-6, which is suitable for later in 1943. This is probably quite a good kit for my purposes but to represent the G2 would meant removing those blisters – which would be very hard to do cleanly. In fact Zvesda produce what is probably a more suitable model (actually of an F, as well as a later G). I had already experienced Hobby Boss with my P-47, so I knew what to expect. The big problem is that it does not have an undercarriage up option, in spite of the box art (which says it all in my view!). The model is simple and robust apart from that. It actually had more interior cockpit detail than Airfix, though it necessitates the amputation of the lower legs of the pilot. The join between the upper wings and the fuselage wasn’t seamless, and required filing, putty and sanding. The fit of the cockpit canopy wasn’t quite right either (which I failed to rectify). Otherwise my only complaints were that the scoring to denote control surfaces is a bit shallow (like the P-47) and it doesn’t come with a bomb.
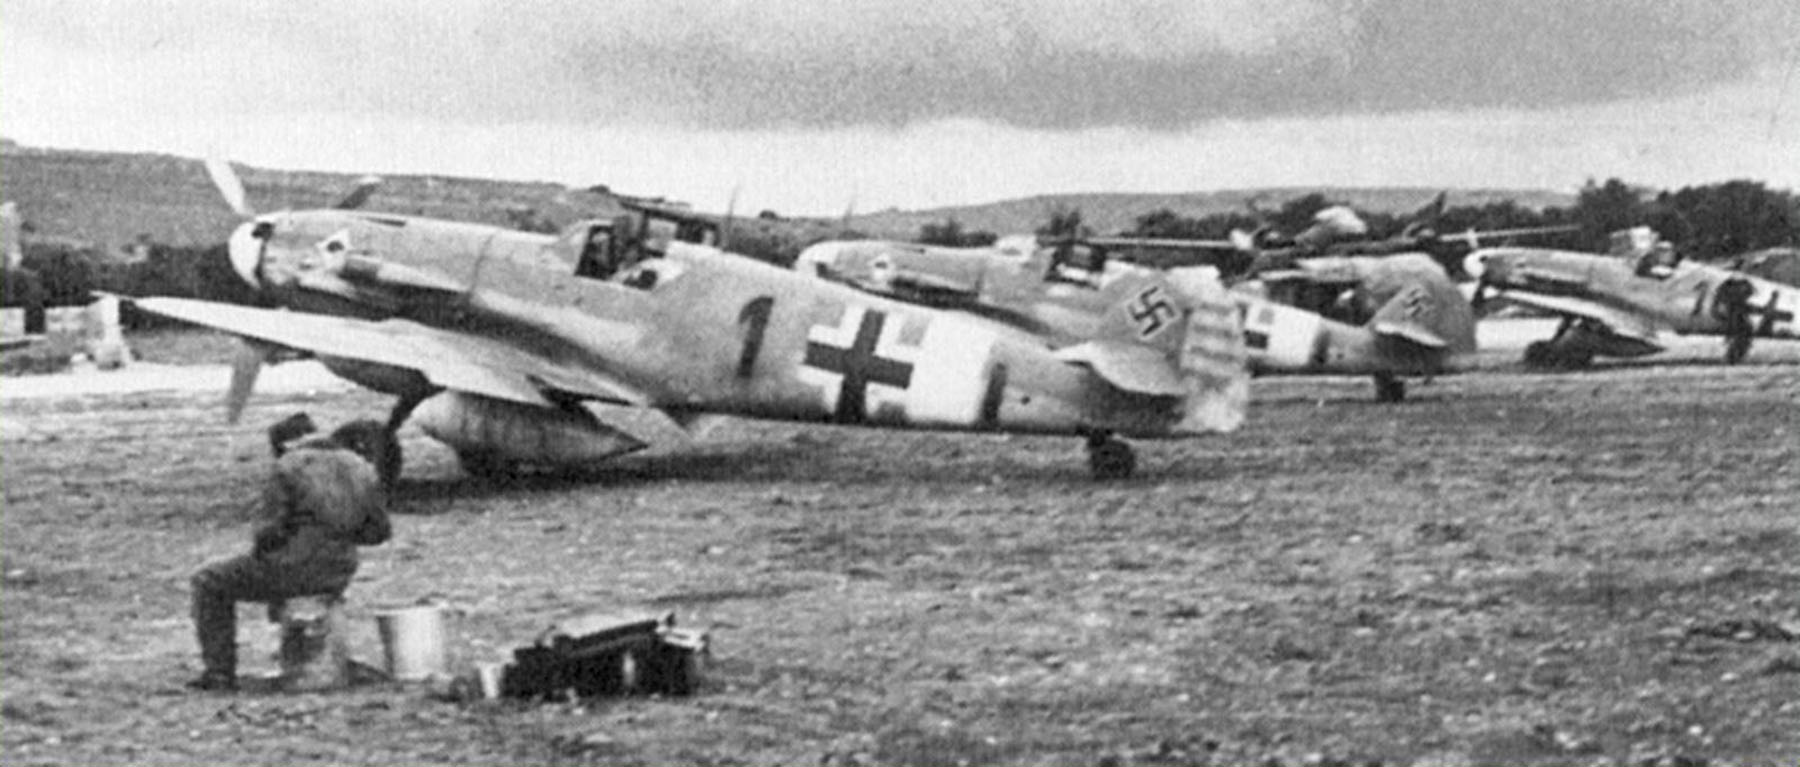
I wanted to represent an aircraft in the classic Luftwaffe desert scheme (as per the box art) overpainted with Olive Green splodges, doubtless to fit better with winter in the greener environment of Tunisia. The model came with decals for such a plane – Yellow 13 from JG53. But this was the plane of an ace pilot (with victory marks on the tail), who was lost in Tunisia. I wanted something more generic. The simplest thing to have done would have been to use the same scheme with a different number (as I did with the Fw-190). But doing yellow number with a black outline looked a bit tricky at the time (in fact I managed it for the 190 without difficulty). I wanted to keep the Ace of Spades insignia for JG 53, so I went for different Gruppe and Staffel – black letters with a downward stroke after the fuselage cross and white band. I was inspired by a picture of Black 1 (see above – another ace, as well as staffel leader), with some aircraft in the background. Evidence for the actual schemes is pretty thin. I have seen Yellow 13 represented with and without the green splodges, and with different shaped ones. Black 1 is usually shown in a very mucky version of the sand and azure scheme without the olive green (a fair interpretation of the picture). It’s actually quite hard to tell on the planes in the background in the picture, especially if the olive green has a similar tonal value to the sand (as was the case for my 190 – but not pictures from earlier in the war), though it should still show up against he blue. I wanted the splodges (“dappling” is the correct term, I think), to help me develop technique for my next batch of German aircraft in the standard grey scheme, which have dappling on the fuselage. Some modellers show splodges on the fuselage and stripes on the wing. I went for splurges on the wing too, following one of the interpretations of Yellow 13.
As with the 190, I had to make decisions about the yellow and white markings. The JG53 109s clearly often had yellow rudders and under the nose. Black 1 had what looks like a yellow rudder – but it looked to me that this was to show off the pilot’s awards and kill marks; it wasn’t clear if the other planes in the background had it. I decided to leave out the yellow rudder, but, like the 190, to have yellow under the nose. I also had white wingtips underneath, following quite a few portrayals of 109s in the theatre. Desert 109s often had white wingtips; I think they were often left off the upper surface to make them less conspicuous on the ground, especially later on. Finally I decided to represent the plane in fighter-bomber mode. Unlike the 190s used by JG2, the 109s do seem to have been able to carry bombs. British soldiers often wrote of being attacked on the ground by “Messerschmitts”, and they were certainly used in this capacity in Sicily. The ID skills of British soldiers isn’t to be relied on though. I suspect a tendency to identify all single engined fighters as 109s, and there were fighter-bomber 190s in theatre (funnily enough aircrew often identified 109s as 190s, such was the reputation of the 190, rather as their army colleagues kept identifying Panzer IVs as Tigers). Anyway as my 190 was a pure fighter, I wanted the 109 as a fighter-bomber. More straightforwardly I put on underwing cannon too, though I don’t know if this staffel had them (though it does look like it from the picture). The early 109 is a bit under-armed, and I am speculating that the extra engine power of the Gustav gave pilots the confidence to take the performance hit of the extra armament.
And so to the build. The biggest problem by far was having the undercarriage in the up position. The wheel wells as modelled were very shallow, and the wheels needed a lot of filing down to fit in. The doors were a poor fit too. I actually found that the doors from the Airfix 109 (those for the down position – they had a different moulding for up) were closer and used them instead. It still took quite a bit of work. As I eventually did with the P-47, I set the doors in plasticine to ensure they were flush. I needed to provide a pilot – I used a resin one from PJ Productions. PJ seem to have this market to themselves, which I find amazing. They are nothing special, and have arms moulded separately, which are tricky to glue into place. Resin is very brittle for such small things. Considering how easy it would be to provide a pilot with the model (as well as undercarriage up), I find it amazing that so few people do it. Only Airfix and Zvesda in the models I have bought. It is even more surprising that Hobby Boss don’t, given that there is surely more demand for this at this end of the market. The cockpit interior, while modelled (an advance on Airfix, which just has the seat), is too shallow, like the wheel wells, which meant that the lower legs of the pilot had to be removed. I have already referred to issues on wing roots (which meant that some panel details were filed off) and cockpit canopy, which I’m sure I could have done a better job of. Incidentally I fixed the canopies in place before painting the exterior in all my models, as I wanted to putty the joins for the non-moveable bits. For this model I masked the whole canopy, apart from the edges, and painted in the frame later. I added a bomb from the Airfix model, which I indent to represent s a pure fighter. There was no means of anchoring it to the pylon though, and it ended up a bit skew.
For the paint job I used the same sand and olive green mixes as the Fw-190. I mixed an azure blue for the underside. I started with an Azure Blue from Daler Rowney, and added a bit of white and neutral grey (and maybe some brown – I can’t remember). The result was pretty much what I was looking for, but disappointingly similar to the standard Luftwaffe light blue I used for the Stuka – mixed by a totally different route. I had fewer problems with the airbrush on this model than I did with the Fw-190. I think this may be because the mixes made up from artists’ paints are a bit thick, though I used copious amounts of thinner for the brush. Anyway I have more to learn on that front. I applied the blue and sand that way. For the olive green dappling an experienced aero-modeller would have thought nothing about using an air brush too – but my skills are nowhere near that level. My first idea was to use cotton wool buds – but these are quite absorbent, using a fair amount of paint that never gets on the model, which then proceeds to dry. Instead I decided to do what I did back in the 1970s – create a stipple brush by cutting down an old paintbrush. This worked adequately, though on one side of the fuselage I got the paint a bit thick, which proved quite hard to undo and redo. The result is still a bit mucky (it’s the other side from the photo above) – though the for the scheme and theatre that’s not such a big deal.
For the decals I used a similar solution as for the Fw-190. The fuselage and lower wing crosses were from the kit (rather better quality than the Zvesda), but it came with the simplified upper wing crosses. I used old Almark decals for the upper wing crosses, the swastika and the number and stroke (which identifies the Gruppe). All pretty straightforward. The stroke came from a separate sheet from the numbers, and is in fact too thin, looking again at the photo. The kit came with Ace of Spades markings, but without the black outline which pretty much everybody shows they had. I had quite a few spares from the old Airfix 1970s 109 model. These broke up slightly and I lost part of the outline (on both sides). Looking at the photo, the border is in fact very thin and the ones with the kit may have been a better choice.
This model suffered much the same problems with the oil paint patination I have described on the 190, with the additional issue that I think I overdid the white on the upper surfaces. The model still looks slightly milky even after the frantic attempts at correction. Here is the underside:

Apart from the skew bomb (which doubtless I will correct at a later point), I was actually quite happy with the underside, unlike the Fw-190. That may just be because there is more going on, with the vents, cannon and exposed wheels, and the colour is more interesting. I wasn’t sure what colour to paint the bomb. I read that the Luftwaffe often painted them blue to fit in with the underside colour, so I chose this. I used my standard Luftwaffe blue mixed for the Stuka (also used for the Stuka’s main bomb) – you can see how little contrast there is. For the exhaust stain I used powdered artists’ pastel, a mix of dark grey and brown. Looking at the photo I could made it quite a bit bigger.
Overall I’m pretty pleased with this model. Incidentally I didn’t notice the white splodge on the nose when I took the picture. I don’t know what it is, but it came off quite easily. Next I will describe the final member of the trio, the Stuka.
Leave a Reply