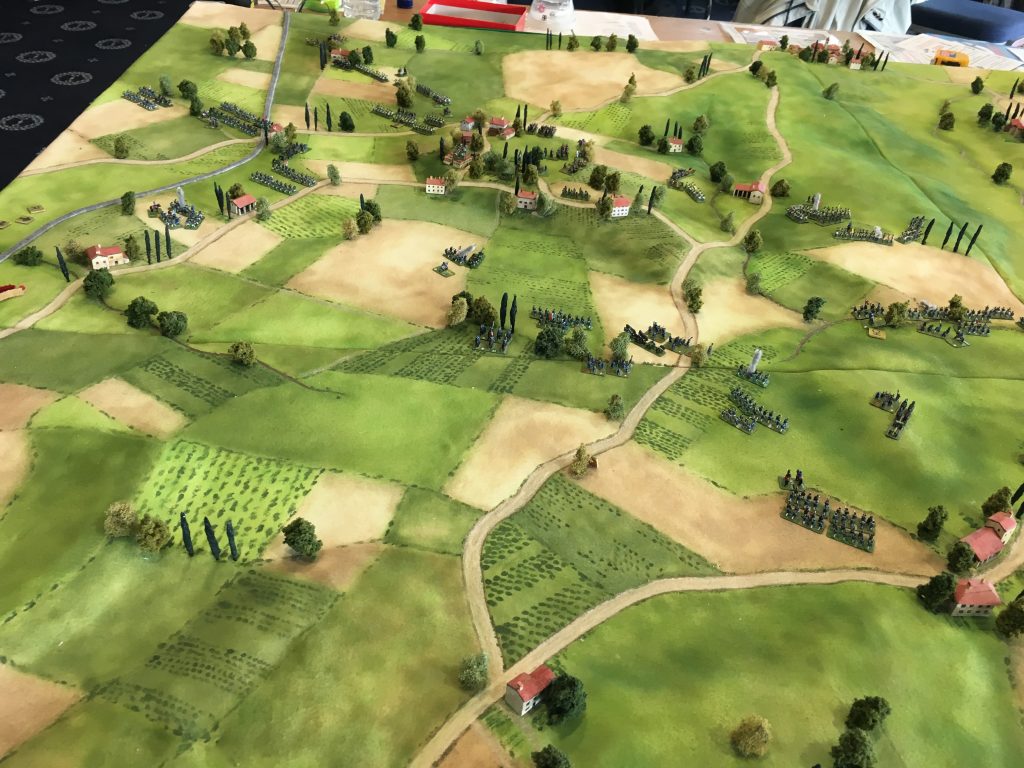
It was my privilege to play a game with Bruce Weigle at the Colours show at Newbury Racecourse last weekend. Bruce is famous for two things: his rule system (and series of informative rule books) for the series of European wars fought out between 1859 (Second Italian War of Independence) to 1871 (close of the Franco-Prussian War), and for his superb terrain boards for his 5mm miniatures, which give you the feeling of being there. Our game was the Battle of San Martino, on the fringe of the main battle of Solfarino in 1859 (which was so bloody it led to the foundation of the Red Cross). It has caused me to reflect on wargames terrain.
First, a little about the game. The scenario is the Austrian defence of the villages of San Martino and Pozzolengo from an onslaught by the Italian (or more correctly, Sardinian) army. I commanded the division of Italians on the left, who carried out the first assaults on San Martino. These did not go well. The Italians were armed only with smoothbore muskets, had weak artillery, and inferior morale/discipline. Though I was careful to ensure that each regiment I sent in had one alongside it that could conduct a follow up attack, fire from the defenders, artillery or rifles, stopped the attack on all three (or was it four?) attempts before they could close. By this time Austrian reserves, which under the scenario conditions were supposed to be unlikely to get involved, were hurtling up on my left, and I had to reorganise to face these off. There were a number of small but spectacular cavalry forays that wargamers find hard to resist, and that generally ended badly, but the main fight petered out. I considered realigning my attack to sweep round to the left of San Martino, but the Italians’ chances were better elsewhere (especially after I had drawn in those reserves), so that was not to be. Meanwhile Italians to my right flooded in, while the Austrians were quick to commit. This developed into two fights. One was a further assault on San Martino, which got further than my attacks, but also failed. And then there was a sweep to the right of the village. This did unexpectedly well, and suddenly an opportunity to attack Pozzolengo, the main prize (which would cut off the Austrians committed to San Martino), opened up. But the Austrian regiment whose rout had opened up this chance rallied, and did enough to delay this attack so that time ran out for the Italians. Bruce had always said that the scenario was hard for the Italians to win (historically they claimed a victory, but really it was an orderly Austrian withdrawal after the rest of their army was thrashed by the French). But both Austrians were more aggressive, and the Italians more successful than he had seen before – he awarded it to the Austrians marginally.
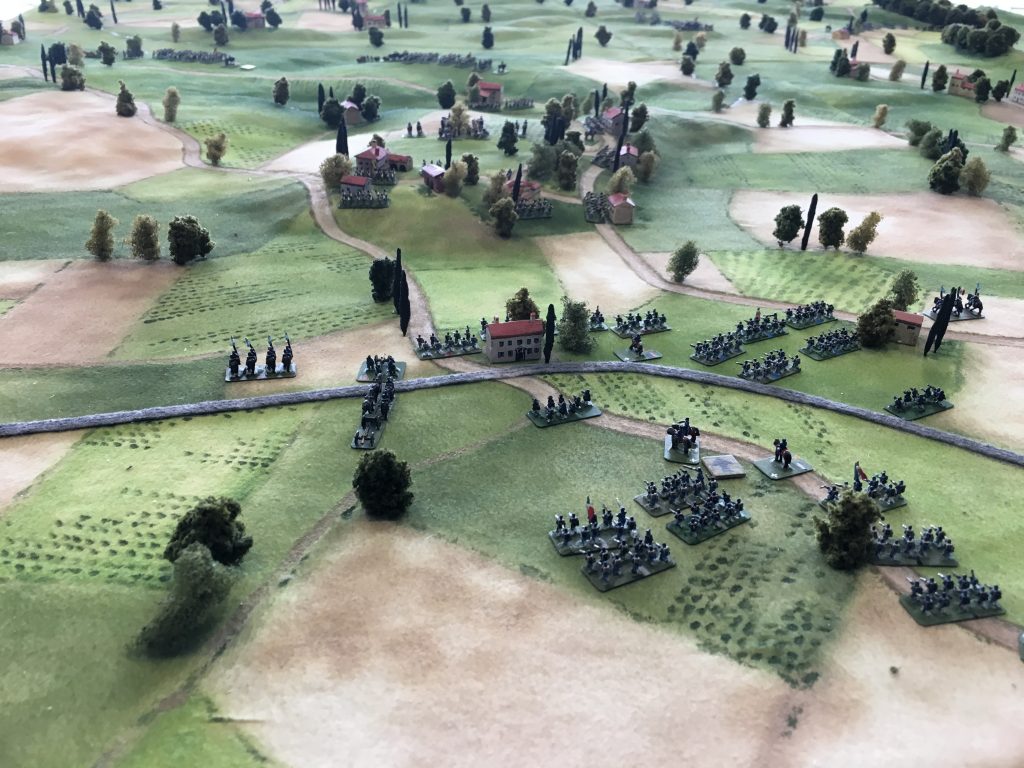
We used Bruce’s 1871 rules, adapted for 1859 technology. He has published rules specifically for 1859 (the same book also with rules for the 1864 Second Schleswig War with Denmark); these are a version of his original 1870 rules, of which there is a further version for 1866 (Prussia’s war on Austria). After 1866 Bruce decided that the rules need a streamline, leading to his much simpler 1871 rules, which has a two-page quick reference sheet, rather than a four-page one. The adaptions for 1859 are in fact quite straightforward, and fully contained within the QR sheet, which is published online, albeit without explanation (the small Italian battalion size reduces their combat performance, for example). I was familiar with the 1871 rules (see my initial comments here), but never used them – though I had played with the 1866 and 1870 predecessors with my friend George, who at Colours commanded the Italian centre. The basic playing piece is a battalion, mounted on a 30mm wide stand. The scale is one inch to 100m. To start with we needed quite a bit of help from Bruce. That slowed things down as he was in quite high demand from members of the public (which, after all, is what a demo game is all about), but we mastered the basics quite quickly. The most interesting feature was the simultaneous move system; this was more problematic as it helped a lot to have the umpire’s arbitration, and depends a lot on both players being fair minded. And some people are pushier than others… but it does give the game a stronger simulation feel. Other than that I don’t have much more to say on the rules system from my article when the rules were released.
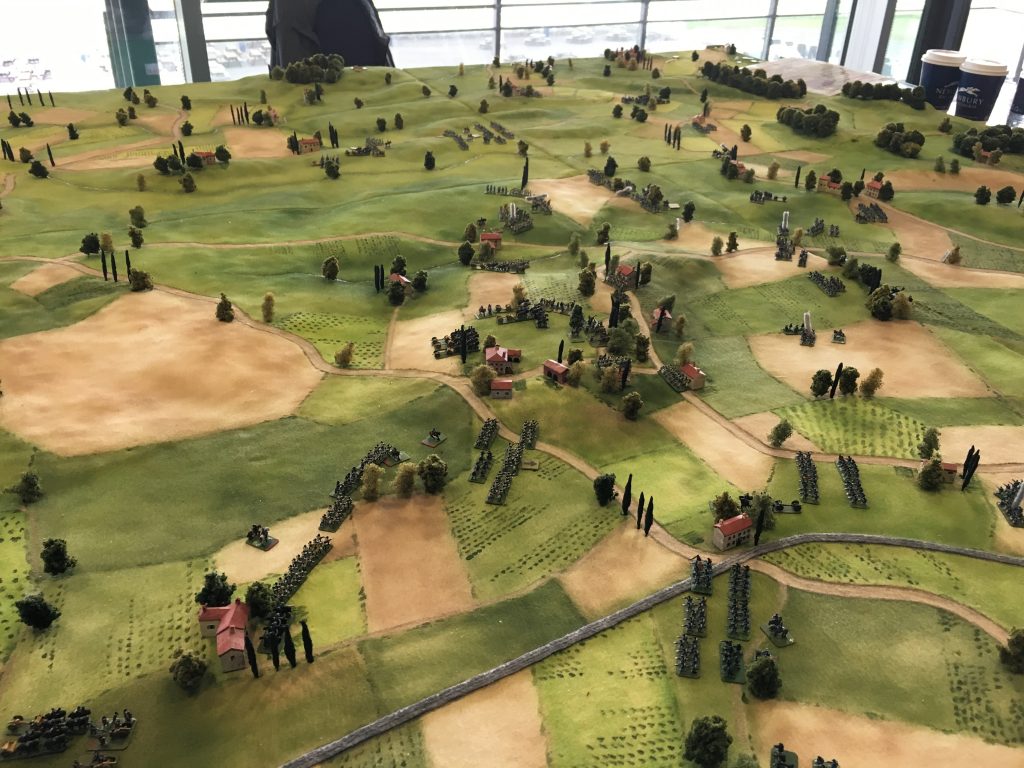
The main thing I hoped to learn from the day was not about the rules system, but the terrain presentation. Is there anything that can be taken from Bruce’s fantastic table that I can use for more ad-hoc games without the creation of a detailed board? What helped to give the terrain its authentic look? The first point is scale. Quantity beats quality, and the smaller the terrain scale, the more you can cram in. The terrain scale is 1:4,000. The terrain features about 1:500 (or more, maybe), and the troops about 1:300. Some wargamers, in larger scales, get upset when the doors in their buildings are too small for their miniature soldiers. But scaling the buildings to the miniatures comes at a huge cost, both because you must have fewer buildings, and the tendency for those buildings to look toy-town by having oversized doors and windows. So 6mm buildings with 15mm figures is probably a price worth paying.
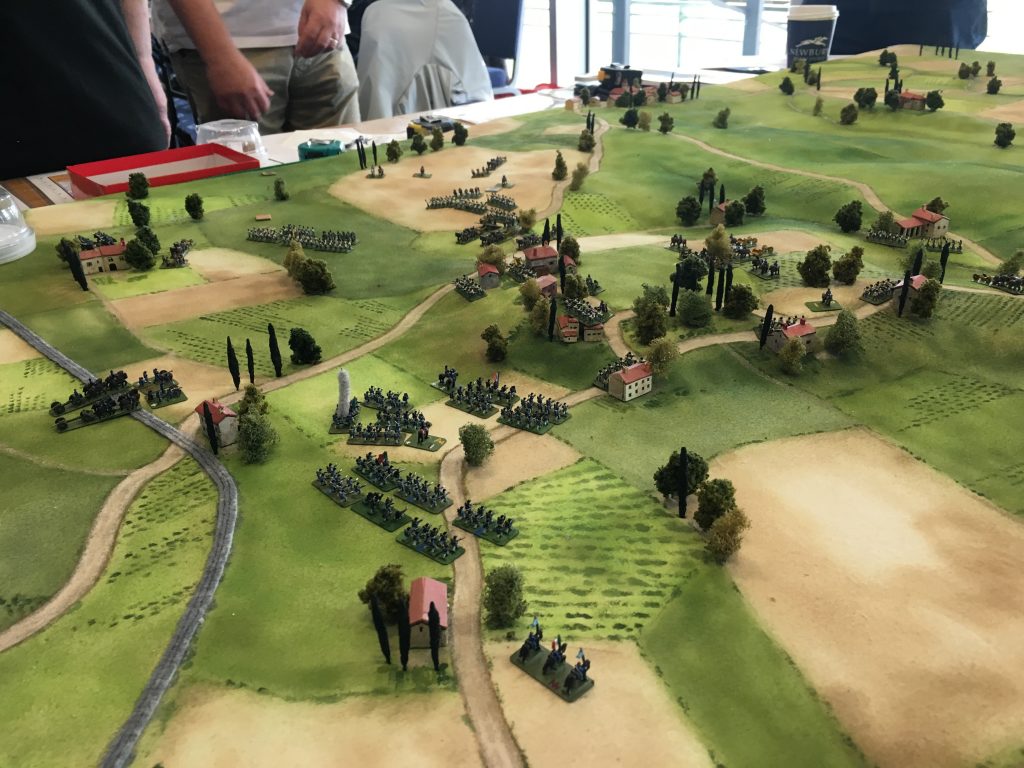
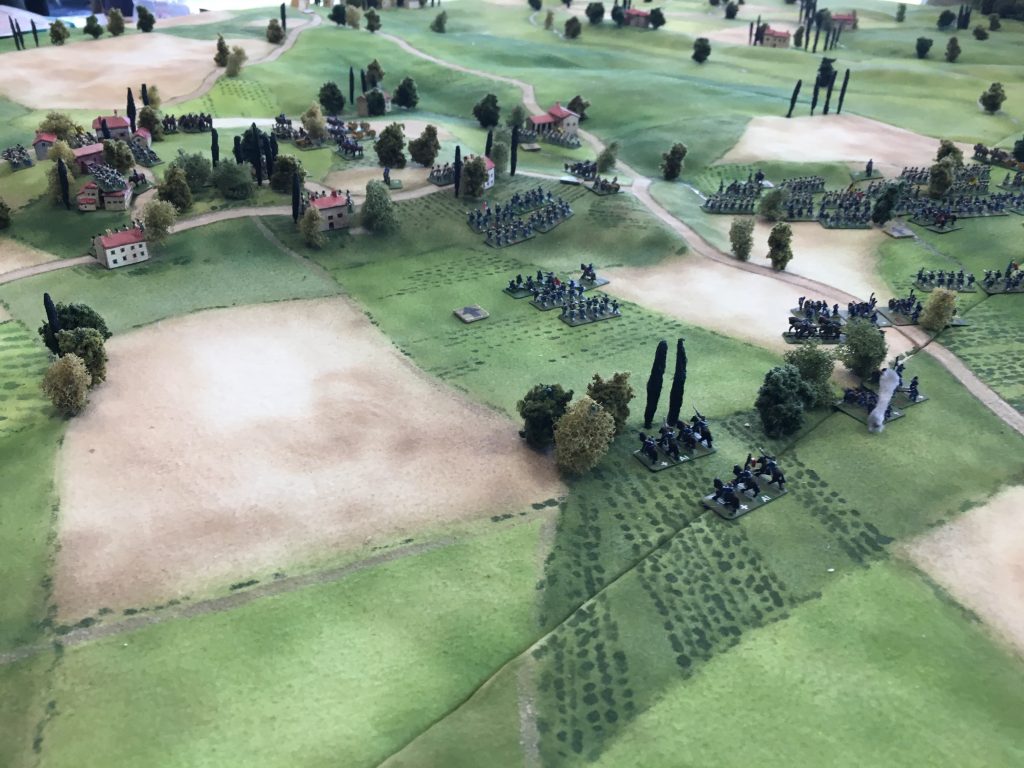
Second is irregular shapes: the sinuous roads and streams and the irregular field boundaries and woods. We often use standard sections made up straight lines and sharp bends for roads and rivers/streams (which are generally too wide for the terrain, though not the figures). We don’t usually bother with field boundaries outside skirmish games, though at least the availability of printed terrain cloths is helping here. Third is sculpted hills with natural shapes, blended into the terrain. Fourth there are the trees. Lots of them are scattered as embellishments to villages, roads and rivers. And wood boundaries are marked by a continuous line of trees, with the interior left open but coloured dark green. This is an idea of genius though he could go even better by showing the undergrowth layer that is usually at the edge of woods (i.e. so the wood boundary is a sort of tall hedge rather than a line of trees). You tend not to see rows of tree trunks when looking at a wood from outside – foliage grows where the light is. And finally there is a more subtle point that has only just occurred to me – the use of unsaturated colours – in other words colours with a bit of white in them. Saturated colour comes on bright and strong, and are OK when you are representing strong sunshine an clear air (the Sahara perhaps), but not so much in northern or central Europe. Also there is a scale effect – colours become less saturated with distance, or the more air the light has to travel through. Since small scales represent a greater distance between model and viewer they should be represented in less saturated colours. This is a well-established technique when painting models and figures (often achieved in the weathering effects rather than the original paintwork), and I use it a lot in my 20mm WW2 models. But terrain is more of a problem, because of the use of pre-coloured materials (dyed cloth, flock, teddy-bear fur and so on) which tends to be saturated. Bruce hand paints his scenery (within airbrush often) onto white T-shirt cloth, allowing a more faded, water-colour look. I think this adds to the authenticity.

And on the other side of the coin, what does Bruce not bother with? There is little texture to boards, which are essentially painted cloth. That painting is quite artful, with subtle shading for slopes, but it is flat. No teddy bear fur here. The vineyards and characteristic of this part of the world are just painted in. Of course the small scale of both men and terrain helps here.
There are good reasons why wargamers don’t do what Bruce does, but there may be ideas that we can use. A printed or painted cloth for one, more sinuous pre-made roads (using caulk, perhaps), and the more imaginative use of tree models. Hills are a big headache – and always have been for me. In the 1871 book Bruce suggests shortcuts to achieving a good-looking board without going through the whole rigmarole. He suggests the age-old technique of placing a cloth over polystyrene formers, of which he has a collection. Historically precise matching of contours is not needed for the sorts of games we play. The problem is that the cloth needs to be pinned in place. In fact pins are useful for a lot of terrain items, including trees, since they do away with the need for obtrusive bases. But what do you pin into? When playing “away”, such as at the club or a friend’s, it is not practical to bring large boards with you, leaving you with hard surfaces that in any case should not be damaged. Besides you don’t have much time for set up and take down. One answer (that increasingly I see at the club) is not to represent relief at all, and play on a flat surface. We did this for our Shiloh and Antietam games, as well as the Waterloo scenario. Other terrain features can dominate hills, and in our large scale games weapons ranges aren’t that long. Where a ridge line is important (as with our Waterloo scenario), alternative ways can be found to simulate it (we used a hedge), or perhaps just mark it unobtrusively.
Food for thought. There is an important difference to Bruce’s tables though: I am trying to create tables for 15mm or 20mm miniatures. These are bound to look different, and some of Bruce’s effects will be impossible to achieve. But I still think we can do much better.