Monthly Archives: May 2019

Battlefront WWII rules

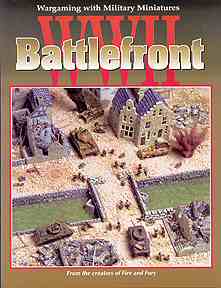
As faithful followers will know, I have been diverted from my original focus on the Napoleonic Wars to WW2, with more modern extensions. This follows my joining a wargames club, and the discovery of some of my old Airfix models in the loft. Since then I have been dragged into the pursuit of a suitable rule system. At the club we have played Fistful of TOWS (FFT), Rapid Fire! and (once) Battlegroup. All have their virtues, but each falls short in important ways. The heart of the issue is that of how movement and firing is organised. Meanwhile I was struck by the idea that the Fire and Fury system, developed for those American Civil War brigade level rules, and used by us in Bloody Big Battles, could work well for WW2. And then I saw that Fire and Fury Games published a set of WW2 rules: Battlefront WW2 (BF). I couldn’t resist. I ordered a copy from Steve Barber Models, which arrived this week. I’m very impressed.

The rules aren’t new: they were published in 2000 (which makes them more recent than Rapid Fire! though). They bear the stamp of that era, and, indeed, of the original Fire and Fury rules, which were groundbreaking at the time. The gaming community has moved on, but not necessarily in a good way. Two things stand out. First is that it uses an Igo-Ugo system, where each side moves all their pieces with distinct phases for firing, moving and close combat, and then hands over to the other side. Modern systems (like Iron Cross and Battlegroup) are based on individual unit mobilisation where movement and firing are combined, and initiative can switch between the sides. This can produce intriguing games, but it slows things down and often makes it hard to relate game play to what it is supposed to be representing – you start playing the rules rather than historical tactics.

The second dated feature for BF is that the rules are heavy. You can read through Iron Cross in an hour or two; Battlegroup doesn’t take much longer. FFT and Rapid Fire! are a bit more detailed, though FFT is much shorter if you ignore helicopters, tactical nuclear weapons and so on. BF is well-written, but hard work: definitely more than Rapid Fire! or FFT. It has taken me several sessions to complete reading it. The reason for that is an interesting one, though. It is not that the rules are over-engineered in the manner of many older rule systems, before Rapid Fire! shook things up. All the tables you need for play are on a two-sided reference sheet; all firing from direct to indirect to airstikes is covered by a single table and not all that many dice modifiers. The armour categories for vehicles aren’t very different from Paid Fire!’s. This is quite a bit cleaner than FFT or Battlegroup. The reason that the rules are so heavy is that they are comprehensive. Two sections are particularly thorough: on spotting and on indirect artillery fire. Other rules writers struggle with these. Iron Cross says hardly anything at all on either. And yet both subjects come to the heart of what war in this era was all about. The rules on indirect fire are particularly good. To be fair both FFT and Rapid Fire! do try to take both of these topics on, but they work that well in practice. To be fair on Rapid Fire!, I haven’t played enough of it to judge properly, in FFT it is just easy for anybody to call down fire on targets that would most likely be invisible. The BF system tries to capture the important differences between the systems of the US, Germany and the Soviet Union. The main rules set concentrates on these nations from 1943 onwards. The British artillery system only gets a brief mention (it was very similar to the German one, apparently) – but it gets more treatment in supplements on North Africa and the late war.

So the heaviness derives from thoroughness, not over-engineering. My feeling is that in fact the rules will play pretty quickly once players have got used to them. I like the thoroughness, even though this is very unfashionable – rule writers nowadays tout how their systems are simple and quick to read. But this comes at a cost. Firstly they leave a lot of things out, leaving the players and games masters with a lot to do to fill in the gaps. Iron Cross (and its derivative Seven Days to the River Rhine) are very bad at this. The other is that they give the players too much freedom and the games start to feel too much like games with toy soldiers without enough reference to history. BF is a welcome break from this. Indeed it could be a useful resource for games masters to help them resolve situations that other systems leave out.

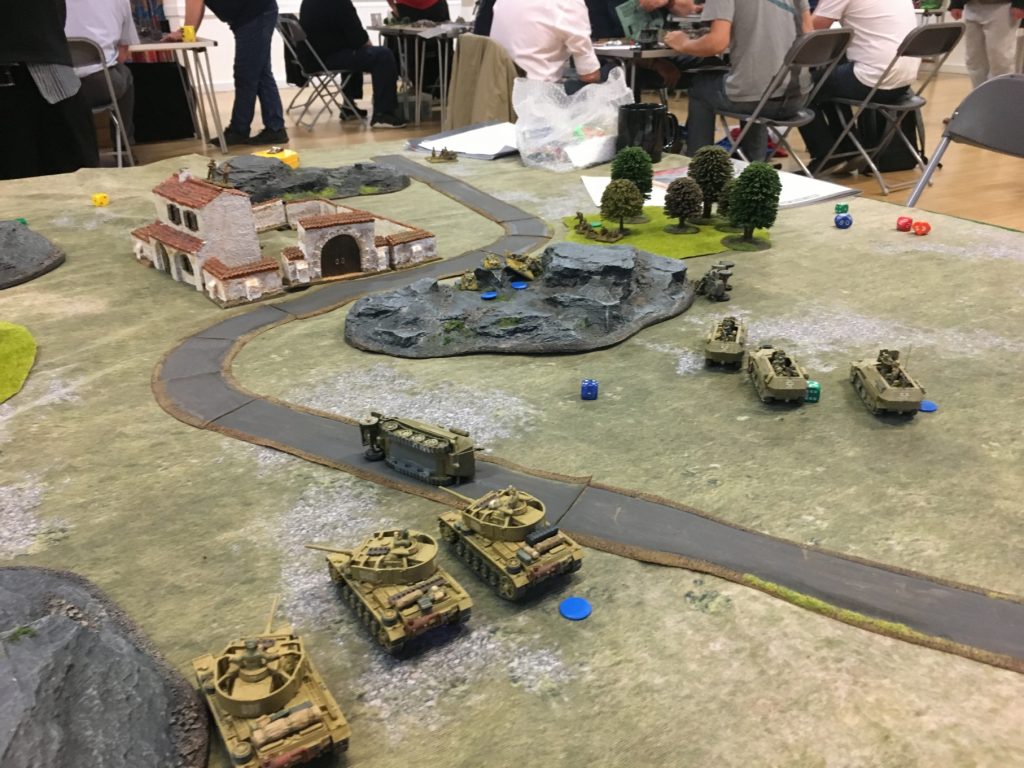
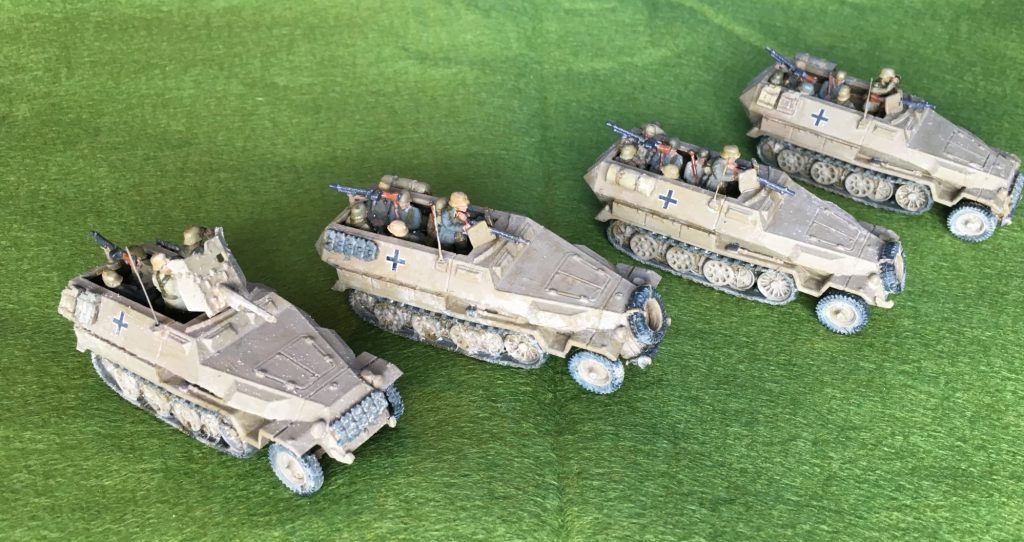
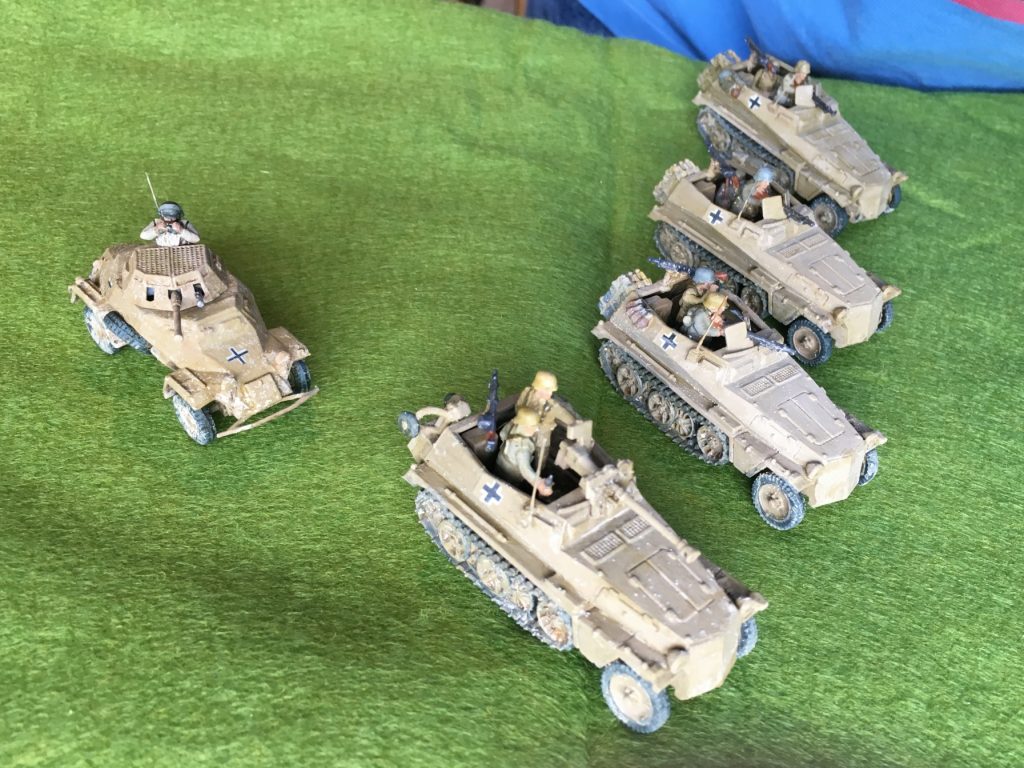
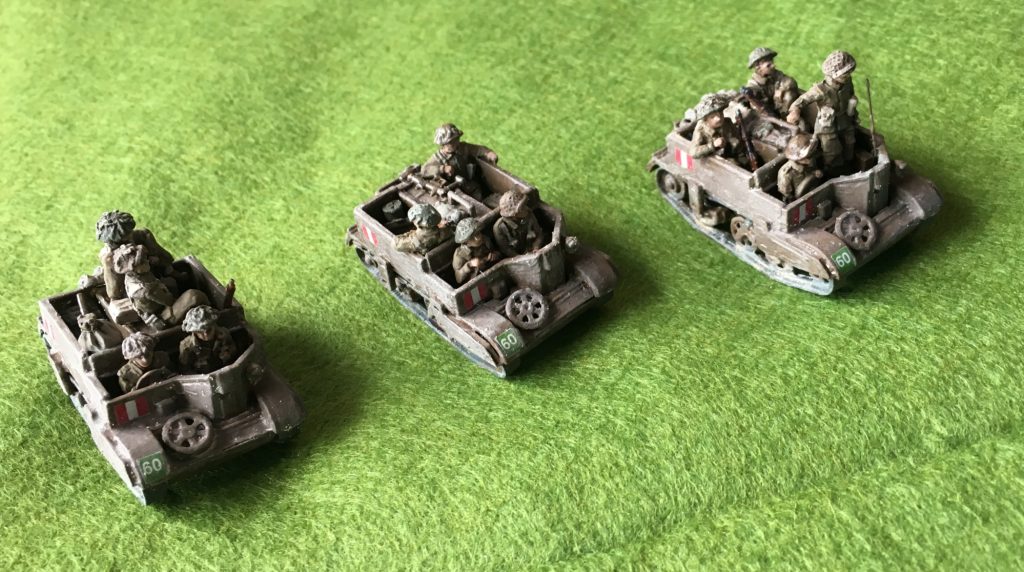
So what about the system itself. On troop representation it is based on company level command, with platoon level missed out. Each model (or “unit”) represents two or three vehicles. Infantry are organised in bases, which represent six to 15 men. A typical infantry company would have a mix of rifle and light machine gun bases. They are mainly designed for 15mm miniatures, with two infantry figures to a base. Distance scale is one inch to 40 yards – essentially the same as Rapid Fire! though that uses 20mm models and a higher figure scale. The rule writers suggest that for 6mm figures you can substitute centimetres for inches, which would put it on a similar ground scale to FFT, though with a lower figure scale.

The play system owes a lot to Fire and Fury, but caters for much more complexity. There is an important difference, though. The Fire and Fury sequence is Manoeuvre, Defensive Fire, Offensive Fire, Close Combat. In BF Offensive fire is brought forward to before Manoeuvre – which is similar to the old Wargames Research Group’s fire then move system. This makes so much more sense than the usual move-then-fire sequence (used, more or less, by all the other systems I have quoted, but most outrageously by FFT) that I struggle to understand why it hasn’t taken over. What it means in BF is that that initiative side starts with its suppression fire, moves in, and then has to deal with defensive fire on those moving units, before resolving close combat. Moving and firing is not allowed in your own turn. At all. The unit can close combat, of course, and a moving unit is free to fire defensively in the other player’s turn. This has a good feel – though the original Fire and Fury system still has something going for it provided suppression fire is brought to the front of the turn, though perhaps more in post-WW2 when moving and firing was more feasible.

I could write a lot more description, as there is a lot to describe. But these rules beg to be tried out. Which is where I bump into a number of problems. My WW2 miniatures are mainly 20mm and the infantry mostly based individually. The rules recommend multiplying the distances by 1.5 for 20mm miniatures – but that is very clumsy. It wouldn’t be hard to modify the quick reference table (only the spotting table needs to be changed) – but unit data comes on cards for each unit type, which would have to be rewritten. Besides there are lot of odd numbers (one inch and five inches especially) which are a bit awkward. The obvious thing to try is 20mm models with the 15mm distances, which actually is probably a similar spacing to using centimetres for 6mm models, but I’m sure the extra space is a good idea.

A bigger problem is that the rules are quite detailed, which will try the patience of my companions on club nights. There are strategies for dealing with this, by keeping the first games simple (no indirect fire, for example). But it could be hard work.

There is another idea. And that is to write my own, rationalised version for our purposes. While the system is not over-engineered I think there are several opportunities to make the rules simpler. I have two possibilities in mind. One is a Rapid Fire! replacement with the same distances but a bigger model scale. Like most systems BF plays as if each model was a single vehicle or gun, even though it represents more. For a larger model scale this doesn’t wash in my view (it is one of my issues with Rapid Fire!), so that there needs to be some provision for damaged units, for example. The second possibility would be an Iron Cross replacement, with one inch to ten yards, and a one-to-one vehicle scale, and with the long-range features written out.

Both types of rewrite would be a lot of work (especially as I would quite like to use d6s, especially 2d6s, instead of d10s). But fun too!

Seven Days to Iron Cross

Last night at the club we tried out a game of Seven Days to the Rhine, reverse-engineered for World War 2, as a sort of update to Iron Cross, on which 7 Days is based (both are published by Great Escape Games). We encountered issues both with the core system and specifically to 7 Days.

First the good news. The adaptation of 7 days was quite clean, amounting to just one page of supplementary rules, plus another half-page adapting the chance cards. This compares to my 8 pages of “house rules” for Iron Cross. As I have written earlier, 7 Days is cleaner and better-written than Iron Cross, so it is a lot less tempting to fiddle with it. The second bit of good news is that we used my new 1943 vehicles on the tabletop for the first time, alongside my slightly earlier miniatures in the project. They looked really good, though I say so myself. Especially the Dingo and Humber armoured car, which, alas, don’t come out in the picture above. The one taken from the British lines came out blurred. In the low light conditions of an evening game any flaws are less visible (I don’t think the dust on the wheels tracks is particularly good…).

For a scenario we used the Breakthrough scenario in both rulebooks. We didn’t use the chance cards in 7 Days, because of the issues of adapting them to period. The forces were of equal size, but the defending force (British) had more infantry, and started the game dispersed and unprepared. They had two Shermans, a 6-pounder, the armoured car, and four infantry sections, one with a PIAT. The Dingo was used as a command vehicle. The aim for the Germans, with three PzIIIs and three infantry sections mounted in SdKfz 251s and an SdKfZ 251/10 command vehicle, was to get a third of their force to the other end of the table. They were given extra command points. They didn’t manage to do this, taking some heavy casualties. They were probably too hesitant at the start and should have picked a flank and gone for a combined arms attack… However we did finish the game, for the first time with the Iron Cross system, which shows that we had the right number of units on the table for a two player game. Unfortunately having more players doesn’t speed things up with a sequential system like Iron Cross’s.

So, what were the issues? First specific to Seven Days. There were two significant problems. First there is no advantage to closer range for fire by or against vehicles: just one d10 and the same required score to hit. And no penetration benefit either. This led to a rather absurd encounter between a Pz III and a Sherman a couple of inches apart blasting away and either missing or shells glancing off. I think the justification is that the whole table is short range, and that in the stress of combat it is all too easy to fail at short range. Also vehicles would not stand still. Well up to a point. Range seems to be about 100 yards for 12in (maybe a bit less) based on the range of bazookas et al, so we can get vistas of 500 yards across the table. Not long ranges, but enough to make a difference. This is probably less true of armour penetration than of scoring hits in the first place (especially with WW2 technology) – though even then it is easier to place a hit on a vulnerable spot at close range. In original Iron Cross it is slightly easier to hit at 12in or less; in my house rules you got an extra d10 (as you do for fire against infantry in 7 days). You also got an extra 2 penetration points in Iron Cross at under 12in

The second problem is that to react to infantry in cover (to return fire, for example) takes 5 on a D6, compared to 3 against infantry in the open (which is what it was for all units in Iron Cross). This is fair enough against infantry opening up for the first time. No so much after it has being firing at you for several rounds, by which time you are needing a 6 to react. This allowed a British infantry section to wipe out a German one before the initiative could be passed back. This happened quite a bit.

What about the wider problems? My partners didn’t like the scenario. The German player felt it gave too much advantage to a side that could stay static. Realistic tactics such as suppression fire were hard to replicate. To do well in a scenario you had to game the rules as much as play the tactical situation on the table. In particular the idea that you concentrate your command points on a small number of units while leaving the rest static was a bit counter-intuitive. Trying to overwhelm your opponent with a coordinated move forward is not really feasible (though it is too easy in other systems like Fistful of TOWs and Rapid Fire!).

What to do? Some of the issue is with scenario design, and with lack of familiarity with the rules. The withdrawal option, for example, could be really quite useful. But that wouldn’t have helped that German infantry under fire from British infantry – as a failed reaction freezes your command points which stops any possible action later in the turn – too big a risk to take. The card system in 7 Days would also help, allowing re-throws and a bit of artillery intervention, for example. Though it isn’t hard to redesign the era specific cards, this is quite hard to do without producing a new set or defacing the original – which is hard with home-made resources. I might give this a try anyway.

But the search goes on for a more satisfactory rule system. I have just bought Battlefront WWII from the makers of Fire and Fury, and I’m also working on my own system.

A new version for BBB

Foe some months I have been planning a new version of my house rules to cover Napoleonics for the Bloody Big Battles rules. Recently I drafted a version and tried them out at the club on Monday night. There are some issues to fix, but I think I’m making progress.

The changes represent a further migration away from the core BBB system, which is derived from the Fire and Fury ACW rules. However, there are some simplifications, making them shorter than the earlier version, and reverting back to the original in places. I like it when that happens – you know you are onto something when rules get simpler.

The biggest change is to make disruption cumulative. In the original system if a unit suffers disruption when it is already disrupted then nothing happens. In the new system the unit can acquire a second disruption marker. If it gets a further disruption then a base is removed (and the unit remains disrupted with a single disruption marker). A double disruption result may arise from firing or assault – if so a unit that is already disrupted (single or double) will lose a base, and retain a single disruption. A double disruption can be cleared through the movement throw, but it takes an extra half move.

This change makes firing and assault more lethal, so I adjusted both to compensate. On the fire table the bottom 1s (for single base loss) in each column were replaced by DDs for double disorder. I tried something more radical on the Assault table: the new system allows more increments in terms of losses – so in the +3 to -3 range each result has a different outcome. For -1/0/+1 the result is both sides suffer disruption, with the losing side falling back 3in; for a draw there is a further round of combat. For +2/-2 the loser takes a double disruption and falls back 3in, with the winner taking a single disruption. For +3/-3 it is similar except that the loser takes a base loss and the winner a double disruption. This table is intermediate between the original one (which we were still using for cavalry combats) and the house infantry table, which had base losses for both sides except the draw. So I decided on the radical step of moving back to one table for all combats. Cavalry attacks on infantry (which used a third table) were tweaked with some special rules on squares.

A second area of change was on formation changes. Here the main rules and artillery rules were re-merged, by infantry and cavalry taking on the new artillery rule. That means units can do two out of three of move, offensive fire or change formation, without any half-effect to either movement or firing. This is simpler and more flexible. There is a possible abuse: a unit could march up to musket range in march column, and snap into line or depth without the other side intervening except with defensive fire. So I added an opportunity charge rule, by which units changing formation within 6in of enemy units may be subject to a charge instead of defensive fire.

The third main area of alteration was skirmishers. Units don’t now have to break down one of their formed bases to deploy skirmishers. The skirmish bases live behind the unit when not deployed. Also normal firing rules apply when a unit with skirmishers is hit: the unit may suffer disruption, rather than removing a skirmish base. A skirmish base is removed whenever a main base is removed. This is simpler and tidier. I did like the idea of players choosing whether to put strength into the skirmish line or keep in the main body, but that was one too many more things for players to think about, and they never really engaged with it.

There was also a tweak on artillery fire, with bouncethrough fire allowed 3in beyond the main target, at reduced effect. The main effect will be that infantry can’t shelter behind artillery batteries with impunity, as happened in our Shiloh game. Finally I had written some special rules on artillery units close-supporting infantry in the earlier version. In fact I rediscovered a bit of the original rules about infantry and cavalry units supporting artillery units, which did much the same job, so I reverted to this.

So overall the new version is simpler and in many cases closer to the original, though the cumulative disruption and formation change rules are a change to the core system.

How did they play on Monday night? It was a question of so far so good. The skirmish rules need a bit of tidying up. This is about when they affect assaults, which wasn’t all that clear. Also I need to be clear about when you measure distances to the skirmish screen and when to the main body, though this was intuitively obvious. In the game I let the French player keep his skirmish bases very close together, as his divisions concentrated on a very tight front. This looked fine on the table, but made skirmish fire potentially very effective. Should I enforce a one inch gap rule between skirmish bases, or reduce the effectiveness of fire per base? This will need some thought.

The main issues with the game arose from core BBB – which in turn arose form poor scenario design by me. It was a trial game and I was in a hurry. I made the objective a town occupied by the Prussians, who were split between and initial occupying force and a reinforcement. But the town was way too big (I was using some of the clubs 15-20mm buildings – which had quite a big footprint). That meant the Prussians started to pile their infantry in and the French to concentrate five or six infantry divisions in a single attack. I also classed the town as a “town” rather than a village in the rules, which made it more like a massive fort. In fact a town should cover quite a small area (you pretty much have to use under-scale buildings – and use a clear base plate). And both armies needed to be spread across a wider front, with perhaps more than one objective.

The town fighting was rather unrealistic: it didn’t have the characteristic ebb and flow of the era, because of its size and classification. A second issue was that the French player was able to concentrate up to five four-base divisions in depth onto the single Prussian 6-base division in line. This allowed some extraordinary concentrations both in firepower and in assault , though it took four moves before he was able to get a properly coordinated attack in to send the Prussians packing. This highlighted two rules issues. First when about four infantry units and two artillery units concentrated fire they threw an 11; this wasn’t all that effective because of the double left-shift arising from the cover, but it did mean that all the units had to take a disruption (which replaces the out of ammo rule), which delayed the main attack. This felt a bit farcical, though actually it probably isn’t that hard to rationalise away. The French were spending too much time trying to reduce the enemy by firepower and so didn’t have time to organise a proper assault. In the assault the French were eventually able to concentrate 3:1 on the unfortunate Prussian unit. What this drew attention to was the looseness of the BBB rules on which bases can be involved in a combat. Four bases piling in on each flank didn’t look quite right, especially when the Prussian were reduced to five bases by assault fire. Mainstream Fire and Fury looks a bit tighter, so maybe something can be learned from that. Still a six-base division deployed in a single line covering practically a kilometre is going to be rather vulnerable!

Another curious episode came when the French were able to pile up one infantry and two cavalry units in a combined attack on a single Prussian unit in depth (with an exposed flank). In the previous version combined arms attacks were resolved with infantry and cavalry kept separate, not least because they used two different combat tables. I rather liked that because it was in fact hard to coordinate the two arms at such a grand tactical level. Also there is a scaling issue each infantry base has three times the men of a cavalry base (unlike mainstream BBB), so using bases to stack up odds doesn’t feel quite right either. There is something to be said for forcing the separation again, and taking the odds out of the infantry-cavalry combats. Cavalry vs. infantry combats were more about psychology than numbers after all.

And finally we had rogue cavalry units in the rear – a familiar problem in wargames – but artillery is very at risk under my rules. These seem far too effective. Of course cavalry in rear areas could be a problem, but it was hard to direct. And cavalry exploitation for half a move (9in – pretty much a mile) looks a bit heavy: cavalry were often exhausted by the initial assault – though there was the Union brigade at Waterloo, but that came at the expense of utter disorganisation. We also had a case of a french cavalry unit able to catch up with the retreating Prussians from a previous combat. I don’t think this kind of long-range pursuit combat with cavalry actually. A more limited exploitation rule looks better (3in or 6in perhaps), and disruption for winners on a big combat win (7+) looks sensible too (though this is presumably meant to represent the defeated side collapsing without a fight).

So a few things to think about before I settle on a definitive 2019 version. There is also another idea which I picked up from a wargames magazine which might be worth a try. How about replacing lost bases with “morale makers” with the same footprint (e.g. a base with some casualties,say)? This means the unit footprint stays the same and it is obvious how many bases have been lost – which perhaps reflects better how things worked in this era. More radically the “spent” status could be replaced with a deduction for each base lost. That would then mean making adjustments for veteran and raw units in movement and assault throw. There’s an interesting idea in there!

My new 1943 vehicles: the Germans

As I was preparing the British vehicles last year, it struck me that I badly needed some German half-tracks to speed things up in German attack scenarios. I had already bought boxes of Plastic Soldier Company SdKfz 250s and 251s, so I put these together. There were three in each box, and I added an extra one of each from PSCs “reinforcements”. For good measure I also added an SdKfz 222 armoured car from my legacy collection. This was over ambitious, but we’re done now.

First the SdKfz 251s, sometimes called Hanomags. These were the earliest armoured personnel carriers used by anybody in quantity. The Germans often used them to carry troops into battle under fire in close support of armour, though this led to heavy losses. They used this tactic at Salerno, which gives me a bit of a gaming opportunity. By comparison, though the Allies had M3 or M5 half-tracks, they were slow to use them so aggressively. I had a couple of 251s in my teenage collection (from different manufacturers), and hoped to use at least one of these. But they were seriously under scale, and really wouldn’t have worked next to the 1/72 PSC models. Also they seemed to be based on the early A or B variants, when I wanted the mid-war C (different again from the D, introduced in 1943, and which is the most commonly seen in Normandy). I decided I needed four to make a complete platoon, which included the platoon leader’s version with a 37mm gun, though I have no idea whether they used these in Italy!

The models were an early PSC release (fitting in with their initial focus on Kursk), which means that the model is a bit more basic than I was used to, and the instructions very vague, with no explanation of the options. The model is quite chunky, as usual – PSC scale them up from their 15mm (1/100) versions. I had a little difficulty in fitting the top hull section to the middle bit, which necessitated the use of some putty. But the models do the job and are good value for money. PSC provide crew figures (2 in the front, 4 in the back and a gunner), which I used. These figures are a bit chunky and not nearly as nice as AB castings (which would have been available as an option, for quite a bit of extra money). By using some spares from the platoon leader, and the 250s I was able to up the crews by one in each of the ordinary vehicles – still one short of the actual crew. It was a bit of an awkward fit in places, and I tried to get the layout slightly different in each model. Also I used the loader form the 250 for the 37mm gun, and a figure with binoculars. I added an aerial. I’m not sure they were all equipped with radios, but I decided to be generous. The aerials were scale 1m, which looks a little short, so upped it to 1.5m for the platoon leader. Some stowage was added too, but sparingly. Pictures tend to show these vehicles quite clean. Mostly these came from the kits themselves.

Next come the SdKfz 250s – the alte version, still in widespread use in 1943. Unlike most half-tracks, this vehicle was purpose built for that mode, and was accordingly more robust. It was used a lot by the German reconnaissance forces – hence my interest, as I think interesting scenarios can be built around reconnaissance forces. Once again I opted for a platoon of four. The leader is a 250/11 with the sPzB 41 anti-tank rifle. This was dismountable, and the kit provides the dismounted carriage both in a folded version to be carried on the back, and the deployed version. I will do a dismounted version when I next do some German infantry, using some surplus crew figures from the PaK 38.

The kit was from PSC, but a later issue than the 251, with more options and better instructions. The crew was of similar quality to the 251 kit (and the machine gunner identical). It was the usual chunky fare but fitted together a bit better than the 251. Only three crew were provided per vehicle, when there should really be five. You can’t see that one is missing from the front seat though, so like the 251s there is just one short in the back. It would have been very awkward to try and fit more figures in. I used some of the figures from the 251s to give some variety as well as having the machine gunners pointing in slightly different directions (which mean a bit of surgery to the lower legs in a couple of cases). Aerials and a bit of stowage were added.

Finally there is the SdKfz 222 armoured car. I had kept one back from my teenage collection, taken form the old Airfix reconnaissance set. This contained one of these armoured cars, plus a kubelwagen. I kept the latter too, but it is hopelessly under scale, even for 1/76, and unusable. A pity because I had gone wild with the reconnaissance set and I have two or three lots of it unmade and unpainted. The Airfix 222 is a bit of problem as the turret just isn’t right. It’s too small, doesn’t have the mesh covers, and it would be very hard to add a crew figure. But the PSC kits came with a turret for the 250/10 version. So I wondered if I could marry these turrets with my Airfix models to get a platoon of armoured cars. The good news was that notwithstanding the scale difference (1/72 to 1/76), it looked about the right size. The bad news was that it is modelled with the mesh cover closed – in pictures it is always open. I manged to fit it to model, and even to perch a crew member on the back of the turret (there are photos of them doing this). So I thought I would give it a go. By 1943 the SdKfz 222 was a bit passé, as its off-road capability was a bit limited. I think it had largely been replaced by the 250/10. Never mind it’s what I’ve got.

Painting the half-tracks provides a bit of a challenge given the partially enclosed nature of the vehicles. I usually like to assemble then paint, but that was clearly impractical. So I assembled the top (including the machine gunner attached) separately from the rest, and then gave it all the darker base coat. I then completed the assembly. That meant I couldn’t reach the lower deck portion of the models to provide any paint detail there. That was OK though – these are only wargames quality after all.

As with my previous two attempts at mixing the dunkelgelb main colour, I struggled to get a satisfactory mix. After thinking I had achieved it, I took against it and decided on a remix and repaint. That meant the paint went on a bit thick. Though building up paint in layers with slightly different shades is a recognised painting technique, this was clearly overdone. And I’m still not 100% with the result, which is a bit too grey and has a hint of green (though that was partly down to the wash). Dunkelgelb came it in a wide variety of hues during the war, so there is no such thing as accuracy – but I had hoped for something a bit lighter and yellower. As it is I ended up with something very close the old Humbrol “authentic” shade, so it is well within the realistic range. This is the third successive time I have struggled with this colour and painted many more coats than I originally intended, so there is still a fundamental problem here. One difficulty may be that I have been using student colours, which tend not to dry true – though since this is a high volume job I would like to make these cheaper pigments work. But also I’m attempting to reach the result with a three hue mix (plus white), with yellow ochre, Prussian blue and terracotta red. This leaves far too much room for variation. I need to experiment with two hue mixes. Yellow ochre and black may work (though this is the traditional mix for olive). I am even thinking of using a brighter yellow and purple (my attempt with yellow ochre and purple not working so well when I tried it). This is not an advert for my practice of mixing paints from artist’s colours, rather than the usual paint by number approach using hobby paints.

Like my other German vehicles so far, I didn’t paint any camouflage patterns, though olive green and red brown were issued for that purpose. I don’t see it much in pictures form Italy in 1943, and I went a bit too wild on this back in the 1970s. I might try this on some later vehicles, based on a degree of historical evidence. The crew figures were painted in uniforms with various shades of olive, sand (i.e. faded olive) and grey. As before I don’t have good sense of what they should look like – photos are a bit scarce. But at least it’s reasonably consistent with the infantry I have already painted.

The next adventure was the wash. I decided against using the Windsor and Newton peat brown ink I used for the British vehicles. It has a bit of a red tint which I thought would make the dunkelgelb look wrong. Something like this happened with the Panzer III models and the Quickshade, which has a similar hue. So I decided to have a go at mixing my own with yellow ochre and black ink, diluted with water. This proved very tricky. It took me quite a bit of time before I reached a version that I felt brave enough to use on my models – a sort of olive green. This was fine where it pooled in the recesses, but gave the models a slight greenish hue elsewhere else. It took the models even closer to the old Humbrol colour! I think I’ll try something else next time, though I have large quantities of my mix left over. Should be fine on olive drab (I used it on my jeep too).

For decals I used just the balkankreuse. I considered ID numbers (as for the tanks), but this was a bit awkward with the stowage items, and anyway you rarely see them on this sort of vehicle. For the 250s I used spares from old Airfix Pz IVs. A bit chunky but OK. For the 222 I used some from the old Airfix recce set. The black and white weren’t properly aligned, which was a pity! For the 251 I used slightly bigger ones from a set I acquired commercially at Salute in 2017 at significant expense – black and white ones on the sides, and white ones on the back doors. These decals are very sharp and much nicer than the old Airfix ones (though you have to cut them out carefully), but the back door ones were a bit tricky as I had to cut them down the middle so as not to obscure the crack between the doors.

The decals were placed on a surface prepared with polyurethane gloss varnish, and sealed with the same substance. I’m not sure the first step is strictly needed given that I prepare the surface with Microset – but the flash is invisible. I might experiment without next time. After this I sprayed the vehicles with matt varnish. As with the British I painted a bit of “matt” varnish (which gives a rather unpredictable level of sheen) onto some highlights for a bit contrast – flesh, small arms, straps and helmets. This was a good move for the machine guns, which look much better, and I think it works on the helmets too. It is a technique I will develop as a complete matt finish doesn’t quite work.

Finally came the dust patina. I experimented a bit on the 222, as the most dispensable of my models, and overdid it bit. The others turned out fine, though I did apply some extra to the running gear afterwards as the mix had become too diluted.

That’s going to be it for a while on my 1943 stuff. I have a stack of stuff still to paint, and plans for much more, but my Napoleonics are feeling neglected, and also some terrain stuff to do. Plus I have some domestic credit to build, which means a bit of a clearout in the spare bedroom where I do my painting.

1943: vehicle arrivals. The British

All 16 vehicles

This week at long last I completed a batch of 16 vehicles for my 20mm 1943 Italian theatre project. I started this back in October, but a trip to Australia, Christmas, flu and other stuff intervened. I had thought it was a good move to do large batches of vehicles in order to clear the plastic/resin/pewter mountain, but this was probably too big, especially as it covered both sides. But it is an important reinforcement which will enable much more variety in any club games we play with my 1943 stock. In this post I will look at the seven British vehicles.

First come three Bren carriers, giving me a complete carrier section. A British WW2 force without carriers is like a pub without beer. Apart from the rimmed helmets nothing looks more British. Also carriers give the British side a mobile reserve – which matters since they didn’t use armoured personnel carriers at this stage. And a common theme of this batch was to strengthen reconnaissance forces, which is another role for the carrier section.

The models are from my teenage collection, from which I kept six Airfix carrier models. They aren’t particularly nice, and they are 1/76, when I prefer 1/72, especially for the smaller vehicles. But it seemed a shame not to make use of the inheritance. I crewed them with the AB Universal Carrier set. These are lovely figures, not entirely suitable for 1943 Italy (1944 Normandy more like). Getting them to fit into the models was a challenge, especially the ones seated in the back. I added various stowage items, including weapons – though I was unable to get Bren guns sticking out of the aperture in the front – in fact it was a bit of a struggle to find any suitable spare Bren guns, which barely feature in the various sets of parts on sale. But I did manage a PIAT and a 2in mortar. It took me a long time to get everything sorted out and positioned reasonably plausibly. But it was worth it. The figures and stowage lift the final models to a new level. One issue is that these crew figures will stay in place even when they have disembarked and take their place on the table on foot. But it was impossible to devise a system of removable figures, and doing up spare debarked versions felt excessive. I have the same issue with my German half-tracks.

Next come a Loyd carrier and a jeep. These are metal models bought from SHQ. They worked out OK, and metal models have a satisfactory weighty feel, but I don’t think I will get any more. The models are a bit vague when compared to the crispness of the Milicast resin ones, which is the main alternative for the odds and ends. The crew for Loyd was from AB, again, and like the Bren carriers, help to lift the model. There are jeep figures from AB, but I bought these from SHQ as I was worried about a size mismatch on a model advertised as 1/76. The figures are indeed smaller – but they are also vaguer. The Loyd provides transport for my 6pdr AT gun. I had three Airfix ones which came with my carriers. I have one in deployed mode, and one towed, as it is hard to get these models to serve as both, though in theory you could.

And finally for my recce forces I have a Humber armoured car and a Daimler Dingo scout car. The Humber is one of my teenage leftovers: a Matchbox model that now looks pretty unobtainable. It is the desert version of the Mk III, so not actually right for 1943 Italy (the spare wheel should be at the side, among other details). I managed to get the turret hatch open and insert a Milicast resin commander. These aren’t as good as the AB figures, and a bit smaller. That’s OK for a 1/76 model. The stowage was as per the original model, which got the balance right. I am very pleased with how this one has turned out. I wasn’t that keen on it originally, in its desert sand coat, but with a bit of TLC and a new scheme and it is transformed. In fact I am now very attracted to the Humber armoured car: a sturdy vehicle that looks as if it would have good off-road capability.

The Dingo is a new 1/72 plastic S-Model – there were two in the box but I left the other one for later. This is quite a fine-grained model with a few fiddly parts – unlike the chunky Plastic Soldier Company models that are my mainstay. But a big drawback is that it is modelled with the hatch closed. In photos you never see this vehicle with the top closed over. As a scout car it would not be functional like this. It wouldn’t have looked right. I had to cut the top cover and file it down to make it thinner to represent it folded back. I then inserted purpose-made crew figures from AB. There is no inside detail, but the AB driver has a wheel, and this suffices for wargames purposes. The other modifications were the addition of two aerials and replacing the Bren gun. The version with the kit was very delicate – whereas the Brens with my figures are much chunkier. Doubtless the delicate version is more realistic, but it would have jarred with the AB crew. I used one of my few spare Brens. The Dingo is a versatile vehicle that can be used for recce, artillery/mortar spotting or as a command vehicle (they were often commandeered for that purpose). And less vulnerable than the jeep: wargames rules seldom allow its small size, speed and manoeuvrability in getting out of trouble.

As for painting and finishing, the carriers (both sorts) were done up in infantry colours based on a much used picture of three carriers coming out of a landing ship on Salerno beach. The main colour is SCC No. 2 – the standard colour for British army vehicles and equipment in the mid-war, sometimes called Service Drab or Khaki Brown. This is not a colour you often see on modern restorations (or at all in fact), and colour photos are rare and unreliable – so unlike other colours it hard to know how it actually looked in action. The colour swatches in various publications show a dark brown with a slight reddish tinge. Photos and colour drawings from the time suggest something a bit paler and duller, not at all far from the khaki on soldier’s uniforms. I struggled and it took three goes before I decided I had something I could live with. This was closer to the swatches than the pictures, though still quite close to uniform khaki. I used the usual raw sienna base, with some blue, white and raw umber. Some red got into the early mixes but was pretty much gone by the end.

The Humber and Dingo were done up in recce regiment colours, using the two tone scheme of Light Mud and Blue Black. Having pioneered this with my Royal Scots Greys Shermans, it was quite straightforward to get to the mix – using Raw Sienna, Prussian Blue and white (the same three pigments I used for the British uniforms). It may have helped that I was using artist quality paints for this, which dry truer than the student colours I often use for bulk jobs. The disruptive patterns were largely made up, as there was not an official pattern for either vehicle – though for each there was a photo to get started with. I did the jeep in olive drab. Jeeps were painted up in Light Mud/Blue Black, but I think they were mostly left in their original colour. I reached this using Yellow Ochre and black, with some white. Olive drab presents difficulties for modellers. The swatches and official mixes all show something very dark; the pictures of vehicles in the field show something lighter. Modern restorations (and modern art work representations) go with a lighter version too – but more chromatic than you would expect from the “authentic” version weathering. I went for something paler than the swatches, but greyer than the modern interpretations. I looks right to me and I will use this colour in any future models needing this colour.

After the main paint work I gave the models a wash in peat brown ink, a little diluted. This was instead of the Quickshade I had used before (but not the jeep – which used the same mix I used for the Germans, which I will describe next time). This shade doesn’t discolour the vehicles the wrong way, as the colour schemes are variations of brown anyway. It worked fine as a substitute for Quickshade.

For decals I wanted enough to give the vehicle a period feel, but without the hassle of full serial numbers and vehicle names, which with my OCD tendencies would have taken ages to fix. For the British this meant the characteristic Arm of Service badges and the red and white ID flashes. I was going to do divisional ID badges too (for the 56th division), but I had printed these on transparent decal paper. Given the trouble I had with transparent decal paper on dark backgrounds for my Shermans I decided to skip these. They were an indulgence anyway: vehicles at Salerno and for much of the Italian theatre didn’t use the divisional badges. I didn’t do any markings for the jeep. The decals were my own, printed on white decal paper, which meant I had to cut them out right to the edge – which was a little inaccurate at times.

After a matt varnish aerosol spray I did a little touching up with some paint-on matt varnish, which dries to a slight sheen. I did this because otherwise the varnished vehicles look a bit too flat. This varnish went on to the flesh, the weapons and any binoculars and earphones, and also on any helmets not covered in netting. I’m not sure this is entirely right for the flesh, but it works well for the weapons and equipment, and I think a little contrast is a good idea.

Finally comes the dust patina. This time I used a purpose-made product: AK spatter effect accumulated dust. I bought this at Salute and it was my first serious job for it. It takes quite a bit of courage to do this on models you have been working months on in the knowledge that they could be ruined. The product is quite thick, and it is textured. It works very well if dabbed on with a paint brush in areas where you want it to be thick – it is good for spatter effects, as its name suggests. But I also wanted a weathered patina effect for the whole vehicle. I used a diluted version dabbed on with an old paint brush. I wasn’t at all sure about this as I was applying it, especially with the odd grains of texture effect which dotted the models a bit. I had to be careful it didn’t pool too much in the cracks. Putting it on with a cotton bud (which is what I did with my paint mix on the Shermans) didn’t work with this product. I was worried that I had overdone it; it was quite heavy on the Loyd carrier in particular. There was too much in one or two places (the wheels on the jeep, for example), but actually it was a little underdone in other places (on the wheels and running gear on some models, where it needs to be thickest). Once it had all dried and I got used to it, I decided that it worked well, giving the vehicles a nice used look. It worked especially well over the decals, helping to integrate them into the paintwork. My technique will doubtless improve over time.

Next time: the Germans.

A BBB version of Shiloh

End of Move 2 I think the French attack on the Prussian right develops

Last night Terry and I used my cloth for the Altar of Freedom game on Shiloh to refight a Napoleonic version using our version of BBB. It was fought using my Napoleonic French and Prussian armies. It is interesting to compare the two systems.

The distance scales are the same, which meant there was not problem in using the same terrain layout. The main difference in game layout is that BBB is played using brigade units (two or three to a division), while BBB has division sized units. Each AoF brigade corresponds to two BBB bases. That means a two brigade division has four bases and a three brigade one six. That makes BBB a bit more compact, but the frontages are broadly similar using the 40mm bases for AoF that we have being doing. Using the recommended 60mm bases would mean that two brigades could cover five inches easily and six at a pinch. A BBB equivalent division would cover four inches. Artillery units are pretty much the same between the two systems. Cavalry is different mainly because of the different cavalry role between the Napoleonic and ACW eras. In BBB we use a much lower figure ratio, since firepower is unimportant. A typical BBB cavalry unit is a brigade, the same as AoF, but it has a bigger footprint.

In putting together the armies I wanted to keep my standardised 1815 units rather than do a new lot of labels. The French took the Confederate role. Bragg’s corps of six brigades translated into three four-base divisions, but otherwise the conversion was quite simple. Command and control was harder. I did not provide leaders for the counterparts of Polk and Breckinridge, but Bragge and Hardee’s counterparts were on the table, as well as Johnstone represented by Napoleon himself. On the Union side all the divisions were three brigades, so it was quite easy to give them Prussian six-base units as equivalents. I divided them into two corps, each with a general, and a commander. I gave the French a slight quality edge: with one Aggressive infantry unit (the Young Guard in the reserve corps) and veteran cavalry. The Prussian had one Raw infantry unit.

We started a bit earlier than a normal club night and got three hours of game time in. In that time we played four and a half moves. That was no quicker than AoF, in spite of the smaller number of playing pieces. But there were only two of us (rather than four) and more did happen. The French (played by Terry) started with an aggressive assault on their left and centre. This went badly, with some effective firing by the Prussians, followed by a good close combat result. In the second move one of the French units was destroyed, and that left three of the smaller French units facing off against two Prussian ones in a static stalemate. I was mulling a counterattack.

But with this failure, the French decided to switch to the left, throwing in their reserve corps against the open Prussian flank. This fared much better, with the Prussians struggling to hold off superior numbers. A spectacular cavalry counterattack managed to do for a second French infantry unit, but the two front line Prussian infantry units were flagging to the point of near collapse, though the lead French infantry was similarly flagging. But they had two fresh infantry units (including the Young Guard), backed by two cavalry units, to face one not so fresh Prussian infantry unit and the triumphant cavalry. Meanwhile the wooded terrain was making the artillery hard to organise. I thought the Prussians were losing at the end (given that we had only reached midday), but it wasn’t hopeless. It was an exciting game.

How did the systems compare? The French/Confederates were able to deliver a much quicker and better coordinated attack in BBB. The Prussians/Union were not able to organise their defence so easily. Vital movement throws failed to come up on several occasions, limiting my ability to pull the defensive line back (something that the Union did very effectively in our AoF games). Not that I can complain too much: I had good combat dice on several critical occasions. The BBB game was much more decisive. By the end of our game the French had lost two infantry divisions and a battery out of action, two spent and another one damaged (one base loss), and one cavalry unit damaged. The Prussians had lost no units, but two infantry units were spent and the other three damaged (they only had five, until the possibility of reinforcements much later). At the equivalent stage in our AoF games at most one brigade had been put out of action.

This reflects each system’s strengths and weaknesses. In AoF command and control limitations were much greater on the Confederate side, making their attack much slower to progress, and limiting them to two or three divisions a turn. The Union side had much more flexibility. But BBB combat handles attrition much better. A lot of this is due to my modified rules for Napoleonics. Core BBB would have meant many fewer losses. This may be a fair reflection of the difference between the two eras, before the needle gun and chassepot suddenly upped the casualties.

Another difference is that artillery movement is much more flexible in AoF. In BBB you cannot limber and unlimber in the same turn, which makes it harder to move artillery around. We have made it more flexible in our version than core BBB (so that you can limber/unlimber and move a full move), but it is still hard, as I found as the Prussian line faltered. If the infantry gave ground it effectively meant the accompanying artillery couldn’t operate; it was similarly hard for artillery support to keep up with the attack without pausing it. The artillery needed to fall back further to occupy a new defensive line behind the infantry. This is something I should have been thinking about as the Prussian player. It is exactly how the French approached their withdrawal at Vitoria in 1813, so I don’t think BBB is unrealistic.

Overall I’m quite pleased with our house BBB system. It is working much as intended, and produced an exciting game. The skirmisher system remains scrappy and needs some cleaning up. The cavalry flowed through the woods and conducted attacks there a bit too easily. I am planning a substantial revision which will also address the disruption issue: inflicting disruption on a unit that is already disrupted doesn’t affect it. But I’m also working on something much more original that deals with some of BBB’s deeper problems. Meanwhile I think AoF works perfectly well for ACW, and represents command and control issues much better.

One more learning is on terrain. I have constructed a terrain cloth for Shiloh, with painted masking tape for roads and revers, and patches of felt taped on for woods. It can be folded up and is very portable, while representing complex terrain much better than using just standard club equipment. Last night we put the cloth on top of another felt cloth – this didn’t work well and led to it rumpling easily. Felt needs to be placed on a frictionless surface to lie flat. I think the idea can be developed – though hills are an unsolved issue and the rivers don’t work as well as the roads.