Monthly Archives: January 2023

Grouchy’s Waterloo by Andrew Field: Ligny

I’ve had this book for some years, and I’ve grazed from it, especially its account of Ligny. But recently I reread it in its entirety, and that serves to help me refocus on Ligny. I last studied this battle in detail in 2018, producing this article, in which I voiced my frustration with English language historians. That included this book.

This book, of course, is only tangentially about Waterloo – but you need to get the W-word into the title for it to sell, especially if the N-word or the other W-word (i.e. Wellington) doesn’t work. There is a discussion of why Grouchy never made it to Waterloo, which I suppose is link enough.

What this is actually about is the right flank of Napoleon’s assault on Belgium in 1815, and Grouchy’s role in it in particular. As with his other works on this campaign, Mr Field’s brief is to present French sources, which are typically under-represented in English language writing. That gives it a lot of value – but one of my main frustrations with most military history is that it is written predominantly from one side’s sources, and from their point of view. For all that, Mr Field does mention Prussian sources where relevant. My main frustration with the work is the one I raised in my earlier post: he “lets the sources do the talking”. He often uses the quotations as a substitute for his own narrative, and he rarely tries to pull the accounts apart to throw light on what is likely to be inaccurate or belong to another episode in the battle.

The main attraction of this book is its accounts of the battles of Ligny and Wavre, alongside the combat at Gilly. For all the one-sidedness of the sources, the accounts are as clear as any I have read, and his overall judgements seem sound enough. It is notable that he emphasises that the Prussian army wasn’t crushed, as breathless French-sourced accounts tend to suggest. He does indulge in critiques of the various commanders’ decisions though. Most historians do this, though I prefer a little more of AJP Taylor’s “What happened and why” – still it does help to understand that there may have been better choices.

Ligny is my main focus. One of my planned focus points for 2023 (I hesitate to call it a New Year resolution) is this battle, moving towards reconstructing it on the tabletop using my newly developed rules. Alas probably solo. I had allowed myself to be a little diverted by Waterloo, and especially the Prussian role there. I am left with a number of puzzles about this battle:

  • Why did Wellington, on his visit to the site before the battle, suggest that Blücher had deployed his men on forward slopes exposed to French artillery, drawing the riposte that Blücher “liked his men to see their enemy”. In fact the Prussians were so well concealed that Napoleon was confused as how many corps he was facing. Prussian reserves did have to cross a forward slope to reach Ligny, and did suffer – but their initial deployment was out of sight. Mr Field does not mention this. So much of the British reverse slope mythology is built on this episode – and yet I can’t believe that Wellington completely fabricated the story (though there are no corroborating witnesses).
  • Where did Vandamme’s corps start the battle? Almost all maps of the battle show it to the west of the St Armand complex, to the right of Girard’s division of Reille’s corps. That leaves a large gap between it and Gérard’s corps. Mr Field remarks on this gap but moves on. I think it is likely that the corps was in fact to the right of Gérard and astride the road out of Fleurus towards St Armand. This is what the language of the French sources suggests, and it also explains how these units came under artillery fire as they approached, as the first-hand accounts suggest, though these aren’t entirely reliable. An early Prussian map shows the corps in the westerly position and I think that most people have simply followed this.
  • How did the Prussians lose? The big question. They had more men and a decent defensive position. They just seemed to burn through their men more quickly in the two built-up areas. But why? Reinforcements had to expose themselves to French artillery, but that hardly seems enough to account for this. Mr Field does not address this question directly, but his assessment of the casualties on both sides does throw some light on it. They were similar, once you take out the desertions from some Prussian units. That suggests that the casualties in the street fighting were roughly similar – but that the stamina of the French was much better (a bit like the success of the British infantry at Albuera). I think the presence of so many recently established landwehr units (the Westfalian and Elbe units were formed only in 1814) may account for this. It also suggests that the advantage to defenders of built-up areas, a prominent feature of Blucher rules among many others, needs to be rethought.
  • What happened to the Prussian units that fought in Ligny? Reading the account of the battle, you would think that the Prussian units fed into the village disappeared, but this is clearly nonsense, as they turn up later, but depleted, at Waterloo. Mr Field adds something rather interesting. At the point of the famous Guard attack on the village, there seemed to be few Prussians actually in occupation – accounting for its rapid success in taking the village. This suggests that the Prussian command had been pulling out exhausted units, and had effectively abandoned the village by the time the Guard struck, leaving the defence principally to the cavalry as the French came out of the village.
  • Could d’Erlon’s intervention have been decisive? The standard French account of any lost battle is that but for one missed opportunity the battle would have been a triumph. In this case d’Erlon’s failure to arrive with his whole corps, and the hesitancy of the troops that did make it, was the missed opportunity. They could have cut off the Prussian retreat and helped nearly annihilate the Prussian army. The first problem with this is that they did not turn up where Napoleon had intended them to – on the road from Quatre Bras. This would have taken them right into the Prussian rear. But this was never a possibility (and Blucher would not have stood at Ligny, or not in the deployment he did, had this been a realistic possibility). Wellington’s army was in the way – a fact that Napoleon had no understanding of. The second problem is that he turned up pretty late, at about 6pm. As Mr Field points out, the Prussians hadn’t collapsed at this point and (though he doesn’t say this), may already have been contemplating withdrawal. D’Erlon may simply have hastened the Prussian withdrawal, rather than annihilating the army.

These are the questions that I hope my efforts will throw some light on!

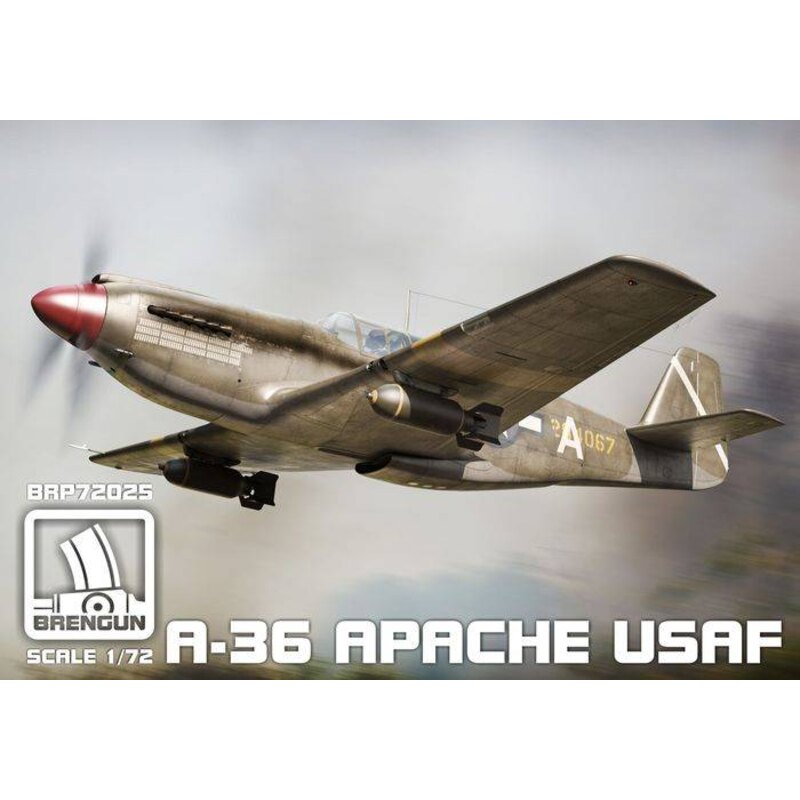
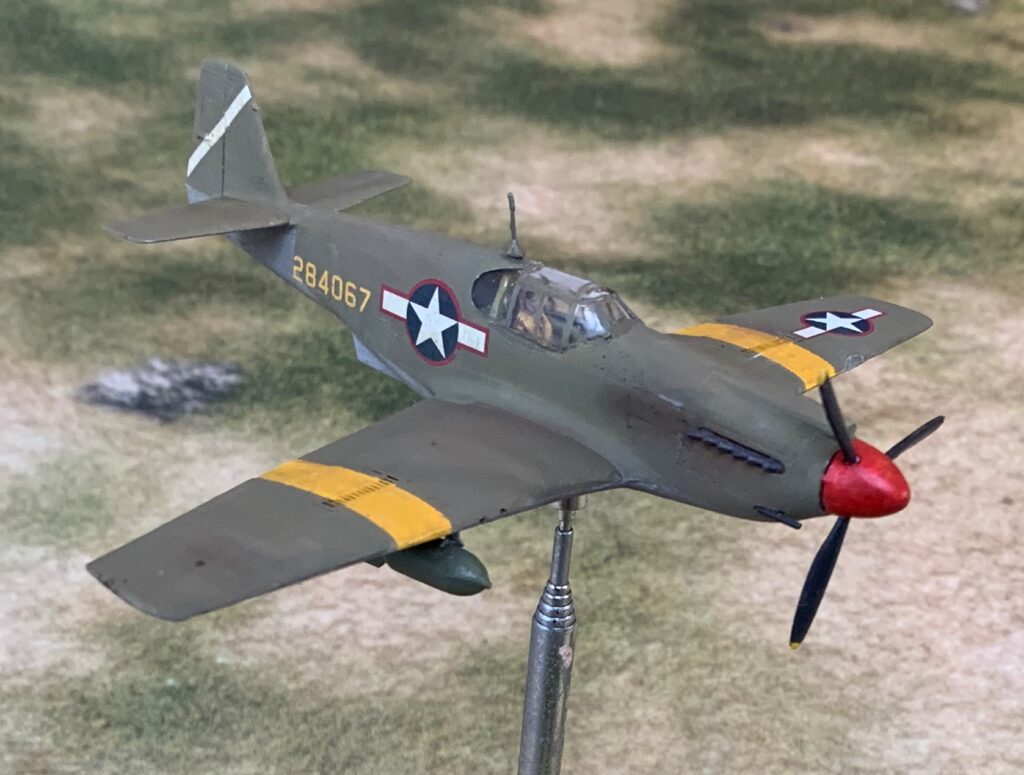
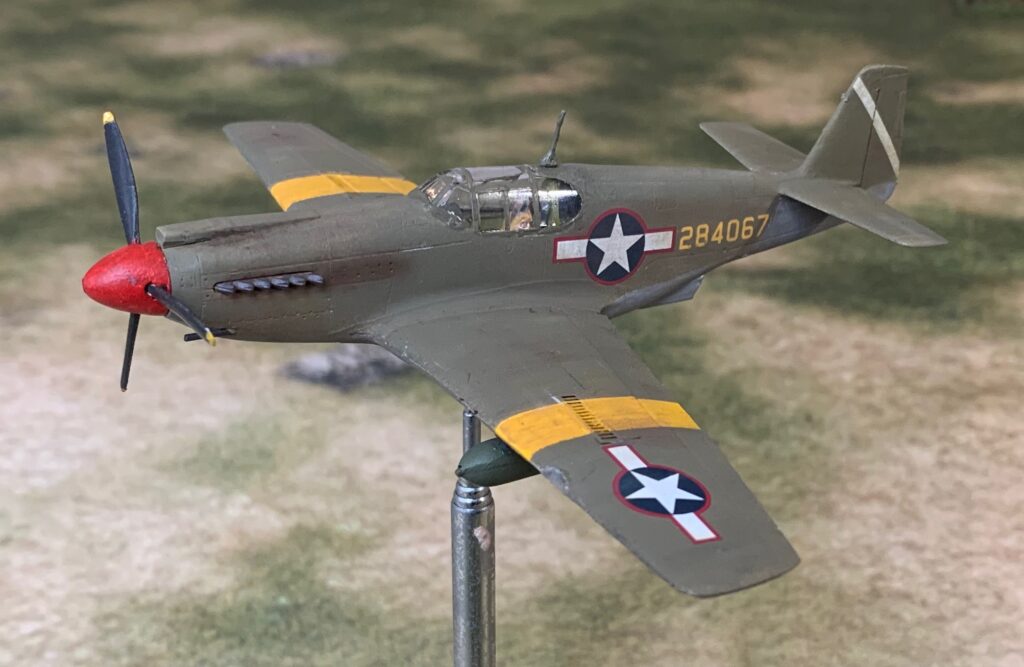
My Brengun 1/72 A-36 Apache

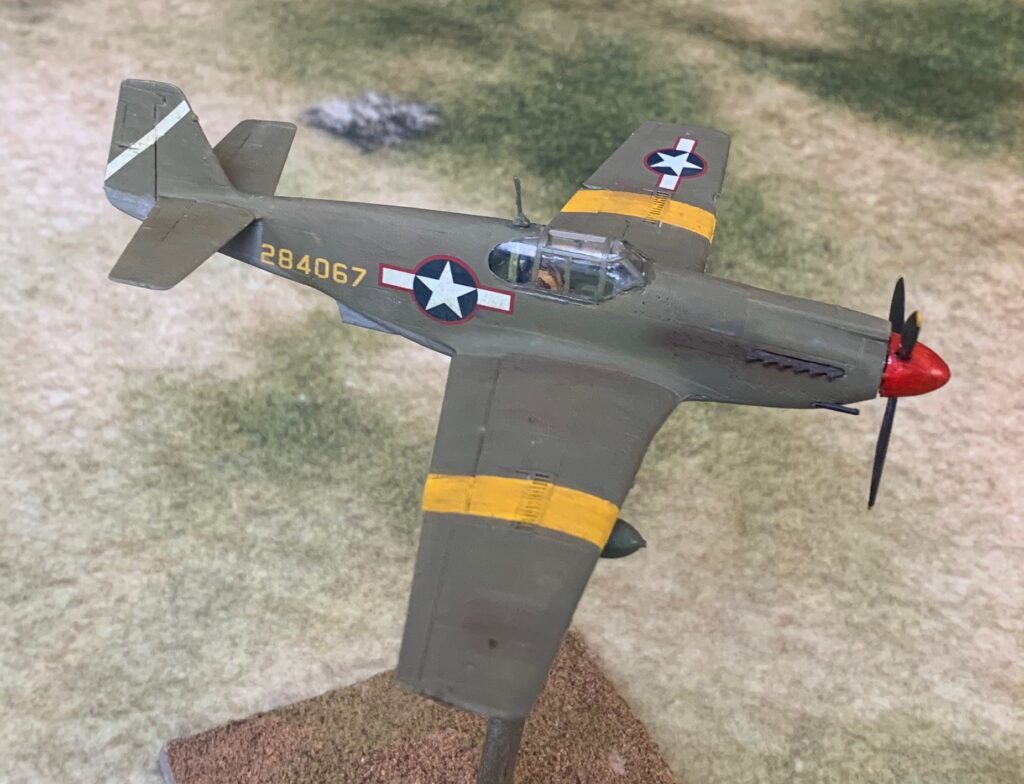
And now to the last of my recent batch of US aircraft: the A-36 Apache. Unlike the other two aircraft, which were more or less ubiquitous to the US war effort, this one had limited use. But t it was one of the most important aircraft types in US use in 1943 in the Mediterranean theatre, especially in the ground attack role – so bang in scope for my project. There were very limited options for modelling it though – with the Brengun kit being the most obvious. It wasn’t a great kit, but much easier than the RZ P-38.

The A-36 is, of course, an early version of the North American Mustang, which in its P-51 incarnation became one of the most important aircraft types in the war. It was named “Apache” by the makers, but this never caught on. In theatre there was a move to call it “Invader”, but eventually the name of its fighter cousin was the one generally in use. It was powered by an Allison engine, as were the first P-51s. This rendered disappointing performance at higher altitudes, and it wasn’t until it was powered by the Merlin engine that the type really came into its own. Doubtless this led to the development of the ground attack version, where it would operate primarily at lower altitudes. This included the fitting of dive brakes, which allowed it to do near-vertical, Stuka-like, dive-bombing attacks. I’m not sure how often it used this capability, which required experienced pilots, and I think it more typically used shallower dives (like the RAF used for the P-40 Kittyhawk, its equivalent aircraft). Its successor, the P-47, did not have this capability. Some were armed with four 20mm cannon – but this option was not available in the Brengun kit, where the plane has six 0.5in machine-guns, including two in the nose. The aircraft could look after itself if it met fighter opposition, and, apparently, 86 kills were claimed in combat, with one ace. It was used as an escort fighter on occasion, but wasn’t so popular with bomber crews, as it was easy to mistake its profile for the Bf-109 or Fw-109 – as well its lack of performance at higher altitudes. A-36 was highly effective in its fighter-bomber role, apparently, but suffered from high casualty rates. That partly went with the job of tackling well-defended targets at low altitudes – but there were structural vulnerabilities, especially compared to the P-40 and P-47. They were in use until well into 1944, though.

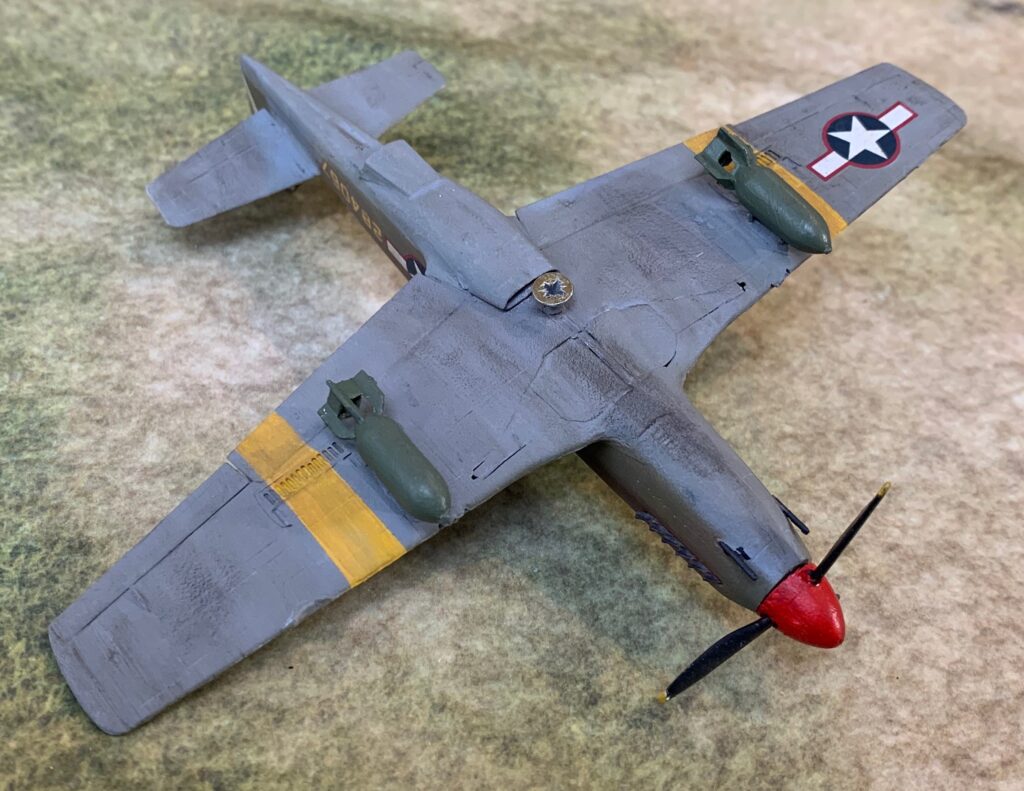
The kit was OK-ish. There was the usual lack of lugs and recesses to hold parts in place, and no undercarriage up option. But the undercarriage doors weren’t too hard to fit. Some parts didn’t fit properly, especially on the underside. That included the air intake, and the vent behind it, which left an ugly gap. The air brakes for the underwing didn’t fit either (thought the ones on the top of the wing were OK). I ended up by bodging the intake a bit, but this is invisible from most angles. The rear cockpit was a bit awkward, as the overhanging bit of the fuselage above of the rear side windows was moulded into the canopy part. This mean it had to be seamlessly integrated into the fuselage, and then painted (which is trickier on acetate). There was no question of adding the canopy after the paint job, as I did with the P-38. But I now understand that this is usually better anyway. Filler helps integrate it with the fuselage. I didn’t do an especially nice job with the aerial, but this was tricky, as it required a hole to be drilled – not easy on acetate.

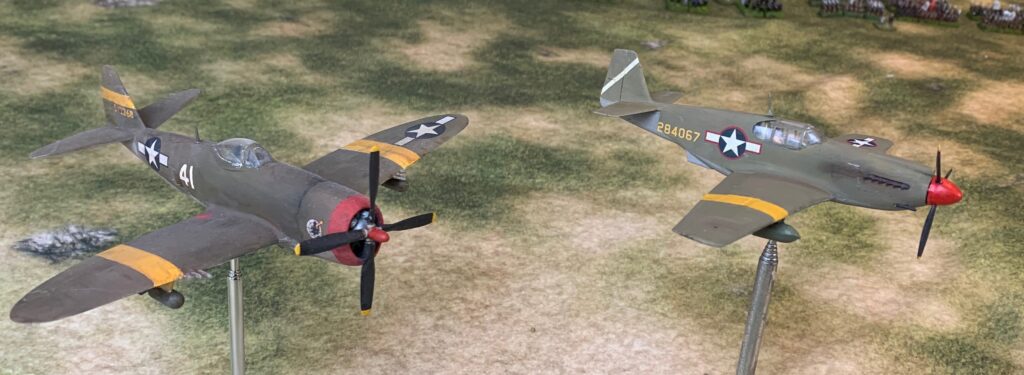
I decided to model plane 42-84067, which was included in the decal pack, and on the box art. But the decals were for 1944, when it had completed lots of missions. I wanted it as it might have looked in Sicily or Salerno. That meant the only decals from the box I used were the number and the ID stripe on the tail (which probably dated from this time). The over painted battle ID letter “A” was almost certainly later. The national insignia needed the red outline, so I used my trusty sheet from eBay. It has the yellow ID stripes on the wing, which seem to be standard on US single-engined aircraft in the Med. These stripes were painted first and then masked – as overpainting pale colours onto Olive Drab is hard work. Nevertheless the yellow paint was didn’t go on very nicely, and it looks a bit rough. As with the P-38 the red spinner is a bit bright in hindsight.

And that’s it – an interesting aircraft to support my tabletop forces, which ended up looking pretty good.

RS Models 1/72 P-38F Lightning

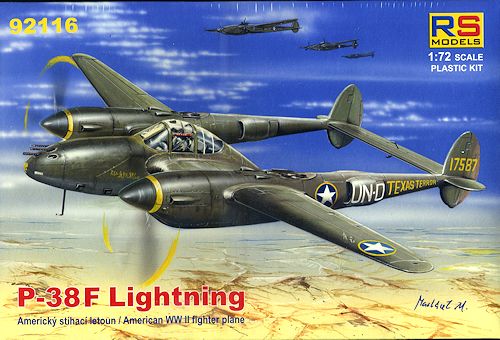
The box artwork

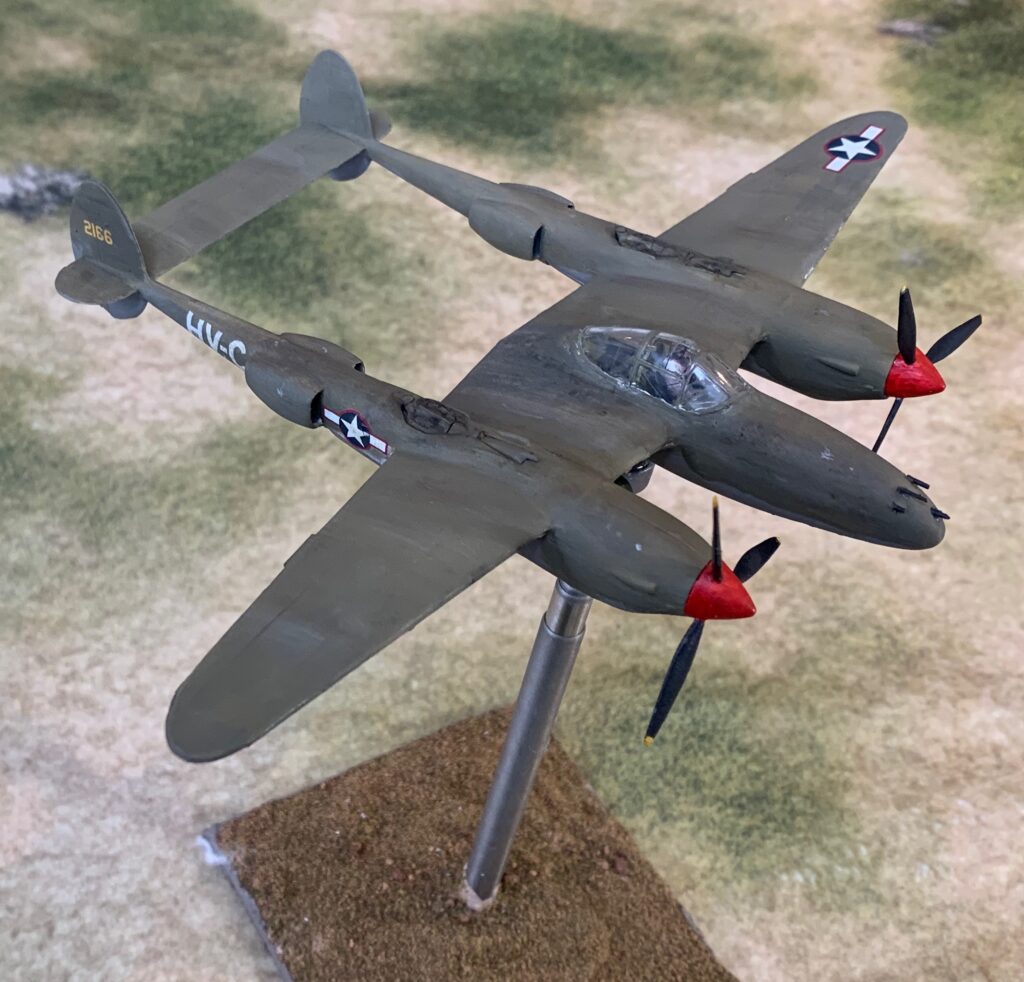
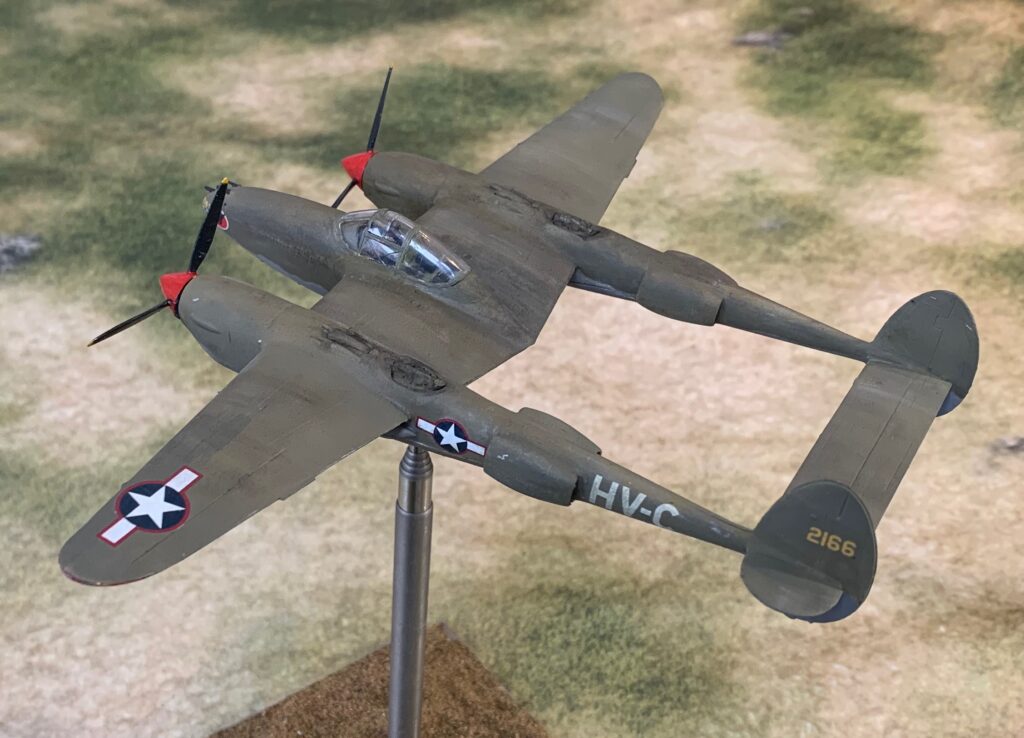
And so to the P-38 – which proved a nightmare. I wanted one of these iconic aircraft, in the early F variant that would have been in action in 1943. The RS Models kit was the only show in town, and the online review on modelling madness.com didn’t alert me to any major issues. Still the overall result looks fine if you don’t look too closely!

The P-38 at this stage of the war was primarily an escort fighter, assigned to bomber formations. Although it was outperformed in combat by the Bf-109, the primary German interceptor of the time (the Fw-190 being used mainly for ground attack), the P-38 had an impressive range, and so was able to accompany the bombers on deeper missions. Bomber crew gunners liked them because they were instantly recognisable as friendly. Although on occasion they took heavy losses, they did a decent job of keeping the fighters away from the bombers. The interest from my point of view though was that on critical occasions, such as the campaign for Sicily and at Salerno, they were used as fighter-bombers. Their range was a major asset, and they could manage a decent bomb load too.There’s also a bit of nostalgia. One of our favourite models as children was an old Airfix P-38 made up to a very nice standard by my elder brother.

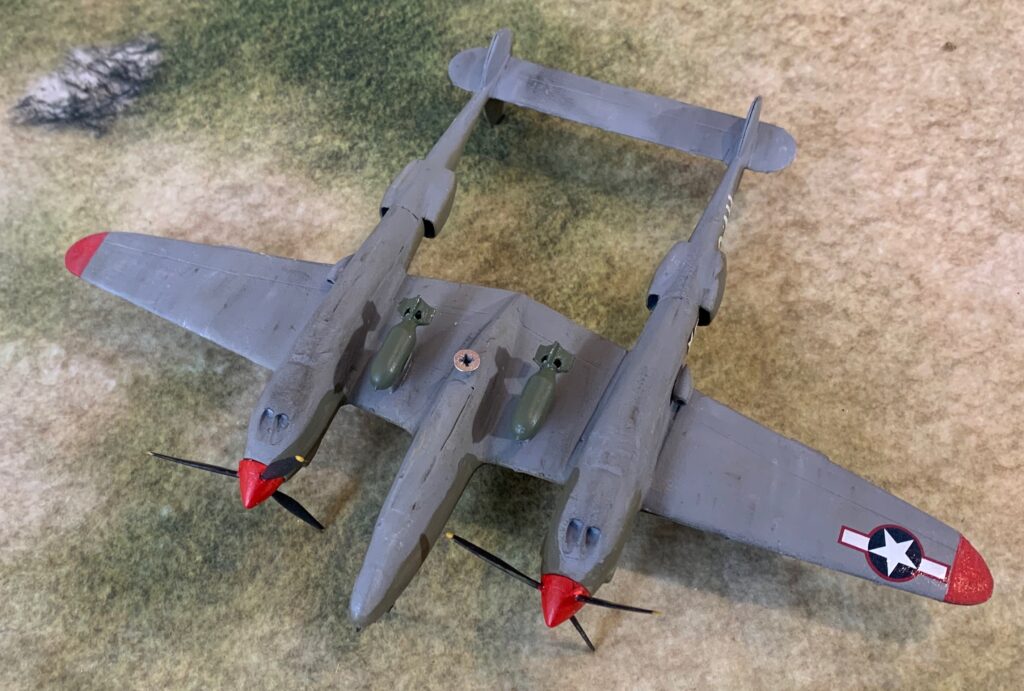
The main problem with the model was that the parts didn’t fit together properly, and, as with a lot of modern models there were no lugs and recesses to hold things in place. Problems began with the undercarriage doors because, as is often the case with modern models, there is no undercarriage up option. Modelling with the undercarriage up means trying to fit badly fitting doors into the wheel well openings. For this model, the fit was more than bad. This wasn’t made easier by the curvature, which was particularly pronounced and complicated on the booms. It took an immense about of time of cutting filing and sanding to get anywhere at all, and in the end I applied liberal amounts of filler too, both the cover gaps and build up. Even after all this effort, the result was pretty clumsy – at least I won’t be looking at the underside that often:

The next challenge came when trying to assemble the central fuselage. There was no room for the interior assembly, and the bottom was too narrow. Cue more frantic cutting and filing, and a bit of bodging too. And when I finally managed to get this assembled, the match between the lower and upper assembly was poor. More filing, sanding and and filler. If you look closely you can see where I’ve tried to build up the surface with filler to get something reasonably smooth. There were similar, though thankfully lesser, problems almost everywhere in the assembly. The result was that the whole thing took much, much longer to put together than any other model I’ve done, with a fairly mediocre result to show for it. But it is acceptable within my “don’t look too close” criteria. The lumps and bumps don’t show up in the photos at least!

The problems didn’t end there. I left the cockpit off before painting, to add on later, saving me having to mask it. But, of course, the fit was terrible (I can’t believe I didn’t check or notice this beforehand). So I needed to cover the gap with filler – which meant more paint and patination to try to blend it in with the rest. This didn’t altogether work, and the finish on the inner-upper wing is a bit rough.

The final problem was all my own fault, though. I applied the decals on the booms in the wrong place – with the insignia on the air intakes, and the ID letters on the rear boom. I was able to remove the insignia decals (which came with the kit) and replace them with one from the sheet I bought from eBay (I had already used these on the wings to get the right size), in the correct place, in front of the intake. But the ID letters should be on the intakes – and I didn’t have anything in stock to do this (the model decals look too big anyway). So I left them! The plane modelled is one of the schemes in the box, except that I was trying to model it earlier in its career – as it would have been at Salerno or Sicily. I left out the kill/mission marks from the nose, but left the nose art on the port nose – actually surely too far forward as it was probably only there to make room for the mission tally marks.

One further thing is worth remarking on. The red on the spinners and under-wing tips is quite bright – you wouldn’t think I did quite a bit of dulling down on the original pigment. Red spinners were a standard Allied ID feature for fighter aircraft. The British used Insignia Red (used on the national insignia) which was quite a dark, dull red, so as to be less conspicuous. I had read that the US equivalent paint was much brighter, until they dulled it down later in the war. So I’ve tried to represent the earlier version. I used the same shade on the other two models assembled in this batch. I should have dulled it down a little more though!

This is an iconic aircraft, and I’m glad I have one for my collection. But if I want to do another one I will start with a different model, perhaps converting a later version.

My Airfix B-26 Martin Marauder

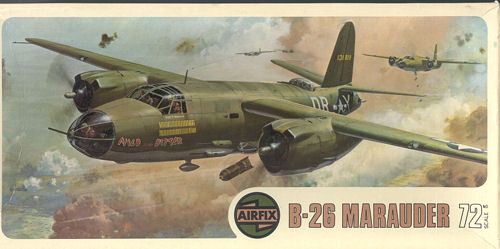
The box artwork

The first of my latest batch of aircraft models for to describe individually is the B-26. I bought this kit back in the late 1970s, as a gift to my younger brother. But he was losing interest in modelling and left it in my parents’ attic, from whence I rescued it during one the their periodic clear-outs as they moved and downsized. Since then it lurked in my attic. After moving house in 2020 I decided that I was going to assemble this model – indeed it sowed the seed of the idea of my 1943 aircraft project. I have always liked this aircraft.

Along with the B-25 Mitchell, the B-26 Marauder was one of the two principal medium bomber types in US service in WW2. More B-25s were produced, and many more survive today – but, apparently, more of the B-26s were in use in the European theatre. That is certainly true of the Mediterranean in 1943 – three bomber groups were in operation, compared to two for the B-25. The B-25 had a longer range, and so more useful in the Pacific, I read. Still Catch-22, set in the Med, featured the B-25. The B-26 had a bit of a tricky reputation, as it required quite a high landing speed – and there were quite a few accidents in the early days. Tweaks to the design, and better training, overcame the problems, however, and the overall casualty rate was lower than the B-25 in the end. I guess that was because it was faster, and so harder to intercept. Anyway, to my eye it is much better looking, with its cigar-shaped fuselage, compared to the boxy B-25.

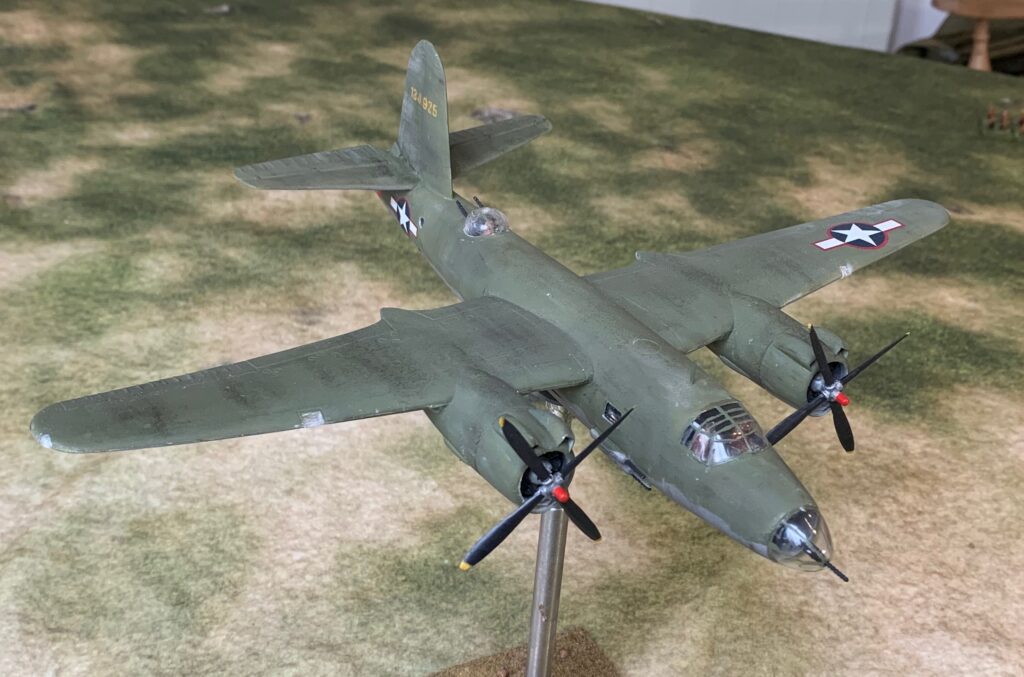
I wanted to make an aircraft as it would have appeared in September 1943, when B-26s supported the Salerno battle. That meant a plain olive drab and grey scheme, and no large battle number on the tail – so characteristic of later on (they were introduced a month or so after Salerno). The insignia had the red outline. I wanted to depict an actual aircraft, where I was limited by two main factors. First, the model depicts a later variant, with a distinctly different tail gun position (and may be differences too). That ruled out quite a few planes in operation in 1943. Second I wanted to be able to make up the tail numbers from as few sources as possible, including the original Airfix decals. This pointed me at number 41-34925 “Kismet” from 37th Squadron of 17th Bombardment Group. This plane survived the war, completing many missions. One tricky issue was nose art, which I was really not keen to get into. The illustration I found from Mark Styling showed this plane with quite simple nose art (apart from the many mission markers visible in later line). It has the word “Kismet” with further words “Sine Qua Non” in a curve below – all quite small and in yellow lettering. No cartoon characters, bombs or busty ladies. This would not have been impossible for me to put together and print off, though yellow printer ink would not have come out strongly without a bit of white ink to give it body – but I didn’t fancy doing it. Besides I noticed on pictures of planes in action in 1943 that nose art was often absent (see below) – so the model has nothing.

The completed model from the front.

The first stage of the project was to paint and assemble the interior. The model came with three crew figures: two for the cockpit and one for the gun turret. I had already used on of the cockpit figures for my P-47, and since the remaining one would not have looked right next to one of the PJ figures, I put two from PJ in the cockpit. The turret figure was quite crude, with a huge circulardvice in place of his hands to provide a pivot for the guns. I decided to keep it, and in faction can’t see much through the turret plastic, so this didn’t matter. The online sources did not give any consistent colour for the interior, though it is usually represented as green – a mix with the chrome-yellow primer in use. I decided to follow another source, which said it was a mix of black and treated aluminium. You can barely see it though! The transparencies are quite thick, so visibility is not perhaps what it should be.

Assembly came next. This was much easier than for my P-38 model – the fit was generally OK, and there were lugs and recesses to hold parts in the right relative positions. Still it was not as tight as some more modern kits that I have assembled – though not the other two in this batch. I should have spent a bit more time filing down parts to get the fit a bit tighter, especially the bomb doors and the engine nacelles. Fairly liberal amounts of filler were needed in places, causing some of the panelling detail to be lost. – and I needed to use tape to keep the fuselage together while the cement was setting. One issue worth mentioning was transparencies. Except at the rear and nose I stuck these in before painting. The cockpit canopy because I wanted to use filler to ensure a seamless join with the fuselage; the various portholes, etc. because they had to be stuck in from the inside, and the turret because it looked too tricky to do later. These had to be masked. The main problem was that I used specialist glue for canopies – after problems with superglue causing damage – and these had weaker adhesive properties than I was used to. One of the side windows fell into the body of the fuselage, and could not be recovered. I had to bodge a replacement carved from sprue. I had to do something similar to one of the wing lights which I dropped on the floor and couldn’t find. Incidentally in the kit there are windows for the two openings at the bottom back of the fuselage, just under the tailplanes. In 1943 these openings were ports for a machinegun, so I left the transparencies out – though I did not attempt to show include the weapon.

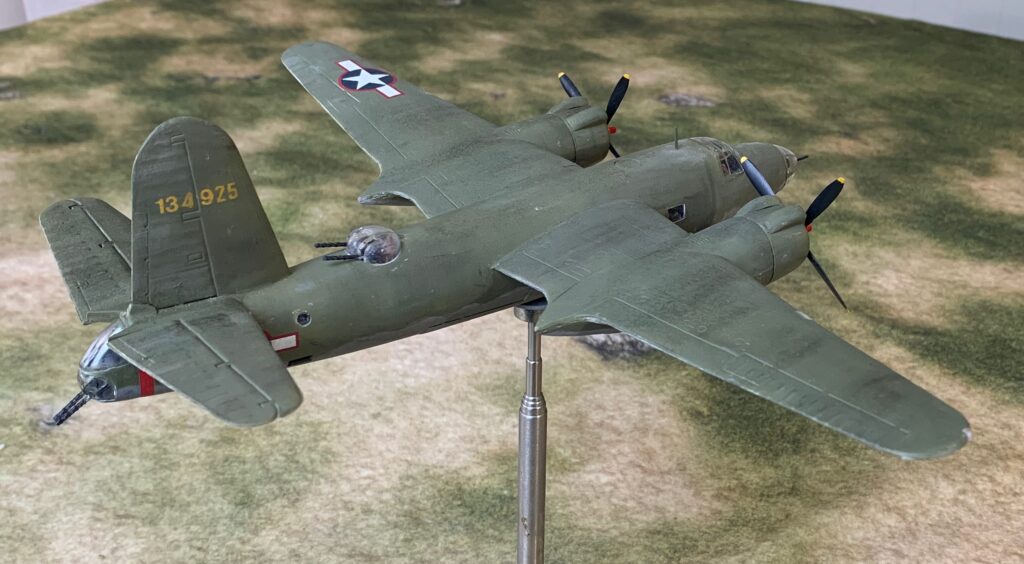
From the rear quarter

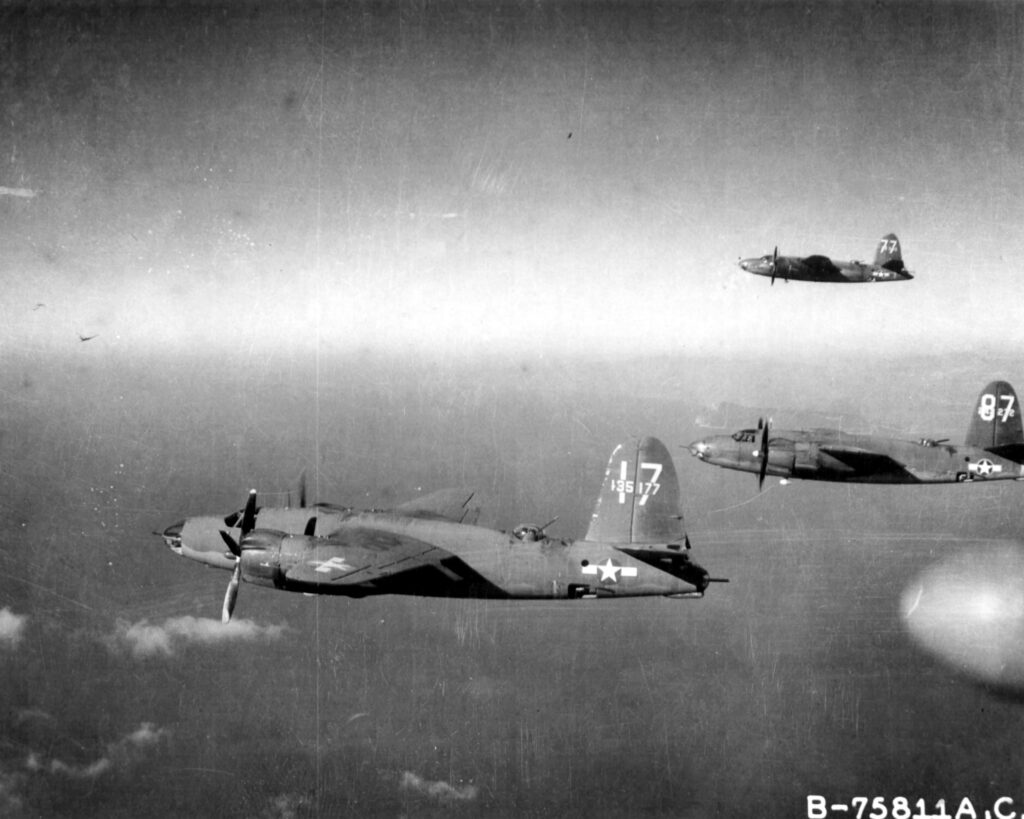
I have already outlined the strategy for painting and finishing. The decals required were minimal. I got the national insignia with the red outlines from eBay. The tail numbers were a combination from the original model and an ancient Airfix P-47 kit (which were slightly duller – which I tried to correct with a bit of yellow paint). The overall result is a bit darker and greener than often depicted (for example in the box art above) – though I think the artificial light mixed in with the natural light in the picture makes it a bit greener. It is meant to show a relatively new plane, not quite as weathered as normal. Here is a new contemporary picture of planes from 17 BG in flight:

https://www.fold3.com/image/161317974

These are planes returning from a raid on Sardinia in November 1943, shortly after the big battle numbers on the tail were added; No. 17 (Uden Uden’s Oil Burner) has a damaged engine from flak and is limping home, escorted by the others (from a different squadron) – it did make it to safety and went on the complete many more missions. Both it and 97 behind it were candidates for my model, but the tail numbers weren’t as easy to source. Incidentally I can’t see any nose art on either the plane – though the front plane at least was photographed later in the war with nose are on both sides. Sometimes it was just on the port side. This picture shows the slightly weather-beaten matt look, with not much contrast between the olive drab and grey. No 17 has a lot of paint damage on the tail, but not much elsewhere.

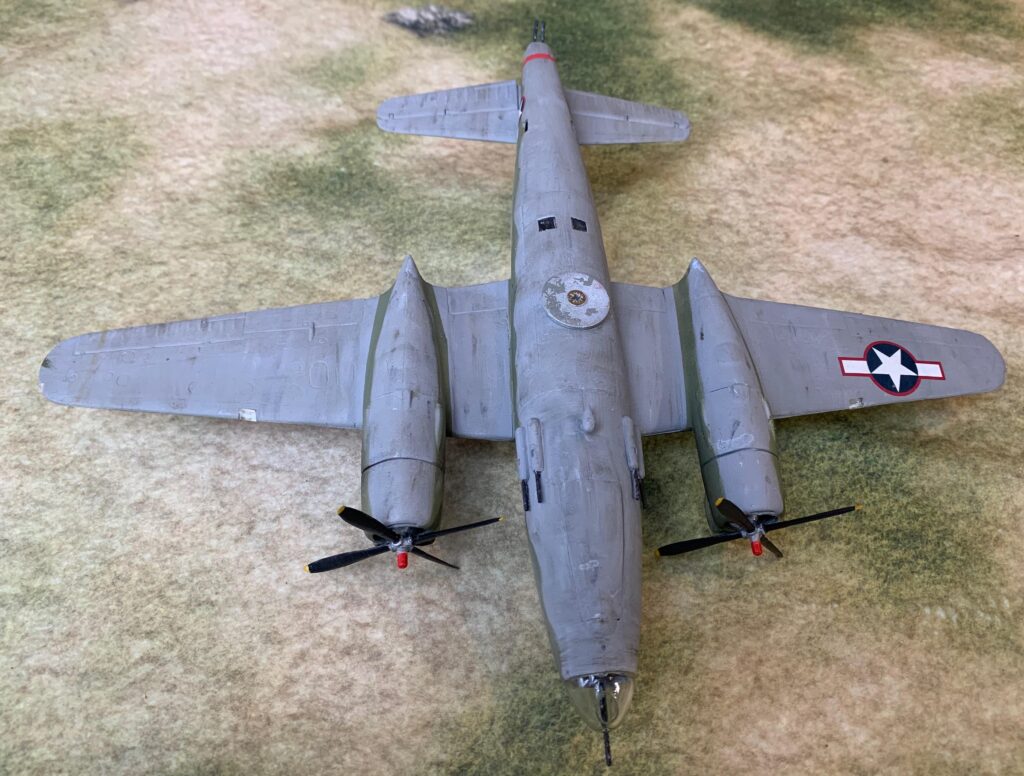
And here’s the underside:

The underside

The weathering is a bit heavy-handed – but I have no photos of what it would have looked like in practice. The underside did get a hammering from the dust airstrips – but I don’t know how that looked!

There’s plenty on the model that could have been done better – but I’m glad its decades in the attic weren’t in vain!

Three US planes for 1943

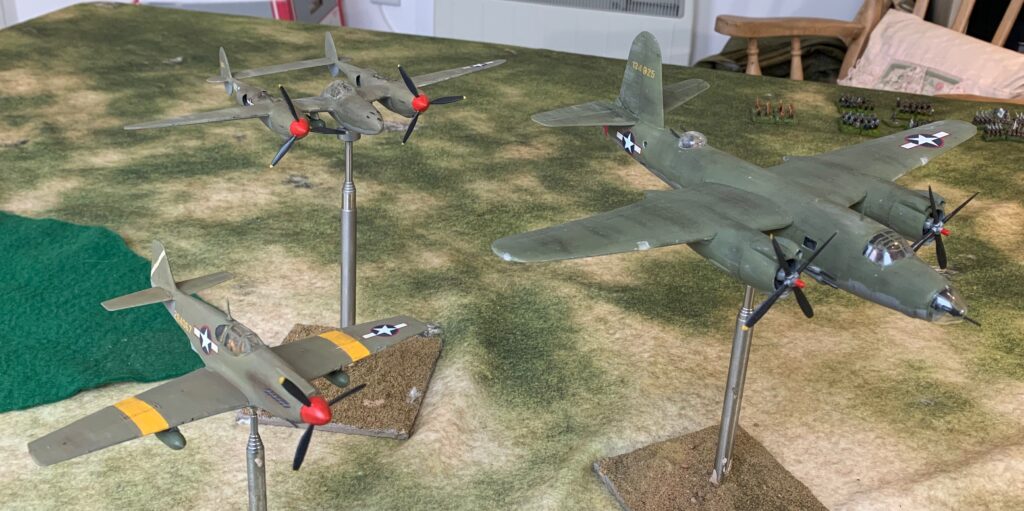
The new trio overflying the wargames table: left to right: the A-36, the P-38 and the B-26

Back to aircraft modelling. The next batch of 1/72 planes in my 1943 project represent the Americans. These are a B-26 Marauder bomber, a P-38 Lightning fighter, and an A-36 Invader/Apache fighter-bomber. Since my main focus is on the British and Germans, these were the only American planes that I initially planned, although I now plan to do a P-40 as well, but not in the olive drab scheme like these, but the RAF one. As usual I will use this post to describe the common aspects of the project, and then publish separate posts for each model.

This project took quite a bit longer than expected – something I have said about each of my most recent projects – it’s probably age! Two things in particular held me up. First the B-26 model is a big one, compared to the single-engine types that I have attempted so far; and the P-38 isn’t a small one either. Bigger models do take more time. Second, none of the models were particularly easy to put together, and the P-38 the worst of all the models to date – worse than my Stuka and Hurricane. And that takes a lot more time, as you attempt to reconcile ill-fitting parts, and then patch up the results with filing , sanding and putty. It doesn’t help that I model with undercarriage up, which only the B-26 kit (a 40-year old Airfix job) catered for, and as with all long projects I then went through a flat patch – especially since the studio where I assemble my models is in the garage block, and not part of the central heating system – so it was pretty cold in the patch of freezing weather we had. One afternoon was just too cold for me to try! Still, they were finished in time for Christmas.

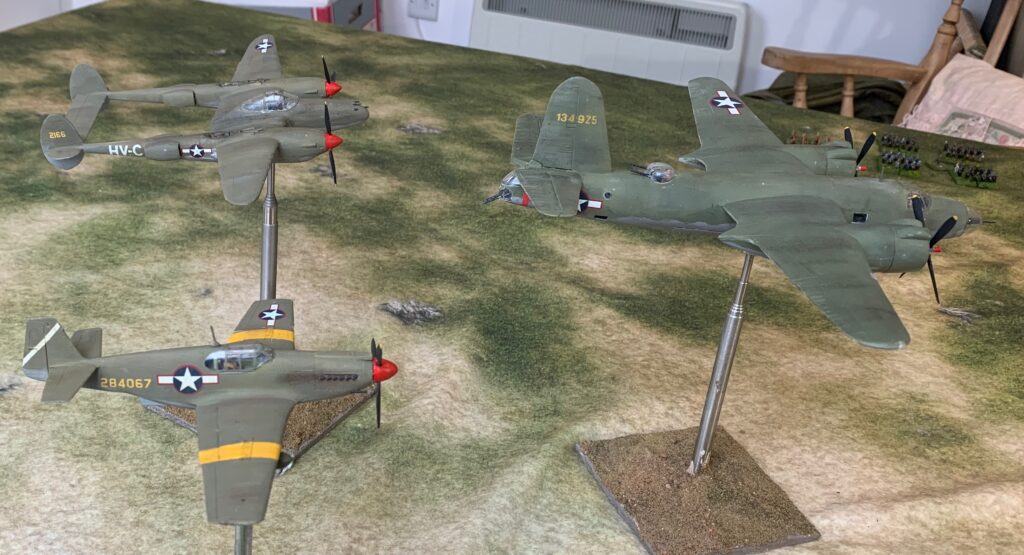
Another view

The steps I went through were the painting of the interior and crew, assembly (easily the most time-consuming phase), priming and painting with the airbrush, and then the various finishing steps, including decals. Not a huge amount to say about the first stage. I had to supply my own crew figures apart from two from the B-26: I dipped into my stock of figures from PJ Productions. I will describe the assembly process for each model in my later posts, as each was a very different experience. The painting and finishing processes were pretty similar, so I’ll say something about that now.

In spite of my frustrations, I persisted with the airbrush for these models. I used white primer from Vallejo. I then mixed my own paints for the main event. For the undersides I mixed a neutral grey from the black and white paint pots that came with the airbrush. For the olive drab I mixed the basic colours using Liquitex artists paints, mixed with Liquitex airbrush medium and on occasion with thinners. The airbrushing was hit and miss. Sometimes things went well, and the paint left the brush with a nice flow. I haven’t managed to get a precision spray yet, but I don’t think that is supposed to be the strength of this particular model. On other occasions I couldn’t get the flow right at all – it came out too thin, or wouldn’t come out properly at all. As a result the process took more sessions than it should. The primer tended to clog on the nozzle, and it needed wiping quite frequently. This didn’t happen for main paints so much (and not at all on the olive drab mixes) – but these were prone to clogging further back in the mechanism when they weren’t too thin. One thing I discovered to be a bad idea was mixing in the cup – by adding thinner to a mix that was a bit thick, for example. I had been encouraged to do this by a video tutorial. I think the thicker paint tended to get into to the system and clog it before being mixed properly. If mixed separately to the right consistency, and then put in the cup, things went much more smoothly. I like to think I’m getting the hang of the airbrush, but I’m not sure, to be honest. It produces a lovely finish, but is it worth the trouble?

I used two mixes for the olive drab. For the P-38 and A-36 I used the usual yellow oxide/black/ white combination (though I may have started with neutral grey and yellow and tweaked with black/white). This was the as same as for my P-47 trial model, but a bit lighter. For the B-26 I wanted something a bit greener. I started with Sap Green, and mixed various things into it. The first attempt was too green, but with tweaking I got a satisfactory result, looking close to a lot of artist’s portrayals of the aircraft. This was a bodge as I kept adding different things to the mix, though, and I can’t say precisely how I got there. My general rule is to only use two pigments/premixes and white for mixing – that makes it much easier to replicate. I would need a different method to repeat! The first mix was to represent a more weathered finish – the colour reportedly turned quite brown after exposure to the elements. The second, which is closer to the commercially available mixes, was for a newer aircraft. I am pleased with both results. Incidentally the pictures were taken on a dull day (I gave up waiting for the sun!), so there’s a lot of artificial light in the mix, which tends to make things a bit greener.

The A-36 alongside my P47 model, showing the paler version of olive drab

I used a combination of tape and Blu Tak to mask. This included the canopies for the A-36 and (mostly) the B-26. I left the canopy off for the painting stage for the P-38 and the B-26 nose and tail to be stuck on later. This was a mistake for the P-38, as it was so ill-fitting it needed filler and more paint later. Blu Tak works better than magic putty, as I needed it to stay in place for days. The magic putty is easier to put on, though, and I did use it for varnish spray.

After the decals came the oil paint patination: small blobs of oil pigment in various colours (white, Payne’s grey, yellow ochre and raw umber) brushed vigorously into a very thin layer with a fore-and-aft or up-and-down motion. The paint did not spread as easily as before – perhaps because of ageing, or perhaps because it was colder than normal – but nothing that a little extra linseed oil couldn’t sort out. I’m getting better at this – I have had a tendency to over-apply; and there was the disaster of trying to apply over matt varnish! The undersides were left looking pretty messy – but with the dust from Mediterranean airfields, I gather that they did get into a bit of a state. This stage left the models with quite an appealing off-matt finish: but photos of US planes in theatre usually show a very matt finish. So I sprayed on Winsor & Newton matt aerosol spray, which leaves a very matt finish. I protected the decals with some gloss varnish first – though I doubt there was a real danger from contact with matt varnish – but I wanted to play safe. The next step was to represent a bit of paint damage using a silver/pewter coloured pencil. I didn’t want to overdo this; I think ground crews were usually quite diligent in repairing damage. But it’s usual to represent quite a bit of damage on a B-26 – they were especially exposed to flak explosions – so I tried a bit harder on this, though still quite subtle. Finally I applied some powdered pastel in various mixes of grey and brown. The biggest job here was applying the exhaust stains on the A-36. I couldn’t see anything comparable on old photos of the P-38 though, and not on the B-26 either. In the end it did a similar job to the oil paint, in producing a rather weather-beaten finish, with the effects of air flow as well. On the B-26 I tried to show a bit of differential weathering on the canvas control surfaces – but not very successfully. With the high-matt finish for these models, I could have skipped the oil paint stage, I think. For my British and German models, where I like the off-matt finish that the oil leaves, it’s a different matter.

As usual, close examination of these models reveals a lot of things I could have done better (or in the case of the P-38 model, defects I couldn’t quite remedy) – but I’m not comparing myself to the master-hobbyists. I want good-looking models from a respectable distance – and that is what I have ended up with!