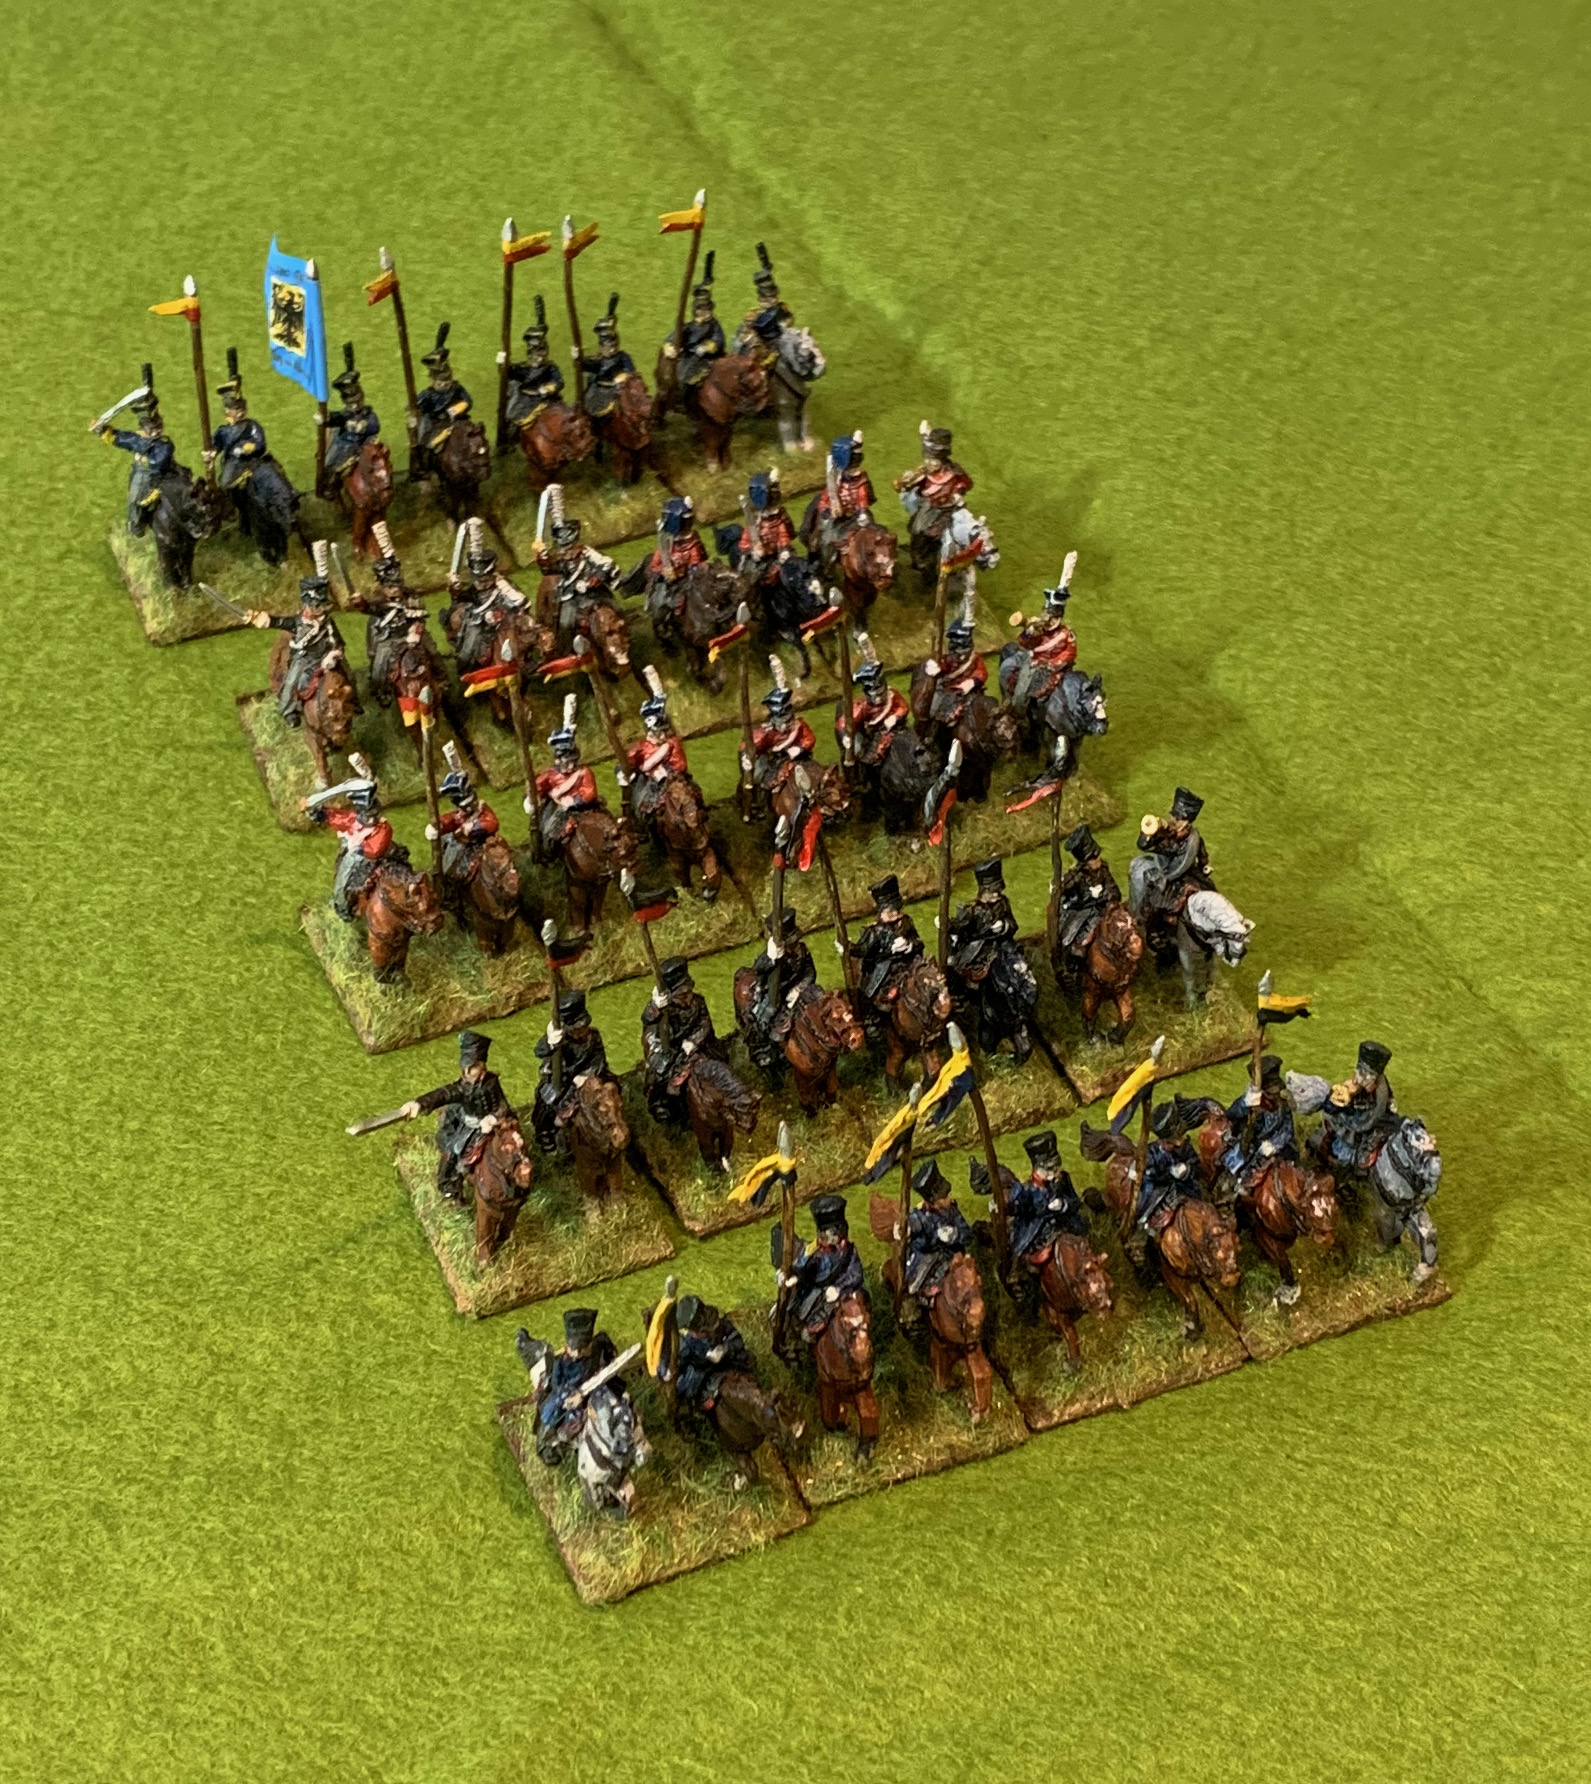
My attack on the lead and plastic mountain continues. For this project I wanted to draw a line under my remaining Old Glory Prussian cavalry. I had two packs of uhlans, with and without czapka, and a mixed pack covering Prussian friekorps, in reality a motley collection of British and Prussian figures from other packs. From these I have painted up five four-base units representing 3rd, 6th and 7th Uhlans, 8th Hussars and 3rd Silesian Landwehr cavalry. These are not outstanding examples of the figure-painters art, and there are minor inaccuracies, as well as the nonsense of that large infantry flag. But they will help to brighten up my 1815 Prussians, who can be a little dull.
The method was to paint the horses first, without riders, in batches depending on horse colour. I’m still developing technique on this. For these I tried oil paint for the first time, having read so many people recommending it. The idea is that you undercoat in white or some bright colour, and apply oil paint (Van Dyck Brown is usually recommended) over it and let it go tacky for about an hour or two. Then gently wipe off the paint with a rag from the raised areas. That leaves a patina of paint on these raised areas but deeper colour in the recesses. and it should dry to a nice off-gloss finish. After some early experiments I restricted this to bay and chestnut horses, which are about 80%. My Payne’s Grey oil paint came out very glossy and hard to work with, and this is what I wanted to use for the black horses. I wasn’t sure how the technique would work for grey and other pale horses anyway. I probably shouldn’t give up on the Payne’s Grey. Some oil medium had separated out and came out of the tube first; I may have mixed too much of this back into the pigment (I’m only using small amounts) – I think excessive oil may be the problem. All the horses were primed in white (using airbrush primer). I painted on Raw Sienna (a lovely orange-brown) and Burnt Sienna (a reddish hue) as undercoat in acrylic for the bays and chestnuts (more of the former for the chestnuts). I also experimented a bit with Yellow Oxide (a Yellow Ochre substitute), but not by itself. Then on went the oil. I rubbed it off after about an hour with a bit of old tee-shirt, better than using kitchen towel or tissue. I used various mixes of Van Dyck Brown, Raw Umber, Burnt Umber and Burnt Sienna, with a little Zinc White mixed in. The results were mostly very nice. The main learning is that it is important that the undercoat and is compatible with the oil layer – if one is yellowish and the other reddish then the effect is rather awkward. While at first I didn’t think the results were markedly superior to my earlier method of using layers of acrylic, the more I handled the figures the more I liked them; I’m not sure what accounts for this.
For the other horses (blacks and greys and a sort-of dun or roan) I used layers of acrylic, starting with Payne’s Grey. I stippled on some white on the some of the greys using the cut down brush I used for the Bf-109. I wasn’t especially happy with these and I think I need to develop technique some more here.
After the horses were painted, I attached riders, ready primed but otherwise unpainted. Nothing particularly special about painting technique to note here. As usual I used muted colours and a bit of white with almost everything. All the figures were finished in a diluted black ink wash. Time to look at each of the units.
3rd Uhlans
This was the only unit in regulation uniform, with a blue overcoat, red collar and grey overalls. My source for the yellow over dark blue pennons was the centjours website, as it was for all my units. The photo might be unimpressive but I was very pleased with the blue of the coats (mixed from Prussian Blue) which had just the right brightness to set off the red and yellow elements nicely. Unlike my rather disappointing dragoons.
6th Ulhans
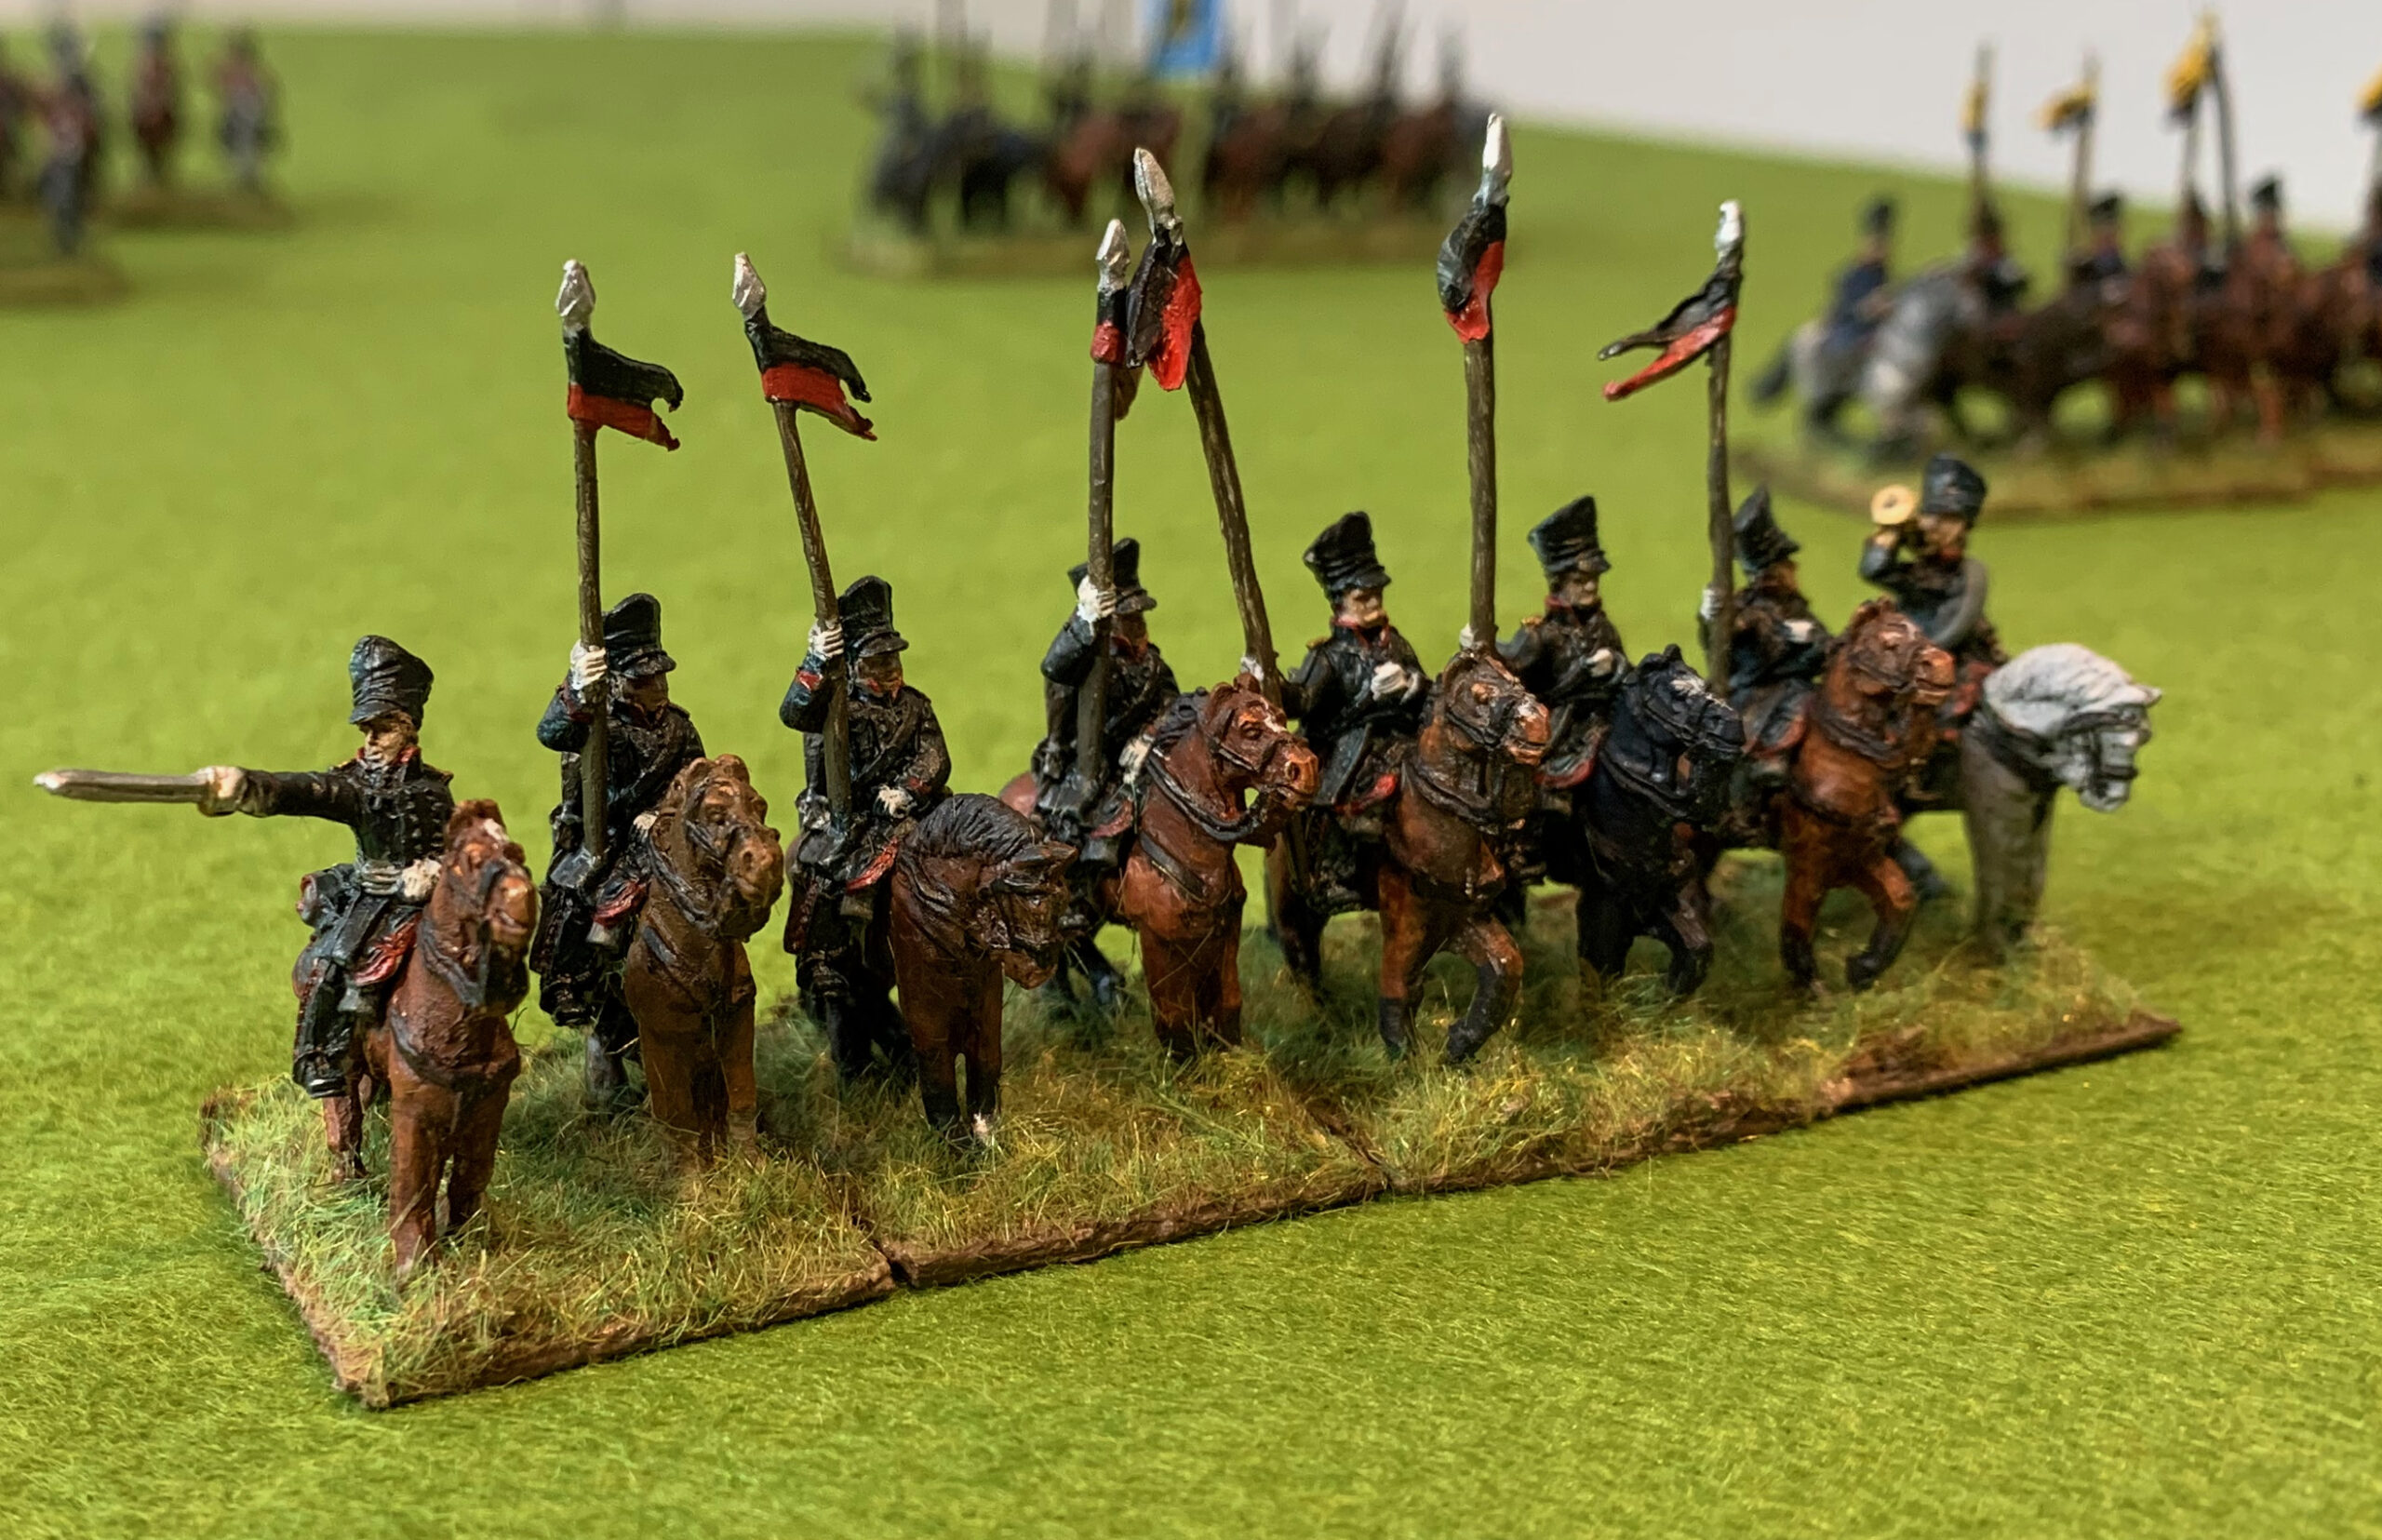
The 6th Uhlans were based on Lutzow’s freikorps; the unit was led by Lutzow himself and involved in some heavy and critical fighting, in which Lutzow was captured. I painted up the whole unit in the uniform of the first two squadrons; the third squadron had a hussar uniform and the fourth czapkas in place of the shakos. With so few figures in a unit there are limits to the variation that can be accommodated. I used standard uhlan figures, some of which were included in the freikorps pack, allowing me to dispense with standard bearers. The uniform is black with red piping on the collars and overalls and yellow shoulder-boards. Simple but striking.
7th Uhlans
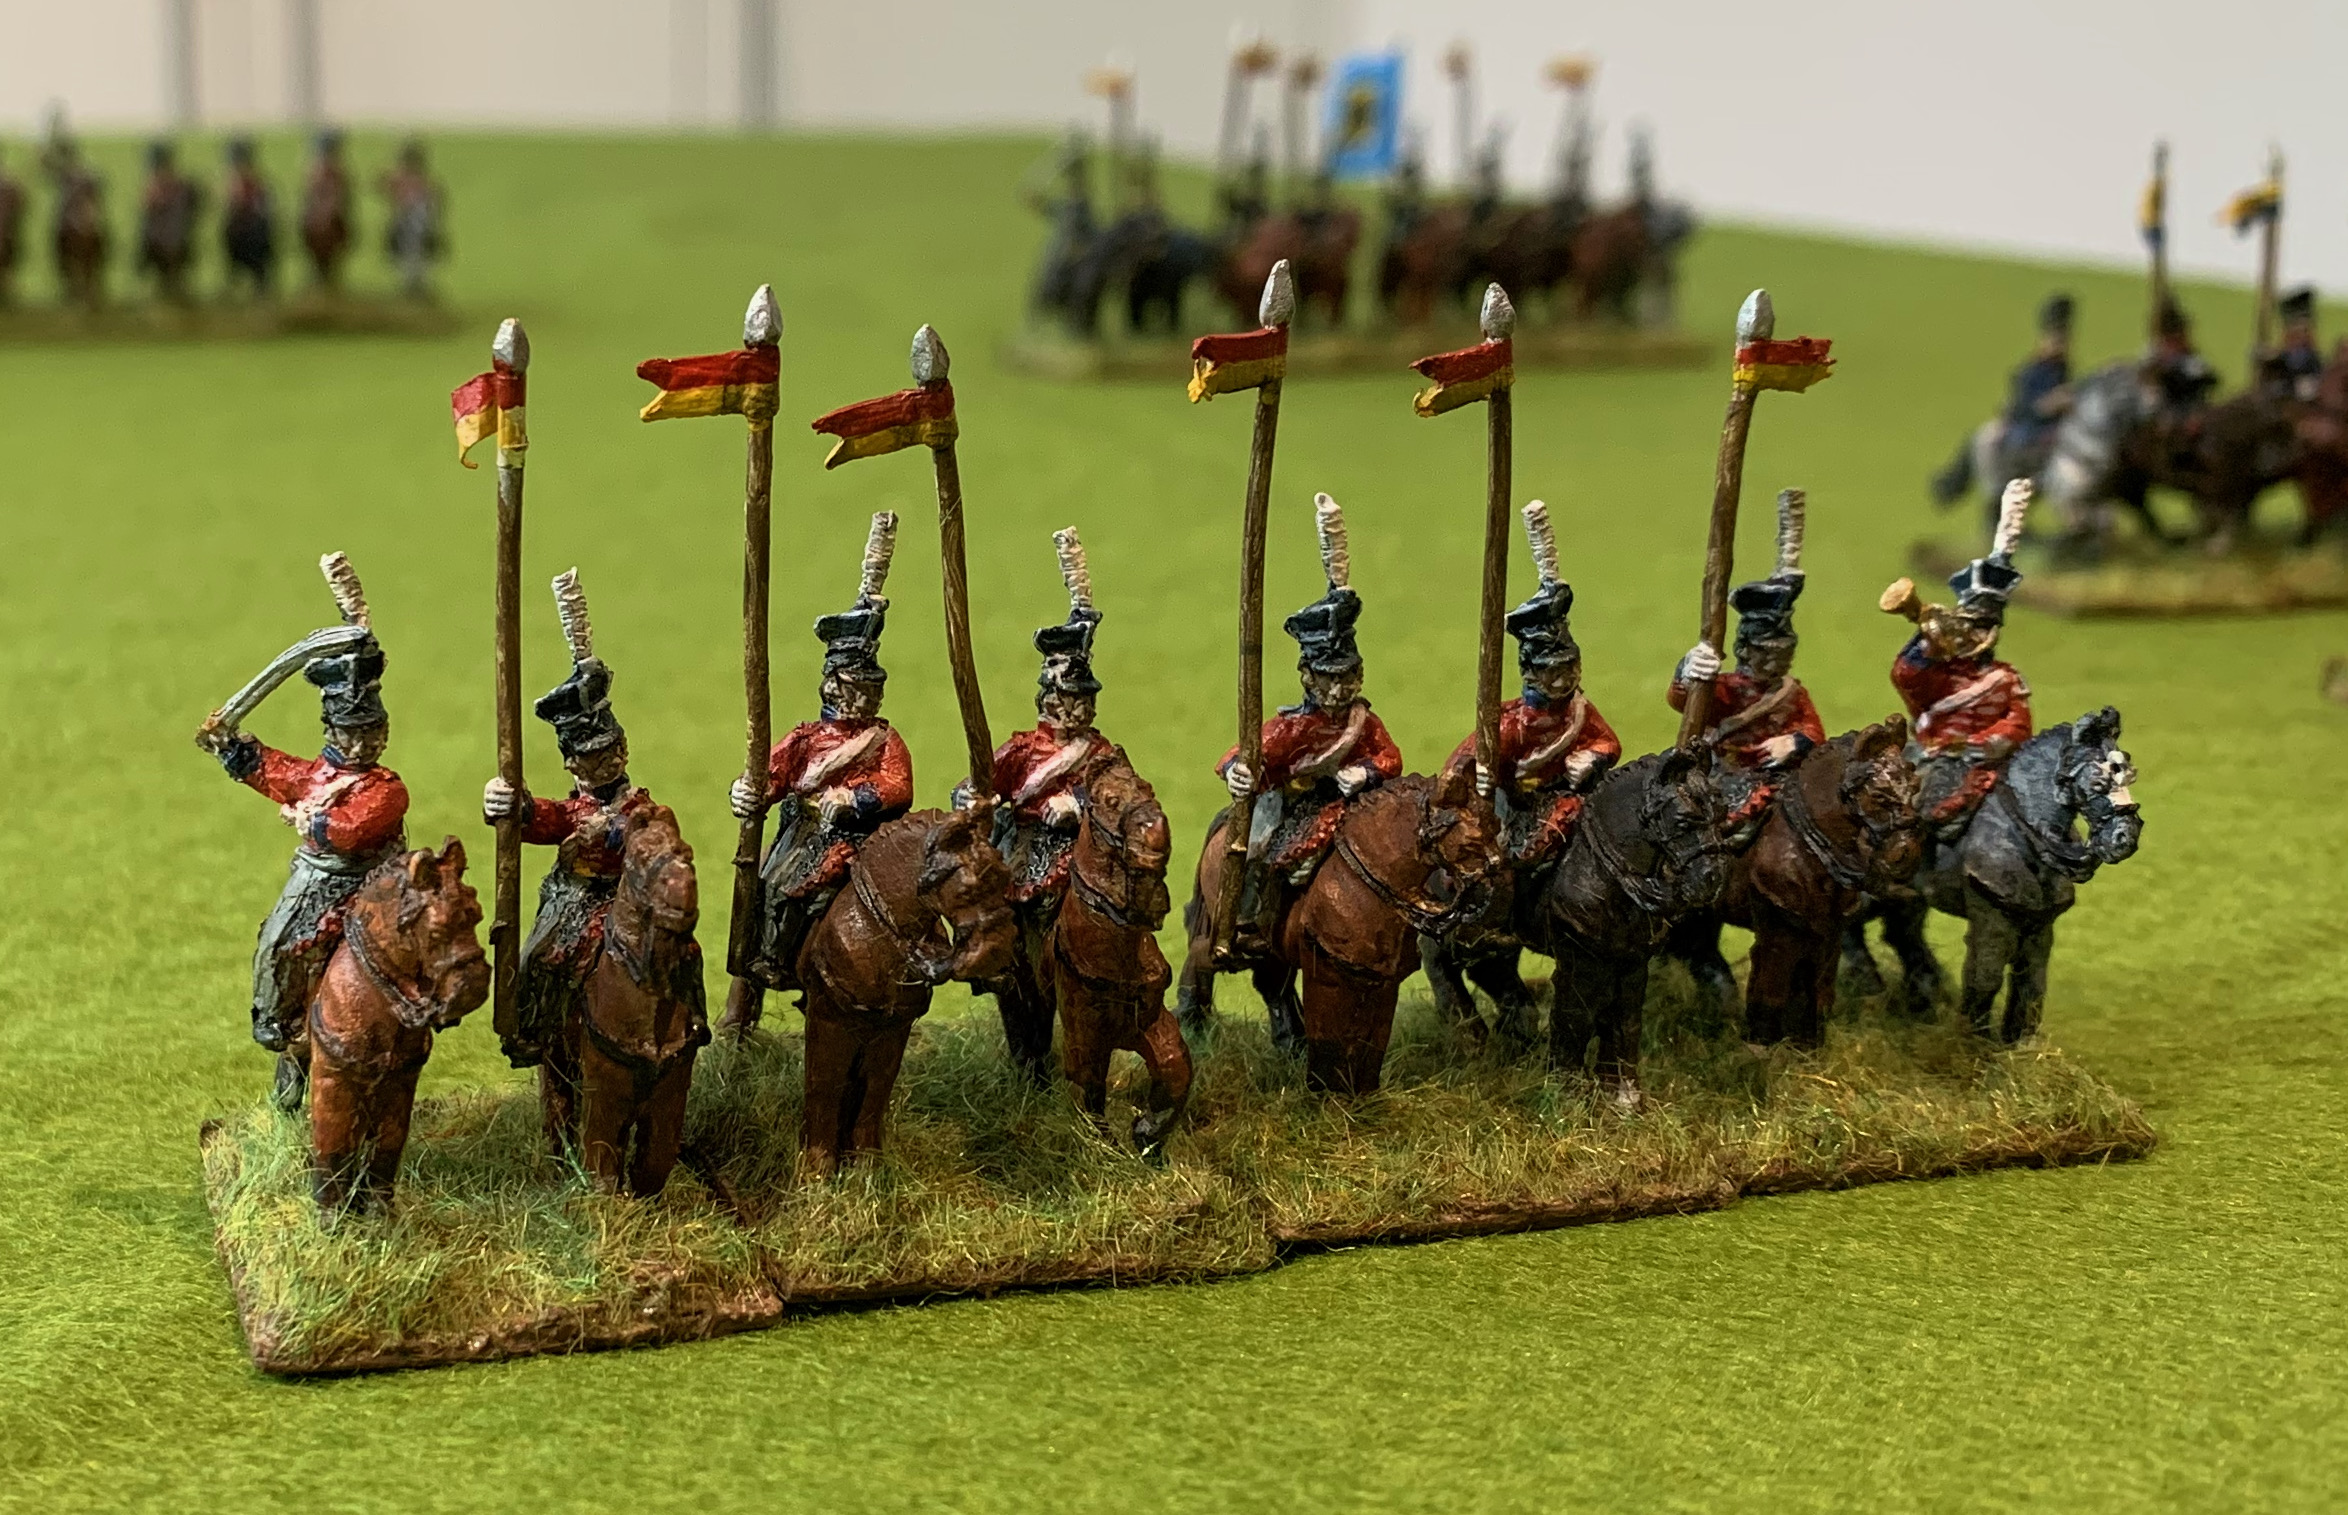
This uniform is again based on the first two squadrons, which were formed from Hellwig’s freikorps. The third squadron, formed from Schill’s freikorps, were in blue British hussar uniforms. I had a rather embarrassing pack of Prussian uhlans with czapka to use up – czapkas were not incorporated into the Prussian uhlan uniform until after 1815. This unit, and the 3rd Silesian Landwehr, were as close as I was going to get, though they had lacing on their tunics – and their red jackets were very striking anyway. One problem with this pack was that it had 16 figures, just enough for two units, but including standard bearers, which Prussian light cavalry did not use. I was able to make a pennon from foil and turn one of them into a regular lancer, based alongside the officer. I did attempt to represent the white lacing with paint, but not very successfully. These are not good quality miniatures – the worst of all my Old Glory Prussians. The regular uhlans aren’t great, but not too bad by comparison.
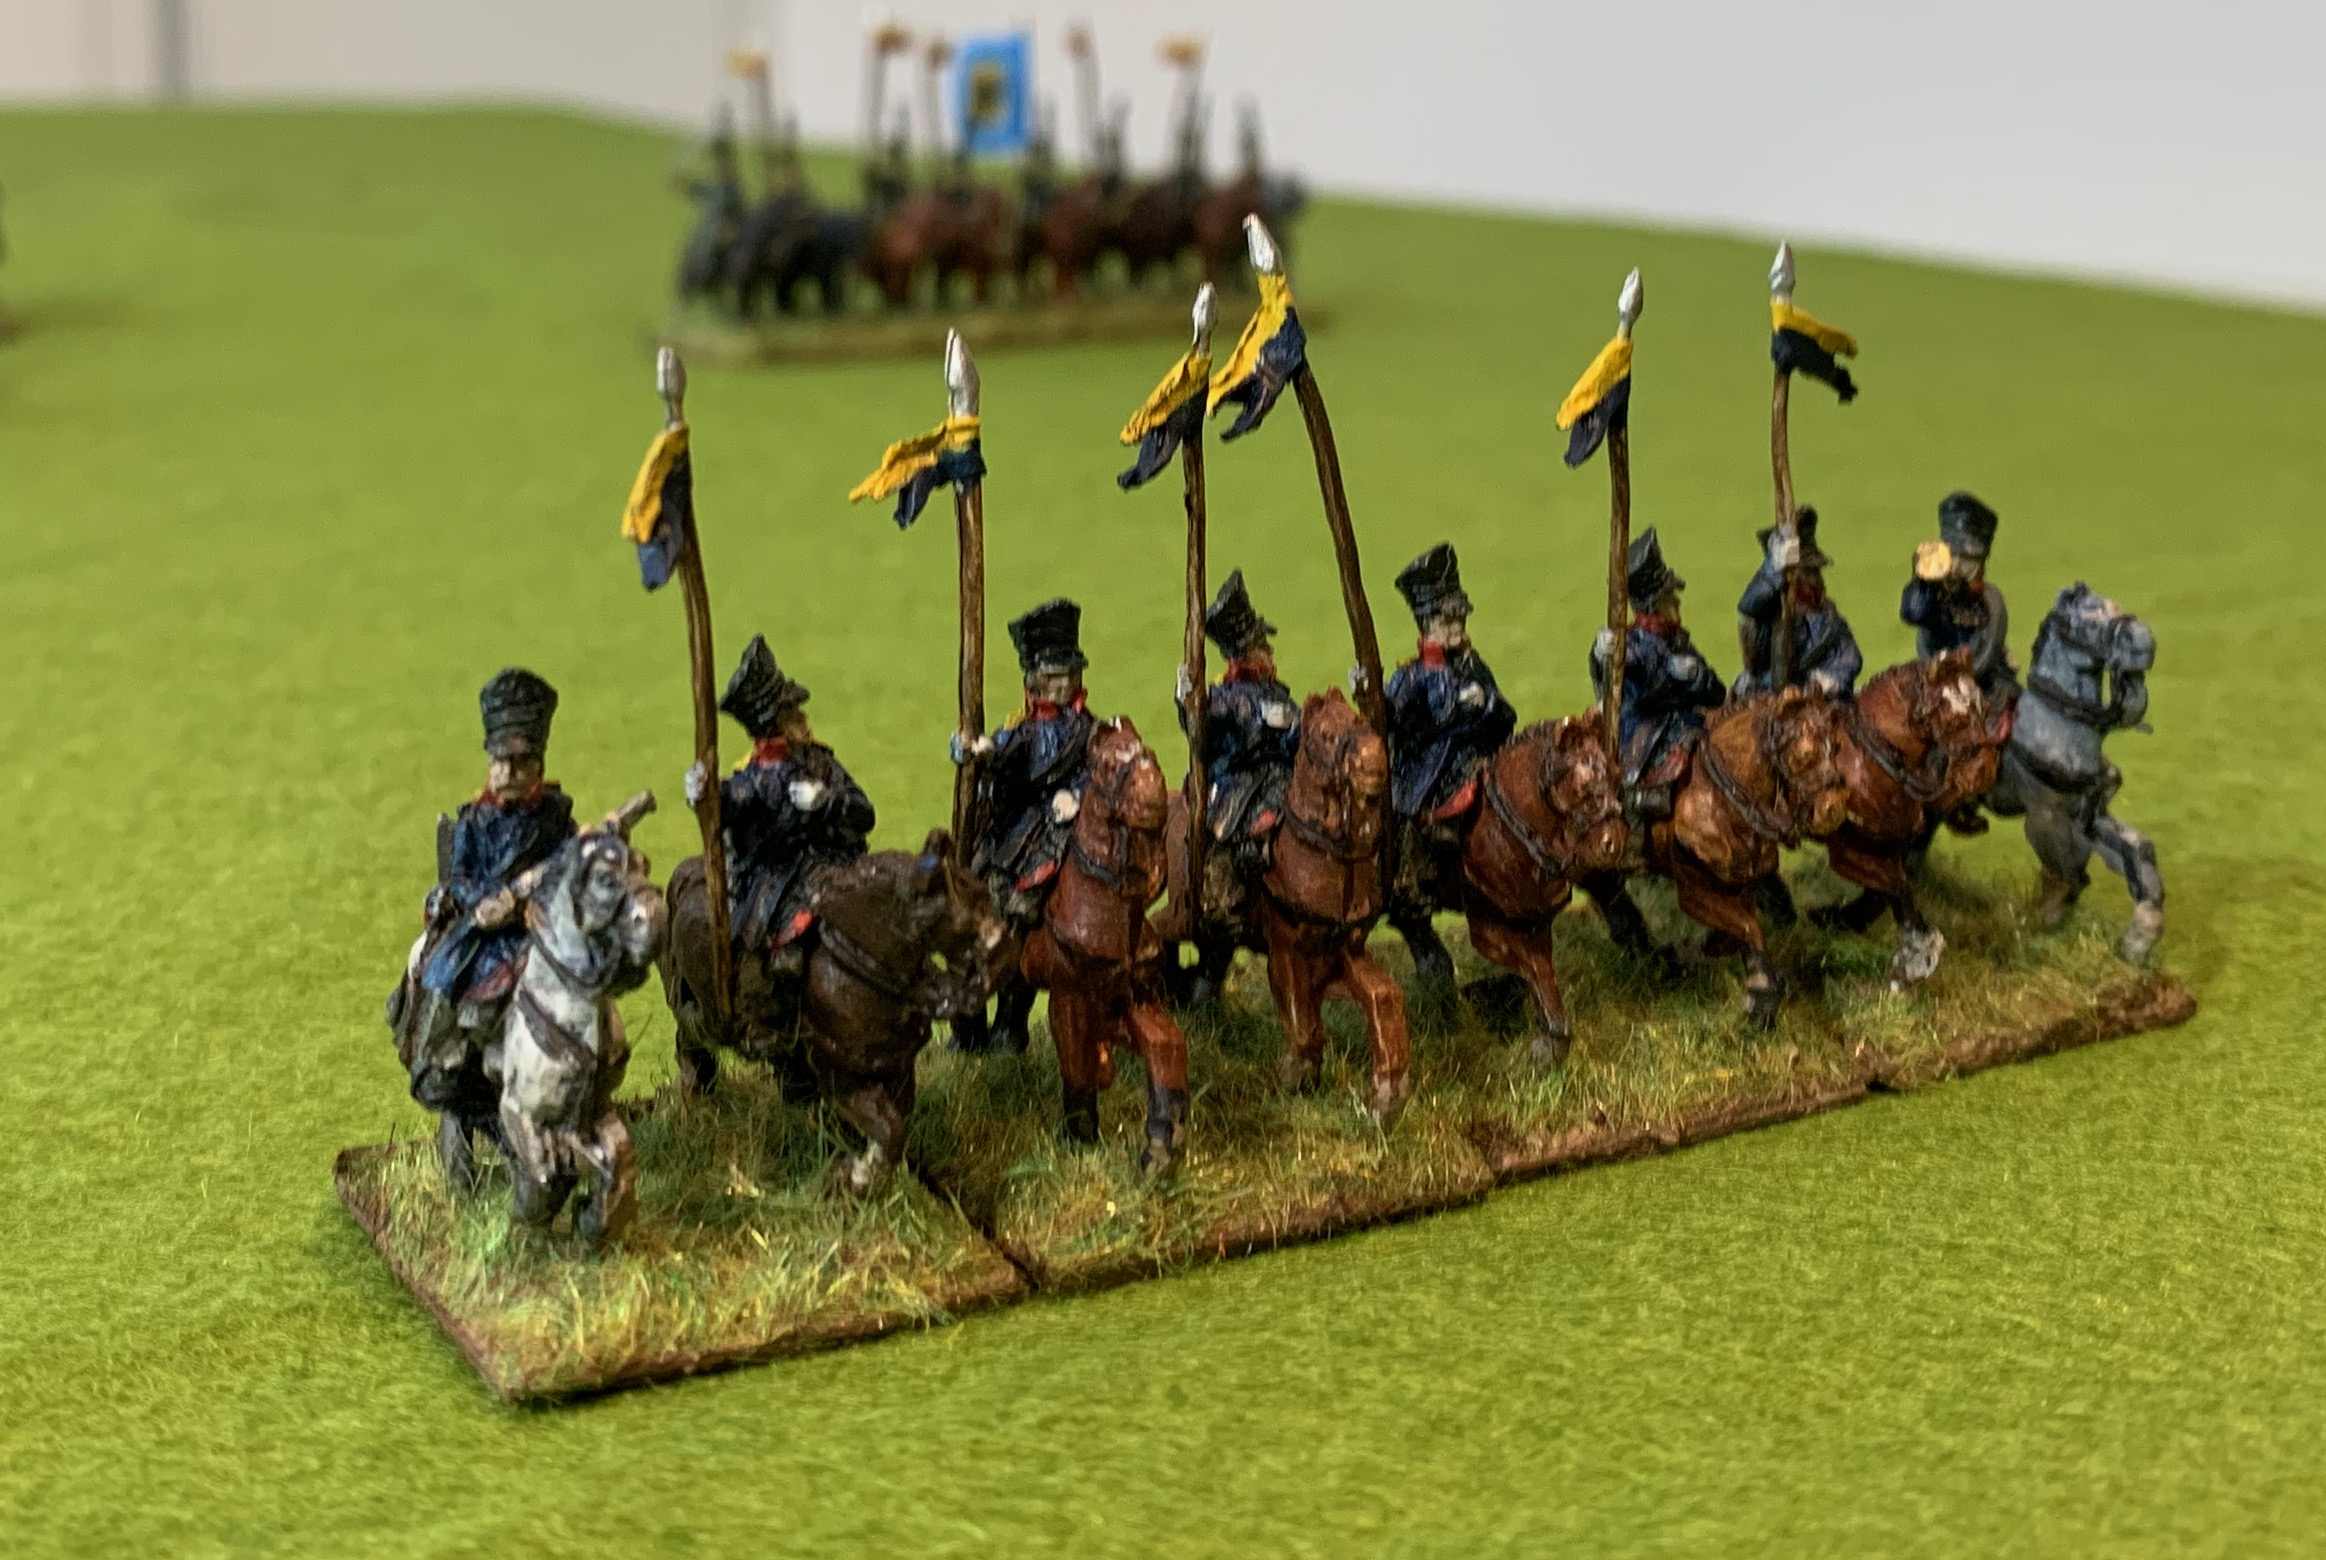
3rd Silesian Landwehr cavalry
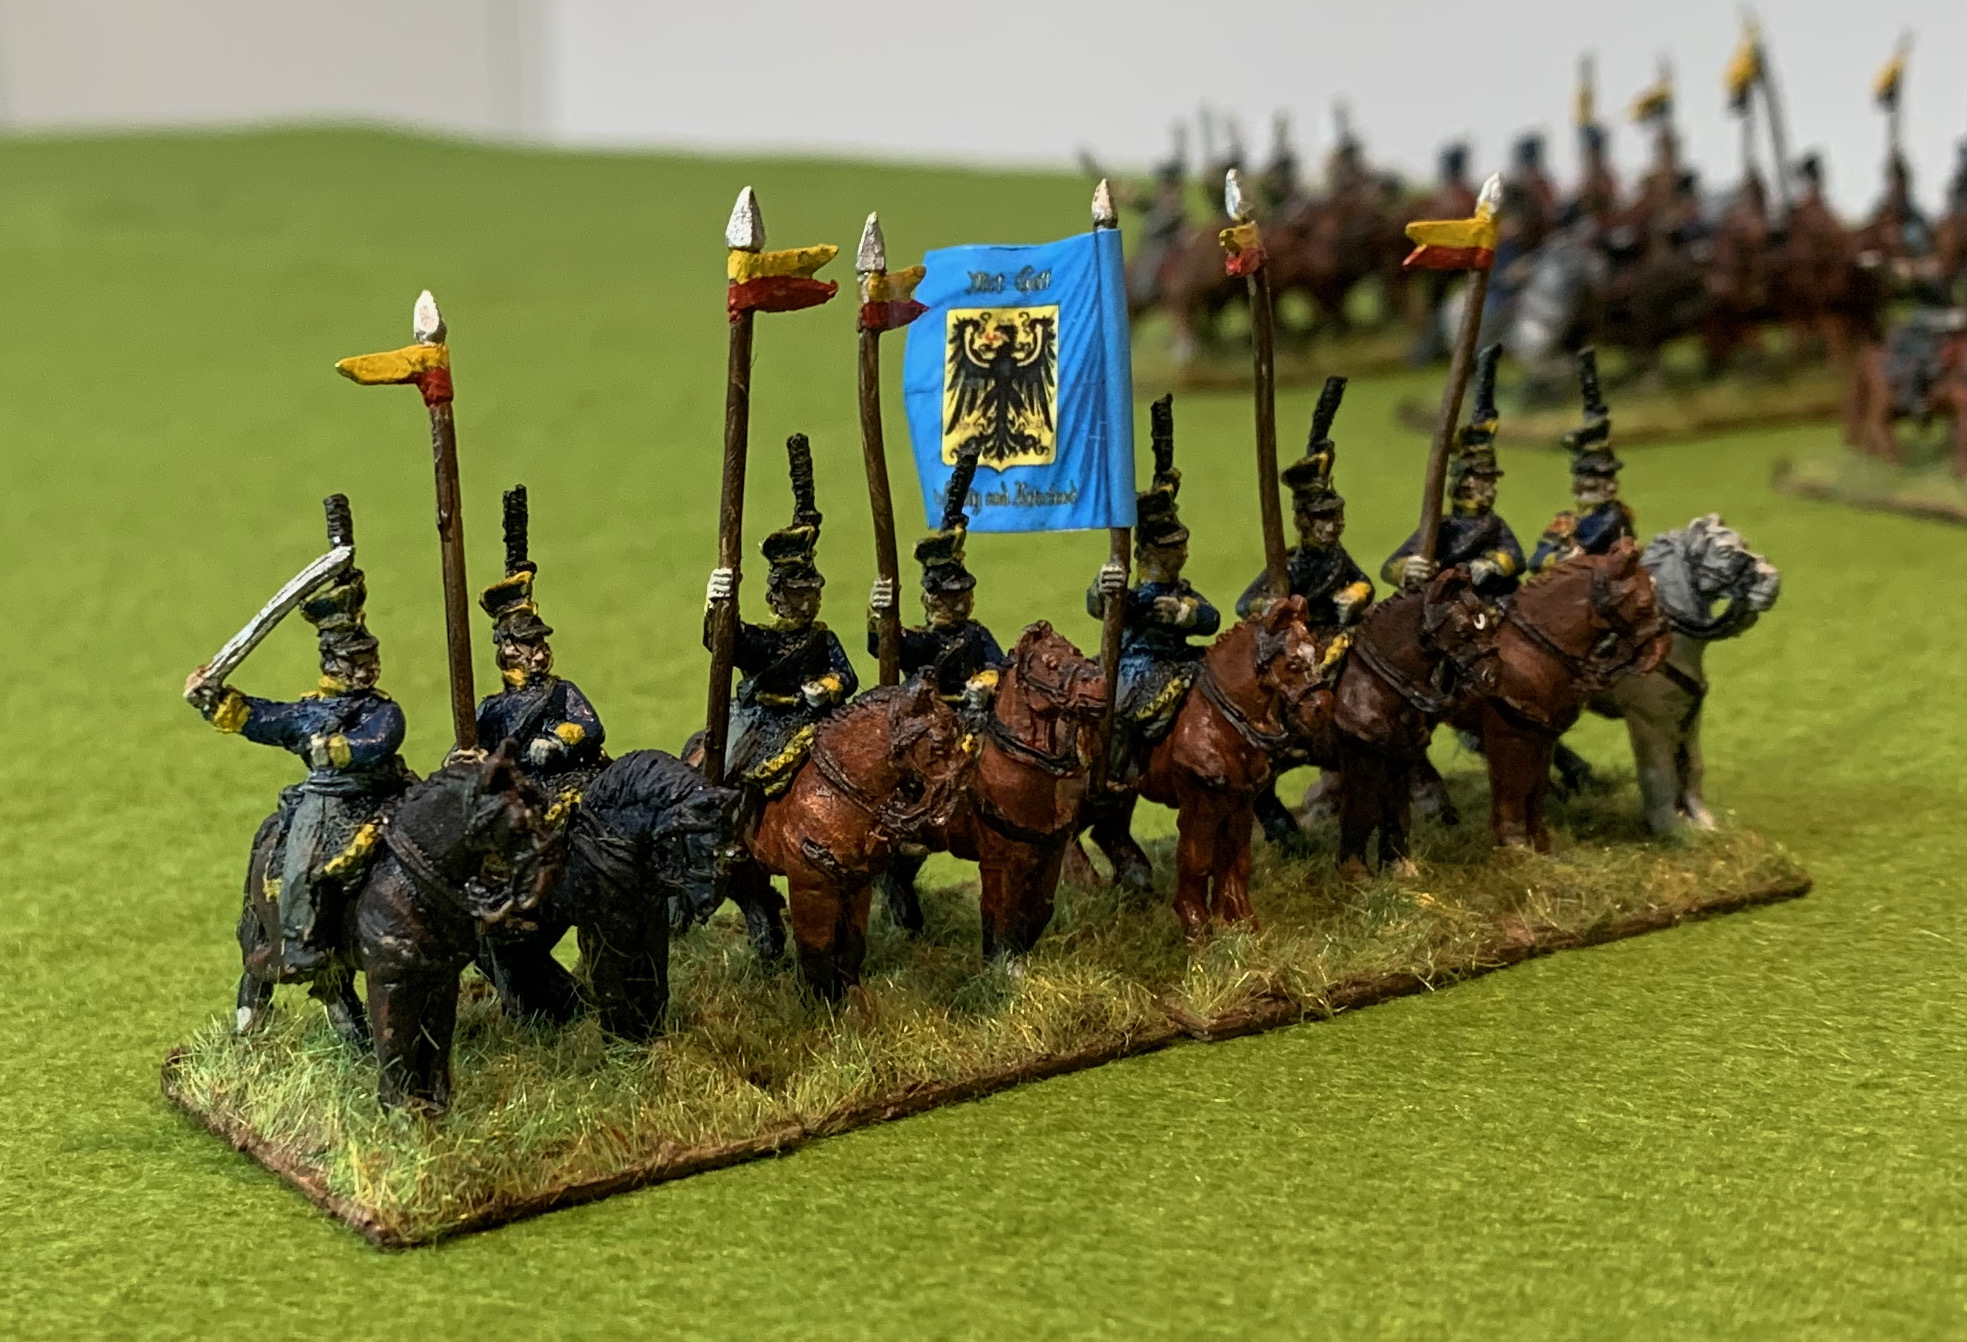
Here are the rest of the uhlans in czapka, this time painted as Silesian Landwehr. Apparently the 3rd regiment captured and appropriated Polish lancers’ uniform in 1813 and were still wearing it in 1815. There is no lacework this time, so the the paint job is more straightforward. This time I decided to use the standard bearer figure as designed. I had lots of spare Silesian landwehr infantry flags (from GMB). This is nonsense of course, as the flag would have been too unwieldy to use. But I thought it would add some visual drama and help mark the unit out as landwehr rather than regulars.
8th Hussars
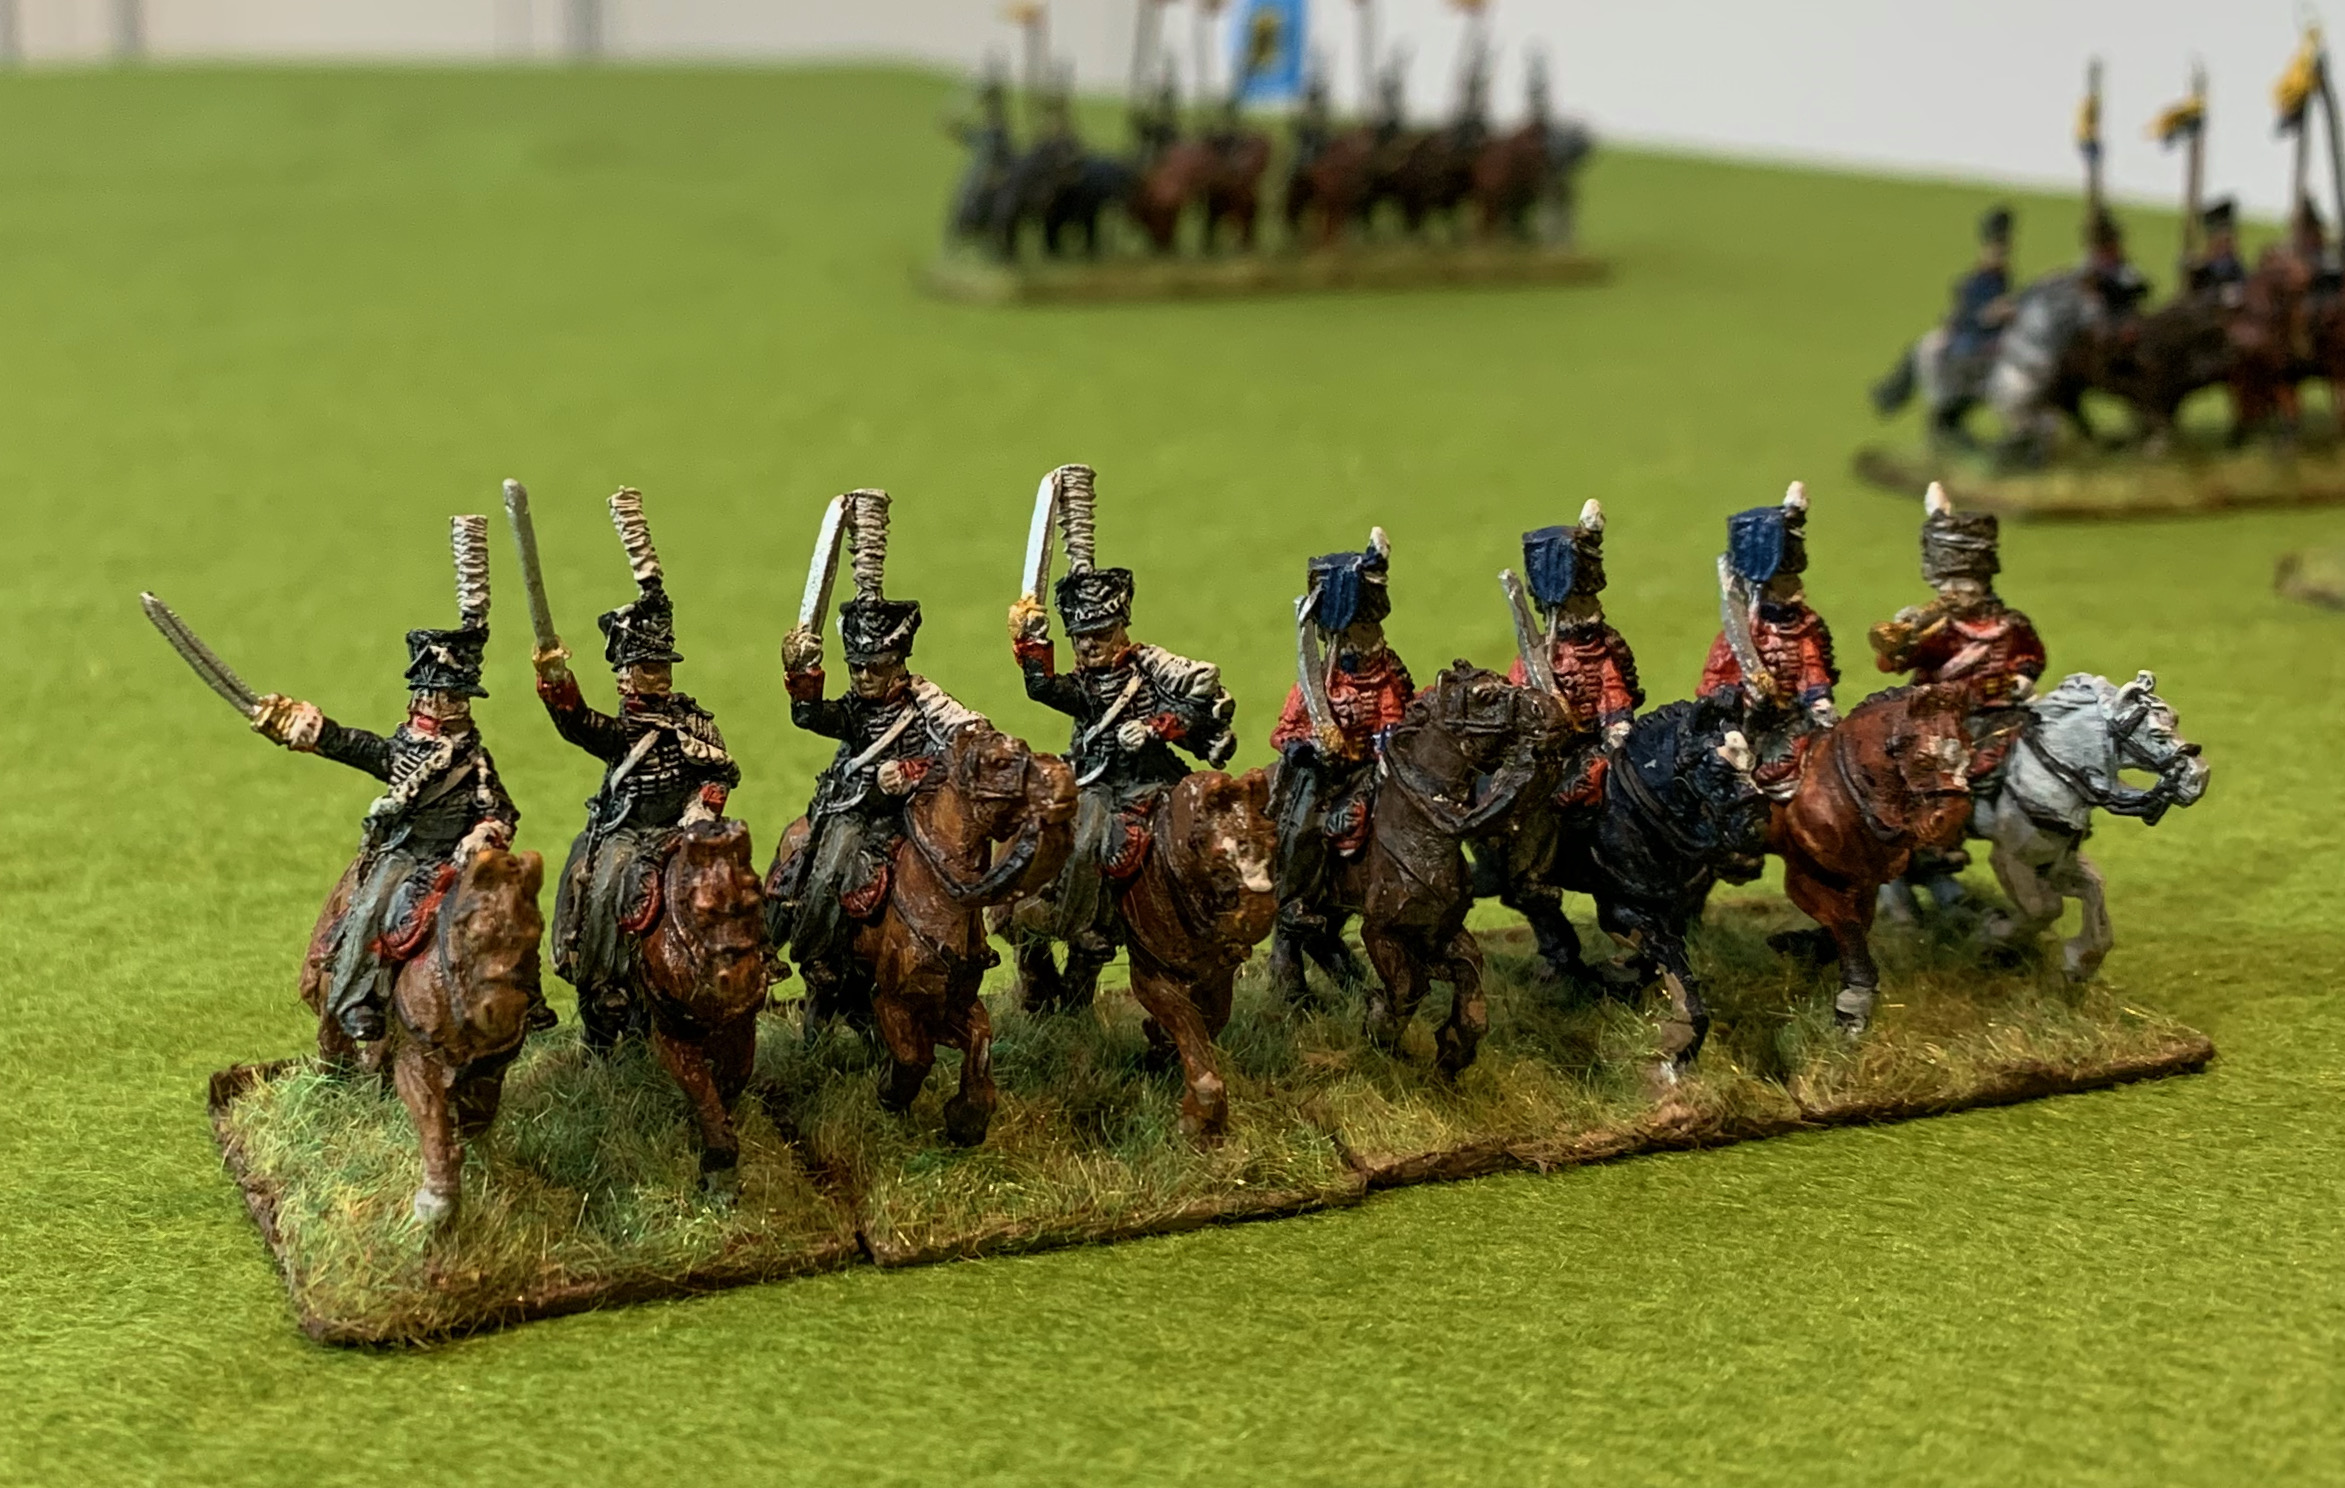
The 8th Hussars consisted of three squadrons thrown together from different formations: the 2nd Lieb Hussars, the 3rd Hussars and Hellwig’s Friekorps (again). I have represented the first squadron, with its black uniform and death’s head insignia, and the Hellwig’s, in their red British hussar uniform with brown colpack. The figures were from the Freikorps set, originally being Death’s Head hussars and British hussars. The saddle cloths are wrong, but these are the nicest miniatures in the set and fun to paint. Overall it looks as if the British figures are amongst Old Glory’s best in the 15mm range, based on my experience with French and Prussians. Some nice riflemen came with this set too. Making a unit out of two such different uniforms is a bit awkward though, but the but these figures would sit respectably alongside the 6th or 7th Uhlans if I needed and extra base or two.
For the bases I decided to go back to static grass, and risk it sticking to the miniatures. I mount my figures on unfashionably small bases, as I want to represent the close formations the troops actually used, as opposed to the loose files. Most people use 30mm squares rather than 25mm. The bigger bases are better for showing off the paintwork, and they also allow more creativity on the bases. There is not much scope for variations my bases, so they get a uniform layer of flock or grass. No space for tree stumps, bushes, etc. This time I mixed static grass from a variety of sources, including a fair amount of beige. The mixing wasn’t overdone, so there is some variation. The beige helps lighten up the bases, part of my battle against darkness and saturation. I used a different glue this time – “strong artist’s glue”, though still a white liquid like the PVA. I did not dilute it. After plastering on the static grass I turned the assembly upside down and tapped the bottom hard, both to knock off the surplus and straighten out the strands. The results were OK, and better than normal. The strands were nothing like as straight as you can get using a static electricity applicator, but the bases are small and I don’t mind if it looks a bit trampled – it’s in the middle of a moving cavalry unit after all. There wasn’t too much trouble with the strands sticking to the figures, and when try only small amounts worked loose. This is just as well as you can’t seal static grass by plastering on dilute PVA. Overall this means that static grass is a bit less hassle than flock, a little unexpectedly, and it is especially suitable for cavalry.
So that’s all my Old Glory Prussian cavalry done. I have a few spare miniatures which will end their days in the corner of the junk box. I have just one Old Glory cavalry pack left: some 15 French lancers, which I want to turn into two units of 8 somehow. I plan just three more Prussian cavalry units; I have AB figures for one each of hussars and landwehr with British shakoes. I also want some cuirassiers for 1813 and 1814 scenarios, but I haven’t bought these yet. But I still have masses of Old Glory Prussian line and landwehr infantry. Do I have a big drive on painting these up, or do I switch to the more interesting AB figures that are also waiting for paint?