Monthly Archives: March 2022

More Prussian landwehr

The two Pomeranian units. The officer o the corner of the font unit is from AB, almost all the rest are Old Glory.

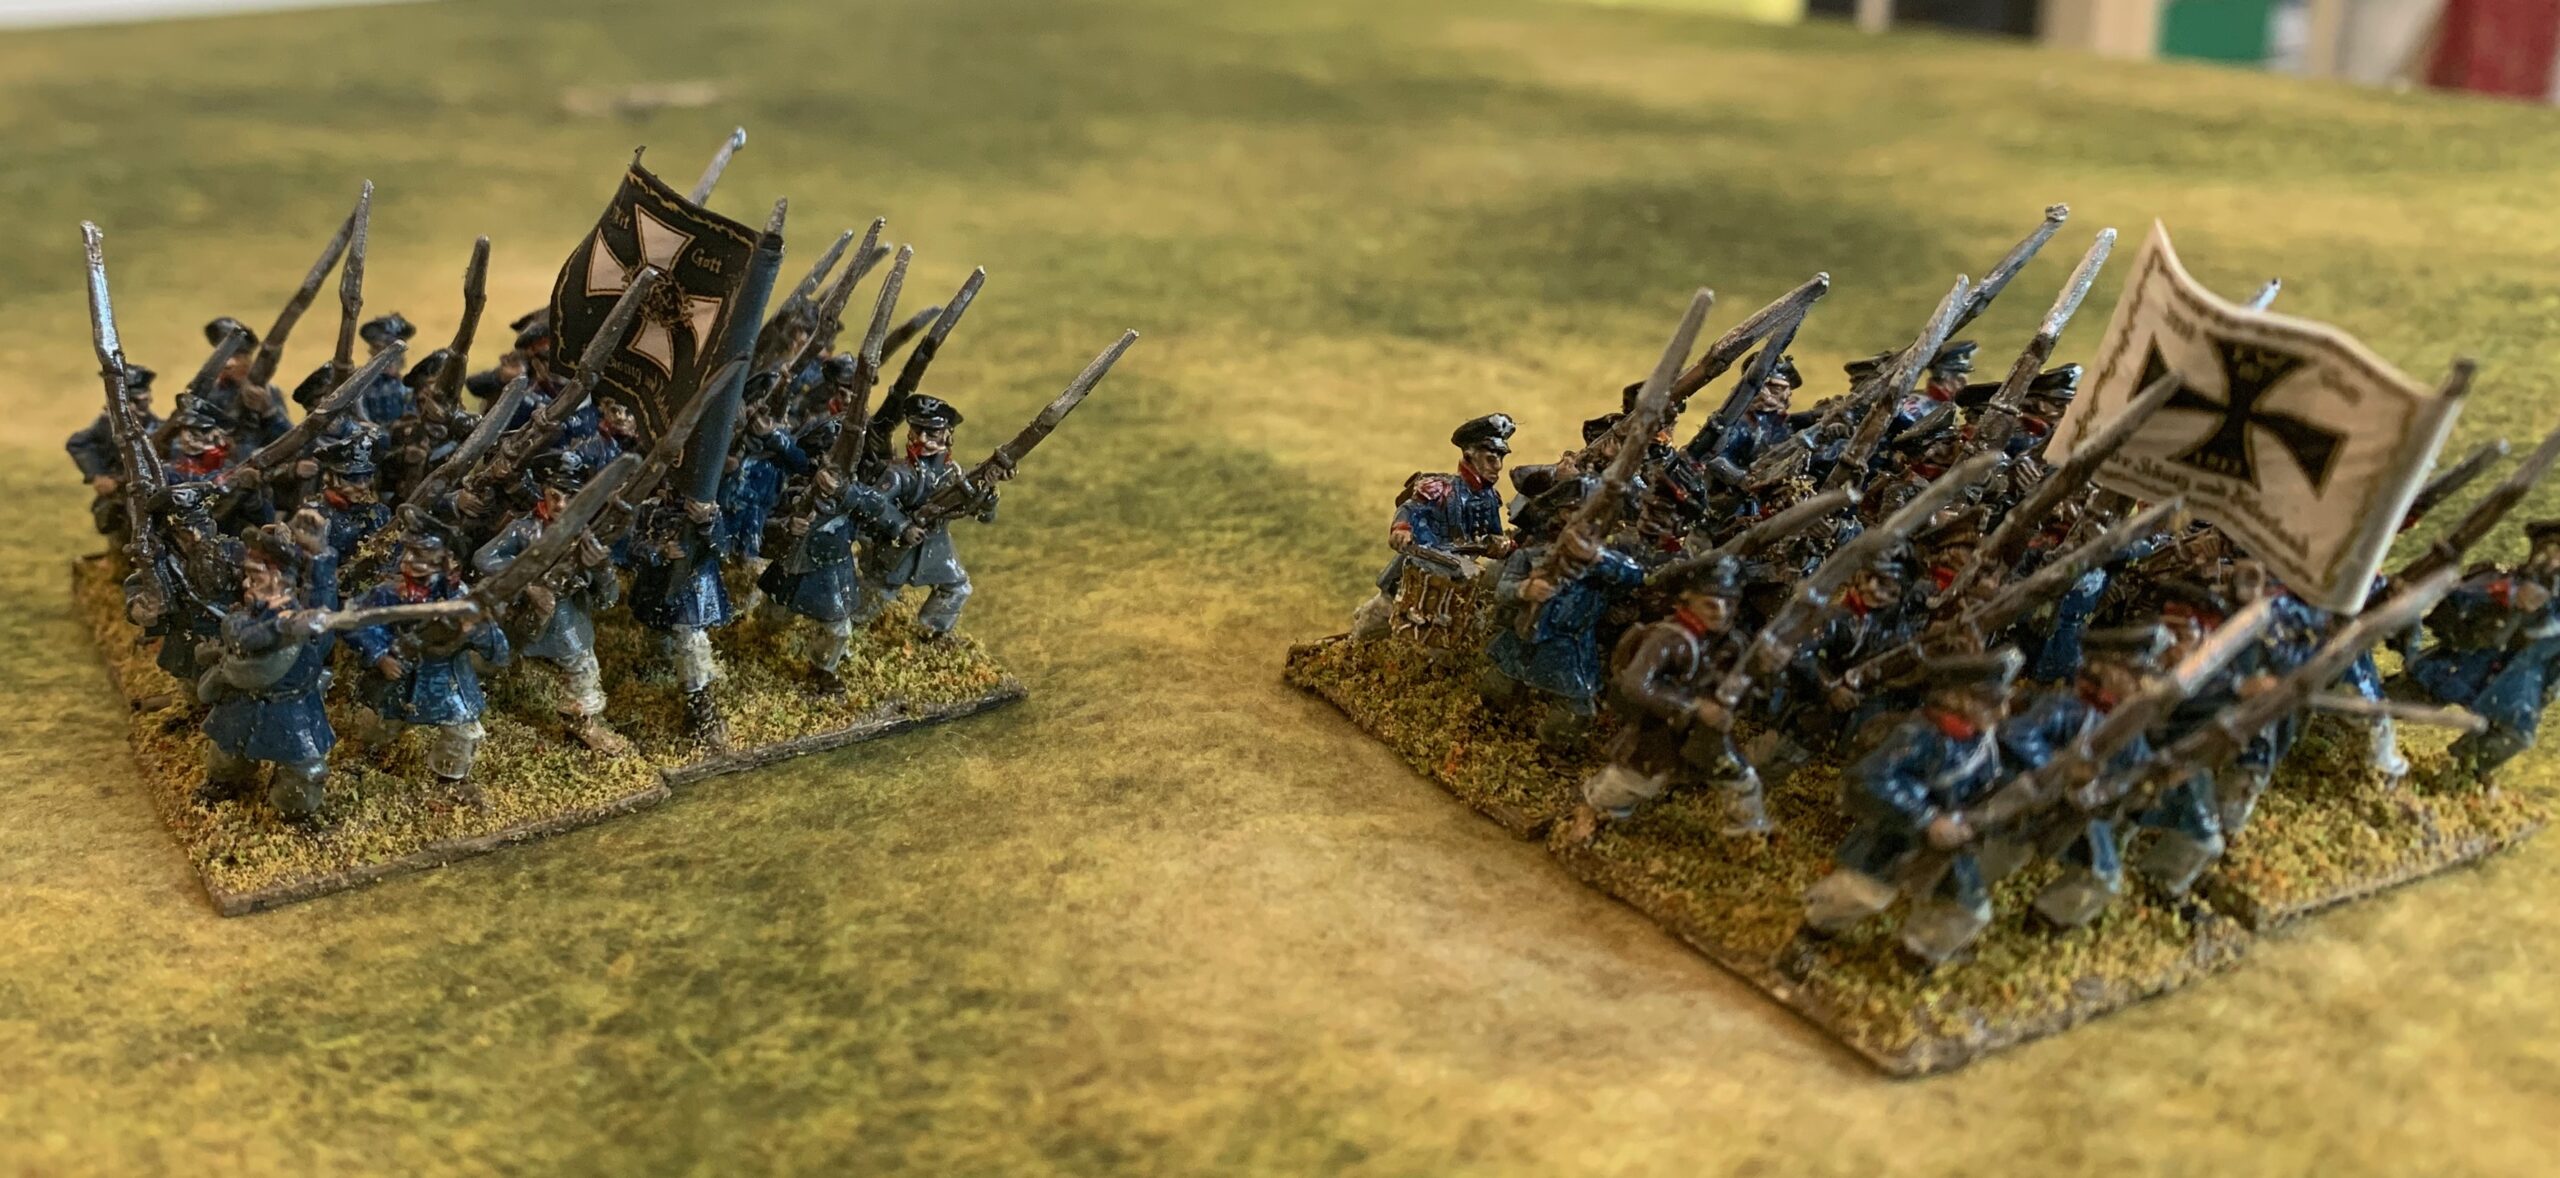
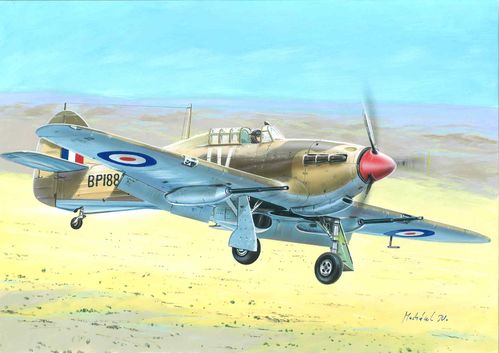
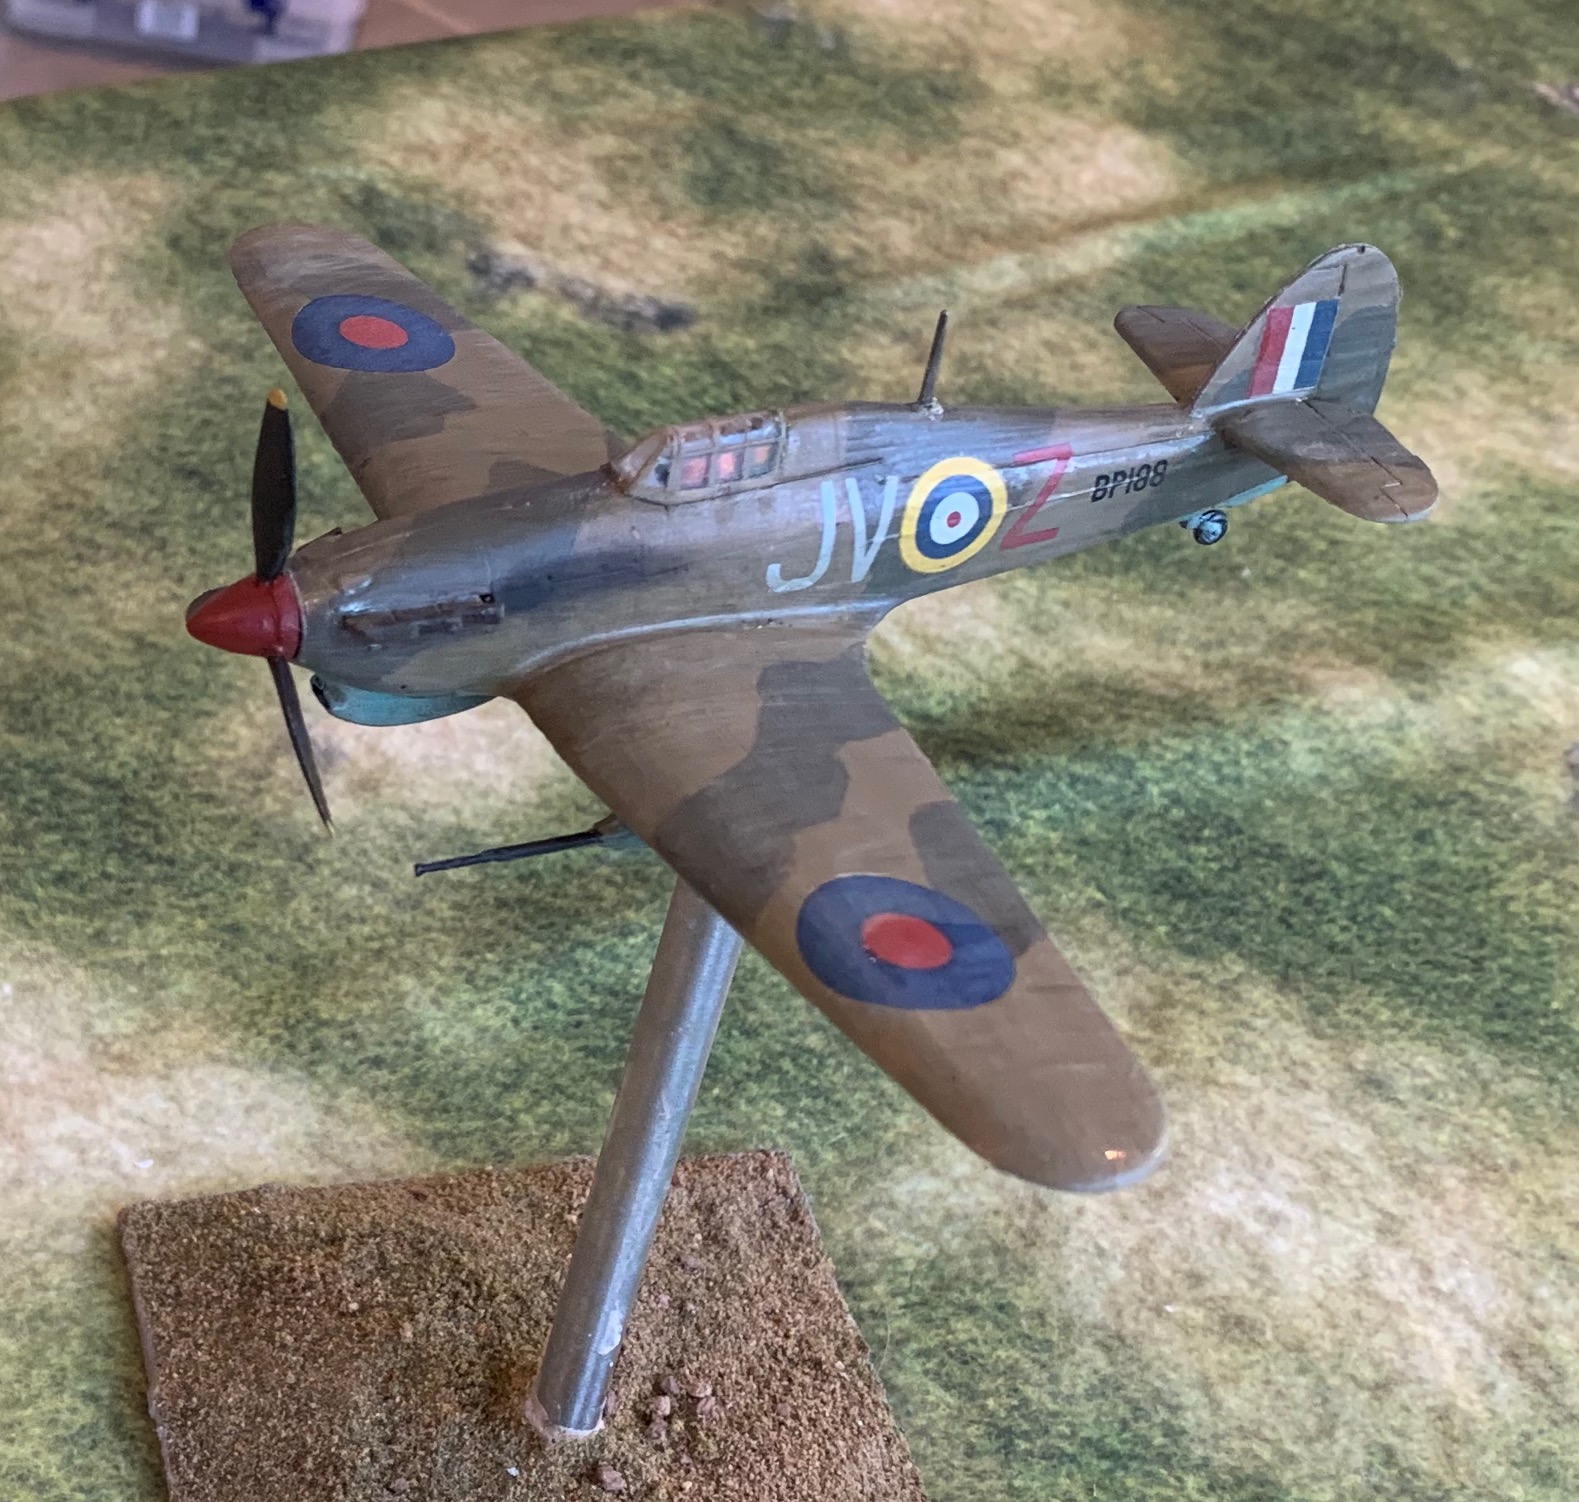
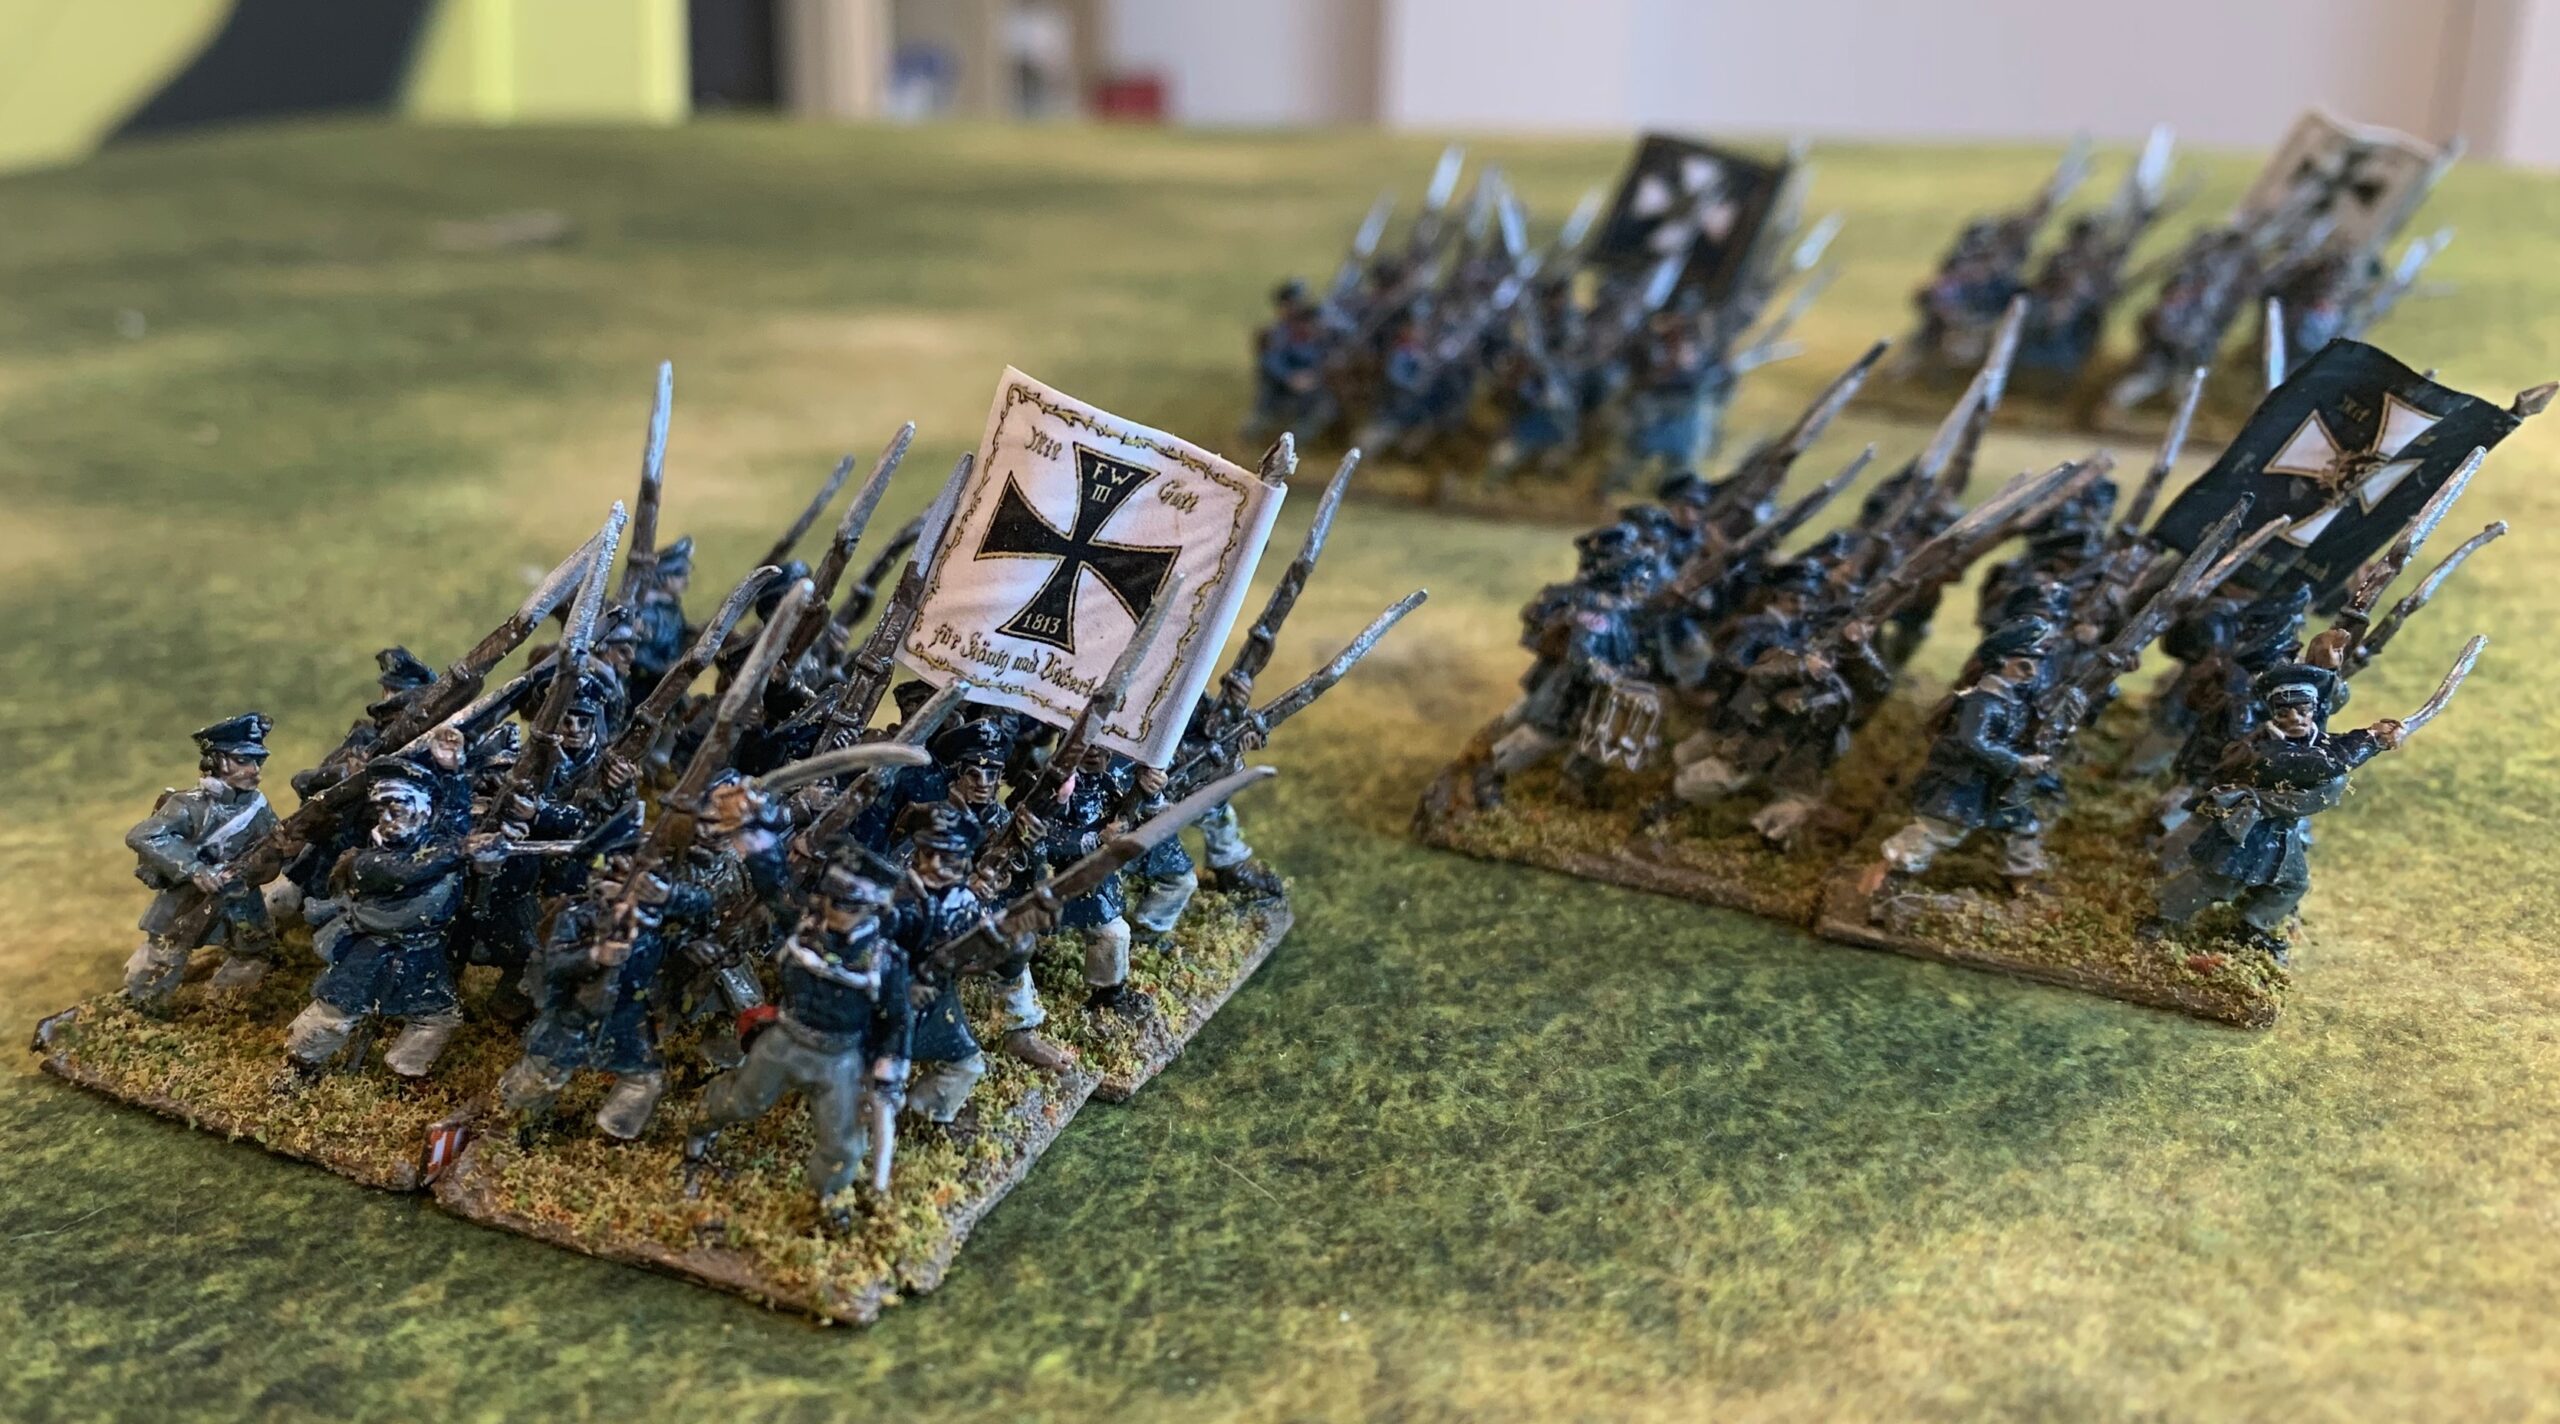
After my WW2 aircraft modelling, I wanted to return to the attack on my lead mountain of Napoleonic 18mm miniatures. This time I experimented with new techniques for a large batch of figures (102) to help make more rapid progress in future. I have painted them up to form four battalions of four bases, painted for two different regiments, from Pomerania and Kurmark (Brandenburg).

For a number of reasons I had far more Old Glory 15s Prussian landwehr infantry in my unpainted pile than I ever really intended. The figures aren’t the finest, and the caps are a bit low. I already had 19 six-figures bases of these done up for Westphalian and Elbe regiments. I have 60 or so of the somewhat nicer AB landwehr miniatures unpainted, which I plan to paint up as Silesians. Still the OG figures are nicely animated and look well enough in bulk – and the Lasalle game system that I have recently acquired is quite expensive in miniatures the way I play it. I could always do a few more more battalions of landwehr. So I thought I would try out some techniques in mass batch painting, on a larger batch than usual. I decided to do four four- base units, from two different regiments, plus one extra base base of Elbe landwehr so that I could top up my current landwehr stock to a full five Lasalle units. Each unit was to have a flag (figure manufacturers are usually over-generous with standard bearers, and I had four spare landwehr flags). Each base was to consist of five ordinary infantrymen, and one “command” figure – standard-bearer, drummer or officer. One of the standard bearers, and two of the officers were AB figures (where I had more than I needed for my Silesians), the rest were OG.

I am not a follower of hobby fashion, and I am ploughing my own furrow on presenting my miniatures. I base them close together on small bases (six infantry on a base 25mm square). The current fashion is for beautifully painted miniatures spaced further apart, sharing bases with rocks, tufts of grass and such. I find photos of the more fashionable 28mm figures based four to a 40mm square base painful to look at (the equivalent of four 18mm figures to one of my 25mm square bases). All contemporary illustrations show infantry in tight-packed masses – tighter than even my basing. Also I often find that the exposed expanse of bases often clash with the terrain board. Of course there is a very good reason that people go for these looser presentations – the painting of the figures is usually of a very high standard, and time-consuming. Looser mounting mean fewer figures to a unit, and the extra space allows the paintwork to be shown off to better advantage. These miniatures always look much better up close and personal than they do en masse and in pictures. I want to achieve the opposite – something that looks better en masse, while requiring less work on each individual figure – something more impressionistic. But I don’t want the miniatures to look terrible up close either, though. My technique had been to paint the figures individually, mounted on strips of card, and then mount them on the bases when they were finished, with the application of flock to the base being the final step. This felt a painfully long process, especially with a batch size of 12 bases (72 miniatures), which I felt to be the minimum to make progress with army building.

This time I decided to mount the figures on the bases much earlier in the process. This wasn’t the first time I have tried this. I did it with my first batch of Prussian line infantry (again 16 bases plus bits), but I didn’t consider it a particular success, as it was hard to paint the figures mounted so close together. I thought it was worth another try. First I primed them by airbrush, using gesso mixed with a bit of black. I then did a quick paint job on the legs below the coat, and some of the feet, and brown on the bases. To get a bit of variation in coat and cap colours I applied an undercoat of dark brown or white on the coats and caps for one figure in six, not including the command figures. This was a bit of a failure on the end result – the variation is hard to see. And then I mounted them on the bases, using the matrix of sand, acrylic medium and paint that I usually use.

And then on to the rest of the painting. The coats were mostly blue (a slightly different mix for each regiment, not that this is very noticeable), with a few brown and grey ones. The caps were black (actually dark grey) for the Kurmark regiment and blue for the Pomeranians. And so on. Predictably the webbing was the hardest – but this is not so prominent on the landwehr, and most of the poses had muskets held close the front of the body, masking the straps. If anything was too hard to reach because of the close packing of the figures, I left it out. I tried to highlight the white cross on the cap front, but not always very successfully; I thought I could rely on the final wash to correct this by highlighting the outline. I could just about reach the collars for the facing colour (red for Kurmark, white for Pomerania), but I did not attempt shoulder straps except for the AB command figures – the straps aren’t moulded properly on the OG figures, and very hard to pick out – their line infantry castings have the same problem. I tried to limit the detailing, but I did paint the gun barrels, as these are very visible. Quite a bit of paint strayed onto neighbouring figures, requiring touching up later. This was basic block painting – nothing clever.

Finally, in order to pick out more detail on the figures I gave them a wash. I’ve tried a number of strategies on this over the years. From acrylic paint and water, to Quickshade, to acrylic ink (sometimes diluted). This time I tried something a bit new again. I had bought some alkyl-based oil painting medium for future use in my aircraft models, to speed up the drying time of the oil paint glazes I have been trying there. I thought I might try this mixed with a bit of oil paint (Payne’s Grey) for the wash. This worked a treat, once the right ratio of paint to medium was found – it needed more than I thought. It dried to a satin finish which was slightly glossier than I normally have, but which helped give the figures depth. And that was the figures finished. No final varnish.

All that remained was to flock the bases. I used the same mix as for my last batch of figures, but it didn’t go especially well. It was impossible not to get flock onto the figures, and not all that easy to brush it off – not helped by the relatively dynamic poses of the figures making them hard to brush. And the flock needed to be sealed with diluted glue once dry, with more risk of flock straying onto the figures. This is a lot of faff for an effect that looks very ordinary. I think I need to try something different. That surely means painting rather than flocking – but I still need to find something textured to cover the bases so that they merge with the basing matrix (without getting onto the legs of the figures!). The base painting would then be directly after this texture is applied and dried, and before the main painting of the figures. Something to think about. With such a density of figures on the base, there is less need to try so hard.

I think the overall result is a success. These aren’t fantastically finished figures, but they are fine on the table. And, though I wouldn’t describe the process of painting them as quick, it felt like a significant improvement on my previous method. The batch of 100 was quite manageable.

The Kurmark units

The Duke of York’s Flanders Campaign – Steve Brown

I have long been curious about Britain’s first campaign in the French Revolutionary and Napoleonic Wars – in Flanders in 1793-5. I was curious because I had seen so little written about it. For most people British military history in this era starts with the Maida campaign of 1807 or Moore in Spain 1808-09. There is sometimes a reference to the Anglo-Russian Expedition to North Holland in 1799. How much was the vaunted proficiency of the British army evident before these campaigns, I wondered? So when I saw this history published by Frontline Books, I couldn’t resist it. It proved a most interesting read, and shed light on an episode that wargamers should take more notice of.

The book covers the history of the First Coalition (1793 to 1795) more generally, which I found very useful, before looking at the Flanders campaign in detail. Until near the end, Britain’s contribution to this coalition effort, which was led by the Austrians until they withdrew at the end, was led by Prince Frederick, the Duke of York and Albany, the second son of George III. It was his first experience of military command, but it was the fashion for armies to be led by “princes of the blood”, and this eased relations with coalition allies (the prince was fluent in German and familiar with the dramatis personae of high society in Austria, Prussia and Hanover). Apart from Austria, these allies were Hanover (part of George III’s realm), the Netherlands, and Hesse – with a theoretical contribution by Prussia that failed to materialise. The campaign was a failure for the Allies, mainly because of poor Austrian leadership. This resulted in Austria losing Belgium (as we now call what was then the Austrian Netherlands) to France, followed rapidly by the rest of the Netherlands.

Why did Austrian leadership fail? I didn’t find the book very satisfactory in explaining this. Two main reasons are offered: divergent strategic interests, and outdated strategic doctrines. While these were both doubtless true, I think that Steve Brown fails to explain them properly. What did Austria want to achieve? In the end what undermined Austrian resolve (and that of the Prussians) was a Russian threat to Poland. Was that their worry all along and did that make them hesitate to commit troops deep into France? This idea is not explored. The Austrians were not the only ones guilty of a lack of clear focus – the British government insisted on a diversion to try and take Dunkirk, and diverted troops to campaigns in the West Indies and the Mediterranean. Coalition warfare always struggles when it comes to clarity of objectives – and historians too often moan about this, rather than properly interpreting the conflicting aims. Warfare is politics by other means, after all, and not a be-all and end-all. On outmoded strategic ideas, Mr Brown makes much of the Austrian attachment to the “cordon system”, which let them to disperse forces. This builds on a narrative that was current at the time (the Duke of York himself refers to it), developed later by such writers as Clausewitz, and has been a staple of historians ever since. But that leaves a question: if it was so obviously wrong, why did the Austrians stick with it? If that was actually what they were doing. My main rule of historical analysis is that if you don’t understand how you yourself could have been tempted to take a particular course of action, then you haven’t actually understood it. Nobody defends the cordon system – which means that nobody is taking the trouble to understand what commanders who used it were trying to do. I was not able to pick up a deep enough appreciation of this campaign to develop a view myself. The maps in the book are generally unsatisfactory, and Mr Brown assumes too much knowledge of the local geography.

Mr Brown is a bit better on the tactical details of the battles. These are extremely interesting. There were no great set-pieces along the lines of the Napoleonic period – but rather a series of much more scattered encounters, often relating to the capture of fortresses and strategic towns. The coalition troops fought very well for the most part, with the general exception of the Dutch (whose people were not bought into the defence of royalty and aristocracy). Often Allied troops won out against vastly superior numbers. The French forces were in a state of flux – with elements of the old royal army combining with various flavours of volunteers and conscripts. The French did start to develop tactics that made best use of their advantages – which were mainly numbers – which has been the main historical interest of these campaigns hitherto. This has been dealt with expertly by the late Paddy Griffiths in particular, and this account of the Flanders campaign bears Griffiths out, though it doesn’t dwell on this aspect of the campaign. Griffiths suggested that the French innovations, far from being a new and superior way of war, were developed as a way of using poor quality troops against superior professional armies – and were largely dropped as the French army regained its professionalism under Napoleon. But until I read this book I didn’t appreciate just how effective the coalition troops generally were. The Austrian army was considered the best of the major powers, and their performance in this campaign bears this out (though Mr Brown reckons the Hessians to be the best troops in this campaign). This should provide a lot of interest to wargamers. The two sides provide an interesting contrast. Coalition armies may be nightmare to command, but the variety of troops they incorporate is a wargamer’s delight. And what’s more the coalition’s cavalry arm was very strong – including a substantial British element, featuring Household cavalry, the Union Brigade, and many other units, who had a good campaign. Britain did not field such a strong force of cavalry until 1813, Mr Brown reckons. Of course, the uniforms are totally different to the Napoleonic phase of the wars, but even so this era deserves more attention form the hobby than it gets. If I was in the mood to take on another army-building project, I would be tempted!

As for British tactics, Mr Brown has not much to say – as the British contribution to the coalition effort was not a major one. Many of the British infantry units were freshly raised and of very poor quality. Officers were often inexperienced surplus sons from aristocratic families, who had acquired commissions through purchase. Having said that, the British units generally seem to have fought well enough, using the conventional three-deep line for infantry. They seem to have been used aggressively in bayonet attacks, rather than attempted much with musketry. The Guards units performed well, as well as the cavalry. The weaknesses of the British units was more a question of a loss of discipline off the battlefield, with a lot of looting in particular.

The campaign ended in ignominy, when the Austrians pulled out, and then the French attacked in the winter. The remaining coalition forces were forced into a calamitous retreat where the logistics and discipline broke down and many men were lost. This was doubtless a searing experience for those that were there. And this was something of a Who’s Who of British and Hanoverian officers who were to feature prominently later on, not least of whom was the future Duke of Wellington, who commanded a regiment of infantry. There is an interesting appendix listing these officers who came to prominence later. There are many familiar names on the French side too, such as MacDonald and Vandamme, but most of the famous French names of later were elsewhere. There was another important participant, whom Mr Brown barely gives a mention: Gerhard von Scharnhorst, who served as a staff officer in the Hanoverian army. His experiences of the new French tactics deeply influenced him, and this in turn was very influential in the rebuilding of the Prussian army after 1807.

The Duke of York’s performance was undistinguished, though Mr Brown suggests that much of the criticism he has received is unfair. However, he does suggest that he lacked the gravitas to stamp his authority on an unruly army. He moved on to command the whole British army, where he is reckoned to have done an excellent job, helping to make it become the effective force of the Peninsular campaign. For him, and for the many other British alumni of the campaign, the Flanders episode was a powerful lesson in how not to manage a military campaign. That can certainly been seen in Wellington’s insistence of stern discipline and focused command.

This is an interesting book on an interesting campaign. I think it falls a bit short on the analysis, where it too often follows conventional wisdom, often quoting other historians’ analysis verbatim, and not leaving me with the clarity on events that I had hoped for. The maps are disappointing. But it throws welcome light on an important episode of British military history.

My Airfix Spitfire VC

And the last but by no means least of my trio British planes is the Spitfire VC, which I built from the Airfix kit, released last year. Airfix was my favourite manufacturer back in the day – but this is my first Airfix kit on my return to modelling. In fact the prospect of this model’s release that was one of the things that prompted this project.

The Spitfire V, in the tropical version with the Vokes filter, was backbone of the RAF (and other Commonwealth air forces’) effort in 1943 in the Mediterranean theatre. It started the year as the main air-superiority fighter – although it was considered to be a bit behind the Messerschmitt Bf 109G and the Focke-Wolf Fw190A then use by the Luftwaffe, it was still the best the Allies had. As the year progressed the Luftwaffe was overwhelmed, and the Spitfire VIII and IX came in, with an upgraded Merlin engine. The Fw-190, considered its best German fighter, was withdrawn from the air-superiority role in this theatre, though still used as a fighter-bomber. The Bf-109Gs were increasingly manned by raw and overworked pilots. The Spitfire V iwas needed less as a pure fighter and took up a role as fighter-bomber (the “Spitbomber”), which is how I wanted my model.

The A,B and C designations of the Spitfire V referred to the wing. The A wing was that used on the Spitfire Is in the Battle of Britain, with four .303 machine-guns on each wing. The B wing replaced two of the machine-guns with a 20mm cannon, including a blister on the upper wing to house ammunition. The C wing was generally improved, and could be configured with 4 machine-guns (which almost never happened), one cannon and two machine-guns (the typical configuration) or two cannon (quite unusual apparently – but what my model shows). The C-wing became standard for later marks. The VC was the most common version in the Mediterranean theatre, I believe – though there were quite few VBs earlier on.

In common with the other models in this batch, I decided to use the box decals. These depict either a US-operated aircraft from early 1943, or one from 3 Squadron of the South African Air Force, dated in the blurb at November. This was a bit late for my purposes – but a bit of research showed that the aircraft went into service with 3 Squadron in early July – just before the Sicily campaign – which was fine. These planes had the unusual four cannon armament, which added interest. Doubtless this reflected its fighter-bomber role. Here is a picture of the plane in service (it is DB-V):

The Airfix kit is excellent – and so it should be from something this recently released – and good value for money. As with standard Airfix practice, it can be made with undercarriage up, and a pilot is provided – though not a very nice one (I put it in the Hurricane, where it was less visible, and where I needed a smaller figure). I have only one real gripe with Airfix, apart from wanting them to make a better effort with the pilot: they did not provide any bombs. Since all the photos I have seen of the 3 Squadron machines show them carrying bombs, and since the box artwork shows the American plane on a bombing mission (though actually I don’t think Spits were used in this role until Sicily), this is a bit of a gap. They do provide parts for a clipped-wing version, for a plane without the Vokes filter, and even for under-belly slipper fuel tank, however. Fortunately I had spotted that my Eduard Spitfire VIII had parts for two underwing bombs, which I had no plans to use. The 3 Squadron pictures show the planes carrying a single bomb under the fuselage – but I think earlier on underwing bombs were standard – and I think the central bomb-rack was not developed until after Sicily at least, and possibly not until a lot later(there was a need to make sure the bomb was thrown clear of the propellor in dive-bombing missions, I think). My reference for the original bomb racks suggested that they were pretty much invisible after the bombs were released – which fits with the Eduard parts (and not photos I think from 1944 which show substantial pylons).

I digress. here is the finished model:

I think this is the best of my three models. As with the Kittyhawk I had a bit of trouble with the fit of the fuselage to the wings, but in the end result this doesn’t show badly. One of the underwing roundels isn’t quite flat. The colour scheme is awry, but an interesting point from the photo is that the underside is quite pale on these planes. Usually the Azure Blue is darker than the Mid Stone, but in this case it is plainly lighter – on the two further aircraft anyway. So even here my model may not be as awry as the others. Another curiosity is that the red on the roundels in the decals is very pale, orange actually – and not the typical dark red. This is possibly consistent with the foreground plane in the photo, and the tail flash of DBV. I decided to rely on Airfix’s research and use them anyway. Perhaps it is an SAAF thing?

Rather remarkably, this is the first Spitfire model I have made. I had previously made a P-47, Bf-109, Fw-190, Stuka, Hurricane and Kittyhawk – so this is the first breaking of new ground in my project. It is a lovely aircraft, even with the Vokes filter. I am looking forward to my Mark VIII later in the project, which is even sleeker. I am minded to attempt a VB, or perhaps another VC, from the Tunisia period, in air-superiority mode. But not until the plastic mountain comes down a bit more. There are still eight more planes in it! To say nothing of the vehicles.

My Special Hobby P-40 Kittyhawk 1A

Next a look at my Kittyhawk. The P-40, later models of which became the RAF Kittyhawk (earlier ones were called Tomahawk by the RAF), played an important role in the RAF efforts in the Mediterranean. At first they were used to supplement the Hurricanes as air-superiority fighters – as the former were outclassed by the arrival of the Messerschmitt Bf 109F – plus it was easier to ship them direct from the US to Egypt than supply from the UK. Then as the Spitfires took on that role, they were used primarily as fighter-bombers. By 1943 they had become the RAF’s principal fighter-bomber, increasingly supplemented by Spitfires Vs, as the Luftwaffe retreated and the Spitfire VIIIs and IXs came into play.

The P-40 isn’t the most elegant of aircraft (US designers rarely did elegant, unlike their British and, less often, German counterparts). But it was robust and highly functional (which the US designers were unbeatable at, except maybe by the Russians), and especially suitable for this theatre and the fighter-bomber role. It was let down by its Allison engine, which performed well at low altitude, but not at the higher altitudes needed for escort and other mainline fighter roles. By 1943 the P-40F and L (RAF Kittyhawk IIs) were powered by Merlin engines – which did much better at altitude. Americans using these models as fighter escorts against Bf-109Gs got perfectly respectable results, especially as by this time the US pilots were better trained and rested than their opponents. But the Merlins were needed elsewhere – notably for Mustangs, a far better air-superiority machine – and the later Allison engines were fine for fighter-bombers, so later P-40s (the K, M and N) went back to these.

At the start of my project, in autumn 2020, I went on a buying spree for my models, anxious to beat full Brexit, which kicked in in January 2021. I chose this model from Special Hobby of the Kittyhawk IA to be my Kittyhawk. Alas for my research. The Kittyhawk 1A was the P-40E, which was obsolete by 1943, being replaced by the Kittyhawk II (the P-40F or L) or, mainly, III (the K or M – and apparently some of the Ls, though presumably re-engined). The later versions were chiefly distinguished by a lengthened fuselage, which set the tail back a bit from the tailplanes. I discovered my mistake quickly enough, but decided to press ahead. I decided to do the plane on the box art from 112 Squadron, with its distinctive shark’s teeth. This is a bit hackneyed and overexposed in artwork – other squadrons did not have these markings. But they really do work well on the P-40, so I thought I’d do it anyway. The plane is marked GA-Y, is from 1942, and was lost in May of that year. For some reason it has been by far the most popular to be portrayed on model aircraft. Here is a picture of it:

The Special Hobby kit proved to be a lovely one, in spite of being on the usual undercarriage down mode. The undercarriage doors fitted neatly into the recesses – the only problem is that one of them was very small, and I managed to lose it. This is the mark of a good quality, professionally-made model. The PJ pilot got in without too much trouble but it is a roomy cockpit compared to the Hurricane or Spitfire – or the Bf 109 or Fw-190 come to that. The only awkward bit was fitting the fuselage assembly onto the wing assembly. For some reason this often seems to be a problem (it was the case on both the other models too). I needed to be a bit more patient, and the fit isn’t quite right. Anyway, here is the result:

I used the US bomb from the kit – the RAF did use these (and the US used British bombs). It’s a bit skew though. Also the bomb dips a bit, probably because I didn’t get the pylons right. I have seen pictures of centrally mounted bombs dipping on Spitfires – but that doesn’t show on the picture above. I might try to correct this. I have already commented the errors on paint colours. Also the cockpit canopy suffered from some excess glue. The biggest problem was with the decals. Unfortunately the GAOY on the port side got displaced, as did the starboard serial number – and this escaped my final checks an so dried out of place. I decided that I could correct the worst of this by replacing the roundel (even though it wouldn’t then match the position on the other side). As I was searching stock for a new roundel, I found the decals for my original Airfix Kittyhawk kit from the 1970s. They were for the same aircraft. The big letters were a bit heavier than the Special Hobby ones (which are more realistic anyway), so I decided only to replace the roundel – though I needed to overpaint the yellow to hide a pale outer circle. The GA remains slightly skew. I was also able to replace the serial number, though the Airfix ones were also a bit heavy. The port serial in the kit has a dark background (which looks like an unsuccessful intervention from the censors!) – which is there in the original photo. I didn’t like this so I was happy to replace the serial on this side too.

And so there it is! Another 1942 model in dodgy colours. This can do service on the table, but I’m minded to do a Kittyhawk III as well. I’m also looking at a P-40L in US service, as flown by the Tuskegee Airmen, which would also have RAF camouflage colours.

My AZ Model Hurricane IID

AZ Model’s Box artwork for Hurricane IID

The obvious choices for my first RAF models for the 1943 project were a Spitfire V and a Kittyhawk. But I have always loved the Hurricane, and so I wanted one of those too – even though the type was on the way out in Tunisia, and does not seem to have played a significant role in the Sicily and Salerno battles. Hurricanes continued to be used until the end of the war in the Mediterranean, but apparently not in the major land campaigns.

I wanted to do the IID model, which featured two 40mm anti-tank guns underwing, and reduced machine-gun armament (down to two, firing tracer). One squadron of these was in operation in Tunisia (6 Squadron). This squadron played a significant role in supporting the advance of the Eighth Army into Tunisia, providing direct battlefield support by attacking tanks in particular, sweeping through in advance of the ground forces. This makes it particularly interesting from a tactical point of view – since mostly fighter-bombers were used for interdiction behind the lines. The IID was reported to be very effective in this role, and apparently referred to as the “can-opener”. There is actually quite a lot of controversy about how effective aircraft were at tank-busting in WW2 – extravagant claims by the crews are almost never corroborated by hard evidence (notably Typhoons in Normandy, using rockets rather than guns). There is no corroboration for the Hurricane pilots’ claims – though the psychological effect of air attack from tank crews should not be underestimated. The 40mm guns were awkward things, and hindered the aircraft’s manoeuvrability. The calibre (the same as 2 pdrs) was by then obsolete for ground use, but planes had the benefit of extra velocity coming from the aircraft, and the ability to attack from the side or top of the tank. They would have been useful enough against the Panzer IIIs that were the Germans’ main tank at the time. But after Tunisia the RAF used rockets for tank-busting. With battles in Sicily and Italy providing more cover for tanks, tank-busting went out of RAF repertoire. 6 Squadron swapped the guns for rockets, and used their Hurricanes against shipping – upgrading to Hurricane IVs in due course. The high-ups were always sceptical of using aircraft in close support, in spite of army pressure. Interestingly the Germans also used underwing guns of similar calibre, mounted on Stukas, in Russia. Extravagant claims of success were made for them too.

There seemed to be only one choice for for a 1/72 IID, from AZ Model, though a number of others manufacturers do other versions of the Hurricane II. Alas, I found that it was an poor model, especially compared to the Spitfire and Kittyhawk. It is now withdrawn. Starting again I would go for one of the other IIs, and try to model the underwing guns somehow – it is possible that one of the other kits has them, but doesn’t advertise it (there are often parts for other versions included). I have some guns from the Stuka, but I don’t know similar they are. The model often didn’t have proper pins or recesses for the parts to fit together in right place (the two halves of the fuselage had to be glued together free-form – a bit alarming); detailing was weak though perfectly adequate for my purposes. The fit of parts wasn’t great. It came undercarriage down, and without a pilot. The undercarriage doors needed a bit of work to fit into the recesses to model the up position – and I couldn’t make the side struts to the door work at all, so just plugged the gap with plasticine (I’m not stressing on the detail for these models). There were few resin parts, including the pilot’s seat and the radiator. It was very hard to get these off the sprue without damaging them. In fact I lost the seat in the attempt, and had to replace it with a spare from the Kittyhawk. The cockpit was too small for the PJ Productions model pilot I had (I have a stock of these) – so I used the Airfix one form the Spitfire, with a bit of filing, as this was a bit smaller, though not especially nice. The whole interior was quite hard to do. That didn’t matter too much because the cockpit canopy is quite small, and you can’t see much from the outside. I also managed to blur up some of the canopy interior with excess glue. Anyway, I pressed on, and here is the result:

It Is OK considering, apart from the colouring. The underside has been heavily weathered partly because I wasn’t very happy with the underlying paint colour – at once too chromatic and too light. In any case the undersides of the aircraft got pretty hammered from the dust airstrips – though I don’t have a good picture of what they actually looked like.

Here is a picture of the actual aircraft (apparently over El Alamein in 1942):

Could be worse! The decals weren’t that great – with lots of flash on the lettering and numbers. The tail flashes seemed too big compared to the box illustration – but seem to fit the photo OK. The exhaust stain should be much bigger. And if this aircraft survived all the way to Tunisia (doubtful), it would have looked even more weathered. In fact two of my supposed 1943 planes turn out to belong to 1942. This is in fact evident from the roundels and fin flashes, which were changed in July 1942. The above photo shows the newer version on the second nearest plane, which gives authenticity to the Alamein date (July to November 1942).

Unfortunately, the more I look at colours on this batch of models, the less I like them! This model will be fine to use on the wargames table, but less for display. But while I will consider doing another spitfire V and Kittyhawk, the hurricane is too minor a player for me to consider doing another one. Still, the model does look like a Hurricane – not particularly beautiful, but iconic.