Monthly Archives: April 2021

My Zvesda Fw-190 model

And so to the first of my three recent models of German aircraft. The Focke-Wulf Fw-190 A4 is one of the earlier models of this classic fighter aircraft. The 190A is one of my favourite WW2 planes from an aesthetic point of view, up there with the Mosquito and Spitfire Mk VIII/IX.

I wanted to model one of the early variants, which were around in early 1943, in one of the Mediterranean camouflage schemes. These early planes were slightly shorter than the later ones (from the A5 on, and the F series of fighter-bombers), which had the engine pushed slightly forwards to shift the centre of gravity, to ease the carrying of bombs. To meet my aim meant going for one of the pure fighter planes in JG2. Some early fighter-bombers were deployed in Tunisia at this time, but they seem to have used the standard European grey colour scheme. This would have made them look very like the A5 fighter-bomber that I plan to make later on. Given this, the Zvesda kit pretty much chose itself. Most models, like the Airfix one, of the 190A are of the later A8, which belongs to 1944. And I wanted a simpler, cheaper model at this stage in my modelling journey.

The Zvesda kit was an excellent choice. It has an undercarriage-up option, and comes with a pilot. Better than that, the fit of the parts is excellent; it needed very little filler. How unlike the kits of my youth! And also better than the low-cost Hobby Boss models. It sells as a snap fit model, without the need for glue. I did use glue, but it was only actually needed it in one or two places. I have just one significant complaint – the Fw-190’s tail wheel partly retracts in flight – but on the model it is in the fully down position. It was a bit tricky to replicate the retracted version. The decals aren’t great either. The only other point to note is that there are no bomb racks included with this kit to make a fighter-bomber version (which would also require the removal of the outer wing cannon) – though not many of these entered service for the A4. Sometimes kits are supplied with extra parts to make different versions, even ones for which instructions and decals are not supplied – not this one. Based on this kit though, Zvesda are the ideal maker of 1/72 kits for wargames purposes. The shame is that they only have a limited range of models. It looks OK for Russian aircraft (unsurprisingly), but otherwise it’s thin. There is no later, or fighter-bomber, version of the Fw-190 – a bit strange given how big a role this aircraft played on the Russian front. But there are a couple of Bf 109s, and they might be a better source for these than the Airfix or Hobby Boss kits that I have bought.

II Group of JG2 (Staffels 4, 5 and 6) was sent to Tunisia in November 1942 as part of a general rush of German reinforcements to this theatre – the unit had been based on the English Channel (the aircraft in the Imperial War Museum that landed in England in 1942 by accident was from JG2). They stayed until February 1943, and were the only Fw-190 fighters to be deployed in the Mediterranean in the war, as opposed to fighter-bombers. Only 109s took up the fighter role for the rest of the war, in a demonstration of the economic principle of comparative advantage – the Fw-190 was generally thought to be a superior fighter to the 109, but the latter was a much inferior fighter-bomber. What colour scheme? The Luftwaffe Mediterranean schemes were always ad-hoc, and that applies even more to Tunisia; there was no manual. Tunisia itself in winter was quite green for the most part, meaning that many of the aircraft rushed in were not given a new paint job at all, like the Fw-190 fighter-bombers. However there is evidence that at least some of JG2’s were. Unfortunately there are very few photos, and even fewer of them are available on online searches, so I’m relying mainly on secondary interpretations. The kit comes with decals for White 14 from 5 Staffel in Tunisia. This appears to simply have blobs of overpainting on the conventional grey scheme (and with the white on the fuselage Balkenkreuz painted out). This wasn’t very interesting. Two other schemes come up in searches: a group staff plane (with black chevrons) in overall sand upper parts, and Yellow 1 from 6 Staffel, either shown in just sand, or in sand with broad olive green stripes. Yellow 1 (1 denoting staffel leader) was flown by fighter ace Erich Rudorffer. I wanted the sand and green scheme, which would give me practice for the similar British schemes (sand and brown stripes), but I didn’t want a famous ace, but something more generic. I decided to do one from the same staffel but with a different number (seven in the end) – fictional, perhaps, but the sort of generic thing suitable for the tabletop. Details on Yellow 1 vary on the illustrations. Sometimes it is shown with white wing stripes – markings which were apparently used by German planes in Vichy France, but these would not have appeared on planes in Tunisia. Also shown are white underwing tips, yellow under the engine cowling and a yellow rudder (as well as the white fuselage stripe which almost all Axis planes in the theatre had). All of these appear on German fighters in the theatre, but not universally. The yellow markings were also used by JG2 planes in their previous posting on the Channel. My speculation is that the upper parts of the planes were overpainted in sand and olive green, but the underparts were left in the pale blue-grey of the original scheme (rather than azure in the German Mediterranean set). Winter in Tunisia wasn’t particularly sunny (it rained a lot), so there was no good reason to overpaint the underside. Besides a large part of the use of aircraft camouflage schemes in this theatre was to make the planes less conspicuous on the ground, as the airfields were quite basic, and there was little cover. Even the Americans were forced to do this in 1944 when they stopped painting their aircraft at the factories. So, I reasoned, they would have overpainted the yellow rudder but left the yellow under the cowling. I wasn’t sure about the white wingtips, but these aren’t very conspicuous, so I left them out.

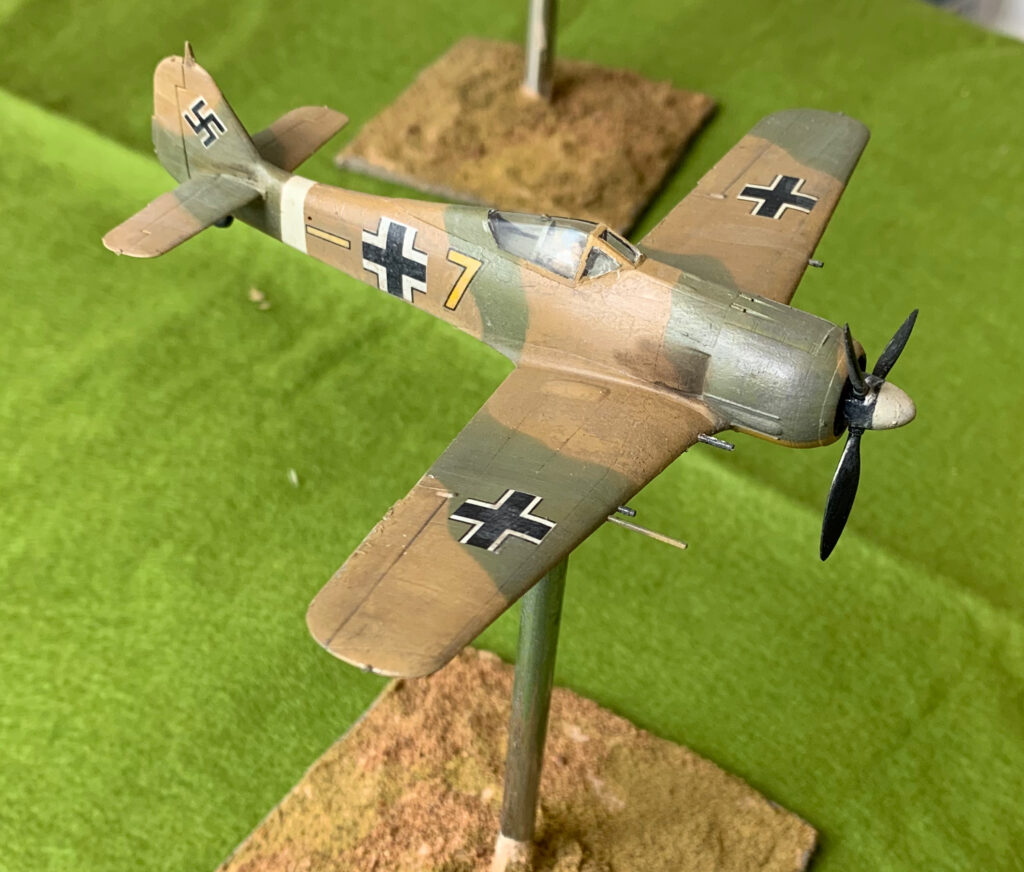
Here’s the finished model:
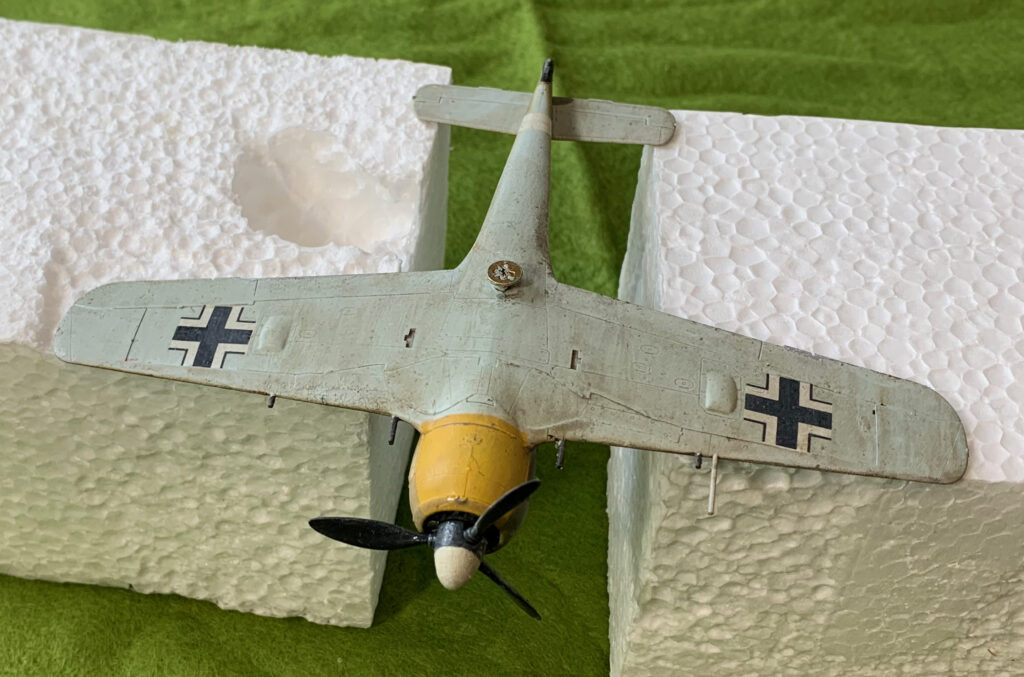
And underneath:
There’s not much to note on the build. It was very straightforward apart from the tail wheel. I used the airbrush to prime, but this time with LifeColor purpose made white primer. This went on more easily than standard paint, but there was still a slight tendency to bubble (even though the parts had been washed). The sand and olive green were mixed for use on this and the other models – the sand on all three models, and the green with the 109. The pale blue grey (“white-blue”) was mixed just for this model. I took the darker light blue I used for the Stuka and mixed some white into it. It should probably have been a bit greyer (on the Stuka too). The sand was Raw Siena with a bit of blue and white – and I am very happy with how that turned out. It’s a bit darker than it is often shown, but close to many representations of this aircraft. The olive green is usually shown as been noticeably darker than the sand (which comes out on may photos) but in this case I thought it would be tonally similar. One the one photo I have of Yellow 1 (showing just the nose) the stripes are nearly invisible. I started with Sap Green, mixed in some Yellow Oxide and white. That works well on this model.

I have already written of my traumas at the painting stage. I painted the whole upper surface in sand, and then over sprayed the green on top, using Science Putty for masking. I used this product as an alternative to the more expensive “Panzer Putty”, and it worked pretty well. However the problem with it is that it moves, so you can’t leave it on the model for long. Blue Tac is probably more appropriate. I had to top up a lot of the airbrushed green with a paintbrush. For the decals I used the Balkankreuz that came with the model for the fuselage and underwing, but they supplied the simplified cross for the overwing, which didn’t seem to be accurate. At this stage, and in this theatre, the Germans seemed to use the standard cross with a thinner white band. This, and ID markings and the swastika were all sourced from my brother’s stock of German markings from the 1970s (or even late 1960s), mainly from Almark. Almark still seem to be going, though Scalemates says they started in 1975, my brother’s main modelling activity in 1/72 was long before this, and I generally only needed the swastikas for my models at this time, so I don’t think I bought these. Zvesda do supply swastikas, but, doubtless for legal reasons, they are cut in pieces and a faff to put on. The old decals took a little while to free themselves from the backing paper, but then were fine to manipulate – actually easier than many of the modern ones. Using decal fluid the flash, a big problem back in the day, disappears – though it didn’t help that we usually applied them to matt enamel painted surfaces. For the ID markings I had to put on the yellow markings first, and then the black outlines over them. I am very pleased with how they turned out.

Overall I am very pleased with the result on the upper surfaces, in spite of the nightmare on the oil paint patination. The LifeColor matt varnish has left a faint sheen (or maybe it’s the oil coming through) which is just what I wanted. While American planes in the Olive drab scheme often appear in a very matt finish, this seems less true of Luftwaffe planes. Doubtless the crews kept the planes clean to extract every ounce of aerodynamic performance. The whole effect is cleaner than the P-47, but consistent with a recently-painted aircraft. The patination nevertheless helps to integrate the whole model, including decals, and give it more of a real-world feel. The underside is much less satisfactory. The main problem is that it is too monotonous. Some of the detail could have done with being brought out. The fit of the undercarriage doors is so good you can hardly see them! The patination effect is also much more visible and makes it look a bit mucky. That’s not unrealistic in itself, remembering that this is the bit that wasn’t overpainted, and the underside would have taken a pounding from dust on take-off and landing, but it still doesn’t look quite right. But after the traumas with the oil, I wanted to draw a line under the project, and had no wish to spend yet more time trying to fix it. The underside is not going to be that visible on the table after all.
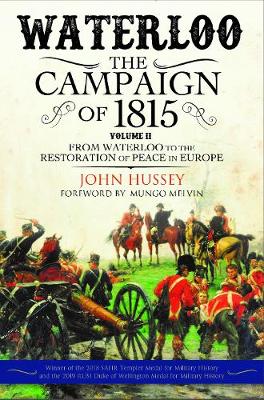
John Hussey’s Waterloo Vol II – a flawed offering

And now I have finished volume two! I have to say I’m rather disappointed. As with the first volume, the book’s strength is that it tackles the high politics with confidence. But there is a lot less politics in this stage of things. And after a while Mr Hussey’s style starts to grate, on me anyway.

The biggest problem is one that he shares with most other histories of the Napoleonic Wars. It’s too judgemental. This is not done in a sneaky way by hiding facts, but he is too quick to present his conclusions on whether particular actors were good or bad at their job. He is especially harsh on the Prussians. This is how 19th Century histories tended to be written, when the events were still quite fresh, and had some sort of bearing on political and military events. But the distance of time should change the tone, so that the focus, in the words of the great 20th Century historian AJP Taylor, is “what happened and why”. The reader should be given insight. Instead most modern historians, who tend not to be academics, feel the need to join in the ding-dong started by those judgmental 19th Century historians. Mr Hussey has disappeared down this rabbit hole.

The descriptions of the battles (mainly the great day itself) are quite brief. That’s fine: the book was always intended as a strategic narrative. But he still could have presented more clearly what we do know and what we don’t. Too often he simply follows an old narrative that he must know is questionable. For example, when he describes the great cavalry attacks we get a completely conventional British version of events. The cavalry came on; the plucky British gunners fired at them, then escaped to the nearby squares wheeling one of gun’s wheels as they went; the cavalry than retired and the gunners went back to their guns an recommenced firing. This is a very problematic account, that many historians reject (where were the limbers and the ammunition supply train?), and leads neatly into one of the more interesting Waterloo controversies, which is why Wellington seems to have thought that he was let down by his artillery. The suggestion is that many gunners abandoned their pieces never to return, and had to be replaced by Wellington’s reserves of horse artillery. This controversy does not get mentioned. In fact not a hint of this debate is presented. I would also have liked a discussion of the French account of this period of the battle, which talks of their cavalry controlling the ridge for a substantial period, rather than the quick in-and-out of a number of waves, suggested by the British version. Mr Hussey does present a few of the controversies, such as the performance of the Netherlands troops, but the selection seems distinctly random.

On one matter he does choose to stick his head out and break free from the standard British account. He suggests that both commanders failed to realise the significance of the farm of La Haye Sainte, in the centre of the field. He suggests that the French should have pulverised it with artillery and taken it quickly, allowing them to press an infantry attack on the centre. Meanwhile Wellington failed to fortify it, unlike Hougoumont. Leave aside the point that these criticisms are mutually exclusive (if the farm was so easy to demolish, why waste time fortifying it?), and I think this account presents problems. My first thought is that I don’t think I can think of a case where massed field artillery (mainly 6pdrs) ever demolished a brick-built farm – this job was usually left to howitzers, which could set the buildings ablaze. Then again, I’m not sure that a relatively small farm in the open ever proved to be a decisive strongpoint in this era, before that day – maybe that was because they were vulnerable, unlike the much more substantial villages, like Aspern and Essling, that so often dominated battles. There is another issue though – the farm was in a distinct hollow, and sheltered by orchards and gardens. It was not as visible as many assume. From the French side the main feature providing the shelter was the “grand-battery ridge”, a low rise which is where most, including Mr Hussey, assume the French placed their artillery, even if “grand battery” is not an accurate description. At the left end of this feature the farm would have certainly been visible, but only one or two hundred yards from it – and quite vulnerable to rifle fire from the farm and the nearby sandpits. Further to right and the lining up and visibility would have been a problem, as the feature curves back a bit. This seems to sum up the problem of Mr Hussey’s whole approach. If your focus is what happened and why, you would start to look for explanations as to why La Hay Sainte might have been neglected, and why the French made no attempt to concentrate artillery on it. And if you had, you might well have spotted the problem. Instead Mr Hussey wants a bit of ding-dong. Incidentally, I tumbled on the visibility issue when setting out wargames terrain using a contour map.

So given this it is no surprise that Mr Hussey has nothing to say on what I think is one of the big puzzles of the battle – the speed with which the Prussians reached Plancenoit. At 4pm, according to this book (and it is generally accepted) the Prussians were nowhere to be seen. They then started to merge from the Bois de Paris; that is over 2km from Plancenoit. They faced Lobau’s forces of two divisions of cavalry and two of infantry. They had numerical superiority but they had decided to press forward before they had consolidated IV Corps for the attack – with only two brigades (actually sizeable divisions) and some cavalry available. By 6pm, according to Mr Hussey they hadn’t just reached Plancenoit, but they had taken it the first time and then been thrown out. Something about this account does not add up. Unfortunately records on both sides are very sketchy. I think Lobau must have pulled back very quickly without putting up any real fight when the Prussians first emerged.

And of course the book was published before Paul Dawson’s recent research suggesting that French casualties were lower than generally thought (though making sense of that book would be a big project, so Mr Hussey was perhaps fortunate there).

Overall Mr Hussey brings forward little fresh evidence. He has unearthed some neglected insights from some secondary sources from Germany and the Netherlands. His coverage of the more strategic aspects of the campaign – right up to the peace treaty – is welcome, given how many people focus on just four days in June 1815. Here his judgemental style can grate, but it I don’t generally disagree. His account of the climactic day is distinctly weak. Waterloo is one of the most written-about battles in history, and I have still to find a satisfactory account of what happened and why.

My next batch of 1/72 WW2 Aircraft

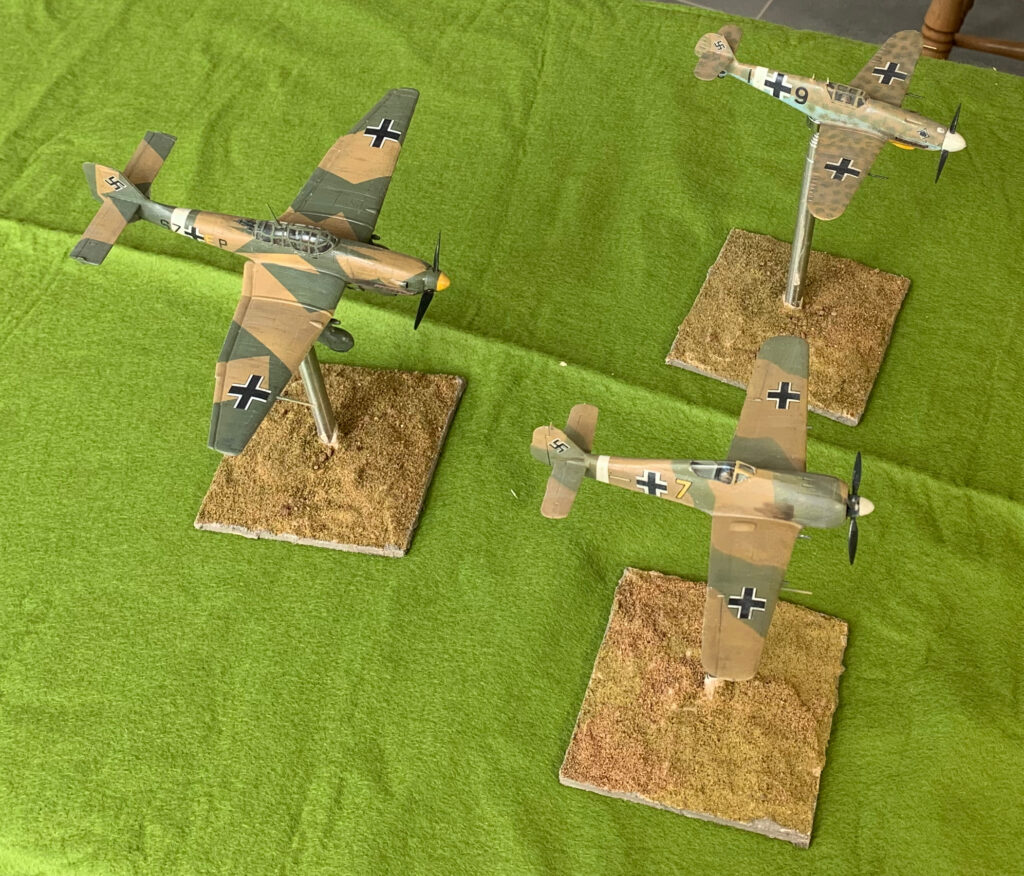
So at last I have finished my latest project. These are three German planes from Tunisia at the winter of 1942/43: a Messerschmitt Bf-109G2, a Focke-Wulf Fw-190A4 and a Junkers Ju-87D1 Stuka. I want to describe each of these planes individually in separate posts, but before that there are a few things I want to say about the project as a whole.

The project was quite a late idea in my plans for an aircraft collection based on my 1943 theme. The P-47 was an interesting trial run, but I thought it would be a good idea to do some more practice on cheap models, before launching into some of the more sophisticated (and expensive) kits that I had bought. I was also a bit short of German aircraft (three from the original ten). This wasn’t so inappropriate given that the Germans rapidly lost air superiority in this period, but at the start air superiority was fully contested. Also I had planned to do the three German aircraft in the standard European grey scheme. But in the early period, in Tunisia, they used their desert colours as well, adding some more interest. And they also used Stukas, which I wanted to model, though increasing Allied air strength quickly drove them into a very minor role. So I bought cheap models of the early versions of Bf-109G and Fw-190A in use at this time, the former from Hobby Boss (£6.25), and the latter from Zvesda (£8.50). For the Stuka I went to Hobby 2000, which was substantially the 1990s model from Fukashima; this was a bit pricier (£11.80), but not in the same bracket as modern hobby models.

The project took a lot longer than I expected, and I had some more learning to do. This was mainly due to my daily routine, which only allows 2-3 hours in the afternoons for the hobby, and very often it proved not possible on that day. To improve my work rate I will have to do some morning time too – fortunately my other commitments are easing, so that should be doable (though there’s more to be done in the garden…). But there were other issues. I had the same problem with raised undercarriage with the Bf-109 as I did with the Hobby Boss P-47, and only the Zvesda model came with a pilot. The Stuka proved quite tricky to assemble. There were some fiddly parts, some of which I gave up on, but a bigger issue was that the fit of the parts wasn’t that great, especially when compared to the lovely fit of the Zvesda. Manufacturing standards have clearly improved. But the real problems came with painting and finishing.

I am still learning with the airbrush; it feels like one step back for every two forward. Partly this is because I mix my own colours. I quickly found this easiest with artists’ colours, rather than using hobby paints (a few Lifecolor ones came with the airbrush). But that gives quite a thick paint that needs to be thinned. Getting the consistency and pressure right was quite hard, especially as things seemed to change as the job progressed. It took longer than expected, and a lot of the green on the Fw-190 turned out to be too thin, and I had to top it up with an old fashioned brush. I would not advise people to take up an airbrush for aero-modelling unless they are quite happy to learn new skills. For wargames purpose I’m, sure you can get satisfactory results with a paint brush, provided the paint isn’t too thick, which may mean you use more than one coat.

The real problems came when I tried the oil paint patina technique for weathering the model – referred to as “dot filtering” in the blog I picked it up from, which isn’t very informative. This means putting small dots of oil paint on the model (such as white, brown and blue-grey) and then brushing them into a very thin patina, which I did after the decals in order to integrate these better. It softens contrasts, creates subtle changes of tone, and simulates some of the effects of fading and dirt. I found this not to hard on the P-47, especially as I could correct over enthusiasm with a bit of white spirit. On that model I applied the oils to a surface on old Humbrol enamel satin varnish. This time I thought it would be clever to to apply a coat of matt varnish first – using Winsor & Newton in an aerosol can. Bad idea. I tried with the Fw-190 first, and I found that the spreading of the paint on the matt surface was much harder and it was not possible to spread the paint thinly enough, which left heavy streaking. So I put a bit of white spirit on. That didn’t help because it reacted with the matt varnish to created a horrid claggy mess. By this time the disease had spread to the 109, as I tried a more restrained application of paint, but without success. This was getting desperate. The models were cheap but I’d invested quite a bit of time in them! I then tried oil paint medium (mainly linseed oil) to thin the paint, and this at last started to shift the streaks and help lift some of the clag off. On the 109, on the unrated areas I applied a layer of medium first, and put the dots onto this, with reasonable results. With a bit of work I got to a generally acceptable result on the two fighters, though close examination reveals areas of mess, especially on the 190. The big problem with this approach came later. The medium took days to dry, and finished in high gloss, rather than the rather nice faint sheen I got on the P-47, before putting on the matt varnish. I had been aiming for that light sheen rather than the heavy matt of the P-47. I had to apply matt varnish, but I didn’t want to use the W&N aerosol, partly because it meant re-masking the cockpits, and partly because I wasn’t looking for the extreme matt finish that this product gives. Instead I used Lifecolor varnish applied with a paint brush. Some of the medium clearly hadn’t quite dried, though, and the gloss finish kept bursting through. After this I had very little patience for further weathering, though I did apply pastel powder for some exhaust stains.

With this disaster unfolding on the 190 and 109, I realised I needed to do something different on the Stuka. I put a layer of Lifecolor gloss varnish onto the matt surface, and applied the oil paint to this. This worked much better, but in places I was still a little heavy-handed, so I put on a little oil medium to thin out. This worked, but I had the issue with it taking a long time to dry. I didn’t dare use the white spirit as the Lifecolor product wasn’t polyurethane (or that old Humbrol product), and I thought it might react in the same way as the matt varnish. Judging by how effective white spirit was on shifting dried varnish on a brush I forgot to clean, this was probably a good call. The patina effect on the Stuka was much more restrained, on the top surfaces anyway, than on the other models (including the P-47), as by this time my confidence had been badly dented.

Other points to note? The white fuselage stripes, and the yellow under the nose on the fighters, was painted on directly after the primer and then masked. On the P-47 I painted the yellow stripes over the main paint. Yellow and white are tricky to overpaint (it took several coats on the P-47), and I think this approach was better. I tried three different strategies for the cockpits. I bought a tailor made mask for the Stuka; frustratingly the model actually came with a mask so I didn’t have to do this – and I used the mask that came with the model. On the 190 I cut masking tape for each of the transparent panels leaving the frame exposed. On the 109 I masked the whole cockpit except the edges and painted the frames afterwards. Some modellers swear by masks, but I’m not sure – I don’t think the end result was any better than painting on, though on the Stuka it would have been much too hard to mask the panels by cutting tape. This is only practical on a much simpler canopy, such as that for the 190 (and P-47), where I was pleased with the result. The results on the 109 were fine for my purposes, though the acrylic surface doesn’t take paint that easily and needs a bit of priming (and the white primer needs toning down as it is visible from underneath). The canopy on the Bf 110 is going to be a real challenge, but I think I’ll take the same route as I did with the 109.

Overall I’m very pleased with these models, except on the undersides, which won’t be all that visible in use. I got away with the botching of the patination. A key learning is that, unlike a true aero-modeller, I am aiming for a good effect from a distance, and not to impress with close -up detailing. These models would be a bit of a disaster by the latter standards, especially the fighters, but they work very well for my purposes, as I think the photo shows. They do a good job of evoking Luftwaffe aircraft of that time and place. In particular fussing around with minor bits of detail, like bringing out panel lines, or showing scuffed paint, isn’t worth it. More comments when I review each model individually.