Monthly Archives: March 2021

Wargames bases for 1-72 aircraft

My P-47 soars high above my workbench on the newly made stand.

After the first WW2 aircraft for my wargames collection, the P-47 Thunderbolt, I decided that I needed to have flight stands ready before I attempted my next set of models, and to build in the mounting from the start. This would have the advantage of having somewhere to put models while paint was drying, etc. I had hoped to be able to buy something that could be used straightaway. The closest I could find came from Debris of War, which was really meant for smaller scales. This was very neat, but I thought it really wouldn’t work for larger models, just as they said; apart from anything else it doesn’t extend that high. I would have to make my own. This turned out to be not especially hard. In this post I will explain how I did it. There are a couple of things I learnt on the way, so this may help anybody who wants to do something similar.

The starting point is a magnetic, extendable pickup tool. There are quite a few on the market. I tried out two different sorts. The obvious choice was the Amtech 2255 which can be had for a mere £2.59 on Amazon. Worried that this was too good to be true, I also bought another one from Raguso, which sells at £5.89 on Amazon. The Amtech is bulkier and extends a few centimetres less than the Raguso; the magnet at the end has a wider diameter, which is probably better for my purposes. But both work fine. The magnets are quite powerful, making the attachment pretty secure for models assembled from plastic kits. The Amtech is cheaper and delivery from Amazon is much quicker; there really is no reason not to go for this one, so I bought a few of them.

Both have basically the same structure: a telescopic arm (like an aerial) with a magnet fixed at one end, and with a pocket clip at the other end secured with a screw-in top. This is the Amtech one dis-assembled:
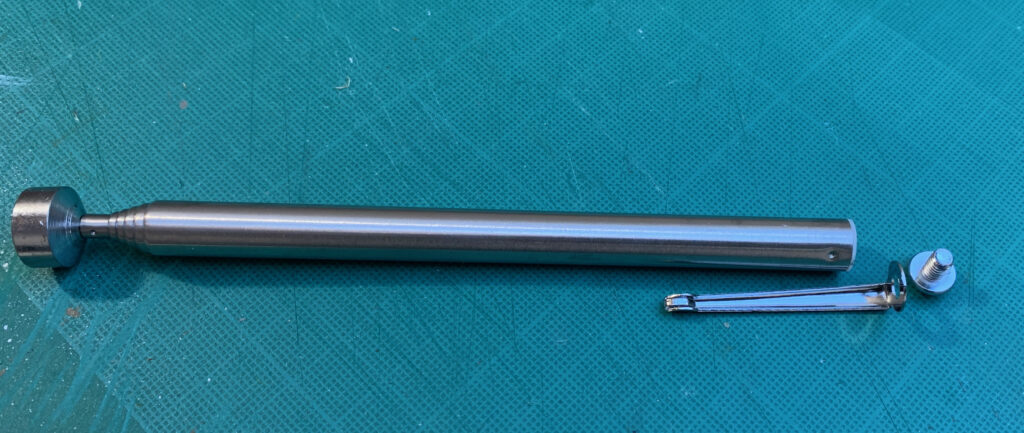
The clip serves no function for us, but the removable top comes in handy. This is bigger and domed on the Amtech; the Raguso one is neater and flatter. Next we need a base. I cut this from hardboard, simply because I had some lying around that needed to be used up. This material works, but is not so good for drilling holes in, as I found out later. MDF or hard plastic/acetate would probably be more appropriate. I cut out four inch squares. I thought this would give the best balance between stability and footprint. Something slightly smaller might well be just as good if I you weight it down properly. It doesn’t need to be bigger. I used the square shape because I wasn’t up for cutting out a circle, and I quite like squares on the games table anyway. I think you can get pre-cut circles of MDF or acetate quite easily.

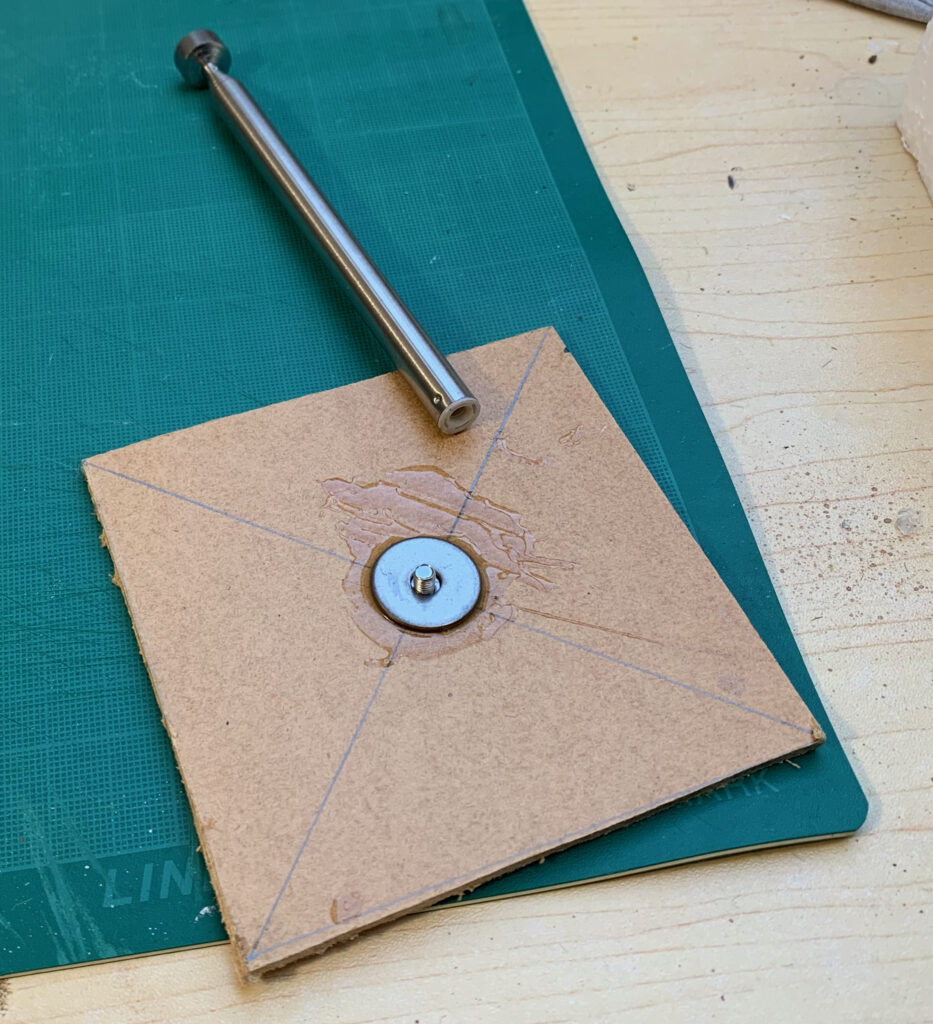
So how to fix the arm to the base? My first idea was to glue the screw-in top into a recess drilled into the base, and then screw the arm onto that. However, the need to make sure the arm was properly vertical meant that in practice I needed to glue the whole assembly in. Then there was the question of adhesive. Having read that people used “liquid nails” I tried Unibond No More Nails. This failed. The adhesive didn’t bond particularly strongly in the context, and in a any case simply trying to glue the arm to the base was asking for trouble, given the leverage on the arm and the sort of forces that the joint was going to have to withstand. Take two. This time I drilled a hole right through the base. Hardboard has a bit of give, meaning that the it bulged a bit on the exit side of the hole, which had to be tidied up with a knife. I then glued a 2cm mudguard washer over the hole. I found some ancient Araldite in my things and I used this, having lost faith in No More Nails. Here is the result, with the Amtech device. Because the drilled hole was slightly bigger than the diameter of the top, I widened it a bit at the top and glued the washer in with it in place. This wasn’t necessary with the Raguso device.
The arm was then simply screwed onto the washer with the top, to create a very satisfactory fixing. This is the Raguso one.
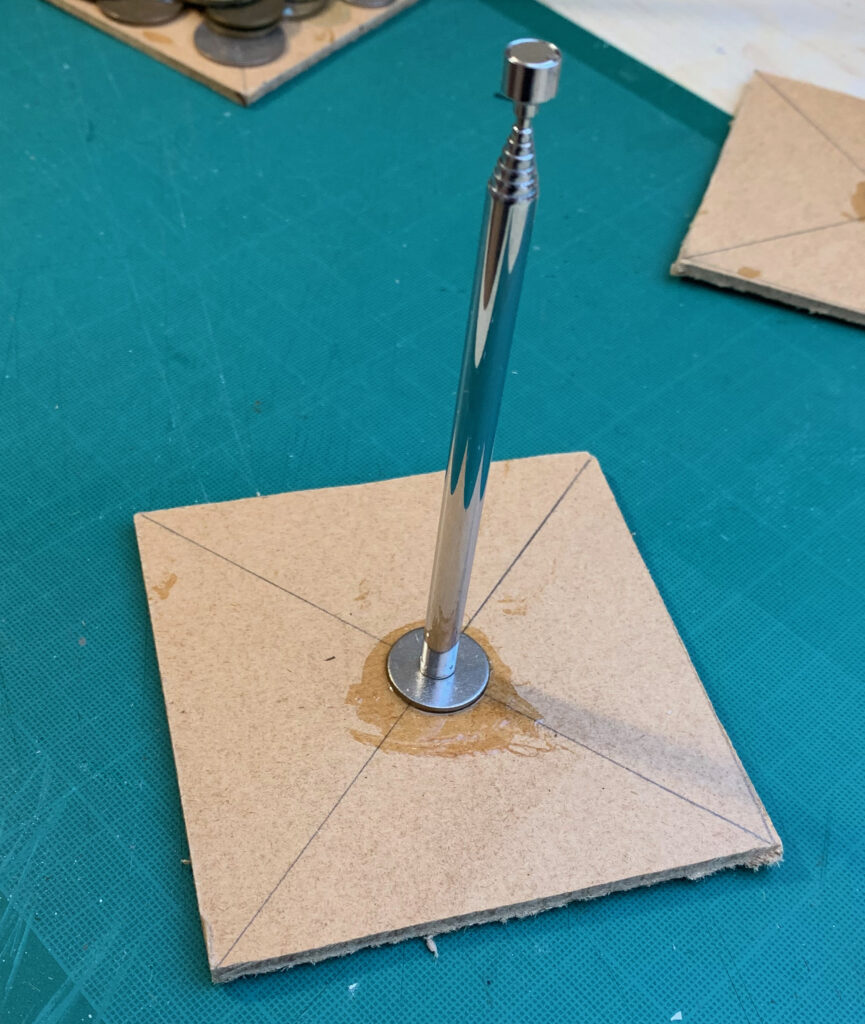
Next I felt the need to add extra weight to the base to ensure it was properly stable, especially with the arm extended. For this I used a collection of old coins I had from my 20th Century travels, including a lot of pre-Euro ones. I sifted out the ones that were attracted to a magnet, as I though these might have other uses. Other alternatives might include washers or similar bits of hardware, which can be had very cheaply from specialist suppliers like RS. One blog I read used a small number of very large washers for this, and that looks a good way to go. I used the No More Nails to glue them on. This shows one of each type of arm;
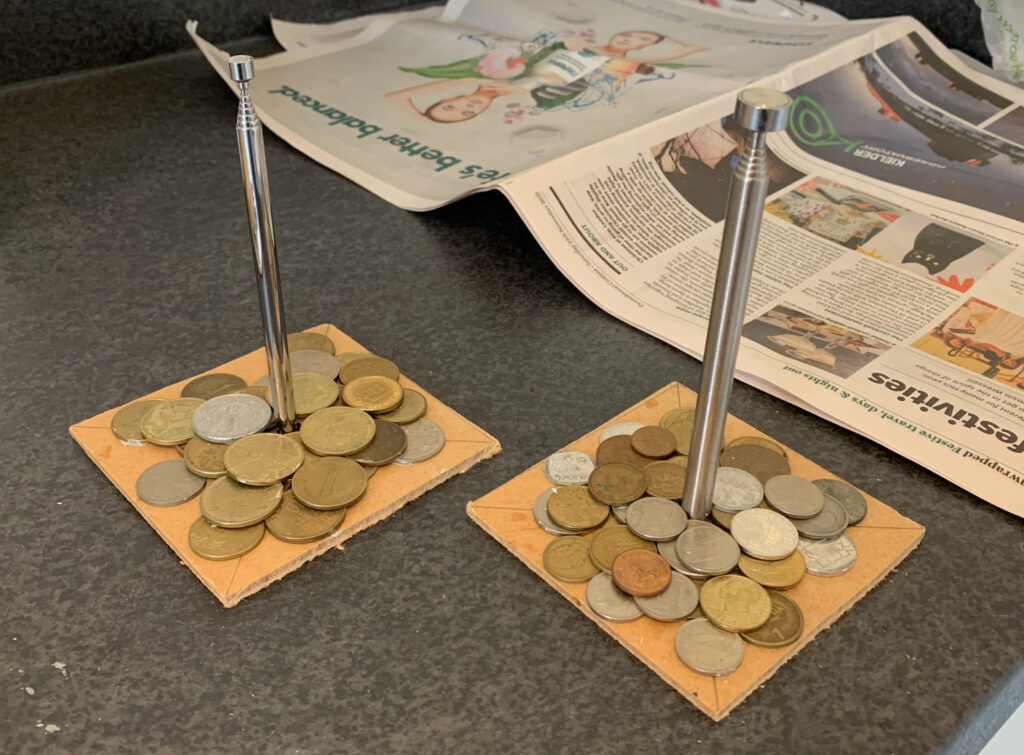
Next the coins were covered with plaster, mixed with paint (brown, yellow and white tempera), together with some of my old mode railway ballast to give it texture. The ballast didn’t work; some sand would have been much bette, but I didn’t have any cheap stuff to hand:
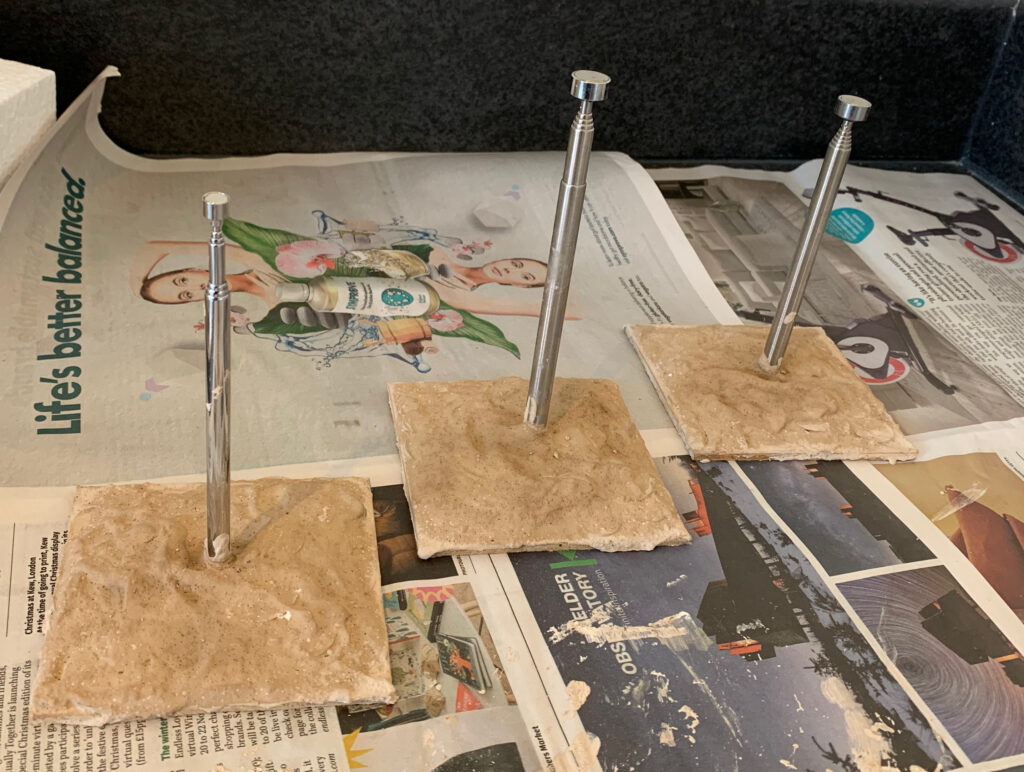
This is all standard terrain making stuff. I simply added flock next. I used two sorts of Woodlands scenic flock, plus some Games Workshop sand (ridiculously expensive but quite nice looking – I only use it for decoration). This was to get the arid terrain look. What worked best to semi mix the three components, and put it all onto the wet PVA at once – rather than applying the different types separately. I then sprayed more PVA onto it to seal it. Finally I painted the edges with a mix of Raw Umber and white to tidy it up. Of course you can be much more ambitious, with bits of scrub, rocks, etc. But I was in a hurry and I didn’t want the bases to draw attention to themselves. Anyway here is the end result:
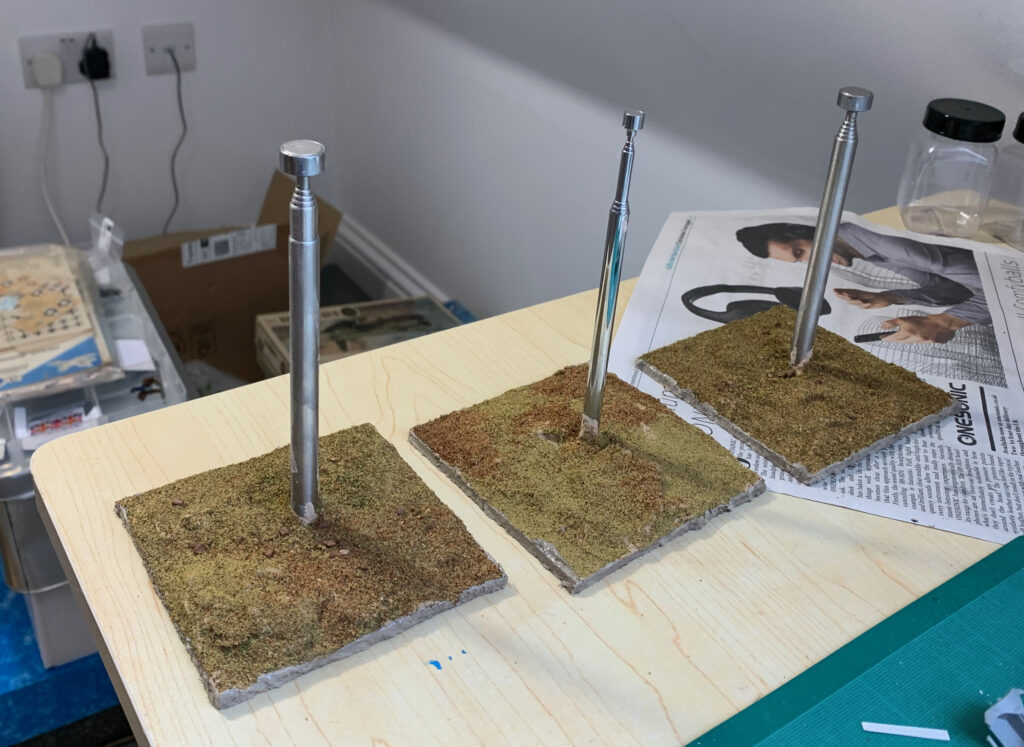
All very easy. Of course at various stages things had to be left to dry out, so it took a few days altogether, but this could be fitted in alongside my other projects.

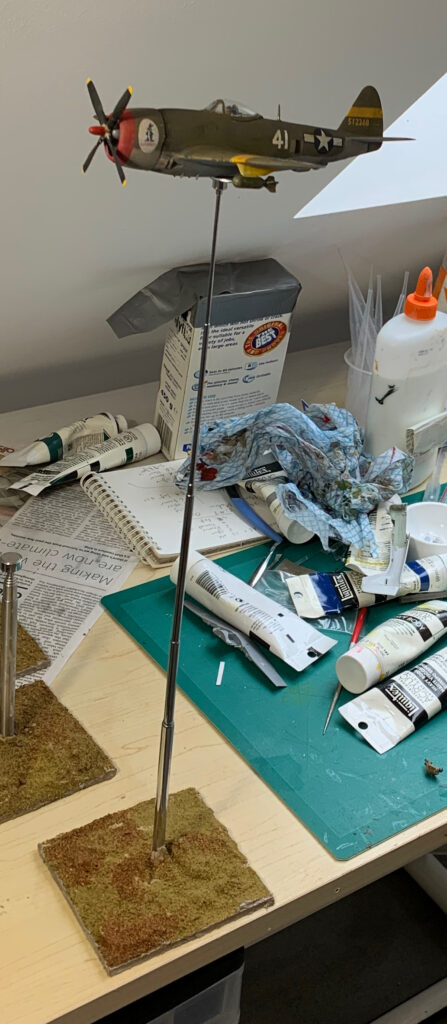
How about the mounting on the model? This is a bit of a work in progress. I started with a simple small steel screw – having drilled a hole into the model with a gimlet. This was robust but not entirely stable (though the model would not have been in danger). I then used the screw to attach a steel mudguard washer, which you can see from the picture above. This wasn’t completely horizontal (because it needed to follow the line of the model’s belly), and the screw wasn’t entirely flush. It nevertheless turned out to be very functional. The attachment is very stable and the slightly raised screw head allows for subtly different flight angles to be made. But it is over the top and unsightly. I’m thinking of gluing on a small coin if an appropriately angled surface is available. Hiding something with iron inside the model might work in some cases. it is a work in progresss.

Incidentally something I have discovered the hard way is that not all steel is attracted to magnets. Some stainless steel isn’t. When buying online it is safest to avoid stainless steel. I bought some the screw and washer from RS Online, though absurdly more than I will need to mount aircraft models: here are the screws and the mudguard washers; they both work with magnets. These are same size as the washers I used to fix the base, but in fact I used some I had bought a couple of years ago for basing 20mm infantry, that I thought would attach to magnets but don’t. Lesson learned.

UPDATE 16 March. I have found that the RS 12mm screws above are quite sufficient of themselves to fix to the model, without the need for anything bigger like a washer or small coin. This is for a Bf 109 and an FW 190, which are quite small, and also for a Stuka, which is a bit bigger. I drilled a hole into the underside with a model drill, enlarged it a little with a gimlet, and then fixed the screw in gently with a screwdriver; in all cases this was into a single kit part, not a join. Getting the angle exactly right is a bit tricky. In two cases I managed to get the head in a millimetre or two off flush; in the other (FW 190) another millimetre or two off – I was unwilling to force the screwdriver in case the force broke the model. The attachment is vey secure.
John Hussey’s Waterloo Vol I

I’ve just finished reading this book. It is Volume I of 2, so I’d normally wait to read the second book before reviewing here. But it proved too good to wait.

There is no shortage of books on Waterloo. Modern ones are often disappointing, while older ones have their own flaws. John Hussey’s aim is to look at the campaign as a whole, and to get the big picture right. This volume sets the scene in 1814, and covers Napoleon’s return up the the battles of 16 June 1815, at Ligny and Quatre Bras. This does mean taking a look at the what happened and why of the battles, but he avoids a lot of the detail, which is what most books on Waterloo take on.

Mr Hussey is not an academic, but he is a serious historian – which sets him apart from most modern writers on the Napoleonic Wars, who don’t get beyond being hobbyists or controversialists, or both. I like that. I am an avid follower of politics, and studied History in my final year at Cambridge. I enjoy the top-level stuff, along with the military narrative. Mr Hussey handles this confidently. The tensions between the main powers occupies a lot of the book, and some readers might think he overdoes it. There is also a lot on Wellington and Blucher/Gneisenau’s planning for the campaign – again this might be too much for some. But I was left with a very clear appreciation of the agendas of the various parties. By contrast there isn’t so much on Napoleon, after he reaches Paris.

But eventually we get into the meat: the day before the campaign starts (the 14th), and the first two days. Mr Hussey paints a compelling picture of this. The Allied deployment was flawed, because each commander was working to a different agenda. Wellington’s army was deployed in depth, so that he would concentrate his army for the second or third day of the campaign to defend Brussels, the critical objective from his point of view. Wellington’s main error was not picking up the evident signs on the 14th of what Napoleon was up to. He had the intelligence but he didn’t act. Mr Hussey doesn’t get to the bottom of why – but he just seems to have been too busy. The Prussians (and it is hard to distinguish between Blucher and Gneisenau), on the other hand, deployed forwards, with I Corps very close to the border. That pointed to concentration earlier and further forward than Wellington; they were not so bothered about Brussels, but more about their communications with Germany. They did respond to the intelligence (much gathered by Wellington’s men, especially Dornberg in fact) on the 14th, which ultimately allowed them to concentrate three corps at Sombreffe on the second day (their intended concentration point, near Ligny). Their massive mistake on the 14th was not giving clear orders to the fourth and more distant corps (Bulow’s), meaning that it couldn’t be there for another day or two.

Napoleon seems to have understood the weaknesses in the Allies’ deployment, as he so often did, and decided to hit the Prussians first before Wellington could help them. But muddled orders meant that he didn’t concentrate properly, and Gerard’s corps in particular was a day late. One important feature of the Allies’ deployment concerns the main road from Charleroi to Brussels – which went through Gosselies, Quatre Bras, Genappe and Waterloo. At the border up to Gosselies, this was in the Prussian sector; after this it was in the Anglo-Netherlands sector. On the 15th Ziethen, the Prussian I Corps commander, abandoned this road in his hurry to get to Sombreffe, without higher authorisation and without warning Wellington. The road to Brussels was left wide open and Wellington didn’t realise this until very late in the evening, and got quite a shock (“Humbugged, by God!”). He managed to concentrate a large part of his army with remarkable speed to get to Quatre Bras the following day however – this was critical to both cover Brussels and the Prussian flank.

A huge amount of ink has been spilt over two centuries about who is to blame for what in these first days. A lot of it is nonsense. Mr Hussey feels he has to deal with the main controversies (such as what did Wellington promise to the Prussians?). But from a grand tactical perspective the Allies got the better of things. Blucher managed to get three corps to Sombreffe, and significantly outnumbered Napoleon. Wellington stopped two French corps from joining the battle (or strictly one, the other was more a French shot in the foot). The problem was that the Prussians still managed to lose.

One disappointment is that Mr Hussey doesn’t spend much time trying to understand why so many of the French were slow to get going on the morning of the 16th. This delayed the serious fighting to the afternoon. The 15th had been a long and tiring day, but the troops were carrying three days of rations. Was it that distrust between commanders and troops meant that the former did not feel they could push as hard as they might in 1805?

Mr Hussey’s accounts of the battles are quite high level. He gets a decent overall perspective. He doesn’t quite manage to explain how the Prussians lost at Ligny, though he does point to mistakes in their deployment, which he thinks should have been further back – this had been the original plan in fact. How the Prussians lost bothers me, as I want to be able to simulate it on the tabletop. I have conducted a few games based loosely on Ligny, and the problem is always the same: the French are short of infantry, especially since the Prussians are defending built-up areas, which get quite a big bonus under many rules systems (such as Blucher). I suspect that there is a vital aspect of simulating larger battles that is missing from the rules systems – but I haven’t found it yet! Mr Hussey follows the conventional story that Vandamme’s two divisions attacked St Armand from the west, alongside Girard. Personally I’m convinced they came in from the south. But that’s a detail. All that we can say is that Prussian tactical management in this battle was weak, and they fed their reserves in too quickly – whereas Napoleon’s management was masterly.

What if d’Erlon hadn’t backed off when he approached the battlefield in the early evening? Mr Hussey does not address this question. Almost every commentator suggests that the Prussians would have been annihilated – but I think this conventional view needs to be challenged. It was late; the French were tired and the Prussians hadn’t yet exhausted their reserves (which Blucher did as soon as d’Erlon backed off). The Prussians may simply have started their retreat earlier.

The battle of Quatre Bras gets rather more coverage than Ligny (30 pages to 20), which shows up the book’s greater interest in the British story. In a couple of places I don’t think he quite gets it right. In describing the battlefield he misses the hedges to the north of the Gemioncourt stream – which I think are a tactically critical feature, as they blocked cavalry, as well as providing an important obstacle to infantry. Also he describes two charges by Kellerman’s cuirassiers, where most people think there was only one. But, as he says, untangling the sequence of events at this battle is very difficult given the very scrappy nature of the evidence.

There’s not a huge amount for gamers in this book, apart from getting a better understanding of the context, and the controversies surrounding the campaign. But here are some thoughts that the book provoked in me, relevant to gaming:

  • The French corps commanders seem remarkably uncommitted to the cause and hesitant, when confronted with uncertainty, when not directly under Napoleon’s eye. They remind me of what people say about Austrian generals in their earlier encounters with Napoleon. They are more afraid of getting it wrong than keen to do the right thing. Once in the battle French tactical handling (more down to divisional commanders perhaps) was top rate, however.
  • The role of wing commanders under Napoleon (i.e. Ney and Grouchy) was a problem because they lacked staff and proper authority. Ney was initially energetic in pushing the French practically up to Quatre Bras, but seems to have lost his way the following morning. He really needed his corps commanders to be on the ball. How to reflect all this in command systems on the table is an interesting challenge.
  • The command of I and II Corps for the Prussians got very entangled at Ligny. Often brigade-level integrity was lost too. This was function of having so many units in a tight space, and using the nearest units to hand to cover gaps. This again presents a challenge. Something similar, though more deliberate, is evident in Wellington’s army at Waterloo.
  • There is also the question of feeding in reserves to bolster tired units, as opposed to using fresh unit to conduct operations on their own. Both sides used both ways of using reserves at Ligny. Feeding is isn’t well simulated in rules systems, however, which like to deal with brigade or division sized units as a whole.
  • Artillery often seems to be used at longer ranges than the oft-quoted “effective” range of up to 700 paces or so, and had tactically significant effects these longer ranges. I noted this at Wagram too. Also overhead firing played an important role at Ligny (and also significant at Quatre Bras), something that some rules writers suggest was not done.
  • On the subject of artillery, Mr Hussey suggests that the Prussians were outgunned at Ligny, with their grand battery being initially effective but subsequently outclassed by the superior quality of French artillery. I wonder if quality difference was not so important as exhaustion and management of reserves. This is something that Blucher covers well (unlike BUA fighting) and most rules systems don’t. Most rules (including mine) don’t bother with quality differences in artillery – but I do find the issue quite hard to relate to hard evidence as opposed to boastful claims by contemporary commentators, which so often turn out to be based on hot air.

I’m looking forward to volume 2 – though I might read something else from my extensive library of books I haven’t read yet first.

My French Guard infantry

Back to the Napoleonic lead mountain for my next project. This is French Guard infantry circa 1809, using AB 18mm figures. In my original Minifigs army of the 1980s I had a couple of units of French Old Guard. I actually still have them – the only ones left from my French army. As befits Guard troops, I had taken more trouble to paint them than any of my other figures and they look quite smart. But not long after this I decided to upgrade the army with bigger, better figures from other manufacturers. The Guard was included in my schemes. My plan was to have 24 figures representing six types in 1809, with Grenadiers and Chasseurs from each of the Old, Middle and Young Guard. In those days I mounted them in strips of 3 figures, with four to a battalion, so this meant two units of each.

I started the upgrade with the Middle Guard, using AB figures for the Fusilier-Grenadiers and Fusilier-Chasseurs. After this I wanted to do the Young Guard with Tirailleur units. But at that time AB didn’t produce figures for them. Instead I used French light infantry figures, with Middle Guard figures for the drummers, half the officers, and NCOs – how realistic this is I don’t know. For the Tirailleur-Grenadiers this required the addition of a plume on the light infantry figures. I painted up 12 each of the Grenadiers and Chasseurs, leaving the same number unpainted, though converted. That’s where it stayed for more than 20 years, as I was distracted by other things. These 12 bases (in my new format of 6-figure bases) have seen a lot of active service, especially the Young Guard, but with only my diminutive Minifigs to represent the Old Guard, it was a bit of an embarrassment, though the Fusilier units often stood in for them. In 2019 I at last bought the AB Old Guard figures required to complete the project.

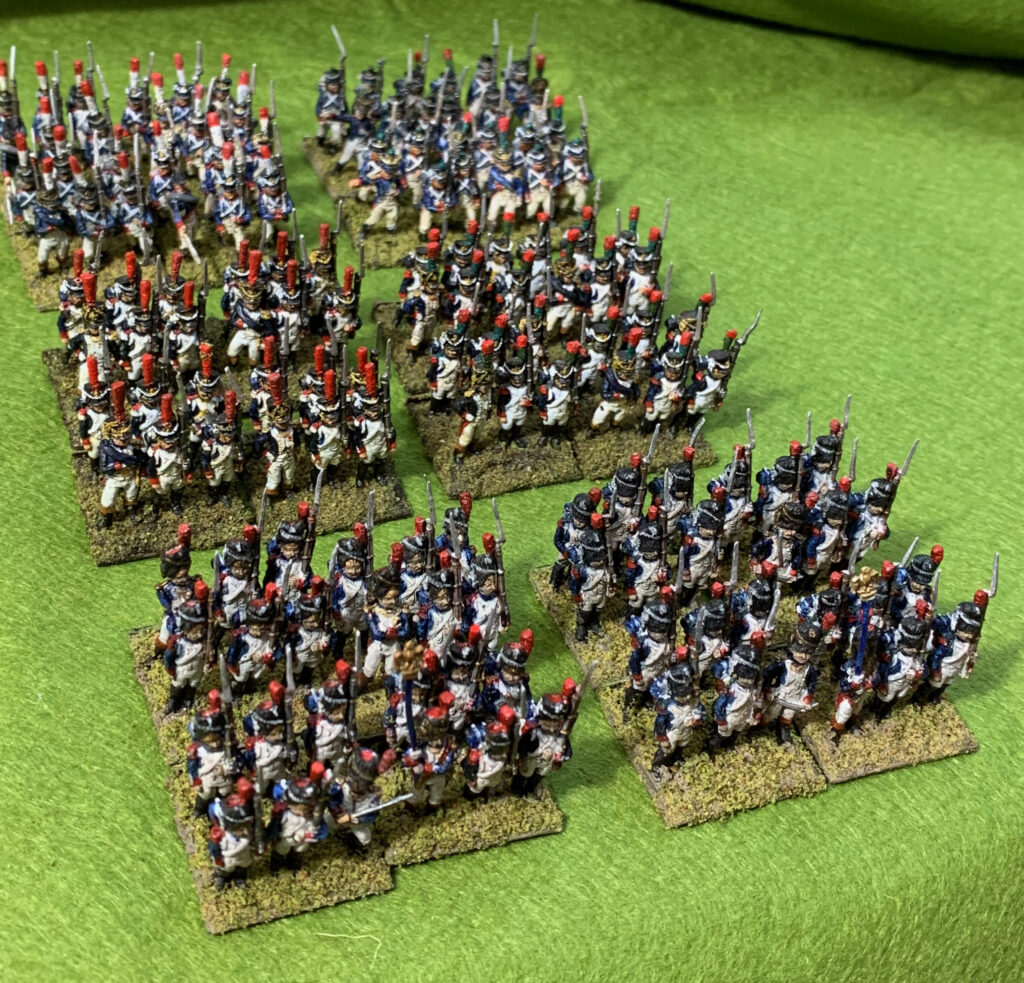
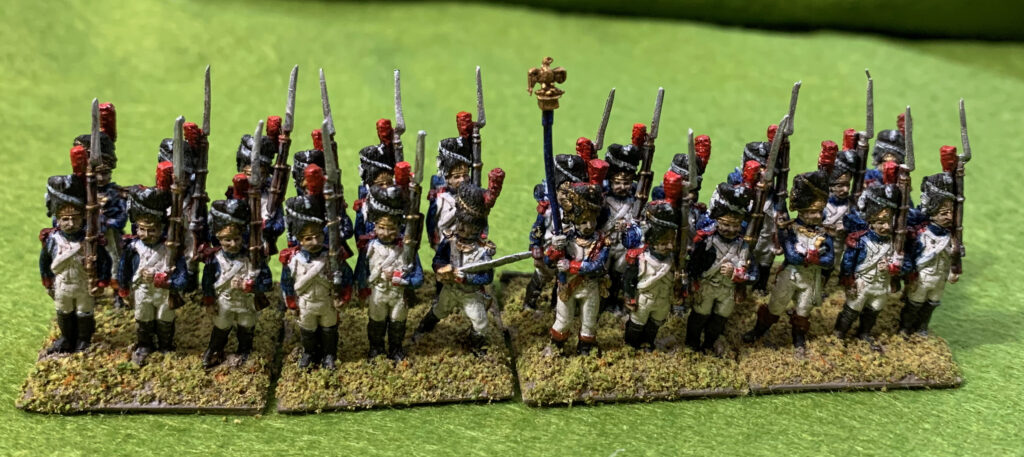
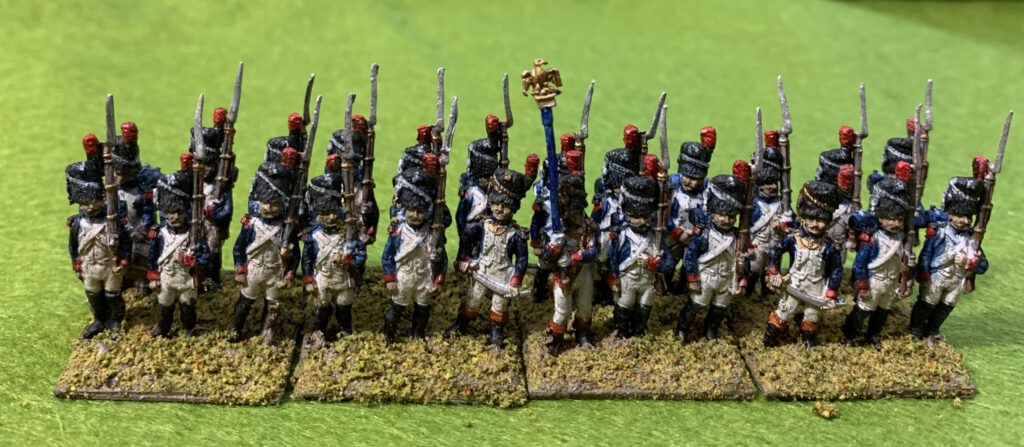
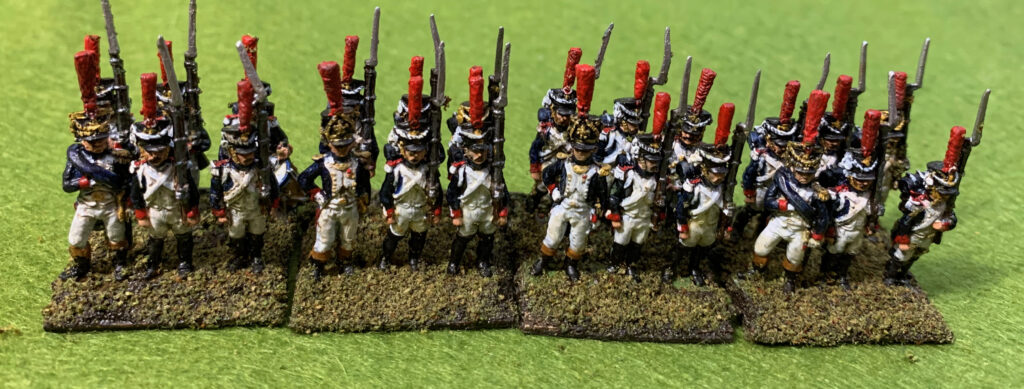
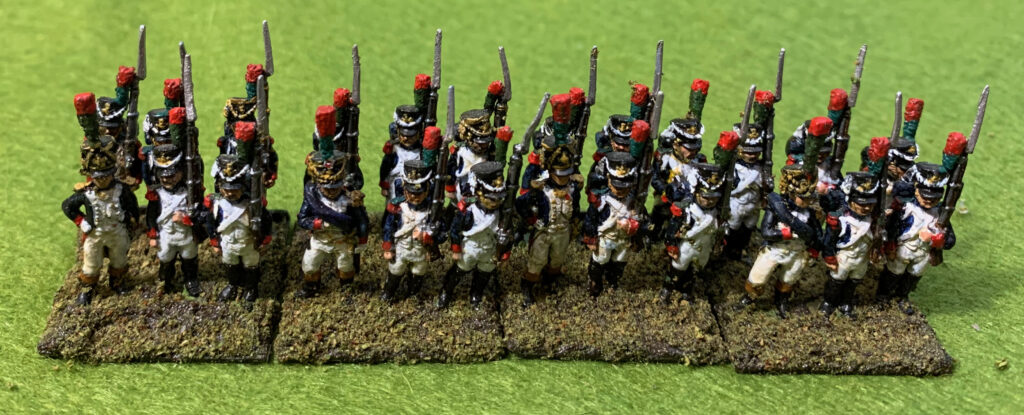
What I did this time was four bases each of the Old Guard units, and two each of Young Guard, to complete the original project. Here are the Old Guard:

Grenadiers of the French Guard
Chasseurs of the French Guard

These are represented in parade uniform with black winter gaiters. This is the most popular depiction amongst artists, whom we wargamers tend to follow. I think they would only rarely have looked like this on the battlefield though. In 1809 (presumably after the campaign that year) the Old Guard adopted a service uniform for the field, featuring a surtout and blue trousers, or greatcoats. Before that I expect they wore white gaiters in summer (which I don’t like as it makes them look like ballet dancers), or greatcoats in winter.

I wanted the figures to be reasonably compatible with the original ones., though my painting style has changed quite a bit in the intervening period. I undercoated with white gesso, applied with an airbrush for the first time (I mounted them on strips of card, one for each base). This worked pretty well. Coverage wasn’t perfect, but better than using an aerosol, and without the clouds of droplets. The blue for the uniform came from a mix of Indantherene Blue and Payne’s Grey, as per the originals. My usual go-to dark blue is now Prussian Blue Hue, but back in the day I used Indantherene, which is a bit darker and a touch redder. It’s actually a pretty decent starting point to represent indigo dye, and I bought myself a new tube when the original one died out (it wasn’t one of the everlasting Liquitex paints). For dark brown I used Burnt Umber rather than the more usual Raw Umber; I used this mixed with the blue to get the black. I didn’t mix a little white with everything, as is my current habit, as I didn’t for the old figures – but the primer was a brilliant white, so this helped to lighten things a bit. The rest of the paint choices were unremarkable; the white was Titanium White with a little Burnt Umber; I cooled down the Cadmium Red Hue with a little green; the green was Sap Green with some added blue and a touch of white. I suffered a bit of a disaster after the first painting session, when I left the top off my Stay-Wet palette, letting all the mixes dry out. When I renewed the water I put too much in, which meant that my subsequent paints were all too thin, making things much harder to manage than they should have been. I didn’t attempt quite as much detail as the old figures – no gold buttons for instance. But I did have a go at the moustaches and the gold rings on the muskets.

The AB figures were lovely, making the task much easier and more satisfying than my my Old Glory French Chasseurs. Still there were some gaps. AB don’t attempt the grenade patch on the Grenadiers’ caps, and the cuff flaps (which should be white) were vague and hard to find. I gave up trying to do blob for the former, as it just looked a mess; with the cuff-flaps I did attempt the first few and then gave up. Once the paint was on, I decided to do a wash, as I had for the original figures. I didn’t want to use the usual W+N Peat Brown ink, as this looks awful on white. I experimented with Daler-Rowney Antelope Brown ink (heavily diluted with water), but this stained the white with yellow, so I added quite a bit of black to it. I put it on quite generously; at first application it was too heavy on the white on the front of the figure, but I was able to brush most of this off (it tended to gather in the crotch, which needed attention). I was quite astonished by how much it improved the look of the figures, bringing out the beautiful detail in the mouldings. A wash produces a sharper contrast than the more subtle glaze method, like Quickshade, that I have used a lot. It lines the details more crisply – but it does this without being too cartoonish. Perhaps for 28mm figures the glaze technique works better than a wash, but this is the way to go for my 18mms, with my skill level anyway. I decided not to highlight or varnish.

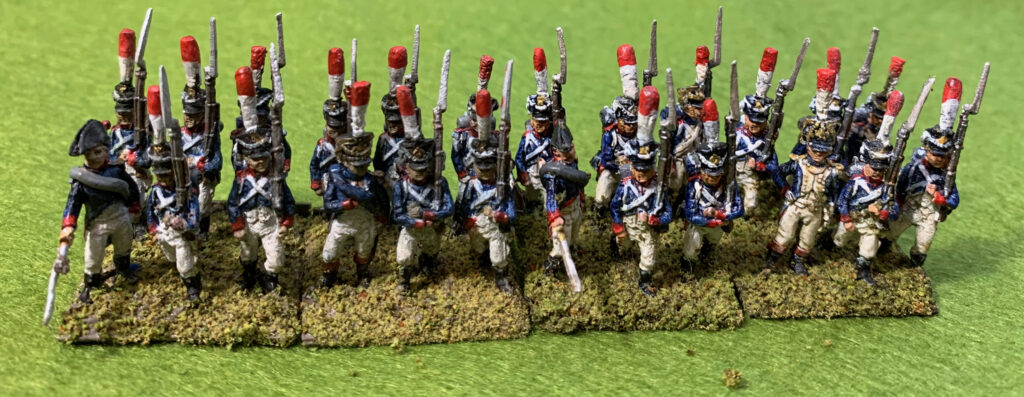
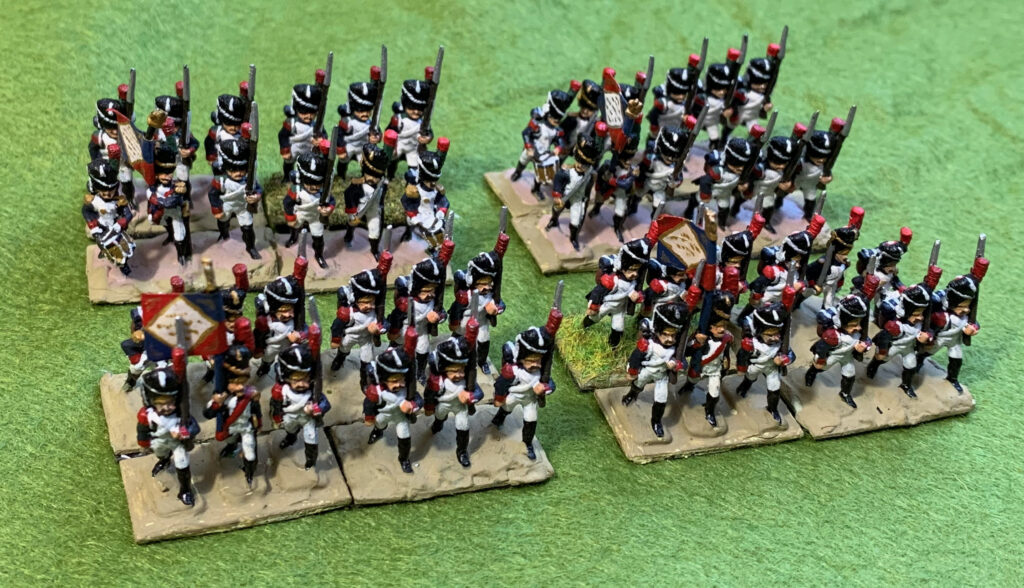
Meet the Young Guard:

Tirailleur-Grenadiers of the Guard
Tirailleur-Chasseurs of the Guard

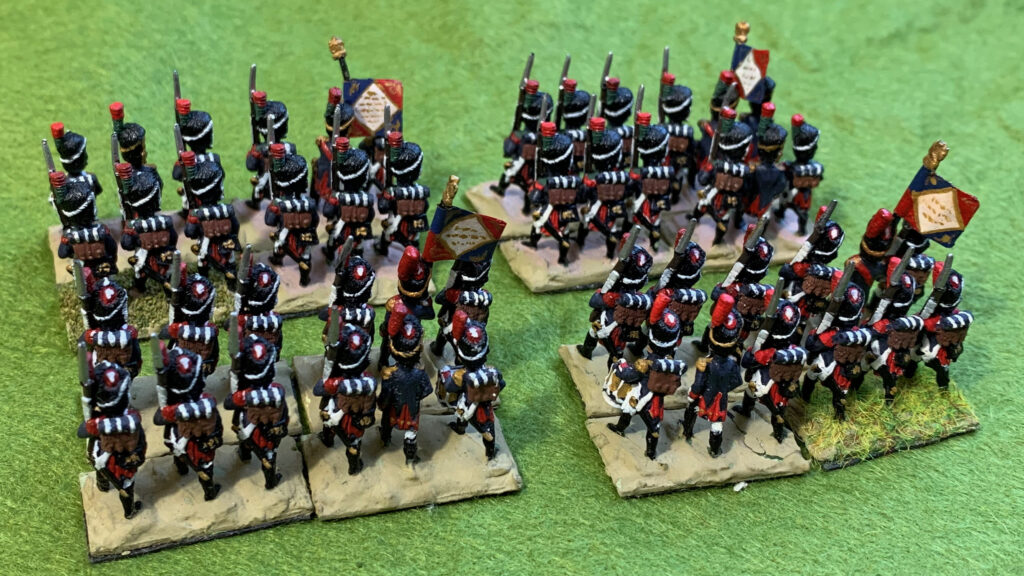
The two bases on the viewer’s left are the new ones, the ones on the right are the originals. The new ones are distinctly duller and darker, and the wash used on the originals was plainly a bit browner. But the two should work well enough together on the table. In particular the green on the Chasseurs’ pompoms and plumes doesn’t zing in my new figures (I have the same issue with the Old Guard Chasseurs); this is partly because the paint had become over thinned, and was mainly painted over black, overlapping from the headgear.

A word about the bases. I had rebased the old figures last winter. I used my usual method, with a gunk of acrylic gel with sand and Raw Umber paint to set the figures in. On top of that I put mix of mainly Woodland Scenic flock. I now feel that this combination is a bit dark, and the a lighter colour would show the figures off better. This time I put a bit a bit white in the gunk, with old railway ballast mix in place of the sand. I lightened up the flock mix with the addition of more light olive flock. I put some of this flock mix on the old bases, to reduce the contrast between old and new. The flock was sealed with diluted PVA; it wasn’t dry when I took the pictures, hence bits falling off. The bases themselves are just cut from artists’ paper, with magnetic material stuck underneath. This is much thinner than the modern convention: the magnetic material adds thickness and I wanted to balance this and not raise the figures too high from the table. This carries extreme risk of warping, so there is no water in the gunk (I used to use plaster), and I leave the bases on a metal surface when setting or drying, so that the magnetic strip can hold the base flat.

And now for the Middle Guard:

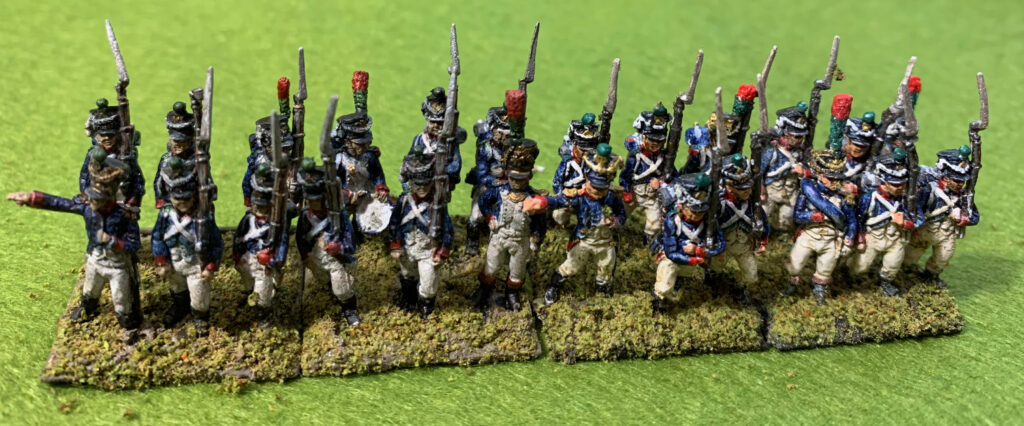
Fusilier-Grenadiers of the Guard
Fusilier-Chasseurs of the Guard

These are my originals from long ago, rebased last winter. The striking thing about them compared to my new figures is the gleaming white of the lapels and breeches. I used pure white paint, even though it was subjected to a wash. Also the red (and green) is much brighter, again with the use of pure pigment. In each unit half of the figures were painted with a white primer and half black; it is hard to tell the difference from these photos. Perhaps I should consider a little highlighting on the front with pure white on the new Old Guard units to reduce the contrast – but I actually think they look fine on their own.

These units represent the original incarnation of the Middle Guard, although they would be better regarded as Young Guard when they were formed in 1806. They wore shakoes in place of the bearskins, with tall plumes, which, apparently, were worn in the field, along with some Young Guard units. These plumes made quite an impression on British observers in the Peninsula in 1811, but things never got as far as combat. The might-have-been battles at Fuente Guinaldo and Aldea da Ponte, between Wellington and Marmont and Dorsenne (who had the Guard units), would be interesting to try out.

I am not done with French Guard infantry. I have figures for late period Young Guard that I want to paint up. That will be part of a late war French infantry project that is not near the top of the list, though. Finally it seems disrespectful not to show some pictures of my retiring Minifigs Guards. A glimpse into a more innocent age. These old figures might be a little crude by modern standards, but they were crisp and actually include details that eluded the AB figures. The main problem is that they are small, when representing big men.