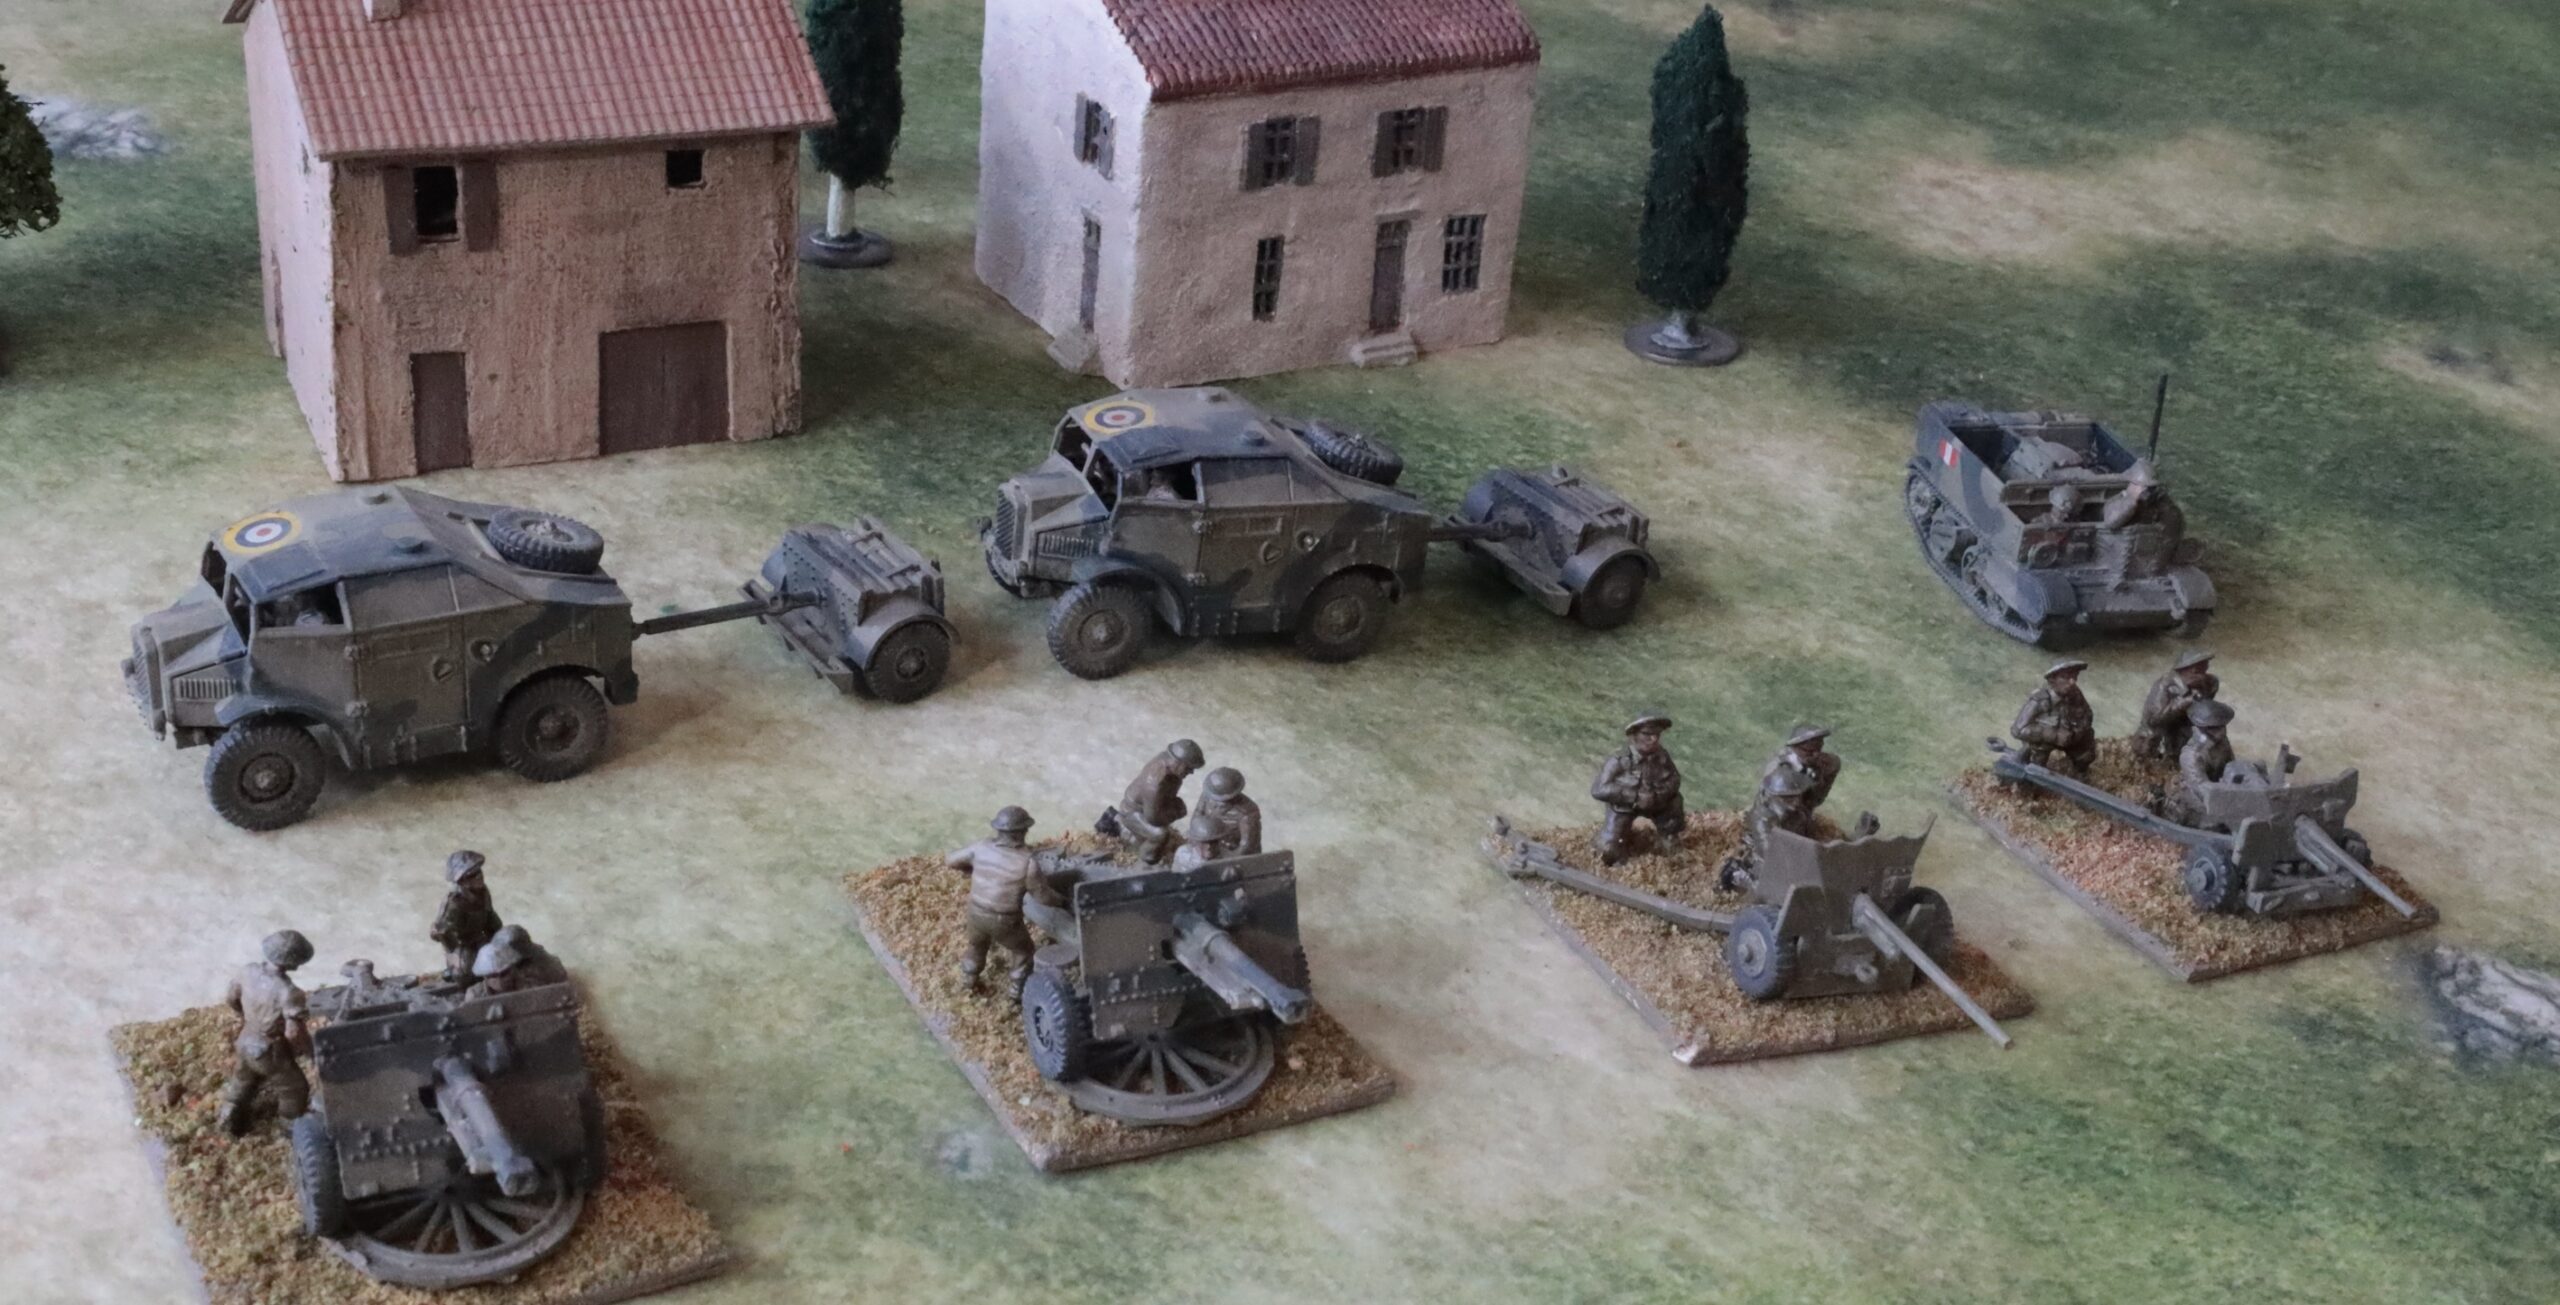
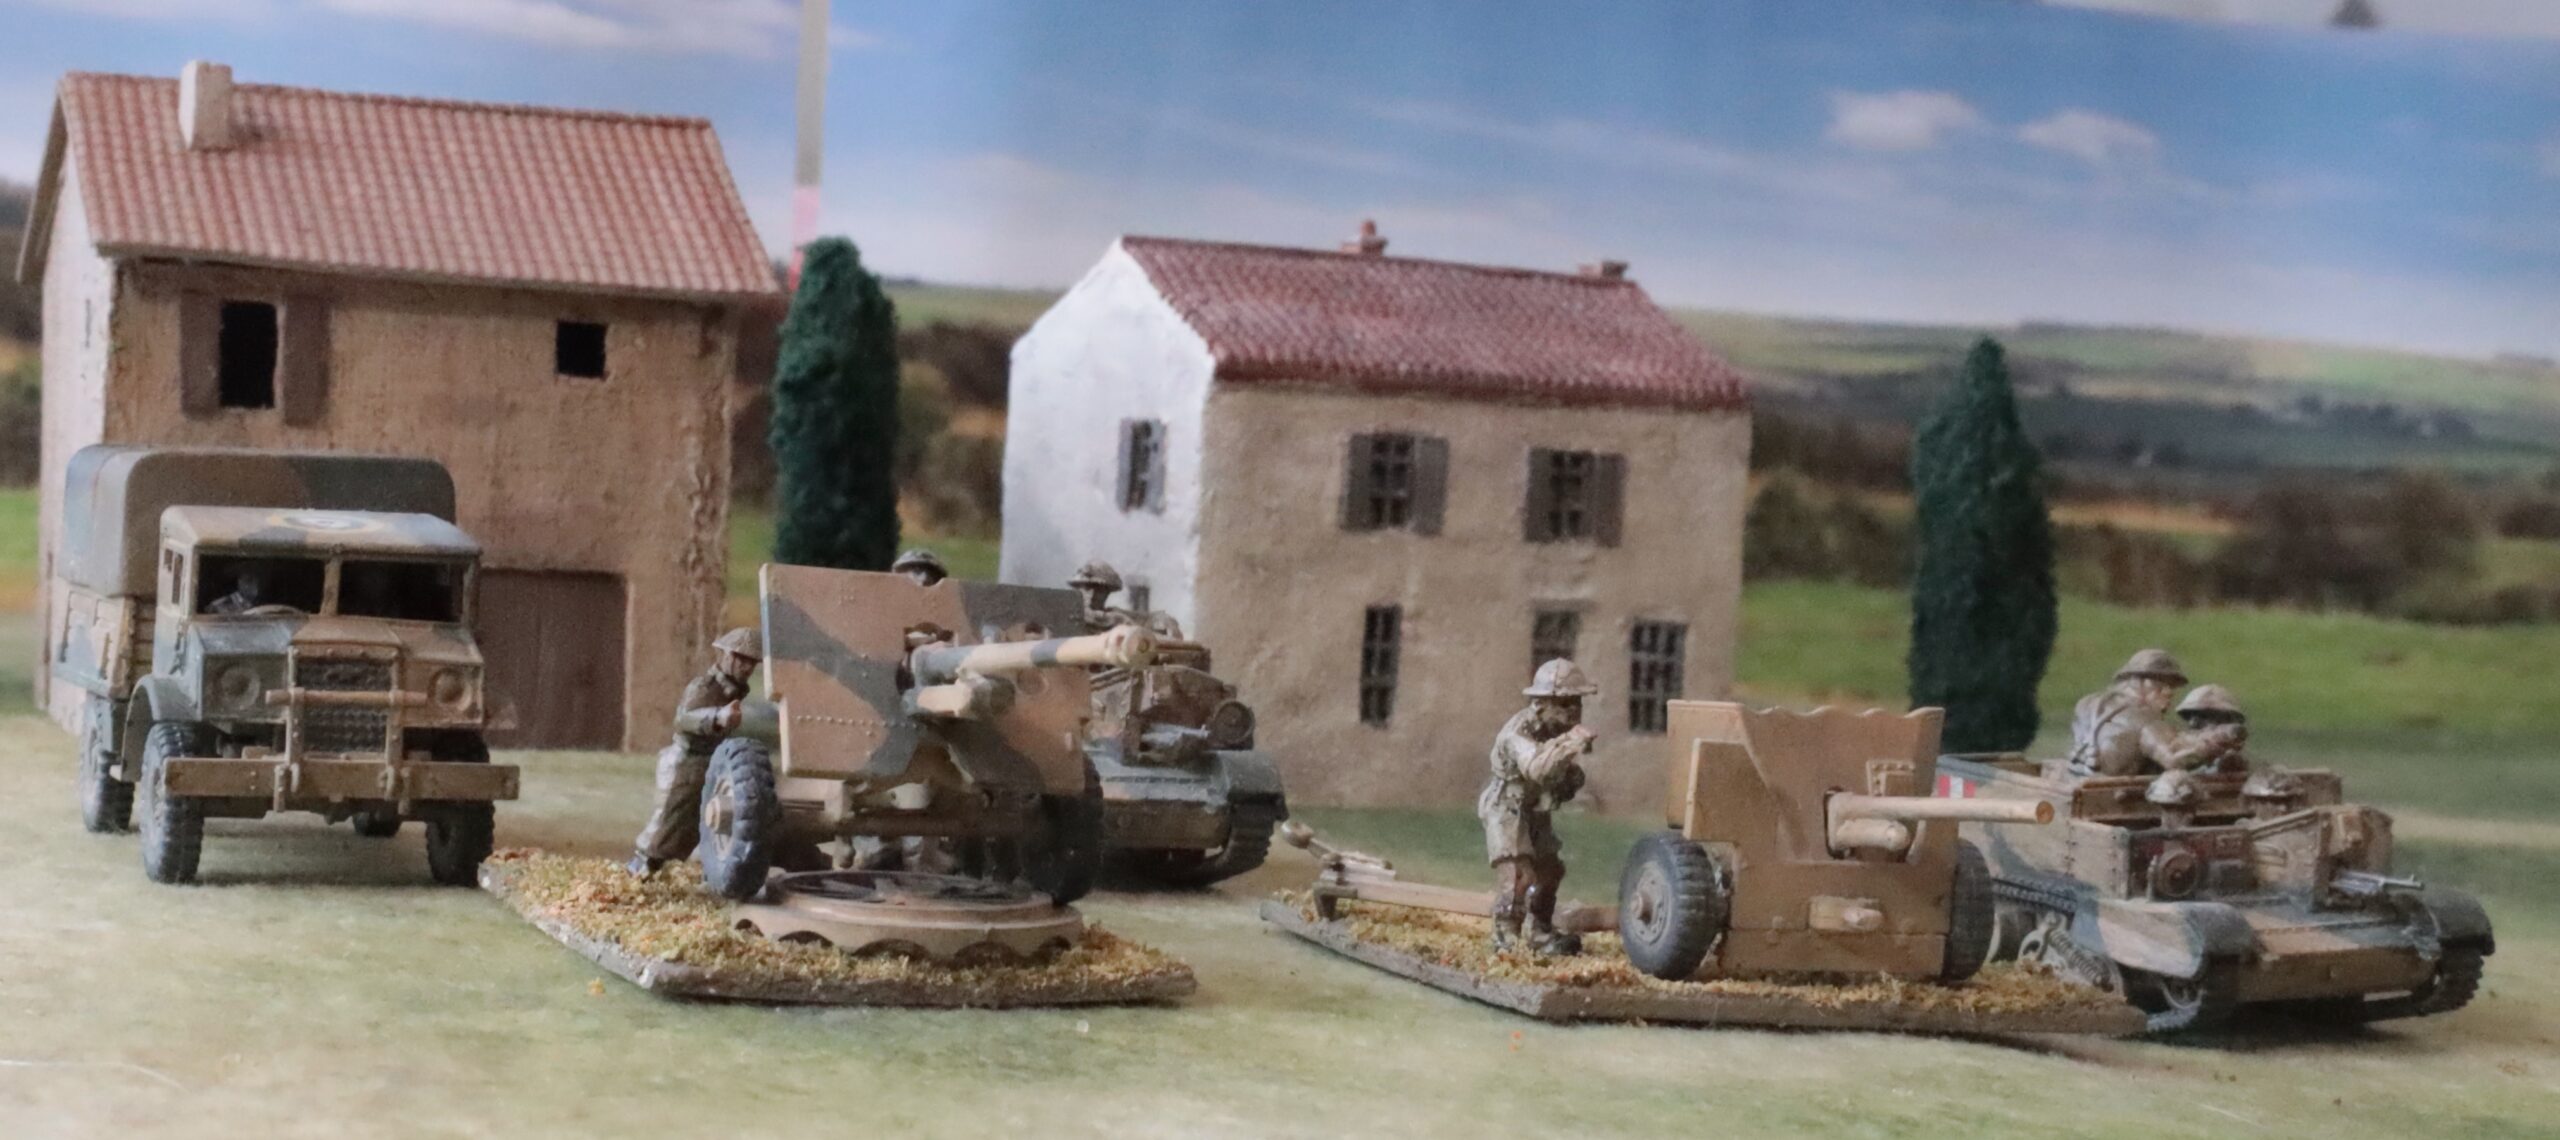
This time I continue with my description most recent batch of figures and models for my 1943 project, as I build up enough forces to run a scenario for Medinine, by talking about the artillery. These comprised two 25-pdrs, three 6-pdrs and a 17-pdr Pheasant. The above picture is of four of the six weapons, together with two Morris Quads and limbers and the carrier OP. These are items I painted in the Light Mud and Blue-Black scheme introduced after Tunisia, ready to be used in Italy. Missing are the two 2-pdrs that I will need, because I didn’t have the models when I started the batch, and found that I needed a second crew assemblage anyway.
Let’s start with the 25-pdrs. These were the workhorses of British artillery in WW2. In the desert, and on at least one occasion in the Tunisian hills, they served as direct fire support, taking on a role as antitank gun. I’m not sure how much of my artillery I will actually use on the tabletop – because even at Rapid Fire scale they would mostly be off the table – though I think Rapid Fire players like to stretch things and put them on. Still I’ve been buying the models: I have two more 25-pdrs and two 5.5in guns in stock, and a number of German guns too. In the Medenine scenario the antitank guns looks a little thin (though more than adequate historically), so I thought it appropriate to have at least a pair of 25-pdrs ready to act as a last line of defence.
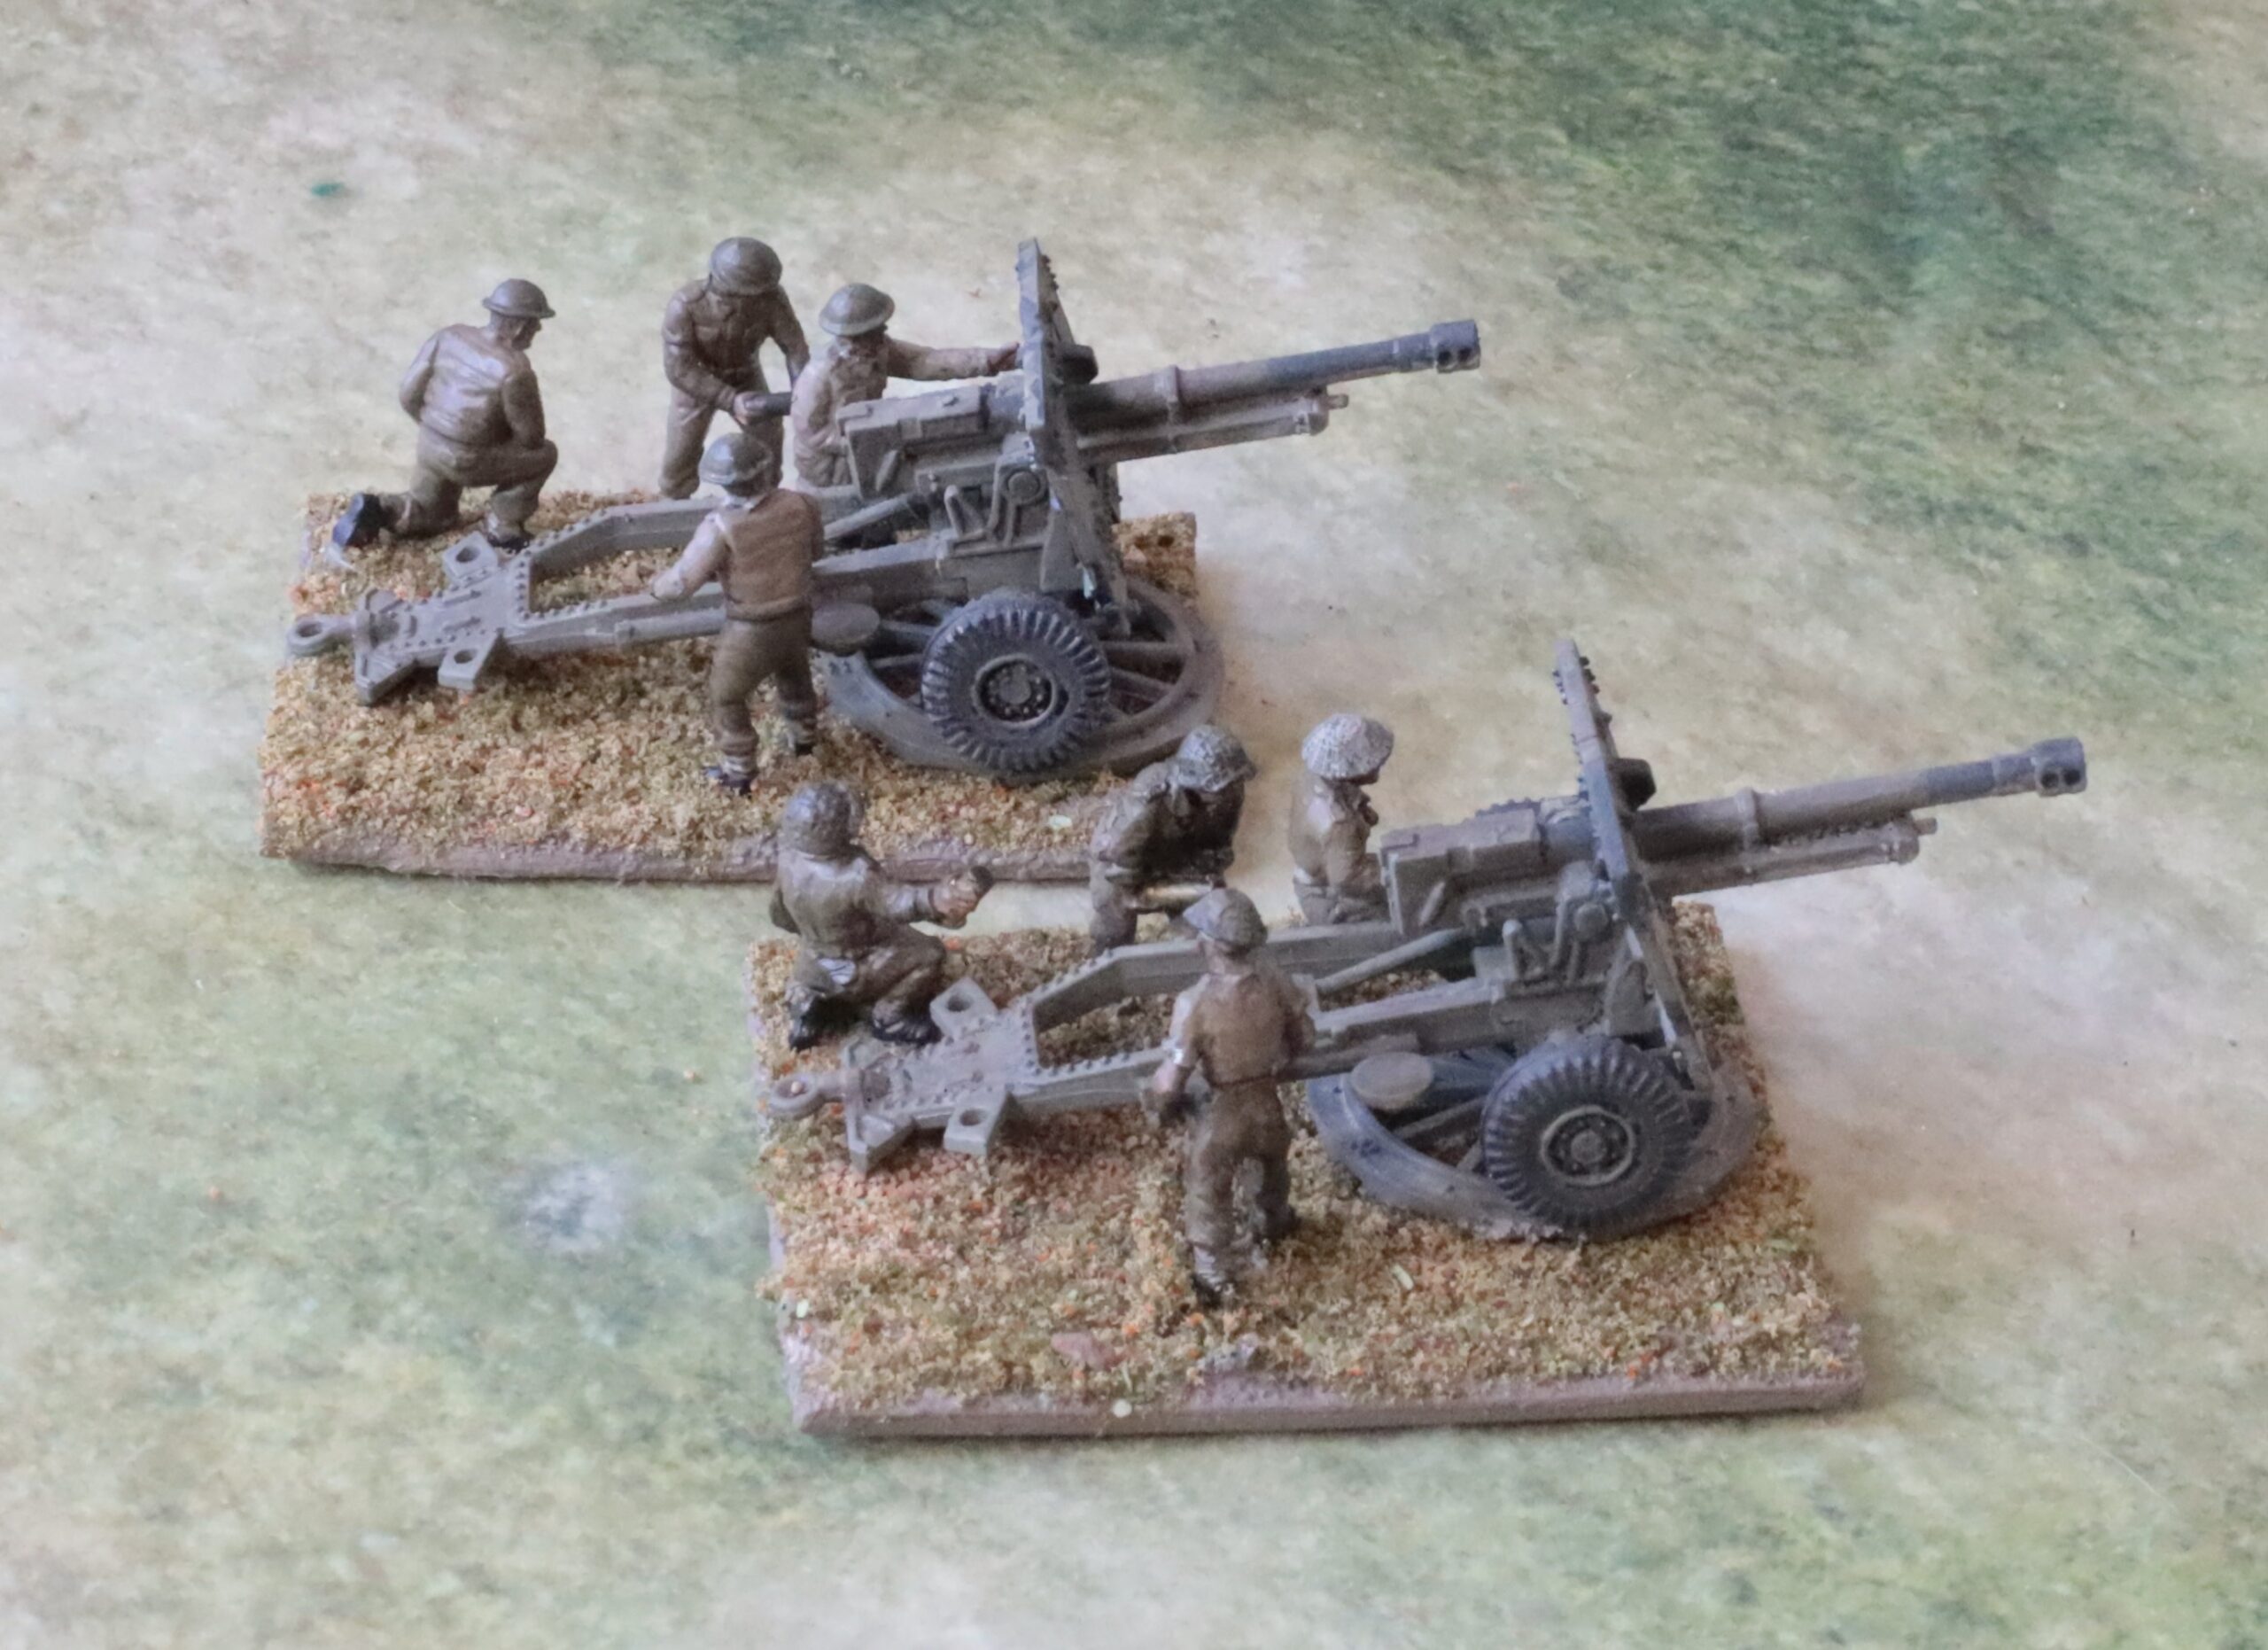
My 25-pdrs. The one in the foreground has an AB crew; the other has a PSC crew with a head-swap.
I had a box of two 25-pdrs with a Morris Quad in hand (together with another with the CMP Quad, as PSC had run out of the Morris sets). I used this. The first decision was whether to use the parts for the later version, with muzzle-brake. I didn’t have definitive information for when this was introduced. A lot of pictures show the earlier version in North Africa – but there are pictures of the later version in Italy in 1943 (or so the picture captions say) – so I decided to go for this, painted up in the Light Mud and Blue Black scheme. Next was the question of crews. I bought one set of eight figures from AB; I only wanted four on the base, so I hoped to get both crews. But they only had one seated figure, and I thought this was critical – otherwise it would be just a group of people staring at the gun. I decided to use the PSC figures for the second gun. These aren’t nearly as good, but good enough, I think. They supply two versions: Western Desert with men in shorts, and North West Europe with late helmets and scrim. I wanted neither, so I decided to head-swap the African heads onto the later bodies. This wasn’t actually that hard. The AB crew have the later helmets too, but I decided to overlook that (as I have on half of my infantry) – and it wasn’t as blatant as on the PSC figures.
Next come the 6-pdrs:
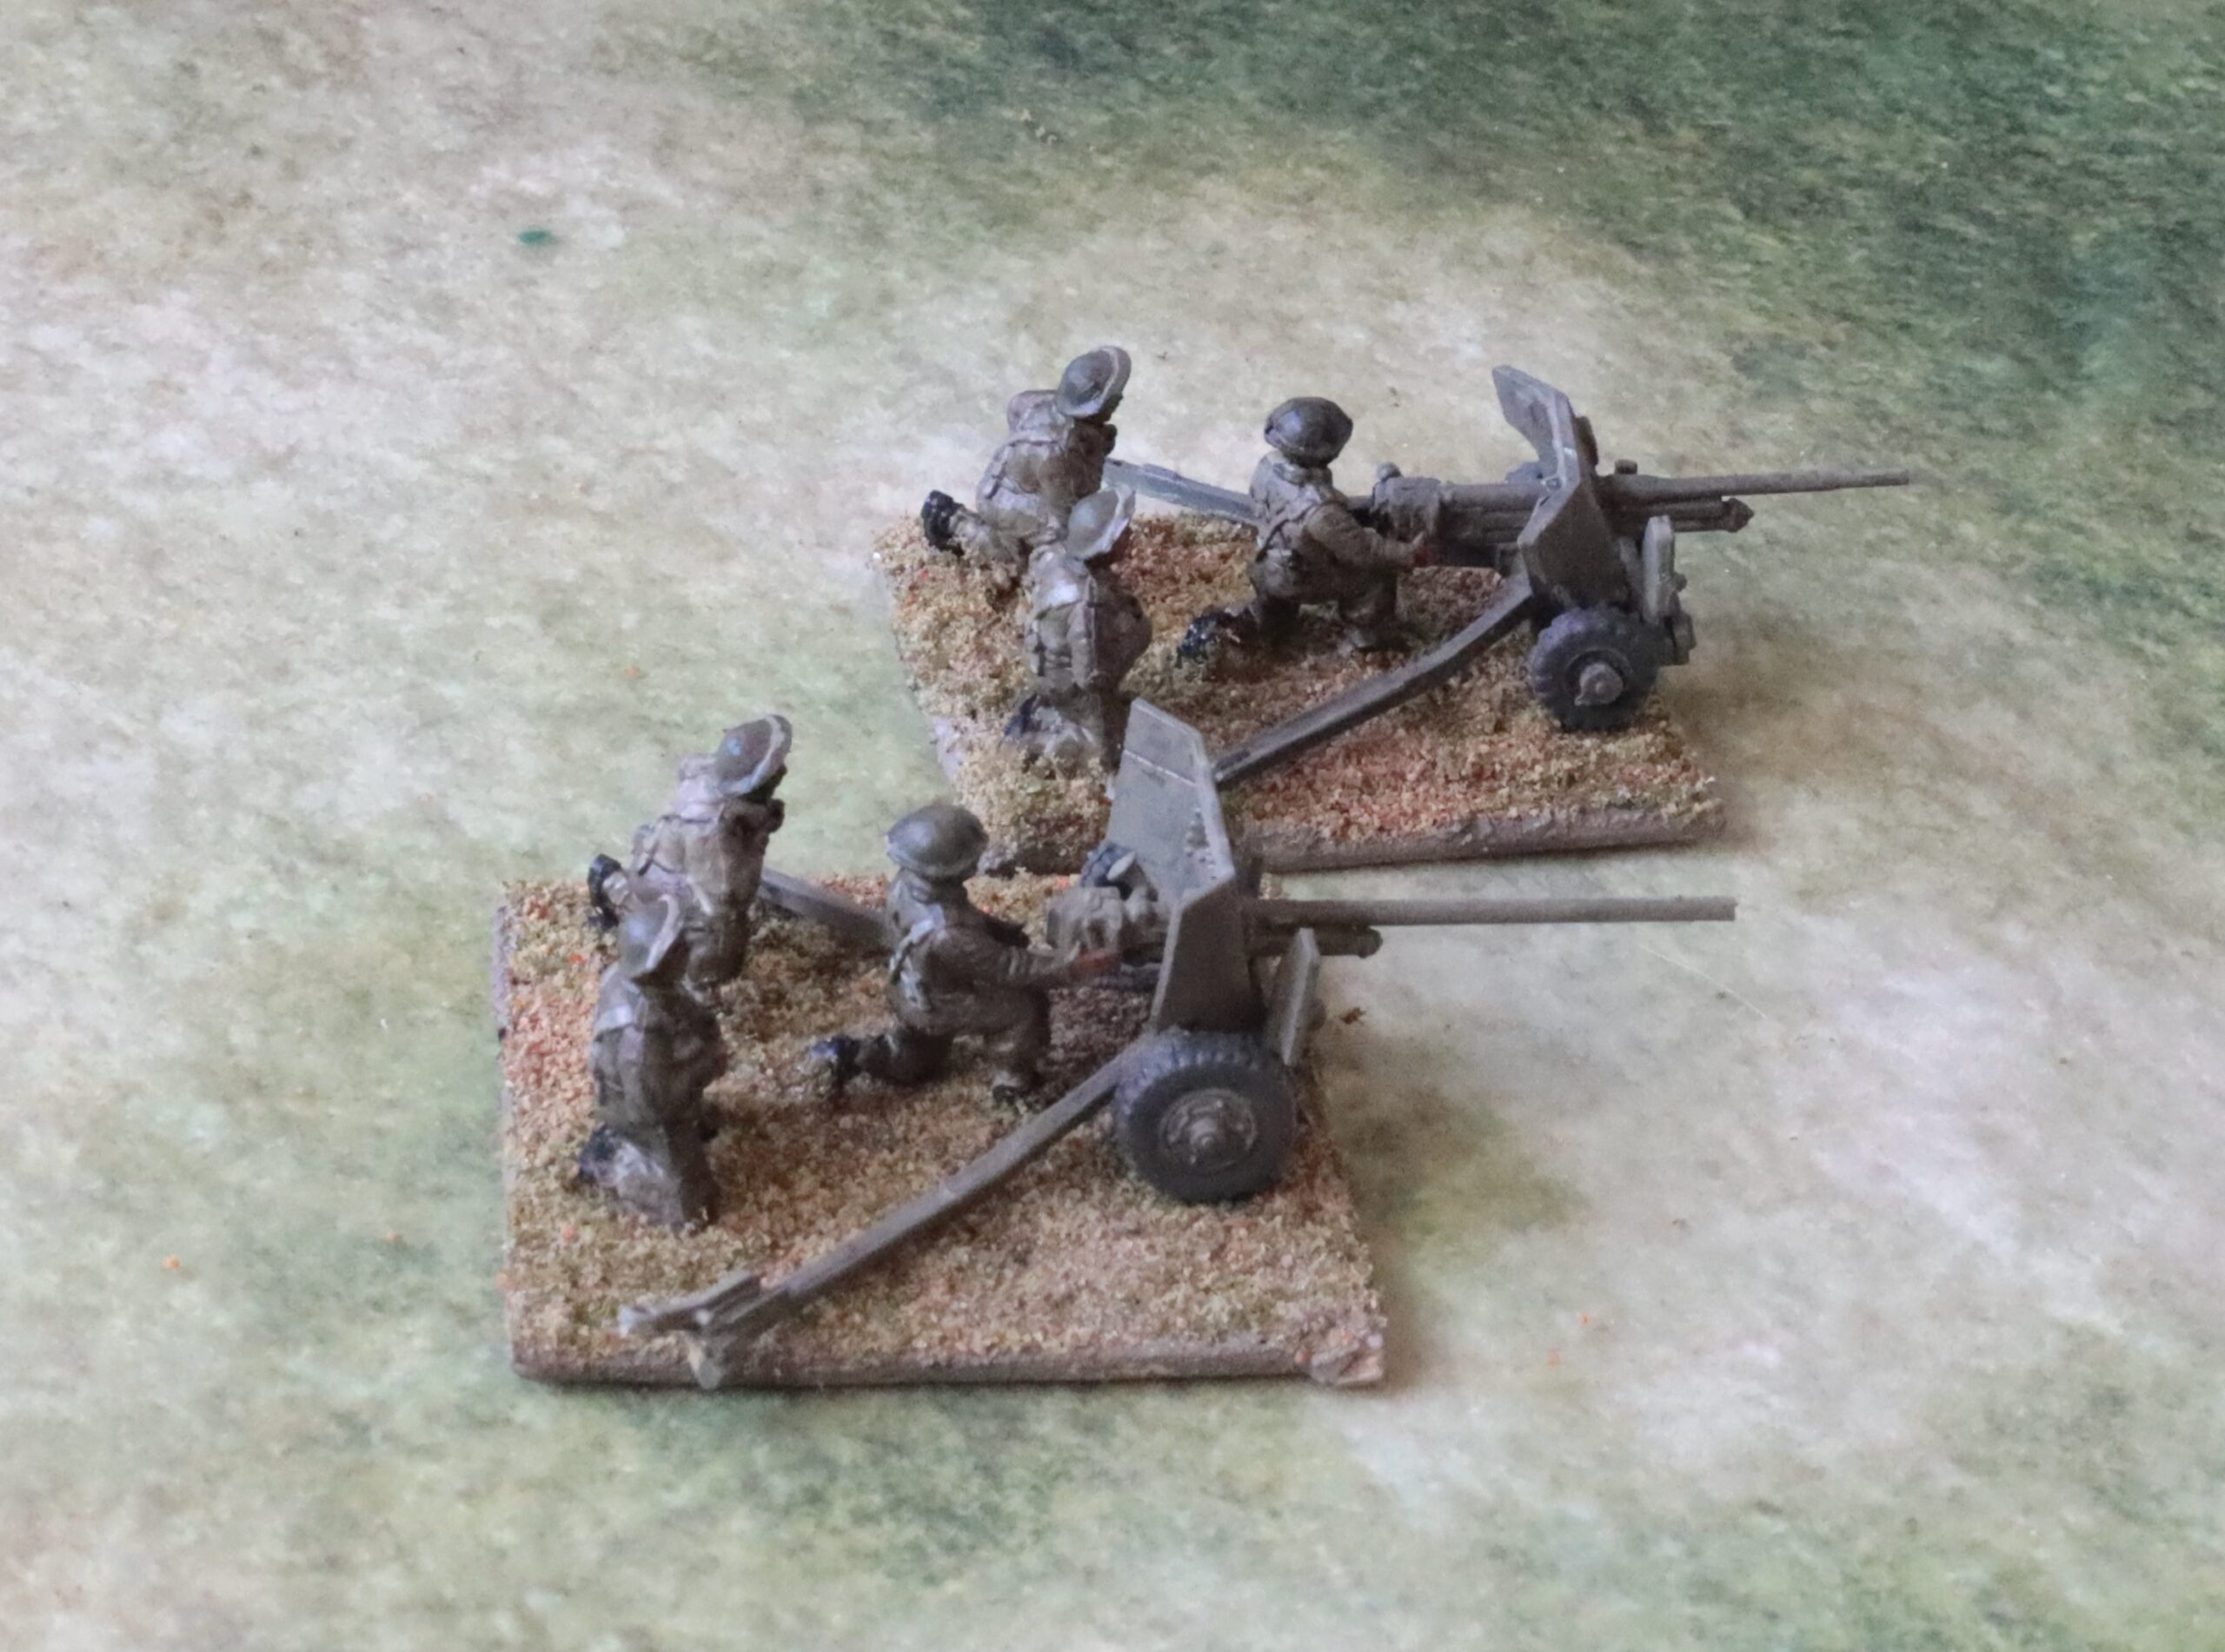
The two 6-pdrs in Light Mud. The one in the foreground is Valiant; the other is an old Airfix one. Both crews are Valiant.
I needed three more of these to go with my one existing model, one of my old Airfix ones. I had another old Airfix one that just needed a paint job. The cheapest way to source a couple more (with crews) looked to be to get the Valiant models, for which I found a decent review. Alas I think they look wrong, when compared to the photographs in theatre. The Airfix ones look better, though I have no reason to think they are particularly accurate – that wasn’t an Airfix strong point at the time. But it looks low and mean, just like the pictures. A second issue is that I wanted the earlier version of the weapon, with a shorter barrel and no muzzle brake. I followed the advice on the Valiant box, but it just didn’t look right either! I am so dissatisfied that I have bought the PSC box of two 6-pdrs with Loyd carriers, hoping these will look better. The Valiant crew figures were OK, though, and in the right uniform for 1943 – though they are too big. Four were provided, though I only used three. For the third crew I used bought AB desert castings with a crew in shorts, just for variety.
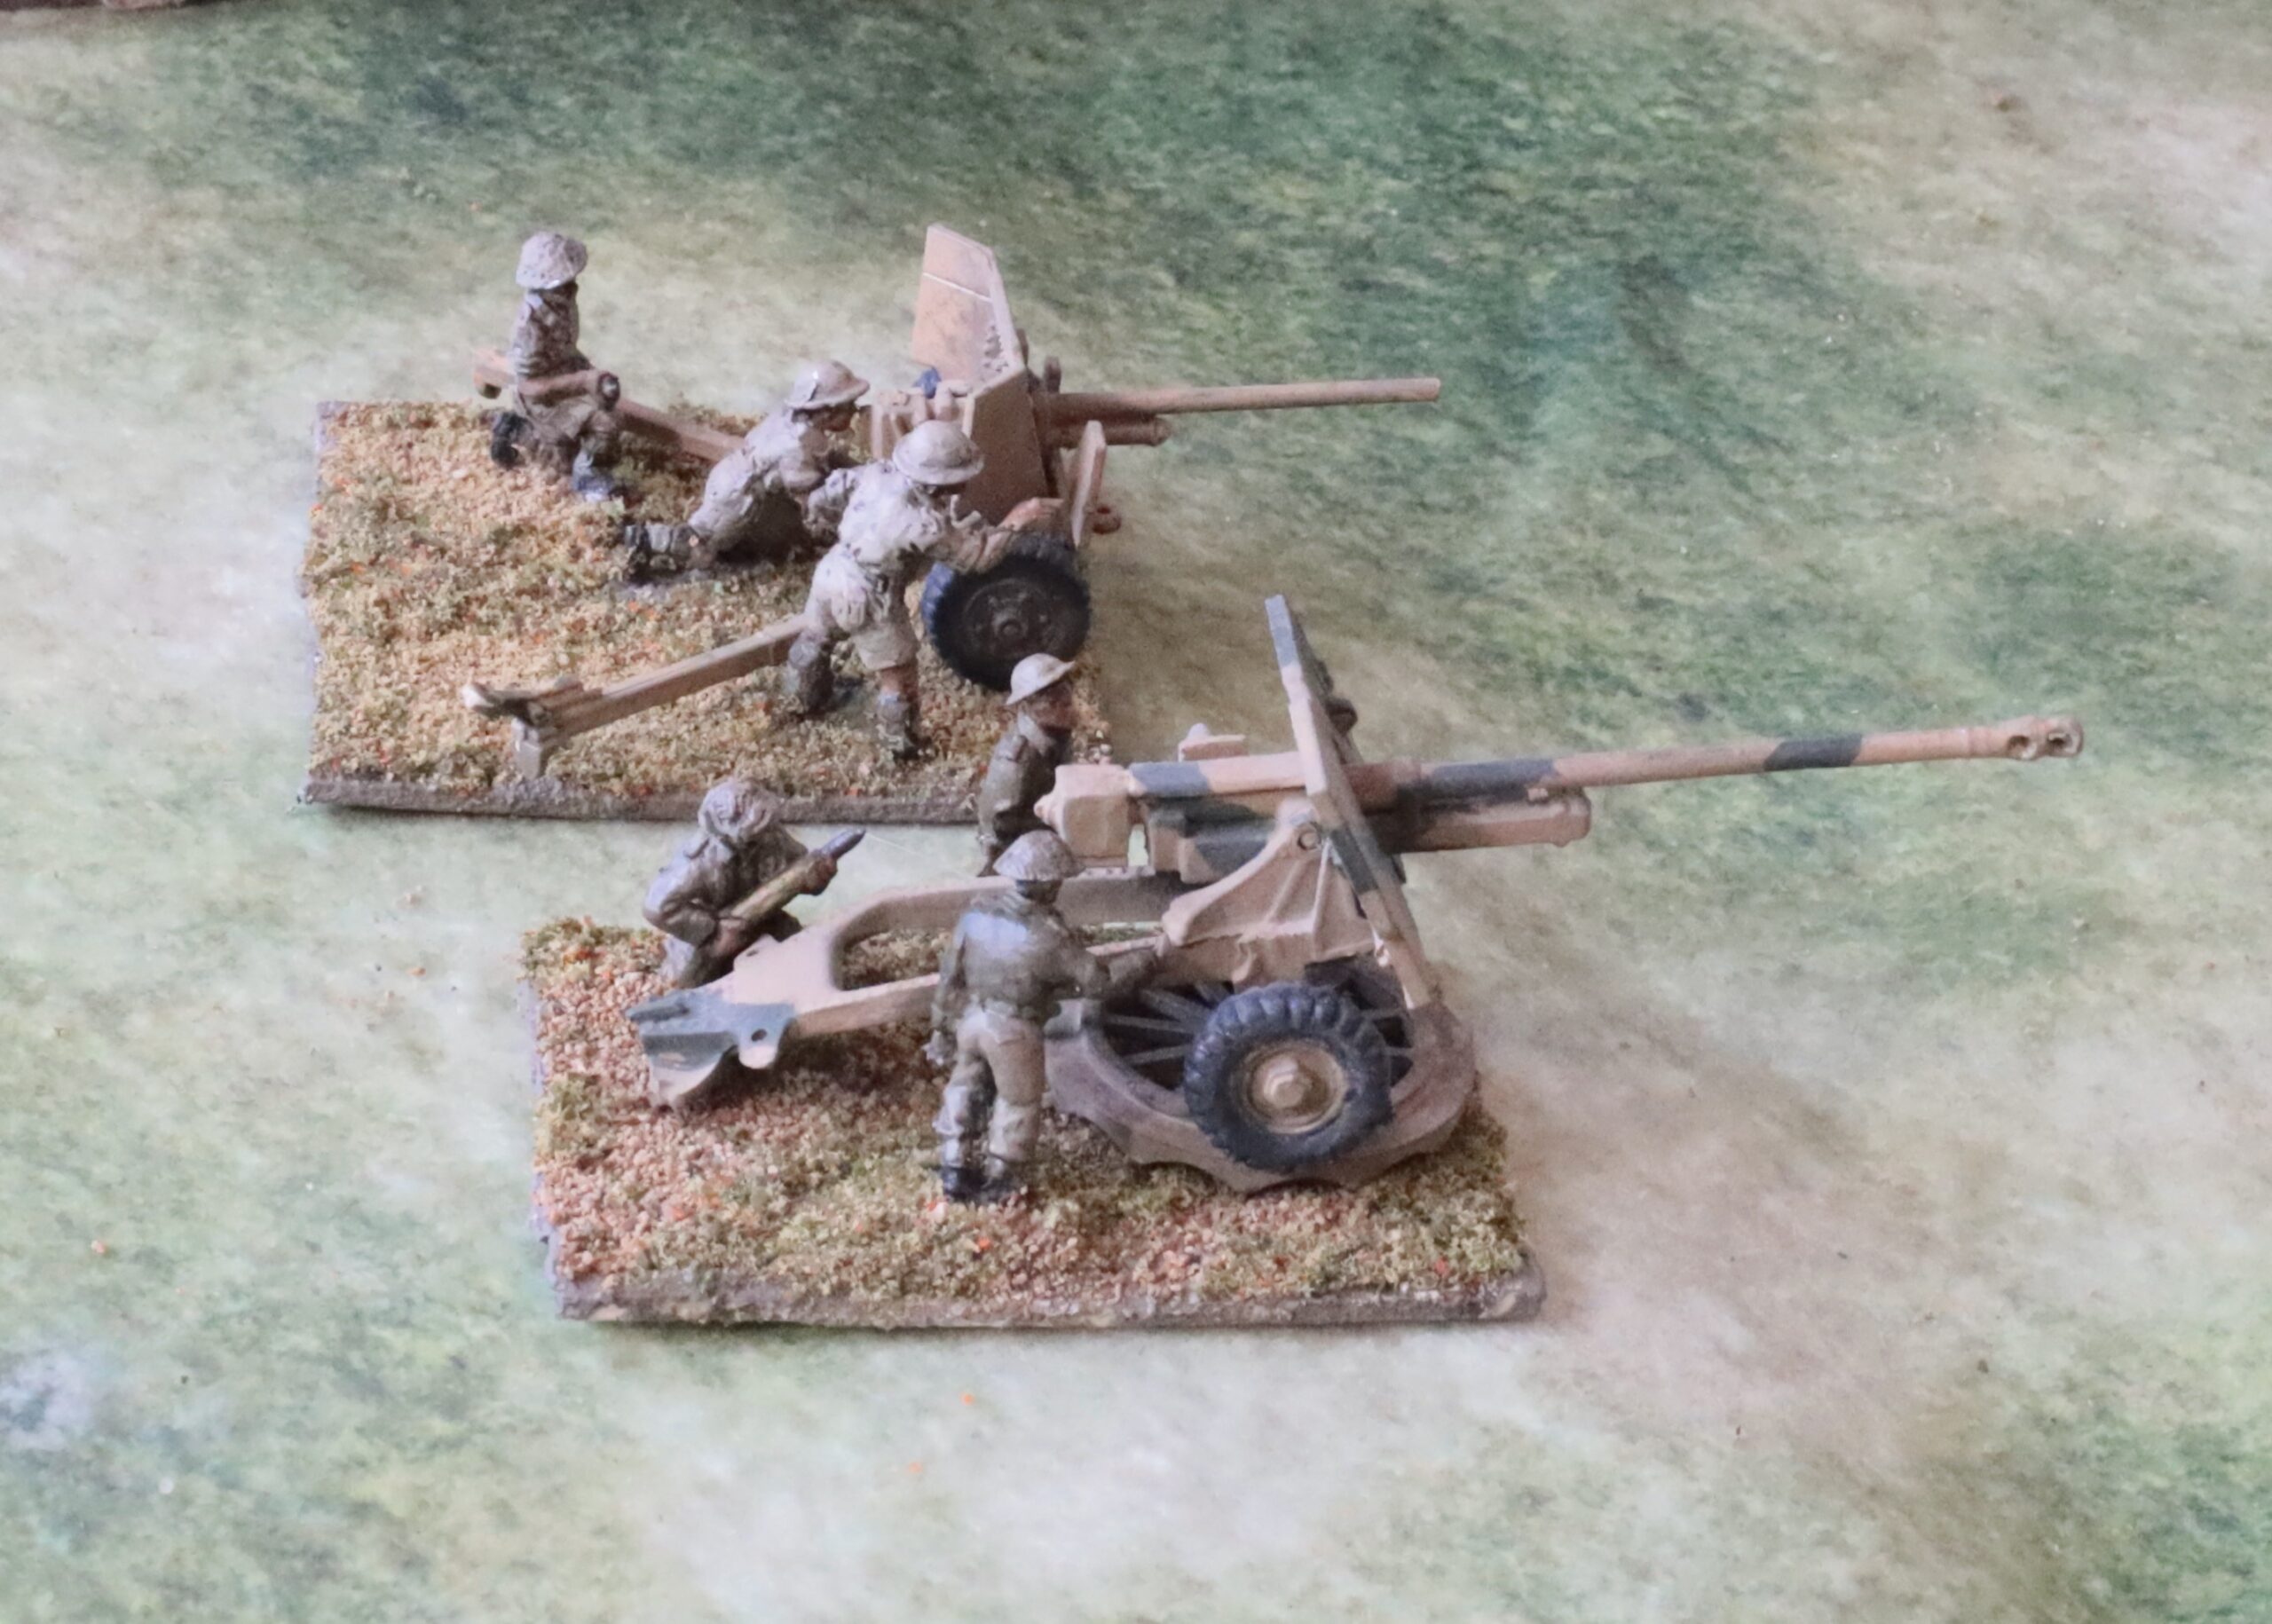
Finally there was the 17-pdr Pheasant. Here it is with the third 6-pdr:
Old 17-pdr Pheasant conversion with SHQ crew, with the second Valiant 6-pdr in the background, with AB crew
As I said in my previous post, the Pheasant was something of an afterthought. I don’t think that this weapon was used in Medinine, but the 7th Armoured did have them at the time, and they would have been an option for the British. Actually they probably weren’t that suitable. Their big virtue was their range – but if they had opened up at long range (and the 17-pdr went off with a very spectacular flash and bang) they would then have been picked off by the German artillery and mortars. Plus they were bigger weapons, harder to conceal in the desert. This model is one I made back in the 1970s from and Airfix 25-pdr and a Panther gun barrel. Very basic, but I adjudged it good enough. I had plenty of SHQ crew, which I brought into play. These are slightly smaller than AB figures, and so more appropriate for this slightly smaller-scaled model. Here’s a different angle, including the three vehicles I painted in desert camouflage:
I will describe how I painted the models in my next post covering the vehicles. The process for figures I have already described – they were painted alongside the infantry.
It’s been a long absence since my last post. I don’t tend to post until a project is complete, and my most recent project has been a big one. As usual lots of life has intervened to slow things down. But I also have a lot of half-finished projects lying around, especially on the rules-writing side, which is not conducive to regular posting. Still, I now have something definite to report.
Following my last post for Rapid Fire! for hexes in December, my focus has stayed on WW2. We played two games, loosely based on episodes at Salerno. They weren’t particularly interesting. Much depended on encounters between tanks and antitank guns, turning on a small number of D6 throws. Infantry proved pretty useless. The first game at least had a close finish, but the second was an overwhelming British victory as the Germans failed to make any impression on the British Shermans, while the British scored hits pretty much every time. Scenario design was partly at fault, I’m sure – but the whole thing reinforced my dislike of the bathtubbing aspect of the rules. Too much hinged on too few dice throws. But I like scaling of RF, allowing bigger battles using 20mm figures. So I have embarked on writing my own rules – which will be part of a rules family stretching from Great Northern War to Napoloenics to the 1859-71 wars and on to WW2. It is surprising how much the game structure and mechanisms can overlap. That’s the idea anyway.
But I needed a scenario to focus on. Salerno is tricky at this level, especially if you leave the Americans out (they had more tanks, which makes it easier to design good games), and I think I need more experience with the system to work out how to design decent scenarios. Similar things can be said for Sicily. But Tunisia is another matter – there are more tanks!. As it happens the Rapid Fire crew have two Tunisia scenarios (or scenario groups): Medenine and Tebaga Gap. These are among the last desert battles, as the 8th Army fought their way into Tunisia – and so fit into the desert battle series that has been designed for Rapid Fire. I picked Medenine – the last major German tank attack in Africa- though allied tanks were only marginally involved. The scenario is based on the central of the three principal thrusts, with the 15th Panzer Division’s attack on 131 (Queen’s) Infantry Brigade of the 7th Armoured. I decided to set out on two large batches of model-making and painting, first for the British and secondly for the Germans. I started with the British.
For the British I needed two four-company battalions (actually this was more than I needed for this scenario – but I’d need more troops for Tebaga Gap), each with a 3in mortar (with carrier), a 6-pdr and a 2-pdr AT gun, and a carrier platoon. In addition I needed Royal Artillery support with a further two 6-pdrs and a battery of two 25-pdrs – and brigade command, for which I wanted a Dorchester ACV. Mostly field artillery at this scale is off the table, but I wanted the 25-pdrs on the table as a last line of defence should the panzers (eight panzer IIIs and Panzer IVs) push their way through the four 6-pdrs and two 2-pdrs – although historically they didn’t. I already had all I needed for one battalion except the 2-pdr. For the second battalion I bought in AB Tropical infantry (four packs of 10 plus support weapons). These are a recent release, and work pretty well 1943 British infantry in this theatre (unlike my earlier British infantry, which are more appropriate to Normandy 1944). In addition I had PSC 25-pdrs with Morris Quads in stock. I bought in two extra 6-pdrs from Valiant, to use with an old Airfix one I had in stock, and an AB desert crew. On top of this I decided to bring into service an old Pheasant 17-pdr I had made up in the late 1970s from an Airfix 25-pdr and a Panther gun barrel; I compared it to the parts in the PSC 25-pdr kit (which can be made up into a Pheasant), and it didn’t look too far off. I had some crew available bought a number of years ago from SHQ. I needed more carriers – I still have three of my old Airfix ones (three are already in service with AB crews and look jolly nice too) – but I decided these didn’t come up to snuff. I needed crews. The AB ones look fantastic, lifting my rather ropey old Airfix models to the heights, but they took a lot of work to fit, as well as being pricey. Also I needed one as a 3in mortar transport and, more complicated, as the all-important OP for the 25-pdrs. I decided to go for the PSC variants set, which has seven models which include an OP and 3in mortar transport – as well as one with a 2in mortar in firing position, which I can use for a carrier platoon. Finally there was the question of transport. Strictly this wasn’t needed. The British positions were essentially prepared and static – the lorries would have been well to the rear. The antitank guns were carried on portees, but they were lifted off these into dug-in positions – keeping these weapons concealed was tactically critical. Still, I had three Bedford QL lorries in stock, and I thought it was time to bring these into the picture, together with one of my PSC 15cwt CMP light trucks.
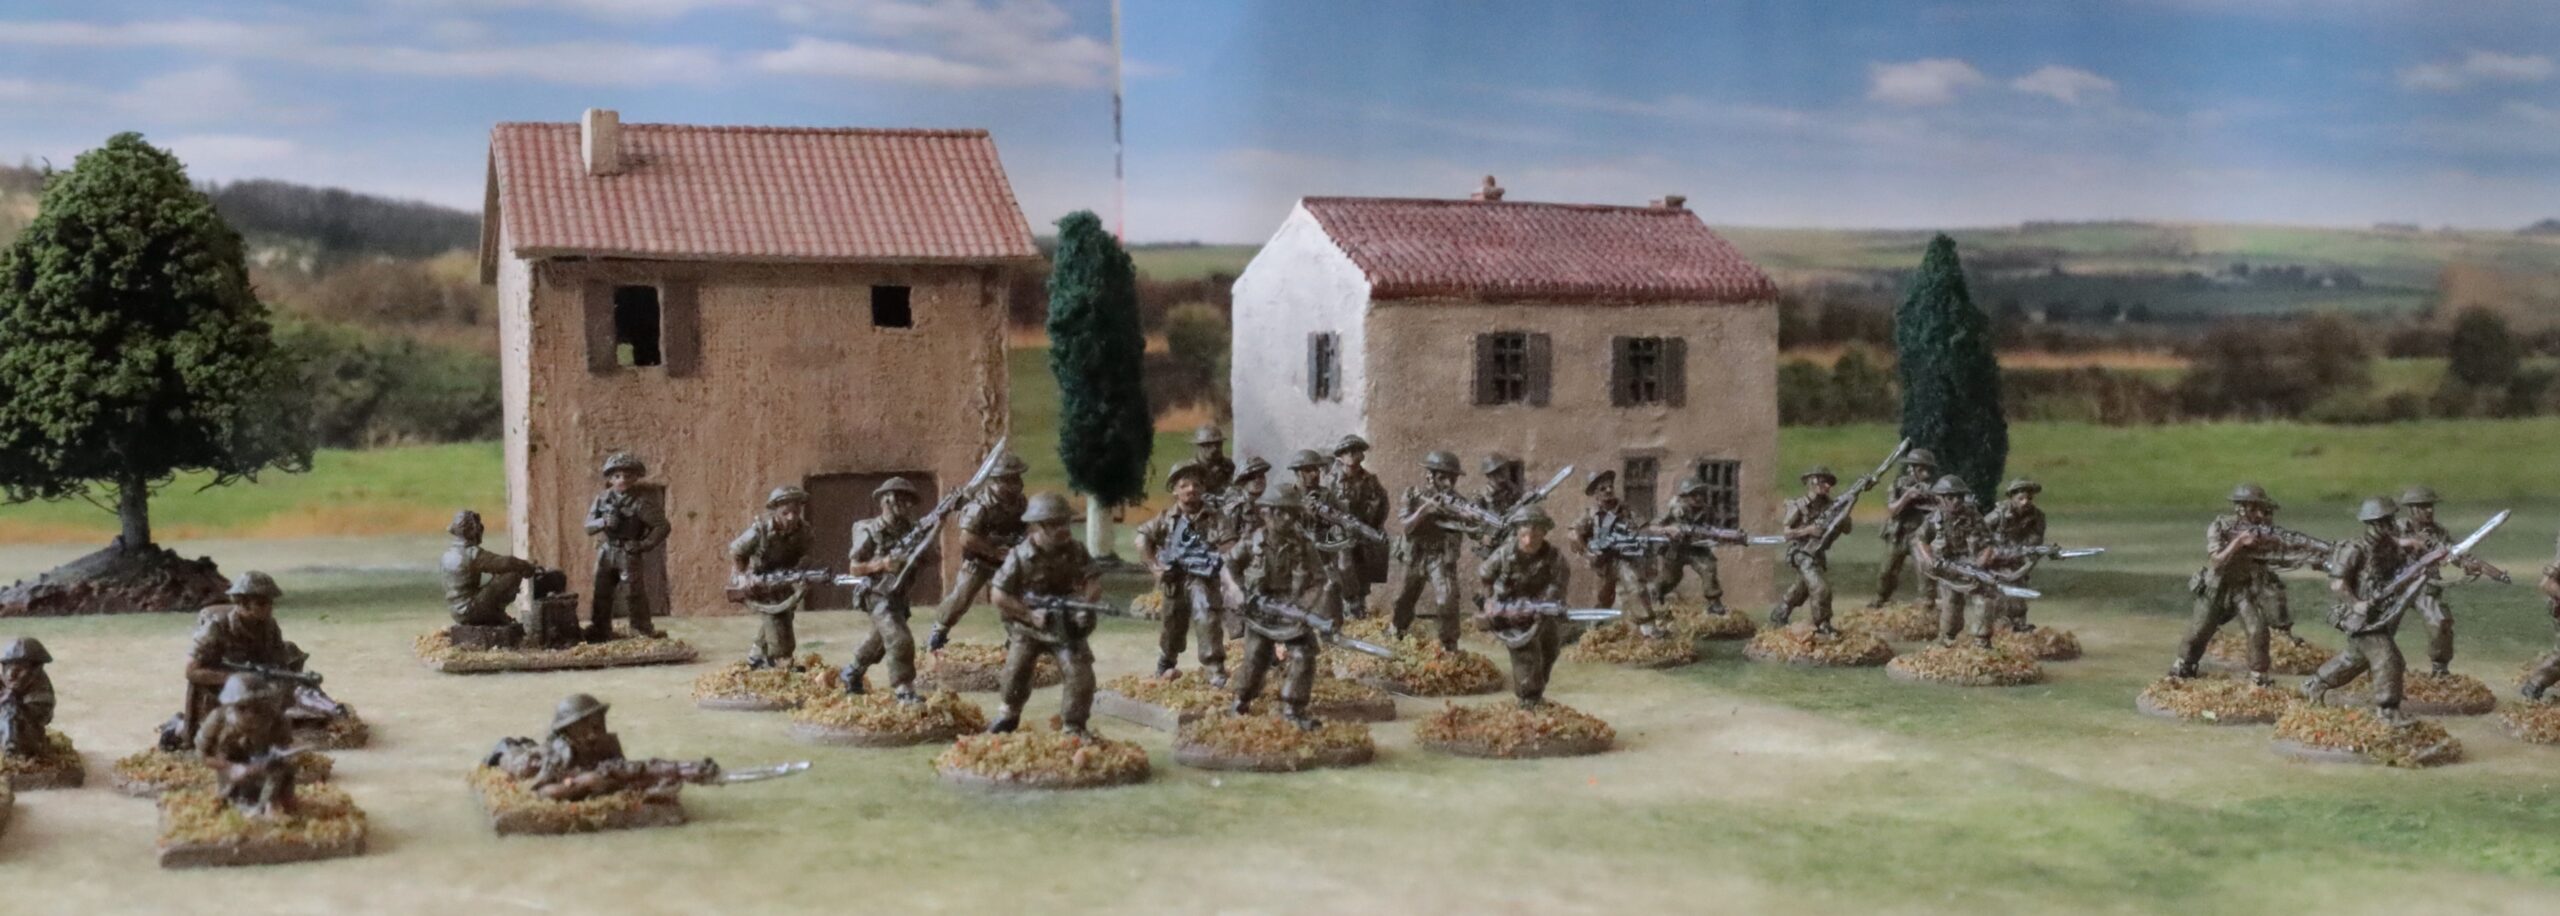
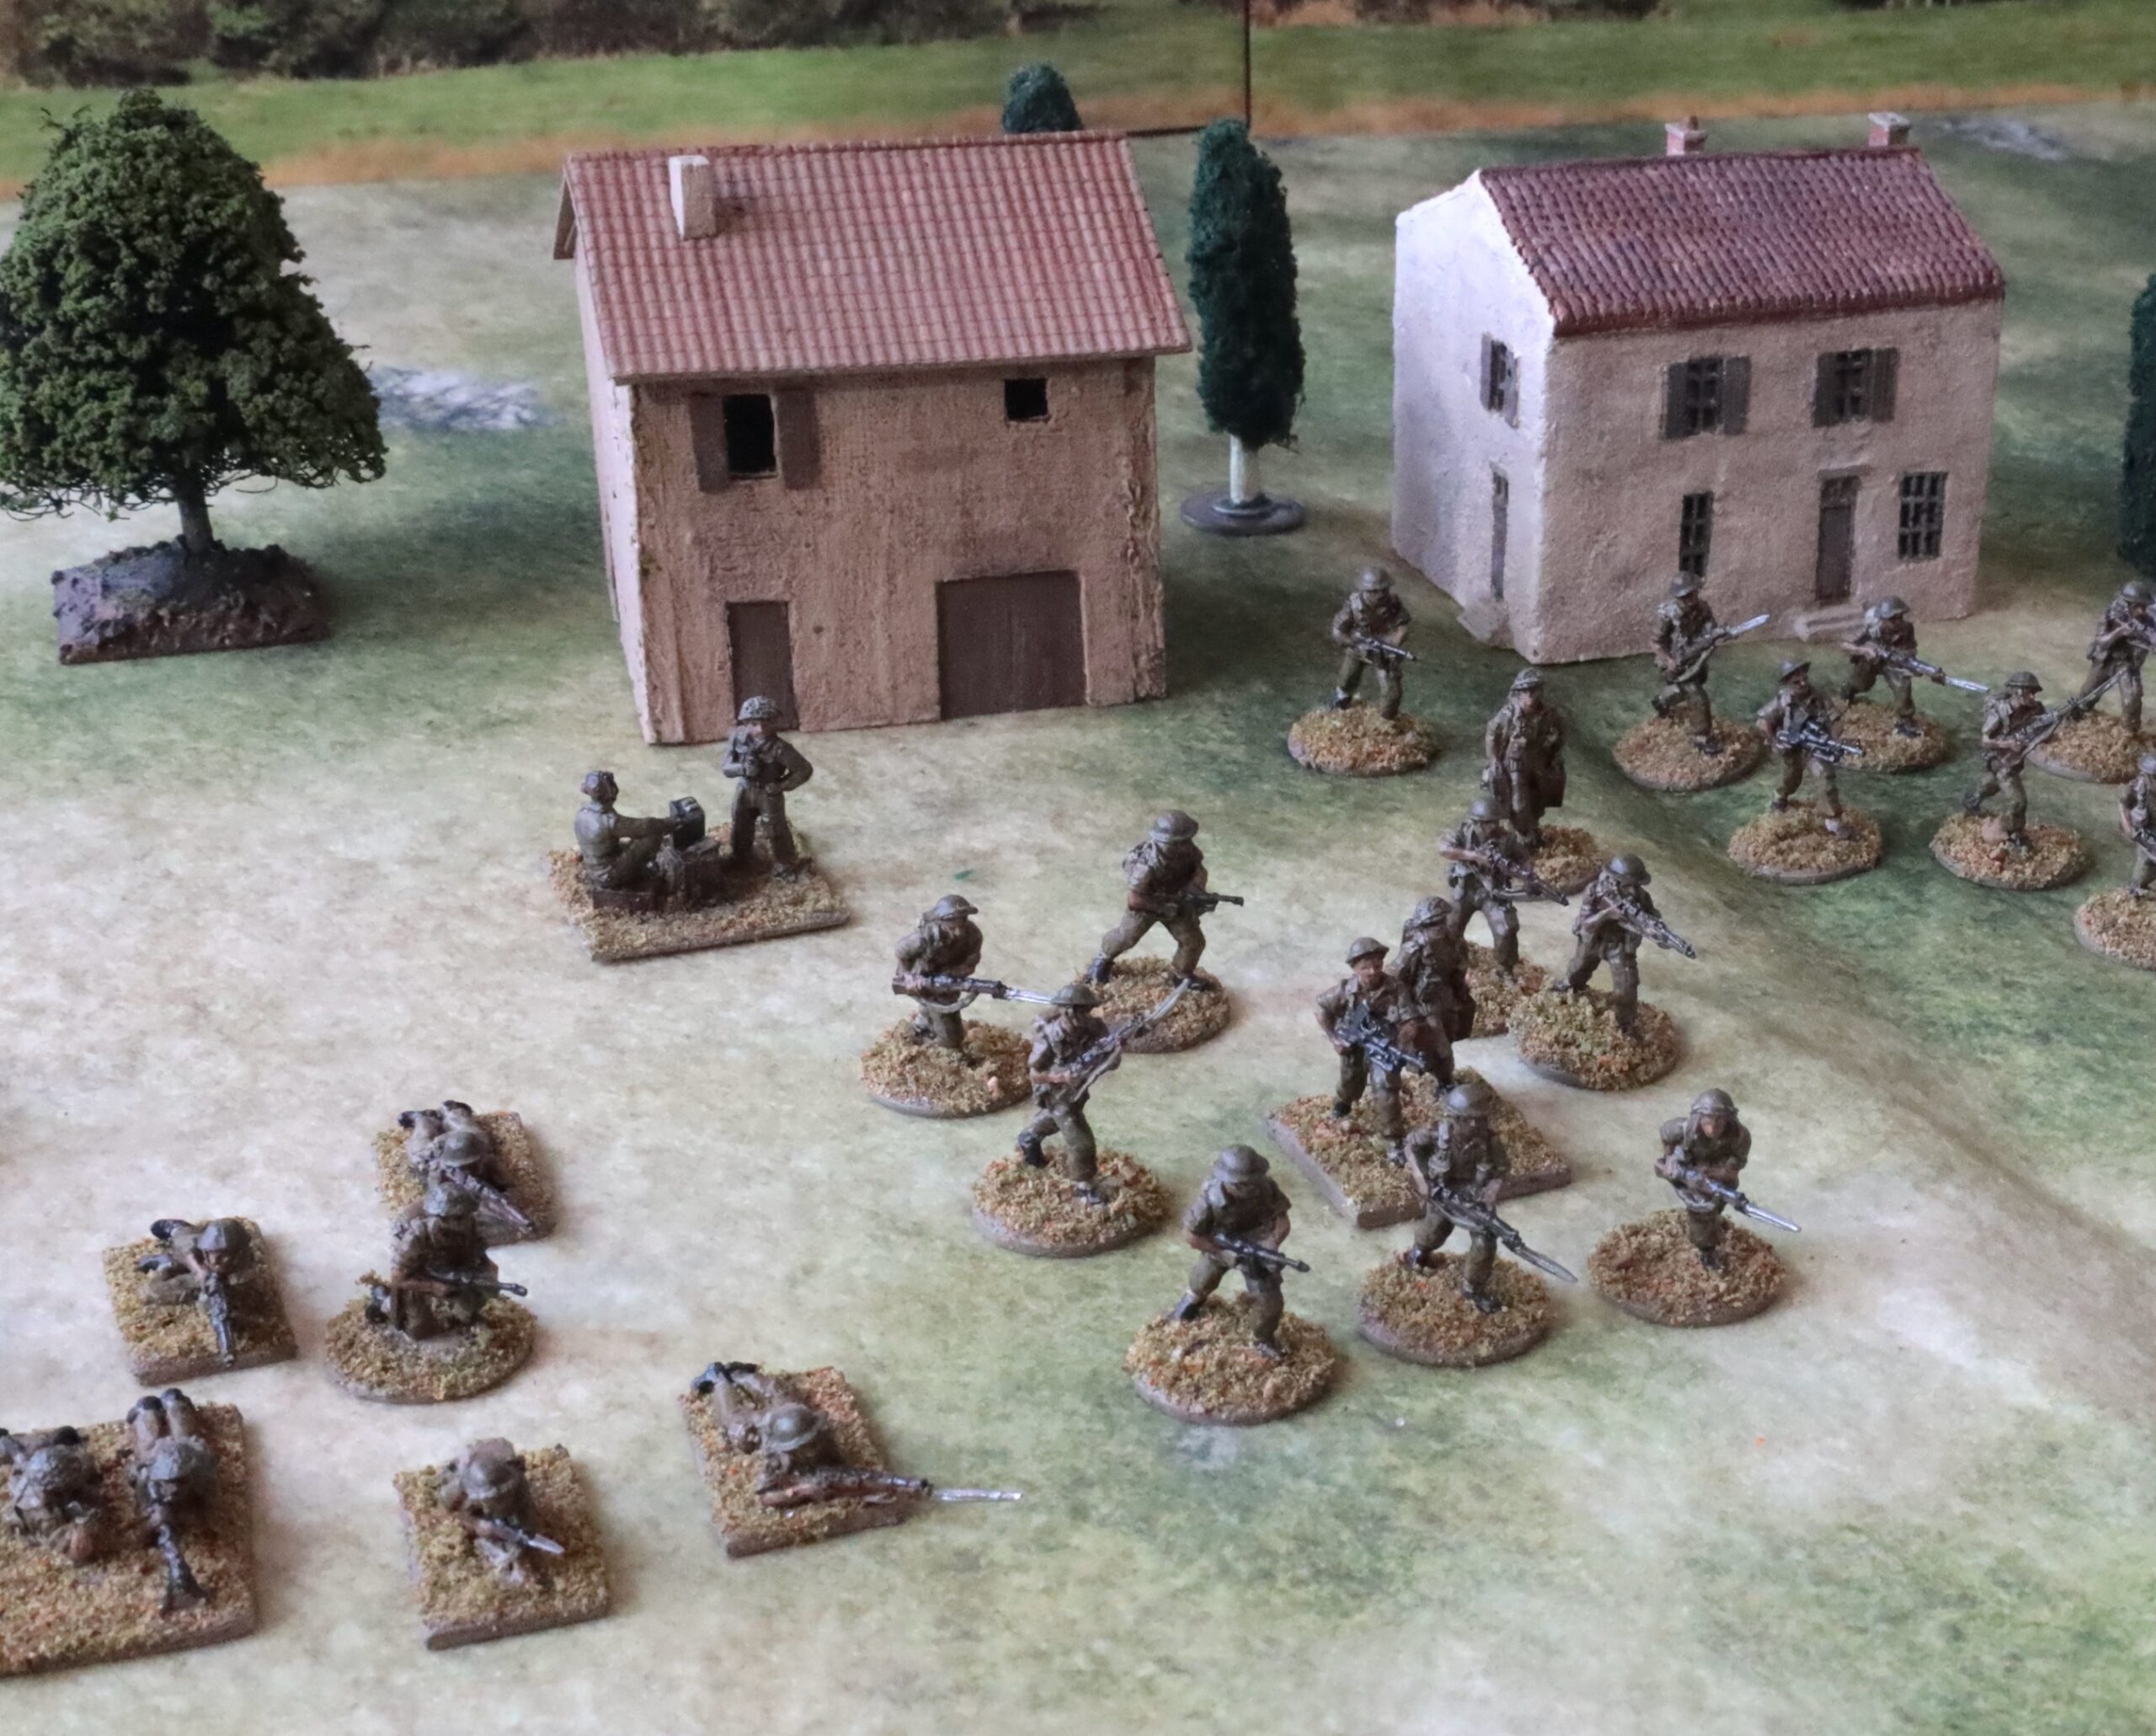
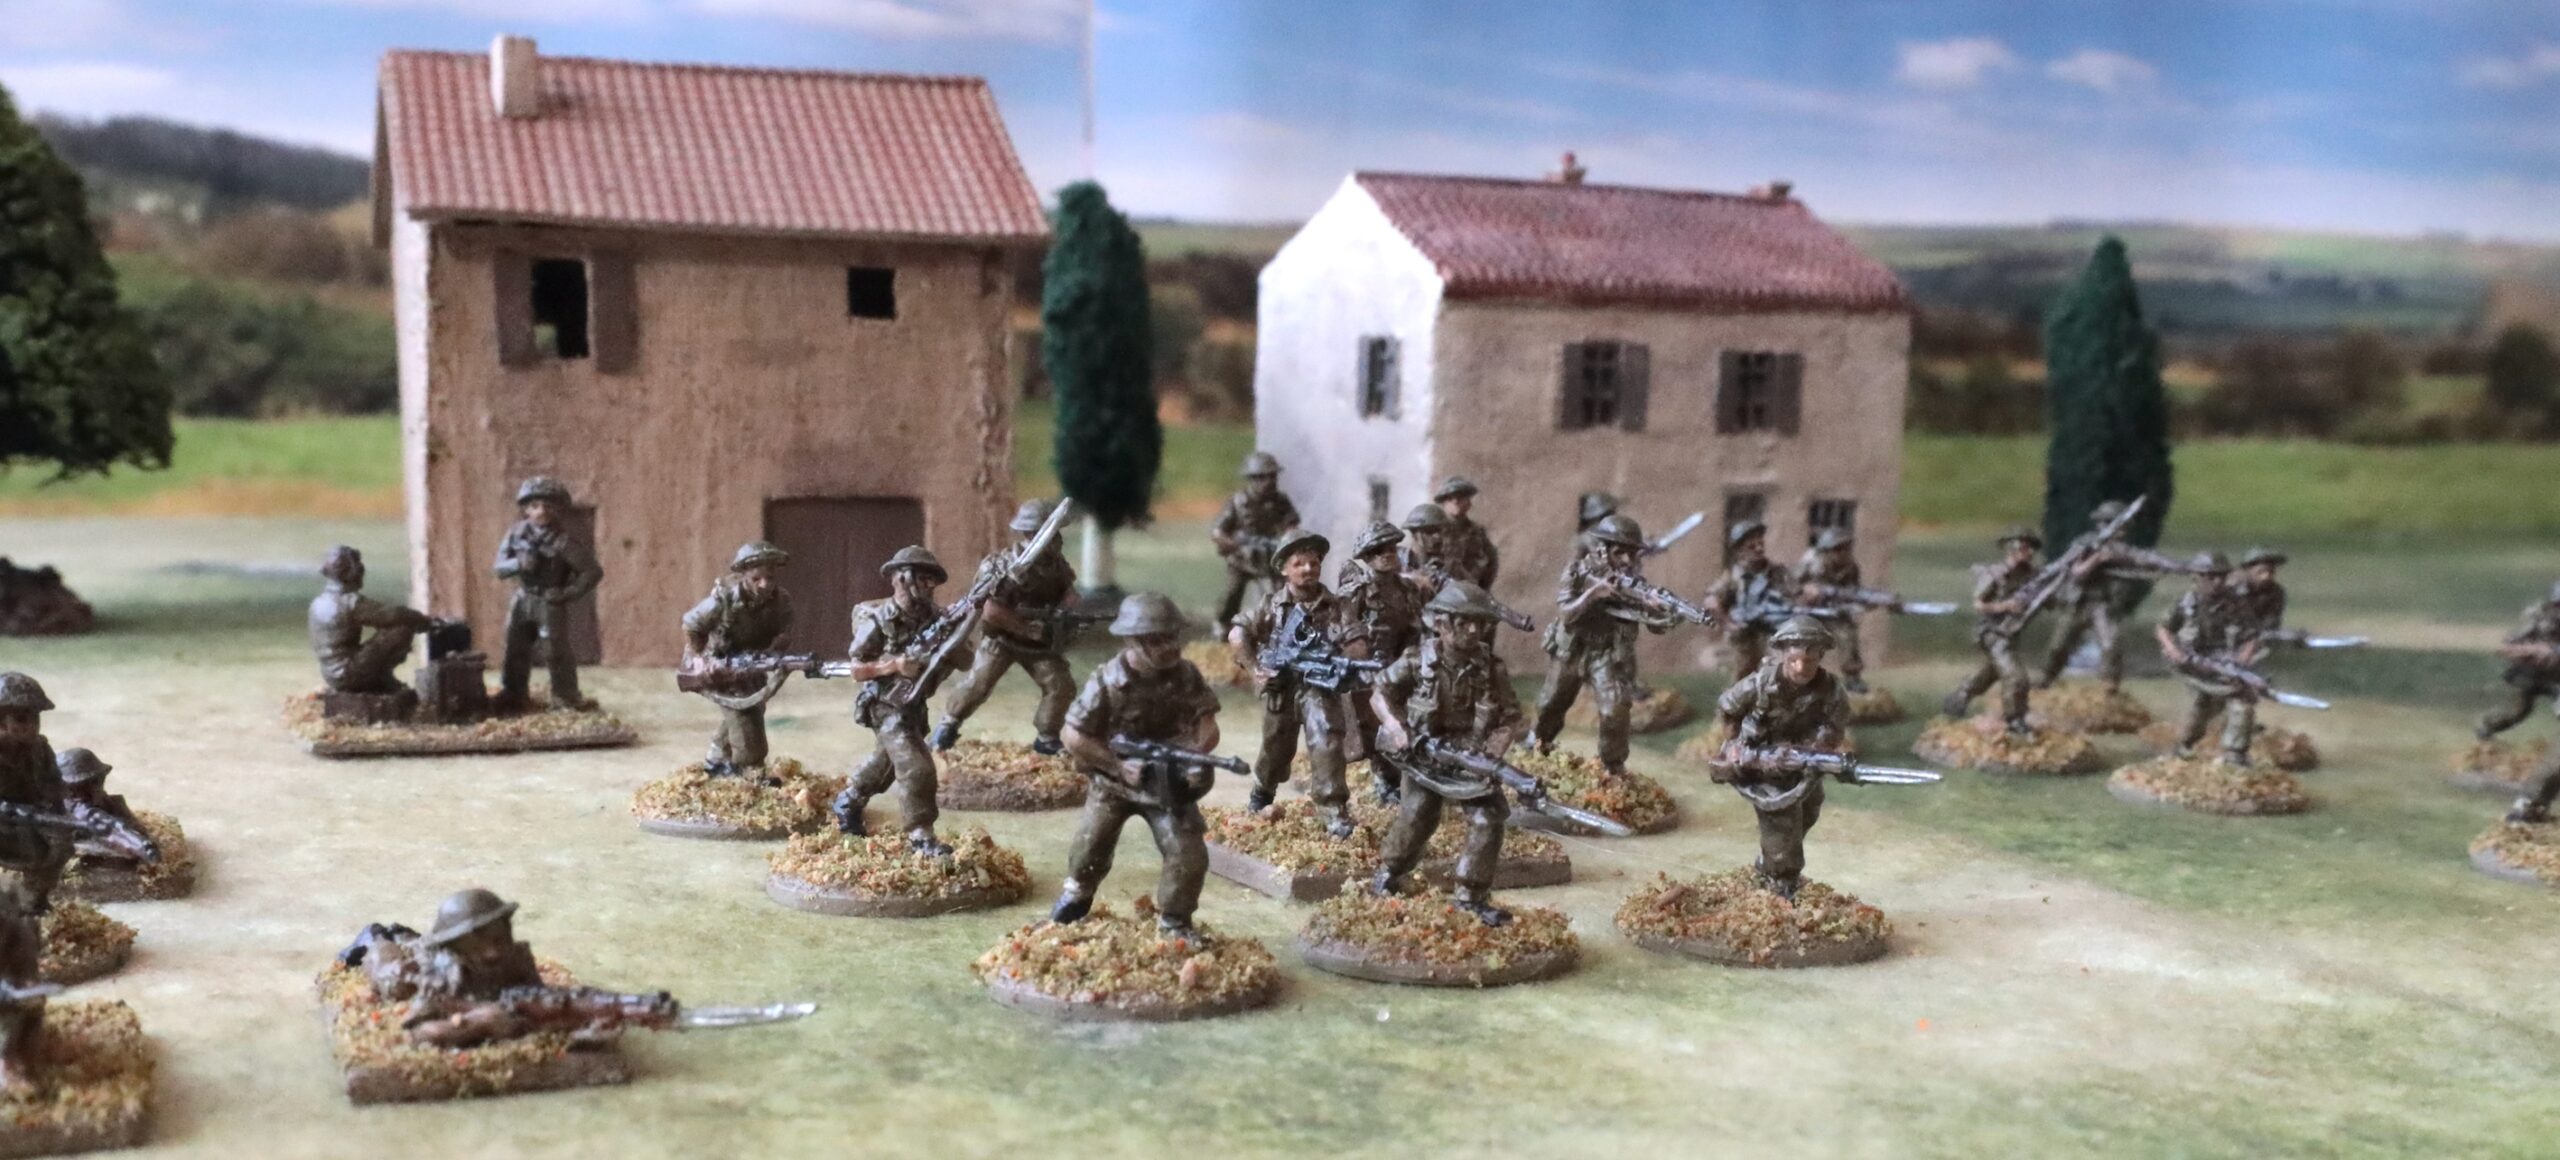
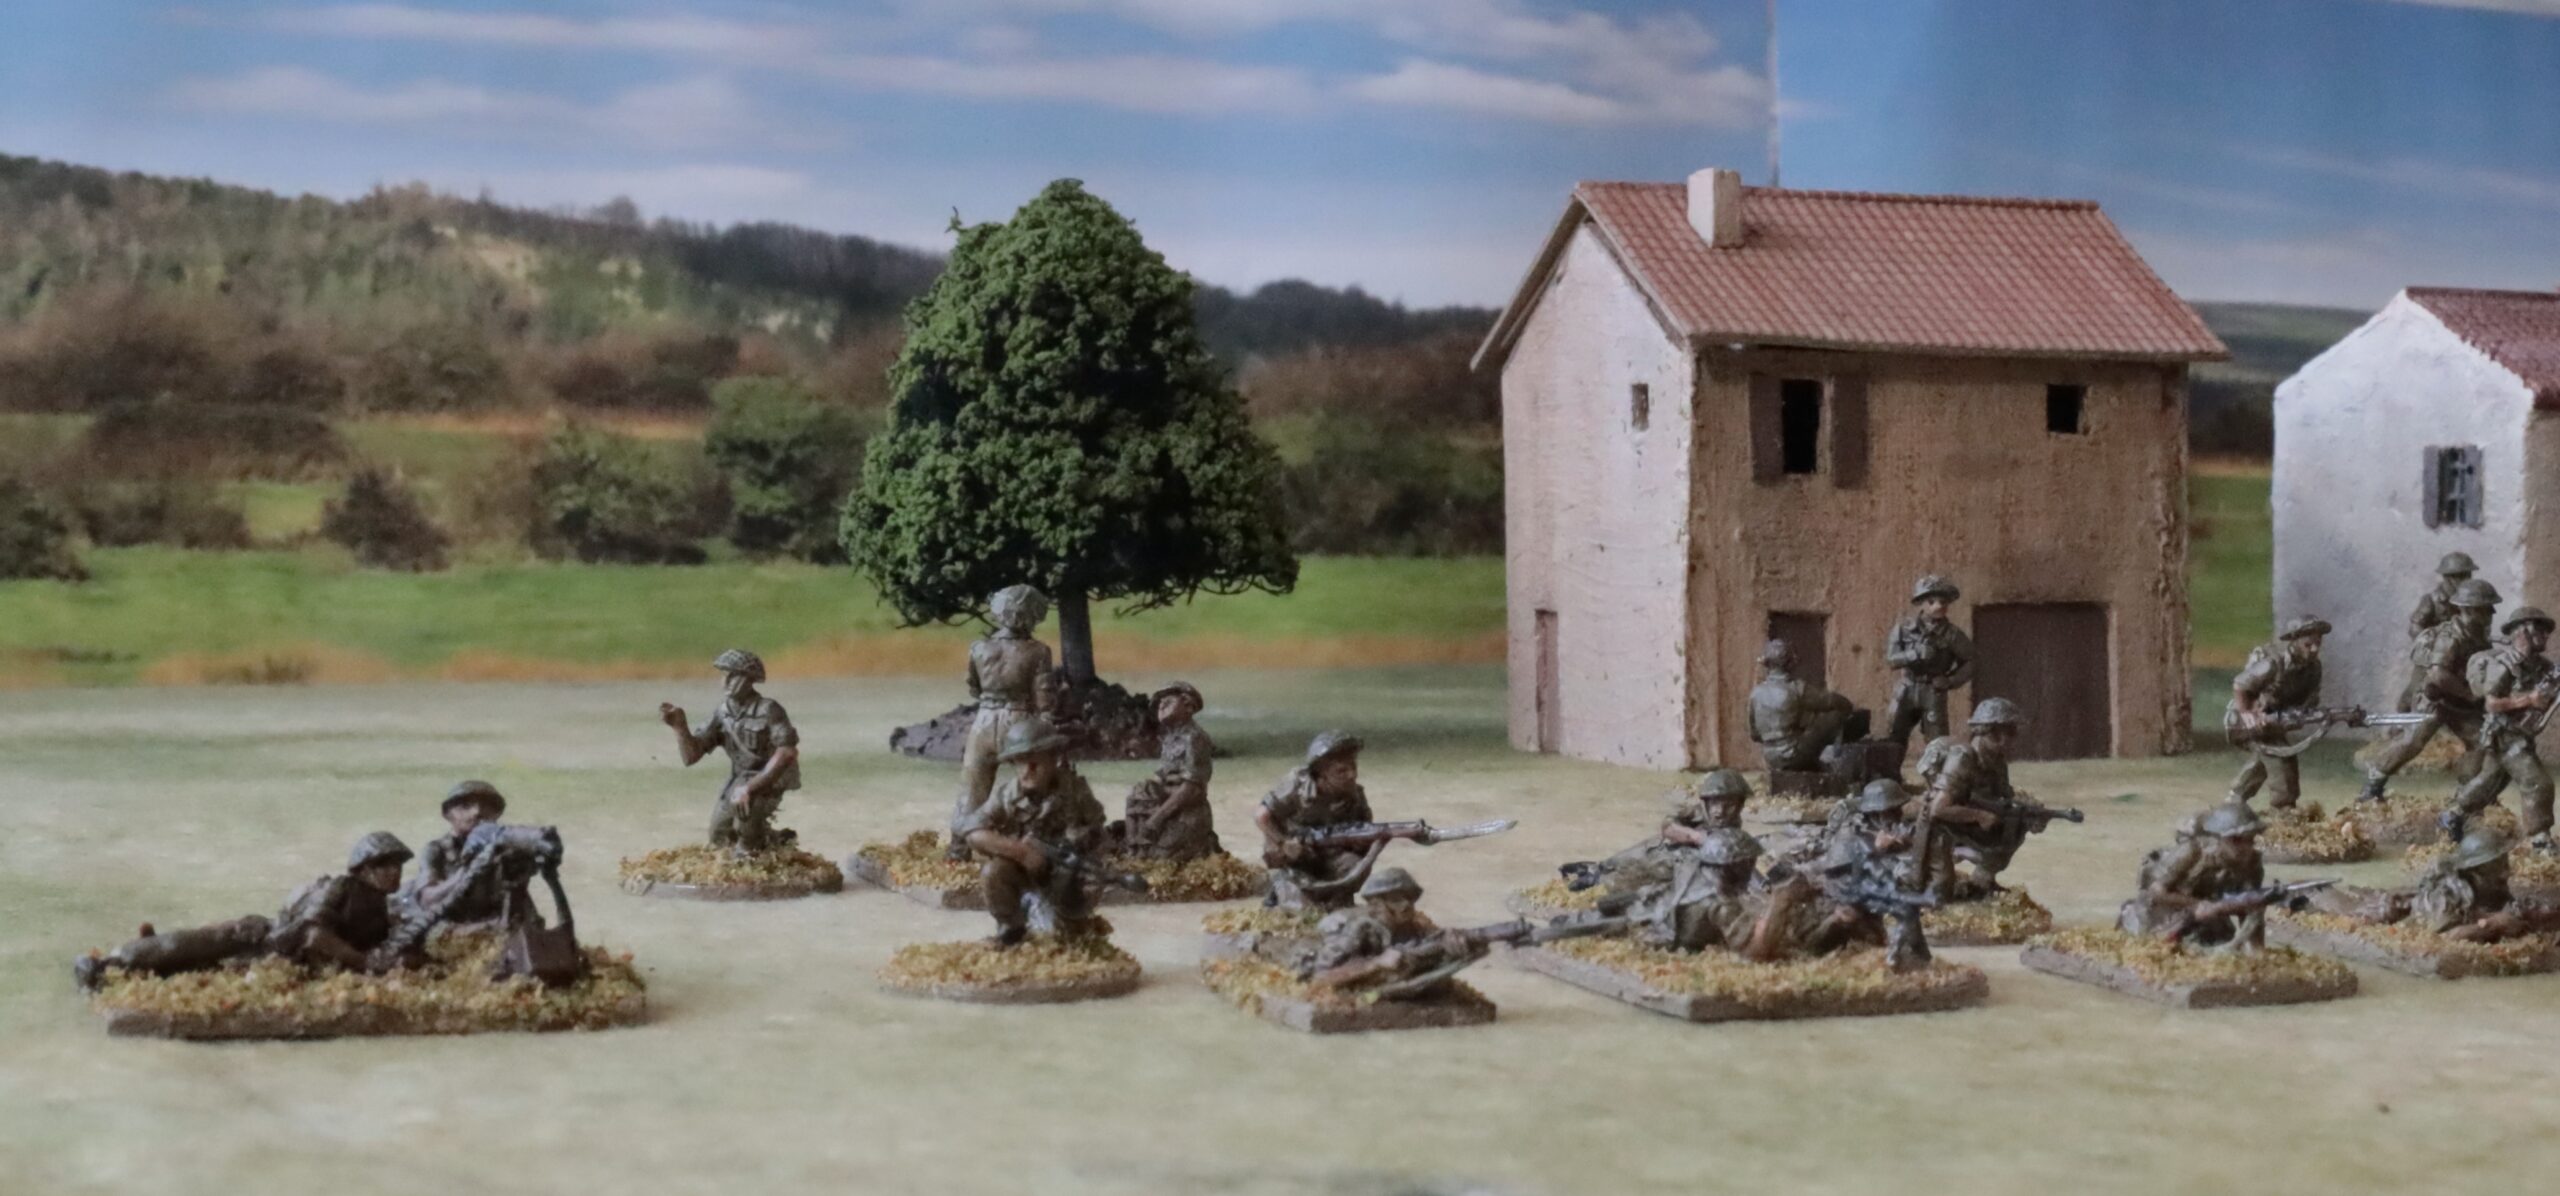
So for this project I assembled some 50+ infantry and artillery crew figures, three 6-pdrs, three carriers, three Bedford lorries, two 25-pdrs plus quads, a CMP light truck, and 17-pdr Pheasant. For this post I will stick to the infantry. Here’s a different perspective on my group photo:
And another, closer up…In the background you can also see a battery command element for the 25-pdrs, which got swept into this photo:
And this one catches the Vickers gun on the end. Loyal readers may notice I have been trying to improve my photography. This now includes a backdrop photo bought from a model railway shop (online). This depicts a a very English looking winter or early spring scene – and I need to pay attention to the join! But it does make the picture look a lot better.
As I already said, these are from the recently introduced AB 20mm British “tropical infantry” range, designed to cover the Med and Far East theatres, when troops weren’t wearing shorts (North Africa) or Burma hats. This works pretty well for my 1943 project – they are wearing the earlier version of the helmet, without scrim, and they are using Tommy guns rather than Stens. In Tunisia it was pretty cold, so even the Eighth Army had abandoned their shorts (though they don’t seem to have bothered with the gaiters, and their helmets were still painted sand) – but their sleeves weren’t rolled up. In Sicily it was pretty hot, and many troops adopted shorts, though not as consistently as in the Western Desert. For Salerno, these figures are just right; later in Italy it tuned cold and wet. I’m making no attempt to get the figures, vehicles and guns to look exactly right for each scenario – and if there is one episode that I’m focusing on, it is indeed Salerno, in spite of my struggles with scenarios. So this range was perfect. I had three packs of advancing infantry, one prone infantry, and a Support 2 pack, with a 3in mortar and Vickers gun. The Support 1 pack has a flamethrower, 2in mortar, AT rifle and a PIAT – and I will doubtless get these later – but I have plenty of 2in mortars and PIATs in the later uniform. (PIATs were not in use in Tunisia – so I could probably have use the AT rifle).
The bases are mainly metal washers, but the prone figures and support weapons required bases cut out from mount board. I decided to have only two crew for the mortar and Vickers (three were provided in the pack) to keep the bees size down. These were plastered with the usual mix of acrylic medium, sand and paint (a mix of white and raw umber) to integrate the figure bases. Once mounted the figures were given an undercoat of artists’ gesso (which is white) mixed with some raw umber. The raw umber and white mix gives a nice neutral grey-brown colour, which is now my go-to base colour for figure paining across all eras. It means that any gaps in painting don’t show up. Then came the usual paint job in various mixes of Liquitex artists’ acrylics. For the uniforms this comprised Raw Sienna (orange-brown), Titanium White and Prussian Blue (not much of the last of these, but it’s needed to get khaki), plus a little green for the helmets. The flesh was based on white and Burnt Sienna (red-brown), but once I get the palette going I keep throwing in bits of this and that. This came out a bit on the dark side, but I did want to get tanned flesh, but with a slight pinkish hue. I’m not entirely convinced, but it probably roughly simulates how my own fair flesh would look in those conditions. I’m painting less detail on the figures these days, so the water bottles and bayonet sheathes did not get more than cursory attention, for example. One innovation for this batch was the use of a light/magnifier. My short-range eyesight is pretty decent, but this in fact proved a big help.
Once the basic paint was laid down I was left with the vexed question of how to finish. With my previous WW2 figures I have used ink washes or oil medium glazes, followed by matt varnish spray. This leaves a very harsh matt finish which I don’t really like – though it’s quite fashionable these days. I have recently tried to moderate this by applying a little not-so-matt varnish with a brush – on flesh, weapons and helmets, but I have been rather underwhelmed by the result. As an experiment this time I mixed some black and brown ink into some Liquitex matt varnish (which is very fluid and dries off-matt). Alas I overdid the black ink and the effect was too dark. I had to go back to the figures highlighting the paler bits, including the flesh. This took me to the margins of the level of shine I can tolerate on WW2 figures (I have a much higher tolerance for earlier eras), but brought out the wonderful AB castings very nicely. I need to go a bit easier on the black ink (the stuff I have is extremely powerful), but otherwise I think I’ve found a good technique.
For my rules system I will need to mount these men in pairs on temporary bases – as I have already done with my other infantry using lower-adhesion Copydex. I still want to be able to use as singles if I want to try platoon level games. Next time: the artillery.