After the first WW2 aircraft for my wargames collection, the P-47 Thunderbolt, I decided that I needed to have flight stands ready before I attempted my next set of models, and to build in the mounting from the start. This would have the advantage of having somewhere to put models while paint was drying, etc. I had hoped to be able to buy something that could be used straightaway. The closest I could find came from Debris of War, which was really meant for smaller scales. This was very neat, but I thought it really wouldn’t work for larger models, just as they said; apart from anything else it doesn’t extend that high. I would have to make my own. This turned out to be not especially hard. In this post I will explain how I did it. There are a couple of things I learnt on the way, so this may help anybody who wants to do something similar.
The starting point is a magnetic, extendable pickup tool. There are quite a few on the market. I tried out two different sorts. The obvious choice was the Amtech 2255 which can be had for a mere £2.59 on Amazon. Worried that this was too good to be true, I also bought another one from Raguso, which sells at £5.89 on Amazon. The Amtech is bulkier and extends a few centimetres less than the Raguso; the magnet at the end has a wider diameter, which is probably better for my purposes. But both work fine. The magnets are quite powerful, making the attachment pretty secure for models assembled from plastic kits. The Amtech is cheaper and delivery from Amazon is much quicker; there really is no reason not to go for this one, so I bought a few of them.
Both have basically the same structure: a telescopic arm (like an aerial) with a magnet fixed at one end, and with a pocket clip at the other end secured with a screw-in top. This is the Amtech one dis-assembled:
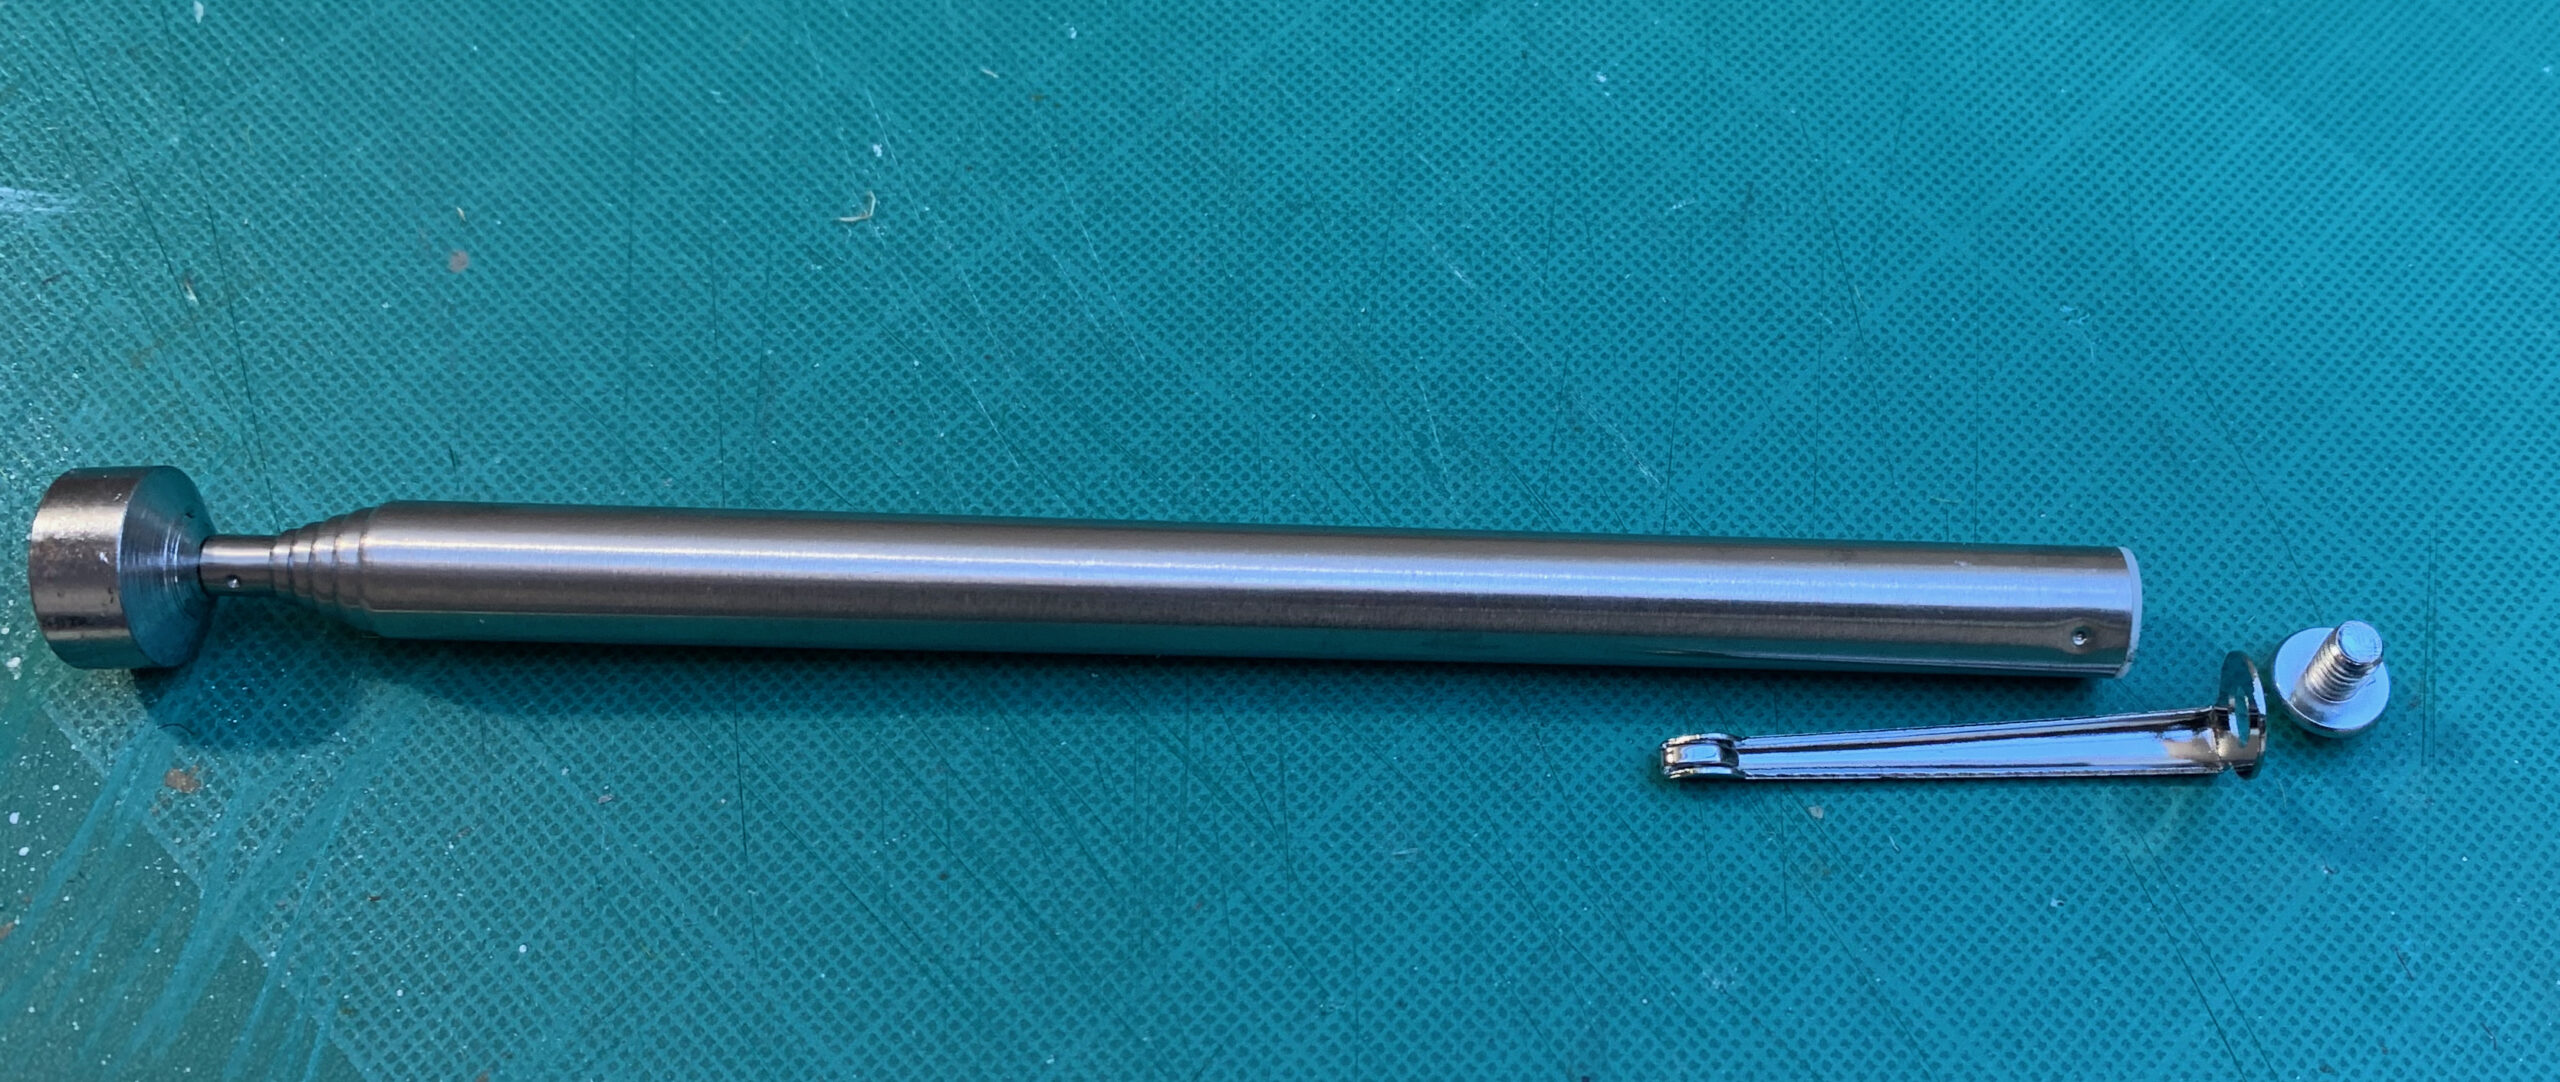
The clip serves no function for us, but the removable top comes in handy. This is bigger and domed on the Amtech; the Raguso one is neater and flatter. Next we need a base. I cut this from hardboard, simply because I had some lying around that needed to be used up. This material works, but is not so good for drilling holes in, as I found out later. MDF or hard plastic/acetate would probably be more appropriate. I cut out four inch squares. I thought this would give the best balance between stability and footprint. Something slightly smaller might well be just as good if I you weight it down properly. It doesn’t need to be bigger. I used the square shape because I wasn’t up for cutting out a circle, and I quite like squares on the games table anyway. I think you can get pre-cut circles of MDF or acetate quite easily.
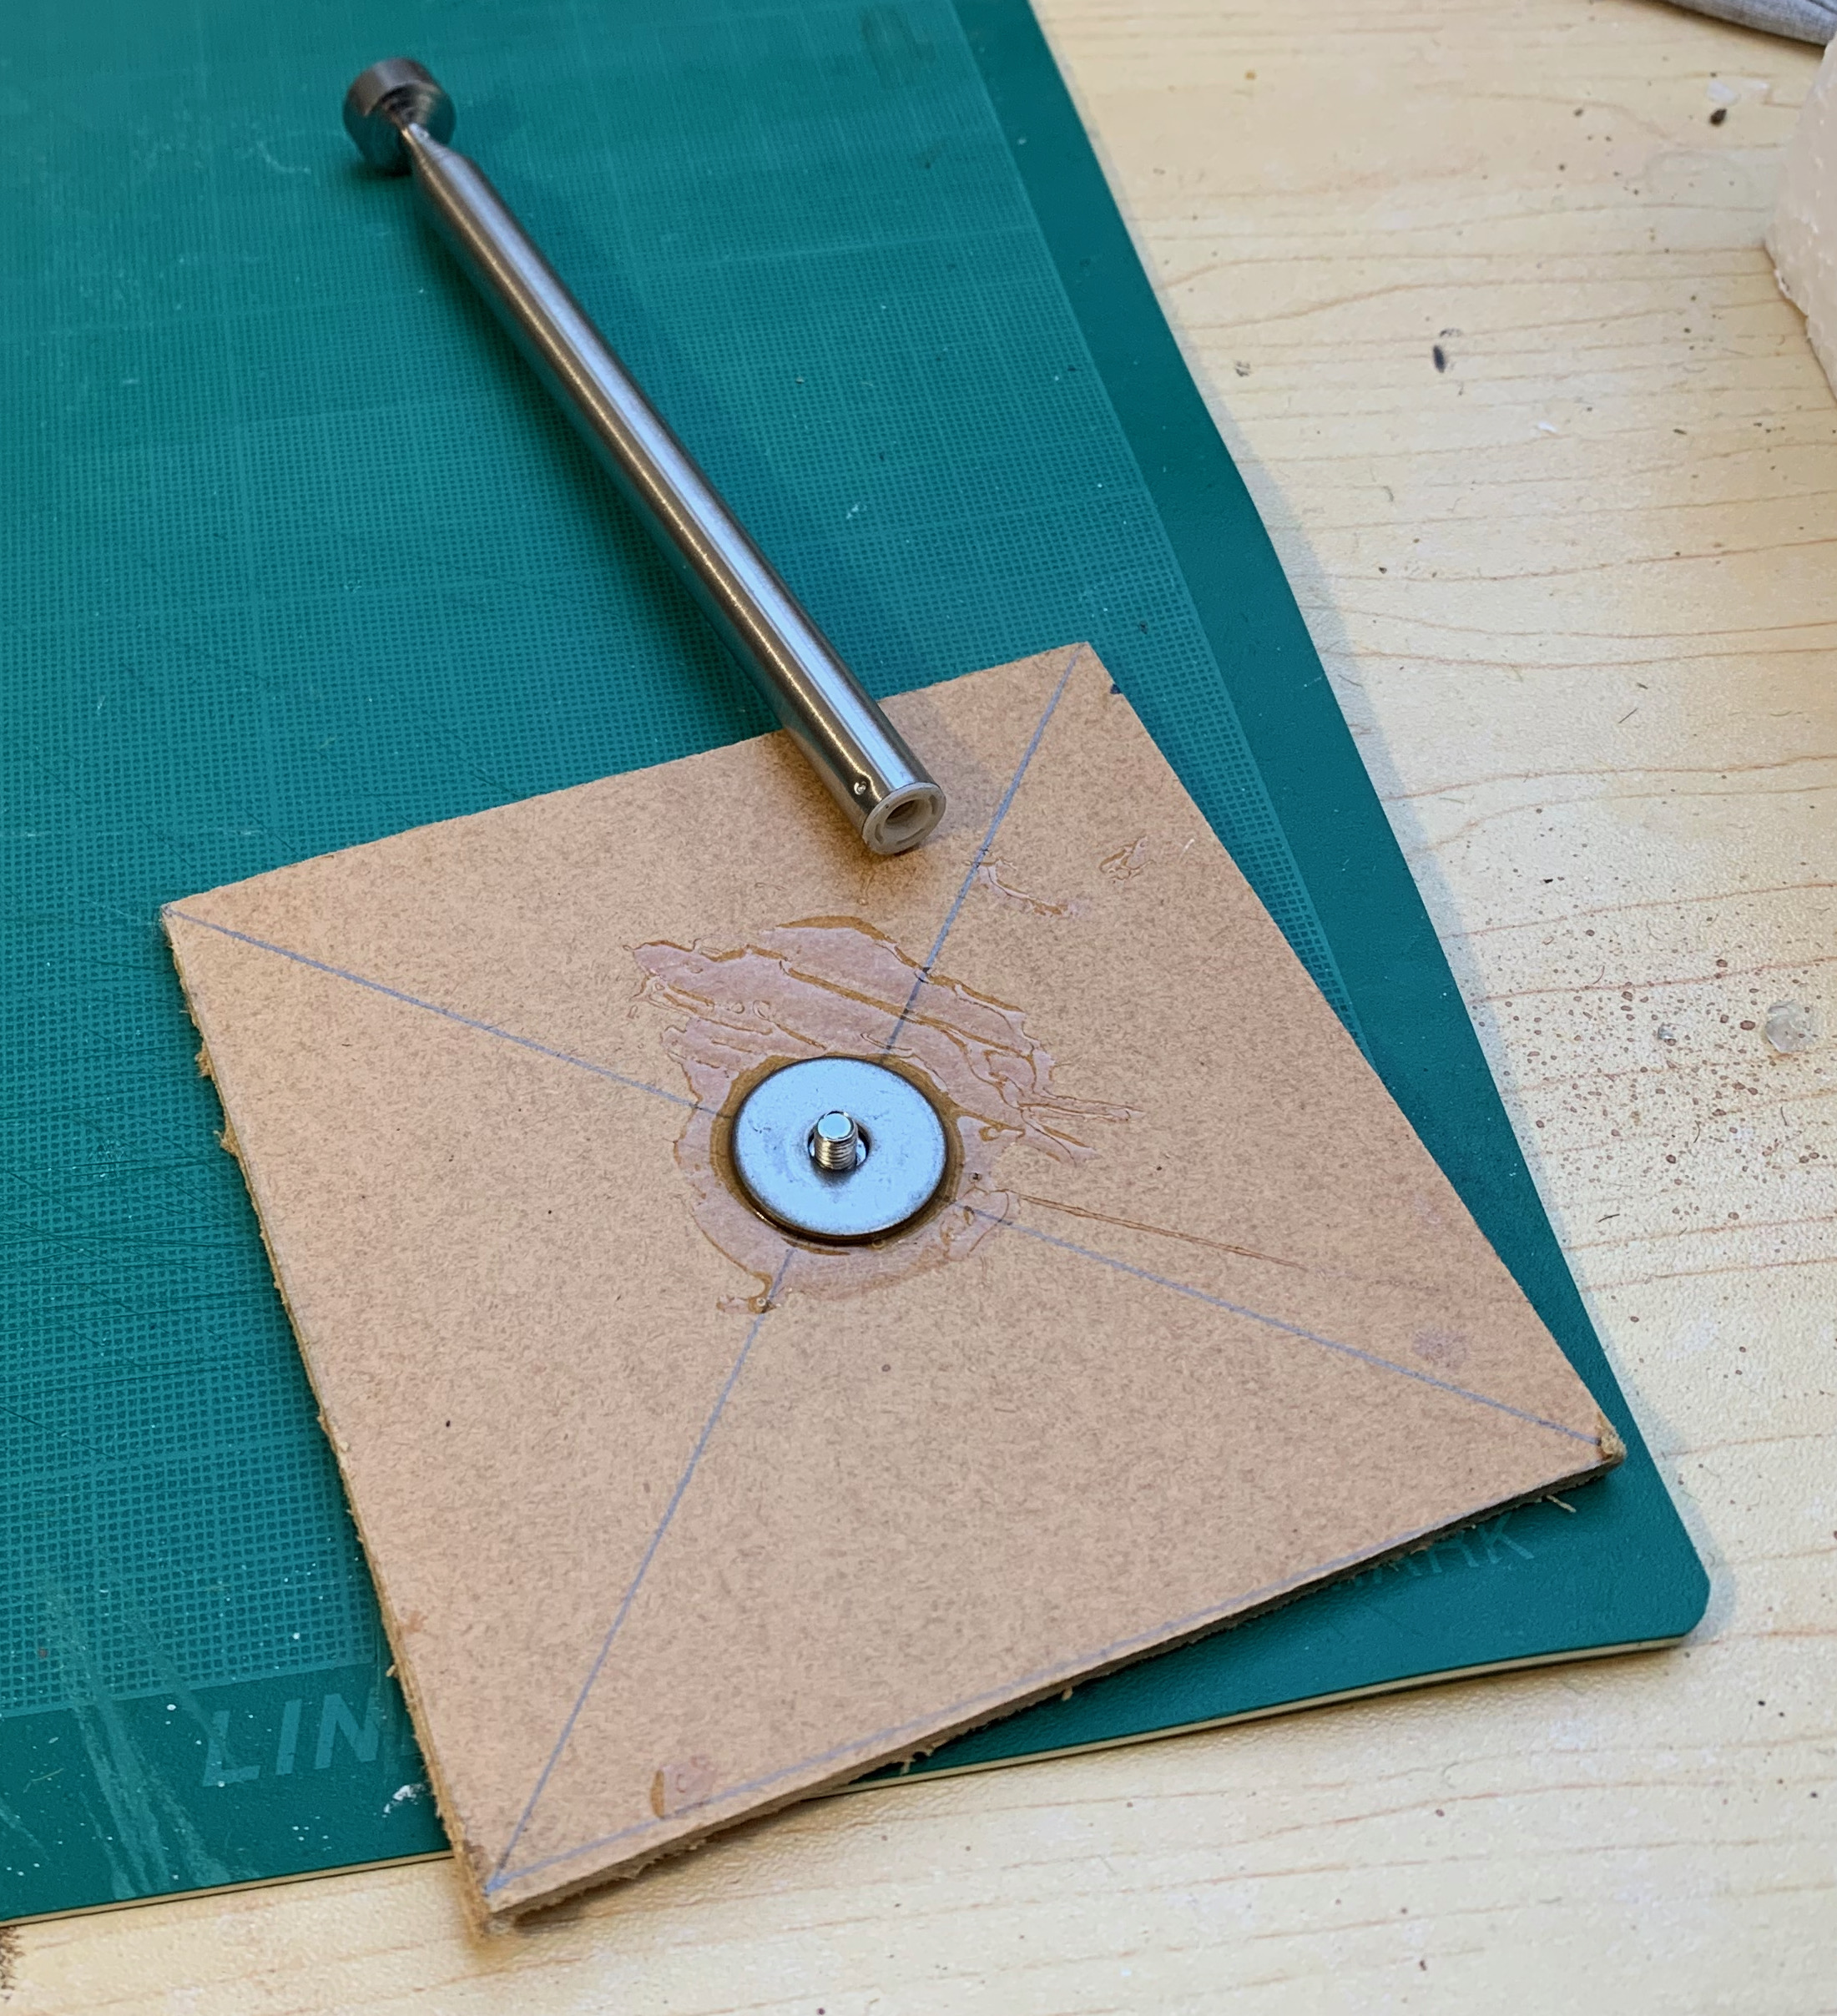
So how to fix the arm to the base? My first idea was to glue the screw-in top into a recess drilled into the base, and then screw the arm onto that. However, the need to make sure the arm was properly vertical meant that in practice I needed to glue the whole assembly in. Then there was the question of adhesive. Having read that people used “liquid nails” I tried Unibond No More Nails. This failed. The adhesive didn’t bond particularly strongly in the context, and in a any case simply trying to glue the arm to the base was asking for trouble, given the leverage on the arm and the sort of forces that the joint was going to have to withstand. Take two. This time I drilled a hole right through the base. Hardboard has a bit of give, meaning that the it bulged a bit on the exit side of the hole, which had to be tidied up with a knife. I then glued a 2cm mudguard washer over the hole. I found some ancient Araldite in my things and I used this, having lost faith in No More Nails. Here is the result, with the Amtech device. Because the drilled hole was slightly bigger than the diameter of the top, I widened it a bit at the top and glued the washer in with it in place. This wasn’t necessary with the Raguso device.
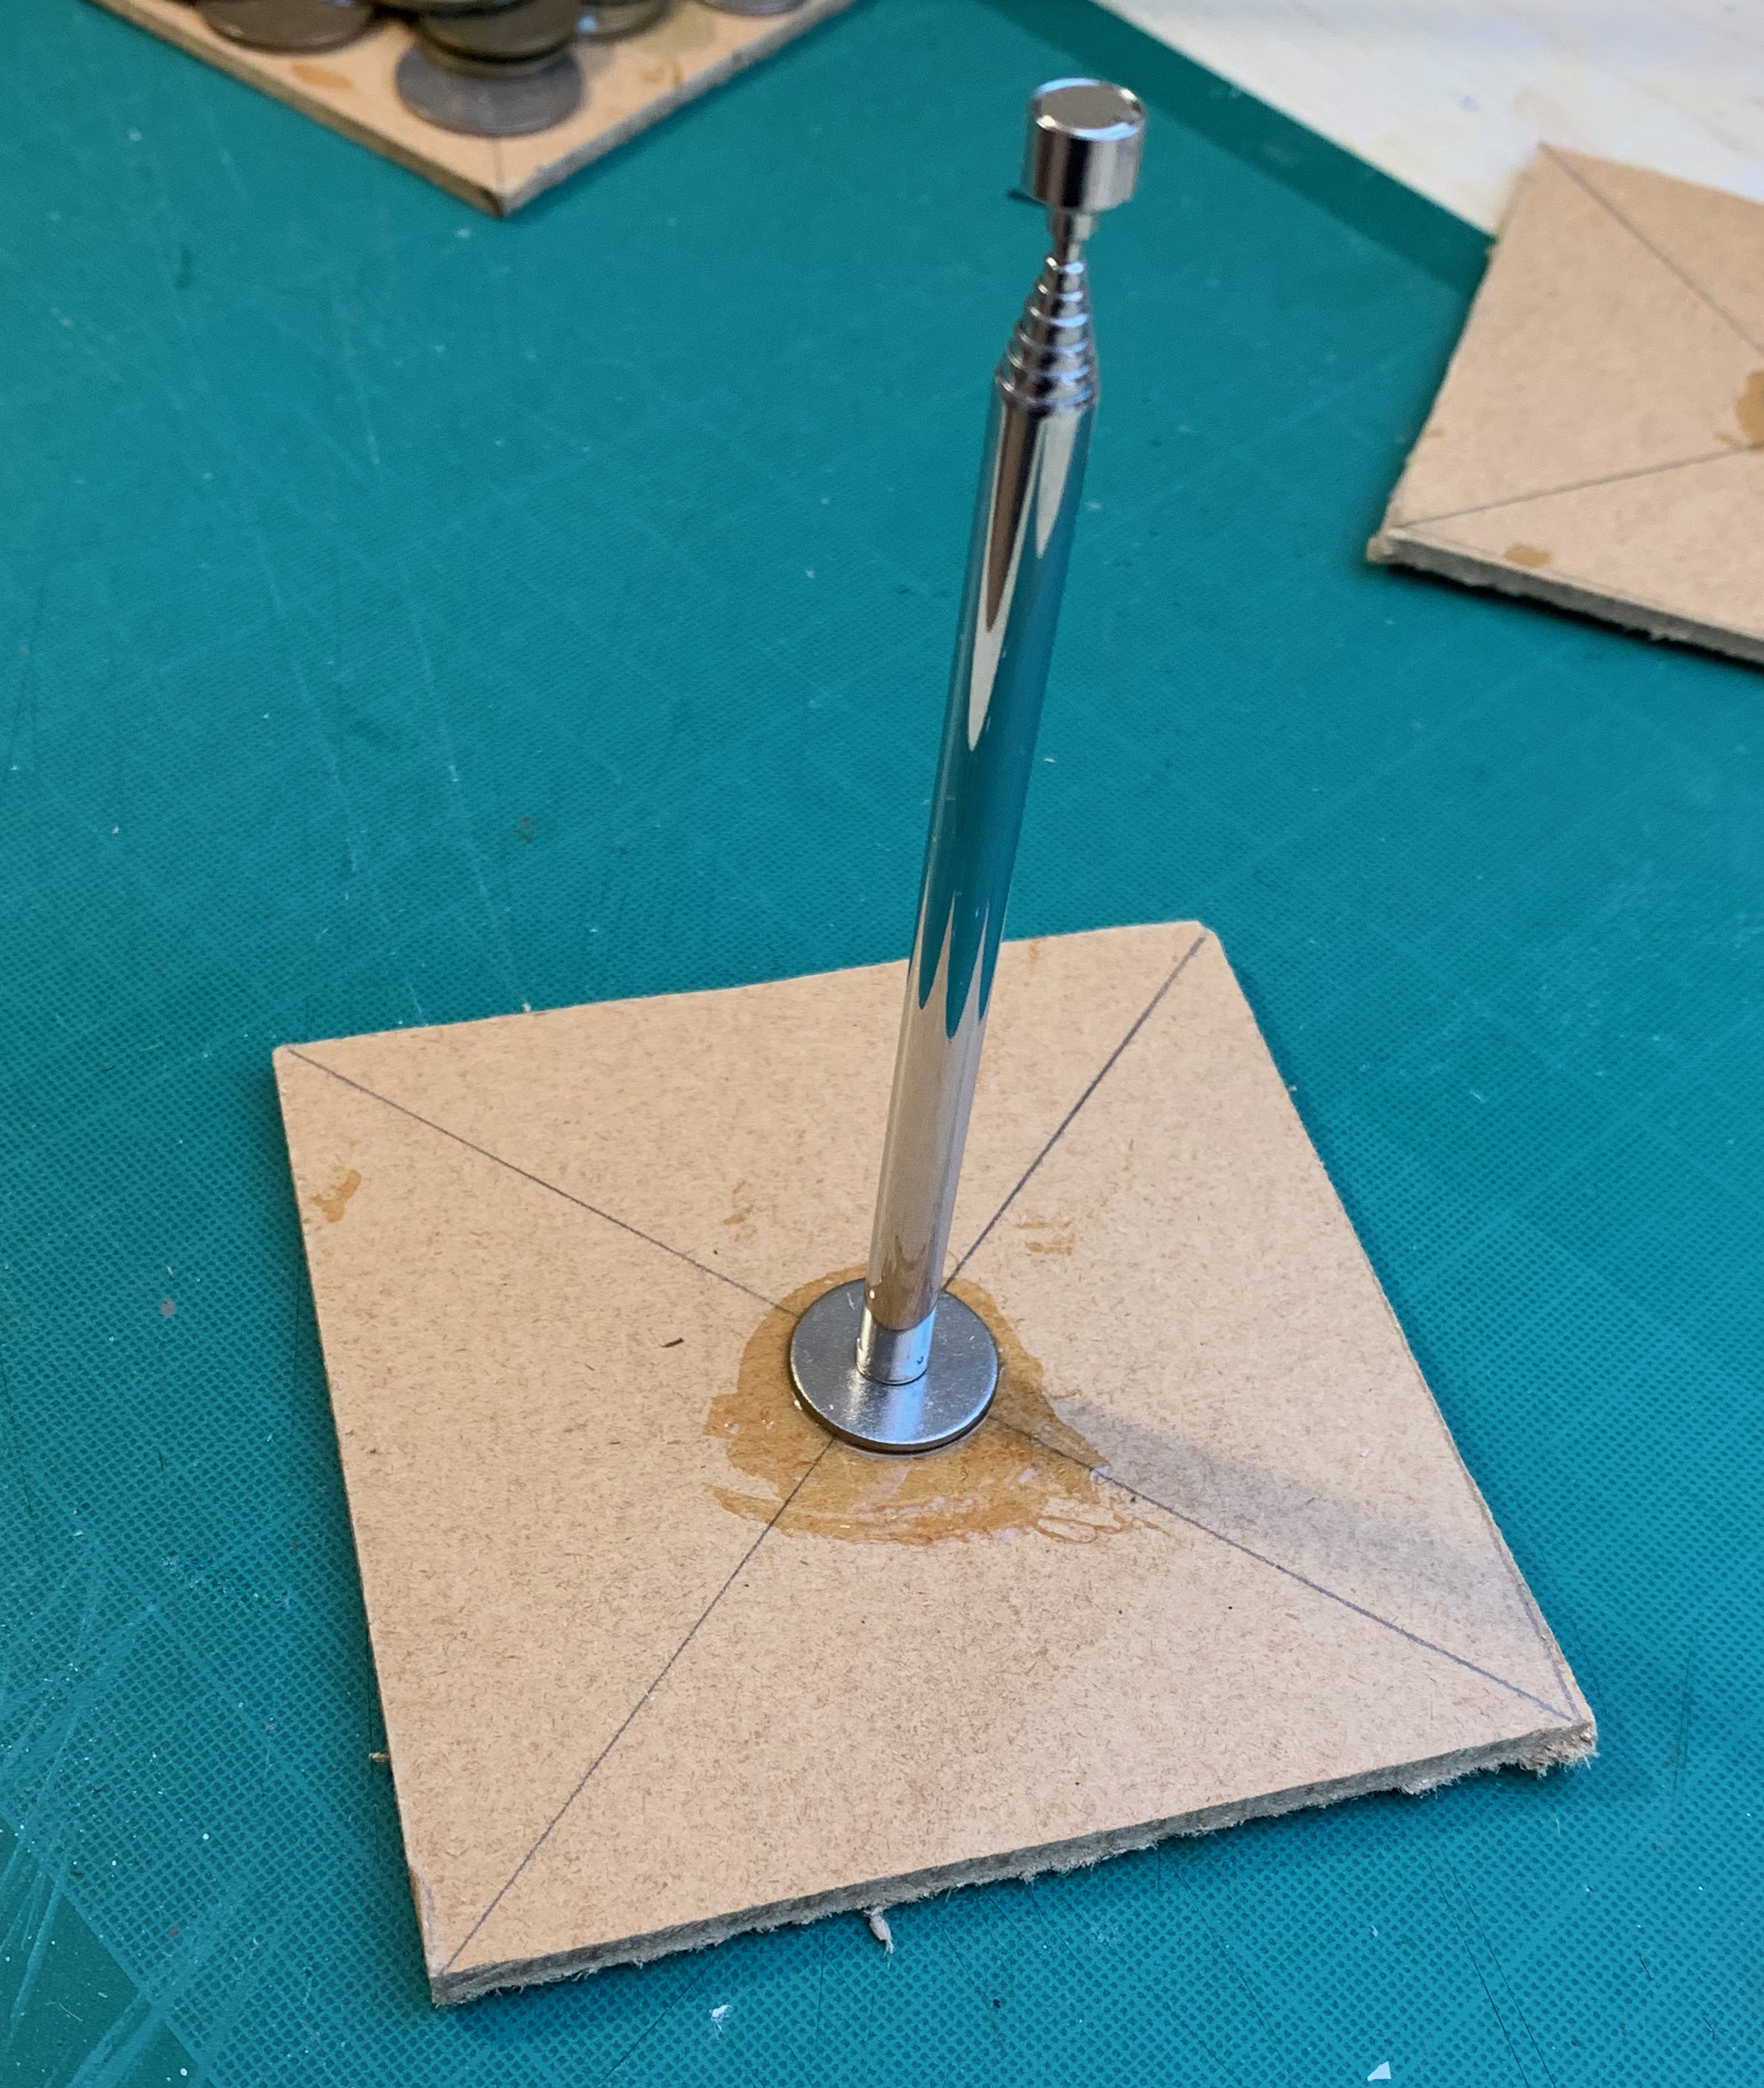
The arm was then simply screwed onto the washer with the top, to create a very satisfactory fixing. This is the Raguso one.
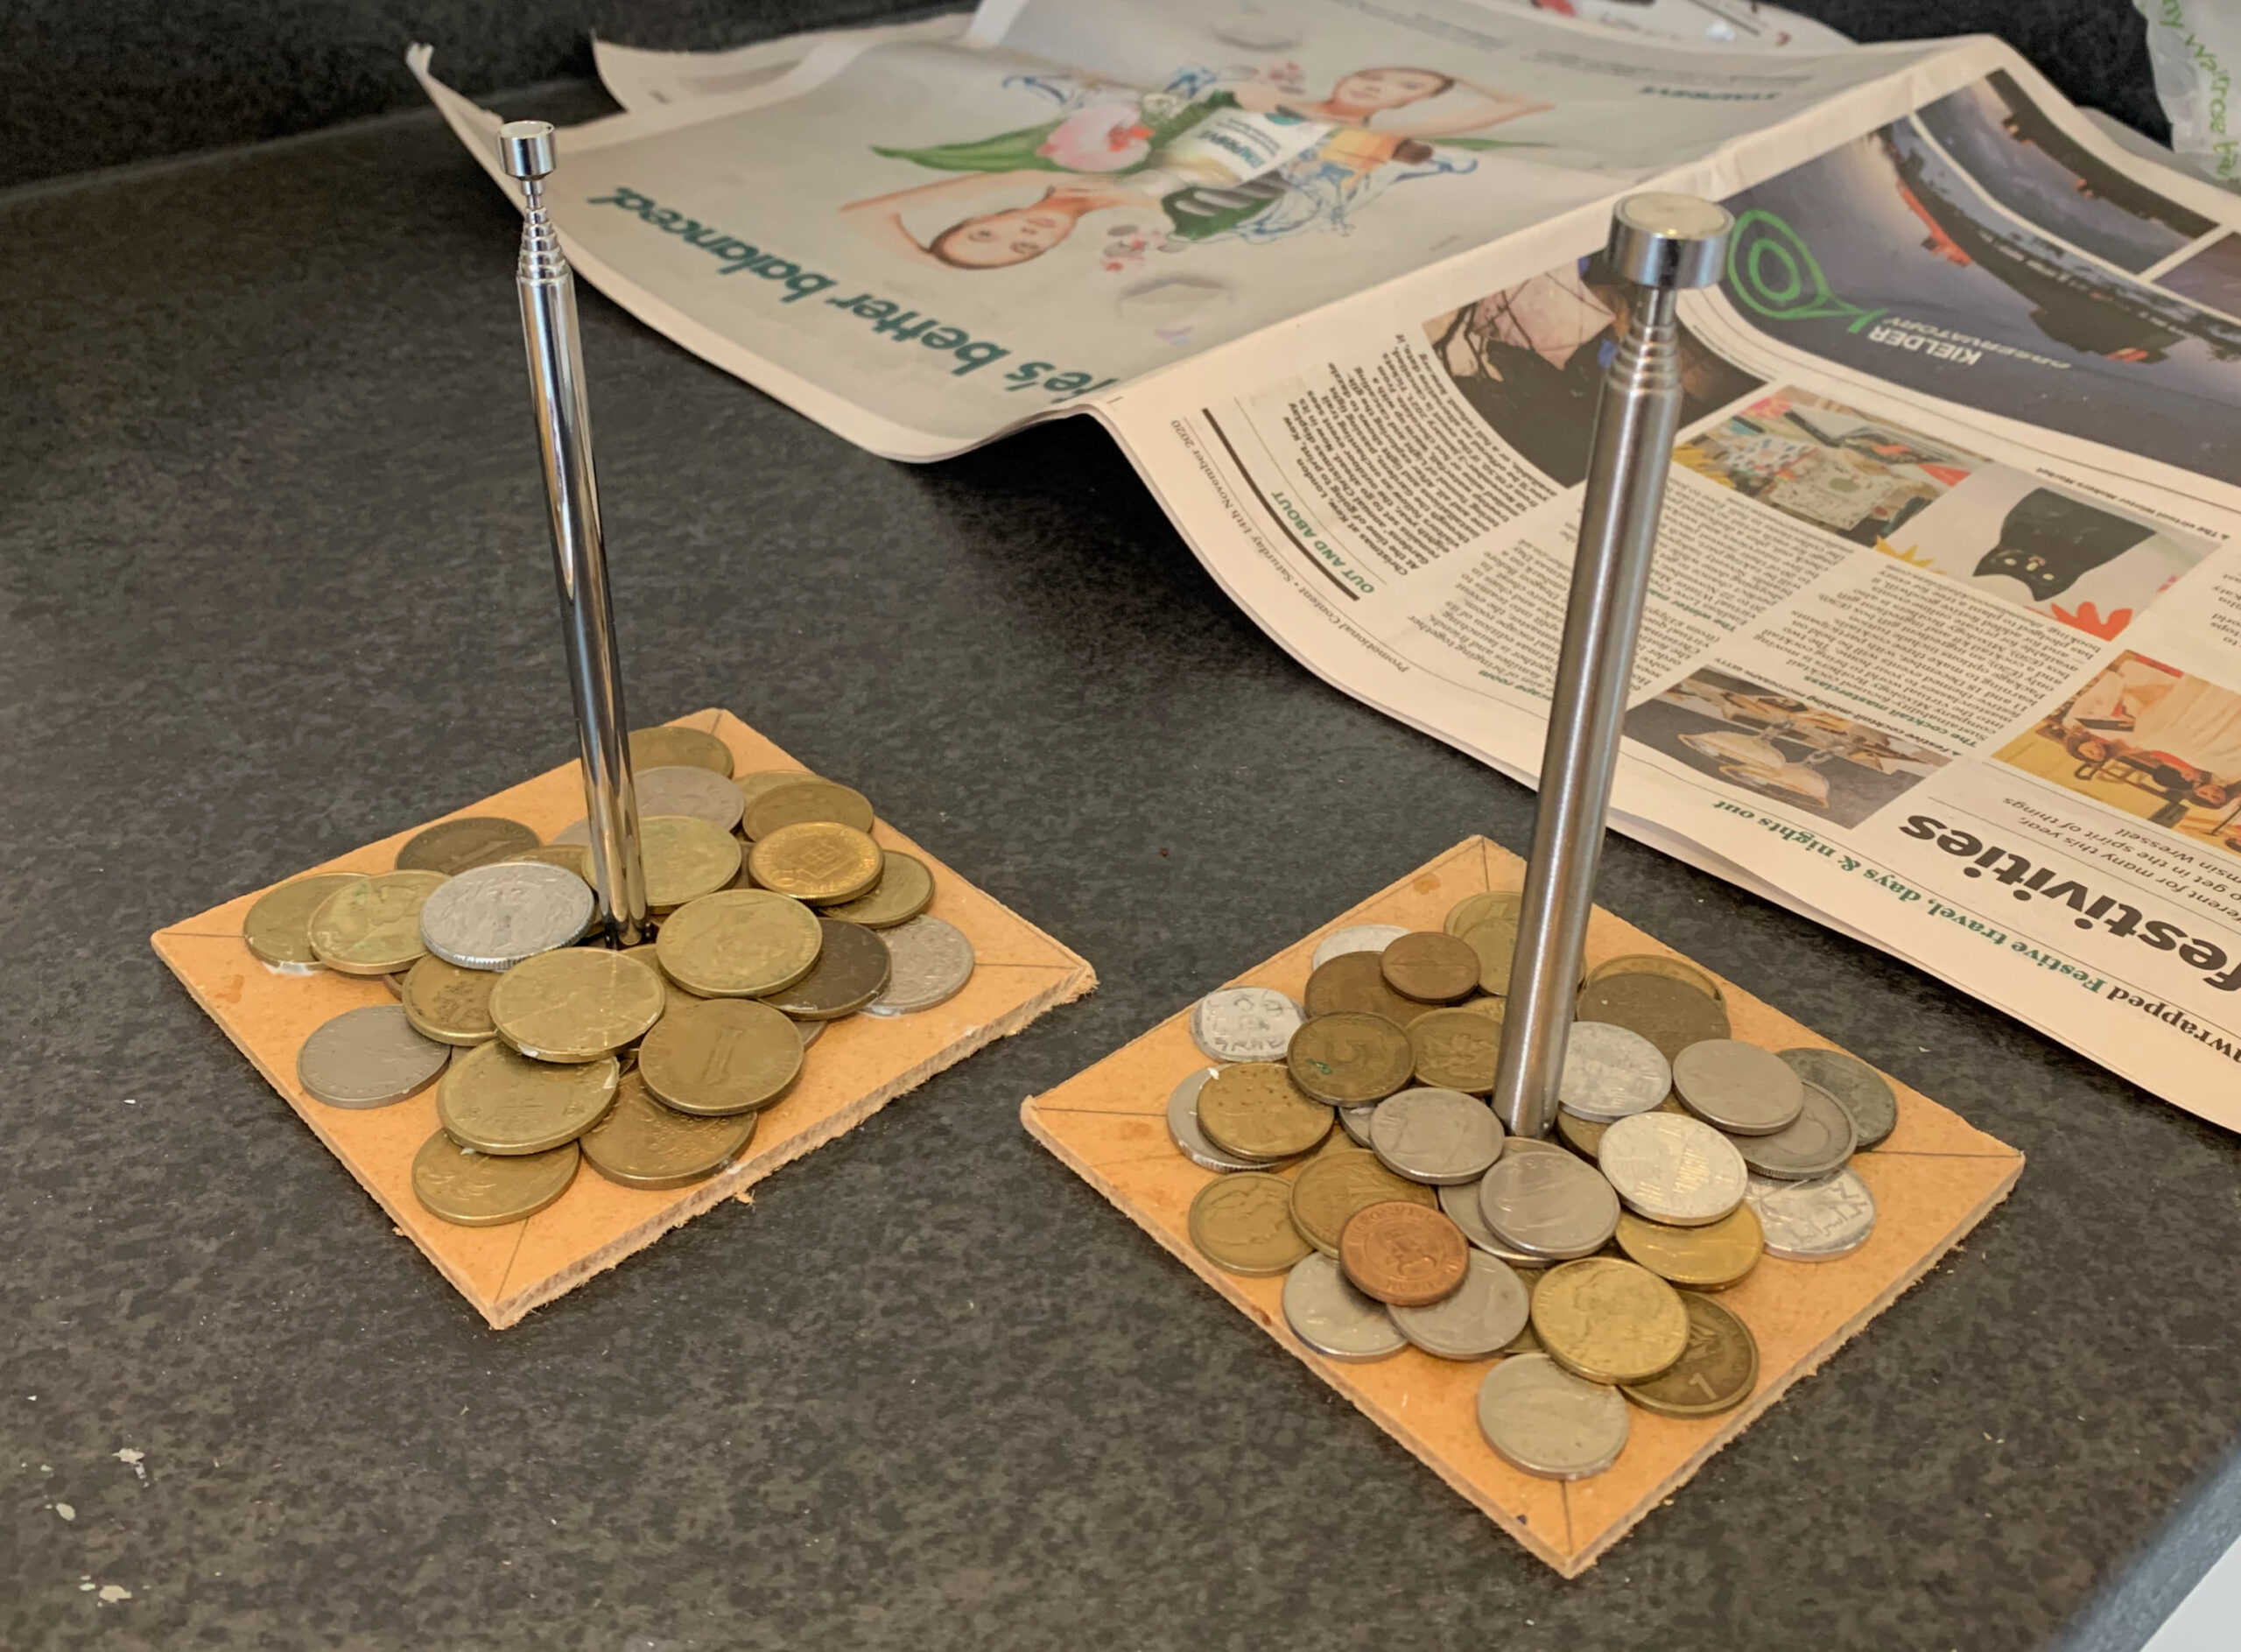
Next I felt the need to add extra weight to the base to ensure it was properly stable, especially with the arm extended. For this I used a collection of old coins I had from my 20th Century travels, including a lot of pre-Euro ones. I sifted out the ones that were attracted to a magnet, as I though these might have other uses. Other alternatives might include washers or similar bits of hardware, which can be had very cheaply from specialist suppliers like RS. One blog I read used a small number of very large washers for this, and that looks a good way to go. I used the No More Nails to glue them on. This shows one of each type of arm;
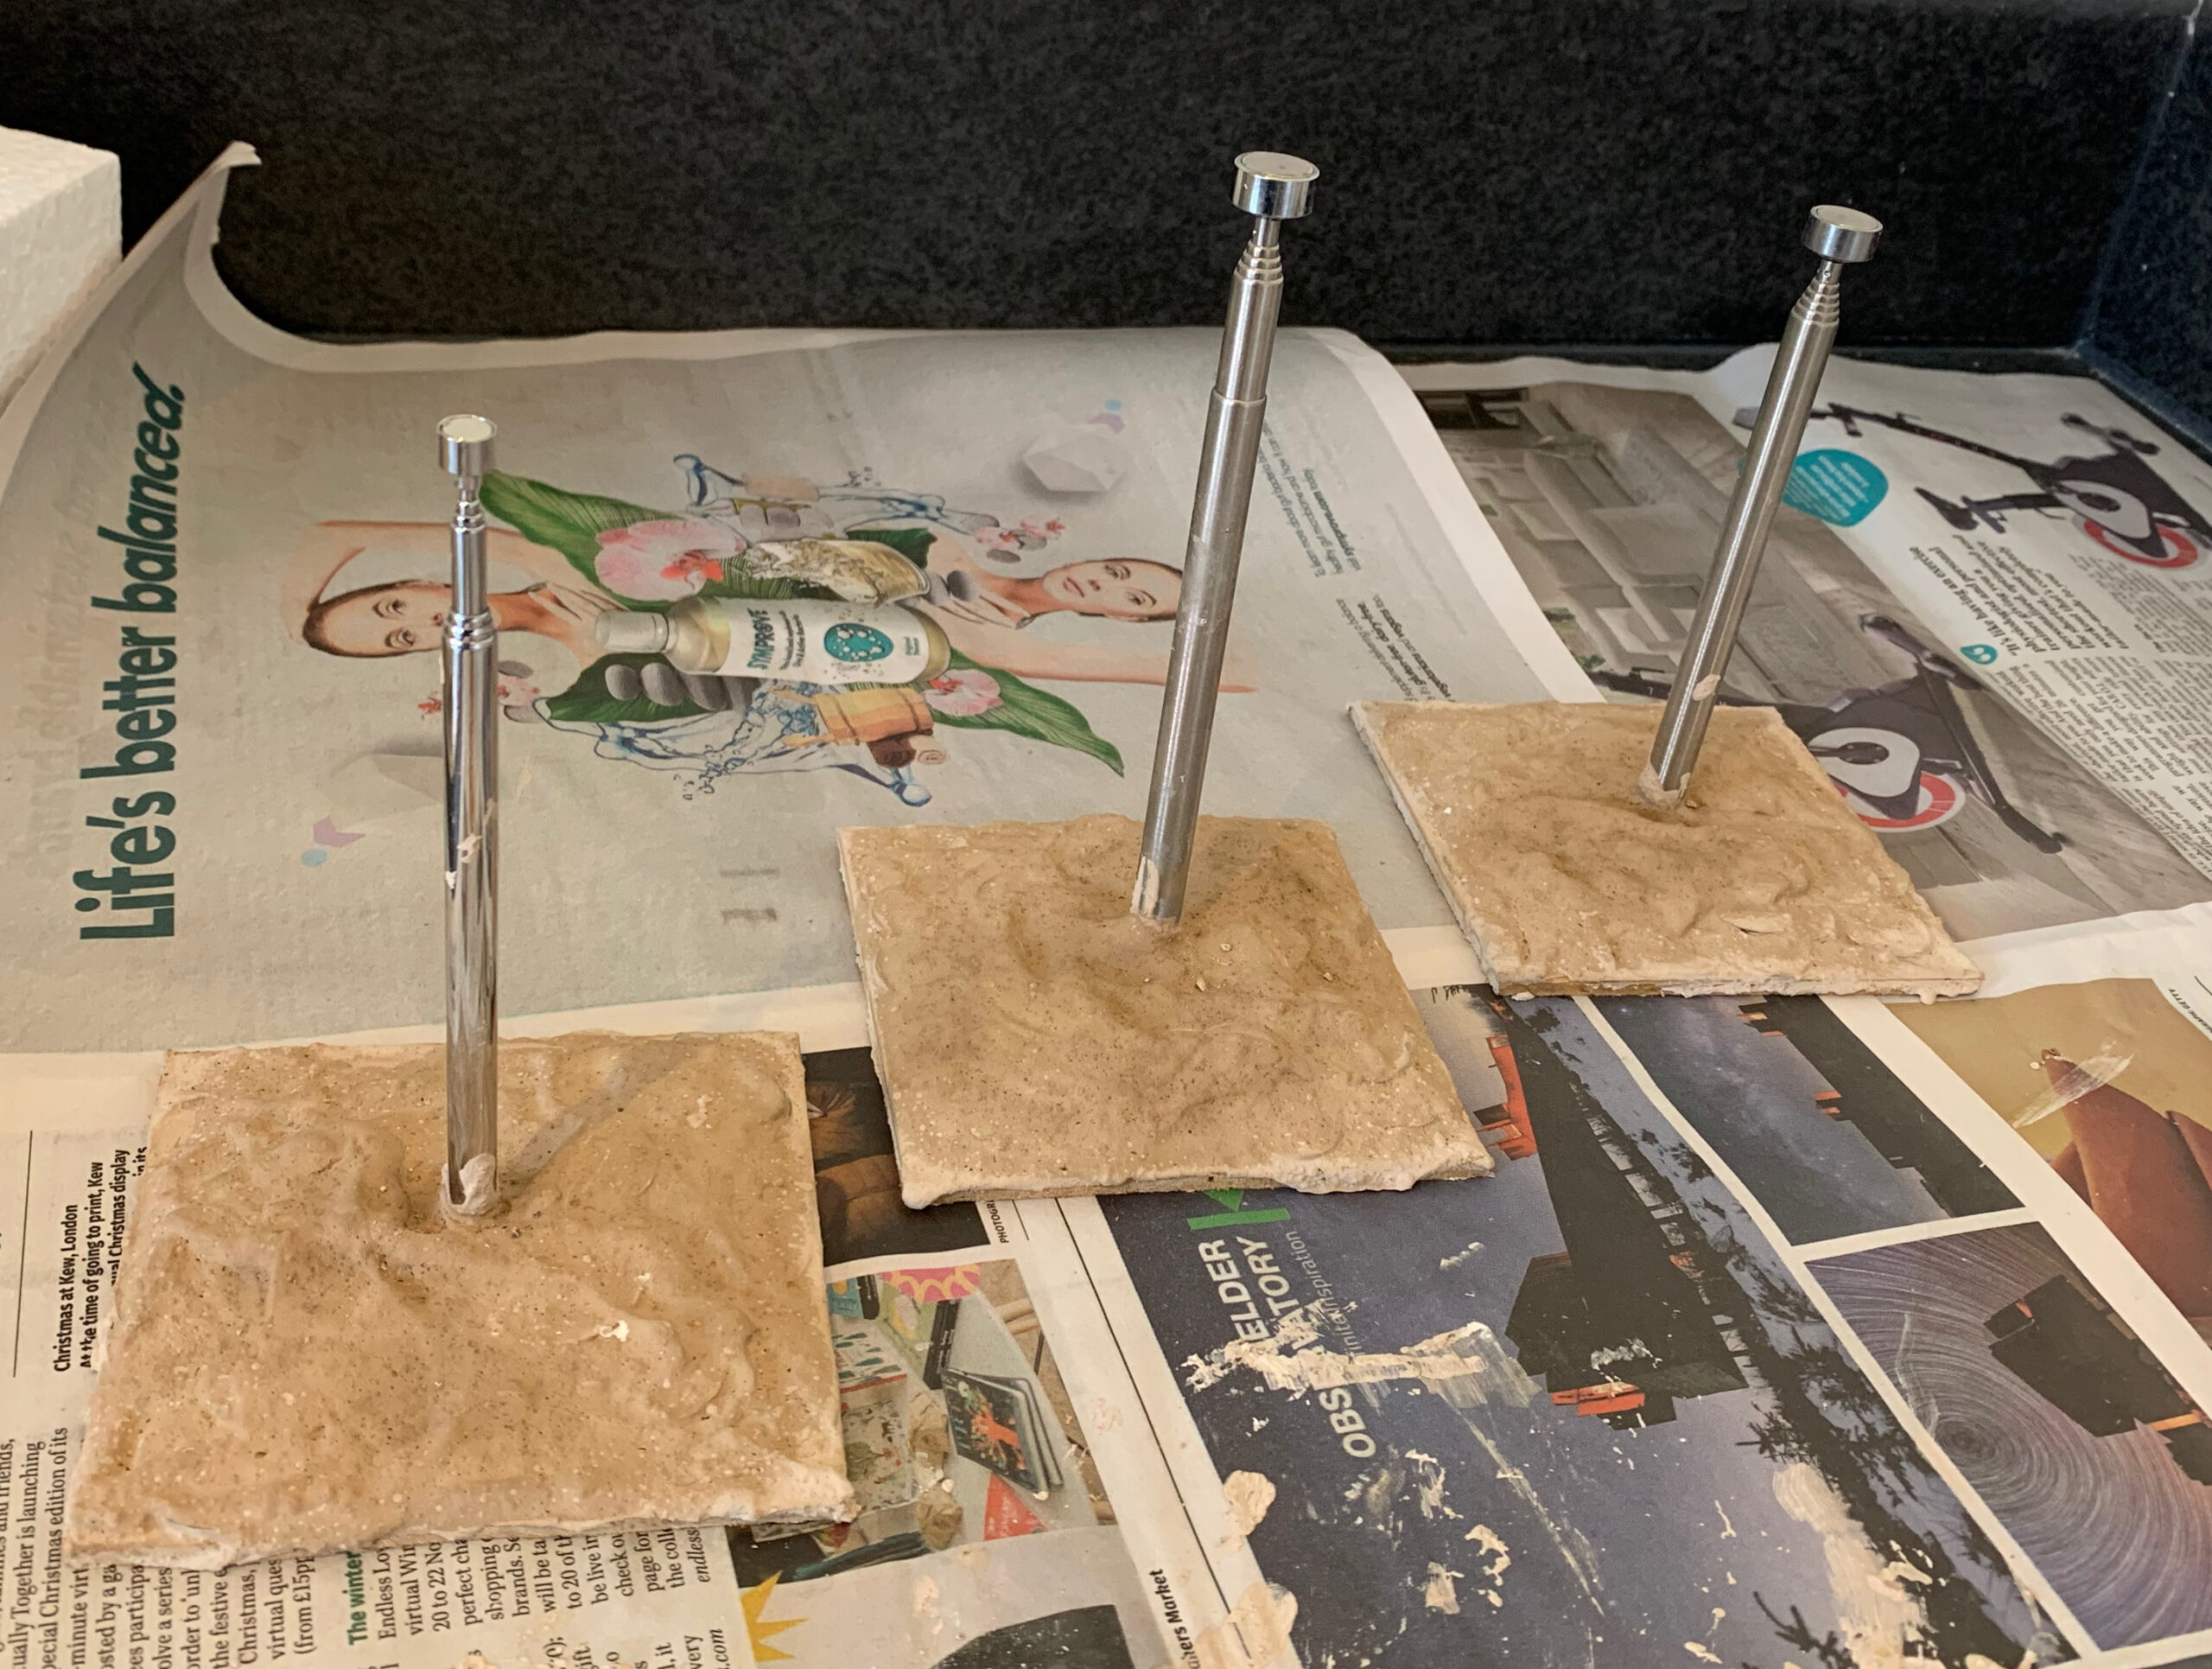
Next the coins were covered with plaster, mixed with paint (brown, yellow and white tempera), together with some of my old mode railway ballast to give it texture. The ballast didn’t work; some sand would have been much bette, but I didn’t have any cheap stuff to hand:
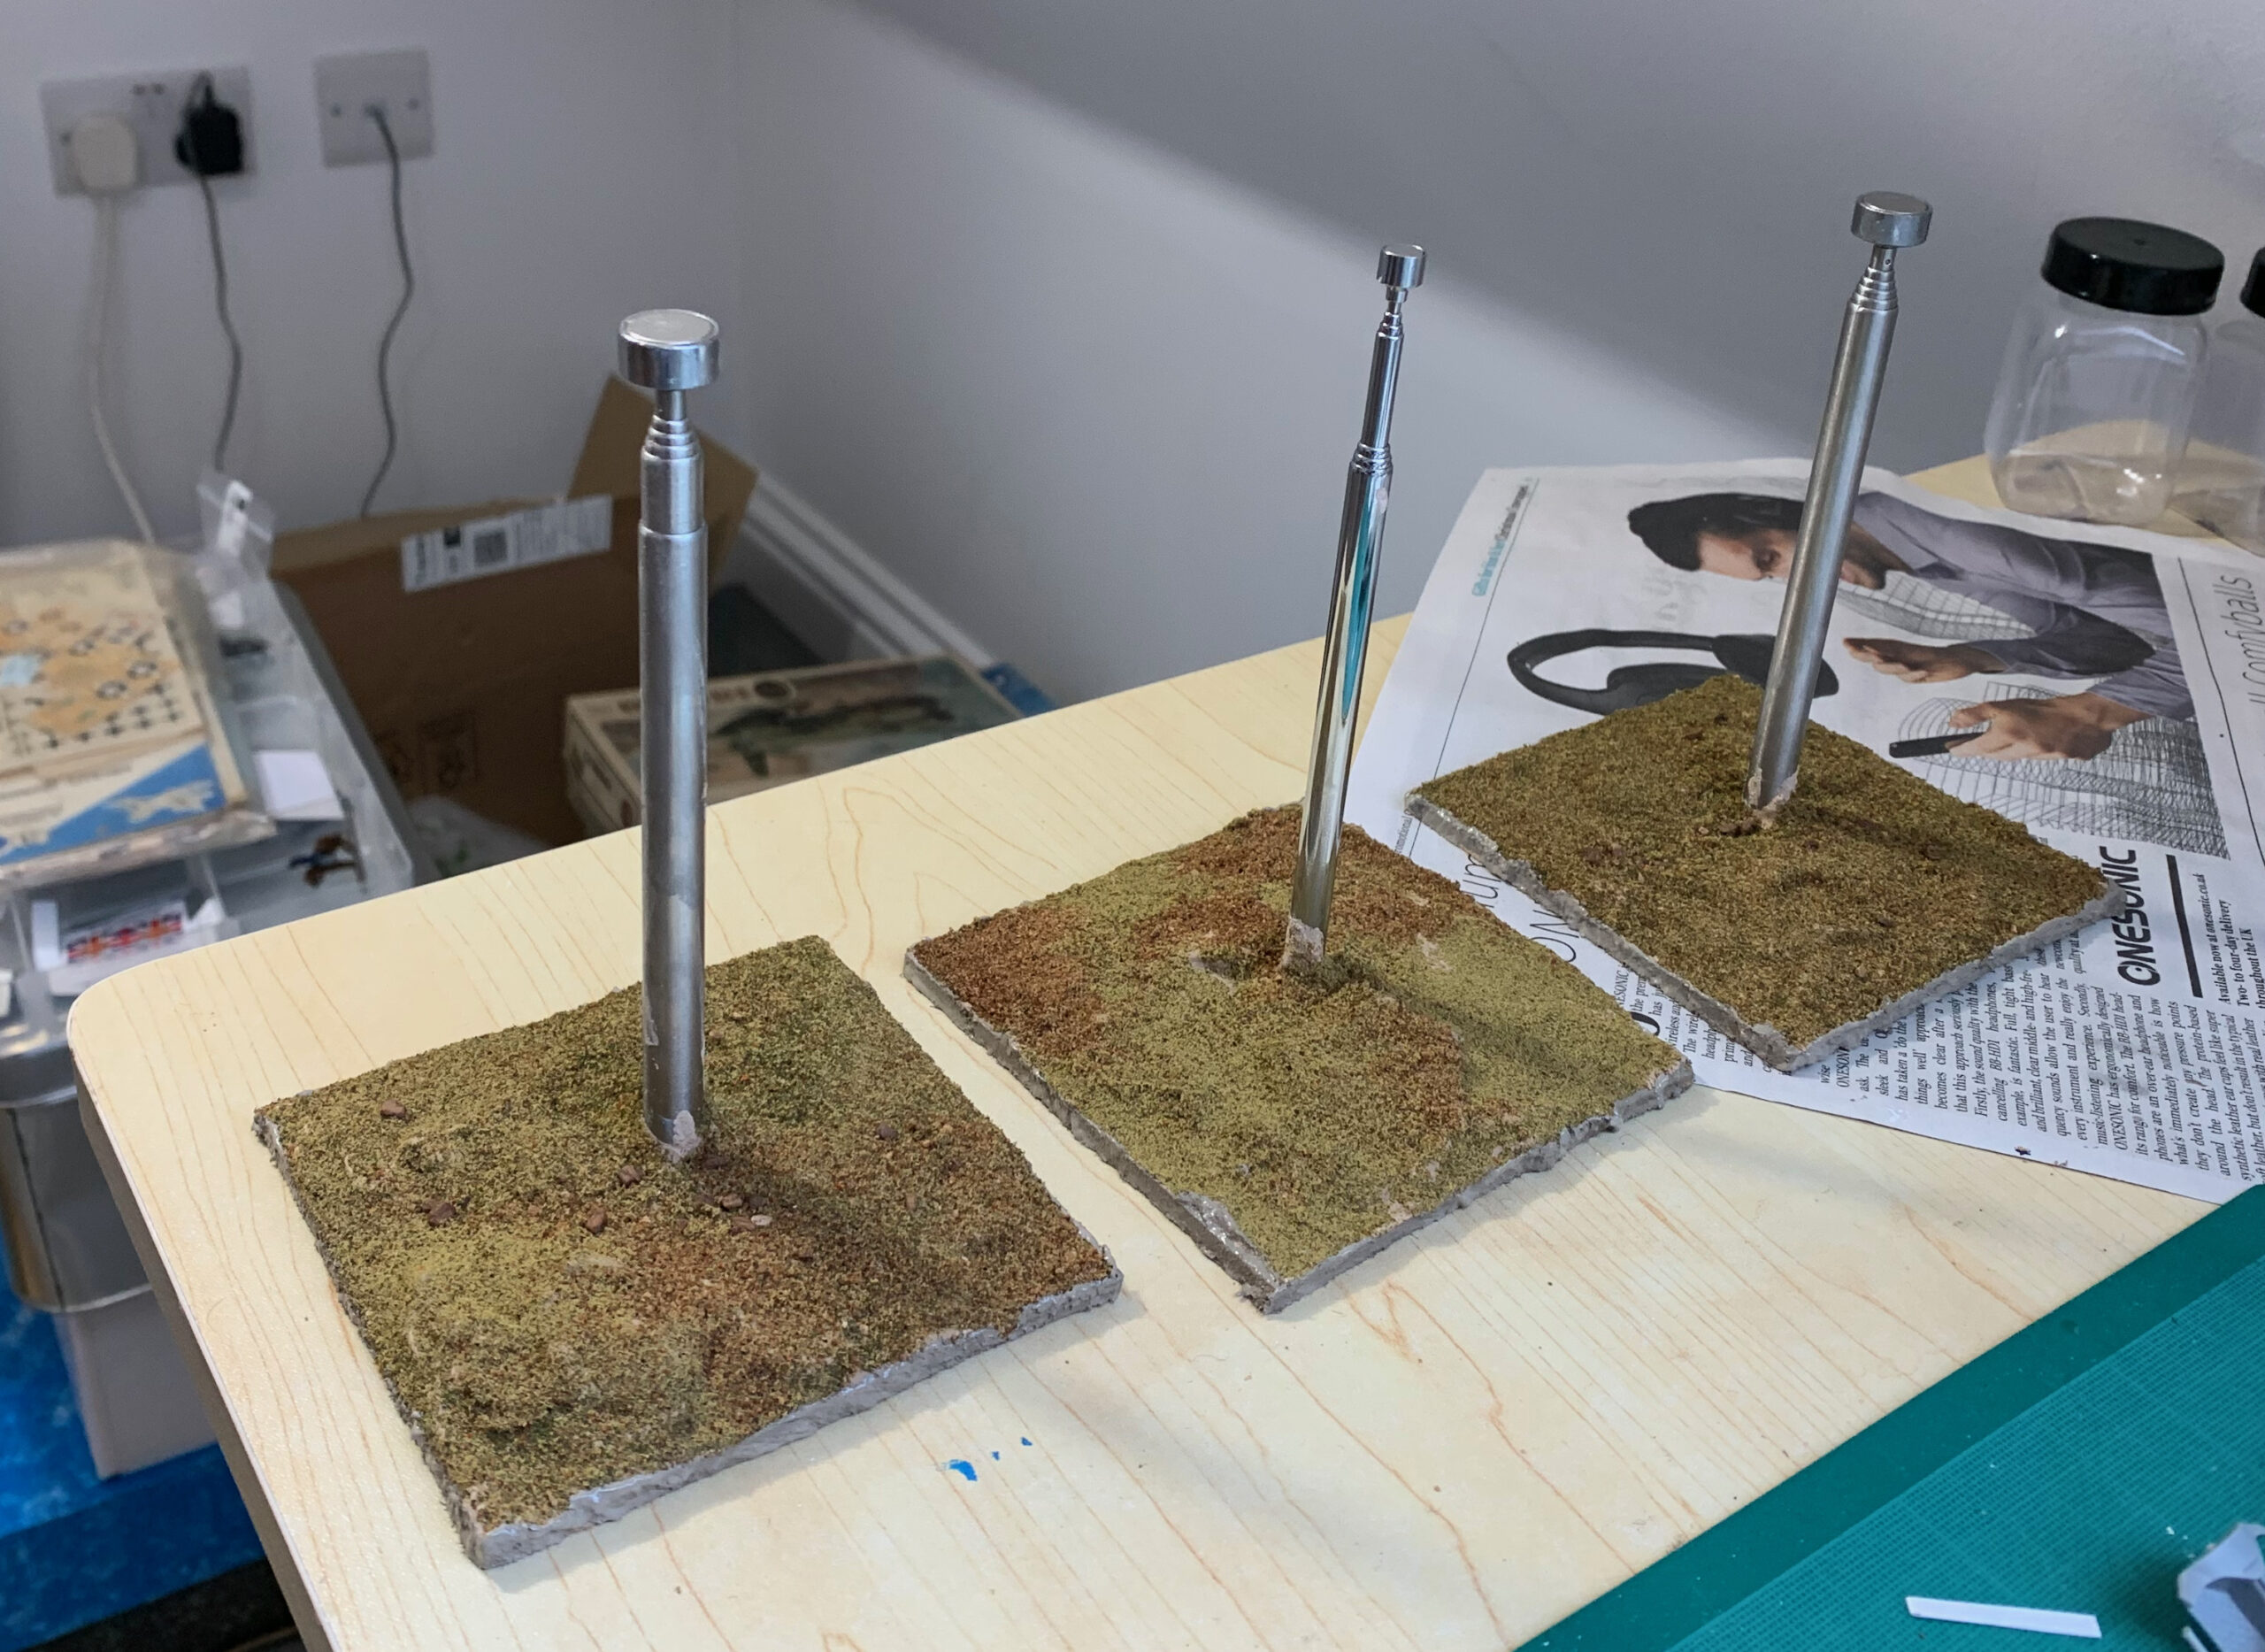
This is all standard terrain making stuff. I simply added flock next. I used two sorts of Woodlands scenic flock, plus some Games Workshop sand (ridiculously expensive but quite nice looking – I only use it for decoration). This was to get the arid terrain look. What worked best to semi mix the three components, and put it all onto the wet PVA at once – rather than applying the different types separately. I then sprayed more PVA onto it to seal it. Finally I painted the edges with a mix of Raw Umber and white to tidy it up. Of course you can be much more ambitious, with bits of scrub, rocks, etc. But I was in a hurry and I didn’t want the bases to draw attention to themselves. Anyway here is the end result:
All very easy. Of course at various stages things had to be left to dry out, so it took a few days altogether, but this could be fitted in alongside my other projects.
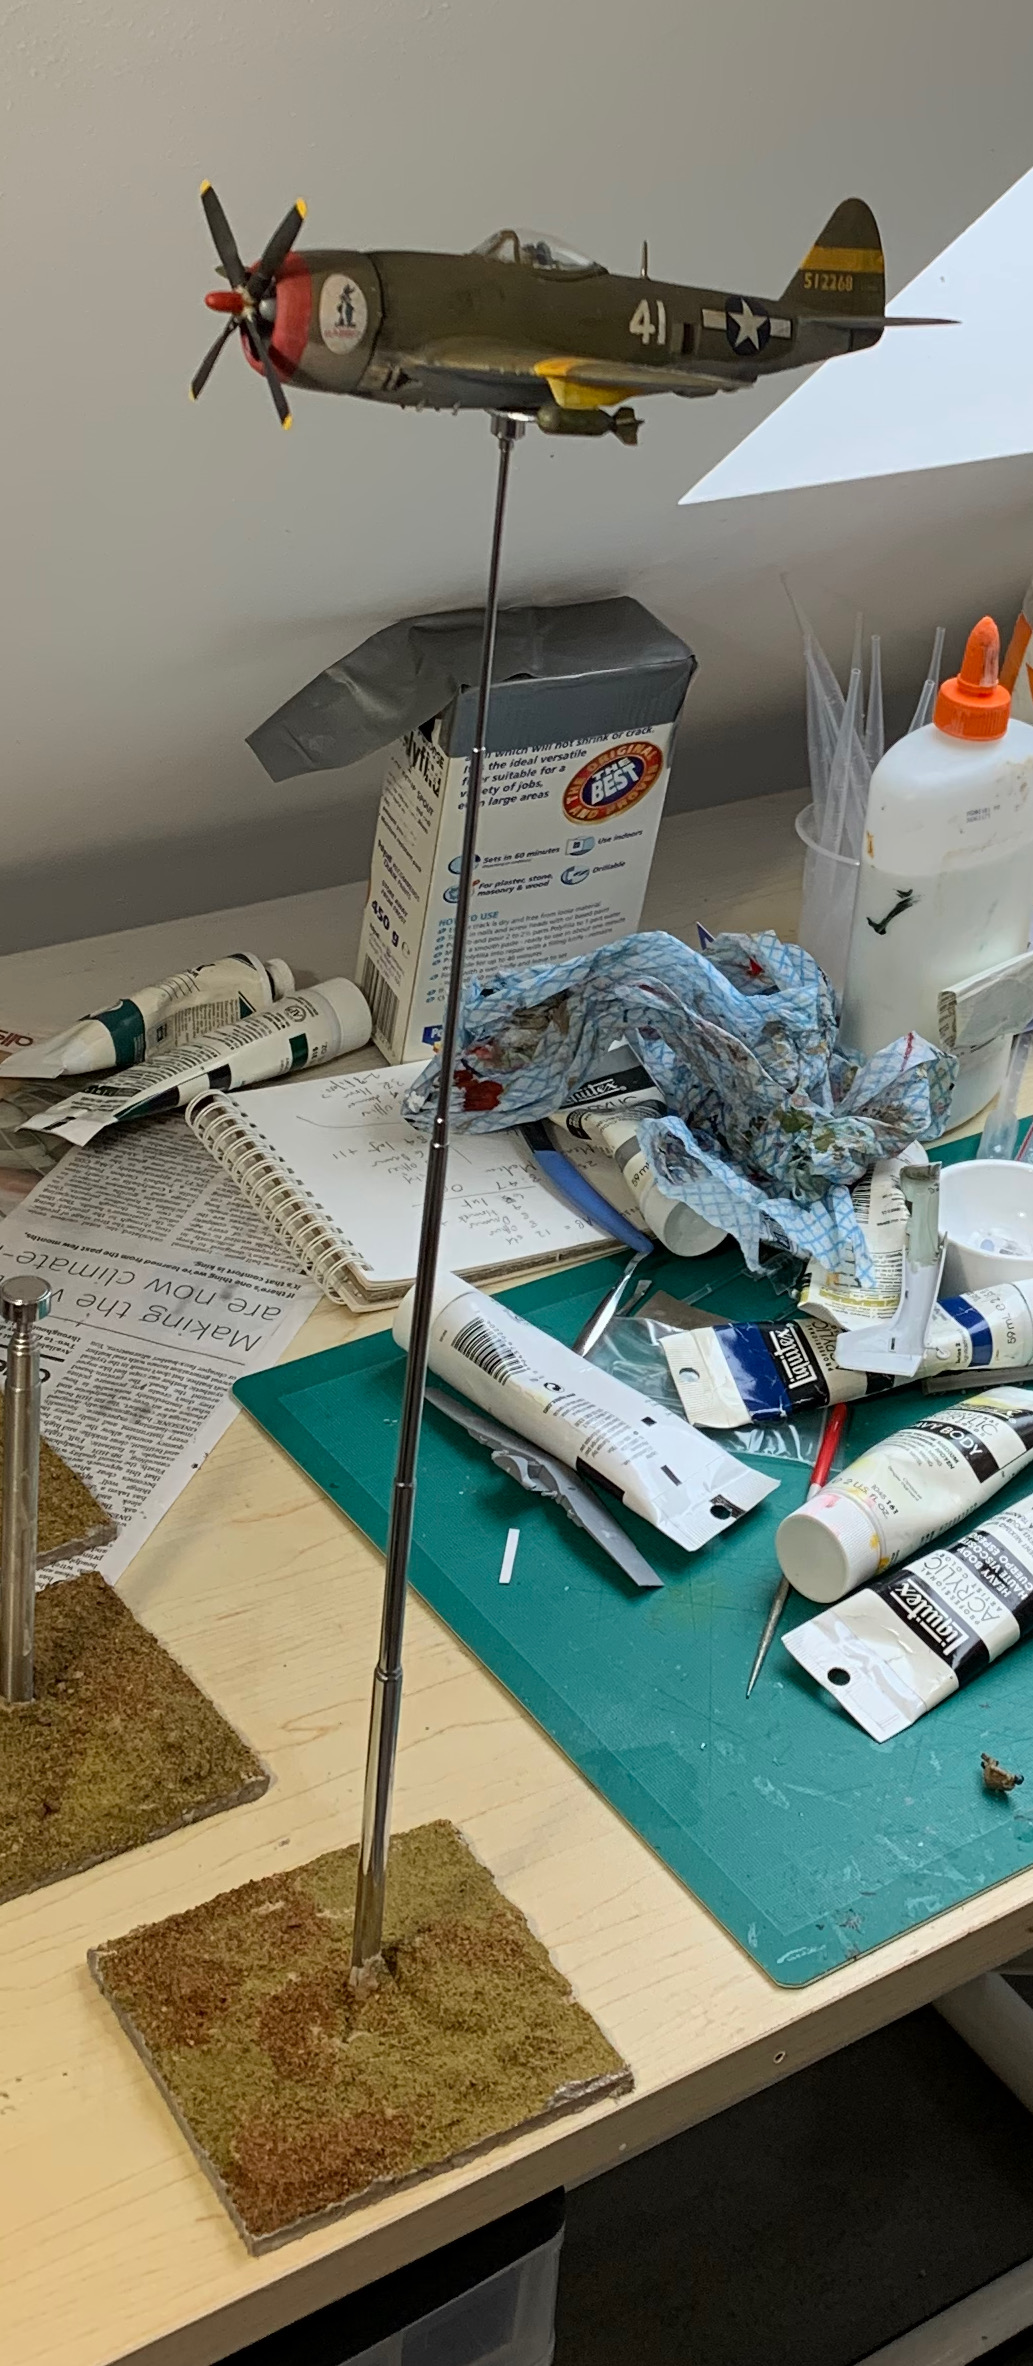
How about the mounting on the model? This is a bit of a work in progress. I started with a simple small steel screw – having drilled a hole into the model with a gimlet. This was robust but not entirely stable (though the model would not have been in danger). I then used the screw to attach a steel mudguard washer, which you can see from the picture above. This wasn’t completely horizontal (because it needed to follow the line of the model’s belly), and the screw wasn’t entirely flush. It nevertheless turned out to be very functional. The attachment is very stable and the slightly raised screw head allows for subtly different flight angles to be made. But it is over the top and unsightly. I’m thinking of gluing on a small coin if an appropriately angled surface is available. Hiding something with iron inside the model might work in some cases. it is a work in progresss.
Incidentally something I have discovered the hard way is that not all steel is attracted to magnets. Some stainless steel isn’t. When buying online it is safest to avoid stainless steel. I bought some the screw and washer from RS Online, though absurdly more than I will need to mount aircraft models: here are the screws and the mudguard washers; they both work with magnets. These are same size as the washers I used to fix the base, but in fact I used some I had bought a couple of years ago for basing 20mm infantry, that I thought would attach to magnets but don’t. Lesson learned.
UPDATE 16 March. I have found that the RS 12mm screws above are quite sufficient of themselves to fix to the model, without the need for anything bigger like a washer or small coin. This is for a Bf 109 and an FW 190, which are quite small, and also for a Stuka, which is a bit bigger. I drilled a hole into the underside with a model drill, enlarged it a little with a gimlet, and then fixed the screw in gently with a screwdriver; in all cases this was into a single kit part, not a join. Getting the angle exactly right is a bit tricky. In two cases I managed to get the head in a millimetre or two off flush; in the other (FW 190) another millimetre or two off – I was unwilling to force the screwdriver in case the force broke the model. The attachment is vey secure.
Leave a Reply