I have read a number of excellent review of Sam Mustafa’s latest game, an updated version of his Lasalle rules, for Napoleonic divisional level games. So I splashed out and bought a copy. I have just tried it out on a solo game. What are my impressions?
As I have said many times here before, Sam Mustafa is one of the top wargames designers currently in business. His games are always elegantly designed, properly tested and clearly explained. However, since his first Napoleonic game, Grande Armée, I have taken a dislike to his various systems – they just didn’t provide kind of feel of game that I have been looking for. That was the case for his first edition of Lasalle. I found them too abstract and “gamey”. There was too big a gap between the way the game was played, and how battles were actually fought. I am very interested in the historical simulation side of the game, rather than it being just a game for toy soldiers. This is a balance, of course: I don’t have much patience for complex mechanisms and piles of detail these days – so a lot of abstraction is essential. And Sam does pay a great deal of attention to the history. The balance wasn’t quite right for me.
Lasalle II never promised to be more than a highly abstracted game for toy soldiers, albeit one that is heavily grounded in the history. However it intrigued me because I would like to have the option of this sort of system for shorter games and club play – in order to give my miniatures time on the tabletop and provide entertainment. This set of rules looked as if it could fill that gap.
What’s more they can quite easily be adapted for use with my miniatures. These are in 18mm and (mainly) based on 25mm (one inch) squares, with six infantry or two cavalry to each base. Lasalle uses standardised units of four bases (for infantry and cavalry). I thought this would look good with my figures, even though typically shallower bases are used. The most popular base width seems to be 40mm for 18mm figures (and this base width is used for 28mm as well – and for 6mm too, albeit with different base depths!). Like most of Sam’s current systems, all distances are given in base widths (BWs); since 1BW equals an inch, I have no need for specially made rulers.
I don’t want to describe the Lasalle II system here – there are plenty of online resources that do that for those that are interested. Suffice to say that it is everything you might expect from a great games designer like Sam. And it’s very abstract. What I want to do is talk about my game and the particular issues that came up for me.
My test game was based on the trial scenario in the rules, but replacing the Austrians with my Prussians (my beloved Austrian army is in a sad state at the moment). That actually changed things quite a bit. The Austrians don’t have the “Attack Column” trait, but did have some high-class cavalry. My Prussians do have “Attack column”, like the French, but five out of the eight infantry units were Landwehr. I still gave them three cavalry units, but these were bog standard quality dragoons and hussars, with the same characteristics as the two French units, of hussars and chasseurs. But I did get the points to balance! I also had to adapt the table layout so that I could use my Albuera table, which I haven’t taken down yet.
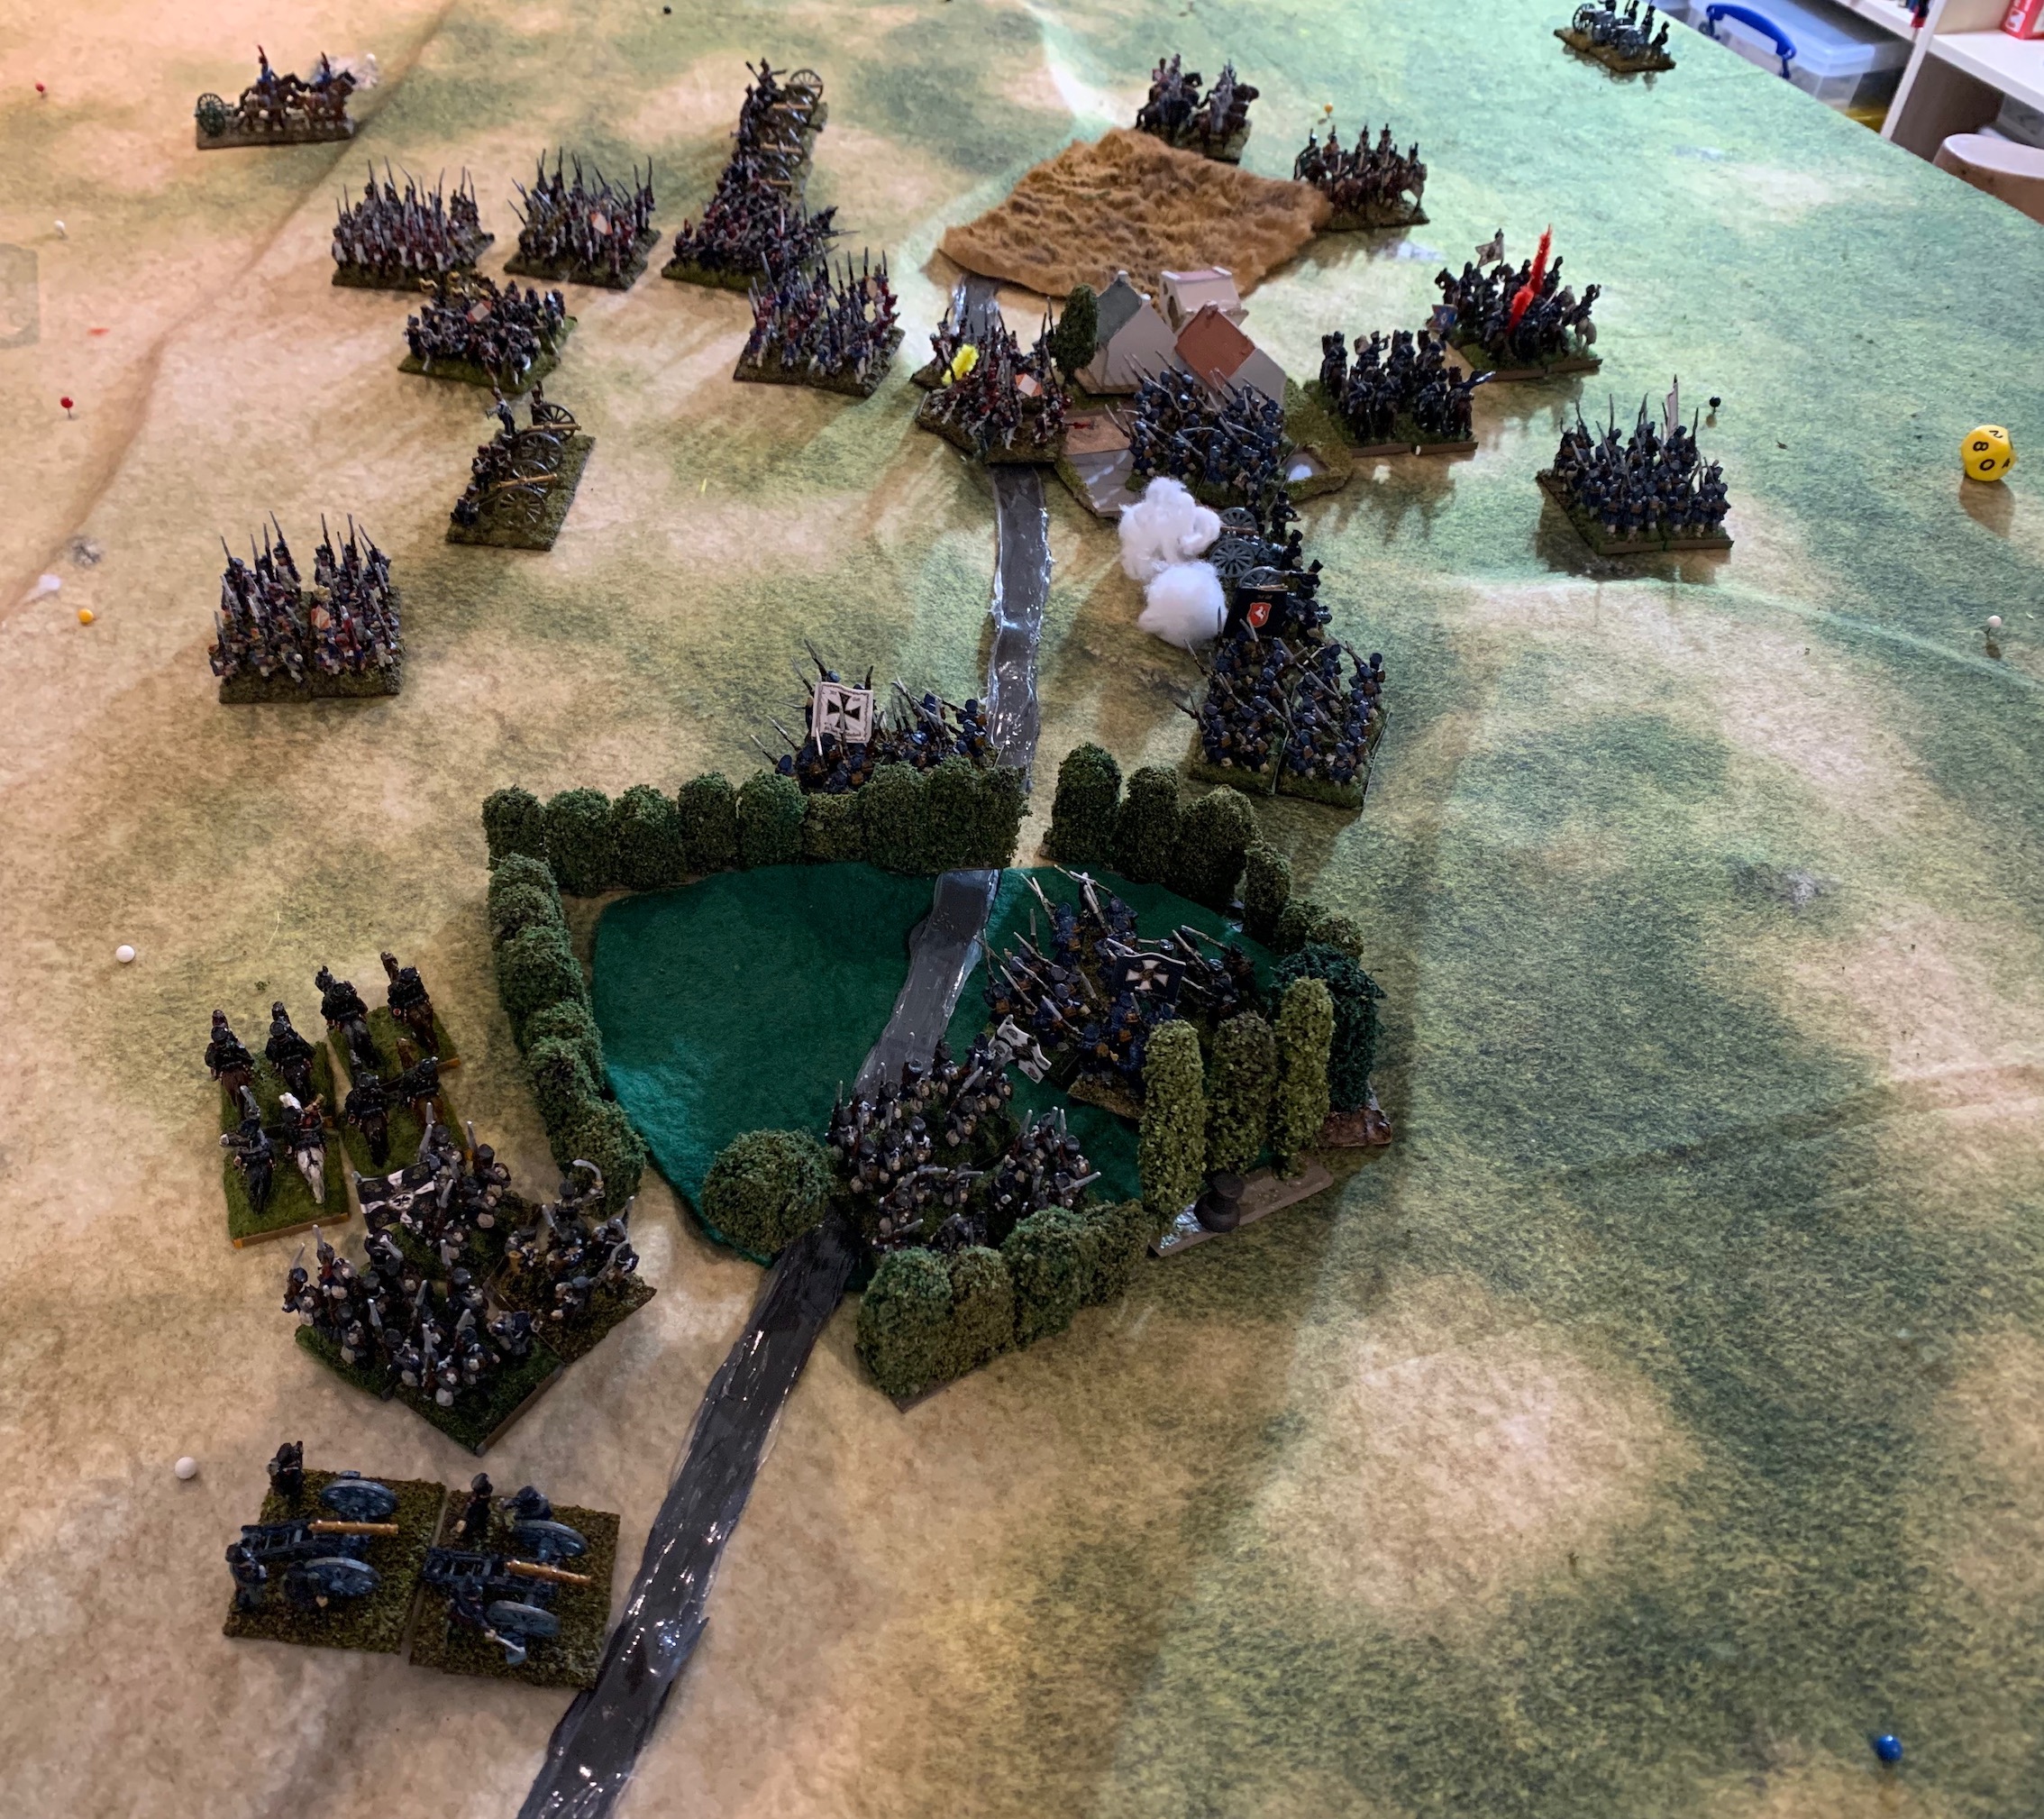
The game length is meant to be eight moves – but mine ended in the fifth, as the Prussians reached their break point of four units lost. This was mainly because I misread the rules on artillery, so that the longer range “bombardment” fire was using the number of dice for canister “volley” fire. The French quickly set up two batteries together, and blasted away the Prussian horse battery before it could let off a shot, and then trashed one of the Prussian infantry units, which had seized the village, followed by one of the Prussian dragoon units. Both of these units were subsequently finished off by close combat, though the Prussians managed to retake the village, and it took a few moves before the cavalry was finally routed. The one Prussian battery to get going did manage to make a mess of one of of the French infantry units before I realised my mistake – and this was duly polished off by a Landwehr unit. This was all aided by good dice throwing; the third French battery did not manage to achieve much – until later. The final battery (Prussian) was never deployed as this was part of an over-ambitious Prussian turning move and it got crowded out.
The Prussians sent their strongest “brigade”, with two line and two Landwehr infantry, one cavalry unit and a battery, on a big turning manoeuvre, through and round a wood. This succeeded in giving them the initiative (in battle rather than game terms), messing up the French plans, and forcing their left brigade to come to the aid of the right one. But one prolong move was enough for them to swing round their battery just enough to face the threat, while there wasn’t enough table space for the Prussian cavalry to get round the rightmost French infantry unit, which formed square and bottled it up. The Prussians decided to risk everything on a charge on the French battery with its leading Landwehr unit (the same one that had routed the French infantry). Because the French had wisely held their fire, this meant that the Prussians had to endure one round of canister before they could close. With some fine French throwing, this time within the rules as written, they scored four disruptions (all the infantry and cavalry units have a strength rating of six, which is the maximum number of disruptions they can endure). The Landwehr rallied and pressed on – but the rally move succeeded in only pulling back one of the disruptions. The battery stood its ground and beat off the attack, inflicting more disruption. A series of charges by Prussian attack columns on the French infantry were also beaten off, and there was some largely ineffectual musketry between the sides – the musket power of attack columns (and squares) is quite limited. But the musketry did manage to finish off the very battered Landwehr unit, and the Prussians had lost their four units.
That was a fair verdict. The Prussians were running out of steam, and didn’t even have the space to deploy their third battery. Quite apart from misreading the rules on artillery fire, there were a lot of mistakes arising from the lack of familiarity wit the rules. In particular my usual method of rapidly throwing in attack columns without bothering much with musketry didn’t really work – and the congestion problems the Prussians had clearly had their root in unfamiliarity too. But there were a number issues that surprised me a bit, and might not be so obvious from the write-ups you see. These aren’t problems with the system, so much as warnings about how they work.
The first issue was space. One inch to a base width gives you a very compact table. The rules recommend a playing area of 24BW by 36: just two by three feet for me (60 by 90cm). I followed this for my trial game wanting, not to spend too much time in the game in early manoeuvring. That meant the playing area was a bit cramped with the suggested armies (8 infantry 2/3 cavalry and 3 artillery unit a side). Both sides were constrained by the opposite table edge. It didn’t help that my wood and crop field were a bit big – the official trial game would have had them smaller. My bases are quite deep, of course, which made them take up quite a bit of space. One-inch bases are doubtless more typical of 10mm or 6mm miniatures on shallower bases. That would still have led to problems with the table depth – and I didn’t even use the suggested unit labels, which are quite big. But this problem has an obvious solution – I have plenty of space to use a bigger playing area. But if you are using a 40mm BW I would recommend that you have a full 4ft by 6ft playing area (1.2 by 1.6m, rather than 0.96 by 1.44m), and space nearby for the routed units, reinforcements, etc.
A second issue is skirmishers. This is a problem that Sam has struggled with for a long time – they were historically important, but are very hard to represent in game terms without making the whole thing too fiddly. Sam has abstracted them away, so that while they have an important effect on the game, no models on the table. Each infantry unit has a number of skirmish points. These are totalled up at the start of each turn and a die thrown for each (an awful lot of dice incidentally) – a 6 is required to sore a “hit”, and this determines who goes first, and may give you extra “Momentum” (MO) points, which drive the game. This is very clever, and further ideas are incorporated into the advanced rules. I would still like skirmishers to be on the tabletop, even if only as markers. At first I thought that I could put one base on the table for each skirmish point, and just use them as decoration. But there are far too many skirmish points for that, in an already crowded table. One base per hit would be fine, but since these have no significance beyond who goes first and MO points, this looks pointless. In fact one of the Advanced rules does give a role for skirmish markers, and adopting this rule is probably the best thing to do.
A third point is that the rules for built-up areas are too abstracted for my liking. At this sort of scale – one base width is something under 40m – you should be able to differentiate streets from blocks of buildings, and so start to represent how street fighting actually worked (it was almost all on the streets, with buildings used as strongpoints only occasionally – otherwise they were just used by skirmishers). I guess the problem is that most wargamers like to use buildings that are “in scale”, and this means the are far too big to leave enough room for streets. On the plus side built-up areas confer no cover or defence benefits unless the defenders have taken time out to “garrison” the block. This is a much more realistic treatment than you usually see in wargames, though the garrisoning is maybe a bit too easy (just a formation change, albeit one that costs two MO rather than the usual one).
But overall this is an excellent game system, fully justifying the rave reviews I have seen of it. The turn play system – both sides interact without the use of phases or player-turns – is especially clever and works really well. There are intricacies which you can miss on first play, but generally the rules should be very quick to pick up. When I get back to club play (some way off – I haven’t found a nearby club yet in my part of East Sussex), I will certainly be trying to introduce these. They are a great way of getting the miniatures onto the table for a bit of fun. The high level of abstraction means they will not be to many tastes, but they are the basis for an absorbing and entertaining game. And the reference to history is much more than a token one, even if it is highly abstracted.
Leave a Reply