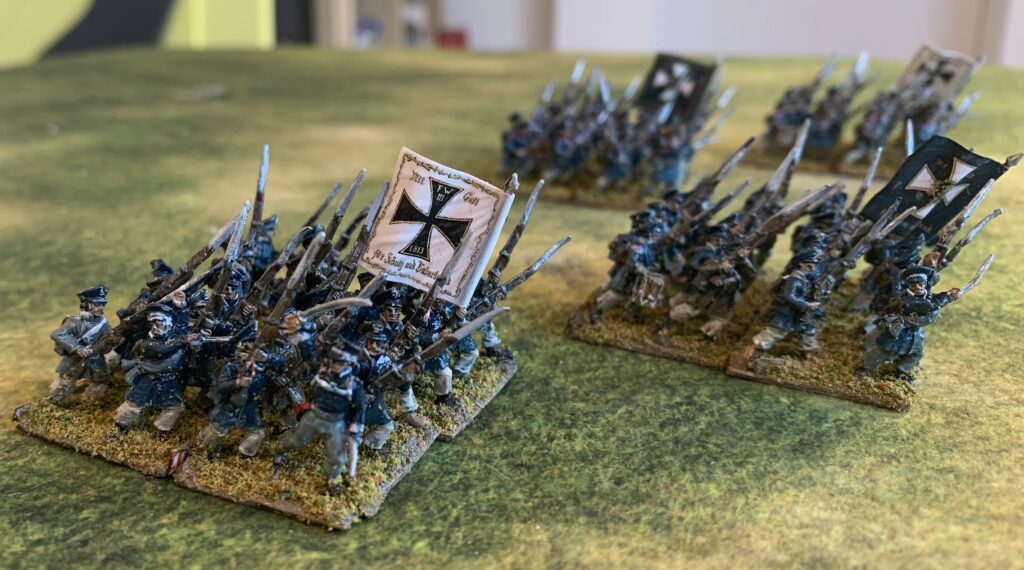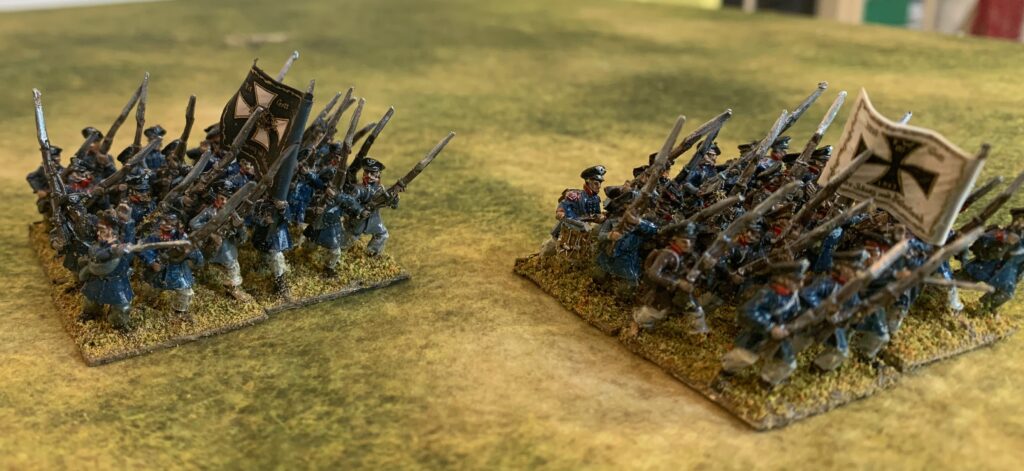
After my WW2 aircraft modelling, I wanted to return to the attack on my lead mountain of Napoleonic 18mm miniatures. This time I experimented with new techniques for a large batch of figures (102) to help make more rapid progress in future. I have painted them up to form four battalions of four bases, painted for two different regiments, from Pomerania and Kurmark (Brandenburg).
For a number of reasons I had far more Old Glory 15s Prussian landwehr infantry in my unpainted pile than I ever really intended. The figures aren’t the finest, and the caps are a bit low. I already had 19 six-figures bases of these done up for Westphalian and Elbe regiments. I have 60 or so of the somewhat nicer AB landwehr miniatures unpainted, which I plan to paint up as Silesians. Still the OG figures are nicely animated and look well enough in bulk – and the Lasalle game system that I have recently acquired is quite expensive in miniatures the way I play it. I could always do a few more more battalions of landwehr. So I thought I would try out some techniques in mass batch painting, on a larger batch than usual. I decided to do four four- base units, from two different regiments, plus one extra base base of Elbe landwehr so that I could top up my current landwehr stock to a full five Lasalle units. Each unit was to have a flag (figure manufacturers are usually over-generous with standard bearers, and I had four spare landwehr flags). Each base was to consist of five ordinary infantrymen, and one “command” figure – standard-bearer, drummer or officer. One of the standard bearers, and two of the officers were AB figures (where I had more than I needed for my Silesians), the rest were OG.
I am not a follower of hobby fashion, and I am ploughing my own furrow on presenting my miniatures. I base them close together on small bases (six infantry on a base 25mm square). The current fashion is for beautifully painted miniatures spaced further apart, sharing bases with rocks, tufts of grass and such. I find photos of the more fashionable 28mm figures based four to a 40mm square base painful to look at (the equivalent of four 18mm figures to one of my 25mm square bases). All contemporary illustrations show infantry in tight-packed masses – tighter than even my basing. Also I often find that the exposed expanse of bases often clash with the terrain board. Of course there is a very good reason that people go for these looser presentations – the painting of the figures is usually of a very high standard, and time-consuming. Looser mounting mean fewer figures to a unit, and the extra space allows the paintwork to be shown off to better advantage. These miniatures always look much better up close and personal than they do en masse and in pictures. I want to achieve the opposite – something that looks better en masse, while requiring less work on each individual figure – something more impressionistic. But I don’t want the miniatures to look terrible up close either, though. My technique had been to paint the figures individually, mounted on strips of card, and then mount them on the bases when they were finished, with the application of flock to the base being the final step. This felt a painfully long process, especially with a batch size of 12 bases (72 miniatures), which I felt to be the minimum to make progress with army building.
This time I decided to mount the figures on the bases much earlier in the process. This wasn’t the first time I have tried this. I did it with my first batch of Prussian line infantry (again 16 bases plus bits), but I didn’t consider it a particular success, as it was hard to paint the figures mounted so close together. I thought it was worth another try. First I primed them by airbrush, using gesso mixed with a bit of black. I then did a quick paint job on the legs below the coat, and some of the feet, and brown on the bases. To get a bit of variation in coat and cap colours I applied an undercoat of dark brown or white on the coats and caps for one figure in six, not including the command figures. This was a bit of a failure on the end result – the variation is hard to see. And then I mounted them on the bases, using the matrix of sand, acrylic medium and paint that I usually use.
And then on to the rest of the painting. The coats were mostly blue (a slightly different mix for each regiment, not that this is very noticeable), with a few brown and grey ones. The caps were black (actually dark grey) for the Kurmark regiment and blue for the Pomeranians. And so on. Predictably the webbing was the hardest – but this is not so prominent on the landwehr, and most of the poses had muskets held close the front of the body, masking the straps. If anything was too hard to reach because of the close packing of the figures, I left it out. I tried to highlight the white cross on the cap front, but not always very successfully; I thought I could rely on the final wash to correct this by highlighting the outline. I could just about reach the collars for the facing colour (red for Kurmark, white for Pomerania), but I did not attempt shoulder straps except for the AB command figures – the straps aren’t moulded properly on the OG figures, and very hard to pick out – their line infantry castings have the same problem. I tried to limit the detailing, but I did paint the gun barrels, as these are very visible. Quite a bit of paint strayed onto neighbouring figures, requiring touching up later. This was basic block painting – nothing clever.
Finally, in order to pick out more detail on the figures I gave them a wash. I’ve tried a number of strategies on this over the years. From acrylic paint and water, to Quickshade, to acrylic ink (sometimes diluted). This time I tried something a bit new again. I had bought some alkyl-based oil painting medium for future use in my aircraft models, to speed up the drying time of the oil paint glazes I have been trying there. I thought I might try this mixed with a bit of oil paint (Payne’s Grey) for the wash. This worked a treat, once the right ratio of paint to medium was found – it needed more than I thought. It dried to a satin finish which was slightly glossier than I normally have, but which helped give the figures depth. And that was the figures finished. No final varnish.
All that remained was to flock the bases. I used the same mix as for my last batch of figures, but it didn’t go especially well. It was impossible not to get flock onto the figures, and not all that easy to brush it off – not helped by the relatively dynamic poses of the figures making them hard to brush. And the flock needed to be sealed with diluted glue once dry, with more risk of flock straying onto the figures. This is a lot of faff for an effect that looks very ordinary. I think I need to try something different. That surely means painting rather than flocking – but I still need to find something textured to cover the bases so that they merge with the basing matrix (without getting onto the legs of the figures!). The base painting would then be directly after this texture is applied and dried, and before the main painting of the figures. Something to think about. With such a density of figures on the base, there is less need to try so hard.
I think the overall result is a success. These aren’t fantastically finished figures, but they are fine on the table. And, though I wouldn’t describe the process of painting them as quick, it felt like a significant improvement on my previous method. The batch of 100 was quite manageable.

Good work. I love Paynes Grey – I’ve used it as a wash on a white undercoat in the past – picks out details but more subtle than a black wash.