At last! My first proper live game in 14 months. My friend Rob came over with his Minifigs of British and Portuguese (with some Brunswickers taking the pace of Spanish) to take on my French army. We always base our games on a historical battle, and this time I chose the battle of Sorauren on 28 July 1813.
This is a medium-sized battle with about 30,000 men a side that is very neglected by historians and gamers. Historians seem to lose interest in the Peninsula War (and its appendix in the south of France) after Vitoria in June 1813. To them this was the decisive battle, and everything afterwards was a side show. But in fact there was plenty of drama, and not least in this battle, which is bigger than many earlier battles – comparable in scale of engaged forces to Busaco in 1810, and bigger than Albuera in 1811. This neglect means that there is little information available on the battle. I tried Googling for wargames scenarios and I got back practically nothing – a few games which revealed little historical research. I didn’t have much time to put the scenario together, so mine too suffered inaccuracies. But researching battles is one of the joys of the hobby for me. Even as an amateur historian you can always add a bit of value to received wisdom with just a little careful research and asking the sorts of difficult questions warmers must resolve but historians can gloss over.
So the background: after Vitoria (incidentally my biggest wargaming project and the starting point of this blog – my maps now come top of a Google search!), the French rapidly evacuated Spain outside Catalonia (another neglected wargaming topic, for another day), leaving garrisons in the fortresses of San Sebastian and Pamplona. Napoleon gave command of the defeated French forces to Nicholas Soult, who reorganised and reinvigorated them with the sort of speed that so often caught France’s opponent’s off guard. He counterattacked, seeing that the allied forces were dispersed. To cut the story short, he massed two corps, those of Clausel and Reille, a few miles from Pamplona after storming through the Pyrenean passes, brushing aside British forces at Roncevalles. The first French forces, Clausel’s corps, arrived on 27 July, but these were not enough to take on the allied forces there, based on the British divisions of Picton and Cole and the Spanish ones of McDonnell (conducting the siege) and Morillo. Reille eventually arrived, but too late to be mobilised fully that day. Soult himself was their together with army level reserves of cavalry and artillery. Also arriving on 27 July was Wellington, who, seeing the threat, immediately summoned reinforcements, of which Pack’s division was the only force within a day’s march. The great man’s presence greatly reassured the allied forces.
I didn’t have much time to research the battle; I was hoping to find something readily available that I could use, notwithstanding imperfections. My first port of call was a booklet by Terence Wise that I had bought for £1.50 in 1977. This was part of the Battles for Wargamers series published by Bellona – I also have the booklet from the same author for Tunisia 1943. The Peninsular War booklet covered the series of battles after Vitoria – mainly Soult’s offensive and Wellington’s counterattack, but also covering Suchet in Catalonia. A nice idea, but the battle map was highly inaccurate (including quite the wrong ground scale) and the narrative was suspect. I went back to good old Oman as my main source. Oman makes mistakes, and he can be irritating in his period way – launching into criticism of the decisions of officers at the time, rather than making much attempt to understand why they took them. But it is proper history, and reasonably transparent about its sources. He also surveyed the ground. Alas few modern authors do this and are more interested in painting a dramatic picture which fits into a broader narrative about the Peninsular War. The only other account I read was that in Lipscombe’s Peninsular War Atlas. This was pretty superficial too. The map is a pretty decent one, though the British forces are depicted as being far too far forward. It does provide additional details on the Spanish, though.
And what about rules? My big wargames project for the last month has been a rewrite of my Big Napoleonic Battles rules to get to a “Version 1”, so succeed my “Version 0” which we used successfully at the club, but which I felt wasn’t right for historical refights. This was a classic case of one idea leading to another, which turned into a radical rewrite, about will I will write separately. I had carried out some small scale trials, simulating the Prussian advance on Plancenoit at Waterloo. but Ithe opportunity of something bigger was too good to miss. These are big battle rules, with divisions being the principal unit – so not all that well suited to the Peninsular War, were the big battles were large fought between brigades of around 2,000 men (as well as Wellington’s habit of deploying individual battalions). The battle is too big for rules based on battalion units (still by far the most popular format) – but one based on brigades, such as Blucher, would have been a more natural choice. That would have been a bigger game though. I would like to find some way of making my big battle rules work in the Peninsula, as a number of battles there could make very good smaller games; so I tried to adapt as best I could.
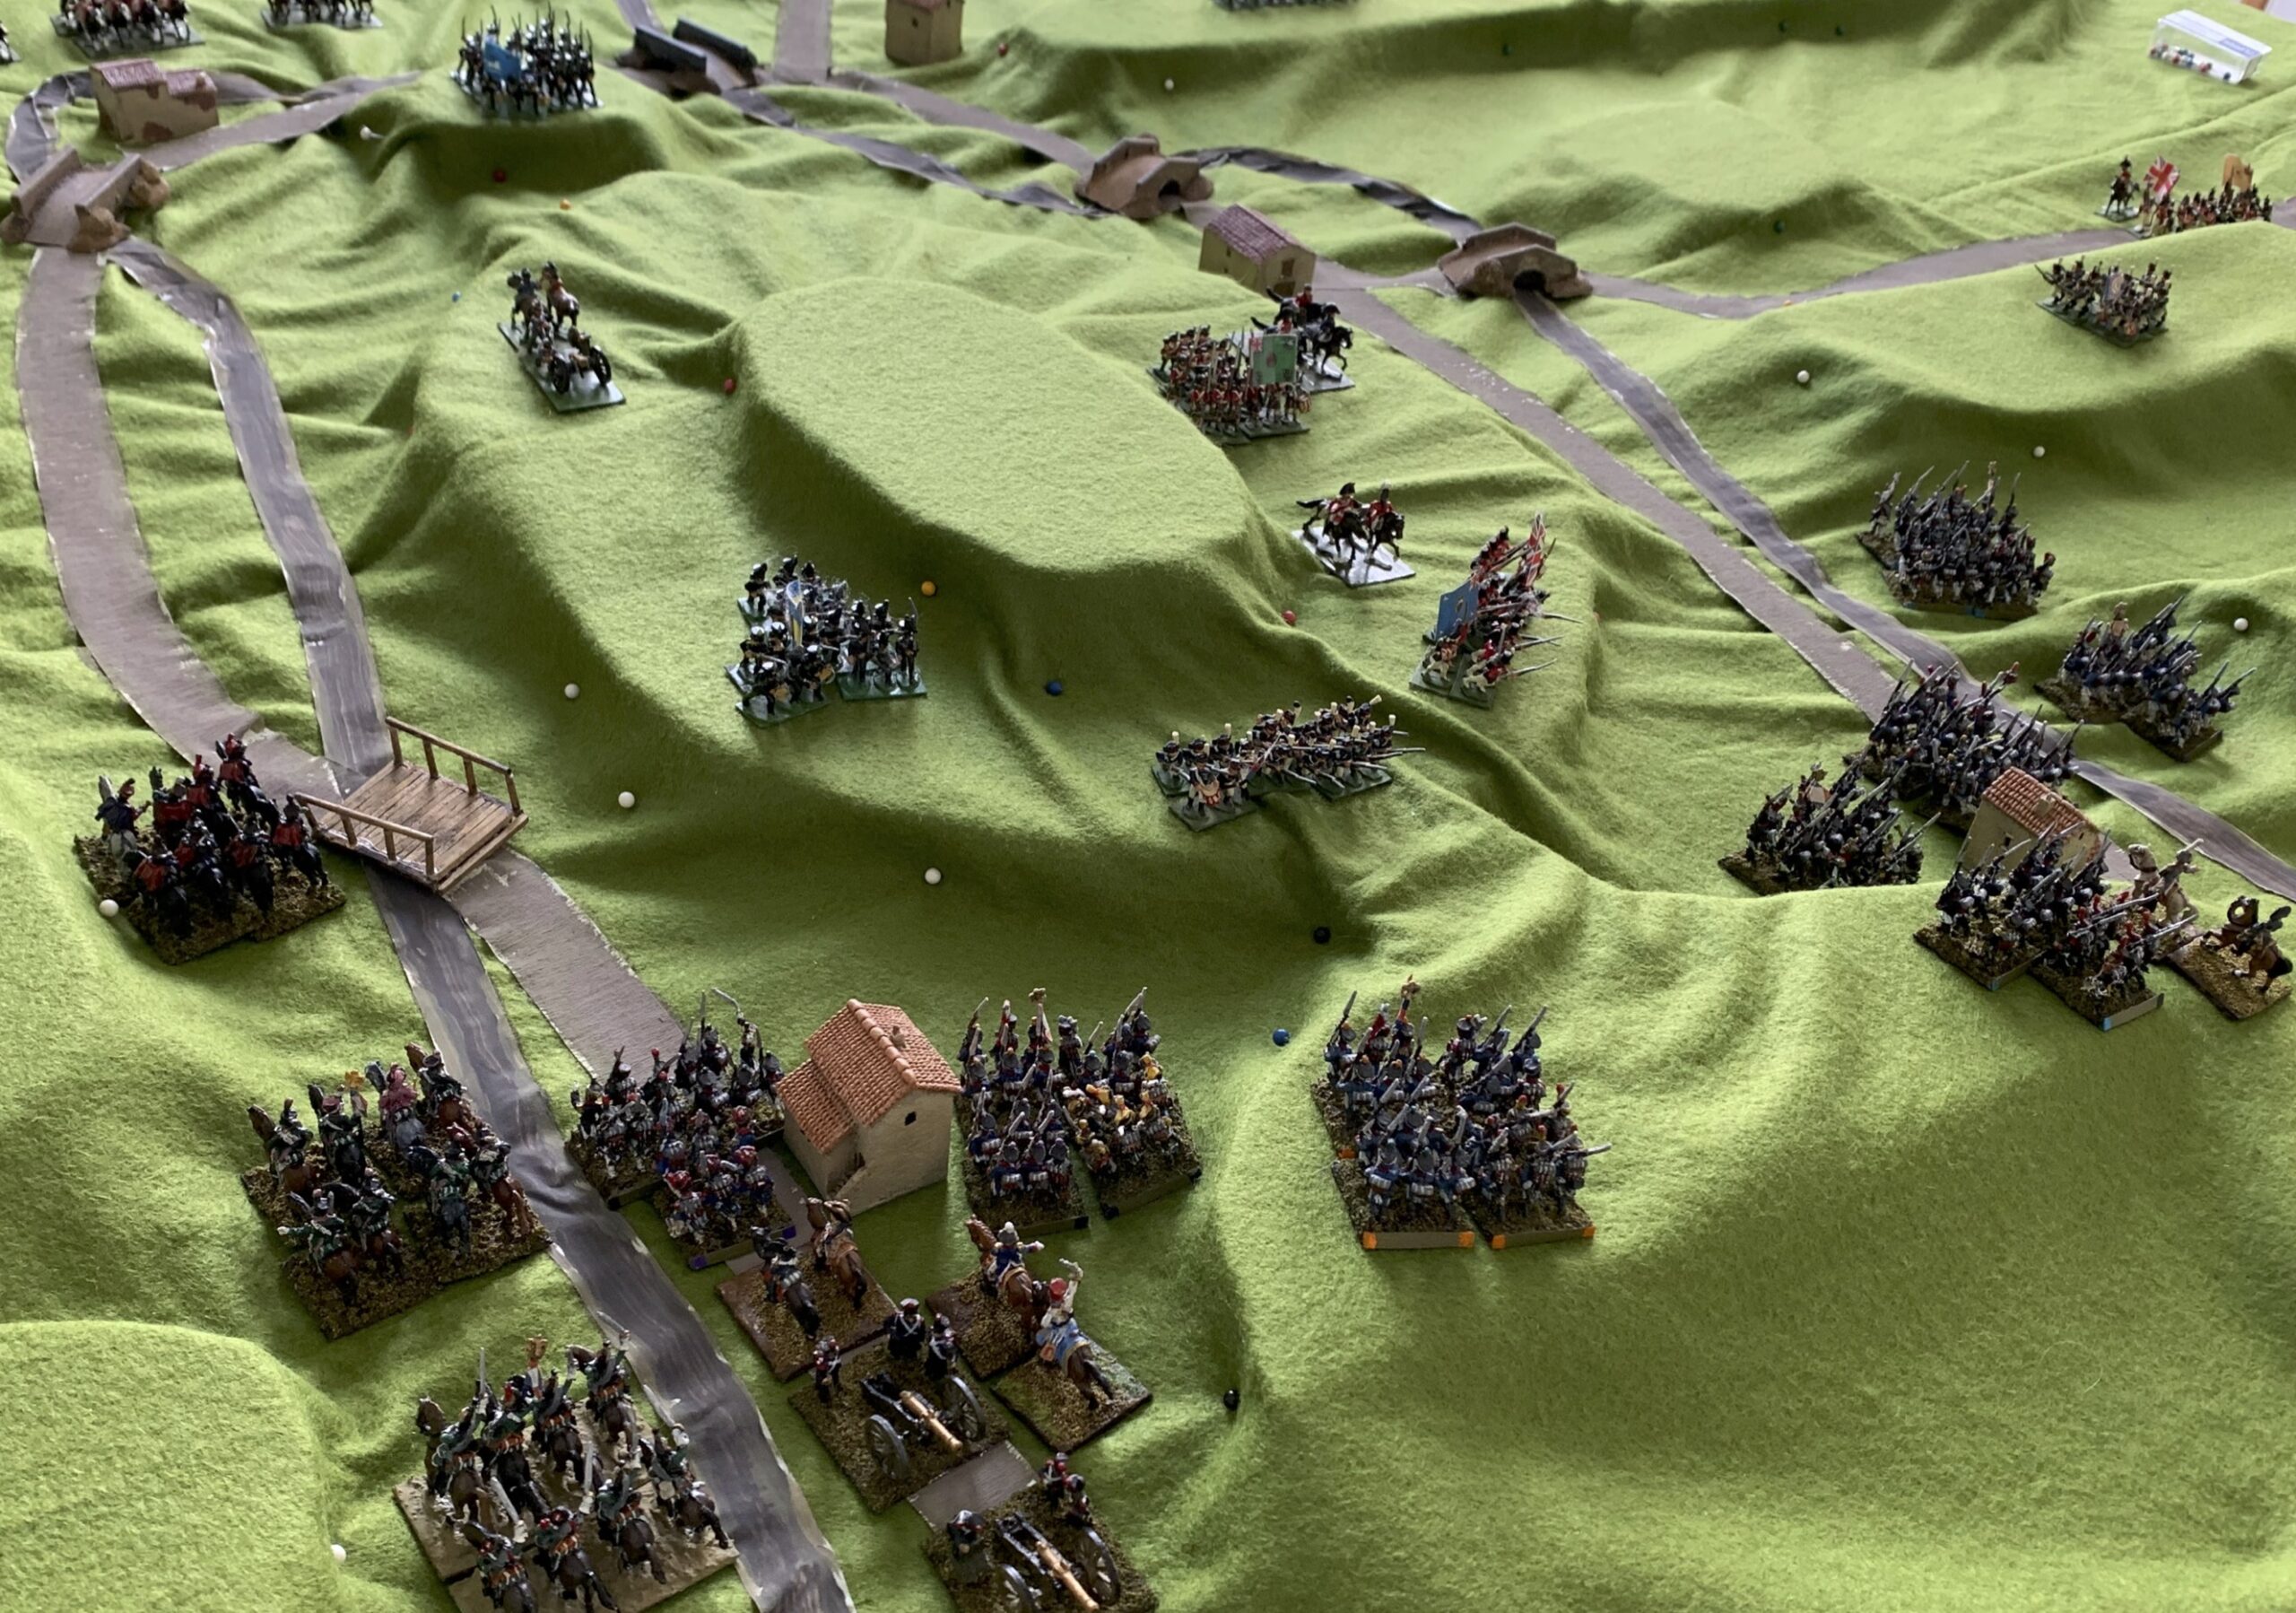
The most difficult thing about refighting this battle is the terrain. I am a big believer that terrain dictates the course of battles, and that even small details matter. It puzzles me that many historical wargamers seem to take a lax attitude to it – though getting it right is undoubtedly hard work. Which isn’t to say you can’t achieve this with a greatly simplified presentation, just that this requires an understanding of which features were critical. Sorauren was fought over terrain dominated by steep hills. This is tricky for wargamers at the best of time. I didn’t have time to do more than a rushed job of taping some 1in chunks of styrene to the table (in two contour layers) and a couple of thinner bits for lower hills, and throwing my green felt cloth over it. This was completed using paper tape for roads and rivers (painted over with tempera paint) and scattering some buildings and bridges on it. You can see the result in the picture, and its not very pretty. With such steep and complicated hills the time-honoured method of using cloth over formers is problematic. I used map pins, but rumples in the cloth are everywhere.
The central feature of the battle is a large hill referred to by Oman as the Heights of Oricain, but otherwise un-named on the maps, which rises to about 200m above the plain. Wise referred to it as “Cole’s Ridge” – but it isn’t ridge-shaped. This is rather typical of the way historians have tried to bend this battle into the shape of a classic Peninsula reverse slope encounter that historians try to do for all Wellington’s defensive battles. In several important respects I got the terrain wrong, as a close examination of Google Earth revealed afterwards, and these do much to explain some of the deviations of the game from history. If I do this again, I will use more contours, as this is a better way of dealing with many of the important complexities. For most battles two contours is more than enough, but alas not here.
I am also left with the challenge of how to improve the visual appearance of the table. One thing I had in hand is to use a different cloth, or battle mat. The day after the game a new fleece mat from Geek Villain arrived, in their Sicily pattern, designed to represent arid terrain. I had a chance to see how it worked over the formers, though I did not try the pins.

A lot of the same problems emerged as for the felt, as can be seen from the rumples, but the material does fall more easily over the shapes, and the colours are much better. My bête-noire is the over-use of saturated colours in wargames products (like my felt mat) – and this product does not fall into that particular trap. The big question is whether I create the hills to sit on top of the mat, using paint and flock as best as possible to blend in. A point to ponder. Other questions are whether I manufacture lengths of roads and streams to look a bit better than the painted tape – perhaps using caulk. On Google Earth the watercourses are marked by vegetation along their banks, and this may well have been the case at the time – replicating this make make them too wide though.
There does not seem to be too much doubt about the forces involved, fortunately. The only doubt I had concerned the French cavalry. The maps (I also have Fortescue’s – but not his text) show that the French deployed cavalry from Pierre Soult’s division – which did engage with the British hussars on the day, having deployed to the far left of the French positions, alongside Foy’s division of Reille’s corps. P. Soult’s division was in fact a very large cavalry formation, especially by Peninsular standards, with nearly 4,000 men. It is highly unlikely that all of it picked its way across the difficult hill paths to reach the positions shown on the battle maps. I divided this unit into three, and placed one of the sub units with Foy, with the rest backed up along the mountain pass with the artillery. To represent the forces on the table I dropped the normal ratio of 1,250 infantry (or 400 cavalry) to a base to 1,000 (or 333 cavalry), and limited the maximum unit size to four bases rather than six. This reflects the terrain which made it hard for large formations to operate cohesively, as well as the relatively small numbers of the forces involved. Using this system for the French was quite straightforward – each unit was a small division or large brigade. The British infantry divisions were another matter. They typically had 6,000 men organised into three brigades, one of which was Portuguese. The whole division is too big to be a single unit; the brigades are too small. I allowed two units per division, the second unit being Portuguese for Pack and British for Picton. Cole’s division was another matter, as it was reinforced by additional British and Portuguese British brigades, and a couple of Spanish battalions. I represented this formation as four three base units, two British, and one each Portuguese and Spanish.
For the game I chose to start it at midday, an hour before Soult planned to launch his attack, but when the French spotted Pack’s arrival and Clausel responded. In fact I had Pack too far back historically (or I should have started with the British moving first). The objective was for the French to break through to the far side of the table and relieve Pamplona; the game was six turns long. Playing the French, I got nowhere close to this objective, though not radically far from the historical positions. On the their right, the French benefited from Pack’s late arrival, which was compounded by the British component of this formation grinding to a halt due to poor activation throws. The Portuguese took the brunt and the unit was eventually eliminated. But Rob brought forward McDonnell’s Spanish division, which was more than able to to contain the remaining threat. On the French left, Rob could not resist the temptation to use his considerable body of cavalry (which included two fine units of heavies, not actually used on the day), to push forward up the valley. This brought out all of the French cavalry, and I also pushed forward Foy’s infantry. This was eventually reduced to a stalemate, with the French infantry rather battered. Rob then started to move his infantry to the centre to contain the French threat there. Subsequent research showed that this highly unhistorical course of events was shaped by errors in my terrain layout – the river valley was too narrow to take such troop movements while the main heights were being contested. The front of Picton’s position was also more difficult terrain, with a steep slope and a river bed – which would have limited the movement of cavalry.
The main battle was in the centre, as the French tried to take the hill. Cole’s four units looked distinctly vulnerable as they could barely cover the front, against the six French units, some of which were large four-base ones, notwithstanding the steep slopes. It didn’t help I forgot that the British units had a discipline bonus (allowing them to recover more easily from disruption). But once Rob had brought forward the British unit in reserve (Byng’s brigade), the slope was enough to keep the French contained on the British left, while the Portuguese holding the famous col in the centre (inasmuch as anything in this battle is famous) where the slope was not steep, also held their own. But that left two French units to gang up on the Spaniards on the British right. These were pushed back and French breakthrough beckoned. I saw an opportunity to push through to Pamplona; Rob was worried that the French units would turn to take his other units in the rear, where his reserves had been committed. He brought forward Murillo’s Spanish division, which contained the threat to Pamplona.
And there the game concluded. The French objective is pretty much impossible to reach. Even if the battle on the hill had gone better, there was not enough time to get to the other side of the table, especially as there was likely to be some form of last line of defence. It would perhaps have been better to either focus the game on the hill, or perhaps leave a path to victory for the French in destroying a substantial part of the allied army. Not that I had nailed the battle particularly well; I devoted too much strength to the centre, and could easily have deployed an extra unit to the right after the good initial progress there.
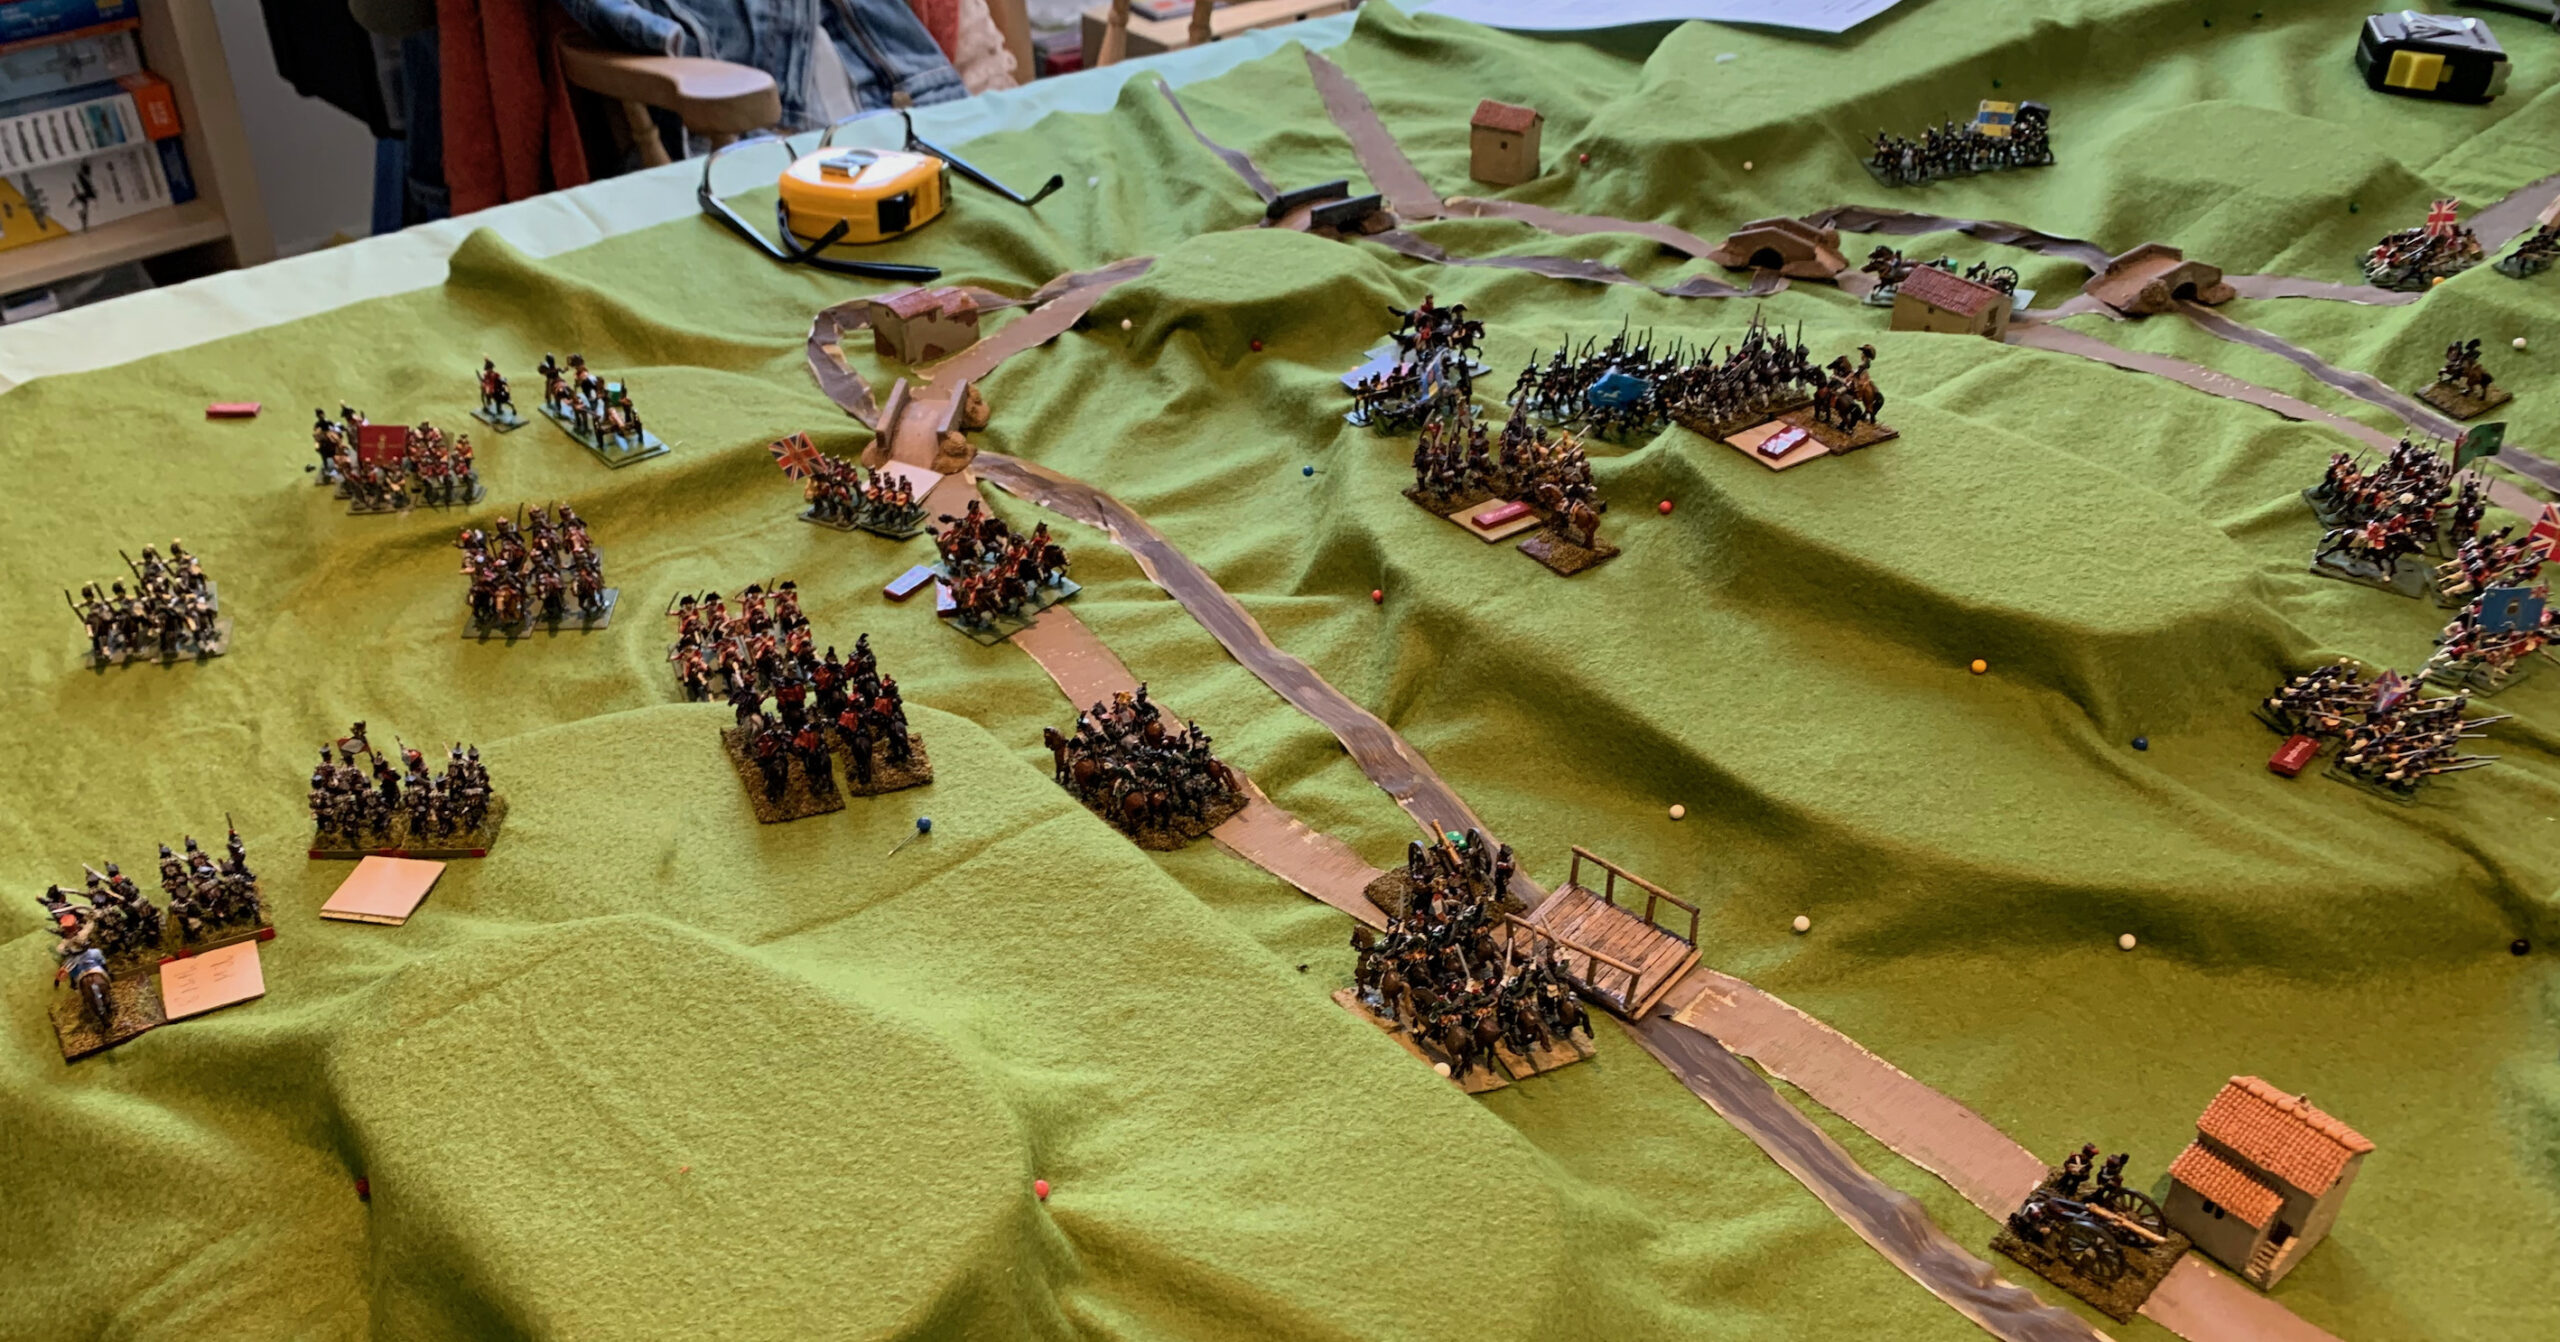
Here’s how the game looked at the end:
It was very good to have a proper live game at last. But it has left me with plenty of food for thought, about the scenario, the appearance of my games, and the rules.
Leave a Reply