In my post before last I said that the next step this project would be to take my old German tanks and bring them up to standard. This I have now done: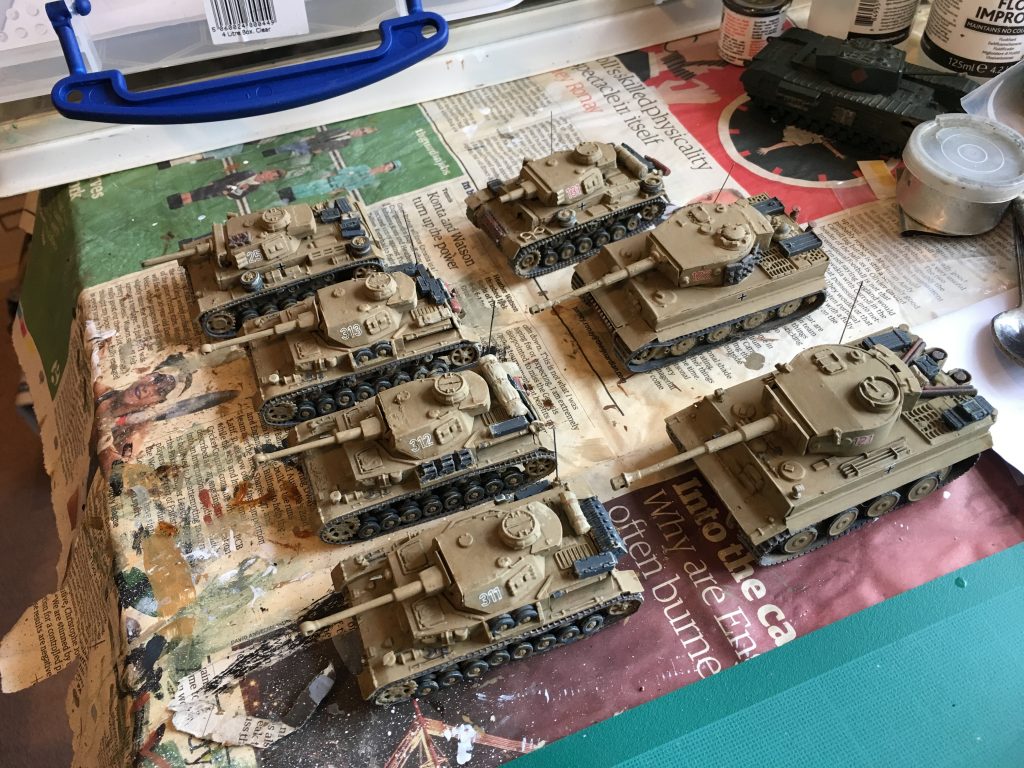
I followed a similar process to my Pz III platoon. First, though, the models needed a little preparation. This included fitting aerials. I used plastic bristles from a broom, but to scale 2m (28mm). These were fitted in a blob of superglue. This works very well – they are robust and have survived quite a bit of accidental battering. I also fitted some stowage from the PSC set. Not as much per tank as the Pz IIIs, and especially not for the Tigers. German tanks of this era don’t seem especially laden – not as much as in the Blitzkrieg era, or Allied tanks. The pictures of Tigers show them as quite clean, except for track bits added to the turrets, which I did for one of the tanks.
I primed the bare plastic additions, and also the polythene tracks, which all these models had, using the white metal primer. I still had some of the adhesion problems on the new plastic that I reported for the Pz IIIs. The primer was slightly diluted, but not as much as before, so that problem remains to be solved. If it isn’t dilution of the primer with water, and not the plastic requiring a wash first, I will change primer – artists gesso looks as if it works well.
And then to the base coat of dunkelgelb. I wasn’t able to reuse the paint I mixed last time – it was too far gone, so I had to mix afresh. I wasn’t able to get an exact match – and that is one of the main issues with my use of artists colours, and why I expect that most hobbyists will find this approach unpersuasive. Still, the mix was arrived at much more quickly (yellow ochre and white, with Prussian blue and terracotta brown added – all from “student” quality paints). The result was slightly greener and slightly whiter than the Pz IIIs, event after the application of the brown Quickshade. Actually I think I prefer it – the Pz IIIs look slight too red. The base coat went on in one sitting, but in several layers. The first was quite liquid, the others much dryer. I lightened the mix a bit as I put more on. It’s hard to say whether the layering had any effect, byond smoothing and imporving the coverage. I don’t think the models looked as flat as my old single coat of Humbrol enamels did, but the layering is not visible to my eye. Incidentally the paint dries very thin, so the layering did not obscure the detail. One of the tanks was victim of several layers of Humbrol, though, and the detail was noticeably less sharp on this one. The quick succession of the various layers may have had the effect of taking off excessive accumulations on the detail rather than accumulating it. Anyway, this looks like a good technique. The first coat takes a bit of time to apply; the others are very quick.
After that came the detailing, including the tracks, wheel tyres and stowage. With no crew to paint this was simpler. Then there was a dry brush of dust colour (the dunkelgelb with white), which was not as heavy handed as last time, though there were still some excess blobs. And so to the Quickshade.
The decals came next. I was more sparing, since these are going to be second-string miniatures. Only two turret numbers. The Pz IVs had no Balkenkreuse on the left (because of stowage) and the Pz IIIs none on the rear. Even so I’m down to my last two of the small (3mm) ones, which will give me issues. I sealed with polyurethane again – but only after the decals had had nearly 24 hours to dry out – they seemed much more robust. Like the Pz IIIs the flash is still visible from some angles though. With the Pz IVs this is made worse because they had to be applied over a slight bump on the turret, which they couldn’t quite do as tightly as I would wish for. I am wondering whether I should revert to a technique I used on my model aircraft 40 years ago – which is to float the decals off the backing paper as normal, wipe off the glue backing them, dry them and then place them using varnish. These modern decals may be too fragile – but this technique worked a treat back in the day. I will have to experiment. Finally I finished with a spray of matt varnish.
Lets look at them in a bit more detail. First the three Pz IVGs: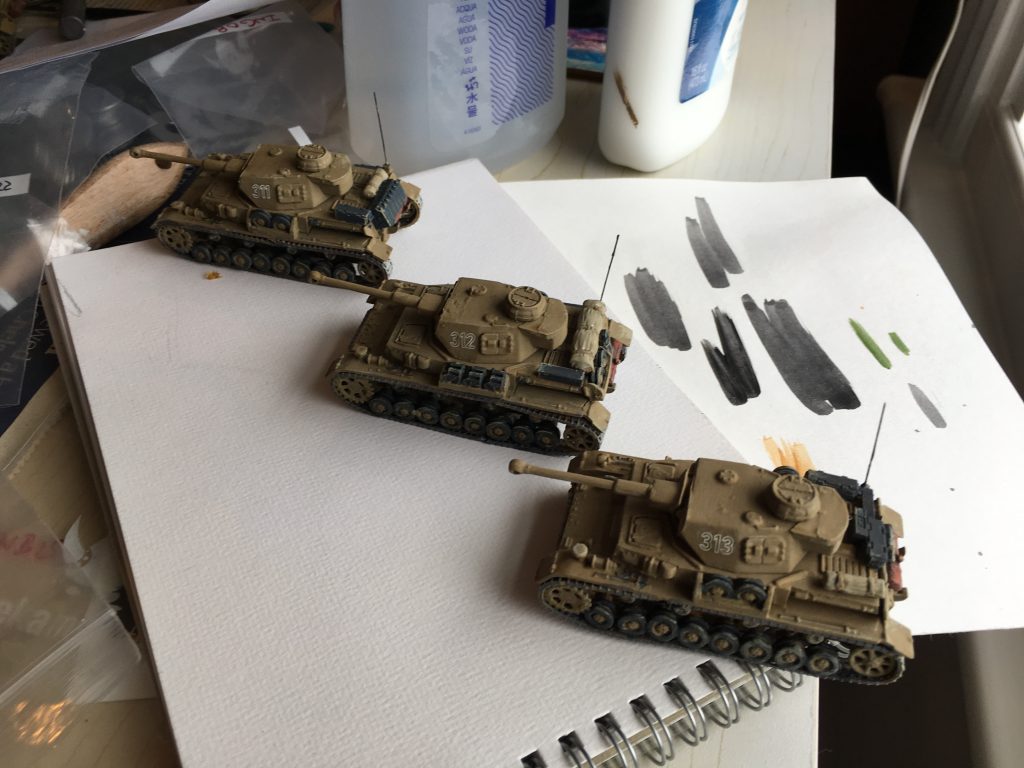
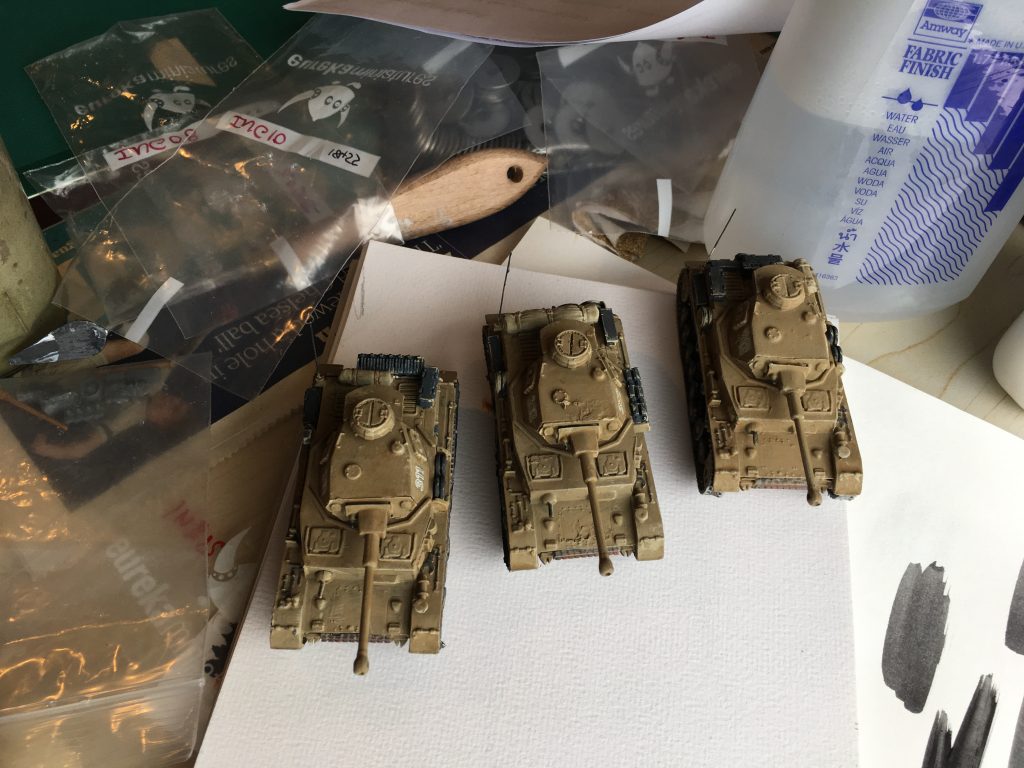
The lighting conditions were a bit challenging, so these pictures aren’t very good I’m afraid. These are Airfix 1/76 kits. I was very excited when these first came out. Until then the only German tanks readily available were the Tiger, Panther and StuG III. These set up very unequal battles with the Airfix Shermans. And this model was of a higher standard too. One of these models (213, closest to the picture) was my first, which I painted green at first (we knew no better). I then repainted in the fictitious desert orange that Humbrol produced. The layers of paint did the model no favours. The other two models came in later, when I was more serious about wargaming, and had more money. I painted them in the Humbrol dunkelgelb, with (different) camouflage patterns. The models were a bit tricky to assemble, and there are gaps, and some of the wheels are a bit wonky (and one of the top rollers missing). Also my handling of the polythene tracks was very inexpert. This time I did not think it was worth the time to attempt to correct these errors, I painted as was, with a bit of extra stowage. I numbered them as a complete platoon, and these will be useful on the tabletop, until I can produce some smarter 1/72 Pz IVs (which will be Hs with shurzen on the turret).
The aerials, incidentally, are almost certainly in the wrong place for 1943. Like the Pz III, the Pz IV was originally fitted with a solid, tapered “stern” aerial beside the turret, which folded down when the gun got in the way into a wooden tray on the side of the hull. But this tray is not modelled on the Airfix kits, so I fitted whip aerials at the back, according to later pictures of Pz IVs that I have seen. This creates less hassle with rotating turrets.
Next the Pz IIIs: 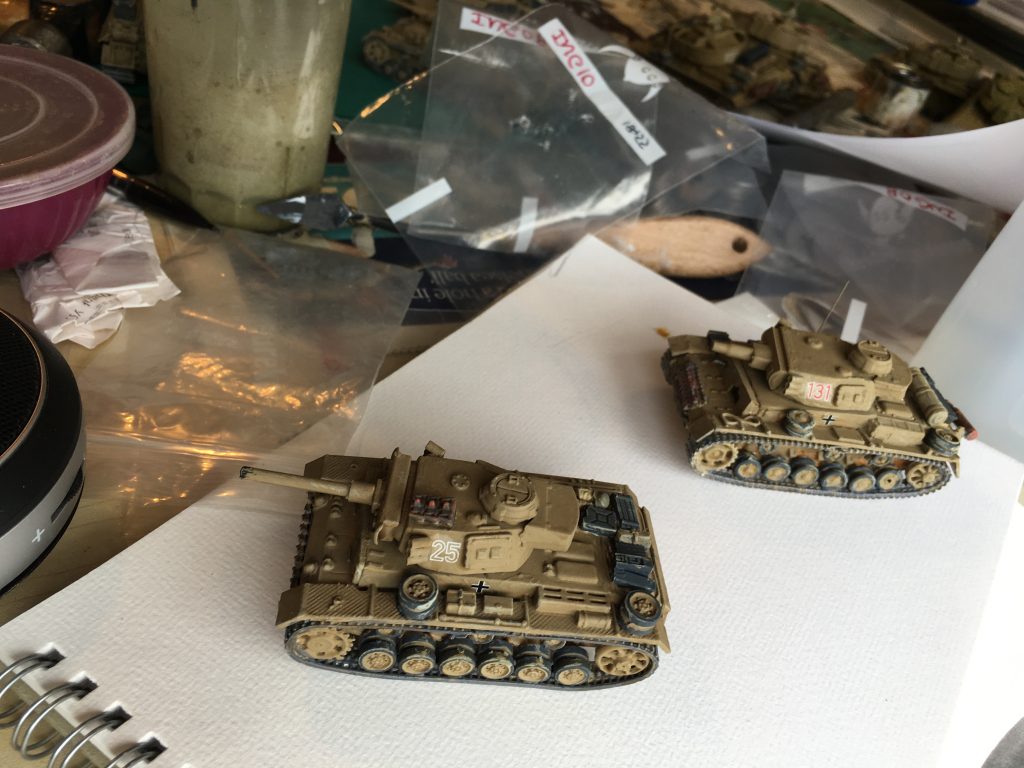 The foreground model is a Matchbox kit at 1/76. This was one of my more recent acquisitions, when at last we had a wider variety of models available. It is a nice clean model, which had fewer of the assembly issues than the other ones. Its only problem (apart from being unable to open the hatch) is that the 1/76 scale makes it look a bit small compared to the 1/72 tanks. For this model I replaced the barrel with the flammpanzer one from the PSC kit, as well as smoke dischargers. This gives me an extra tabletop option – though I can’t deploy a complete platoon, as the Germans did apparently at Salerno, though they proved vulnerable to the Shermans. I did not fit an aerial for this one, for the same reason as the PSC kits. The model clearly shows the stern antenna stowed in its box along the track guard.
The backgound model is a conversion I did from the Airfix StuG III. This lacks the detailing of the proper models, but helps make up the numbers. I replaced the gun and rather crude mantlet with the short 75mm from the PSC kit (slightly overscale, but looks OK), along with the smoke dischargers (I couldn’t fit them to the PSC models because of the turret schurzen). The model is a bit wonky, but it gives a bit of support to the Tigers, with which this sort of tank operated. I fitted an antenna to this one, where the folding stern antenna would have been – though the bristle is a bit too thin at the base. Given the weak detailing on the model I though it would help lift it a bit.
And so to the Tigers: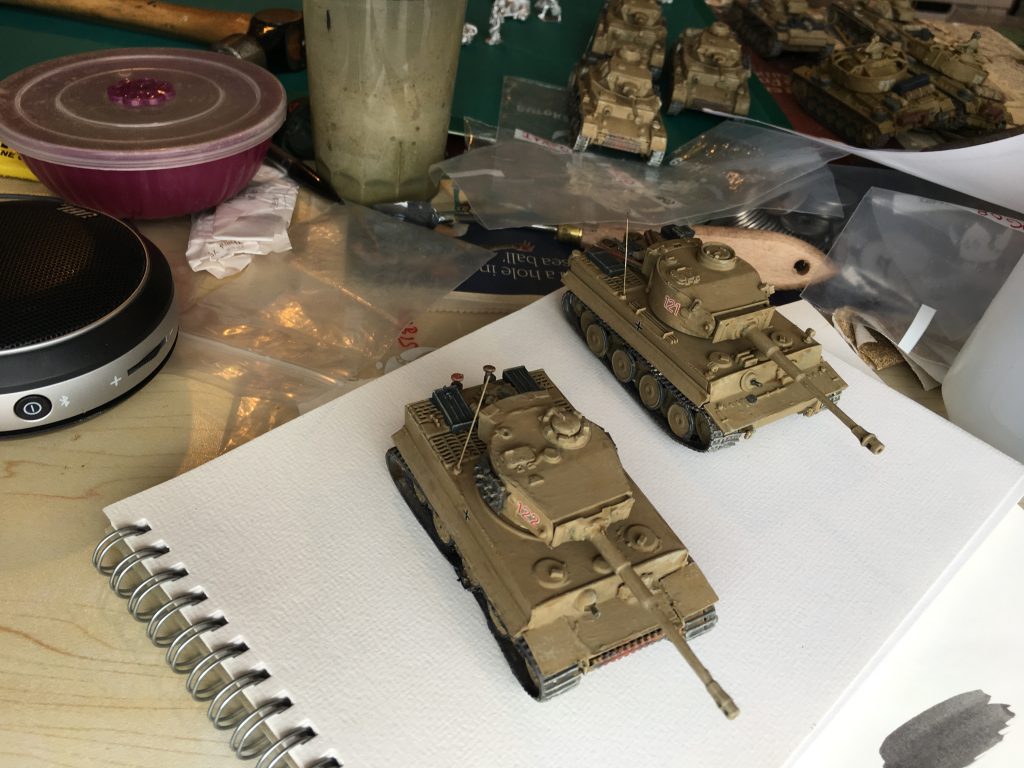 Tigers played a significant role in Tunisia, a minor one in Sicily and were not present at Salerno (though the British kept reporting them there!). I don’t plan for them to be an important part of my games, but I have them, and they will be a handy option. The tank at the front is the oldest German model in my collection – an old 1/76 Airfix kit. This was originally painted dark grey. But when I bought the second kit, I thought it needed a facelift – so I added mudguards to cover the tracks at the front, and a stowage bin at the back of the turret, and then painted it in dunkelgelb. It did the job. There was a bit of an issue with the polythene tracks. In photos these looked heavy and lay on top of the track wheels – something this flexible track wouldn’t do – and it wouldn’t respond to being glued down either. This time I managed to partially glue it down with superglue – though it required to be held down for an hour or more while the glue hardened. The aerial was fitted in the only place that photos show single aerials on Tigers (second or third aerials might appear on the turret or engine deck). It probably should be a stern aerial – but what the hell!
The other model is much more modern, it was from Hasegawa and in 1/72. It’s a much nicer model though I made a bit of a mess with the running wheels, and the polythene track is pretty crude. The track needed the same treatment as the Airfix one, and I also stuck the aerial in the same place. In spite of being different scales the two models can work together for now. the size differential seems to matter less than for the smaller tanks.
These models aren’t to a particularly high standard, but the facelift has improved them a lot, and given the models some unity. Back in the day I tended to make models as individuals. But this exercise shows that I am right to concentrate on more basic wargamer models nowadays, like the PSC ones. The moulded tracks look much better than the flexible ones. The running wheels may be less detailed (you don’t get the double wheels) but they are much less work and don’t end up looking wobbly.
I now have strength and depth in German tanks. While my Sherman project still needs to deal with some complexities (getting crew; making decals; more stowage), I will move on to the infantry. I have ordered a platoon each of Germans and British from AB, and they are now ready to paint!