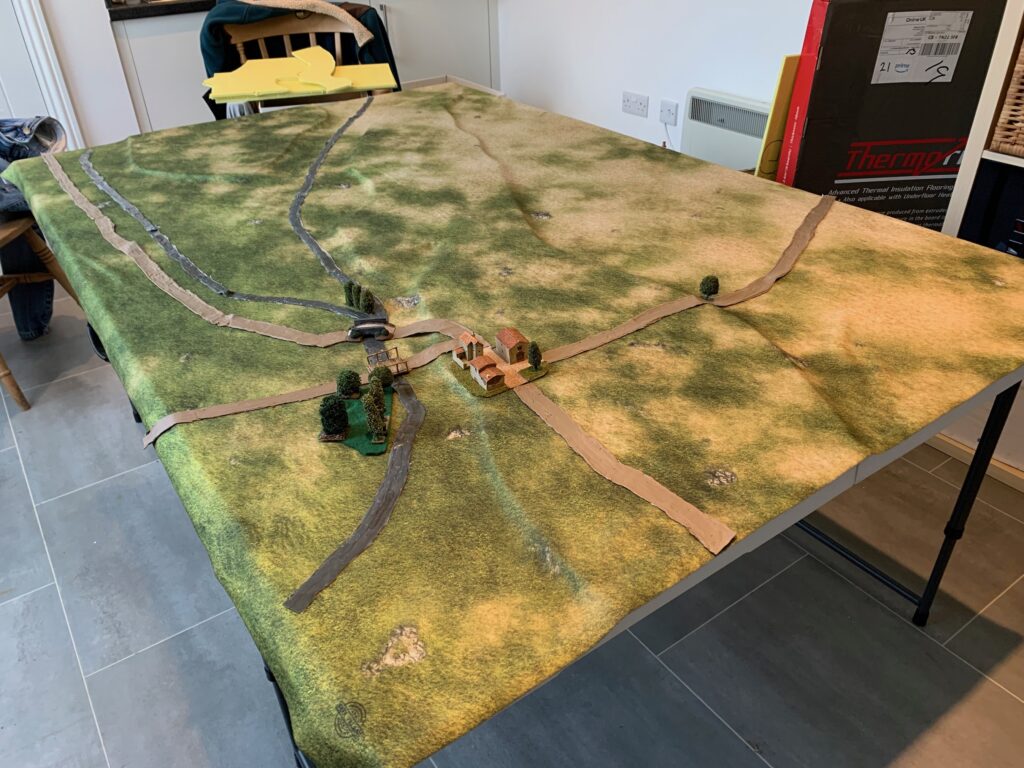
Last time I posted about the first stage of creating a wargames table for my Albuera game – which I dealt with by placing a fleece mat over a contoured surface of extruded polystyrene. Next come the roads and rivers. I have been trying out new techniques on this – by using decorators’ caulk.
I am not a fan of the standardised lengths of road or river that you can buy commercially. Nature doesn’t usually conform to these shapes, and there are lots of joins. All this is fine for an evening club game when you need to set up in minutes, and the game is usually quite generic. But you should aim higher for historical battles. Hitherto my technique has been to use masking tape, painted over with tempura. But these don’t handle bends well – especially in rivers and streams, and painting the edges of the tape means a bit of spillage onto the terrain mat, which also softens the edges. That was OK for my old felt mat, but not my lovely new printed fleece. So I decided to try a technique described on the Altar of Freedom website – using caulk. This is meant for 6mm terrain in the American Civil War, but my features aren’t that much bigger.
Two types of caulk are needed: opaque for the roads, and transparent for the rivers. The material needs to be paintable – so you need acrylic caulk rather than silicone. For the opaque sort I decided to use coloured material rather than the standard white. It would still need to be painted, but any gaps and damage would be less visible. I bought Unika ColorSealant on Amazon in medium oak. It comes in tubes designed for use with a “gun” – which I also had to buy. It proved trickier to work with than I hoped.
First off I tried spreading it on an old plastic document wallet (I have dozens of these) – but one of caulk’s properties that makes it so useful in DIY is adhesion – and it was impossible to get it off the backing cleanly. I experimented by spreading it on jay cloth that had been pre-cut. That was fine, and gave a more robust product, but a bit of a faff. I also tried wax paper – as recommended by Altar of Freedom – and I found that I could peel it off that with a bit of care. Once off the backing though, the product was a bit fragile and retained a slight stickiness. It is unlikely to survive most types of storage, so it will usually need to be remade each time a table is put together. One thing I learnt on my experiments is that this stuff hates water – which dilutes it rapidly. I tried spreading it on damp jay cloth (so that it was nice and flat) – which was a bit of a disaster.
Transparent acrylic caulk is much harder to find, and (usually) pricier. Most transparent caulk is silicone, which can’t be painted. Eventually I found some on Screwfix – No Nonsense All Weather Clear. This is very different stuff from the opaque material: it is less adhesive, dries quicker and is much harder to paint. Spreading it on plastic document folder was fine, but painting the underneath afterwards not so much.
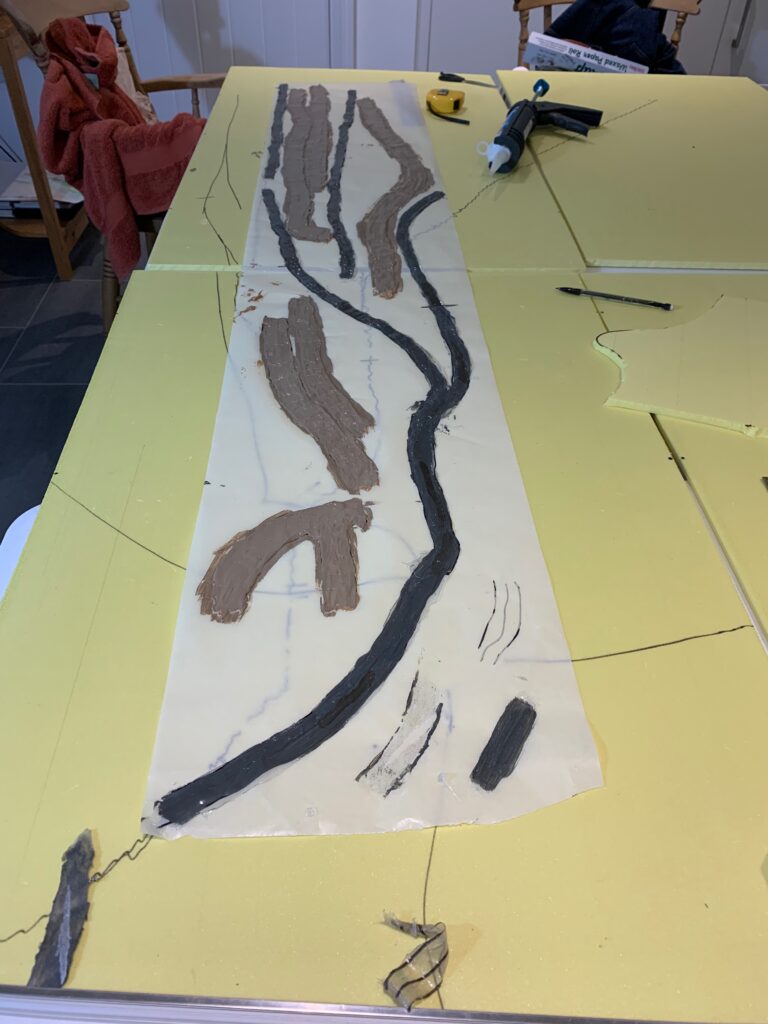
So much for the experimentation. I want to describe what I did for my Albuera table. I decided on using wax paper. It can be rolled out nice and long, and it is transparent enough so that you can trace felt-tip markings through it. The first step was to trace out the course of the roads and rivers in felt-tip on the XPS base board. I could then mark up the lengths required (using the felt-tip) by tracing through the wax paper. The river bottom was then painted onto the wax paper, over the felt-tip. I then spread the caulk. This means laying beads onto the paper from the caulk gun, and then spreading it into a reasonably flat surface with a spatula. And then I applied paint to the road sections. I did this all in a single session of one to two hours, which meant laying things down before the previous stage was fully dry. The sequence, after the tracing, was: paint the rivers; lay the caulk for the roads; lay the caulk for the rivers; paint the road. A bit of wet on wet is fine, so long as there is no water. Small traces of water in the paint I used for the road (student acrylics) caused issues, though fortunately not fatal. Acrylic paint blends well with he caulk, though, and white caulk would probably probably have been fine. This is how it looked when I left it overnight:

I came back after nearly 24 hours. The river sections peeled off fine, with the paint sticking to the caulk rather than the wax paper, as planned – a bit of wet-on-wet probably helped; the sections just needed a bit of trimming with scissors. Alas the roads did not peel off as nicely as they did in the experiment. In the end I had to leave the backing paper on and cut them out. At least that made the end product a bit more robust, though less flexible. I found that there was a bit of spreading on the road, as a result of water in the paint mixture; in some cases this created a slight ridge at the edge – actually quite a pleasing effect!
There was no time to do more work. The roads could have done with a bit of dry-brushing, and perhaps painting the edges in a contrast colour, or even flocking. It would have been nice to do something with the river margins. Both look a lot better than using tape, though, and the more complex features, like junctions, come out nicely. The rivers are fine by wargames standards, but still aren’t very realistic. The grey colour was a bit of an accident – I mixed too much blue in with the brown – I had wanted something browner. Watercourses should run in a bit of a depression – but that could only be achieved with a lot more cut XPS. In fact rivers and streams (especially in Spain) look more like strips of green than blue, grey or brown, as the banks are vegetated, and this tends to dominate the usually trickling flow of water. I could potentially achieve something by using flock while the caulk is still wet – though I would need to be careful about bridges and fords. But as already mentioned, caulk terrain is not robust, and it is best regarded as throwaway – so it is not worth investing too much in it. Flocked margins would make storage even trickier. On the table, the pieces did have a slight tendency to be knocked out of position. Pinning down with tree models may be a solution, but they should really be a bit wider to accommodate this.
I will try to store these pieces, along with the cut pieces of XPS, so that I can run the game again, but my expectations are low. Anyway I’m sure I will be using some variation on the technique for my next project. Once the basic techniques are mastered, this is very quick and easy -the wet on wet technique in particular saves a lot of time. I will post about the trees and villages on another day!