My Panzer III platoon is very much a learning exercise, as it is the first time I have put together AFVs for the tabletop (except some microtanks) for 40 years. This has proved to be the case in particular with the finishing.
But first here are some pictures of a real Pz III on show at the recent Bovington Tankfest.


 This is an L captured at El Alamein. Bovington have painted it dunkelgelb (dark yellow) which became the standard German base colour in 1942. I don’t know whether this because the original was painted this way, or whether it was in fact painted in one of the desert colour schemes in operation at the time. Regardless, it is this dunkelgelb that I want to reflect on my model. The first thing you get from these pictures is how different the colour looks in different lights! Still it looks nothing like the “authentic” Humbrol desert sand sold in my youth, which can be seen on the Pz IIIL model in my last post. That is a brighter and redder shade; quite where it came from I don’t know. The desert colours used before the dunkelgelb were yellow-browns (alongside greys) – a bitter redder, no doubt, than the dunkelgelb but much more muted than that paint.
This is important because I have decided to use artists acrylics on my models and figures, and not hobby colours. I already do this for my Napoleonics, and I fancied the challenge. I get to skip those endless debates about which precise shade of Vallejo colour I should use, and mix a colour from standard pigments as an artist does. This means I need many fewer paint hues – and no new ones. But for WW2 this approach isn’t for the faint-hearted. Getting theoe muted browns, greens and greys to look right is hard work.
But first I wanted to prime the models. I don’t use aerosol paints, because I have no suitable space to apply them. I do have a patio at the back of the house, but it is palaver to get the gear down there and protect the garden furniture etc. from stray paint – and the weather conditions have to be right. I have tried this for my Napoleonics and given up. I also had a problem to make sure that every part of the miniature was properly covered. The exception for aerosols is the final coat of varnish, which I don’t think is as risky. So I apply primer by brush. I use a special metals primer from Fortress, acquired at a DIY store, in white – the water-based version. I works well enough for my metal figures, where I apply it diluted with water. But it was problematic on hard plastic (polystyrene). The surface was slightly repellant. But with a bit of poking I was able to get complete coverage – though it was hard work, and wrecked the brush I was using: I have ordered some cheap acrylic brushes for future work! Next time I will try the primer undiluted – though it is quite thick. But it dried quite nicely and provided a good surface for subsequent layers of paint. It may also help if the models are washed with detergent in advance.
Next came the base coat. This was going to represent the dunkelgelb. The important point to make here is that painting a model is not like finding an authentic shade for a full-sized replica or museum piece. Authentic shades for the latter will not look right on models. I think this may be the problem with the old Humbrol “authentic” dunkelgelb – which I used a lot on my teenage models (including the Pz IV in the picture on my last blog, with camouflage green). It looks too dark and a bit too green – this may simply be a scale effect – the darkness surely is. What counts is finding what looks right on a model in normal indoor light conditions (daylight for me). German dunkelgelb is not an easy shade to mix (unlike practically all the colours used in Napoleonic uniforms!).
It was obvious that I should start with Yellow Ochre or Yellow Oxide (much the same thing), and that quite a bit of white should be mixed in. But this is too bright – it needs to be dulled down. Using conventional colour theory I at first used a deep purple pigment for this (purple is complementary to yellow, meaning that it will neutralise it rather than change its hue). But the result, on my Pak 38 AT guns was much too red. So my next attempt was to mix in a reddish blue (Ultramarine), but this came out a rather horrid green shade (there is some of it on the Leopard tank in the background of the picture on my last post. My ideal in colour mixing is to use two (complementary or near) colours and white. This wasn’t going to work – I would have to balance three colours and white – something that is a bit tricky. I used Prussian Blue and a red-brown to go with the yellow ochre). For the base coat, incidentally, I was using cheaper “student” paints rather than the higher quality “artist” ones – having noticed that 20mm models soak up paint much faster than 15mm figures. (The better quality pigments are much better for painting details, where you need sharp lines) This took three goes. On each occasion I was convinced that I had the right shade, but as it dried it looked wrong, compared to my pictures taken at Bovington, and other sources. The colours did dry a bit redder than when wet (perhaps because of the lower quality pigments – drying true is one of the marks of better quality pigment) – but a lot of it is simply that it is hard for such muted shades, where is slight shift in the mix makes a big difference. Provided the paint isn’t too thick (and it shrinks quite nicely on curing, so it’s generally OK), this layering isn’t such a bad thing – it can give a bit of texture and “depth” to the model. Still, there are a lot of nooks and crannies on a model tank (especially with the turret schurzen), and so it was hard work and not good for the brushes. Eventually I had something I was pleased with.
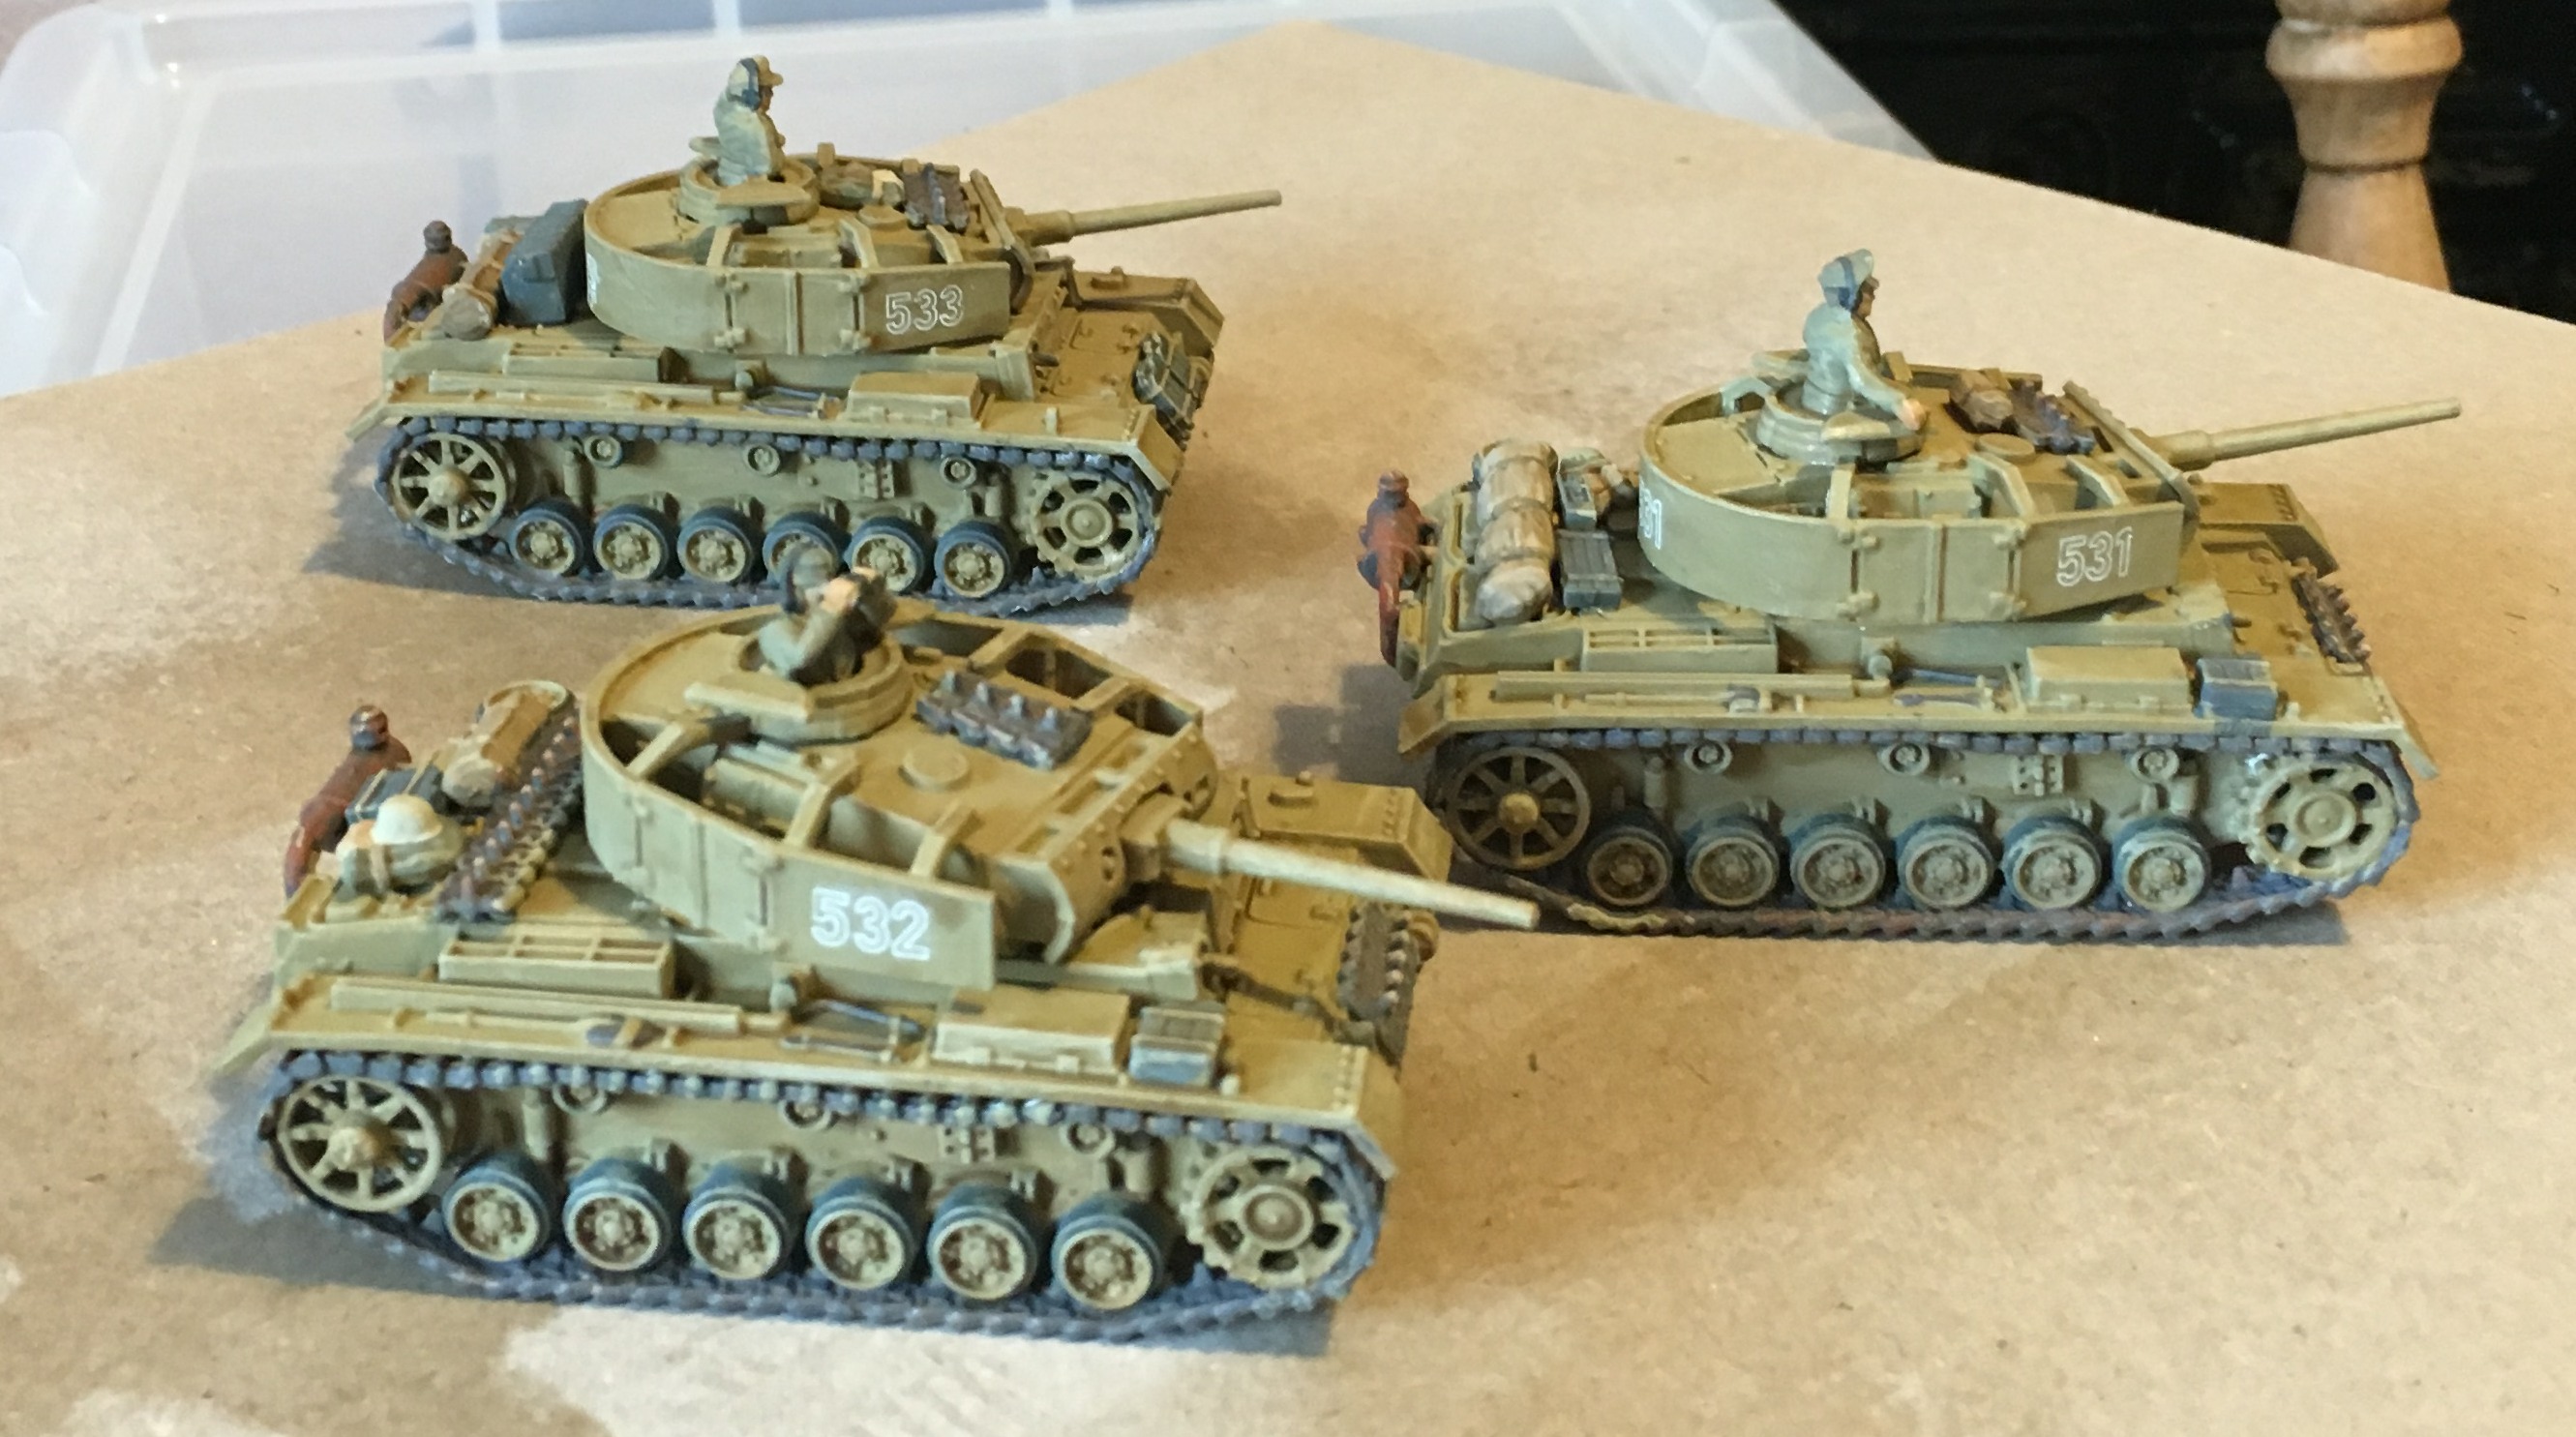
Next step was detailing – the tracks, the tyres, the commander figures, the exhausts and the stowage. I had a little trouble with the uniforms of the commanders – where I was trying to get a faded tropical look. Another problem was the tyres on the running gear – as these were a single moulding in order to reduce the assembly time, so you don’t get the double wheels, so they don’t look quite right – I just hope they won’t be very visible. All this took slightly longer than I wanted – a couple of sessions rather than the one I hoped. I finished with a bit of drybrush with a pale dusty mix – this was a bit heavy handed in places – it’s a technique that is going to need more work. Next came a layer of Quickshade. This is to pick out the recessed detail and generally create depth. It also creates a good surface for decals (otherwise the flash will show horribly, as they do on my old models). I was a bit worried that the brown in the Quickshade would distort the base colour by reddening and darkening it -though the end result is OK, and the photos below sho it to be a bit too green if anything. I have three tins of Quickshade (three grades of colour), though one is dying. Once these are done with I will try to create my own with the floor polish the product it is based on – and that will allow me to have more control over the colour of shading – a dull purple would have been better in this case (the French Impressionists would have approved of that!).
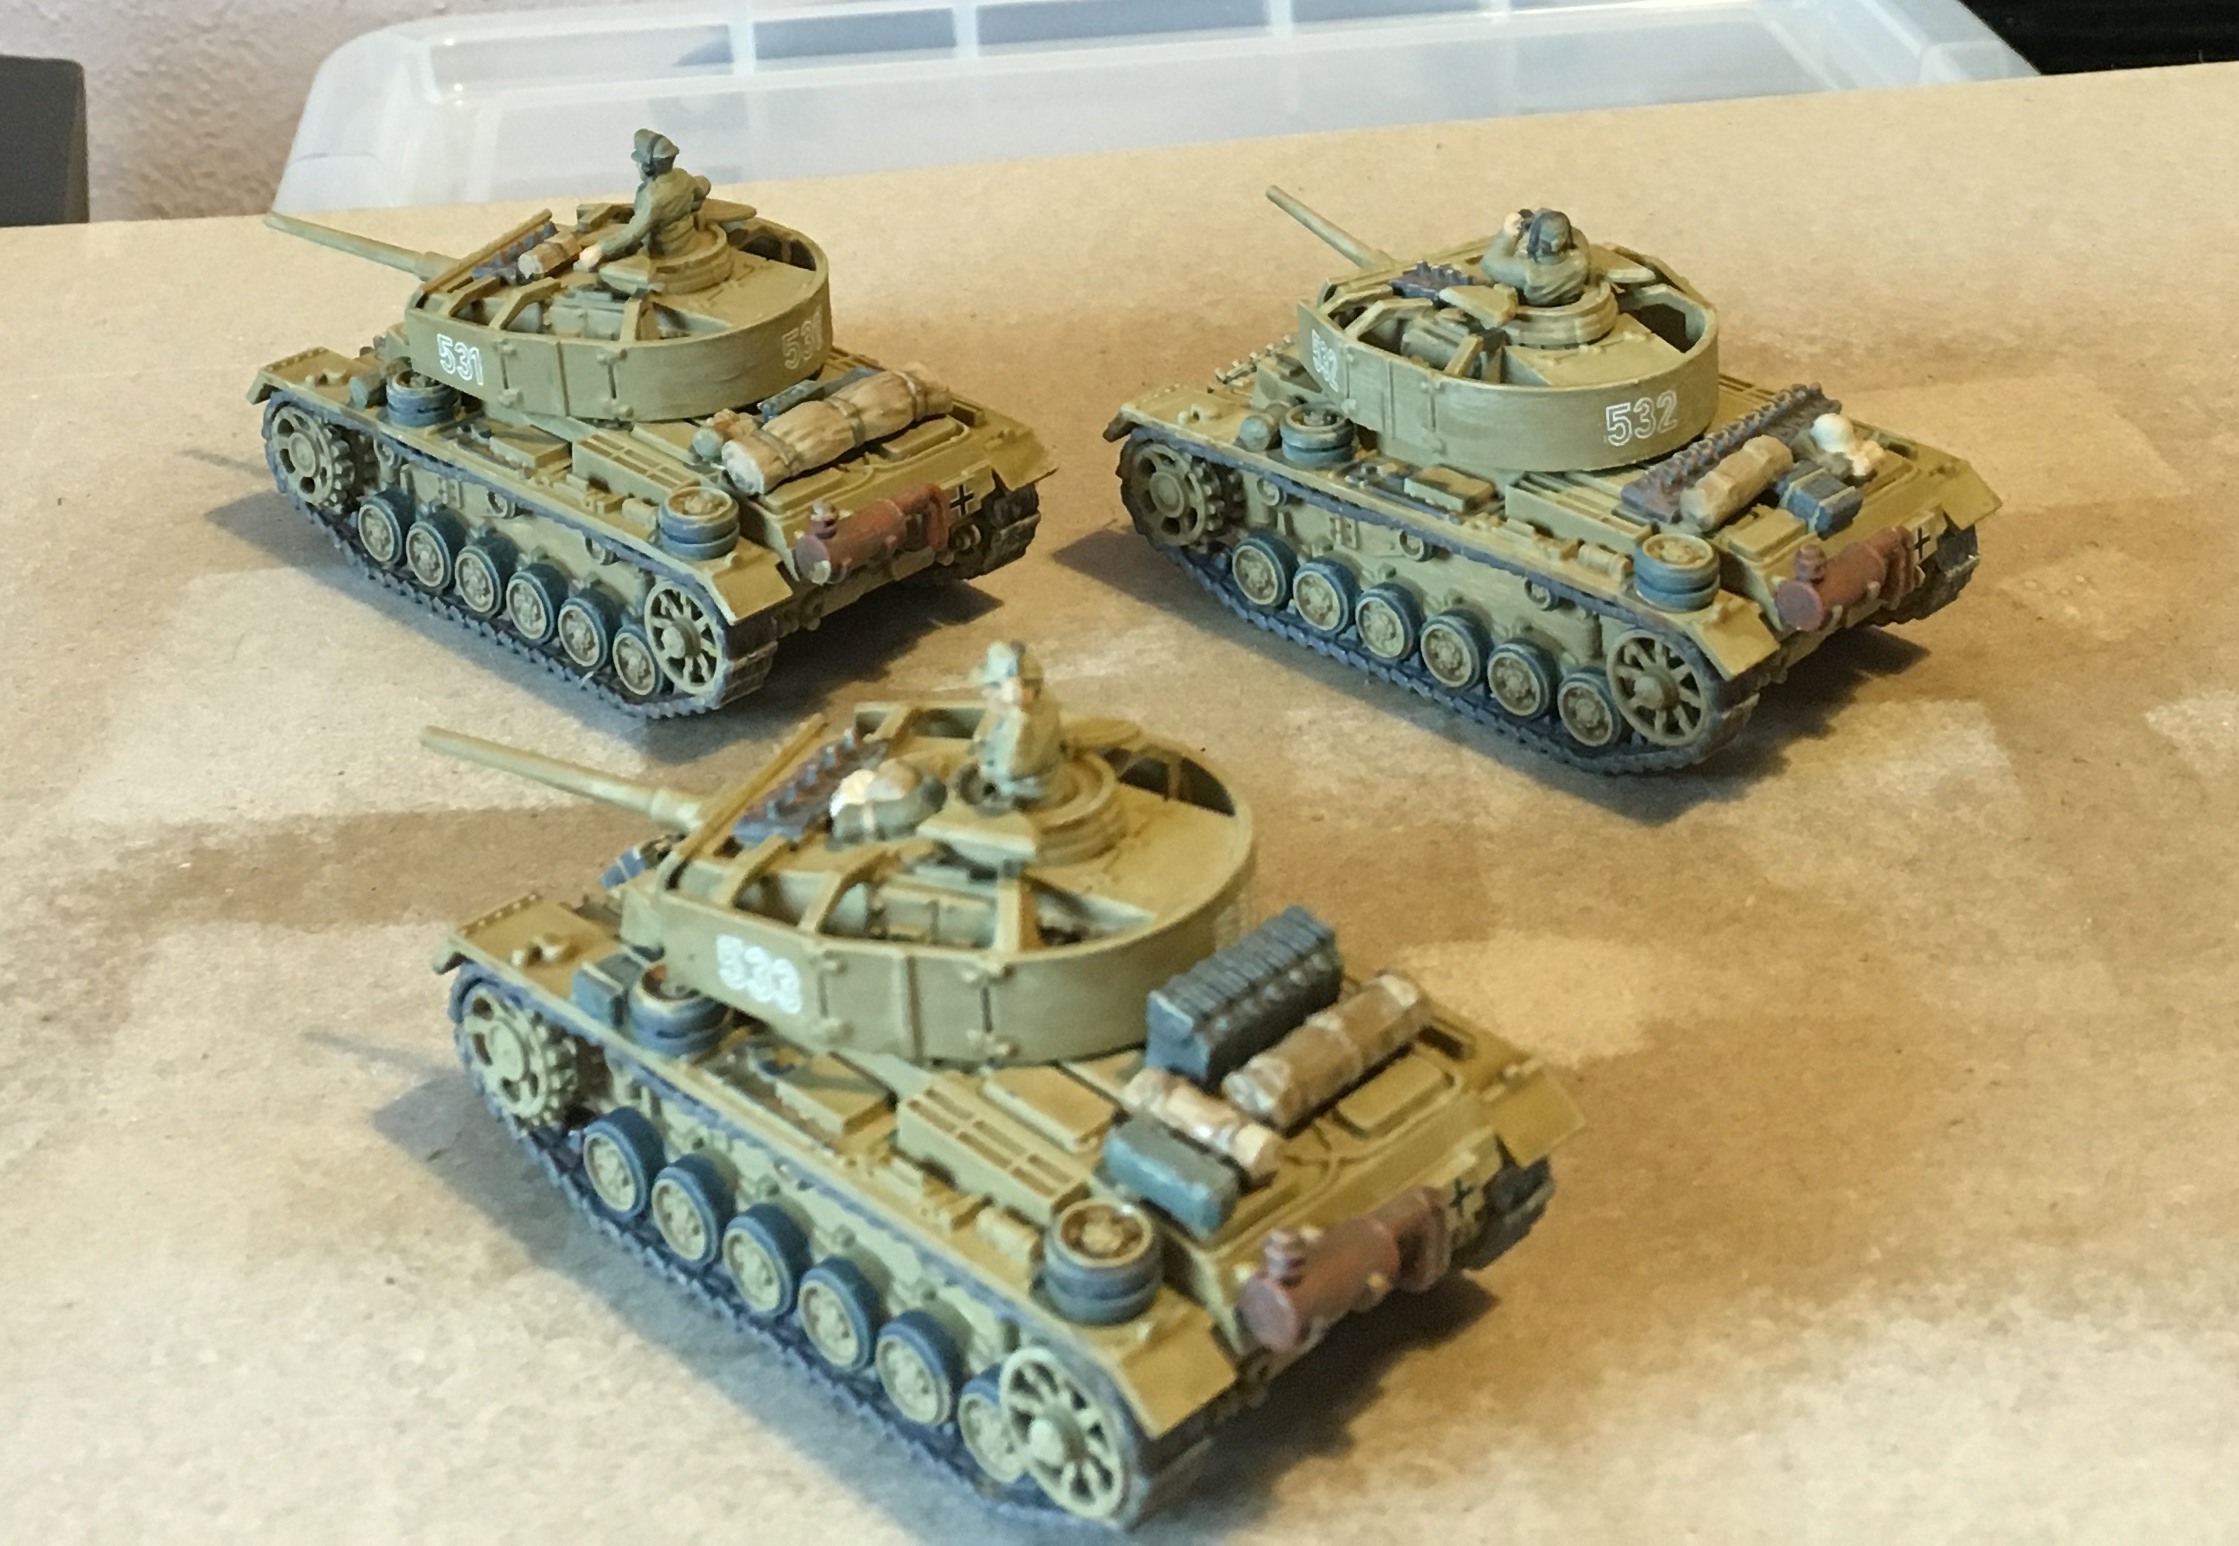
And then the decals. This has been a bit of a headache. I want turret numbers for tanks in the same platoon (with the platoon commander in tank 1). Commercial decals have two problems: they tend to focus on individual tanks from different formations, and they supply two numbers (one for each side), rather than the three that was more typical at this stage of the war (one at the back too). And they are pricey. None come with the PSC box kit. I acquired some generic numbers on eBay. But I decided to base my platoon on some tanks of the Hermann Goering division in Sicily, with numbers 531, 532 and 533. My decal sheet not only had only pairs of numbers, but they did not have any starting with 5 or above (this is the company number – the second battalion in a regiment usually had company numbers 5 to 8). This meant I had to assemble the turret numbers in pieces, and individual numbers in some cases. So applying them was a bit trickier than it might have been, and I did well to lose only one number. Balkankreuse were applied at the back of the hull, from a commercial sheet. I did not attempt a divisional insignia. After that I decided to seal them with some polyurethane varnish. That was very nearly a catastrophe. The decals are quite delicate, and unless the varnish was dabbed on softly, they get damaged by the application. One number was quite badly damaged; I applied a bit of paint to represent the damaged bits being obscured by mud (it was a rear number, and is obscured by some jerry-can when the turret is facing front, which helps). It could have been a lot worse. For the British I’m going to have to print my own decals; this will solve some problems – but white or white-outlined numbers can’t be done this way – (nor balkenkreuse for that matter). Fortunately the Germans used quite a lot of straight black numbers, which can be home-printed.
Finally an application of Windsor & Newton aerosol matt varnish. And here’s the result (albeit shot in partially artificial light given a very overcast sky this morning) – and with less than ideal focusing from my iPhone):
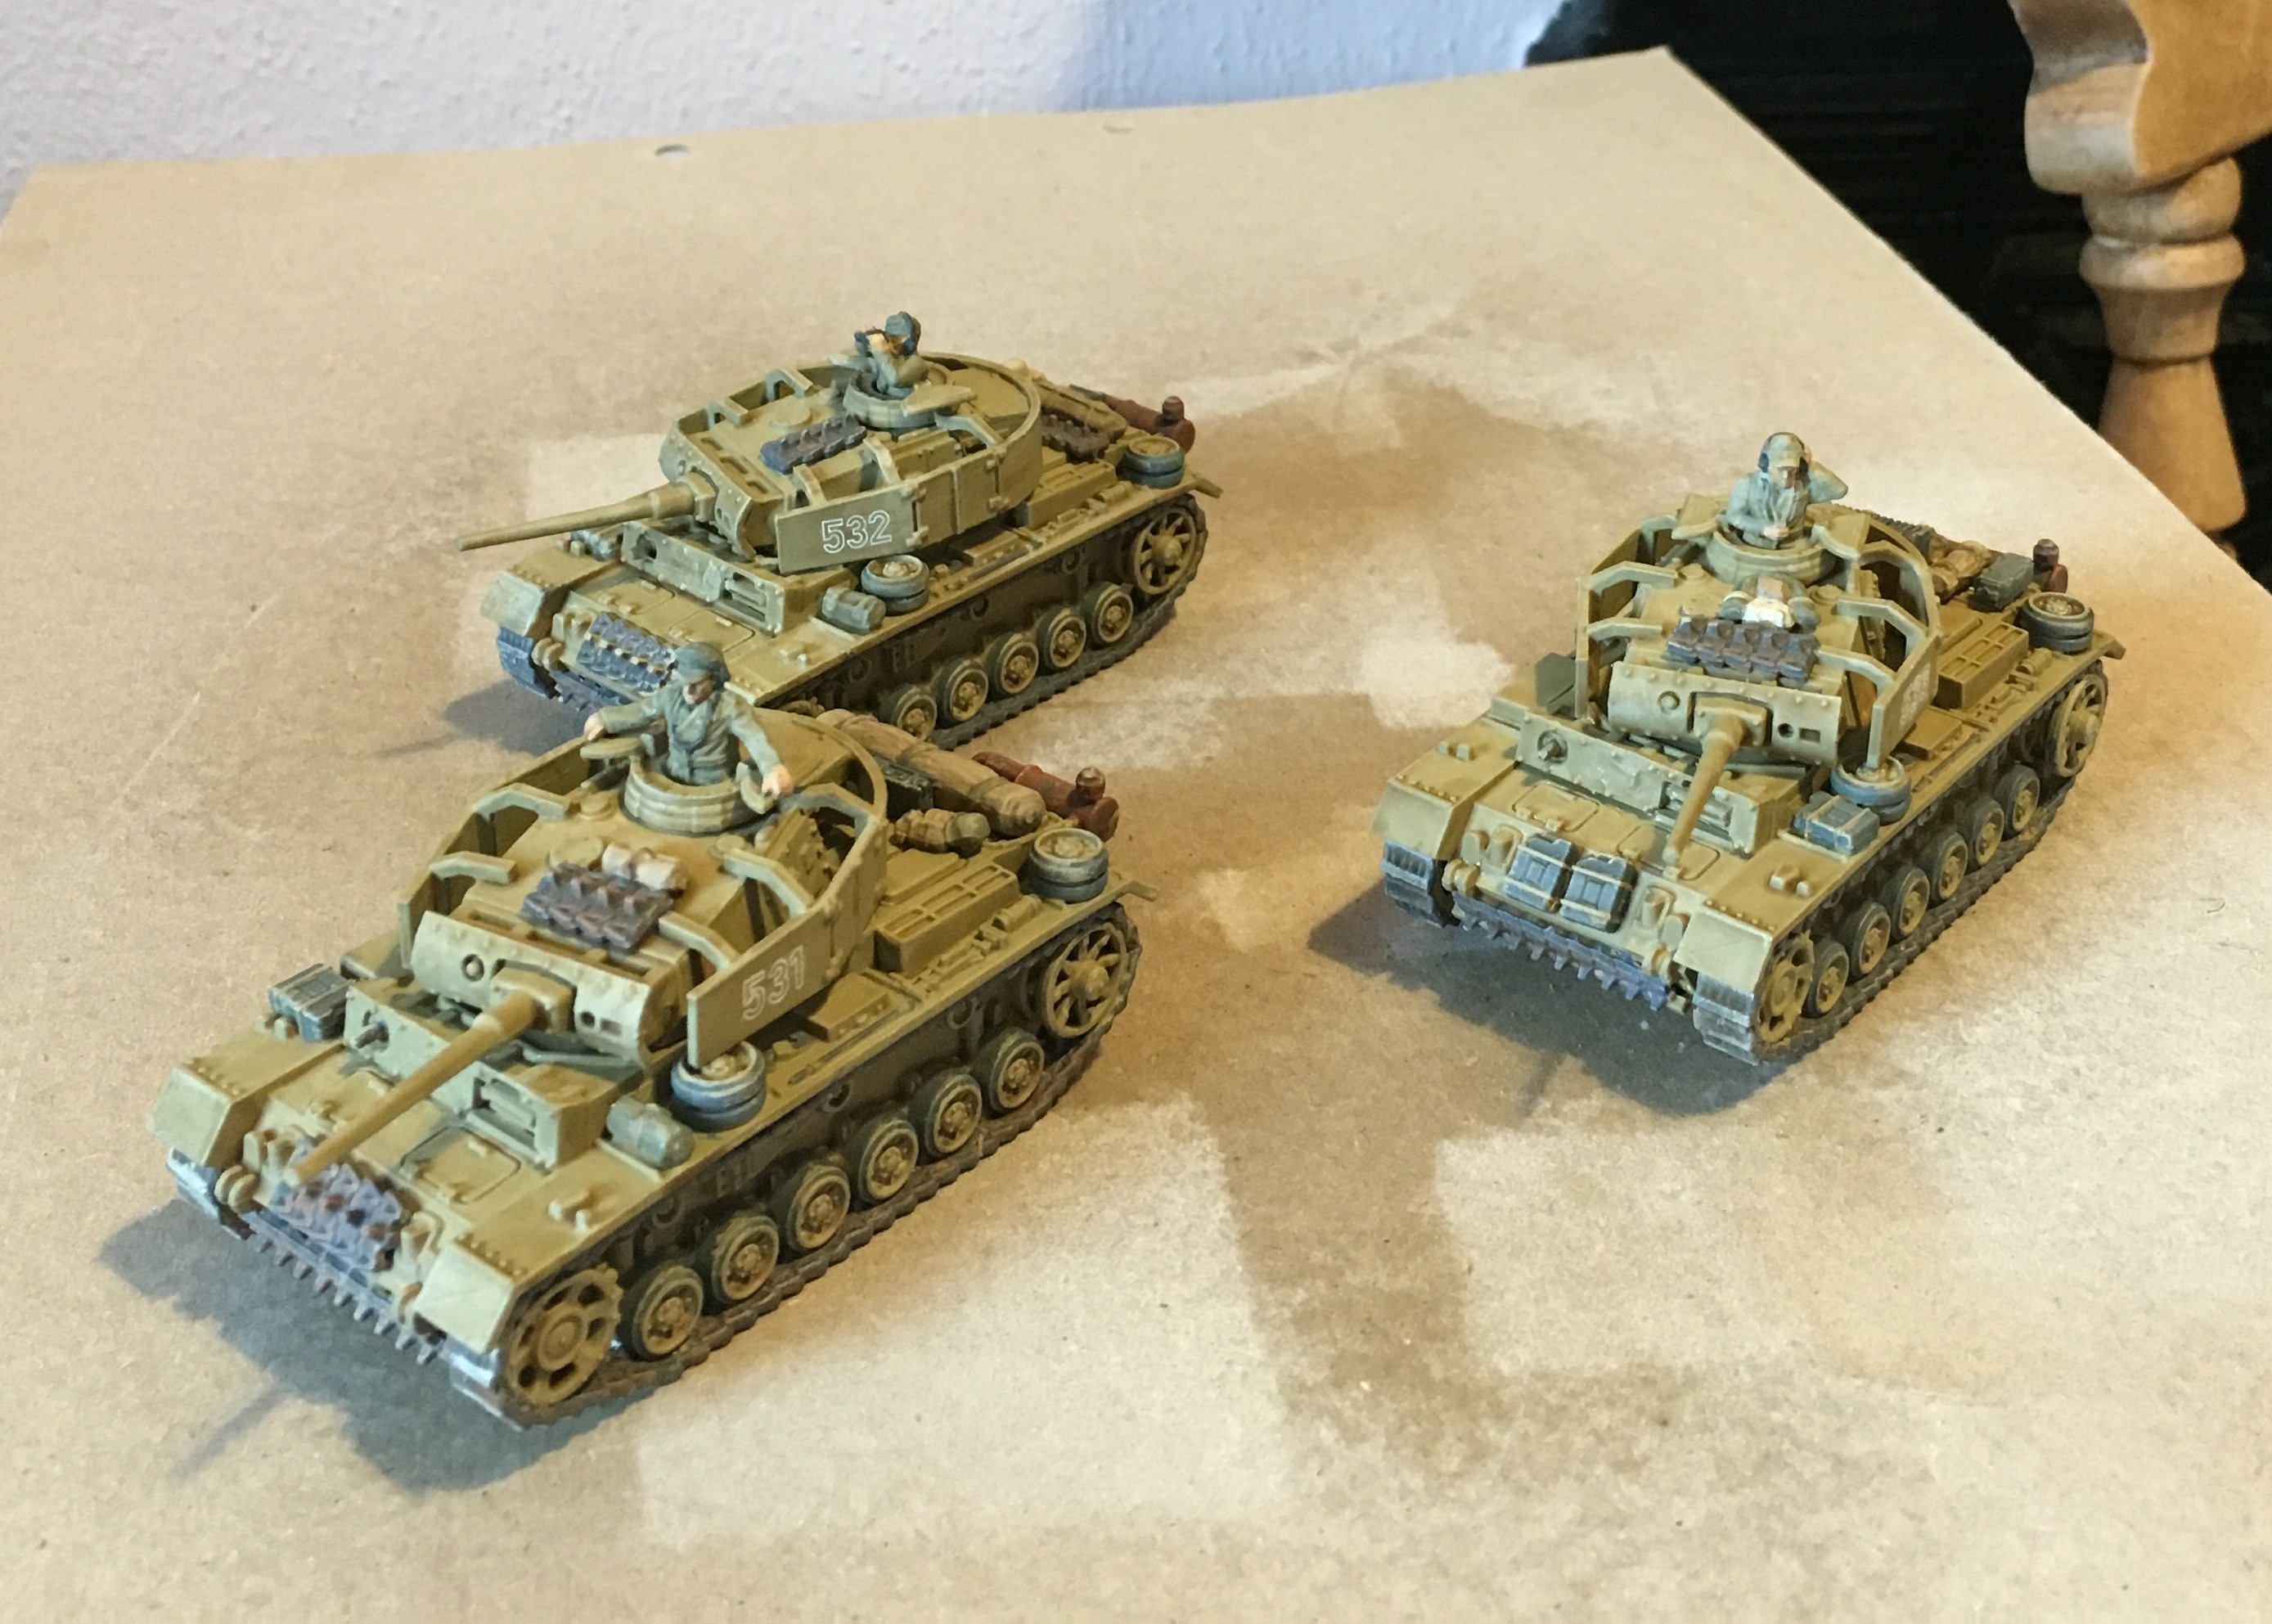
I have to say that I’m pretty happy. Each of the models has mistakes, and they aren’t “professional” quality. But they’ll look great on the wargames table.
Leave a Reply